Bang Bang Broccoli & Black Beans

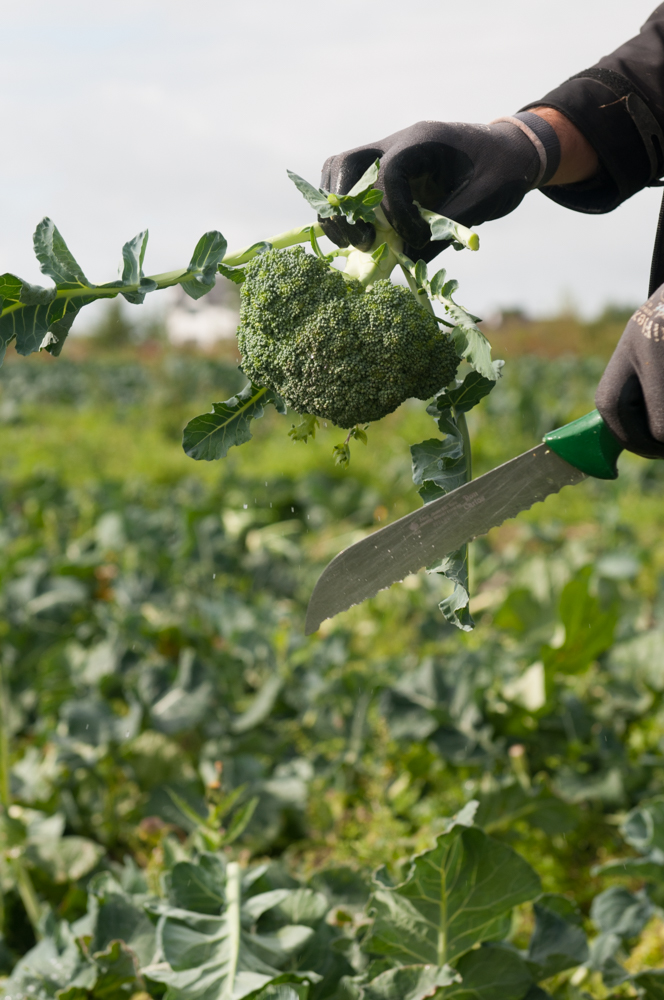
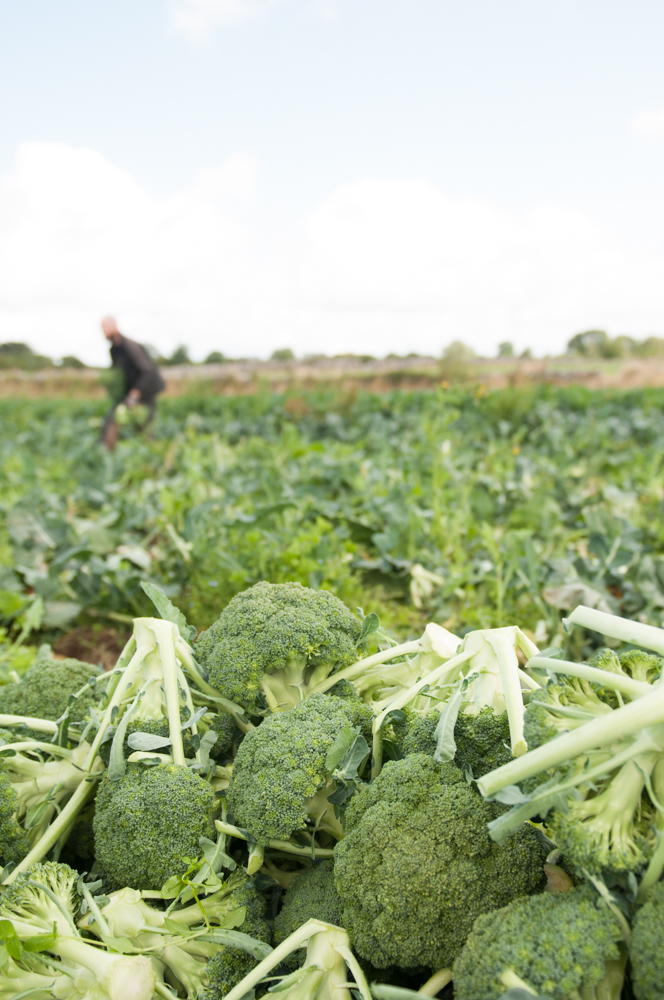
We are harvesting so much broccoli from our fields at the moment! Expect lots in your set boxes or add some to the ‘build your own’ box for a special reduced price. Broccoli is brilliant! Broccoli is a good source of fibre and protein, and contains iron, potassium, calcium, selenium and magnesium as well as the vitamins A, C, E, K and a good array of B vitamins including folic acid. A real Irish super-food! I’ll be steaming some batches to put in boxes in the freezer to add to loads of different meals. Here’s one of our favourite family meals that uses a lot of broccoli.

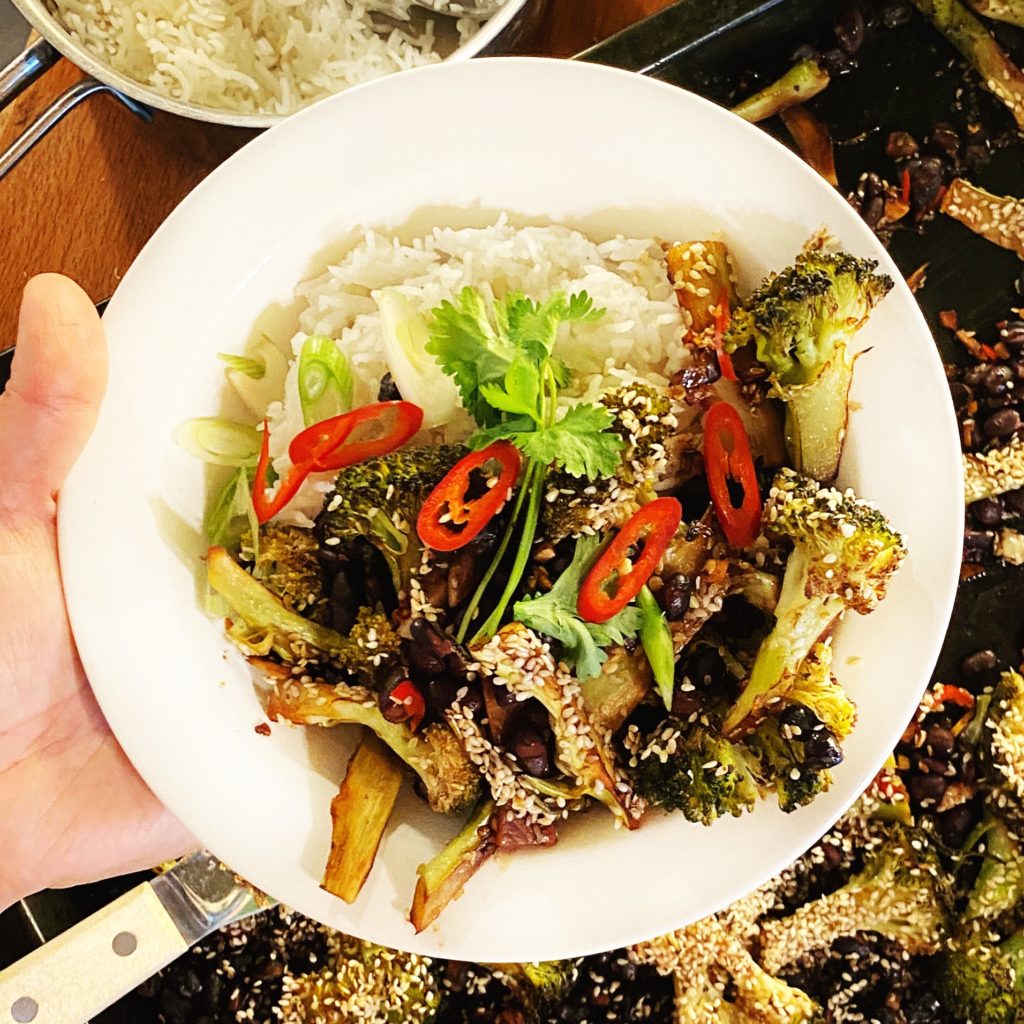
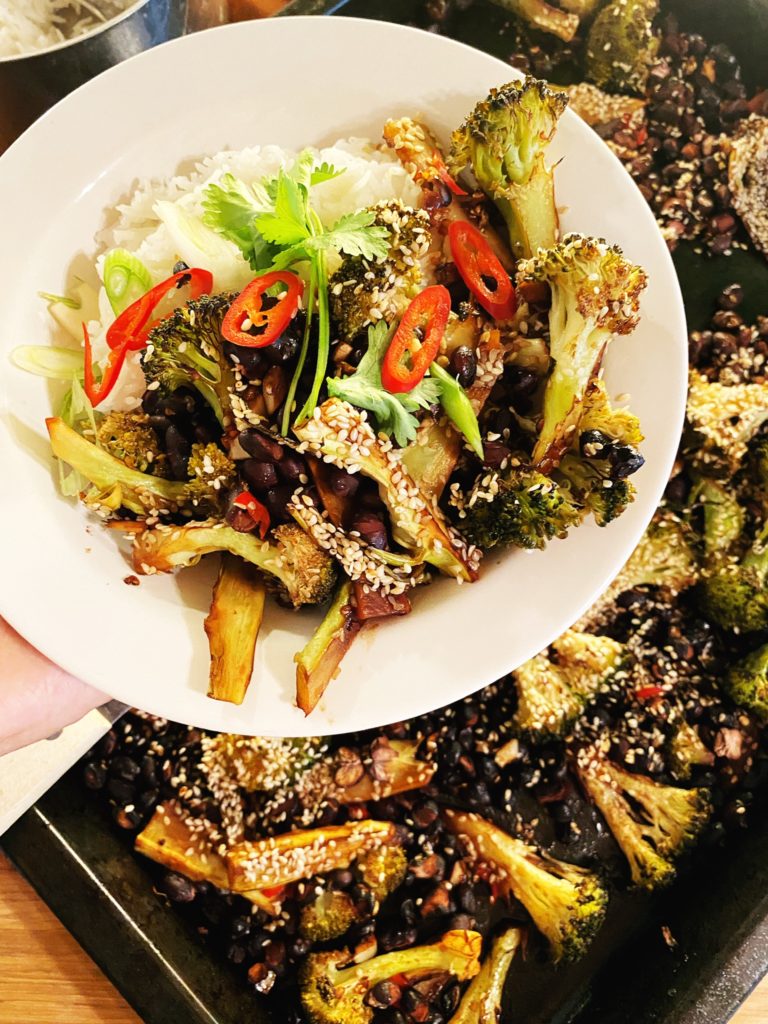
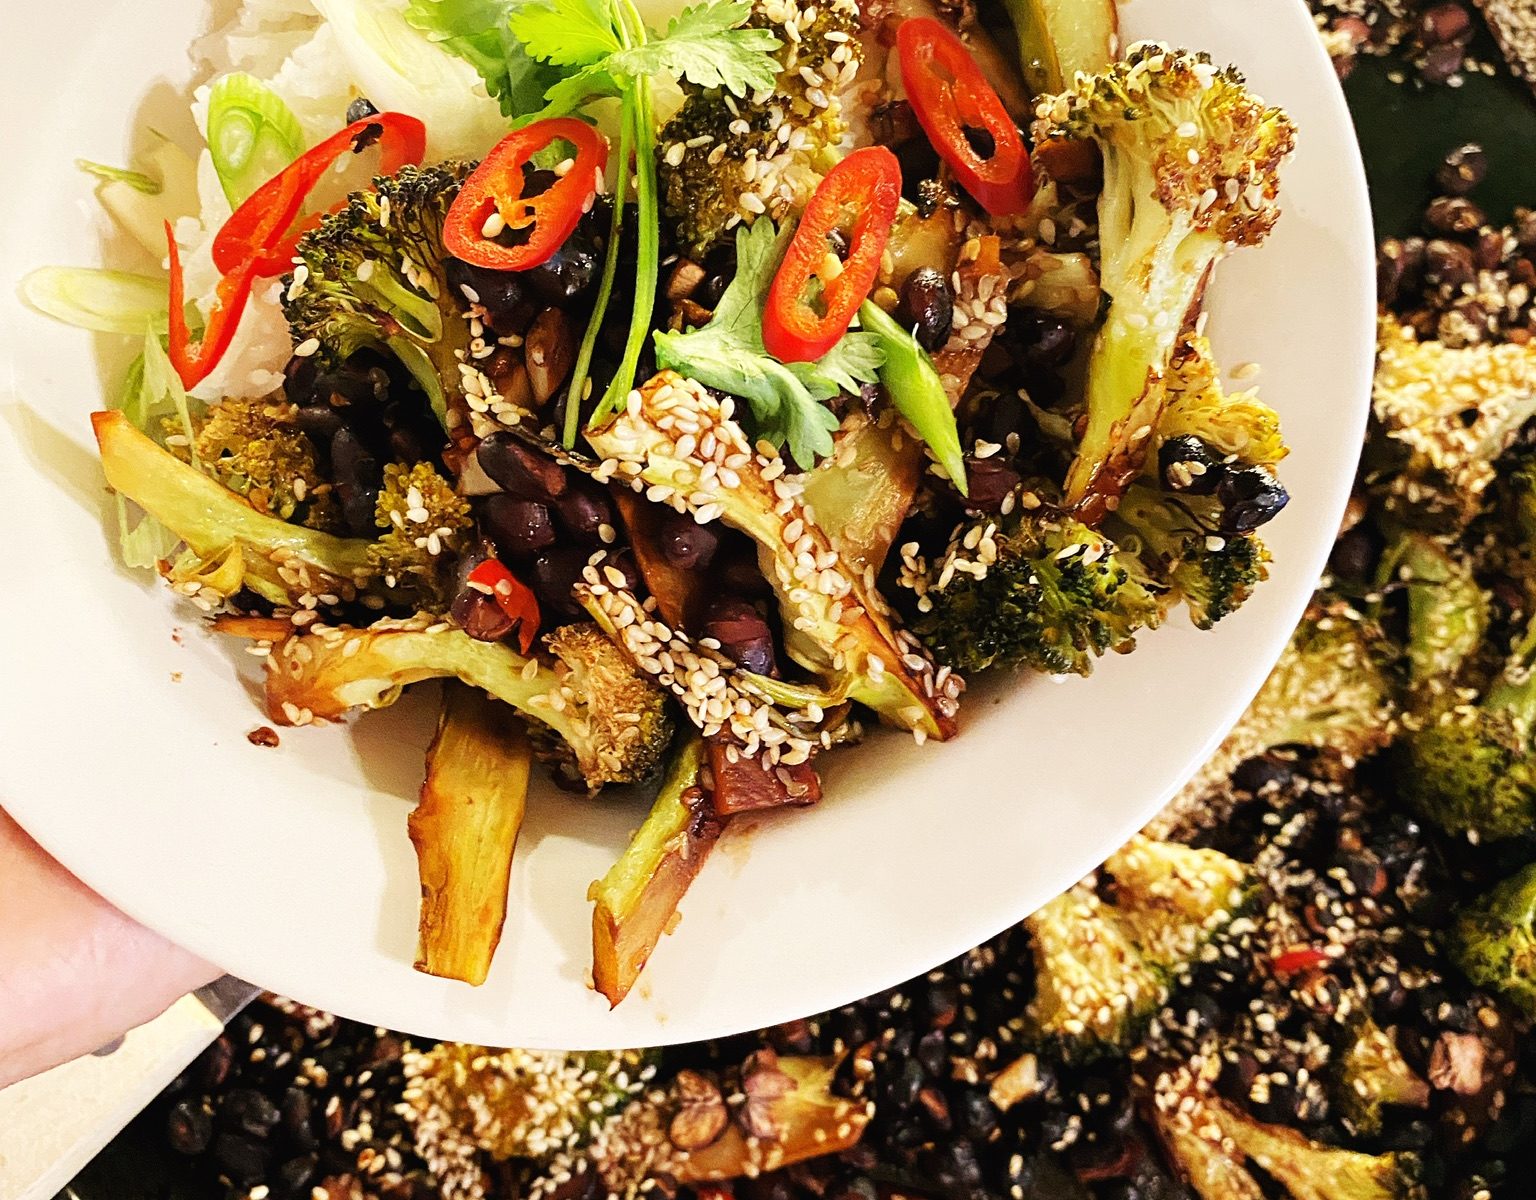
Bang bang chicken is a traditional Sichuan dish of poached chicken which is then ‘banged’ to shred it and dressed in a spicy sauce. It’s a refreshing dish served with julienned cucumber. This is my plant-based nod to that classic. Definitely not authentic, but delicious none-the-less. It’s really simple. Nutritious broccoli and black beans are drenched in a spicy sauce, sprinkled with sesame seeds and then roasted. You can serve it with rice or noodles, or it’s delicious as a warm salad with spiralized courgette.

Liz x

Ingredients (serves 4)

  • 2 heads of broccoli
  • 2 tins of black beans
  • 4 tbsp maple syrup
  • 4 tbsp lime juice (or vinegar)
  • 4 tbsp vegetable or toasted sesame oil
  • 4 tbsp soy sauce (or tamari if you need gluten free)
  • 6 garlic cloves
  • a big thumb of ginger
  • fresh red chillies to taste
  • 6 tbsp sesame seeds
  • scallions, fresh coriander and extra chillies to serve
  • rice or noodles to serve

Method

  1. Preheat your oven to 200C and find a large roasting tray, or two trays if you don’t have a very large one. You want to be able to spread the ingredients into a single layer.
  2. Trim as little as possible off the stalks of the broccoli. Just a sliver off the end is usually enough – those bits can go in the compost bin. Then cut the whole stalk away from the florets, slice it in half lengthways and then slice each half into long, thin strips. Put them in the roasting dish. Then cut the heads of the broccoli into bites sized florets and add them to the roasting tray too.
  3. Drain the tins of black beans and add them to the tray. Then make the dressing.
  4. Mix the soy sauce, oil, lime juice/vinegar and maple syrup in a bowl. Finely dice the chilli, garlic and ginger and add them to the bowl. Mix well and then pour the dressing over the broccoli and black beans.
  5. Use your hands to mix the sauce into the broccoli and beans, then spread the ingredients out into a single layer. Sprinkle with the sesame seeds and put the tray into the oven to roast for just 20 minutes or until the broccoli is tender.
  6. Meanwhile cook your rice or noodles and prepare the toppings. Slice scallions, coriander and extra red chillies.
  7. Serve in bowls and enjoy hot or cold. We like to make an extra batch of the dressing with toasted sesame oil but without the raw garlic and ginger to drizzle over the finished dish too to make it extra juicy and spicy.

Ratatouille

Ratatouille is a classic one pot celebration of summer vegetables. Although it’s a simple recipe, with humble ingredients, it’s all about timings and getting the vegetables cooked just right. Spongey, undercooked aubergine is the reason many people don’t like it. Aubergine should be silky and soft, and almost melt in the mouth and then it’s absolutely stunning! Serve with some good bread and a glass of red. We often add a drained tin or two of white beans or lentils to this summer stew to boost the protein and make it an even heartier meal.

Why not make a double or triple batch and get some in the freezer for a busy day? You could even blend some for a quick summery soup or a flavoursome pasta sauce.

Liz x

Ingredients (serves 4-6)

  • 4 tbsp olive oil
  • 2 aubergine
  • 2 courgette
  • 2 red pepper
  • 4-6 tomatoes (or 12 cherry tomatoes, or a couple of tins of chopped tomatoes)
  • 6 cloves of garlic – peeled and diced
  • 3 tbsp red wine vinegar
  • salt and pepper to taste
  • basil to taste

Method

  1. Pre-heat your oven to 200C.
  2. Chop the aubergine and peppers into bite sized pieces. Put them in a deep roasting dish and drizzle with the olive oil.
  3. Season well with salt and pepper, mix with your hands to evenly coat the vegetables in the seasoning. Then put the dish in the oven to roast for 20 minutes.
  4. After 20 minutes, remove the dish from the oven and add the courgettes and tomatoes, also cut into bite sized pieces.
  5. Add the garlic, red wine vinegar and a little more salt and pepper. Mix well and return to the oven for another 20 minutes or until everything is well cooked.
  6. Stir through lots of freshly torn basil and serve in bowls with fresh bread. Or it’s lovely with pasta or potatoes. Bulk it out and add protein with a drained tin of white beans or green lentils.

Quick Pickled Courgettes

Got a glut of courgettes? We’ve got the recipes. As well as this classic quick pickle, a delicious solution for many excess veg, I’ve shared a fair few other courgette recipes. Just pop ‘courgette’ in the search bar and they’ll come up.

Quick pickles do what they say on the tin. They are quick and simple to put together and they are ready to eat in just a couple of days. You can definitely eat them earlier too, I just think the flavours develop better after a couple of days in the fridge. They last a long time too, especially if you sterilise the jar and close it while the vinegar solution is still hot. Keep the pickles in the fridge and don’t double dip and they should last for 2 months, if you don’t eat them up in that time… don’t store these pickles at room temperature unless you can them, which is a whole other process.

Pickled courgettes are so delicious in a sandwich or burger, with cheese and crackers or as a tangy, crunchy part of a salad. You can also flavour them however you like. Go herby with dill, spicy with chilli, use classic pickling spices, bay leaves, garlic, ginger…whatever you like! Enjoy! Liz x

Ingredients (makes 2 medium jars, around a litre volume)

  • 300ml apple cider vinegar (we LOVE Clashganny Farm’s organic ACV)
  • 300ml water
  • 2 tbsp salt
  • 2 tbsp sugar (optional but really nice)
  • flavourings of your choice – I used: 3 sliced cloves of garlic, 1 tsp ground turmeric, 1 tsp mustard seeds, 1/2 tsp black pepper
  • 1 courgette
  • 1/2 a white onion

Method

  1. Start by finding 2 small jars (or 1 big one? – it all depends on how much pickle you’re making or the size of your courgettes) and giving them a really good clean and hot rinse. Or you can sterilise them to be extra safe. Put the washed and rinsed jars in a clean sink then fill them with freshly boiled water from the kettle. Wait a minute then carefully empty the jars (use oven gloves or a folded tea towel so you don’t burn your hands). Let them air dry while you get on with chopping and heating up your vinegar solution.
  2. Measure the vinegar, water, salt and sugar into a small pan and heat it up while you quickly add the flavourings to the jars and chop the vegetables.
  3. Divide your flavourings between your jars. Then thinly slice the courgette and onion and divide them between the jars too. Lightly press the vegetables down into the jars to pack them in neatly, but don’t crush them. You should leave a couple of cm of room in the jar.
  4. As the vinegar solution comes to the boil, take it off the heat and pour it into the jars over the vegetables and flavourings. The solution should cover the vegetables. Give the jars a light tap on the work surface to remove any air bubbles that may be trapped between the layers of vegetables. Then screw on the lids whilst the jars are still hot. You may not use all the vinegar solution, or you may need to make a bit more.
  5. Allow them to cool then refrigerate. The pickles will be ready to eat in two days and will last in the fridge for 2 months.

Slow-Cooked Courgette Caviar

Courgette caviar is a Russian/Ukrainian spread made from slowly cooking summer vegetables down into a rustic and delicious purée. The long, slow sauté reduces and caramelises the vegetables together, elevating these humble ingredients into a stunning jar of flavour. This is so much more than a stew. Slow cooked courgettes have the most wonderful texture, you can also use aubergines or a combination of the two. It’s just a brilliant way of using up a glut of courgettes and other summer veggies. If we are having a barbecue, I sometimes chuck a few courgettes and aubergines (also peppers, whole bulbs of garlic, carrots…) on to get smokey and soft then make this purée with those. It’s amazing, the smokiness really comes through. Just peel off any very blackened bits of skin and sauté and crush the vegetables together in the pan until reduced.

Enjoy cold on good bread or with crackers. It’s delicious as part of a picnic spread with cheese, pickles, ferments etc. Or heat it up and loosen it with some pasta water for a quick pasta sauce. It’s an incredible pizza sauce base too! I have never tried making a huge batch and keeping the jars in a cellar, but if you have the know-how and the right equipment, that’s a great way to preserve the fruits of summer. But making the recipe as per the method below, the jar should last well in the fridge for two weeks.

Liz x

Ingredients* (makes a large jar approximately 1 litre)

*don’t worry too much about amounts and the ingredients can vary too! Leave out the pepper, add aubergine, use fresh tomatoes, add more or less garlic… it’s more about the technique of slowly cooking down and caramelising the vegetables together than getting the proportions and ingredients exact. I suppose starchy vegetables like potatoes wouldn’t work here, but most other vegetables will be fine. Use any combination that you like. Here’s what I did this time:

  • 1 onion
  • 6 cloves of garlic
  • a generous slick of olive oil to coat your pot/pan, plus extra to to top the jar
  • 2 carrots
  • 1 red pepper
  • 2 courgettes
  • 1 tin of chopped tomatoes
  • salt to taste
  • optional extras like black pepper, dill or fennel seeds, coriander seeds, chilli…

Method

  1. Start by dicing or grating all your ingredients.
  2. In a large, heavy bottomed saucepan or pot, heat up a generous slick of olive oil and add the diced onion. Keep the pot at medium high and stir fry the onions until they start to soften and colour.
  3. Add the garlic, courgettes, carrots, pepper and a big pinch of salt. Sauté, stirring regularly for at least 30 minutes. You will need to lower the heat as you go. It’s nice if the vegetables caramelise and slightly catch on the bottom of the pan. Just keep scraping the base of the pan with a wooden spoon.
  4. Crush the vegetables together with the back of the wooden spoon, or use a masher to help you along.
  5. When the vegetables are reduced and drying out, add the tomatoes and keep cooking, stirring and reducing. You should end up with a rich, thick purée. You can keep it rustic or blend it smooth.
  6. Pack the mixture while it’s still hot into a large, sterilised jar. Add a layer of olive oil and put the lid on. This should make it last longer.
  7. Keep it in the fridge. It should last well for 2 weeks.

Aubergine Involtini

Involtini in Italian means ‘rolls’ and this aubergine version is one of my all time favourite dishes. I am obsessed with aubergine, perhaps it’s because I used to hate it as a child and now I’m making up for lost time? But whenever aubergine season hits, this recipe is at the top of my list. I also make this with courgettes in place of the aubergines sometimes, especially when there’s a lot of them to use up. Griddled courgette strips are so tasty so give that version a try too.

The filling can be whatever you want it to be. I usually go for something simple like a mixture of cheese (vegan feta or cashew cheese are my favs) and pesto. But roasted and crushed squash with toasted pine nuts or hazelnuts is also really good! Perfect for that summer-autumn crossover. Let us know in the comments what fillings worked well for you?

Liz x

Ingredients (serves 4-6)

  • 2 aubergines
  • 4 tbsp olive oil
  • salt & pepper to taste
  • 2 jars of Napoli tomato sauce (or make your own tomato sauce by sautéing a diced onion and 4 cloves of garlic with a little olive oil until soft, then add 2 tins of chopped tomatoes, salt and pepper to taste and some torn basil leaves and simmer for 15 minutes or so)
  • 130g jar of pesto
  • 200-300g cheese of your choice (feta works really well here – I use my tofu feta recipe found at the end of this blog post, otherwise we stock a variety of plant based cheeses and organic feta)
  • pasta or fresh bread to serve

Method

  1. Find a medium sized, deep roasting dish and turn your oven to 200C to warm up while you prepare the dish.
  2. If you’re not using our tasty, ready made tomato sauce, make a simple batch yourself using two 400g tins of chopped tomatoes. I sautéed a diced onion with a couple of tbsp of olive oil and 4 cloves of garlic until soft and just starting to colour. Then tipped in the two tins of tomatoes (swirled out the remaining tomatoey juices from the tins with a little water and added that to the pot too) and seasoned with salt and pepper. Then simmered the sauce with some torn basil leaves for around 10-15 minutes until it was rich and delicious.
  3. Keep the sauce warm while you prepare the aubergines and filling.
  4. Slice the tops off the aubergine as close to the stalk as possible, then peel or slice off any still-attached leafy bits. Carefully cut the aubergines into around 4mm thick, long strips.
  5. Pour the olive oil into a small bowl or glass and season it with a big pinch of salt and pepper. Then brush the aubergine slices with the seasoned olive oil and grill them in batches in a griddle pan, or under a hot grill in the oven. Turn halfway through. They should be soft and beautifully charred but still manageable. As they cook, lay them out on a large chopping board or clean worksurface ready for stuffing and rolling.
  6. Meanwhile make your filling. I mashed about 300g of feta with a jar of pesto.
  7. Pour the warm tomato sauce into your baking dish and start assembling the involtini.
  8. Place a tablespoon of filling at the end of a griddled aubergine slice. Then roll it up and tuck the roll, seam side down, into the tomato sauce.
  9. Repeat until all the rolls are stuffed. Then place the dish in the oven and bake for around 15-20 minutes or until hot and bubbling.
  10. Serve with freshly boiled pasta or some crusty bread and enjoy!

Courgette, Feta & Dill Fritters

Fritters are a fab summer lunch with salads and a great way to use up a glut of vegetables. Courgettes are having their ‘glut moment’ on the farm right now, so here’s a delicious courgette fritter recipe for you to try if you get a lot of courgettes in your box and you’re stuck for ideas.

I usually make a gram flour (chickpea flour) batter of just gram flour, water and seasoning, and then stir in shredded/finely chopped veg to make fritters, but I didn’t have any gram flour so here’s a wheat and corn flour variety which works well too! Fritters are fairly forgiving, just use whatever flour you have in. Courgettes are quite watery vegetables, so I like to grate and salt them, then after the salt has drawn the liquid out, mix in enough flour to make a fairly thick batter. No need to add any other liquid or you’ll end up with soggy rather than crisp fritters!

Liz x

Ingredients (makes 6-8 fritters)

  • 1 large or 2 small courgettes
  • a large pinch of salt (about 1/2 a tsp or to taste)
  • black pepper to taste
  • a big handful of chopped dill or fennel fronds (or any herbs you like – mint or parsley work well)
  • a block of feta, crumbled (or make my tofu feta recipe here)
  • 4 tbsp plain flour (or more/less – see method)
  • 4 tbsp cornflour/cornstarch (or more/less – see method)
  • olive oil for frying
  • lemon wedges, salad & tzatziki to serve

Method

  1. Start by grating your courgettes into a large mixing bowl. Use the course side of the grater.
  2. Sprinkle over the pinch of salt and pepper and mix well. Then taste and decide if you’d like to add more. The courgettes should just taste pleasantly seasoned.
  3. Give the salt time to draw the liquid out of the courgettes and use this time to prepare some salads and make a tzatziki (simply mix grated cucumber through thick yoghurt, season with salt, pepper and a little crushed garlic, stir well and add a drizzle of extra virgin olive oil and fresh dill or mint).
  4. Once the courgettes are wet, this only takes 10 minutes or less, you can start adding the flour. I like to use an even mix of cornflour and plain flour. The corn flour makes the fritters a little crispier.
  5. Add one heaped tbsp of each flour to the wet courgettes then stir the mixture. Keep adding more of both flours and stirring until you have a thick fritter batter. If your courgette is very watery you’ll need more flour, if it’s drier you’ll need less.
  6. Then stir through the herbs and crumbled feta and warm up a frying pan to medium with a generous slick of olive oil in the bottom of the pan.
  7. Fry spoons of the mixture in small batches in the pan. Turn over after 3-5 minutes, once golden brown and crispy underneath and fry the other side for a further 3-5 minutes.
  8. Keep the heat at medium, don’t be tempted to turn it to high or you may get fritters which are burned on the outside and raw and doughy in the middle.
  9. Serve with salads and tzatziki for a lovely lunch. The fritters are delicious eaten hot with a squeeze of lemon. Or pop the fritters into a burger bun or sandwich as a summery veggie burger or sandwich filler alternative.

Grilled Peaches

Have you ever tried grilled peaches? They’re amazing on the barbecue but this morning I tried them in my little panini grill and they were really good so I thought I’d share.

No real recipe. Just slice them in half and twist out the stones. Our delicious flat peaches tend to de-stone quite easily but use a small knife if you’re having trouble. Then brush them with a 50:50 mix of olive oil and maple syrup and place on a hot grill until nicely charred, smokey, sweet and sticky. Serve on natural yoghurt with granola for the best summery breakfast! Or serve with ice cream after a barbecue for a refreshing dessert.

Liz x

BBQ’d New Potatoes

This is my simple and adaptable method for BBQing our gorgeous new potatoes! I have fond memories of pricking large jacket potatoes, wrapping them in foil and packing them in with the food for camping trips. Then we would carefully tuck them into the BBQ coals to bake while the rest of the grilling was done, they’d often come out perfect if we remembered to turn them occasionally, but more often than not, half the potato would burn and half would be raw, or the coals would burn out before the potato was done and there’d be some disappointment… So this way of par-boiling, dressing then skewering little salad potatoes provides a much more consistent result.

Start by boiling scrubbed new potatoes until they are nearly cooked through. Test a few larger ones with a sharp knife or skewer. Then drain the potatoes and allow them to cool in the colander while you prepare a tasty marinade or dressing!

I love potatoes with garlic and herbs. This time I mixed olive oil, salt, pepper, crushed garlic, rosemary and lemon zest in a large bowl. Then toss the par cooked new potatoes in the dressing.

Push the potatoes on skewers (or cook in a BBQ basket) and get them onto a plate or tray ready to pop over the coals.

Cook on the BBQ, turning often until soft, smokey and delicious!

Then push them off the skewers, back into the dressing bowl and toss again to get any last bits of dressing and flavour back over the delicious, charred potatoes. Enjoy!

Raw Courgette & Hazelnut Salad

We are in the midst of a classic courgette glut on the farm. Next week we’ll add some free courgettes to all the boxes, we hope you enjoy them. Expect lots of courgette recipes to come your way. We’d love to know your favourite courgette recipes too please! Let us know in the comments or over on our community Facebook group. I’ll start us off with this super simple salad. It’s so easy to make (just a matter of combining raw courgettes with a lemony dressing, then scattering over some toasted hazelnuts) and oh SO delicious! I have this salad often this time of year as a side to pretty much any meal, or it’s brilliant stirred through freshly boiled pasta or bulked out with a drained tin of lentils.

Liz x

Ingredients

  • Courgettes (2 small or 1 large)
  • 2-3 tbsp extra virgin olive oil
  • the juice of half a small lemon (have you tried our new season verdelli lemons?)
  • 1 small garlic clove, crushed
  • salt and pepper to taste
  • a handful or two of hazelnuts, toasted in a dry pan then roughly chopped

Method

  1. Using a potato peeler, slice the courgettes into delicate, thin ribbons. For ease, slice them directly over a serving platter or large salad bowl.
  2. Make the dressing by stirring together the olive oil, lemon juice and crushed garlic with a pinch of salt and pepper.
  3. Drizzle the dressing over the courgette ribbons. You could toss the salad now to evenly coat the ribbons with the dressing, or just leave it drizzly.
  4. Then toast the hazelnuts in a dry frying pan until nicely coloured. Tip them onto a board and carefully chop them up a bit to make them go further through the salad.
  5. Scatter them over the dressed ribbons and finish the salad with a little sprinkle of flakey sea salt. We LOVE Achill Island sea salt for exactly this type of dish.
  6. Enjoy as is as part of a salad buffet or alongside a BBQ. Or make it a light, refreshing meal by tossing through some freshly boiled pasta or a drained tin of cooked green lentils.

Kumquat Curd

Well here’s a tongue twister if ever I did see one. Kumquat Curd. Try say that ten times in a row without messing up! Have you ever eaten a kumquat? They have very sweet skins and very sour middles. I love using them for curd rather than lemons because all you need to do is remove the seeds, the rest of the fruit can be blended up and simmered into this perfect preserve. No need for zesting and juicing.

This stunning little curd is delightfully sweet and tangy and so simple to make. The perfect use for this tiny citrus. I love curd on toast as an alternative to jam but it also makes the best filling for a cake or topping for a tart. Curd is great sandwiched between shortbread biscuits or rolled up in pancakes. I think a sunny jar of kumquat curd makes the perfect Mother’s Day gift, especially if accompanied by a stack of pancakes in bed and a vase of daffodils!

How do you use curd? Let us know in the comments.

Liz x

Ingredients

Method

Rinse the kumquats then cut them into quarters and remove any seeds.

Blend the kumquats in a high speed blender until smooth.

Then add the sugar, coconut oil, corn flour, salt and oat milk and blend again into a smooth sauce.

Pour the sauce into a small pot and simmer, constantly stirring, until thick.

Taste the curd and add more milk or sugar if needed and simmer and stir again to cook in the added ingredients.

Pour into a clean jar whilst still hot. Put the lid on and allow it to cool. Keep in the refrigerator and use within a week.

Here’s a video on how to make classic shortbread biscuits using the perfect 1:2:3 sugar:butter:flour ratio. Perfect with a dollop of kumquat curd.