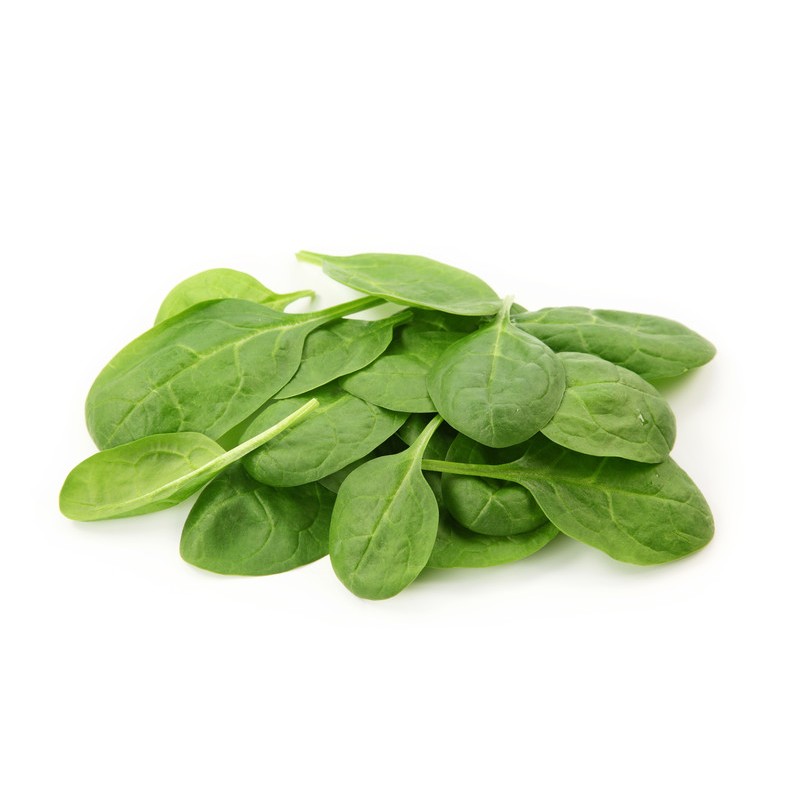
St Patricks day is around the corner and we are very excited to cook and bake with all things green to celebrate! Spinach is a super food in so many ways. Great for fibre, vitamins K, C, A, iron and lots lots more. The flavour of baby spinach is subtle enough that it can be used in sweet recipes too and its perfect partner is the dominant flavour of a banana!
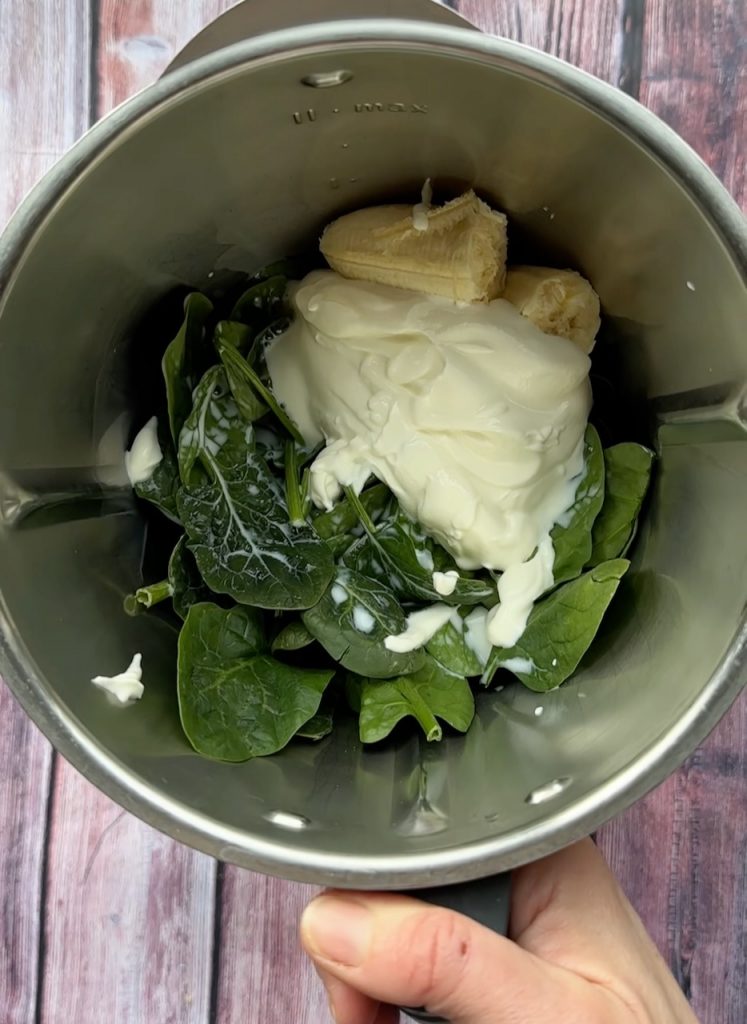
Tip: Use a powerful blender to mix the spinach along with the wet ingredients and you’ll get this lovely vibrant green colour through the pancakes.
We stock all the fresh and dry ingredients you need to make these fun green pancakes!
Tip the cup of spinach into a blender along with the banana, egg, plain yoghurt, milk and blend until really smooth and bright green.
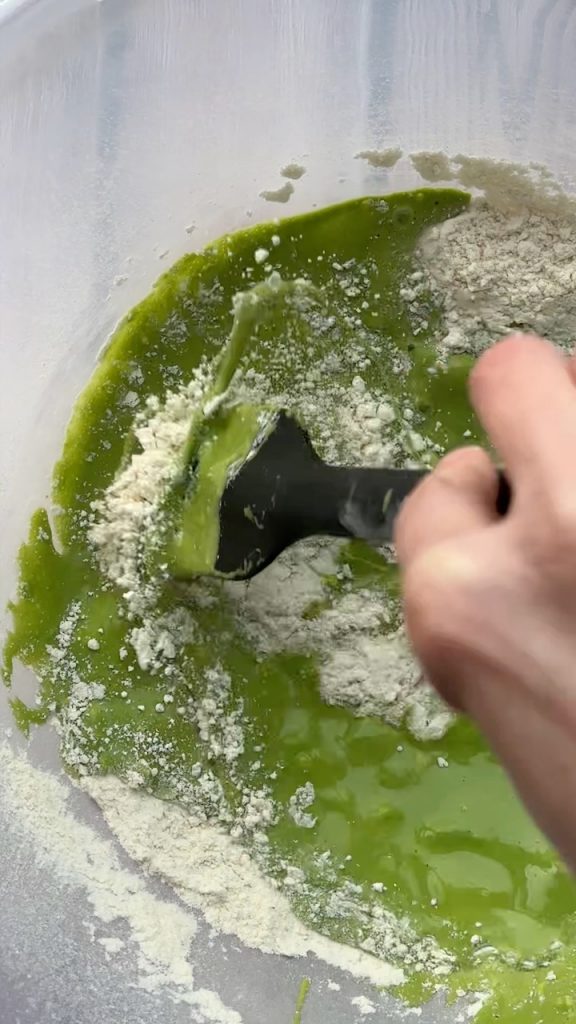
Sieve the plain flour, baking powder, bicarbonate of soda and sugar into a mixing bowl. Mix really well with a spoon.
Pour in the green liquid mix and gently stir the batter until no flour remains.
Warm a frying pan on a medium heat and lightly oil.
Add 2 dessert spoons of batter per pancake to the frying pan and use the back of the spoon to make them round. Cook 3-4 pancakes at a time if they fit on the pan.
Cook until little bubbles appear then flip and cook for a further minute or two until cooked through.
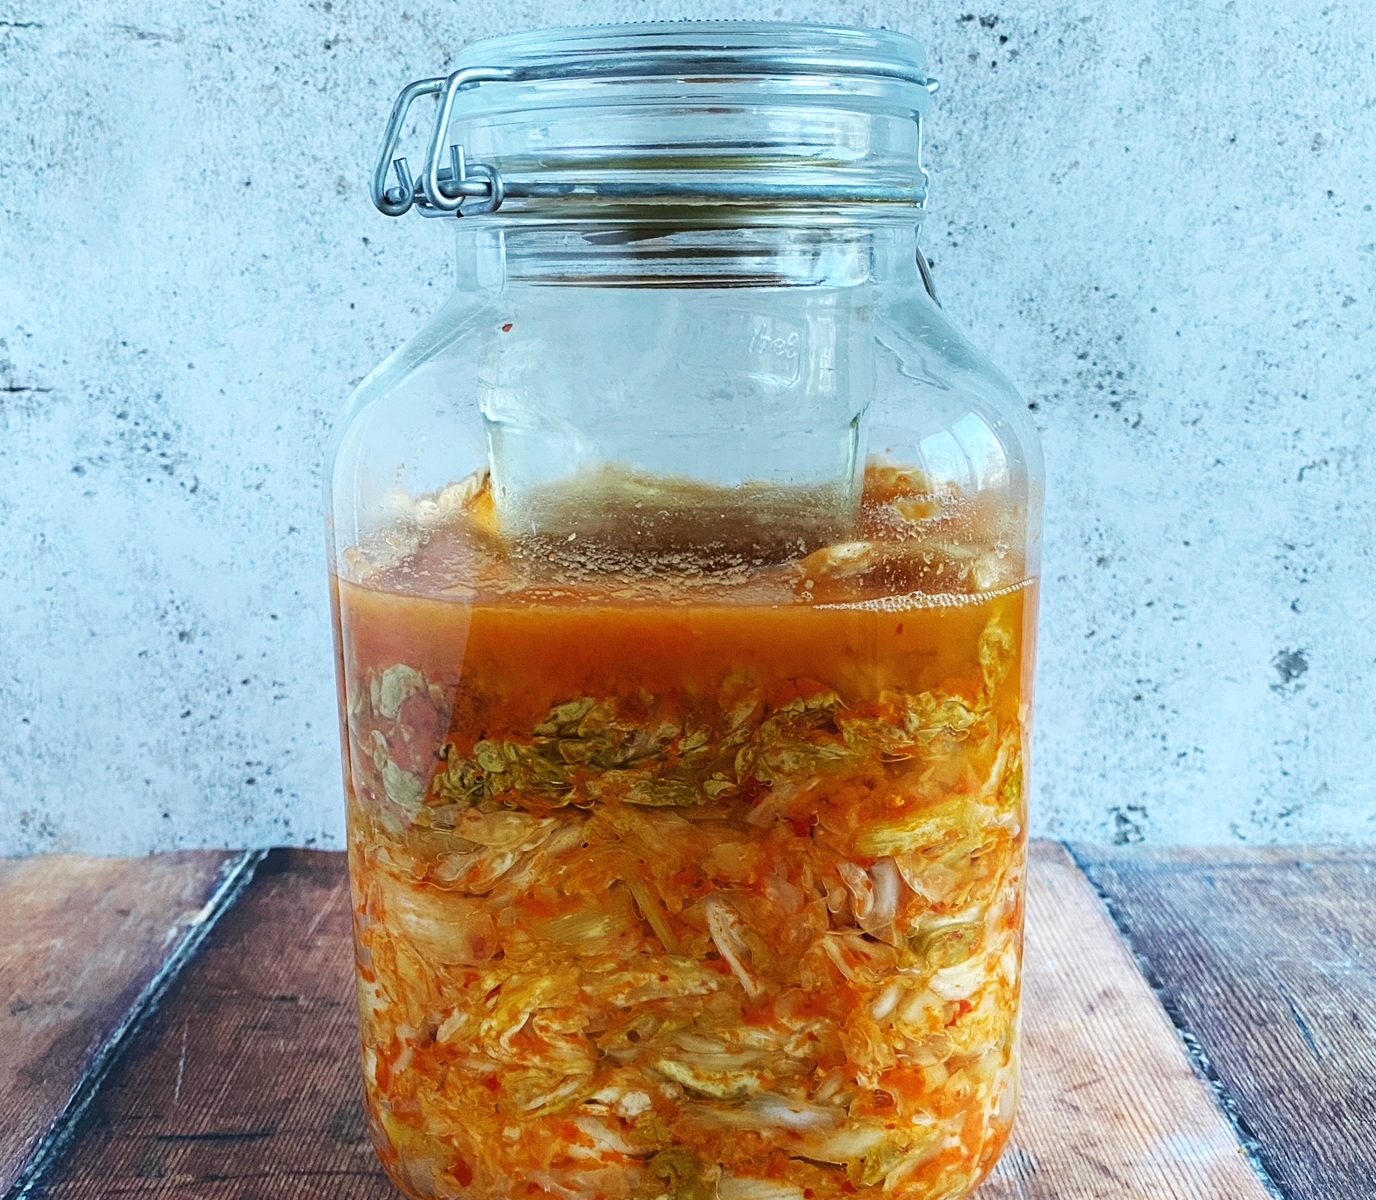
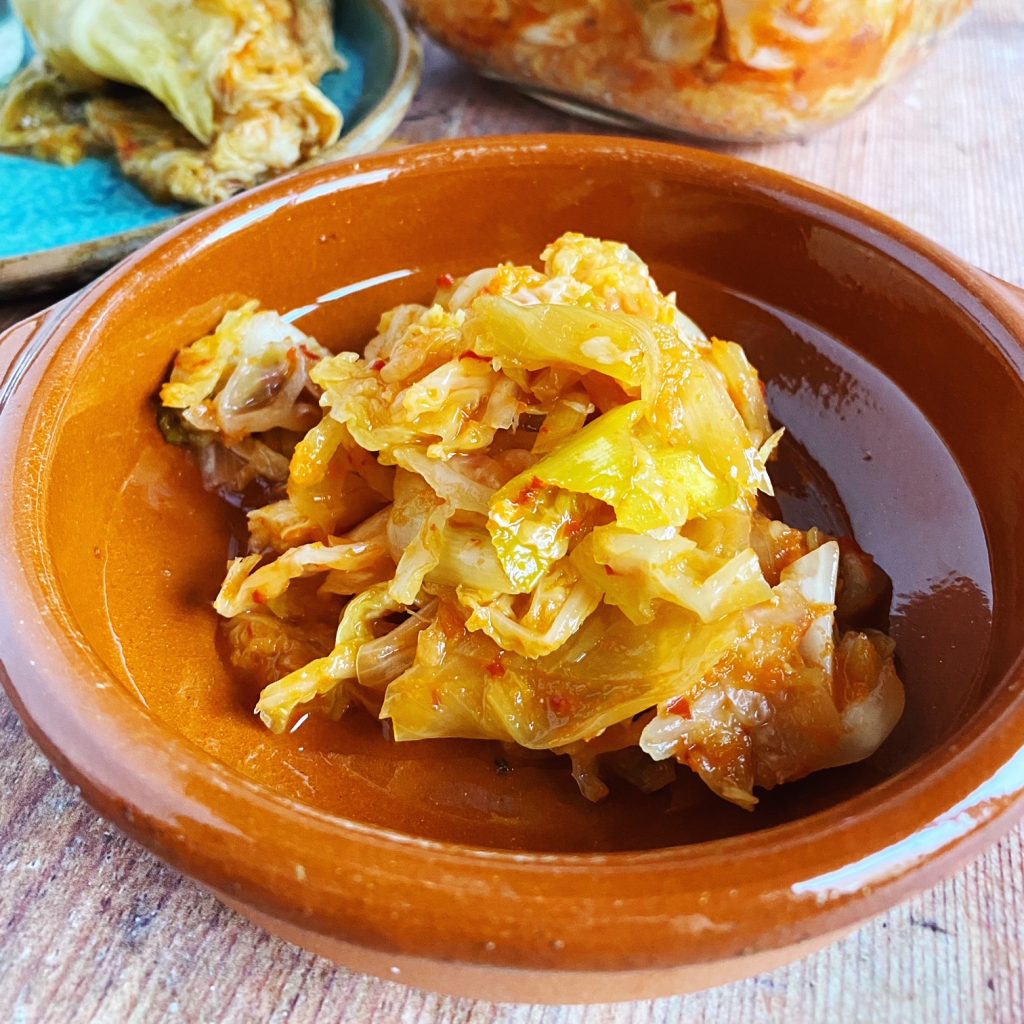
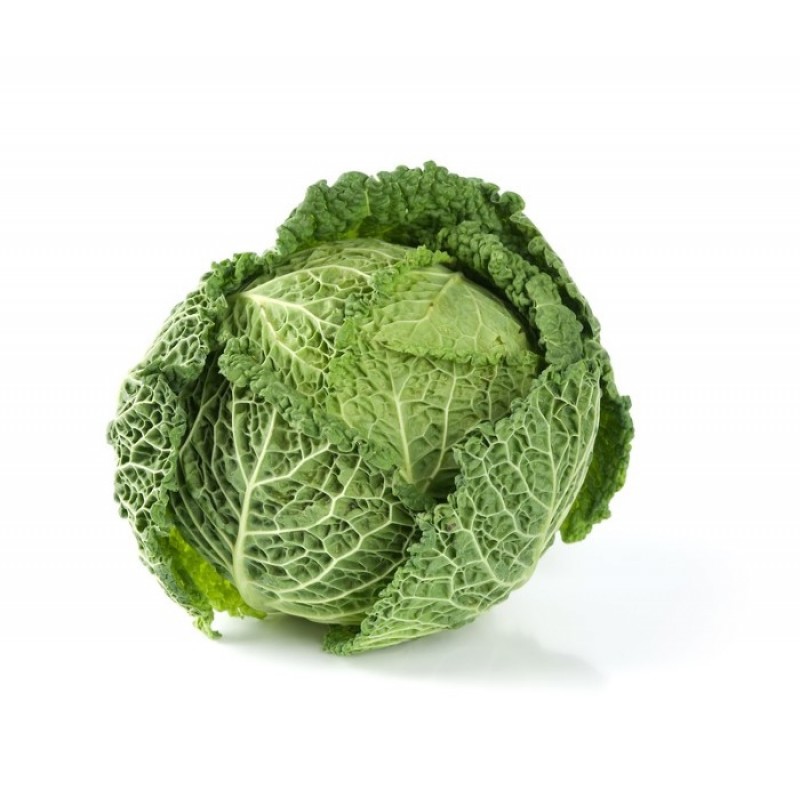
This is an Irish take on the traditional, spicy, fermented side dish from Korea, kimchi. The most common kimchi is traditionally made with Chinese leaf (or Napa) cabbages, but we love to make seasonal versions all year round with our incredible range of Irish cabbages. This recipe would work with any cabbage but my favourite cabbage for kimchi has got to be the beautiful Savoy. With its beautiful ruffled edged, crinkly leaves and deep ridges, it is the perfect vessel to hold the spice paste and it is hardy enough to keep its shape even after fermentation. We have a wonderful harvest of savoys this year, why not add some extras to your next order and give fermenting a go!
Fermenting vegetables can sound a little strange and like a lot of work. But it is actually a very simple way to preserve excess vegetables (just a case of salting or submerging vegetables in brine and leaving them to do their thing at room temperature for a week or so) and it is incredibly beneficial to our health. Fermented vegetables contain trillions of live beneficial bacteria which enhance our gut health. This has a positive knock-on effect to our entire wellbeing. As well as being easy and super-healthy, fermented vegetables are completely delicious! They have a complex flavour and cut through rich foods, think ‘salty pickles’. Just the thing for finishing off a dish or popping into a salad or sandwich. We have jars of ferments on the table for pretty much every meal. Kimchi, of course, goes particularly well with rice bowls and ramens or rolled into sushi, but we are a bit addicted to ‘kimcheese’ toasties. Kimchi is also amazing on peanut butter toast or as a side with macaroni cheese. How do you eat kimchi?
Liz x
Ingredients
1 savoy cabbage
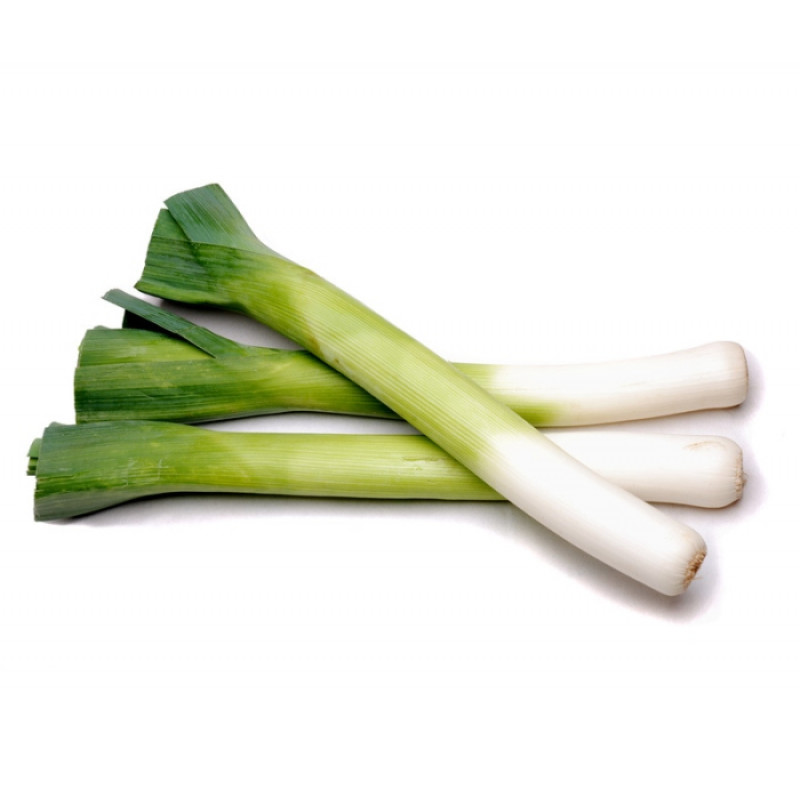
1 leek
natural sea salt
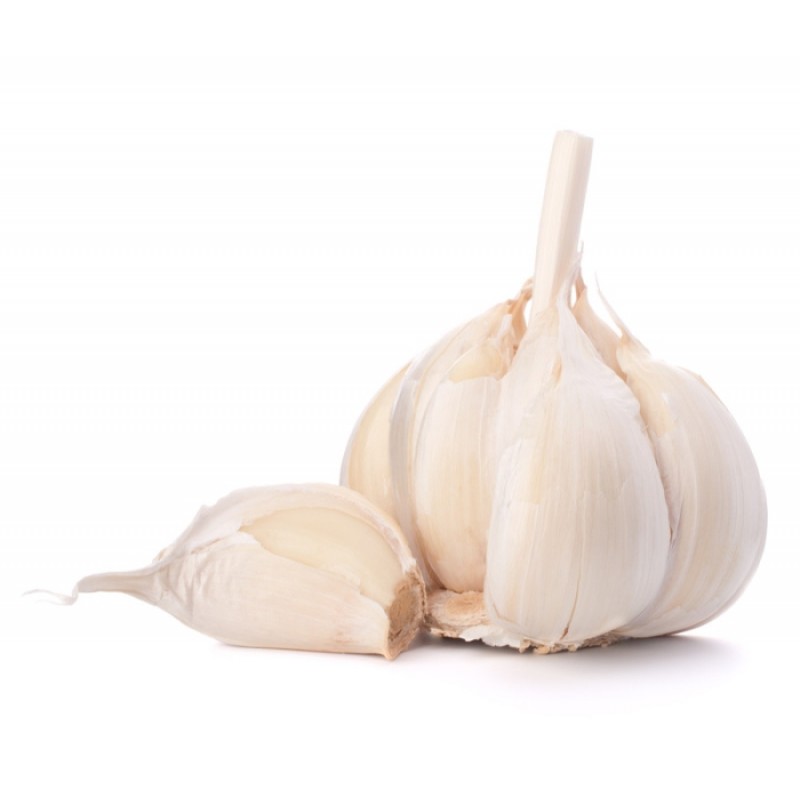
1/2 bulb garlic
4 red chillies (or to taste)
1 large ‘thumb’ of fresh ginger (or to taste)
Method
First clean your work surface and the tools you will need – Find a large jar or several smaller jars and wash them and their lids well with dish soap. Rinse throughly with very hot water. Leave to air dry on a clean tea towel. Find your largest mixing bowl, or if you don’t have a very big one, use a large stock pot or plastic storage box. Clean it very well as above. Clean a large chopping board and knife and a small blender too. Now you are ready to start.
Pull a few of the tough, outer leaves off your cabbage, rinse and put to one side for later. These will be your ‘followers’ which will be important later. Rinse the rest of the cabbage, slice the leek in half lengthways, keeping the root end intact, and rinse out all the mud. Rinse your chillies and thumb of ginger too.
Chop the cabbage into quarters, remove the core from each quarter and thinly slice it and add it to the bowl. Then cut the rest of the cabbage into bite sized chunks and add them to the bowl. Chop up the leek into chunks too and add it to the bowl with the cabbage.
Now you need to add salt. If you want to be very precise, you can weigh the chopped cabbage and leek, work out what 2% of that weight is and use that amount of salt. Or you can do it by taste. I normally start with a heaped tbsp of salt for a whole cabbage and a leek. Mix it well and give the veg a bit of a squeeze and a massage, then taste. They should just taste pleasantly salty. Add more salt if needed, our cabbages are pretty big at the moment so you may well need to. Then let the salted vegetables sit while you make the spice paste.
Peel the garlic, slice off the stalks of the chillies and slice the ginger. Add them all to a small blender and blend into a paste. You may need to add a splash of water to help it blend.
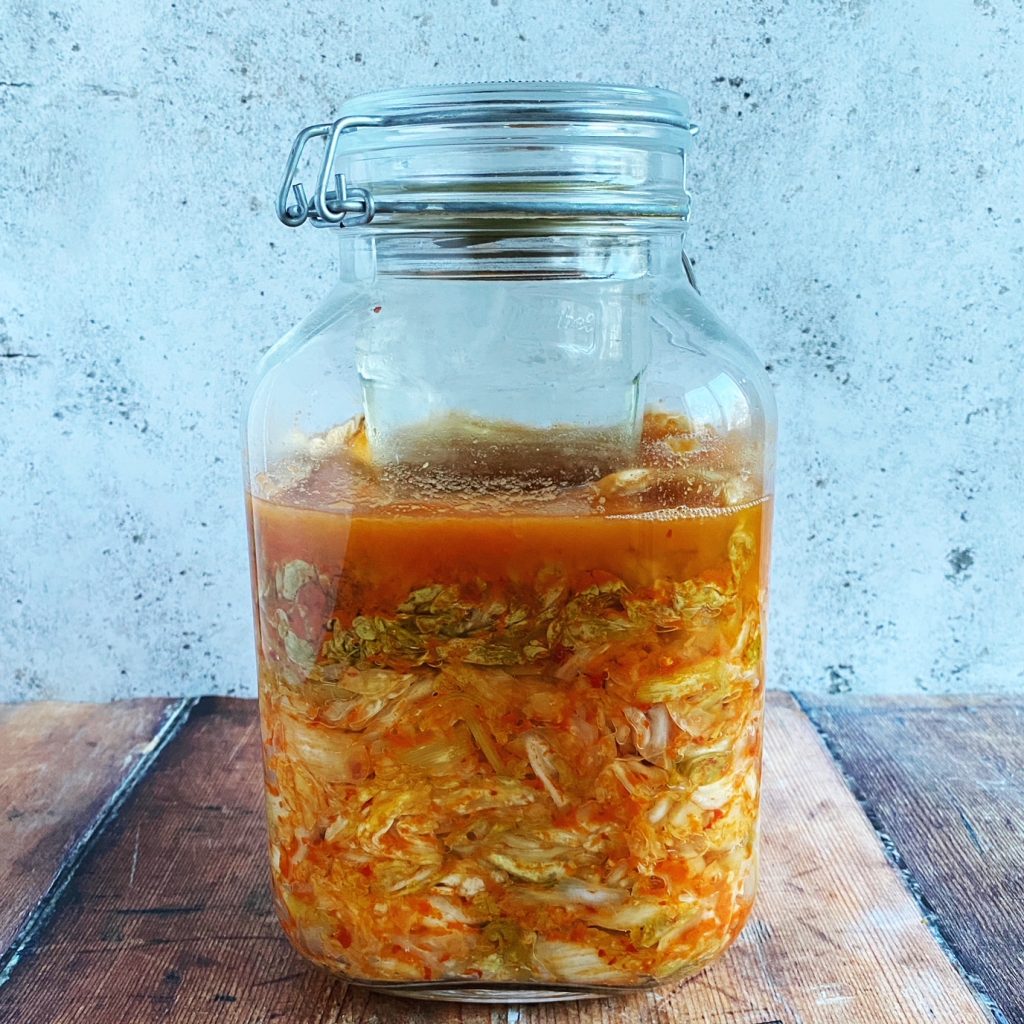
The salt in the cabbage and leek will have started to draw out liquid from the vegetables and create a brine in the bottom of the bowl. You can help this along by giving the vegetables another massage. The vegetables will wilt and decrease in volume and should look quite wet. When you pick up a handful and squeeze, lots of lovely brine should drip down into the bowl. Then you know you are ready to mix in the spice paste and pack your jars.
Use a wooden spoon or gloved hands to mix the spice paste into the salted vegetables. Be careful not to get any of the spice paste on your skin or in your eyes as it can really sting. Then start packing your jar/s.
Do a small amount at a time and firmly press it into the jar ensuring there are no air pockets. Use gloved hands or a clean rolling pin or spoon to help you pack it firmly into place. Keep going until you have either used up the mixture or you have a couple of inches of headroom left in your jar. You don’t want to over-fill the jar as during fermentation the brine can bubble over and escape, making a bit of a mess in your kitchen.
Now you need to figure out a way to hold the vegetables safely down under the brine. Any veg exposed to air on the surface are likely to catch mould. So first use the outer leaves of the cabbage, that you saved at the beginning, to tuck the vegetables in so they won’t float up during fermentation. Take your time and press the edges of the leaves down around the insides of the jar to ensure there are no gaps for the chopped bits to escape through.
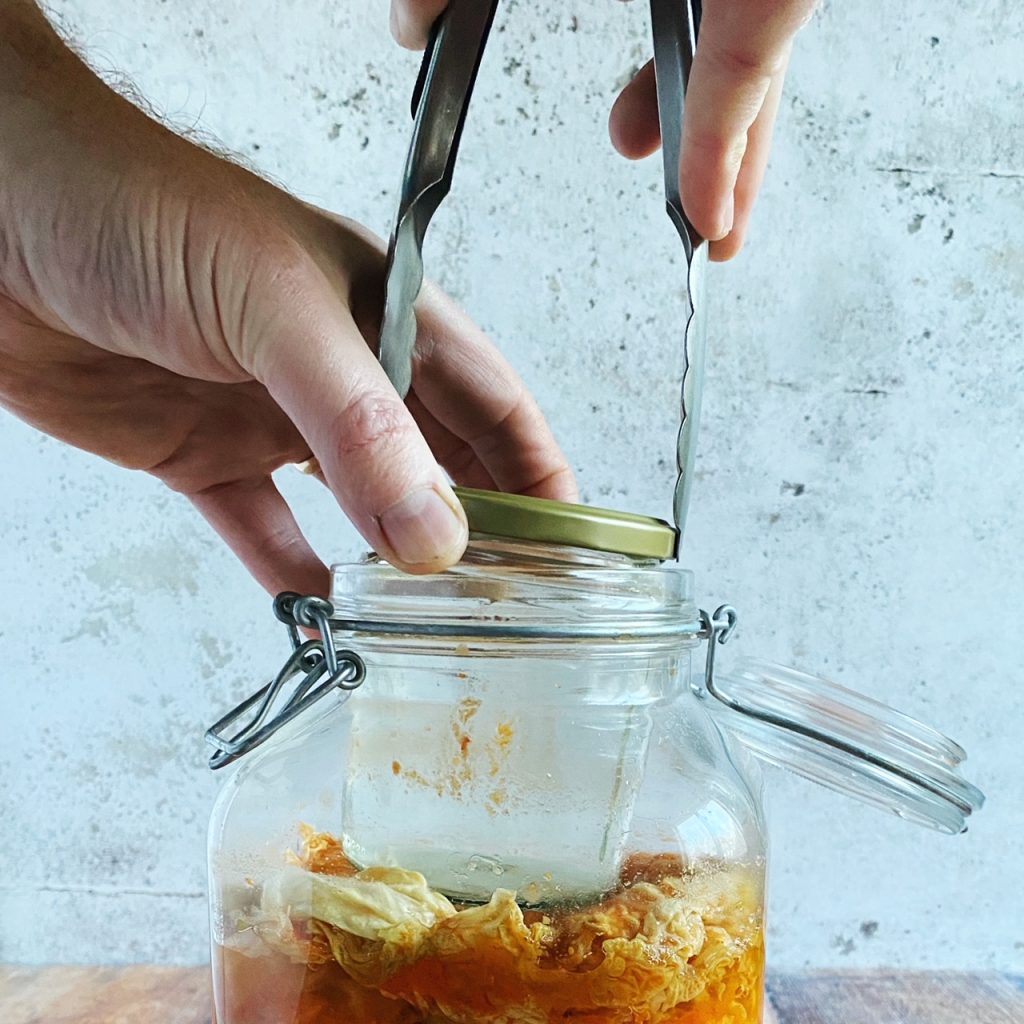
When you are happy that your ‘follower’ leaf has done its job, you can add a weight to hold everything down under brine. This needs to be something food safe that won’t react with the salt. So glass is best. A small water glass or ramekin which fits inside your jar and can be pinned down with the lid is good. Or fill a clean pesto jar or similar with water, make sure the metal lid isn’t touching brine, and pop that in. Other weight ideas are a large, very clean (boiled) beach pebble (just make sure it is not a limestone/chalk) or a ziplock bag filled with water.
Place the lid loosely on your jar so that gases can escape during fermentation but no bugs/dust can get in. Or you can put the lid on tight and ‘burp’ your jars every day by opening and closing them to release built up gases. If you have a clip-top jar like mine, you can simply remove the rubber seal during fermentation.
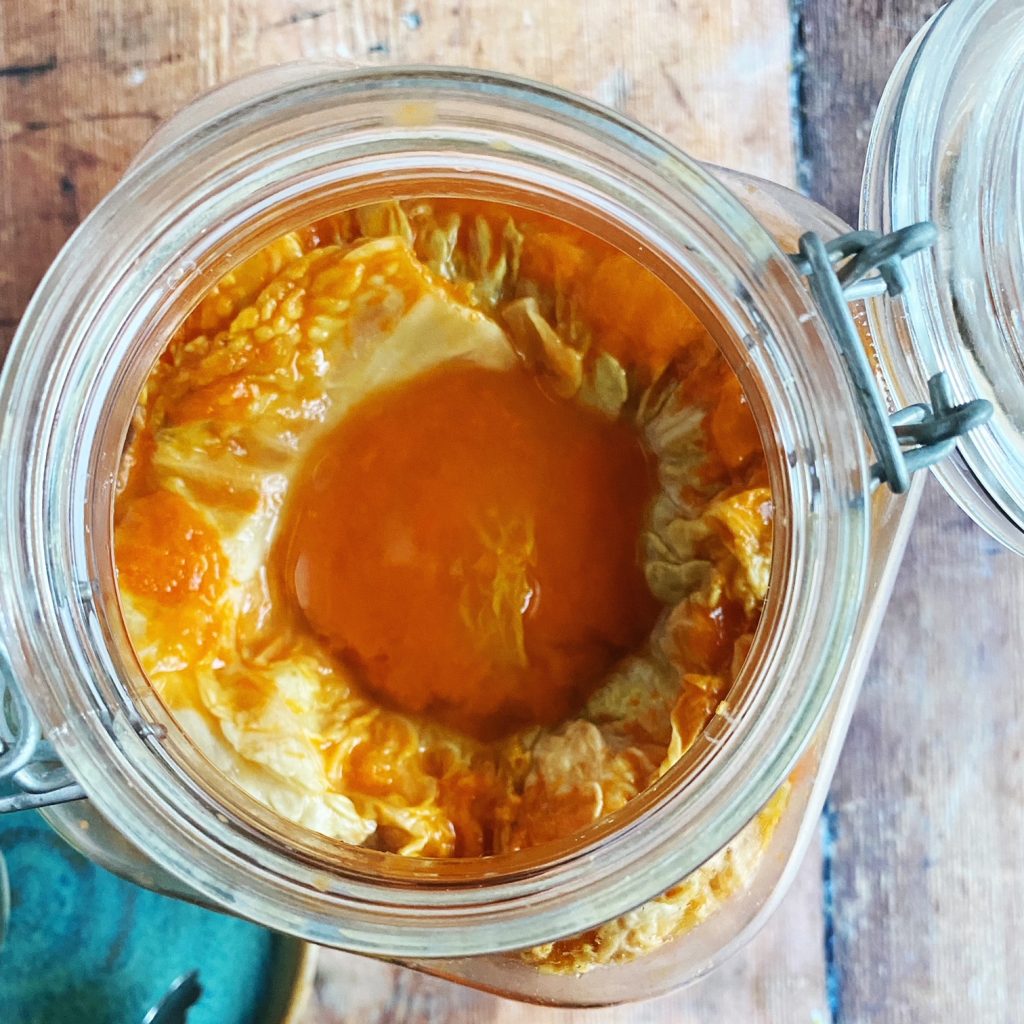
Put the jar on a tray or plate on your work surface out of direct sunlight. Let it ferment for 1 week then it should have transformed into a tangy, delicious pickle! If you would like to ferment for longer then you can of course, just find a cooler part of your house like a basement so that it ferments slowly. When you are happy with the flavour you can remove the weight and ‘follower’ and pop the jar into the fridge where it will keep for 3-12 months.
Make your kimchi last well by decanting it into smaller, very clean jars and just eat one jar at a time. This way the pickle will be exposed to less air. Also, never double dip when eating your kimchi as this would introduce new bacteria from your mouth into the jar. Enjoy!
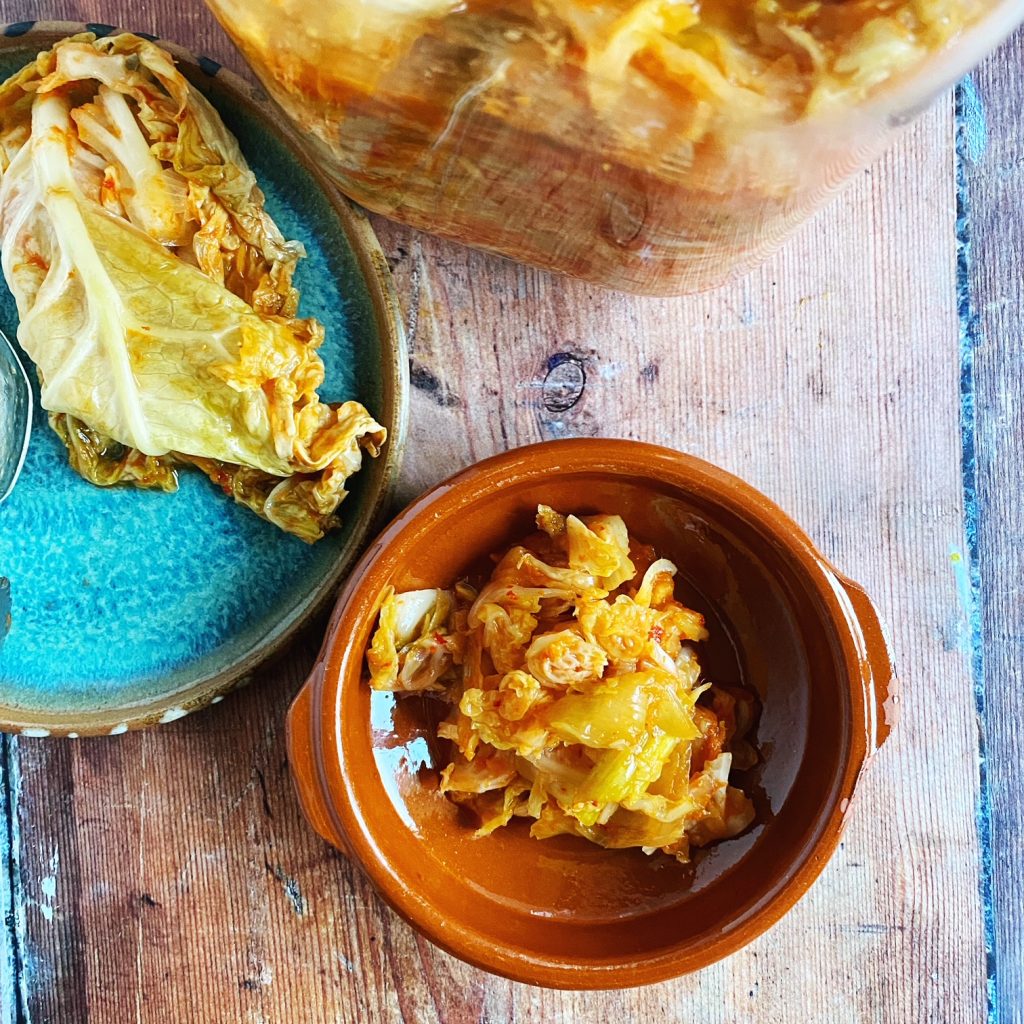
Here you can see the weight holding the cabbage leaf ‘follower’ down, which pins all the chopped vegetables safely under brine. This is after 1 week of fermenting at room temperature.
Removing the weight and ‘follower’. The follower is edible too of course!
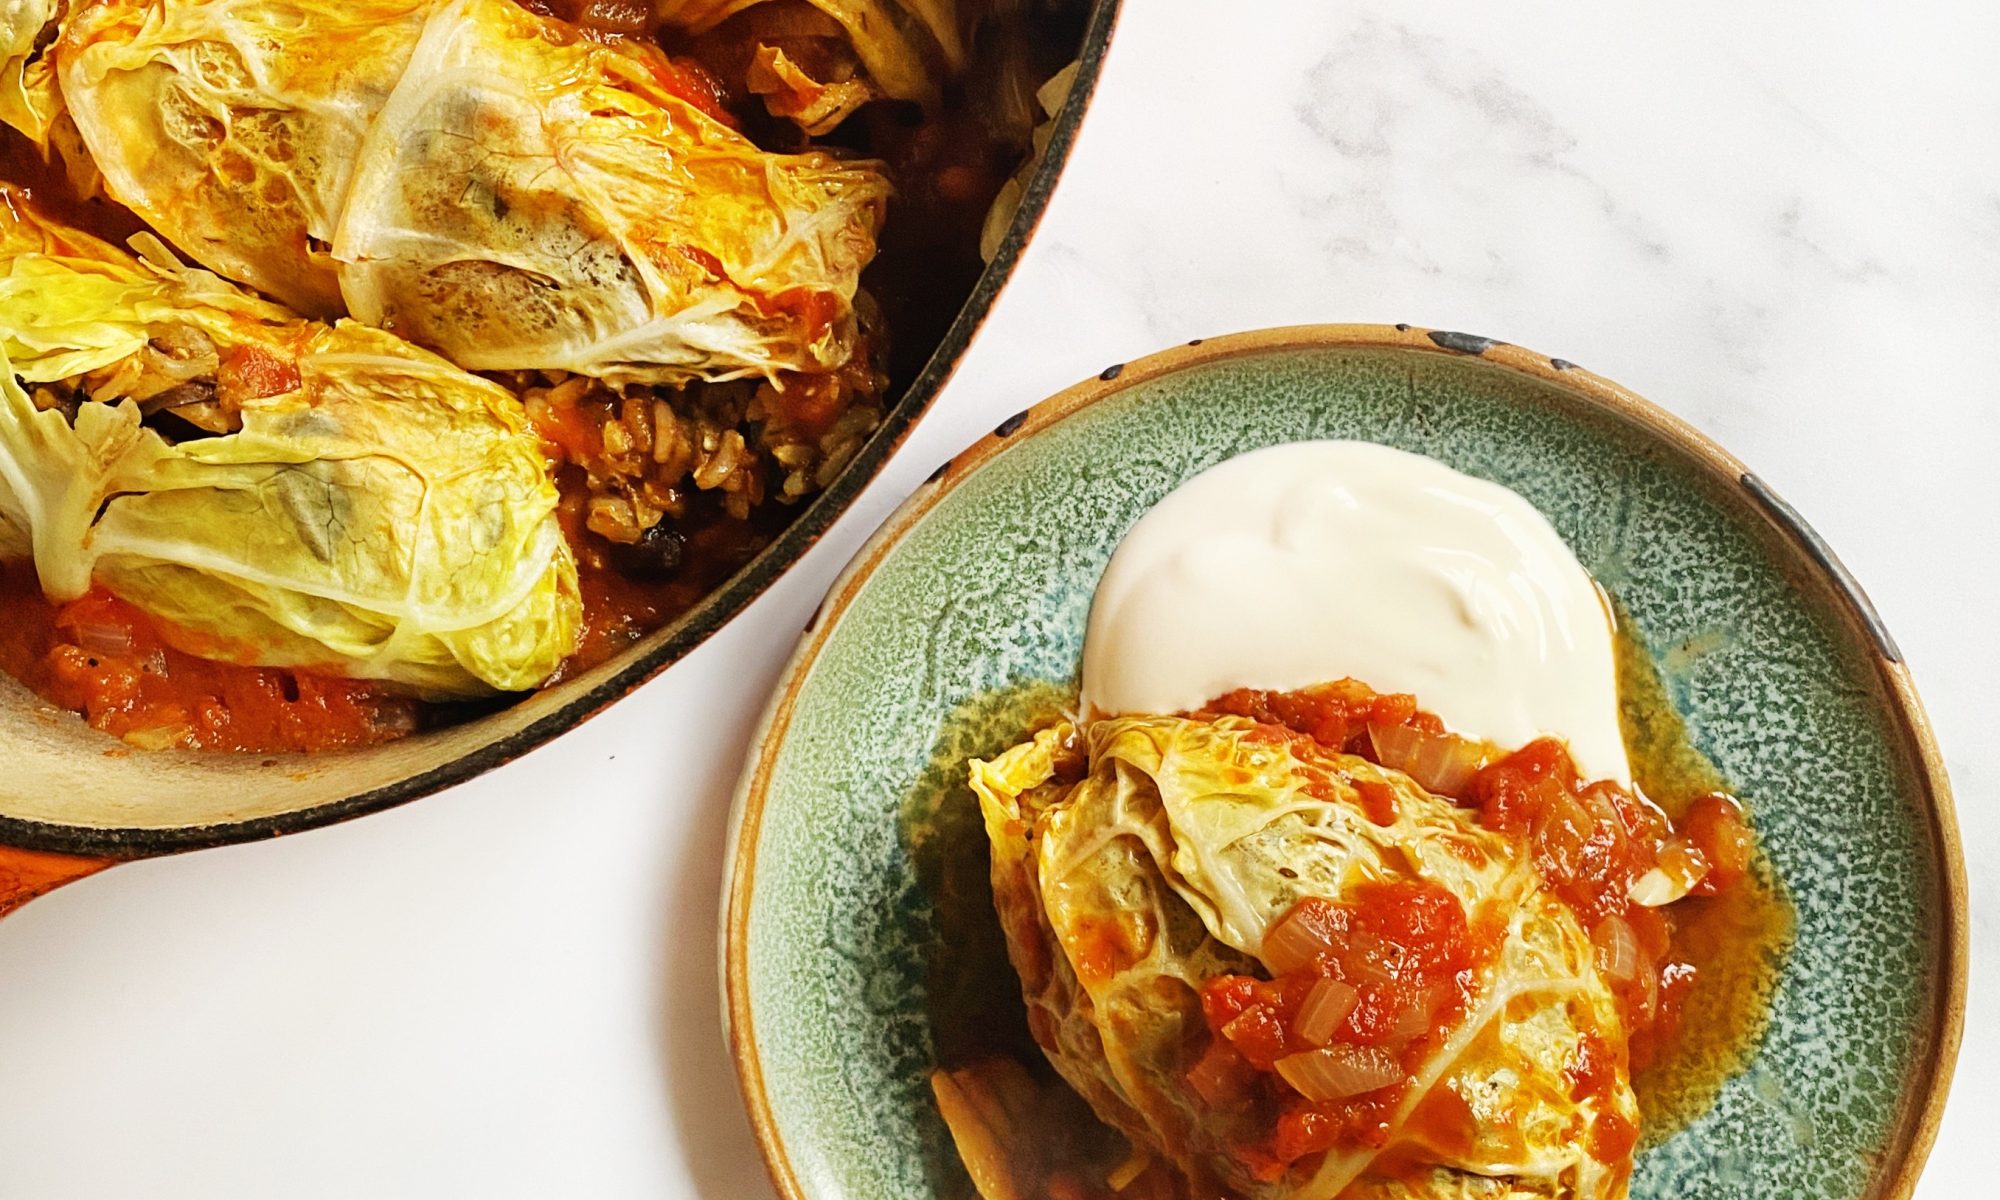
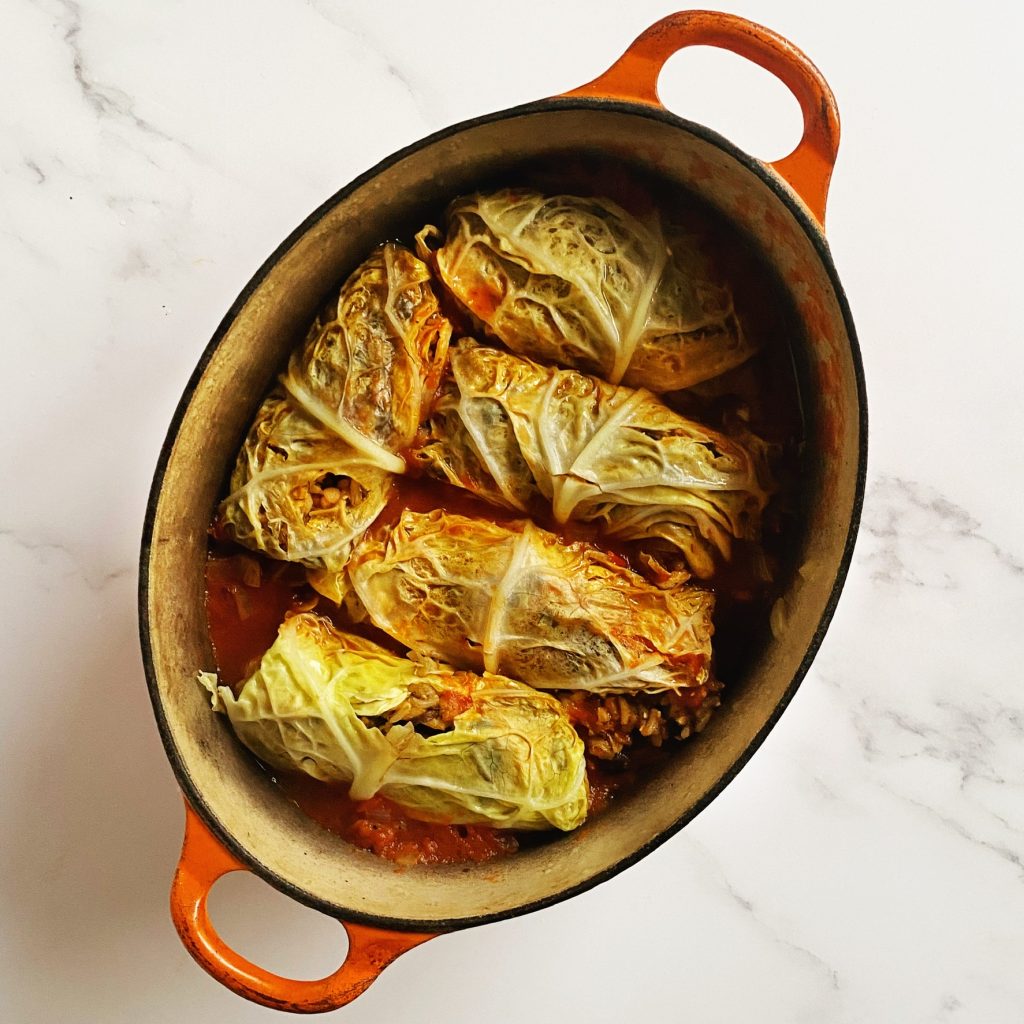
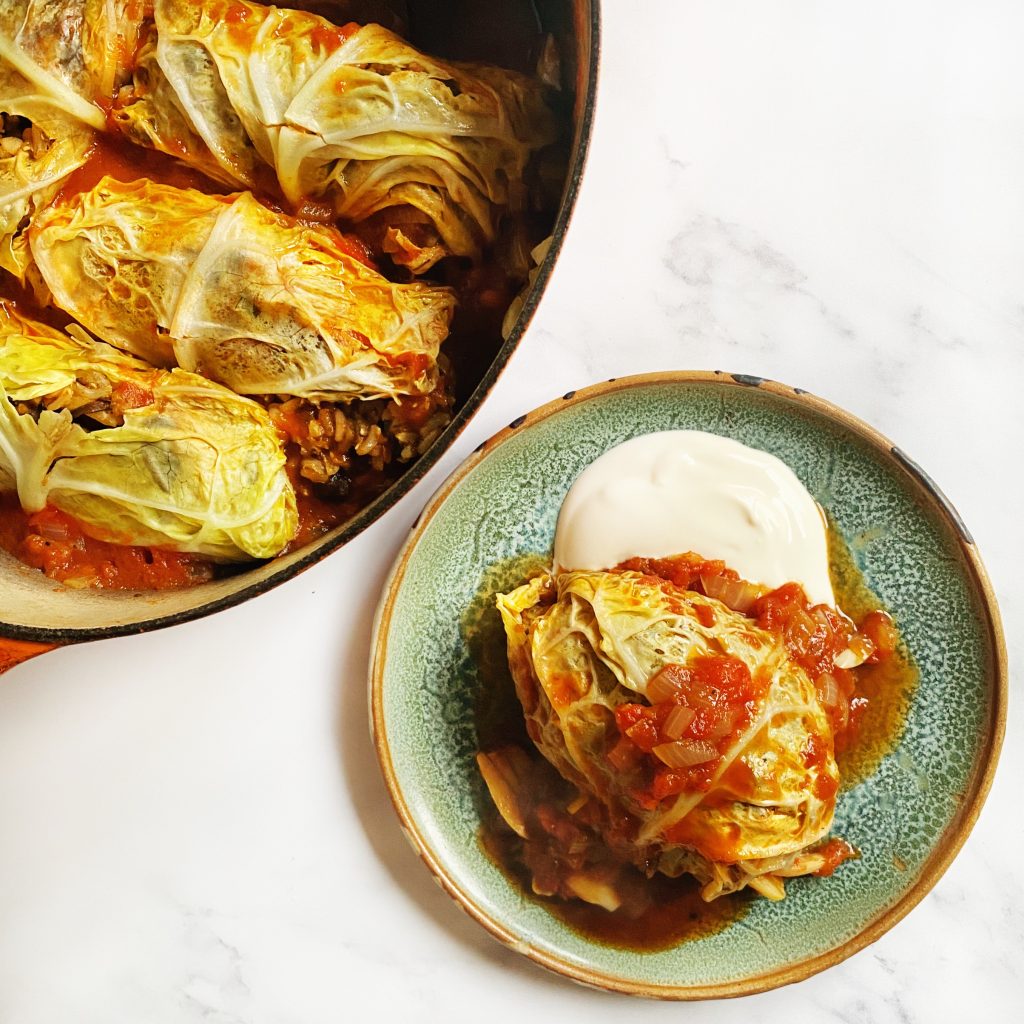
Cabbage rolls are so delicious! The simmered cabbage wrappers turn tender and sweet and are the perfect vessel to hold together a tasty filling. I lean towards herby brown rice, mushrooms and beans as in the recipe below, but of course you can fill them with whatever you like. Traditional minced meat and seasonings, a spiced mashed potato and chickpea curry, or make a twist on an enchilada and stuff your leaves with a tasty chilli? Bake in a rich tomato sauce, a curried coconut broth or simmer in a simple stock. Cabbage rolls can roll with whatever you are in the mood for. How do you make yours?
Liz x
Ingredients (for 8 rolls)
2 tbsp olive oil
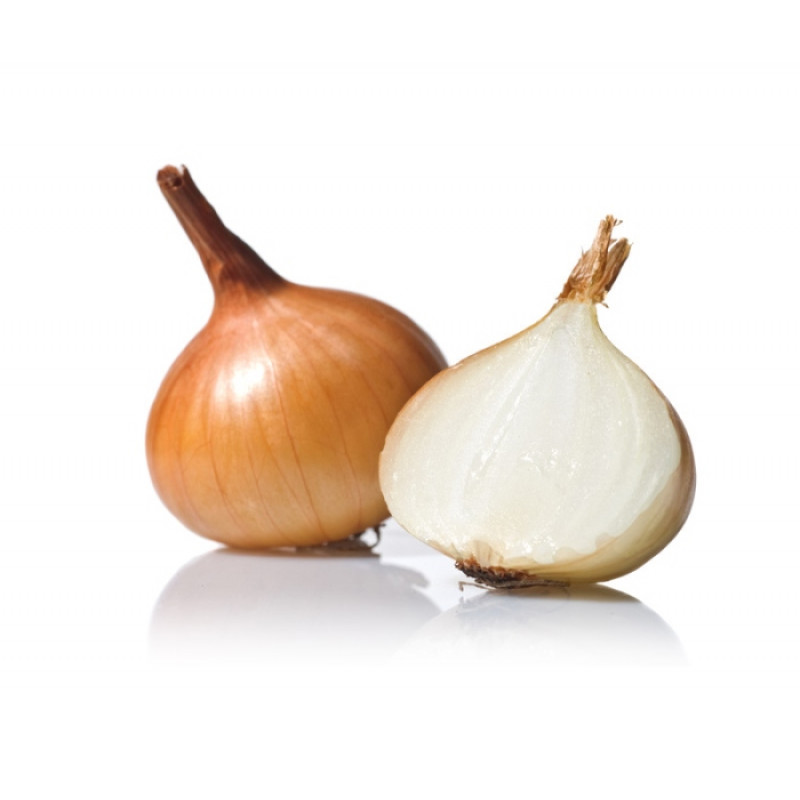
1 white onion, peeled and diced
6 garlic cloves, peeled and diced
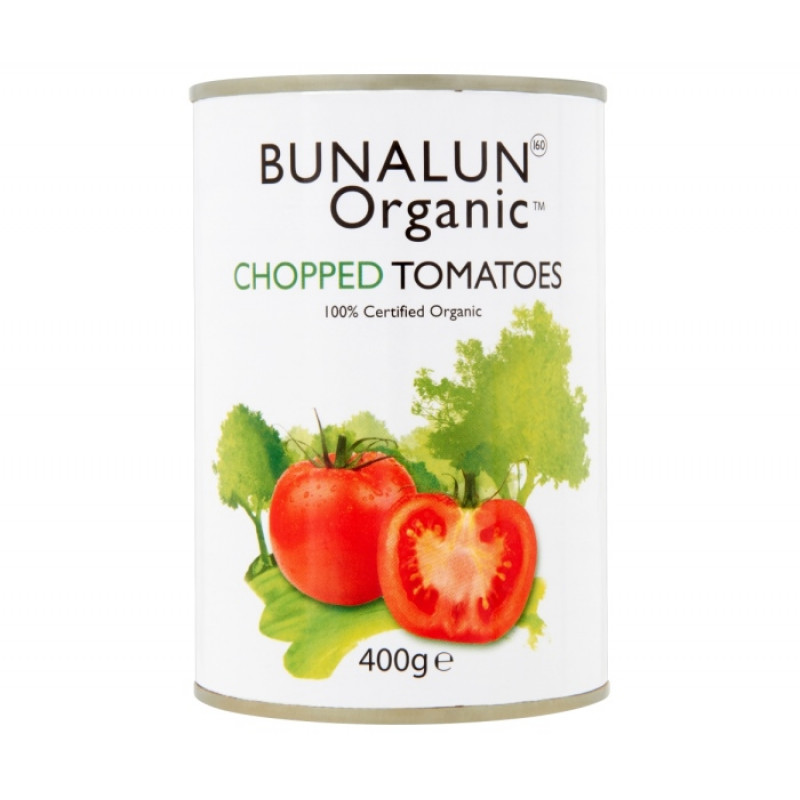
1 400g tin of chopped tomatoes
2 bay leaves
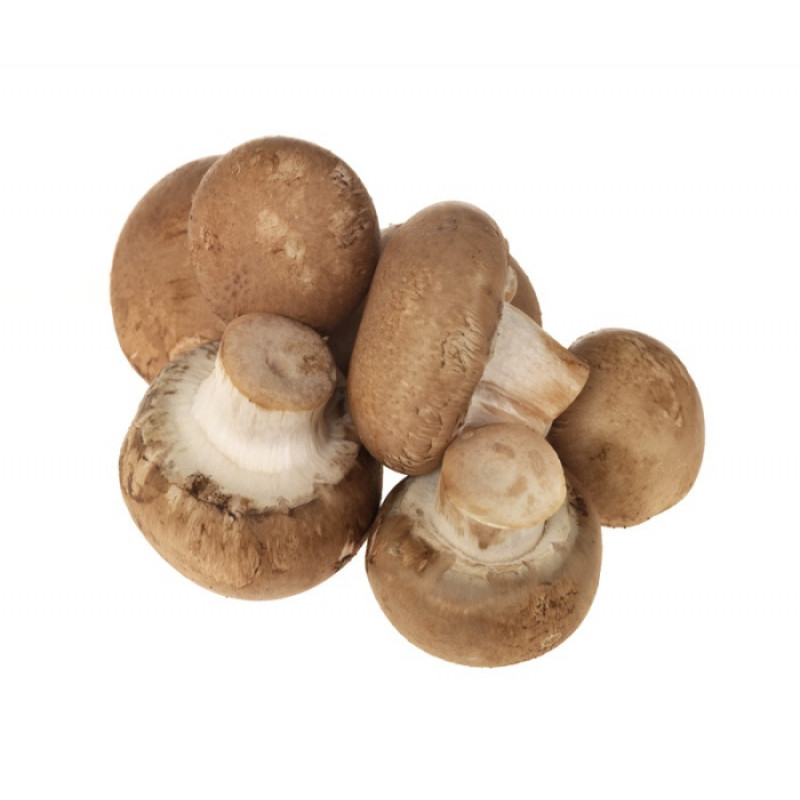
10 chestnut mushrooms, sliced
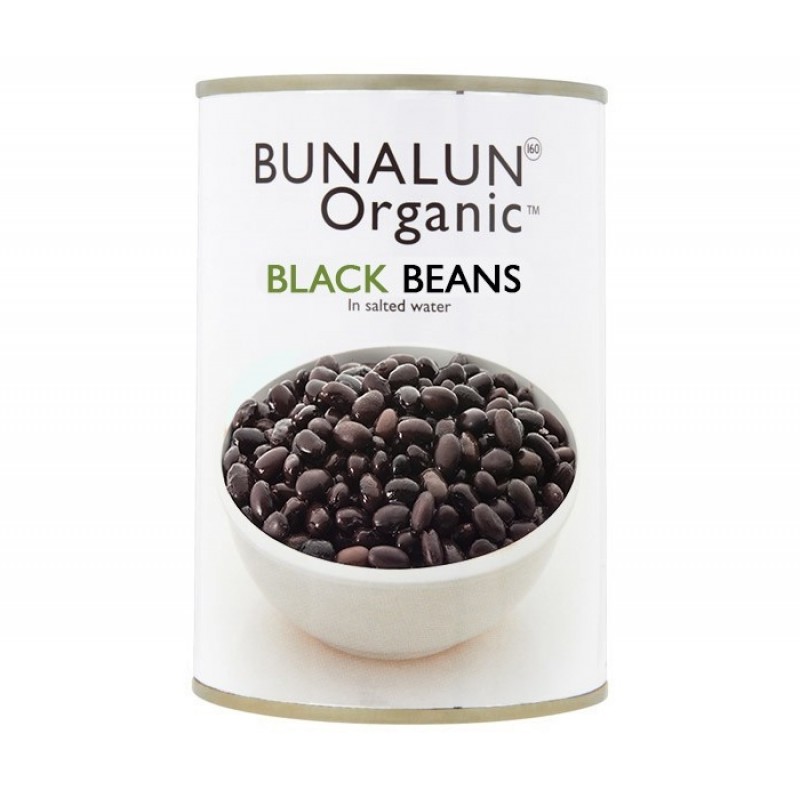
1 400g tin of black beans, drained
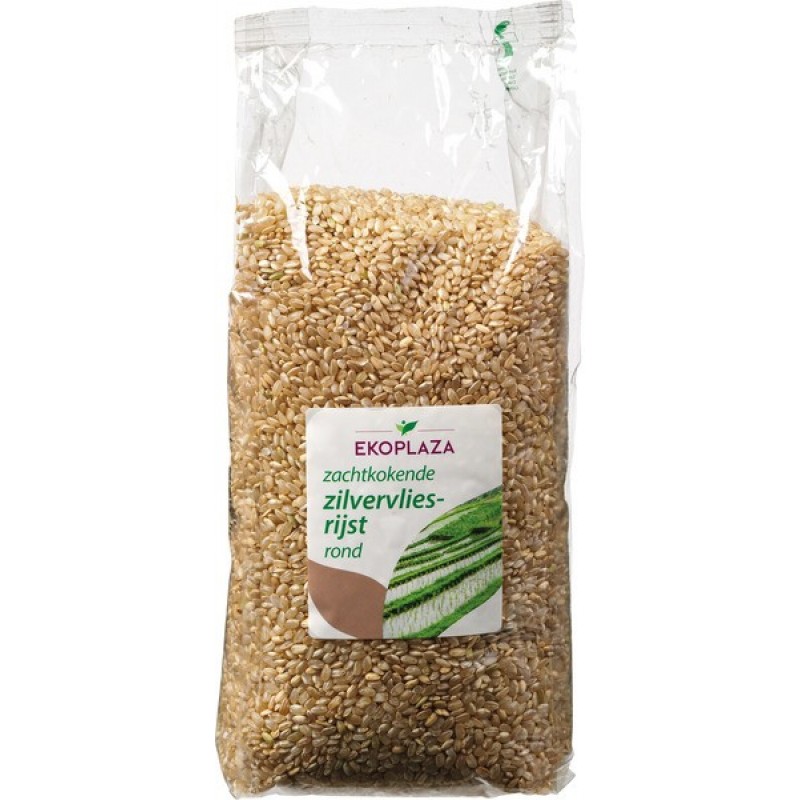
200g short grain brown rice, rinsed
400ml water
1 tbsp dried dill
salt and pepper to taste
8 savoy cabbage leaves, rinsed
natural yoghurt to serve
Method
Start with the filling. In a small pot which has a lid, fry the mushrooms and 2 cloves of garlic with 1 tbsp of olive oil. Season with salt and pepper and when the mushrooms start to take on some colour, add the rice, drained black beans, dill and water. Put the lid on the pot. As soon as it starts to boil, turn the heat down to the lowest setting. The rice should absorb all the water and be perfectly cooked after around 20-30 minutes.
Meanwhile make the tomato sauce. In a wide, heavy bottomed pan which has a lid, fry the onions and 4 cloves of garlic with 1 tbsp of olive oil until golden and soft. Add the bay leaves and the tin of tomatoes. Swirl the juices from the tin into the pot too with half a tin of water. Season with salt and pepper and let the sauce gently simmer while you wait for the rice to cook.
Once the rice is cooked through, taste it and adjust the seasoning if needed with more salt, pepper or dill. Then you can assemble the rolls.
Use a rolling pin or the heel of your hand to flatten the tough stalk of each leaf. This will make it easier to roll. Then divide the rice between the 8 leaves and wrap them up. I find it easiest to have the stalk end closest to me, place the rice in the centre of the leaf, then roll the end of the stalk away from me, over the rice, tuck the sides of the leaf in, then roll on to the top of the leaf.
Place the parcels, seam side down into the tomato sauce. Tuck them in snuggly so that they don’t unravel as they cook. Then put the lid on, turn the heat to medium and simmer for 10-15 minutes or until the leaves are tender. Alternatively you can place the pot in a hot oven.
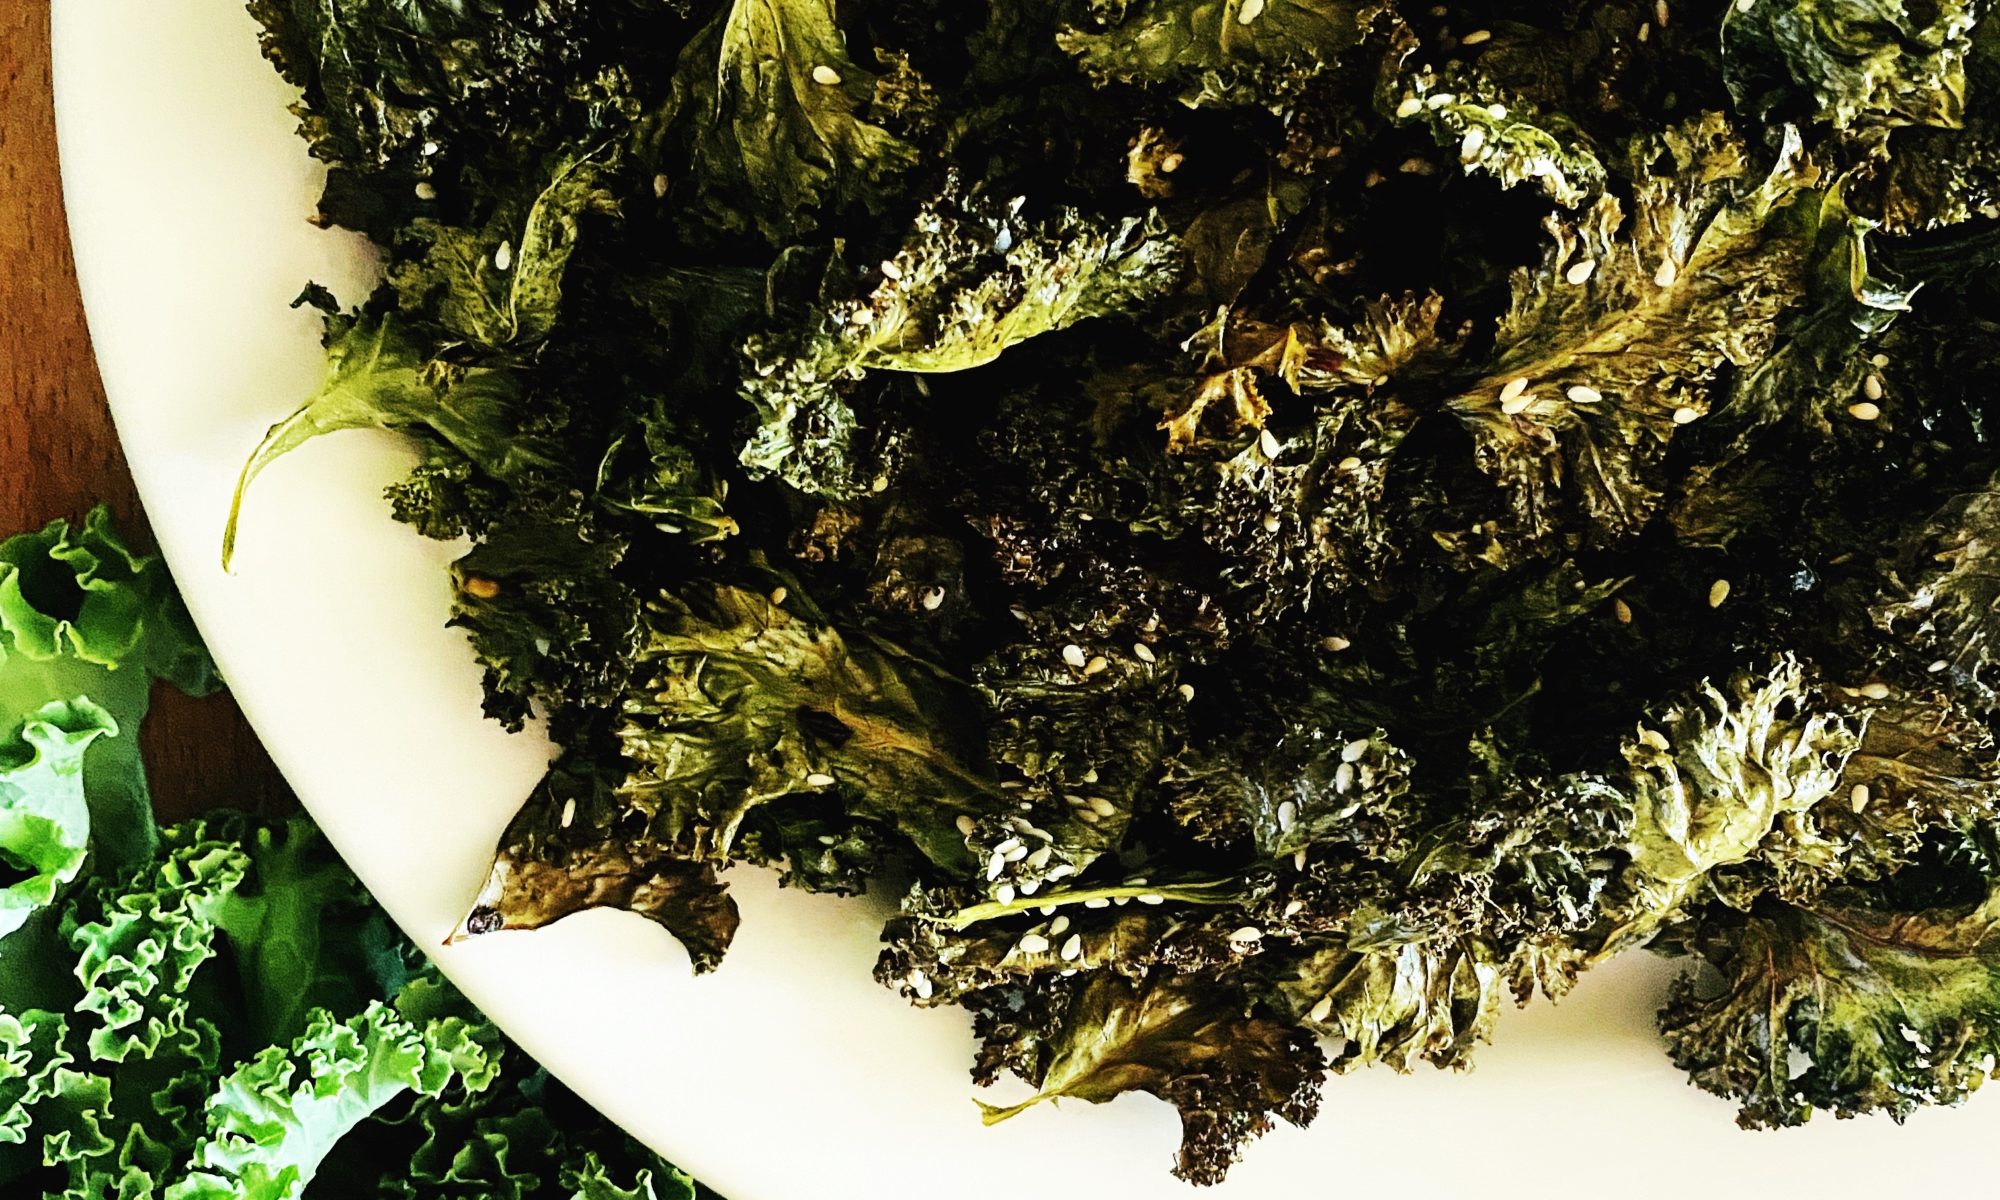
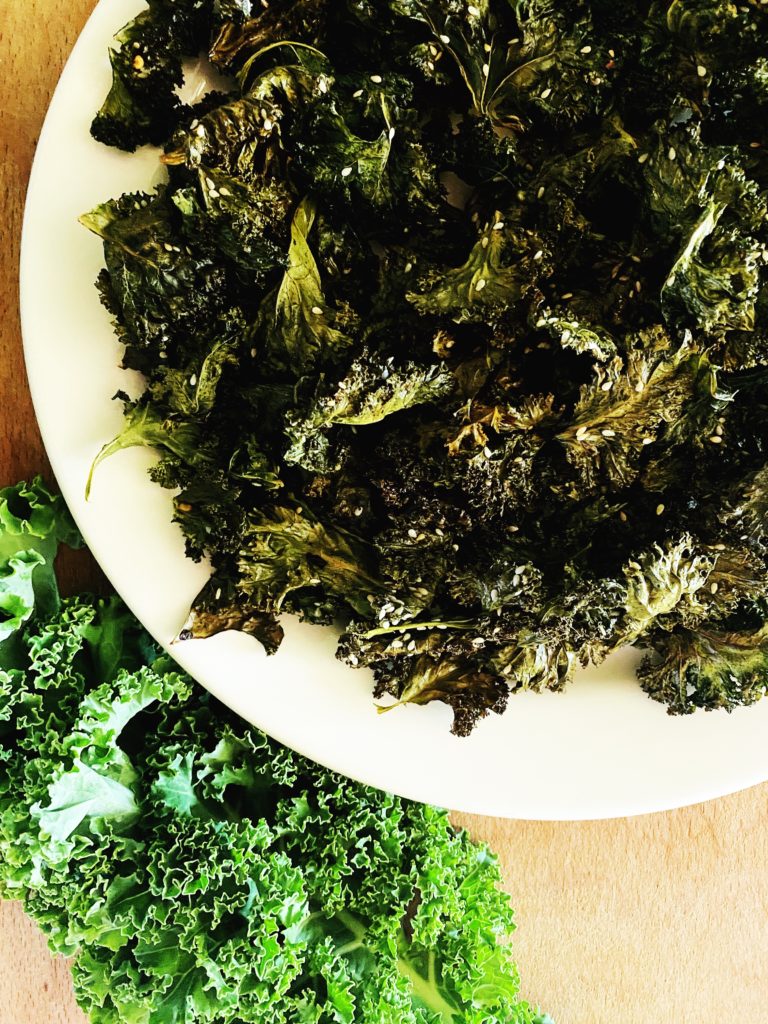
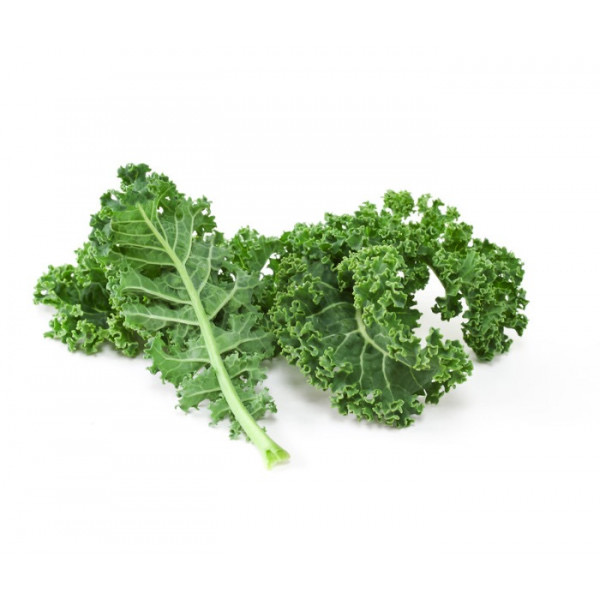
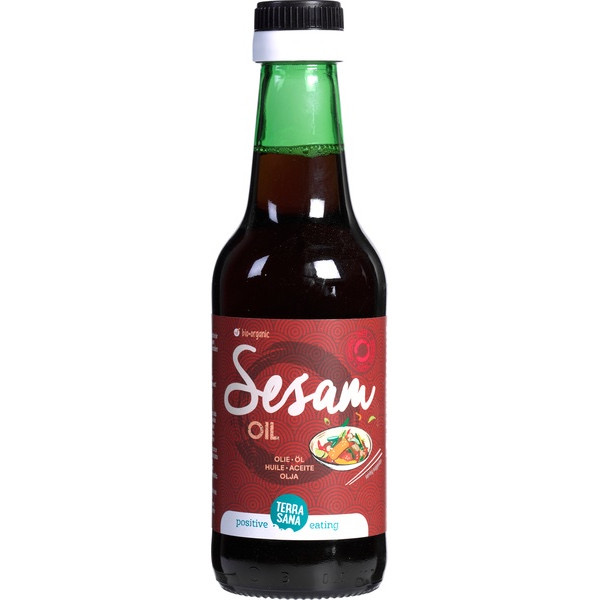
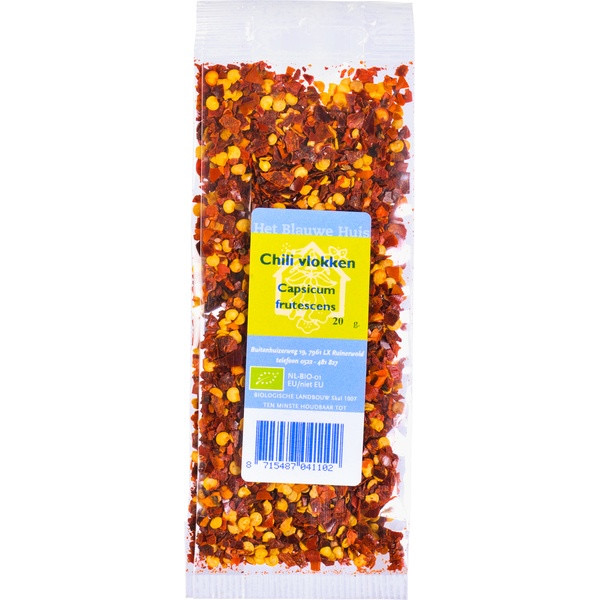
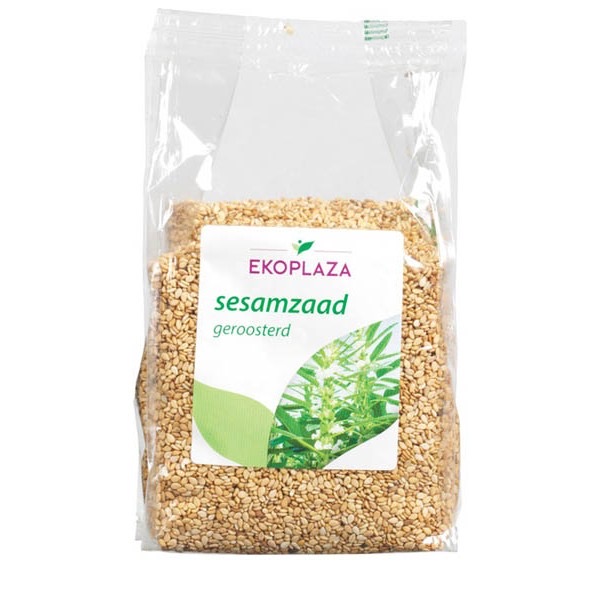
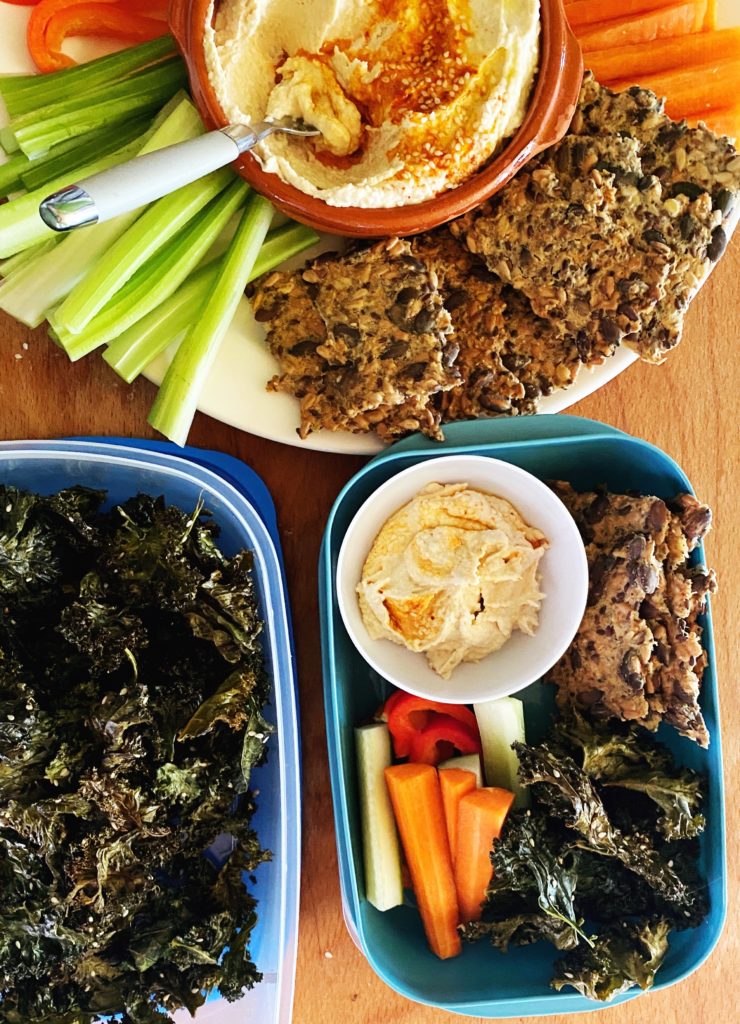
Kale crisps are easy to make and surprisingly delicious. If you’re looking for a healthy, savoury snack, you’ve come to the right place. Kale crisps remind me of crispy seaweed so as well as snacking on them whilst watching a film, I also crumble them over rice or noodle bowls. I’ve seasoned this batch with toasted sesame oil and chilli flakes to enhance that Asian, seaweedy flavour, but you can flavour your crisps exactly how you like them. Some other family favourites: nutritional yeast and garlic/onion powder (cheese & onion), smoked paprika and maple syrup (smokey bacon), or just plain old salt and pepper! Share your favourite flavour combos in the comments.
Kale is a real Irish superfood, full of fibre and vitamins, most notably vitamin C, calcium, magnesium and vitamin B-6. Kale crisps are a fun way to get all that goodness in.
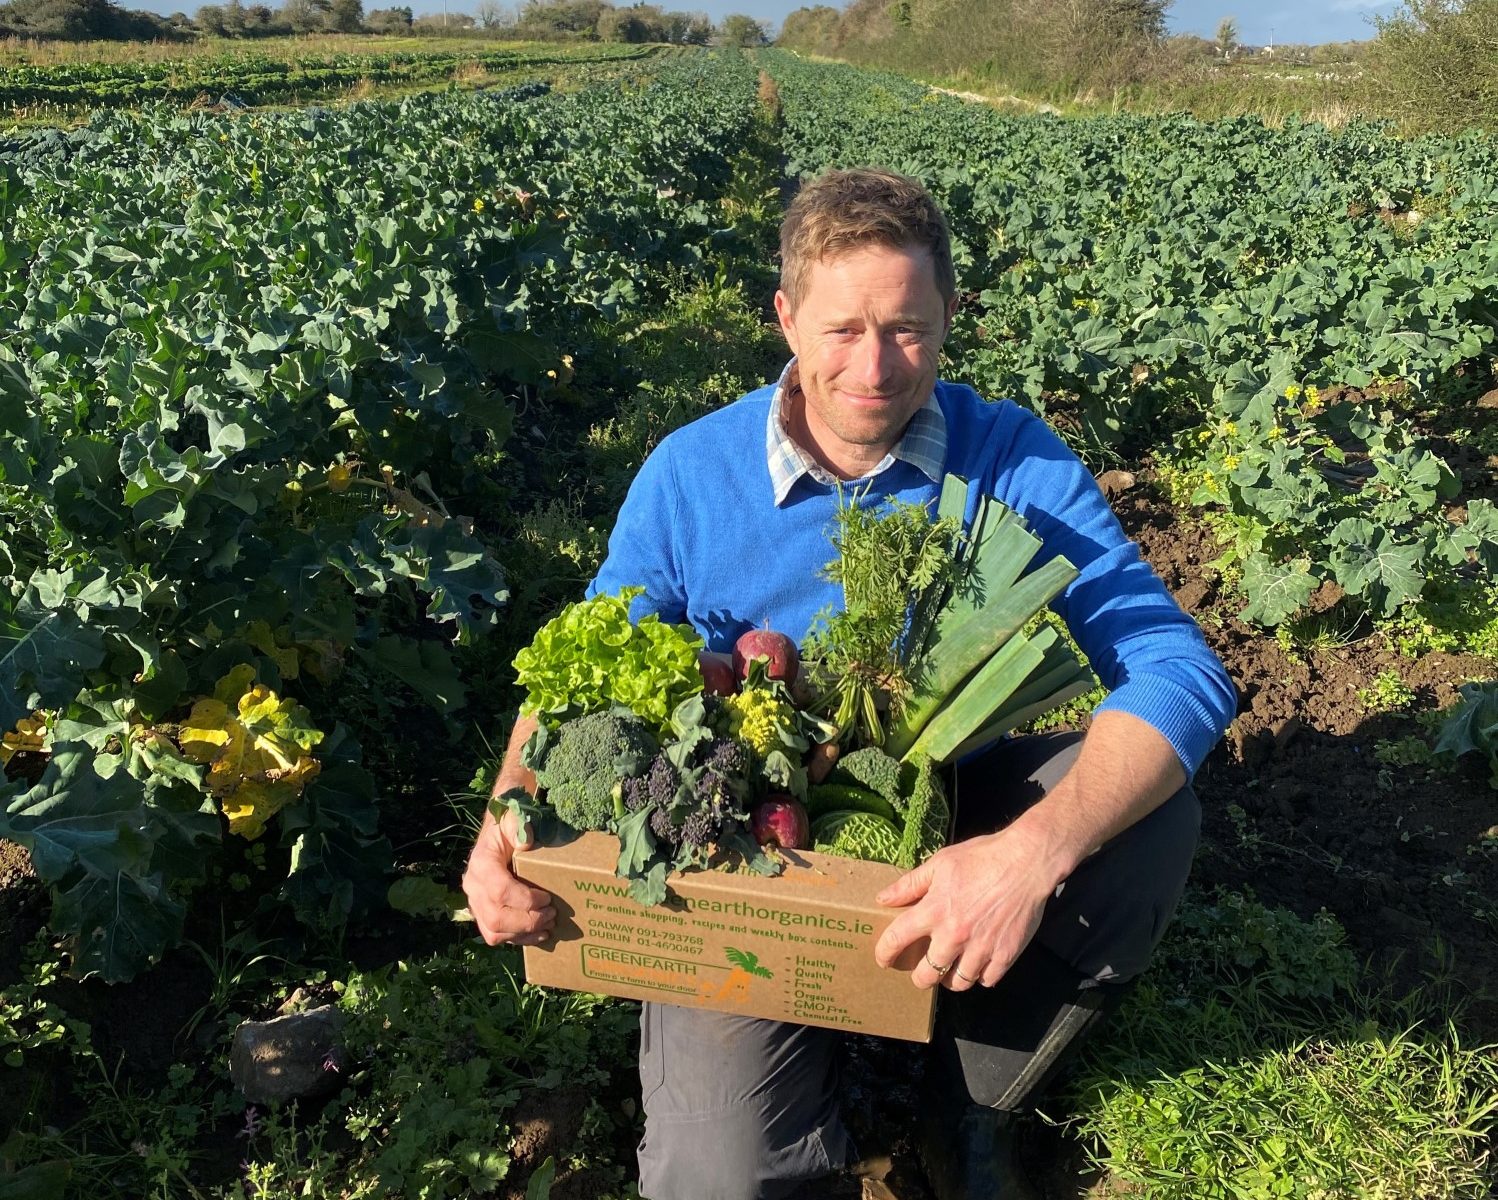
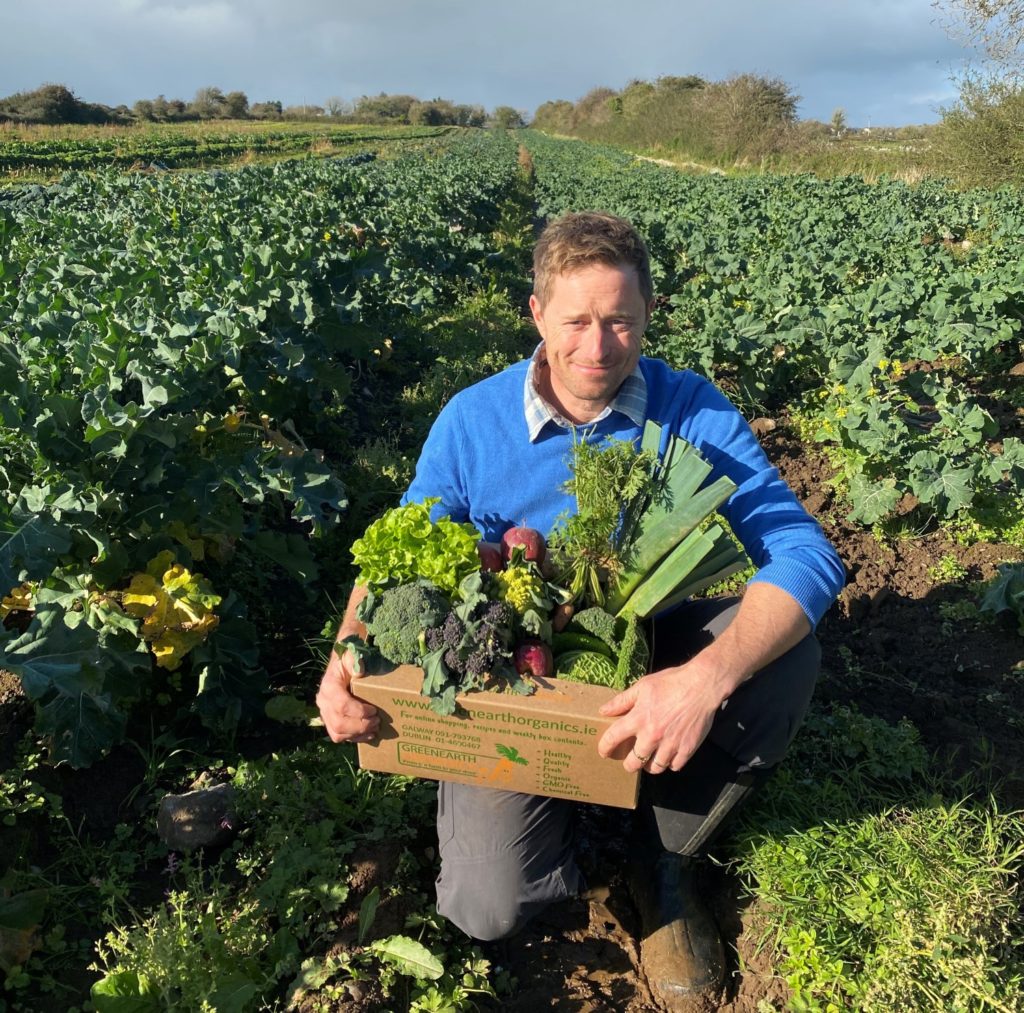
*All the ingredients pictured below can be added to your organic veg order and delivered to your door. We deliver to every address in Ireland and Northern Ireland.
Liz x
Ingredients
approx 14 curly kale leaves (any type of kale works)
1 tbsp toasted sesame oil (or any oil you like)
chilli flakes to taste (or other flavours you like, see above for ideas)
1/2 tsp salt (or to taste)
1 tbsp sesame seeds (optional)
Method
Turn the oven on to 150C (130C fan) and find your largest baking trays. Line the trays with baking parchment – we sell a 100% compostable one.
Rinse the kale and dry it thoroughly. I place the rinsed leaves onto a clean tea towel then use a second tea towel to blot the leaves dry.
Tear the kale leaves from their stems and place in a large mixing bowl. Do not throw the stems away, they are delicious finely sliced and sautéed. Use in stir fries or add to risottos or stews…
Add the oil, salt, chilli flakes and sesame seeds to the bowl and mix and massage the seasoning into the leaves. Break up any large pieces as you go.
Spread the leaves out onto the lined baking trays, it’s best if they are in an even layer and not overlapping.
Bake in the oven for 20-30 minutes or until completely dried out and crispy. You will need to stir them half way through.
Allow them to cool completely before storing in an airtight container. They are prone to loose their crispness so eat the same day or you can try adding a few grains of rice to the bottom of the container to act like silica gel packs in bought kale crisp packets. Just be careful not to eat them accidentally.
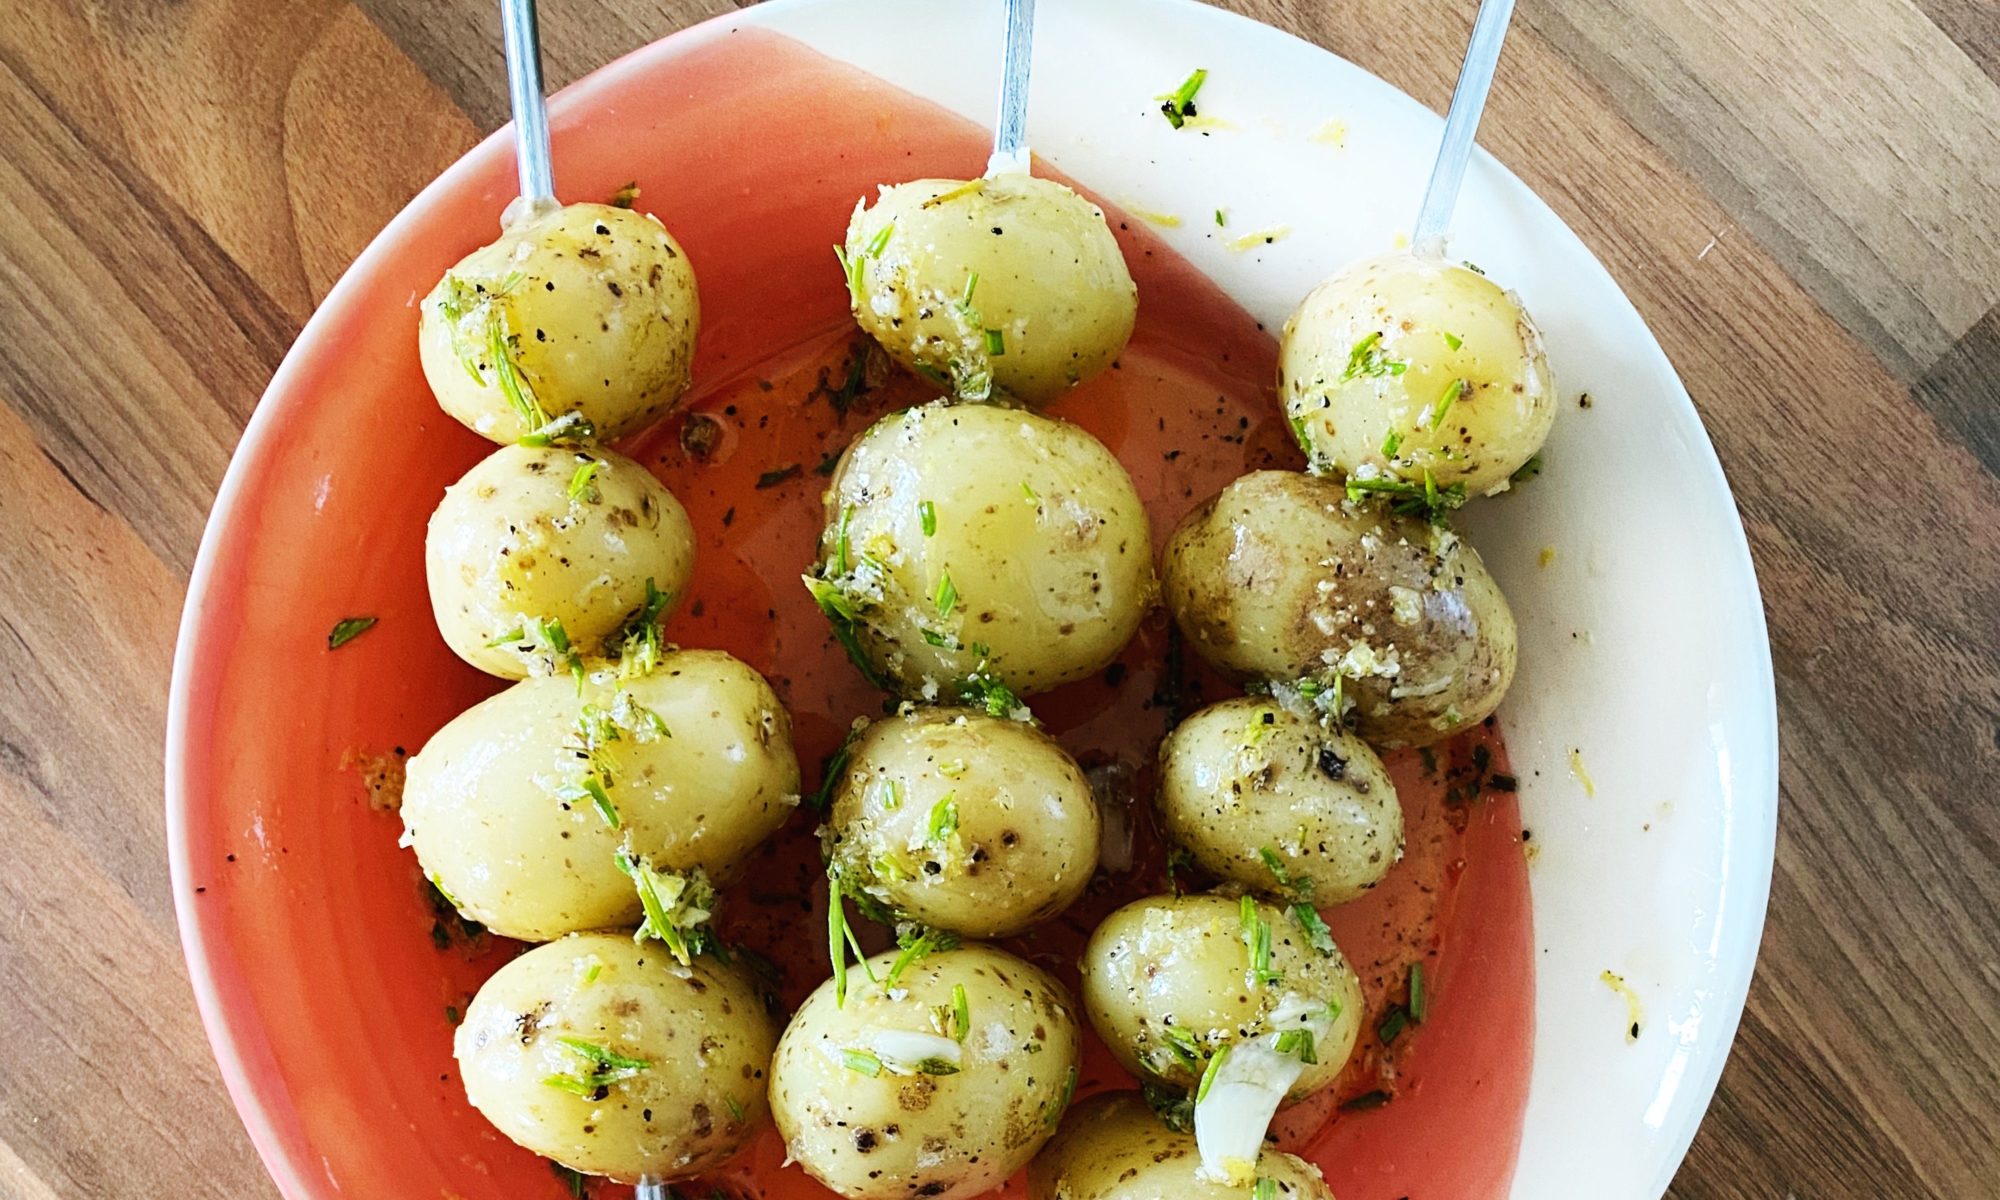
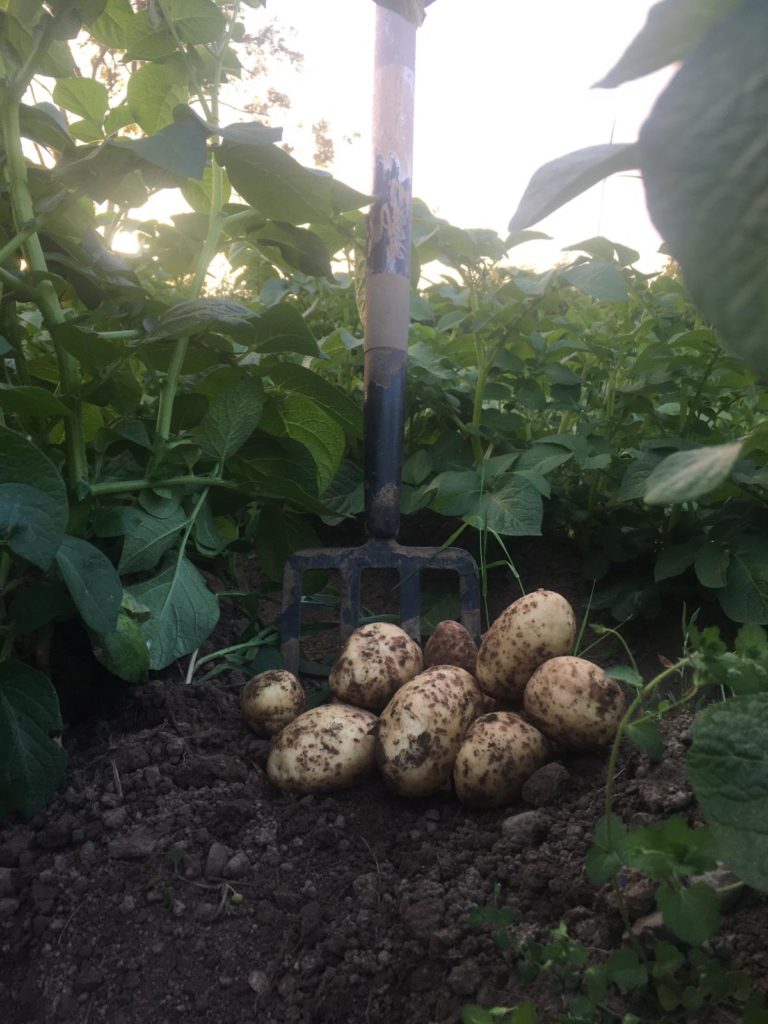
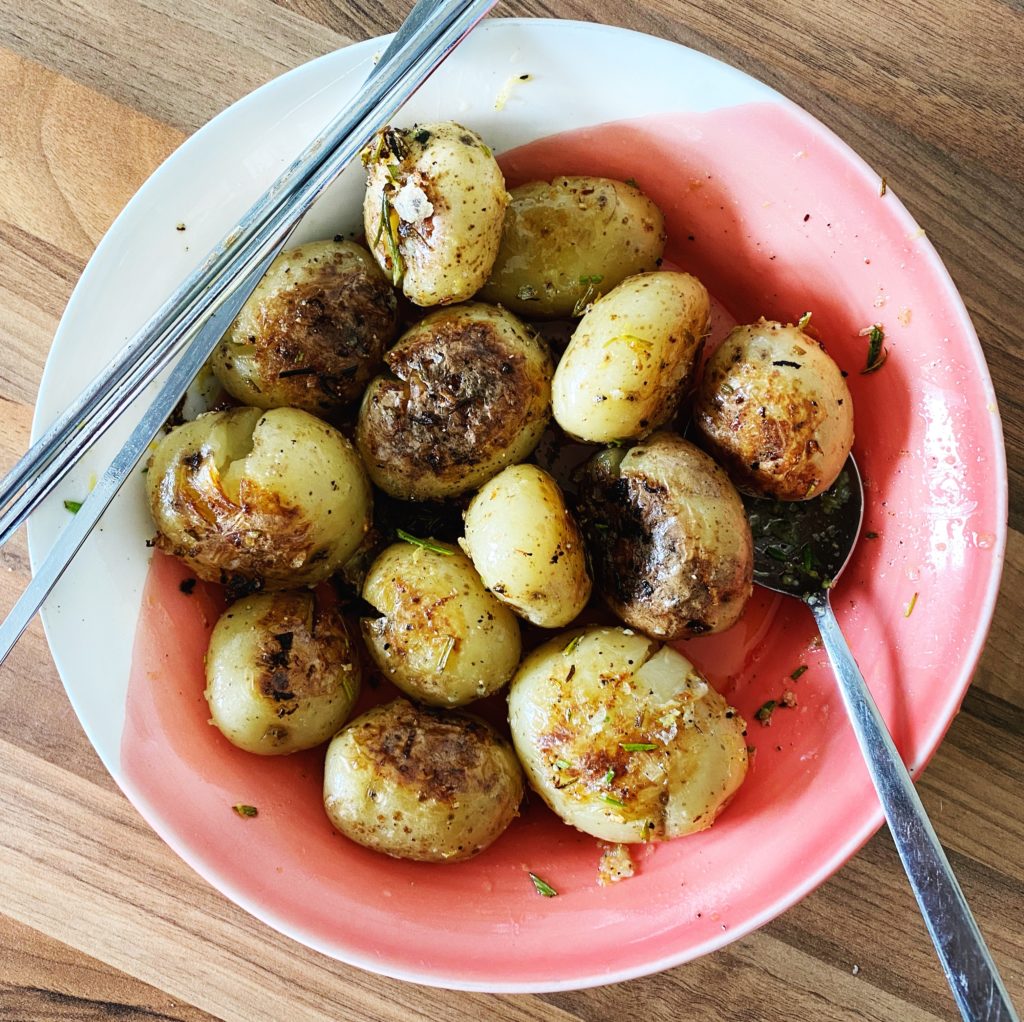
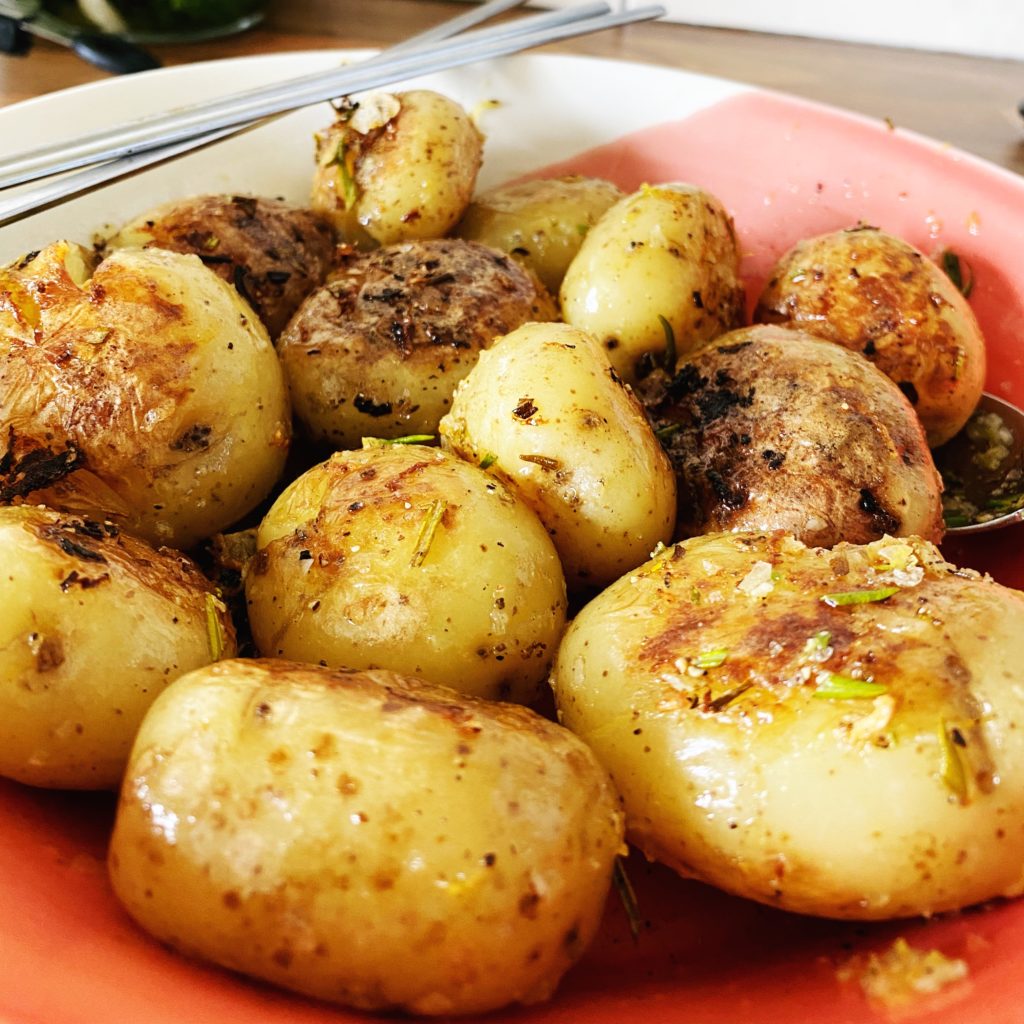
This is my simple and adaptable method for BBQing our gorgeous new potatoes! I have fond memories of pricking large jacket potatoes, wrapping them in foil and packing them in with the food for camping trips. Then we would carefully tuck them into the BBQ coals to bake while the rest of the grilling was done, they’d often come out perfect if we remembered to turn them occasionally, but more often than not, half the potato would burn and half would be raw, or the coals would burn out before the potato was done and there’d be some disappointment… So this way of par-boiling, dressing then skewering little salad potatoes provides a much more consistent result.
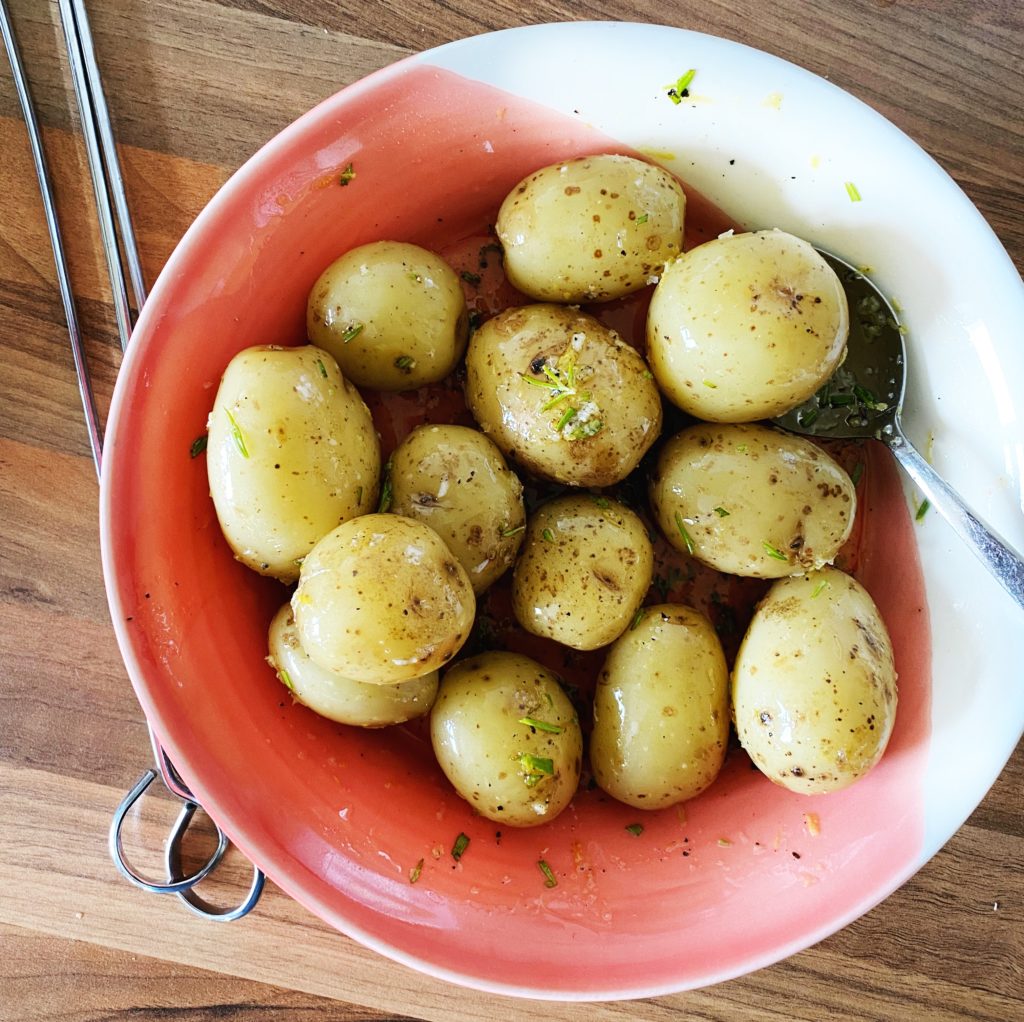
Start by boiling scrubbed new potatoes until they are nearly cooked through. Test a few larger ones with a sharp knife or skewer. Then drain the potatoes and allow them to cool in the colander while you prepare a tasty marinade or dressing!
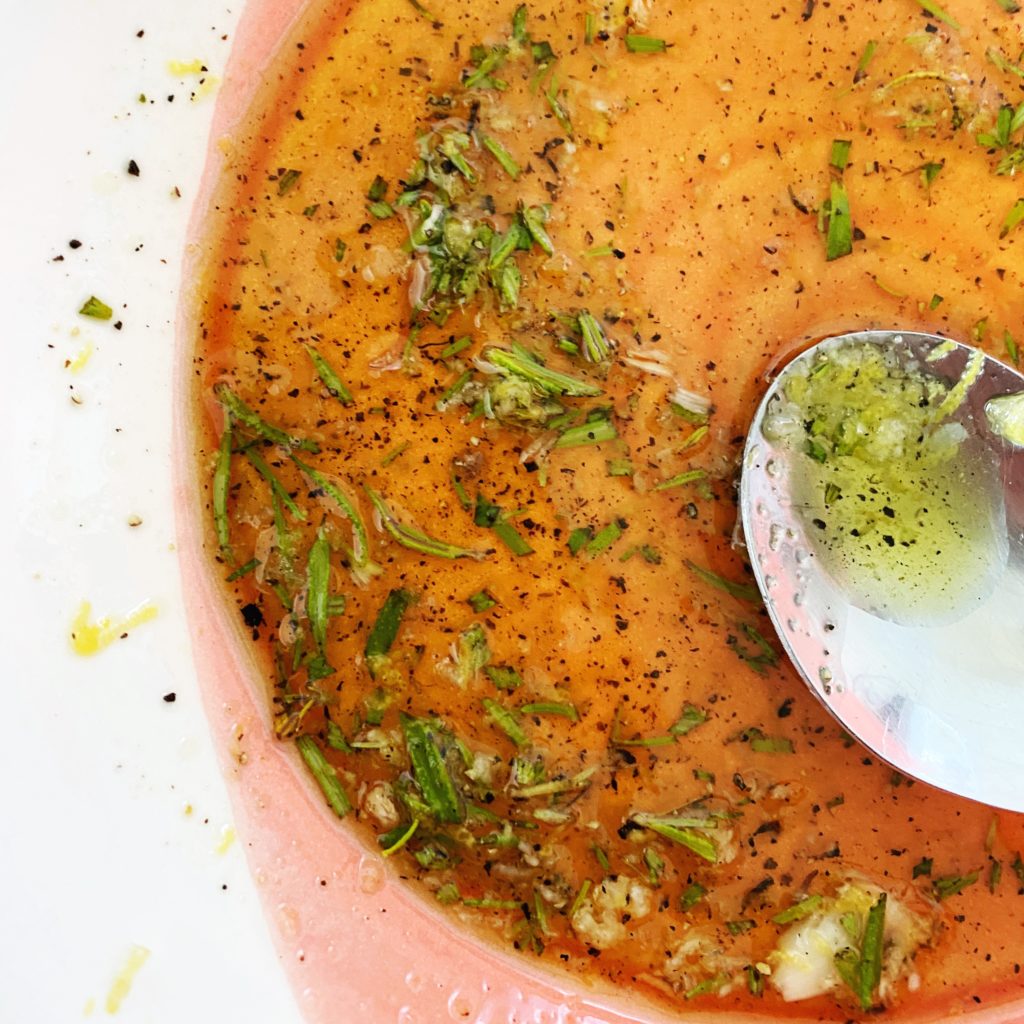
I love potatoes with garlic and herbs. This time I mixed olive oil, salt, pepper, crushed garlic, rosemary and lemon zest in a large bowl. Then toss the par cooked new potatoes in the dressing.
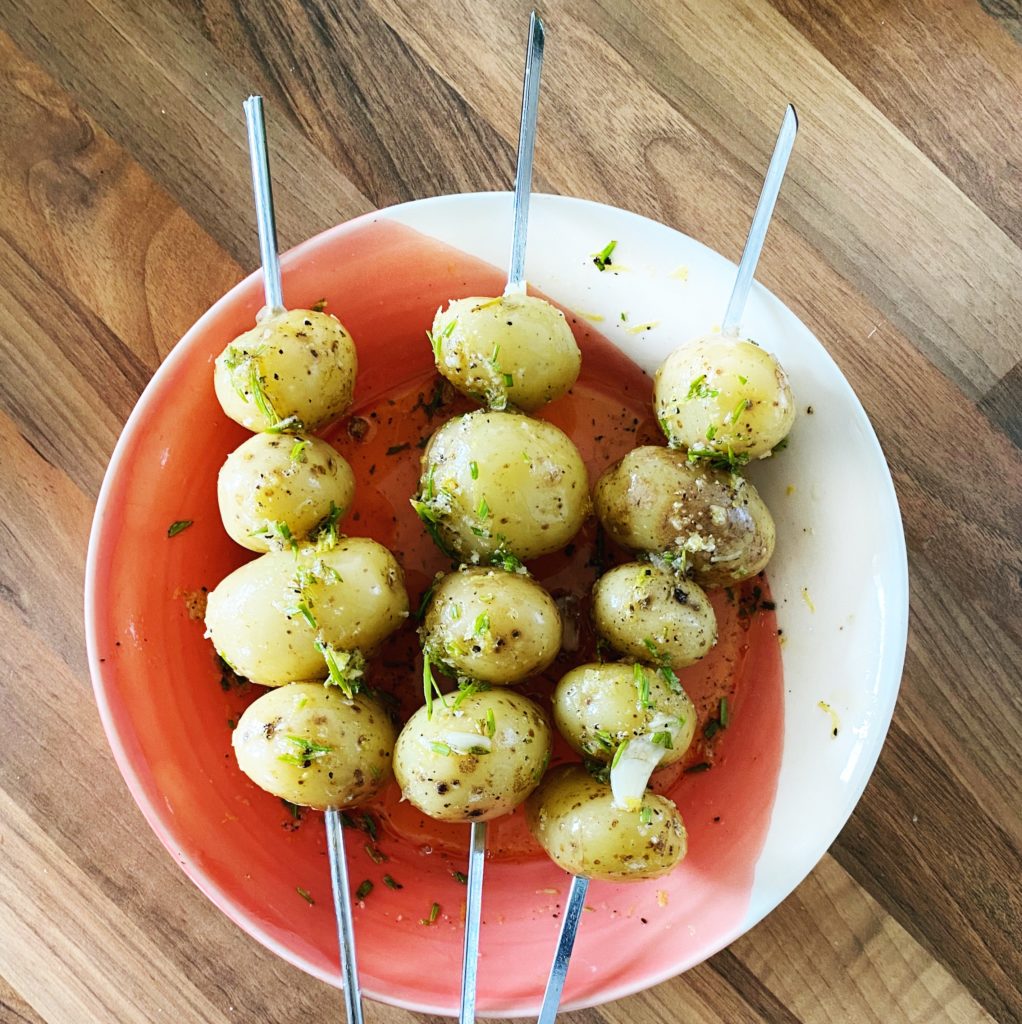
Push the potatoes on skewers (or cook in a BBQ basket) and get them onto a plate or tray ready to pop over the coals.
Cook on the BBQ, turning often until soft, smokey and delicious!
Then push them off the skewers, back into the dressing bowl and toss again to get any last bits of dressing and flavour back over the delicious, charred potatoes. Enjoy!
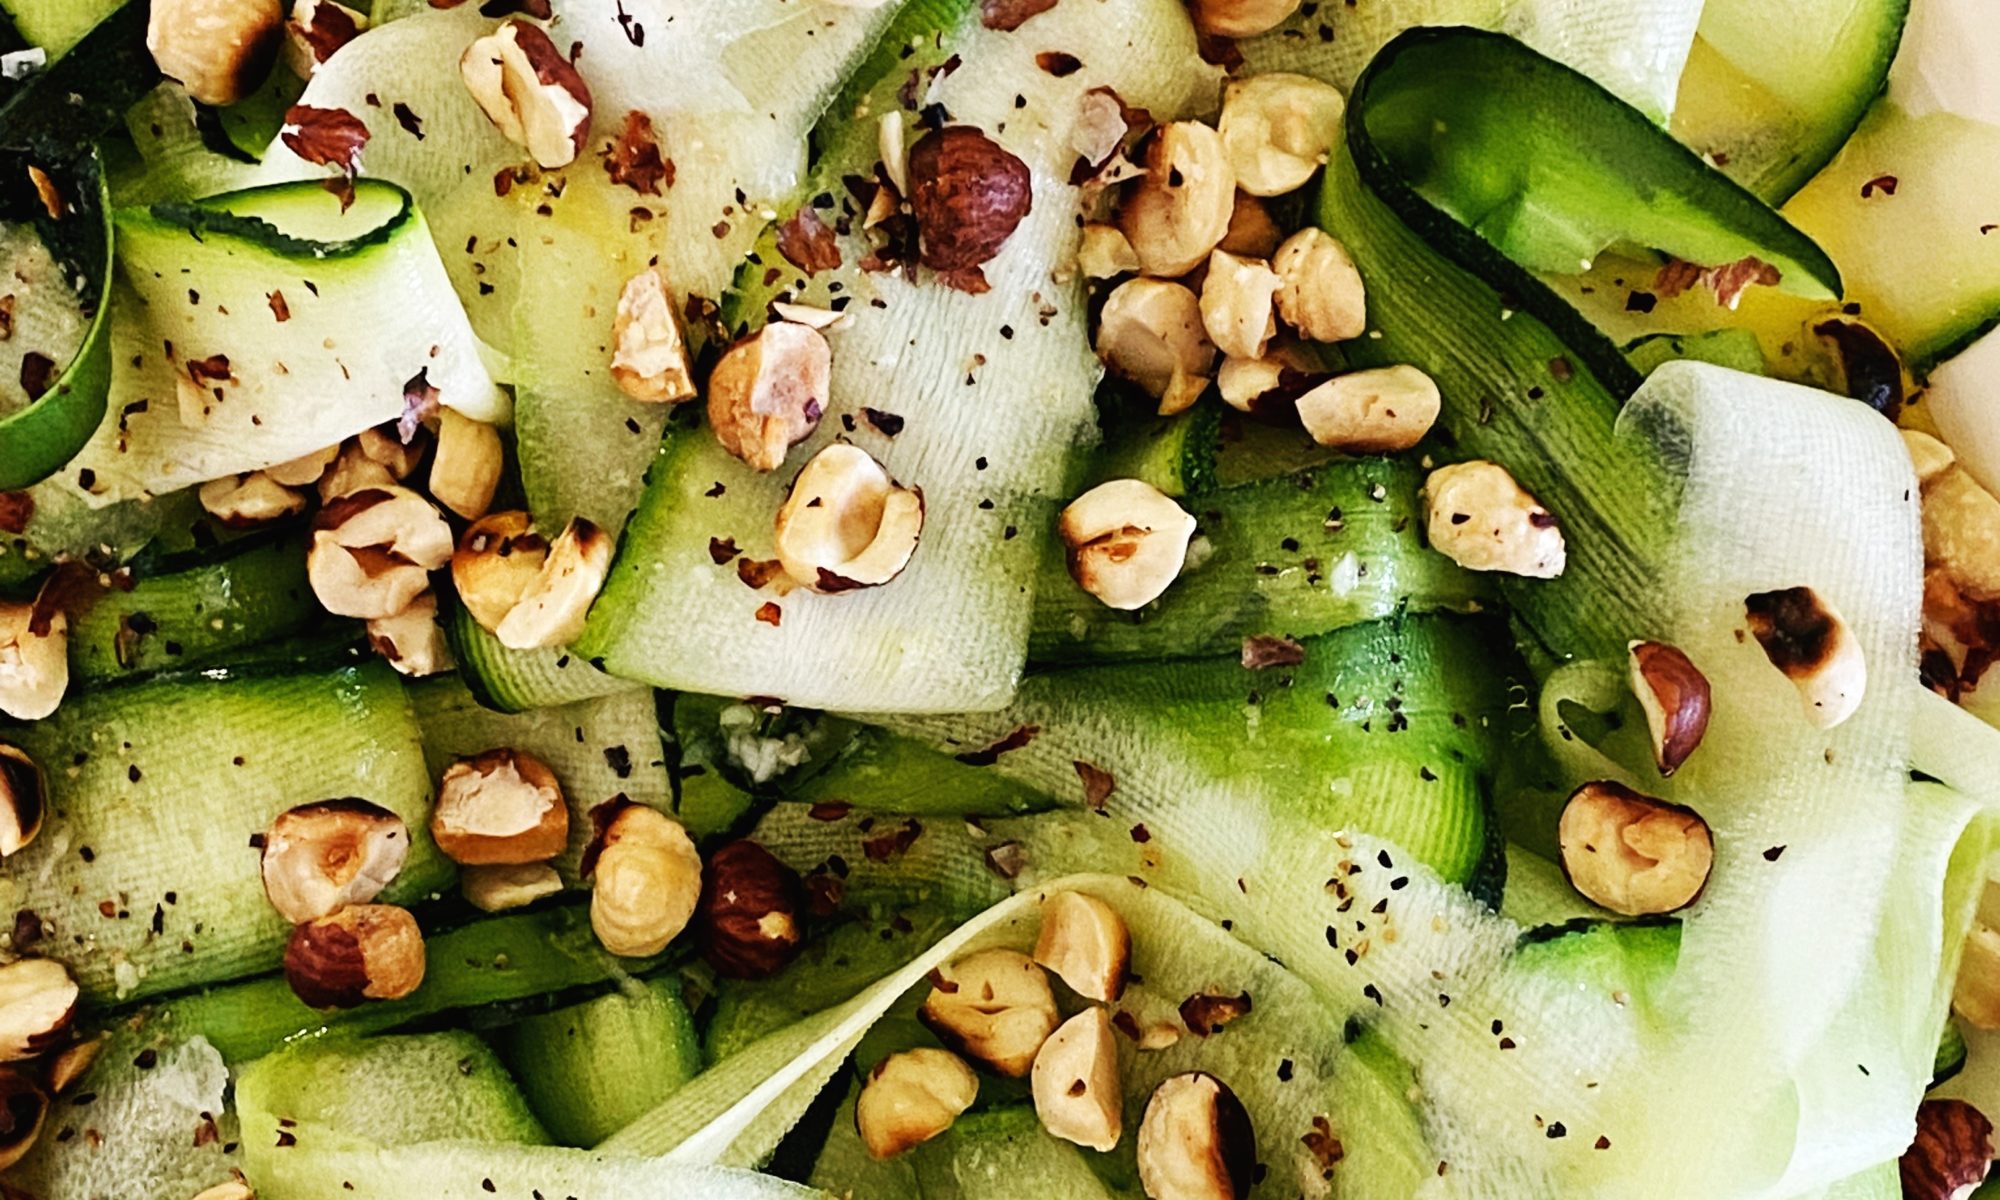
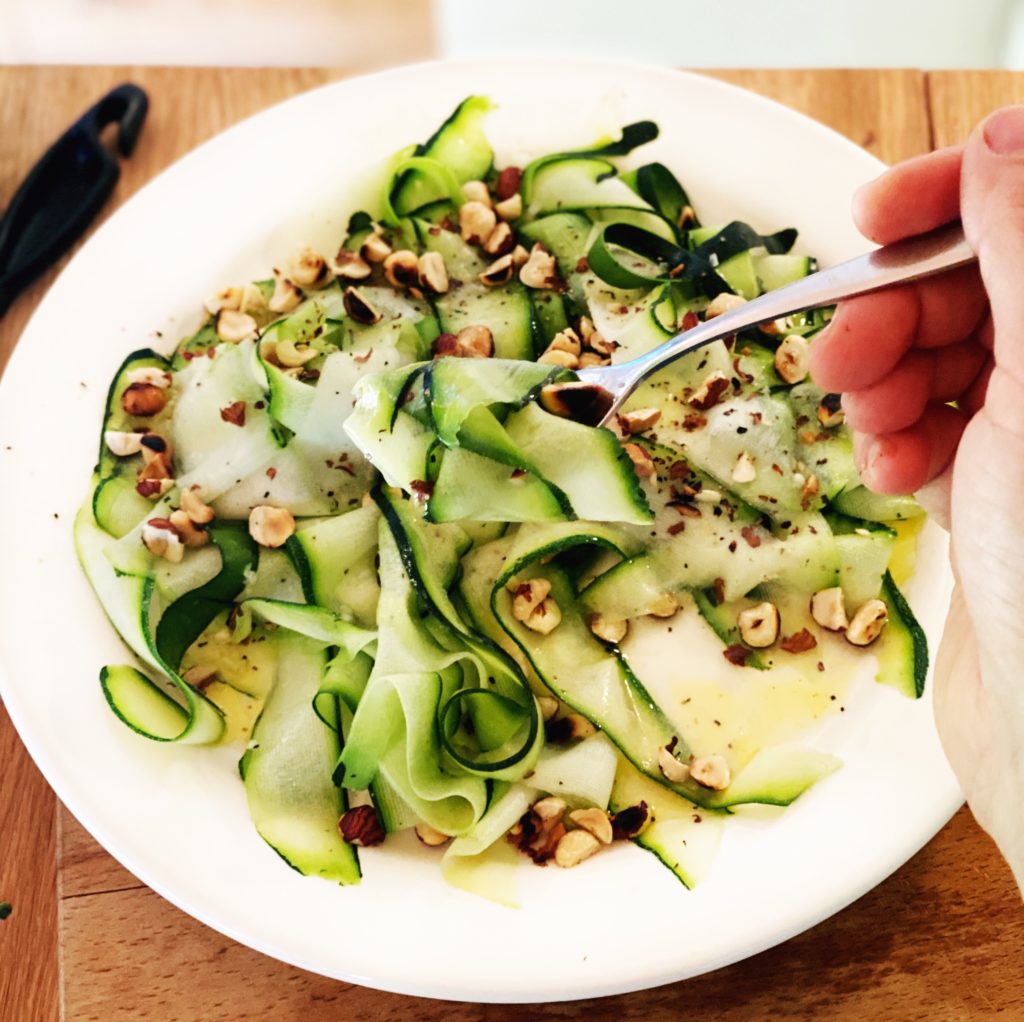
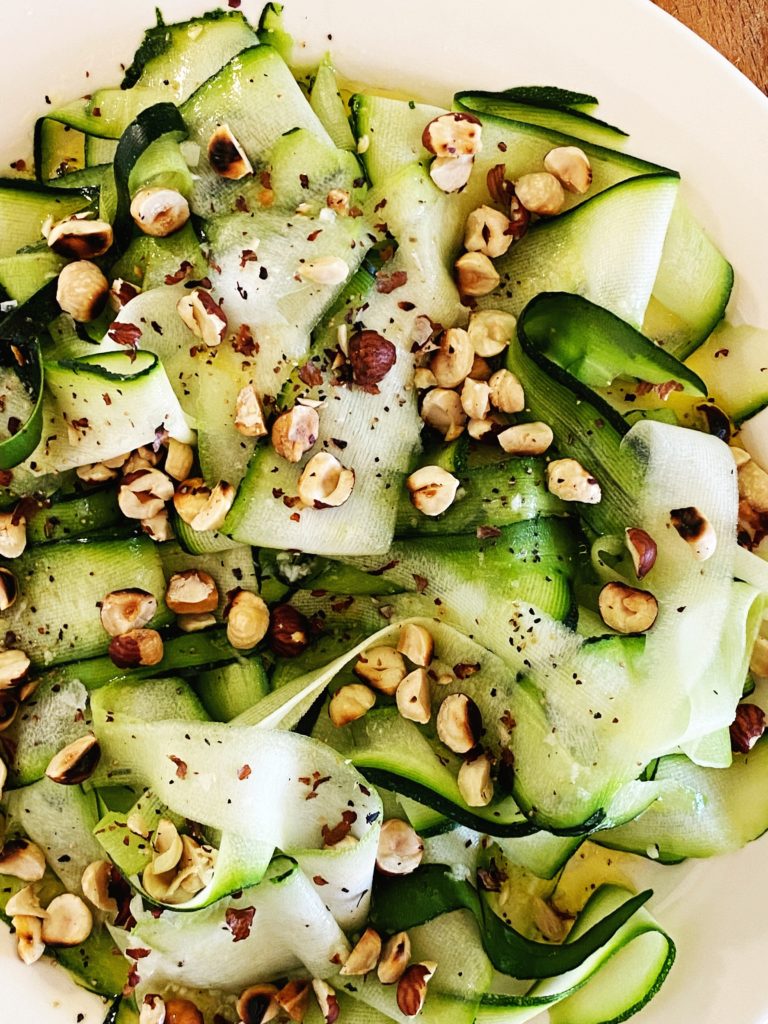
We are in the midst of a classic courgette glut on the farm. Next week we’ll add some free courgettes to all the boxes, we hope you enjoy them. Expect lots of courgette recipes to come your way. We’d love to know your favourite courgette recipes too please! Let us know in the comments or over on our community Facebook group. I’ll start us off with this super simple salad. It’s so easy to make (just a matter of combining raw courgettes with a lemony dressing, then scattering over some toasted hazelnuts) and oh SO delicious! I have this salad often this time of year as a side to pretty much any meal, or it’s brilliant stirred through freshly boiled pasta or bulked out with a drained tin of lentils.
Liz x
Did you know, our organic hazelnuts come in compostable bags?
Ingredients
Courgettes (2 small or 1 large)
2-3 tbsp extra virgin olive oil
the juice of half a small lemon (have you tried our new season verdelli lemons?)
1 small garlic clove, crushed
salt and pepper to taste
a handful or two of hazelnuts, toasted in a dry pan then roughly chopped
Method
Using a potato peeler, slice the courgettes into delicate, thin ribbons. For ease, slice them directly over a serving platter or large salad bowl.
Make the dressing by stirring together the olive oil, lemon juice and crushed garlic with a pinch of salt and pepper.
Drizzle the dressing over the courgette ribbons. You could toss the salad now to evenly coat the ribbons with the dressing, or just leave it drizzly.
Then toast the hazelnuts in a dry frying pan until nicely coloured. Tip them onto a board and carefully chop them up a bit to make them go further through the salad.
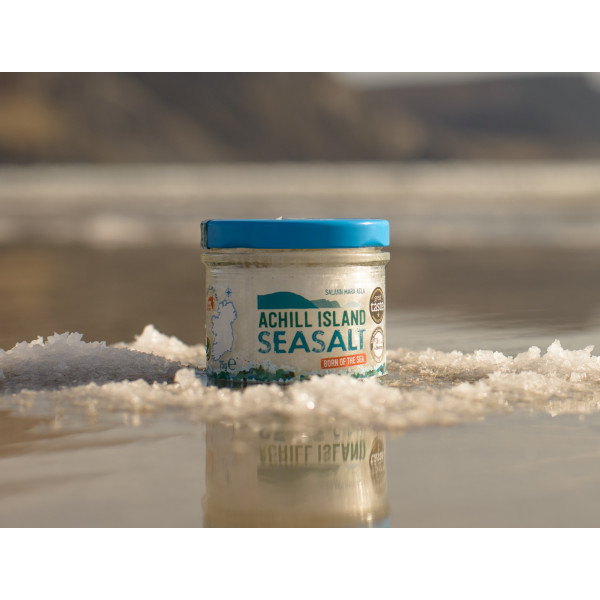
Scatter them over the dressed ribbons and finish the salad with a little sprinkle of flakey sea salt. We LOVE Achill Island sea salt for exactly this type of dish.
Enjoy as is as part of a salad buffet or alongside a BBQ. Or make it a light, refreshing meal by tossing through some freshly boiled pasta or a drained tin of cooked green lentils.
We need your help. We need to survive the summer we have so much local organic harvest from our farm and other small organic farms here in Ireland and we have seen our customer base disappear over the last 5 weeks.
It has been a never-ending rollercoaster and so difficult one week to the next to predict what is around the corner. It is in times like these that we especially need to know why we are doing what we are doing. The irony of course is at these very moments we lose focus and just holding it together is all we can do. At the same time, it can be this singular dedication to a cause greater than ourselves that keeps us going.
The little idea that a small farm here in the West coast of Ireland could help fix this planet, help fix our food system is our “WHY”.
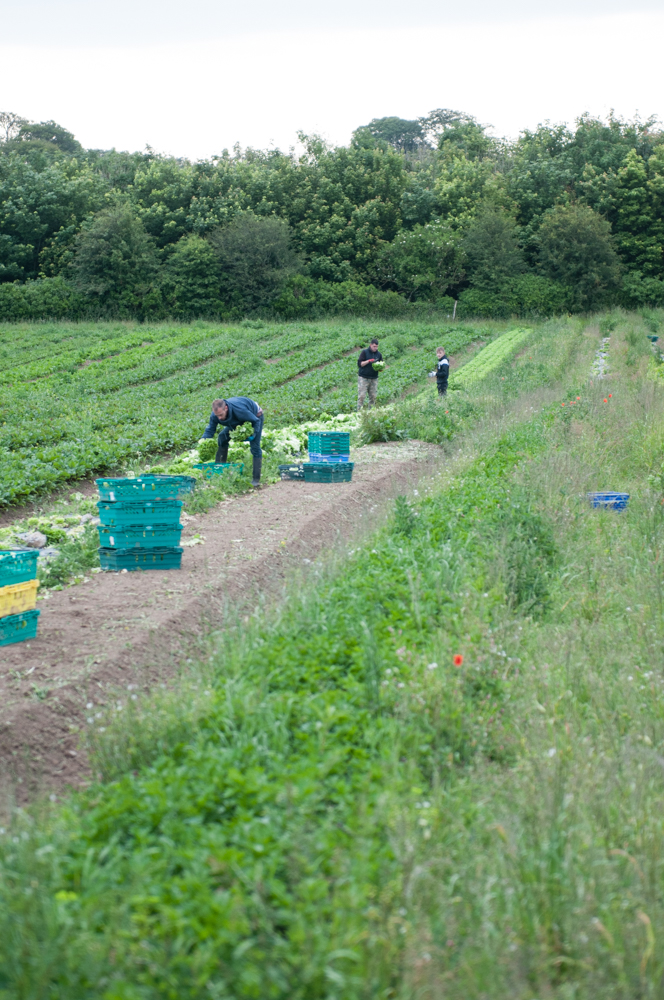
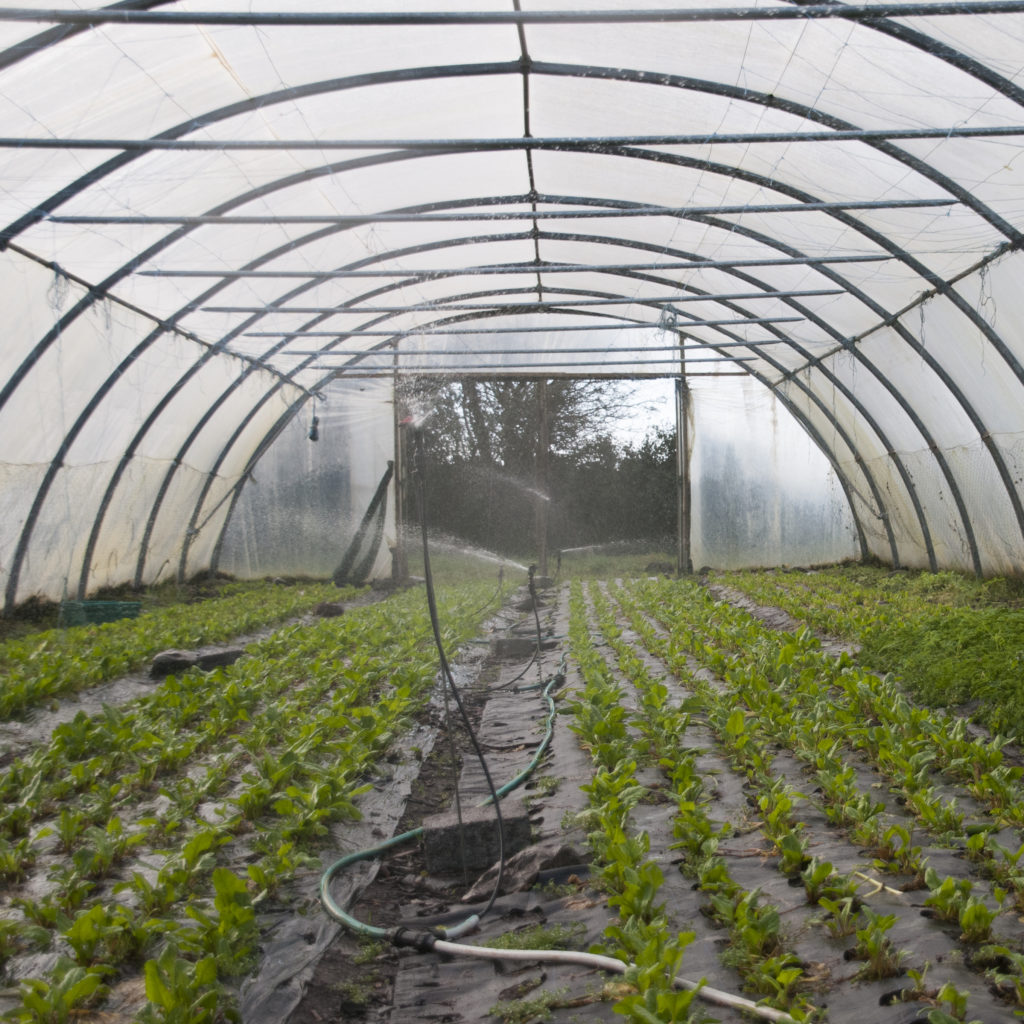
It has been a tremendously busy week on our farm. We have planted 70,000 leeks, our final planting of winter brassicas isgoing into the ground today. As I write some 50,000 plants are being transplanted ,that brings to a total brassica count of nearly 150,000 plants. That is a lot of locally grown food, all done of course without chemicals.
Kornel and Patrick have done amazing work in our polytunnels where our 1000+ tomato plants and several hundred cucumber plants are finally bearing fruit. This is one of my favourite moments looking on the well organised tunnels and tasting the amazing tomatoes.
Emmanuel our farm manager and his team of field workers have been working so hard. At this time of the year, it always feels like we are teetering on the edge of losing control, but thankfully that hasn’t happened yet.
Over the last couple of weeks finally we have had the ideal growing conditions and that has meant harvest season has burst upon us. It also means we have had the perfect mix of too much work, an abundant harvest, planting deadlines slipping away and weeds in hyperdrive, it is frantic and will be for another week or two.
Then there is the backdrop of the week just gone where we have the lowest orders in 18 months right slap bang in the middle of our best harvest season and our highest cost base (covering holiday time, a team of 10 people on the farm from 2 in February, an investment of 6 months and nearly €100k to get to the harvest season)
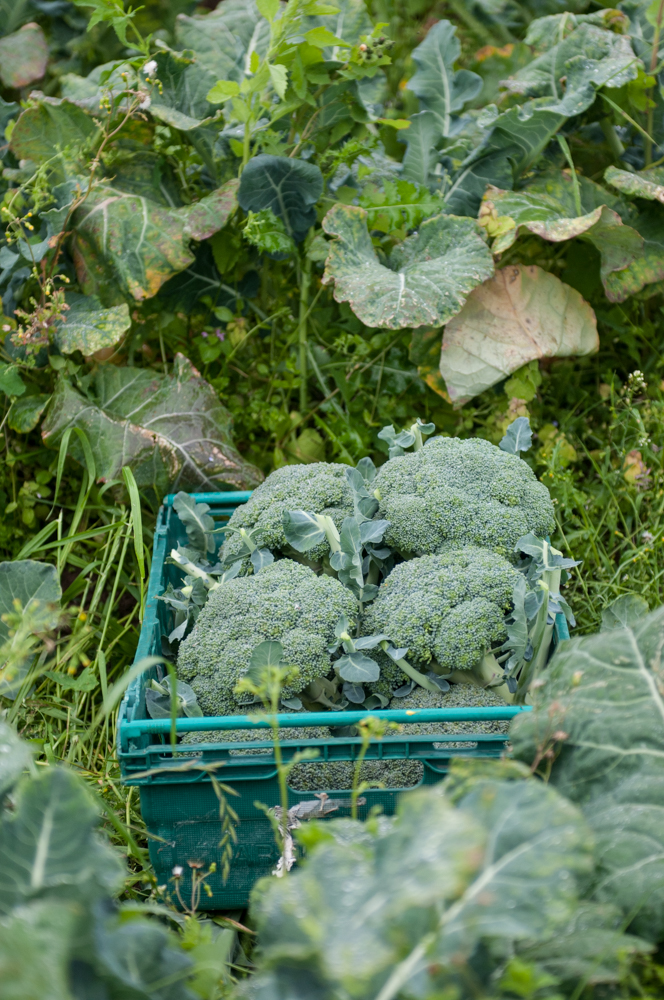
What we are harvesting right now:
Lettuce green and red
Rainbow chard and Spinach
Courgettes and cucumbers
Some tomatoes
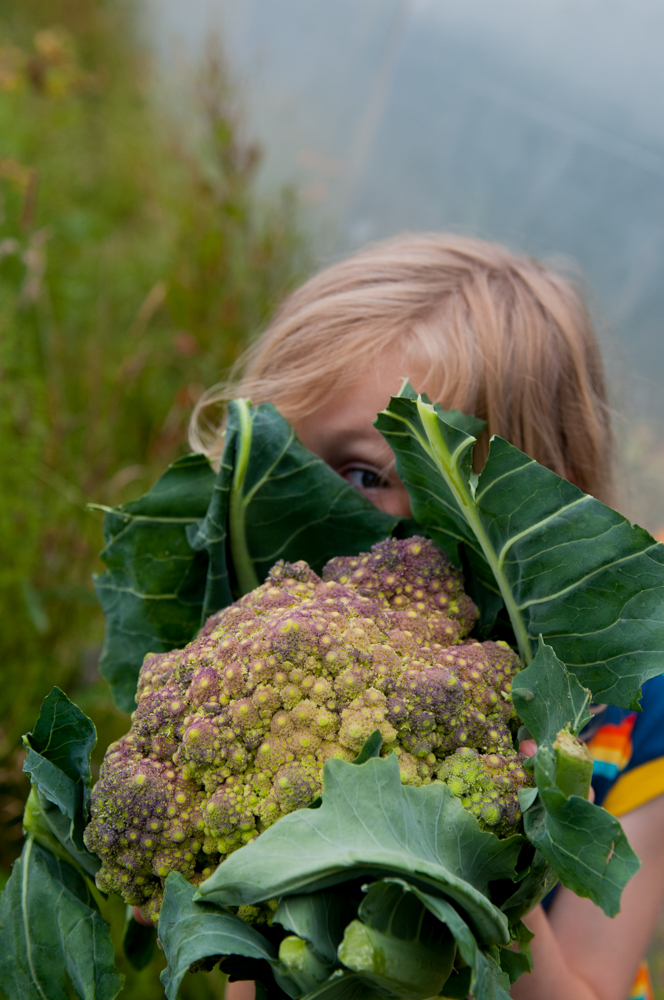
Cabbage, Broccoli and Romanesco
Kale green and black
Radish and Salad
Beetroot
What we are sourcing from other small organic farms week
New season IRISH potatoes
Scallions, fennel courgettes and cucumbers
Mushrooms
Fennel and French beans
It is worth mentioning I think and especially as it is plastic free July that we were the first company in Ireland to make all our boxes plastic free, reuse being the essence of our delivery service.
We need your help, we need to survive the summer we need you if you can at all to place an order, to tell your friends, your family, or your neighbours, tell everybody, bring us with you on holidays or donate a box to charity.
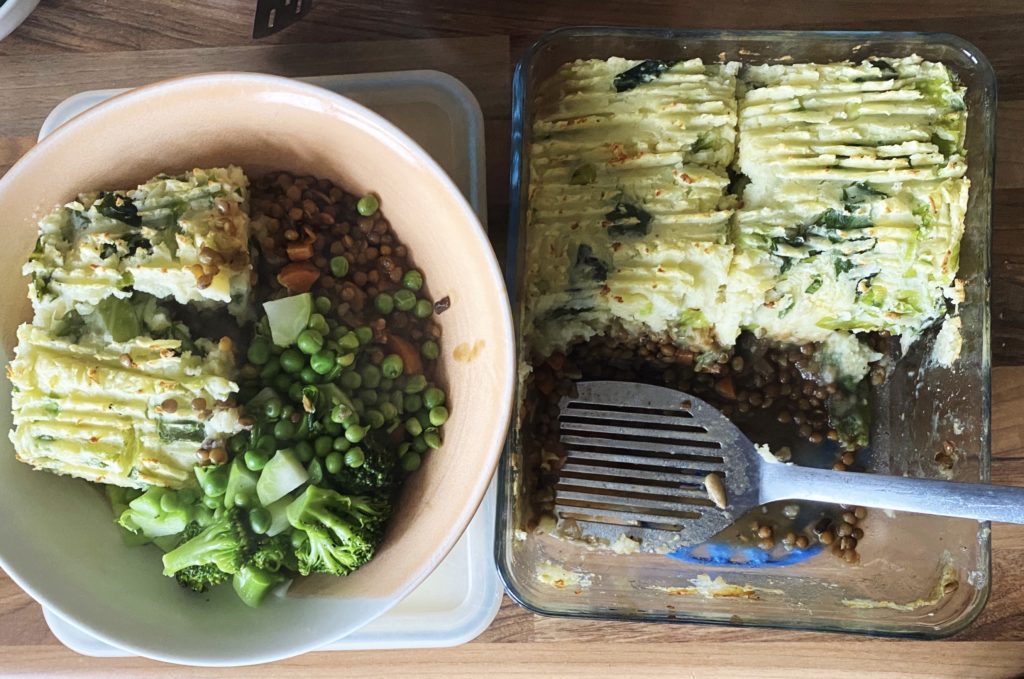
Is there anything more comforting and satisfying than a mashed potato topped pie? This is hearty and healthy family food. Perfect for a cosy evening weekday meal and also special enough, I think, for a Sunday lunch. Colcannon is a great way to get some extra greens in, and it’s crazy delicious! I also cook enough for two and freeze one for a rainy day…no shortage of those here in Ireland am I right?
Here’s the flexible and simple recipe. I hope you enjoy it and it becomes a part of your regular rotation. It’s certainly a winner in my house. Liz x
Ingredients (makes enough for 2 pies which serve 4 hungry people each)
2 white onions – diced
2 tbsp vegetable oil
4 sticks of celery – diced
6 carrots – diced
6 cloves of garlic – sliced
2 tbsp crumbled, dried mushrooms
2 mugs of green or brown lentils – rinsed
2 stock cubes
3 bay leaves
1 glass of red/white wine (or a tbsp or two of vinegar)
1 tsp each dried thyme, rosemary and sage
10 or so floury potatoes
6 scallions/spring onions – chopped
a large bunch of kale or half a spring green cabbage – chopped
a generous knob of butter/margarine
a splash of oat milk
salt and pepper to taste
seasonal greens to steam and serve on the side
One for now, one for the freezer for a rainy day.
Method
You’ll need two large pots and two baking dishes. Preheat your oven to 200C. Get a large pot of water on to boil.
Peel your potatoes (or don’t if you prefer a rustic mash), chop them into even sized pieces and put them in the large pot of water to boil until soft.
Meanwhile make the lentil filling. Sauté the onion in the oil until starting to soften and turn golden. Then add the celery, carrots and garlic and sauté until fragrant. You can of course switch the base veg for whatever you have eg beetroot, parsnips, swede, mushrooms…
Add the rinsed lentils and the wine/vinegar. Give the pot a quick stir then add 6 mugs of water, crumble in the two stock cubes and the dried mushrooms. Add the dried herbs, bay leaves and some black pepper then simmer, stirring often, until the lentils are cooked and have soaked up most of the water. Add more water if needed, just keep an eye on it.
Put the chopped scallions in a wide bowl and just cover them with oat milk so that they can infuse their flavour through the milk.
Once the potatoes are nearly cooked through, add the kale/cabbage to the pot to quickly steam in the last 3 minutes or so of the cooking time. Then fish them out and put them in the bowl with the oat milk and spring onions.
Drain and mash the potatoes with the butter and plenty of salt and pepper. Taste and adjust the seasoning if needed. Then stir the kale/cabbage, scallions and milk through the mash.
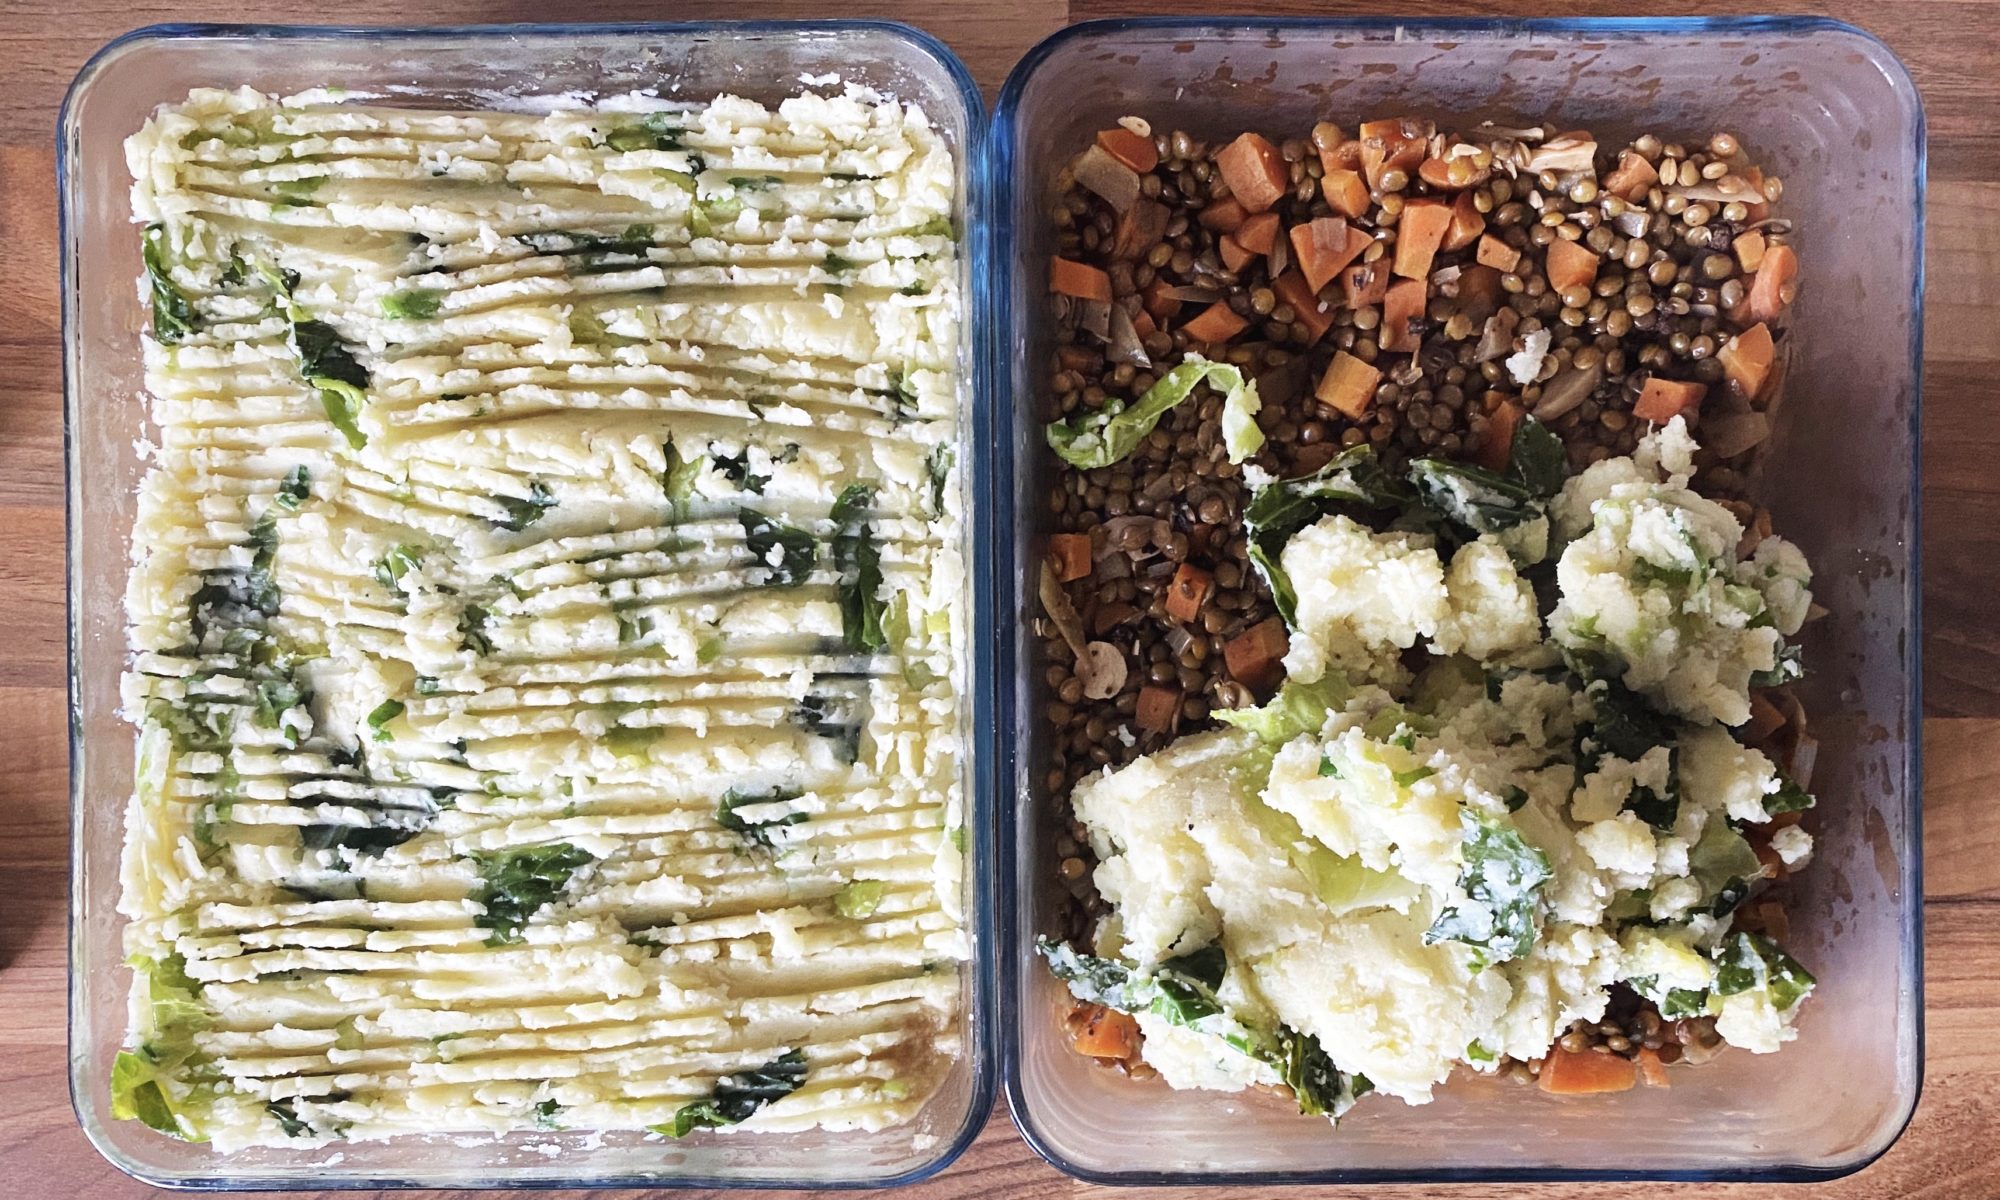
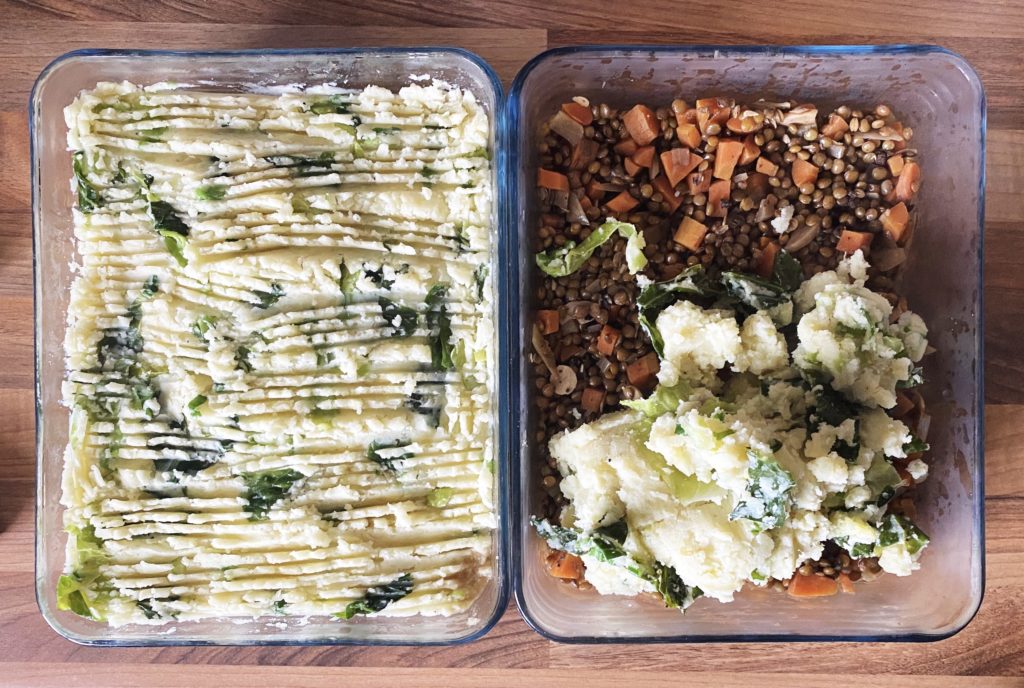
Taste the lentil filling and add more salt/pepper as needed. Them assemble the pies. Make one to eat now and one to cool down and freeze for another day?
Divide the lentil filling between two oven dishes, then divide the mash. Smooth it out and then rough it up a little with a fork so that you get nice crispy bits in the oven.
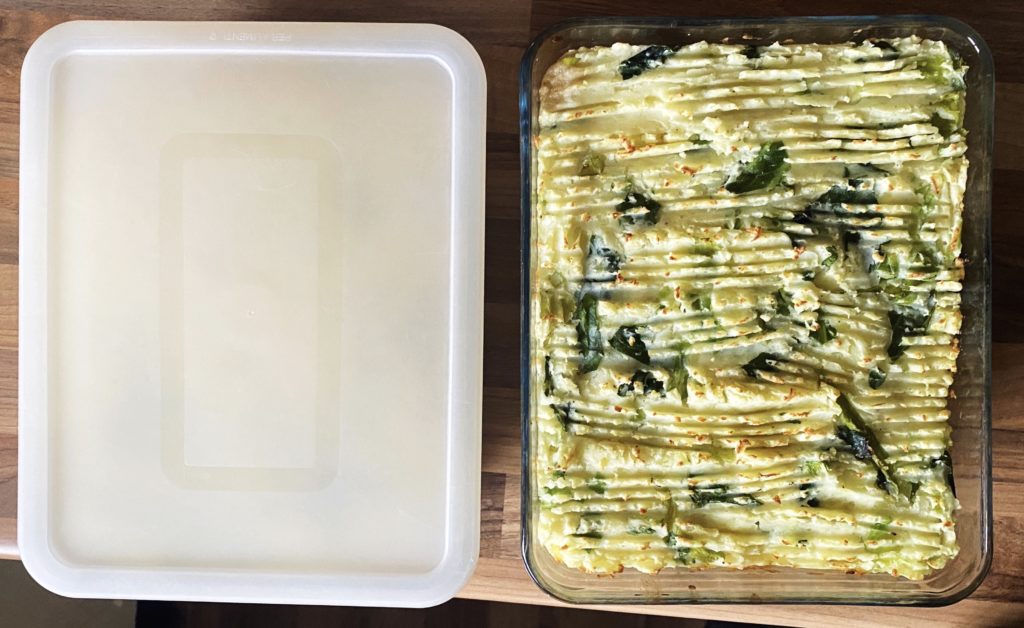
Put one of the pies in the oven to bake and crisp up. It’s still warm so it should only take 20 minutes or so. If you are cooking one from cold it will take a lot longer. You will need to cook a cold one covered with foil or a baking tray until hot in the middle, then remove the foil/baking tray for the last 15 minutes or so to allow the pie to take on some colour.
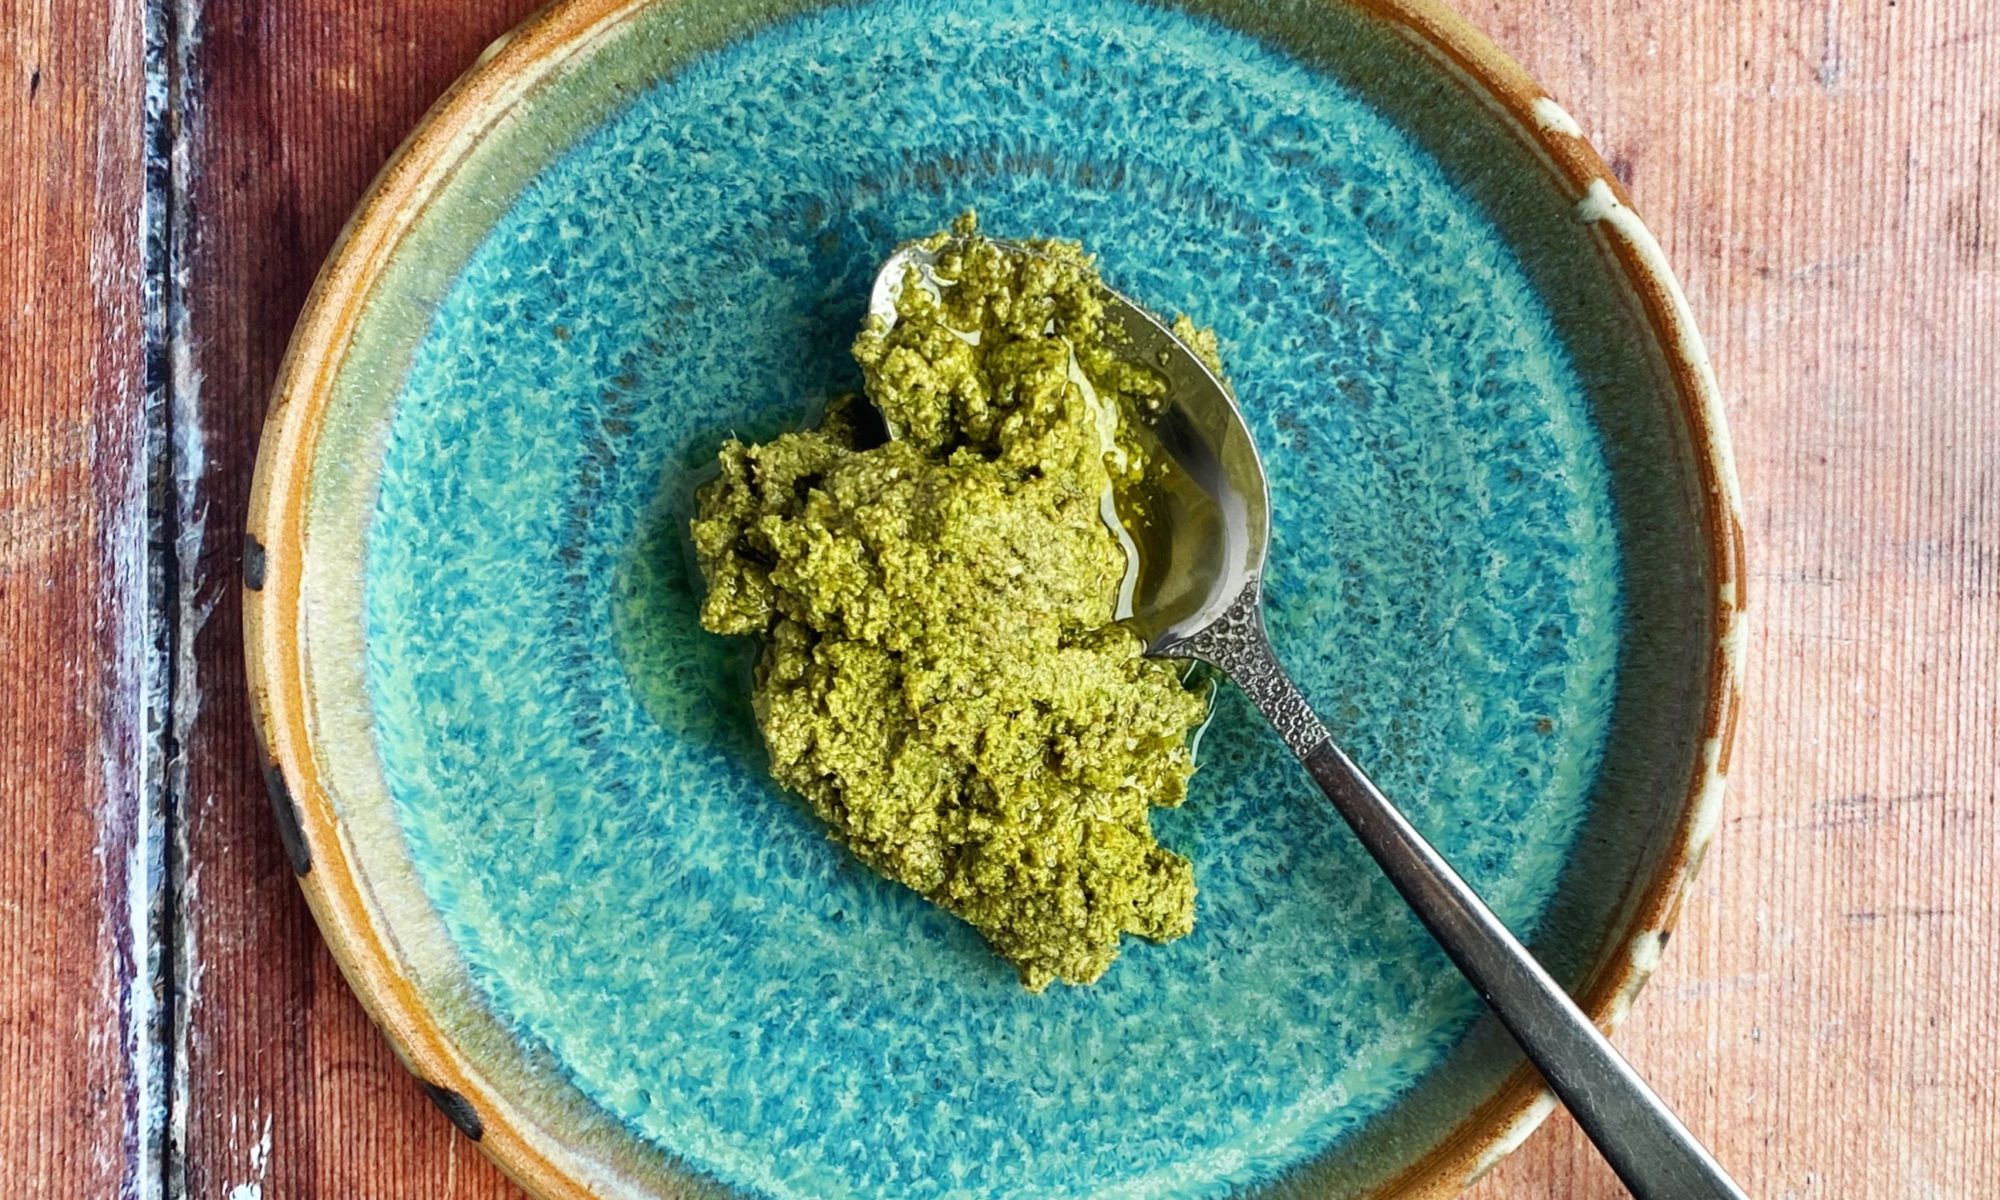
One of the most common ingredients that get wasted are salad leaves. The mixed bags of salad leaves really don’t stay fresh long, really they should be eaten within 3 days. So if you don’t get around to eating a salad, perhaps the weather changed and you were more in the mood for a hot meal, there are a few ways you can use them up in a different way. Whatever you do, don’t throw that bag of slightly sad looking leaves away! Salad leaves can be blended into a soup in place of spinach or watercress or make this very flexible salad bag pesto! If you have any fresh herbs around the place, chuck some of those in too.
Read more about food waste in my blog post on the subject here. Liz x
Ingredients
mixed salad leaves (and odds an ends of fresh herbs if available)
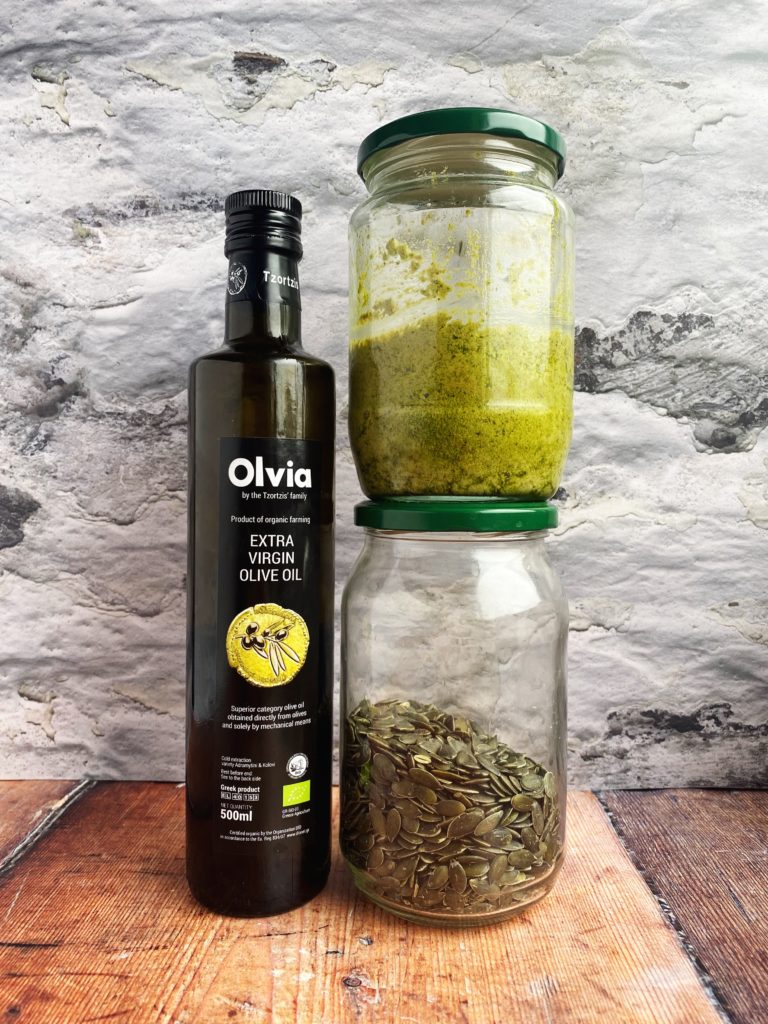
sunflower and pumpkin seeds (or any nuts or seeds you like)
lemons
garlic
olive oil
salt
nutritional yeast (or odds and ends of cheese)
Method
I’ve deliberated not given amounts as pesto is a very fluid recipe. You can taste and adjust it as you go. You should aim to have around half the volume of the mixture as nuts or seeds. So if you have about a mug full of salad leaves that need using, toast about half a mug of nuts or seeds.
Toast the nuts or seeds in a dry frying pan to bring out their flavour. Allow them to cool.
The put them in a food processor. I used a blender because my food processor is broken – it works ok but I prefer a food processor for pesto because I don’t want the mixture to be too smooth in the end.
Add a crushed or grated glove of garlic, a shake of nutritional yeast, a big pinch of salt and all the salad leaves.
Then add lemon juice (you can add the zest of the lemon too if you like, or save it in the freezer for something else). Start with a small amount of lemon juice, you can always add more later.
Add a very generous amount of olive oil. A quality extra virgin olive oil is best for pesto.
Pulse the mixture, scrape down the sides and pulse again until you reach a loose, rough paste. Add more olive oil as you go if needed.
Taste and adjust the seasoning with more salt of lemon juice as you like. Then store in a clean jar in the fridge. To make it last longer, cover it with a thin layer of olive oil to protect it from the air. Use it up within a week.
Pesto is not just for pasta! Use it for a dip, stir it into hummus or mayo, spread it into wraps or sandwiches, toss it through roasted veg or steamed greens, dollop it on your grainy salads…
Every year it happens, we are waiting and waiting and then bang out of the blue it all starts again. I guess life is like that sometimes, we push and we shove and want to change things, and then when we finally just accept the ways things are (often because what we were doing was making no difference anyway) and least expect it things fall into place.
So it was this morning with my first farm walk in two weeks. We have been struggling with rain and frost and snow for the past two months, and then this morning bright sunshine, singing birds, and growth were evident all around.
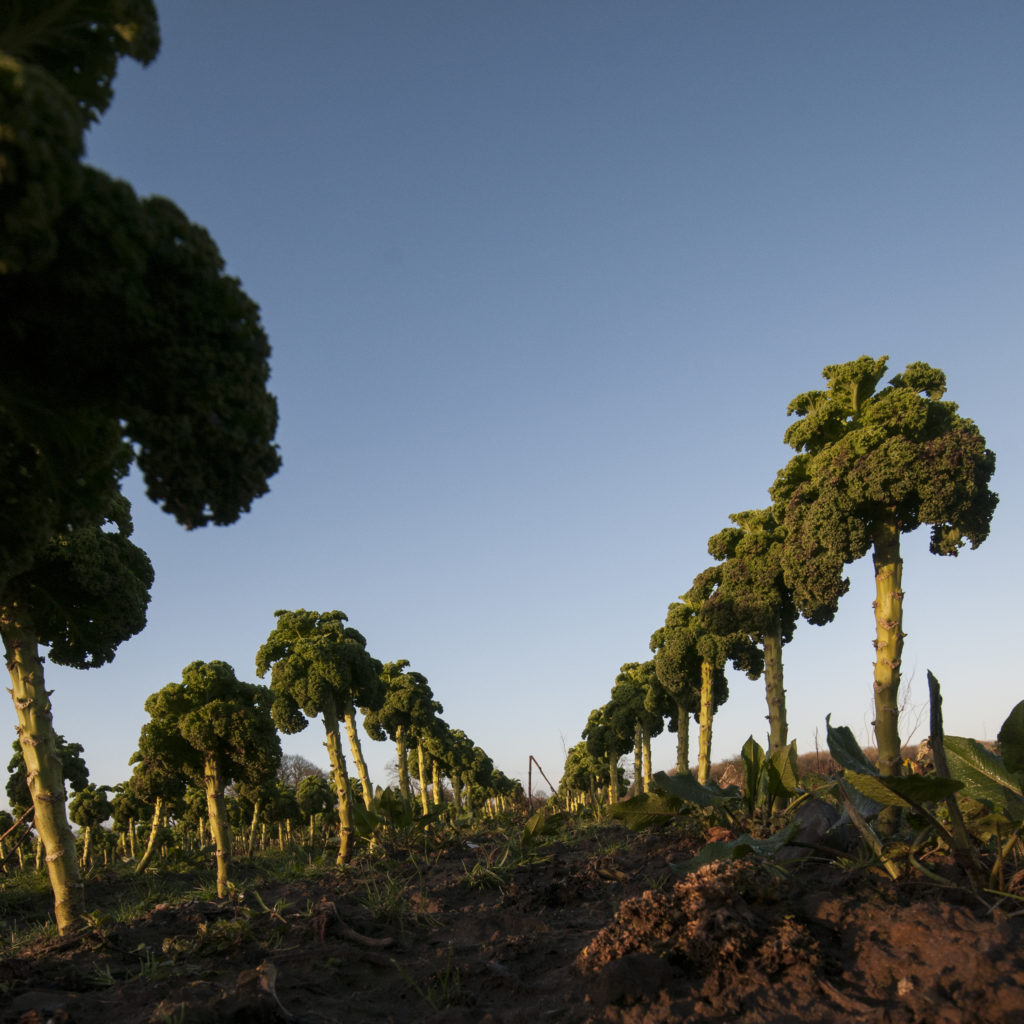
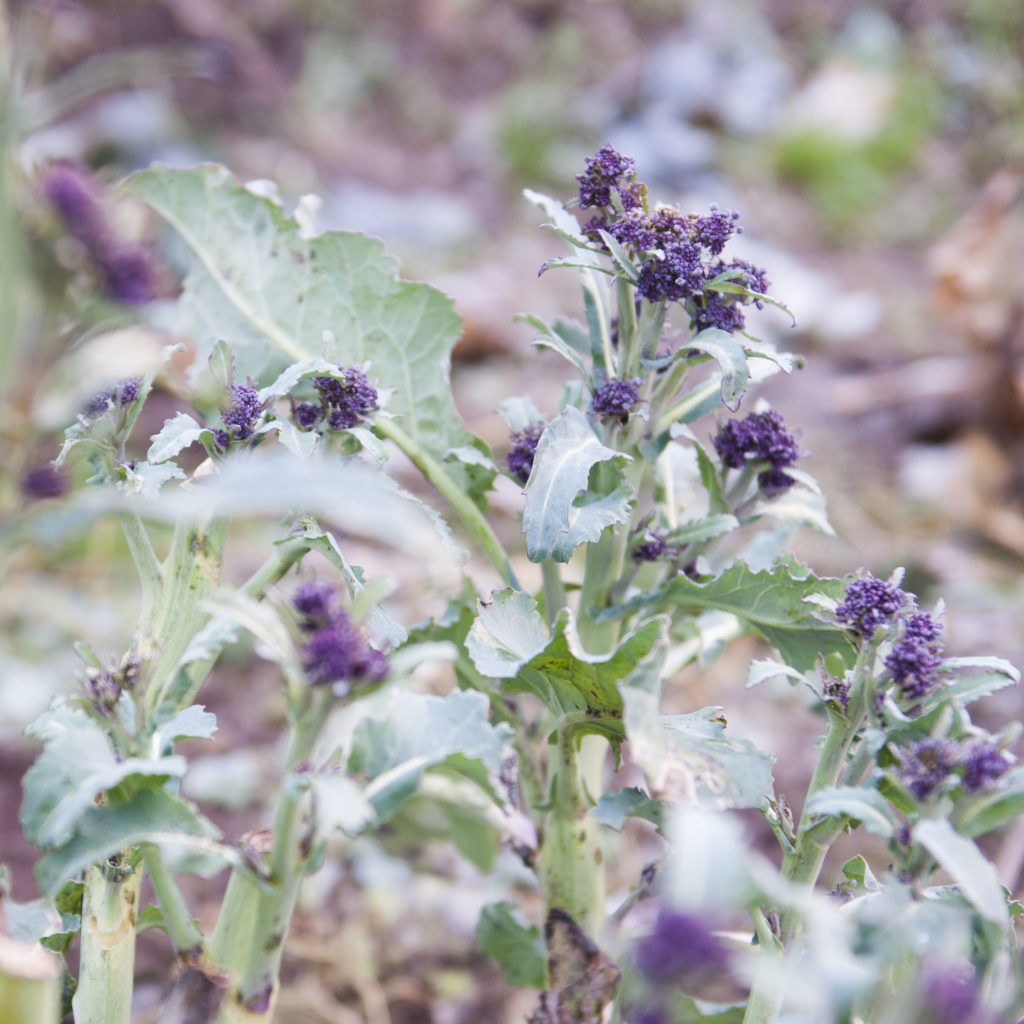
We have been busy planting trees and doing some essential maintenance on the tunnels, thinking we had all the time in the world and now suddenly we do not. The crops need to have our focus again, they are flying. We are finally restarting kale harvest and leeks, and purple sprouting broccoli.
We need to get back into the fields and that starts today.
The first new kale harvest is an unusual one, as we wait for the regrowth, having carefully nurtured the plants over winter, cleaned them and fed them nothing seems to happen for an eternity and then suddenly there is the new kale.
Nature is very subtle, we are always on the watch for change, and somehow just suddenly it changes without you noticing. Like a seed germinating, one day it is a seed and the next it is a plant is has germinated, just like that, this is the miracle and power of nature. It is the same with the kale regrowing, it just happens when the time is right. Or the birds singing a spring morning chorus they just begin.
I get excited at this time of the year, the start of a new growing season and the challenges and opportunities it brings fill me with hope for the year.
It is a natural cycle and as we emerge from the dark winter months there is a sense, at least on the farm, of a new slate, a fresh start, a chance to begin the journey anew.
Nature is wonderful like that, and up until this period in man’s history it has been stable and consistent. I read this morning that the Gulf Stream which here in Northern Europe we rely on for our stable weather patterns is not in good shape. As a result of climate breakdown the ocean currents that power our climate are in turmoil.
These complex global climate regulation mechanisms are hard to understand I would imagine, but there are clear signs that climate stability all over our one and only beautiful home is being compromised.
I do admit to getting frustrated with the slow pace of change, it doesn’t make sense to me. There is a phenomenal opportunity now to take the risk and invest in Green Energy, to cut consumption and do so much more. We as a small farm have done it, and we as a small country can do it.
But maybe it is like the kale regrowing or the seed germinating, you can’t force the seed to grow faster or the kale to appear faster, but all of a sudden without even noticing it has changed.
Maybe that is happening now too with movement to cut consumption, power our lives with green energy, moving to more plant based diets, all these things are happening.
You are causing change by supporting us and as always we could not do what we do without you.
Thank you.
Kenneth
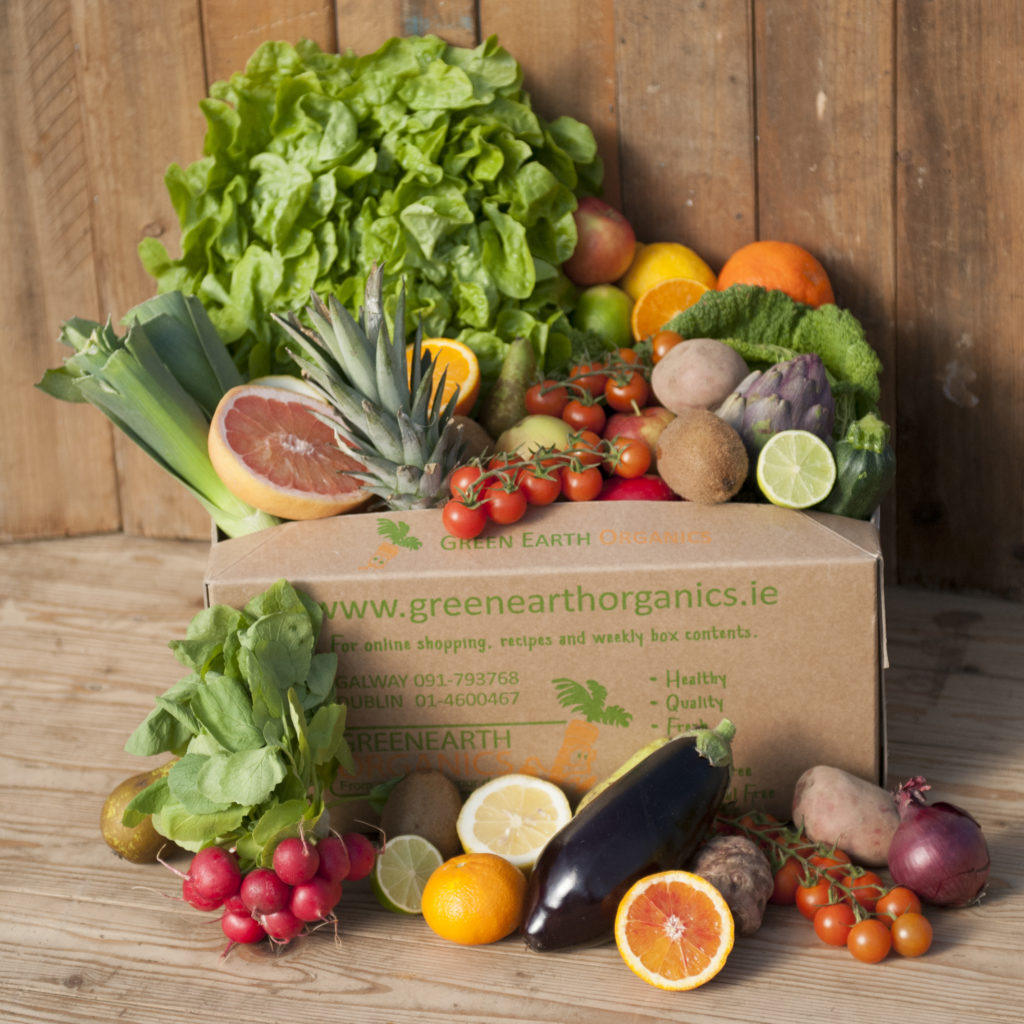
Sign up for a fruit and veg box subscription or build your own box. We deliver to every address in Ireland! Head to www.greenearthorganics.ie to place your order. Thank you.