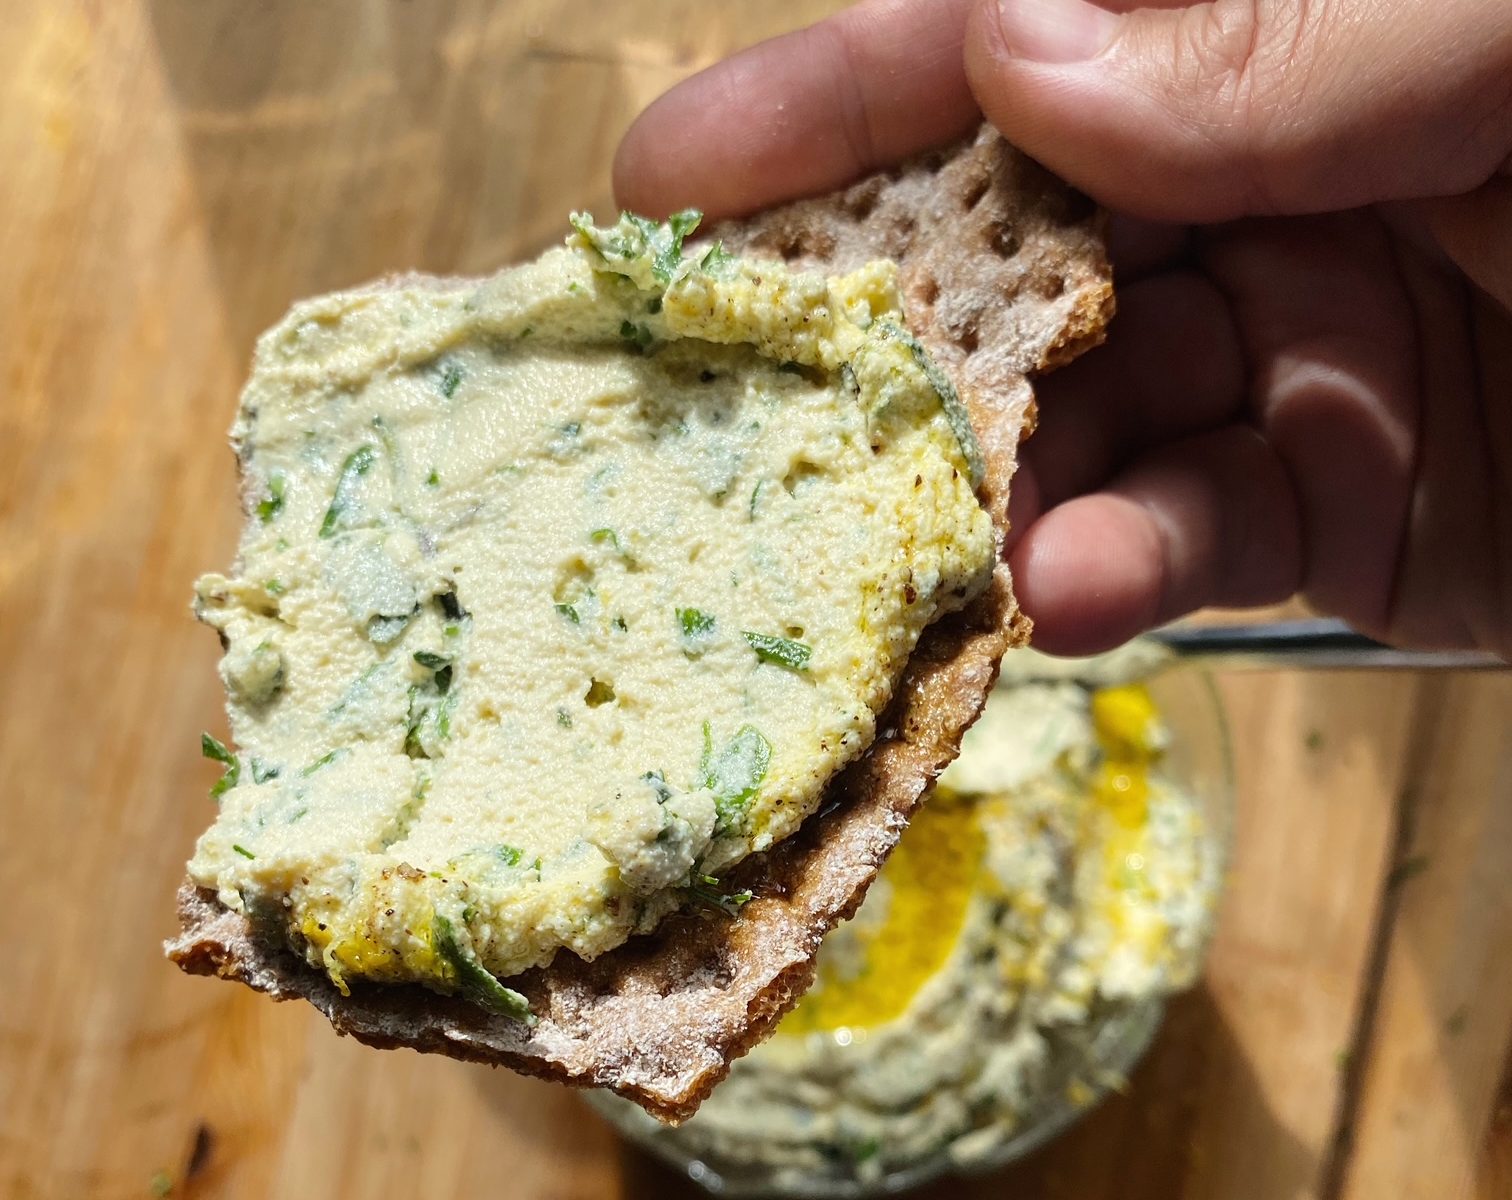
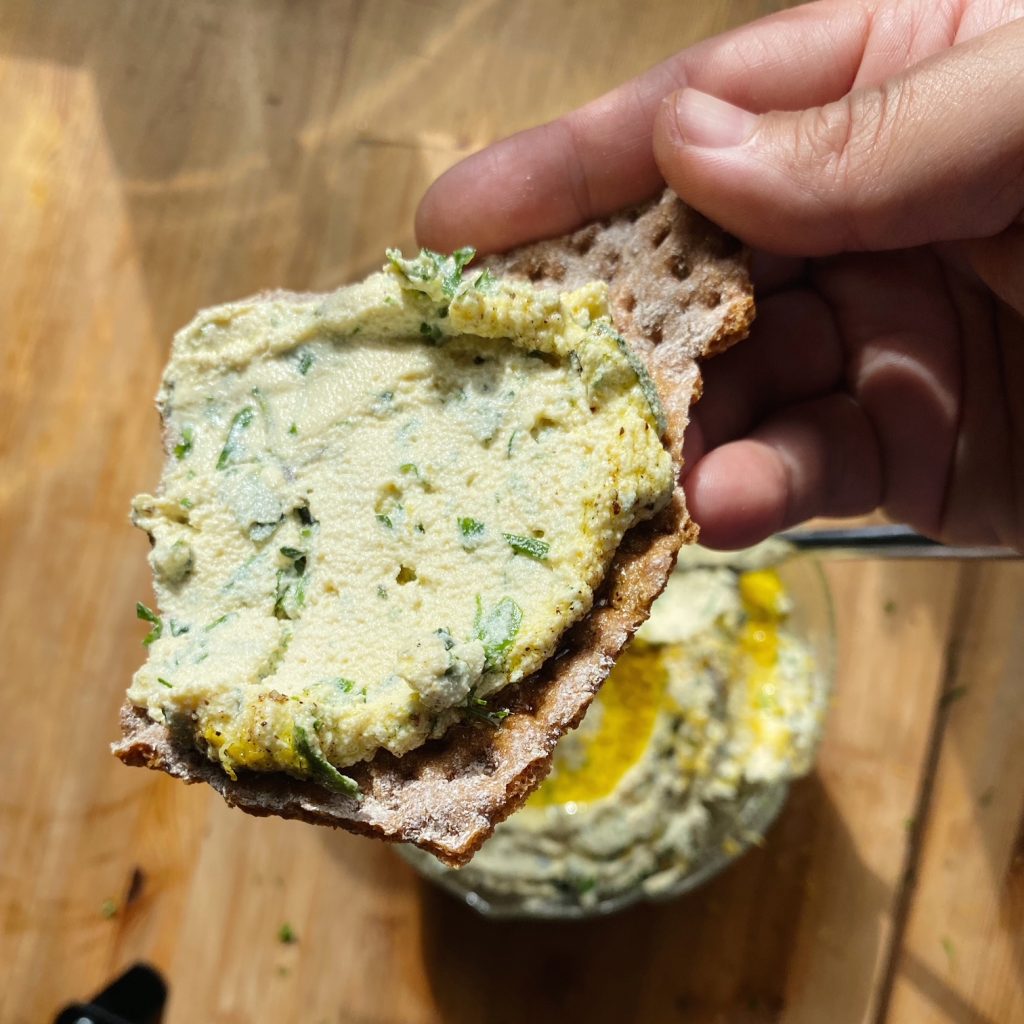
This summery, creamy, cheesey spread is such a useful one to have in your fridge. It is so delicious as a snack or starter with good bread or crackers, some crudités and an ice cold glass of white wine. It is wonderful with pasta – use it to stuff pasta shells, as a layer in a summery lasagne or simply stirred through cooked penne with some wilted spinach or chard. We also use this vegan ricotta rolled up in grilled strips of aubergine or courgette. You’ve got to try it, it’s so much more than the sum of its parts.
Liz x
Ingredients
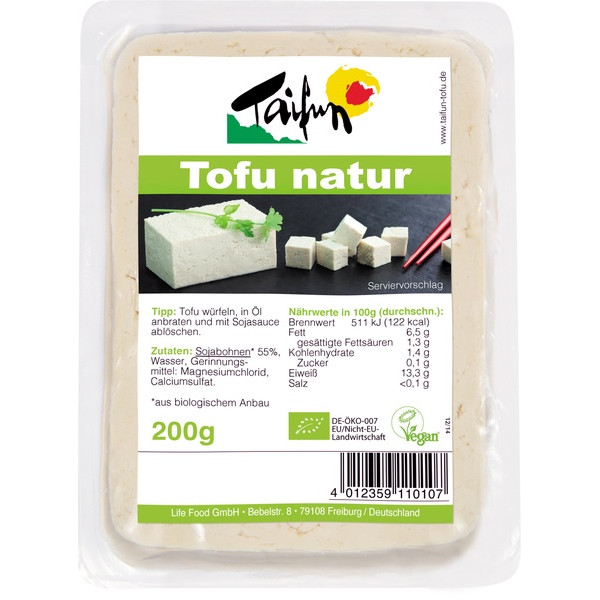
2 packs of extra firm tofu (400g)
1 tbsp garlic granules (or to taste)
the zest of a lemon
the juice of 1/2 a lemon (or more to taste)
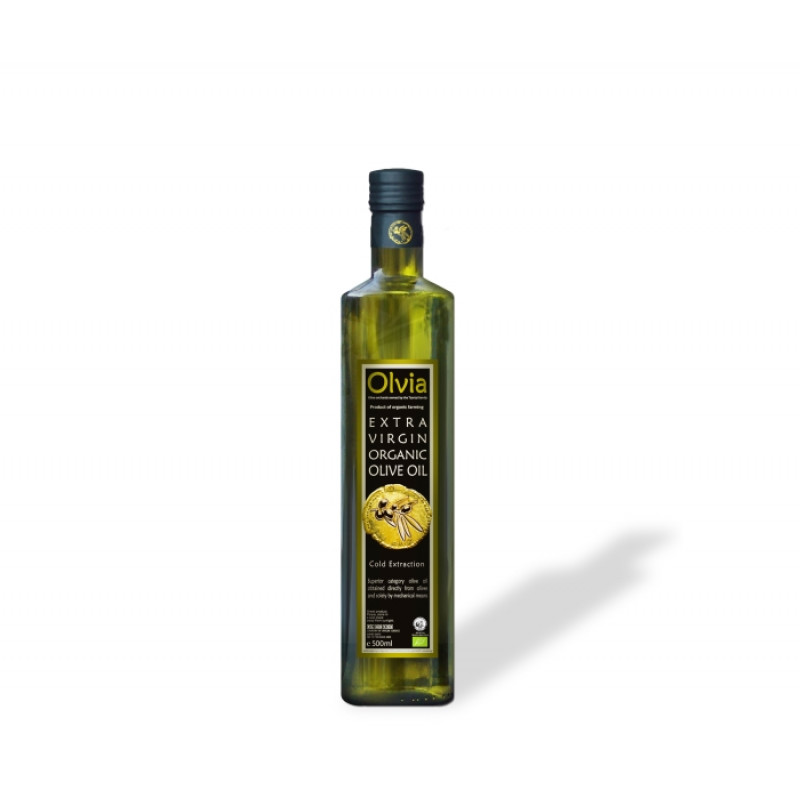
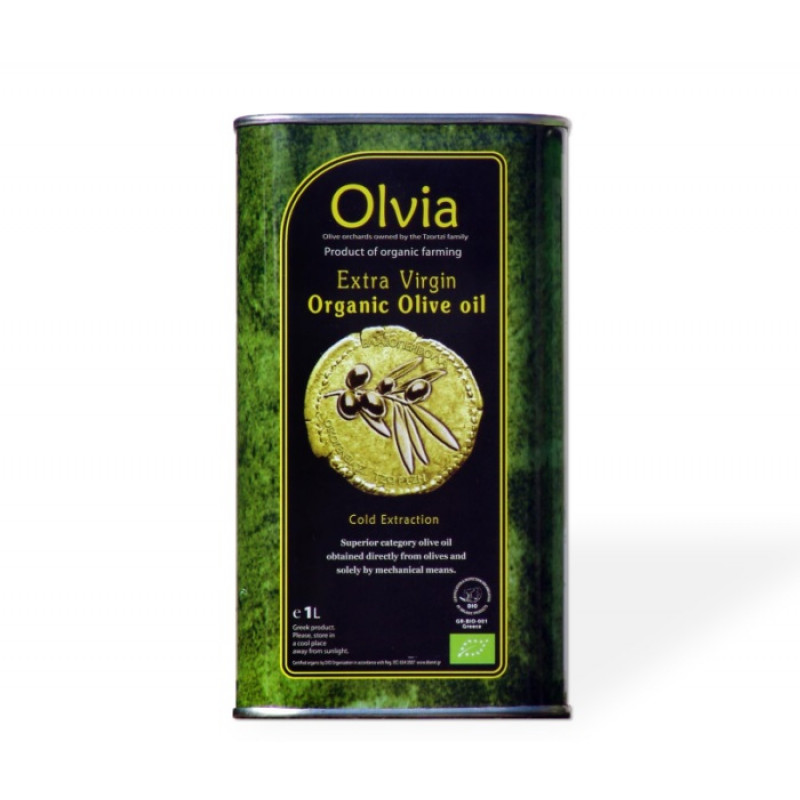
8 tbsp extra virgin olive oil (or really good rapeseed oil)
salt and pepper to taste
fresh herbs to taste – finely chopped (I like a lot! A large handful of fresh parsley, a few springs of mint, a few sprigs of fresh oregano and thyme, a handful of chives, a handful of basil… use whatever fresh herbs you like best)
Method
Open the tofu and drain off the liquid. Crumble/tear it into a food processor. Then add the garlic, a large pinch or two of salt, a good grind of black pepper and half the oil. Squeeze in the juice of half the lemon.
Blend until smooth and creamy. Stop the blender a few times to scrape down the sides and taste the mixture. You can add more salt or lemon to your liking as you blend.
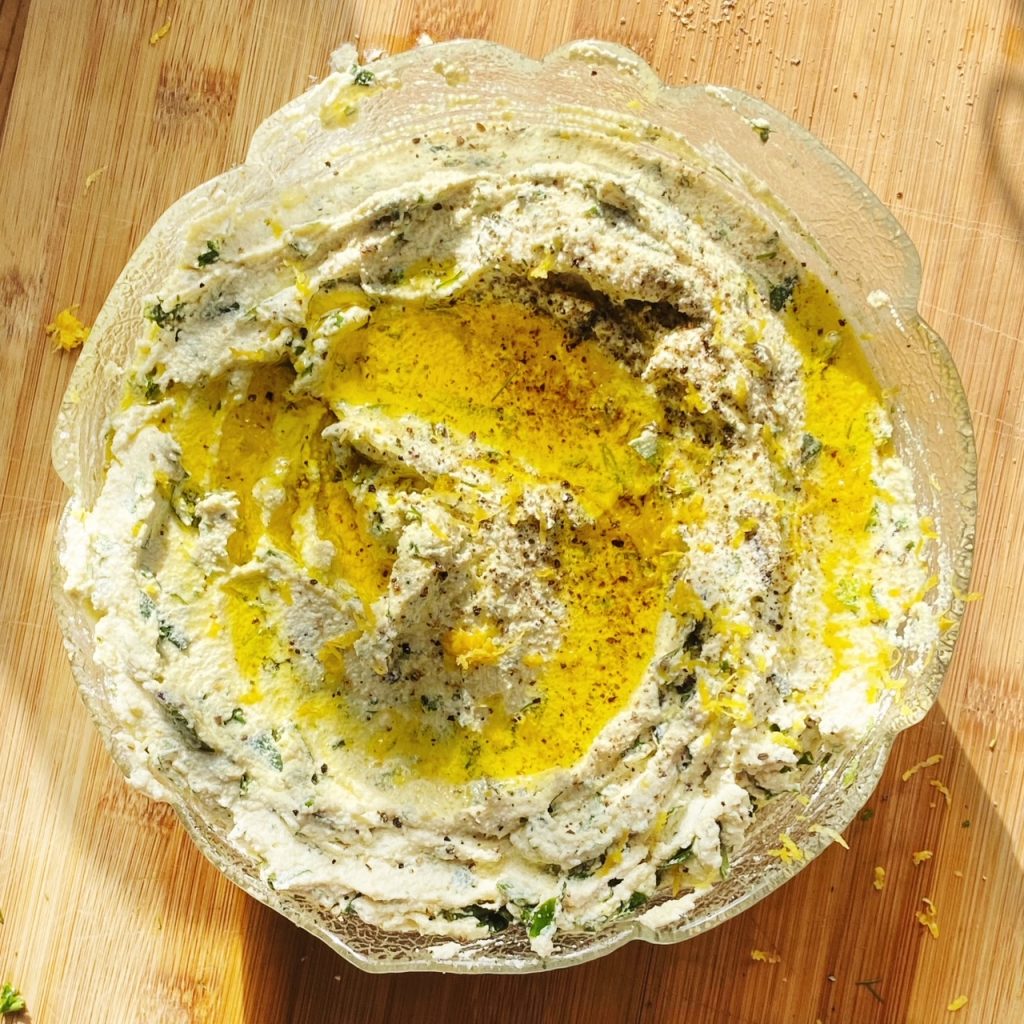
When you are happy with the texture and seasoning, transfer the mixture to a bowl. Add the zest of 1/2 the lemon, 2 tbsp of the oil and the finely chopped herbs. Stir to combine. Then dress the top of the bowl with the last of the oil, another sprinkle of lemon zest and some extra black pepper. Enjoy!
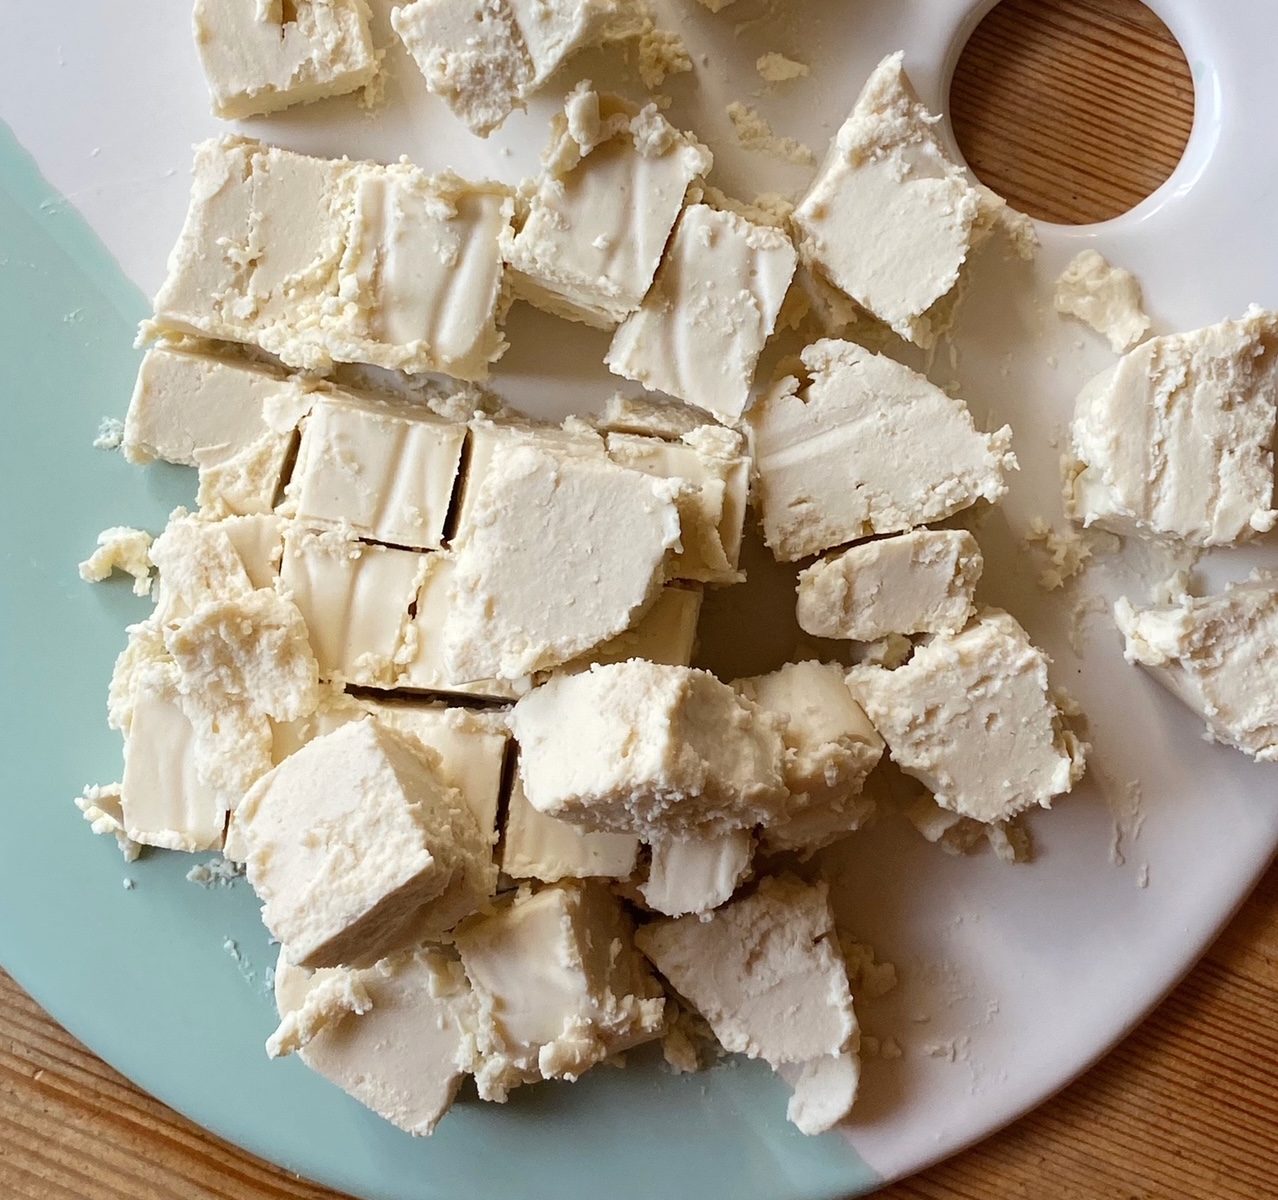
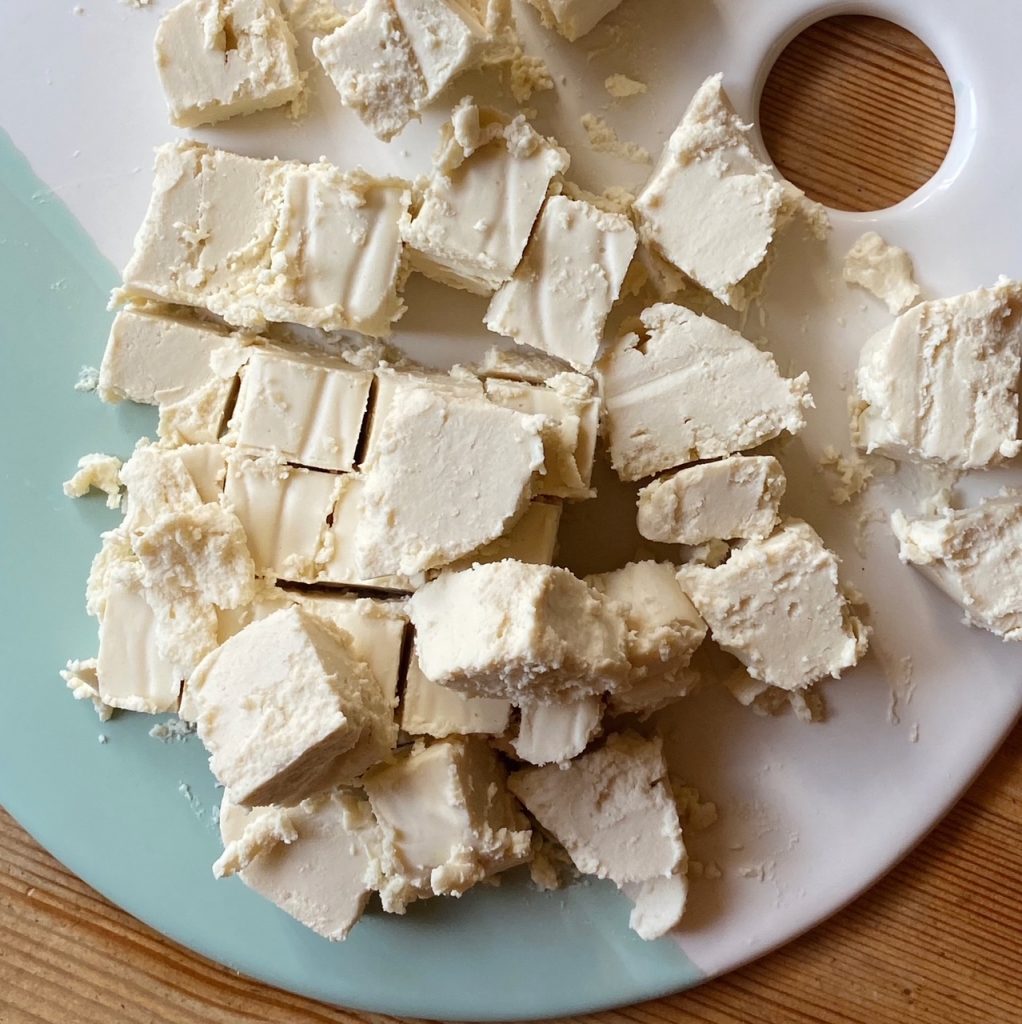
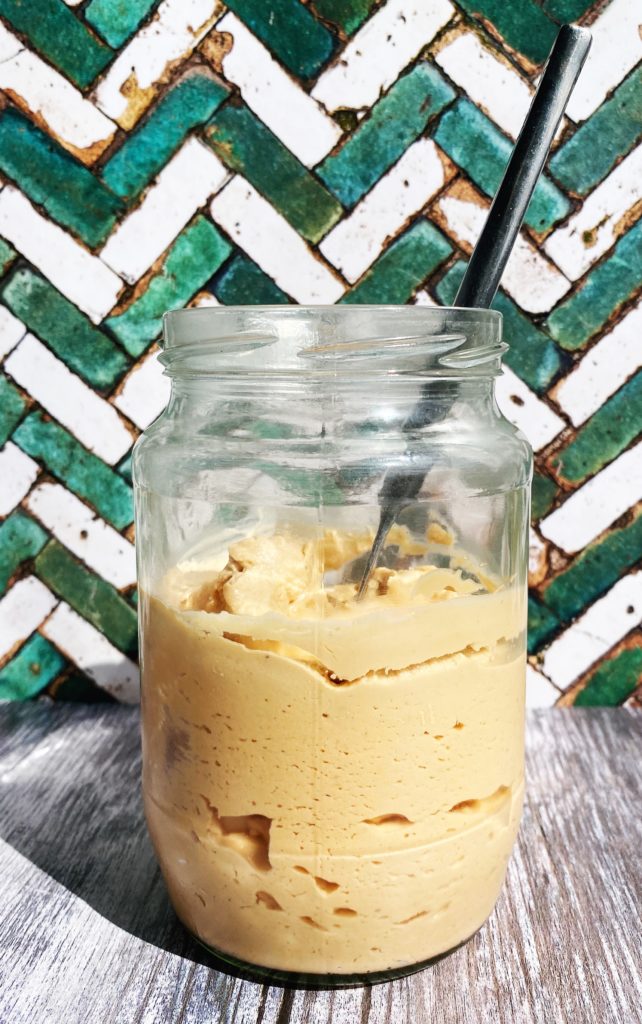
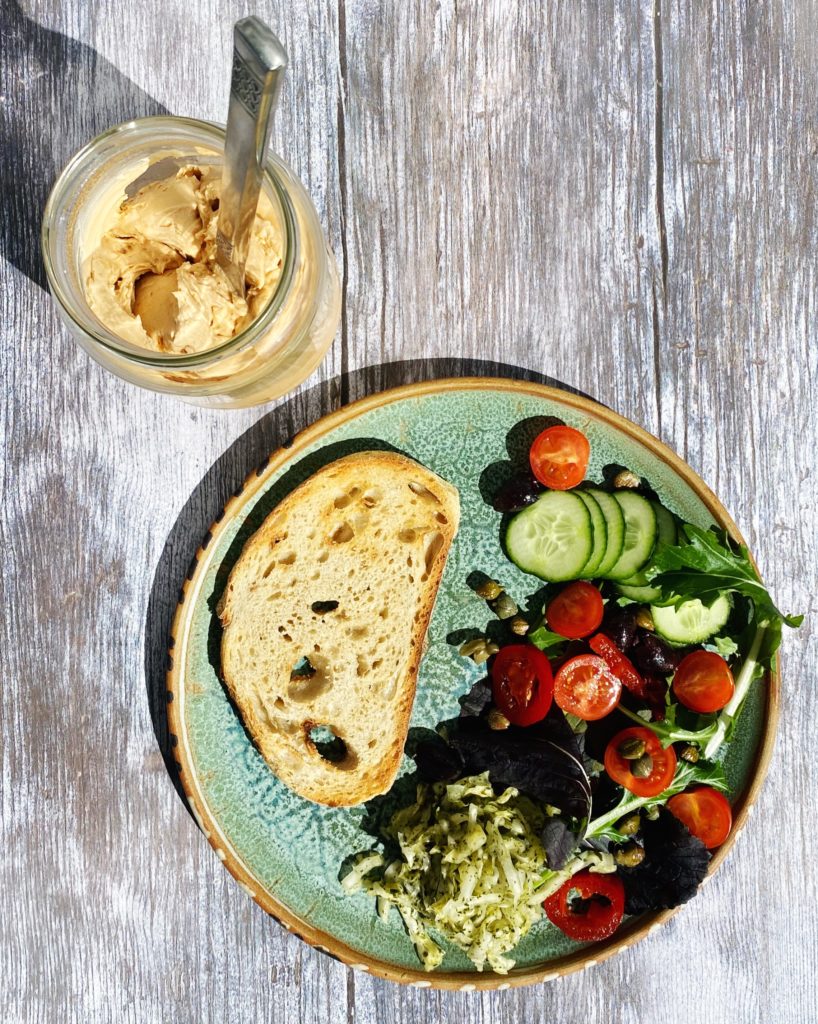
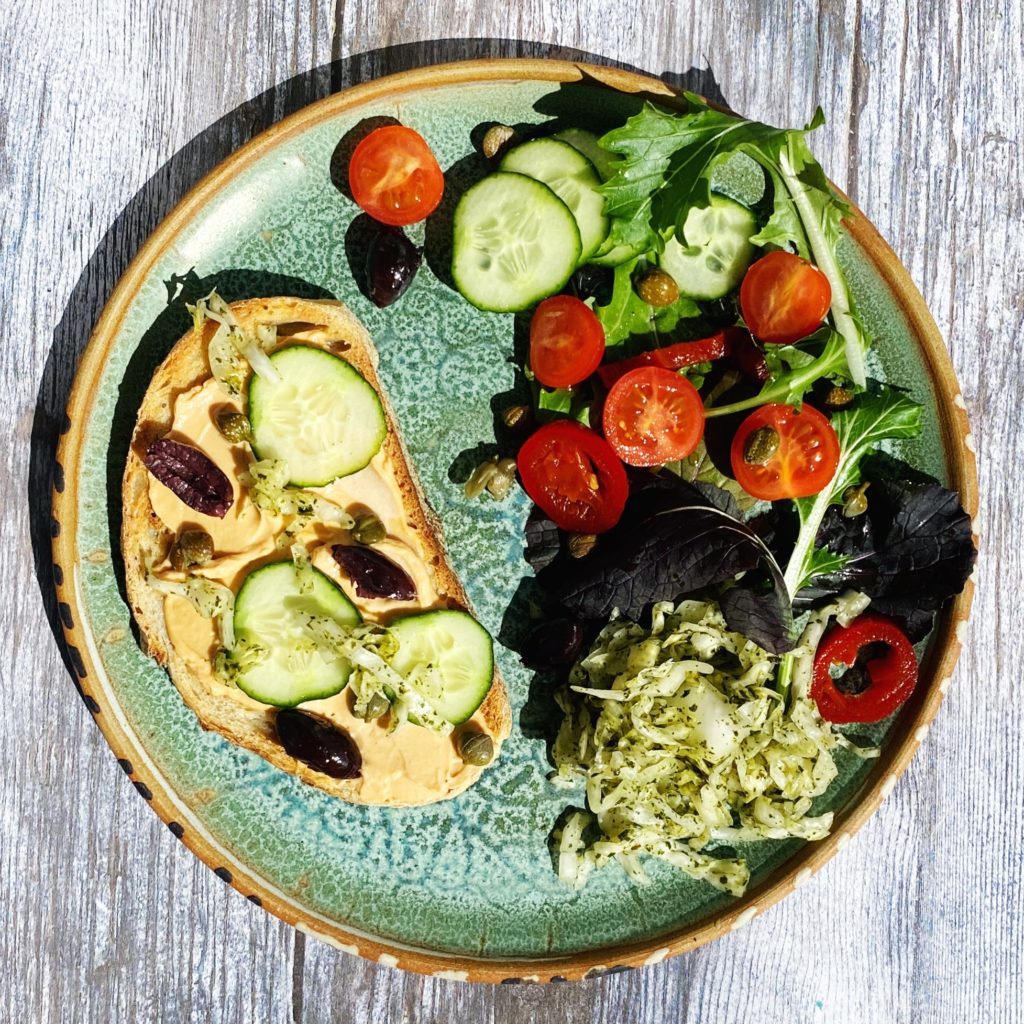
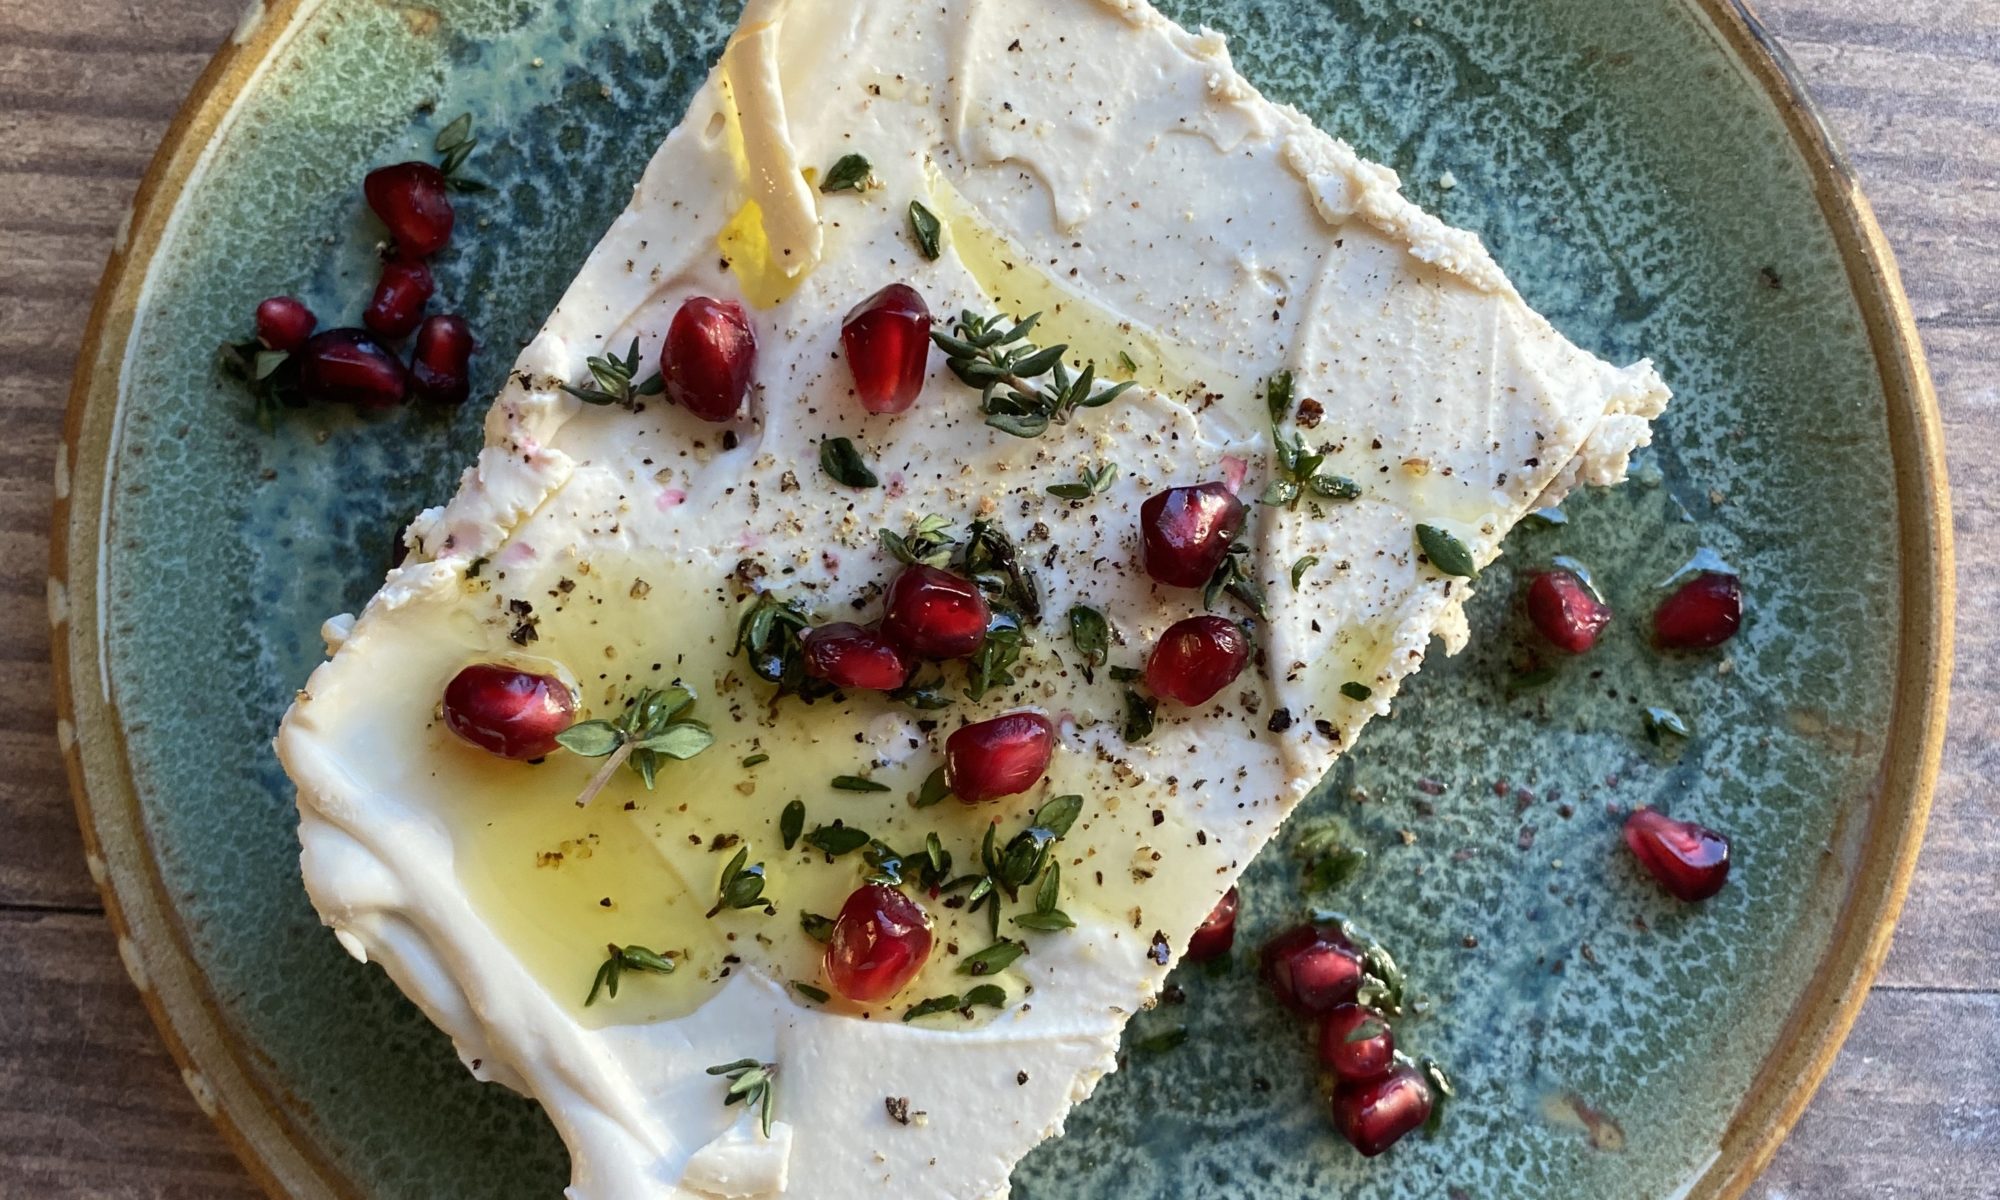
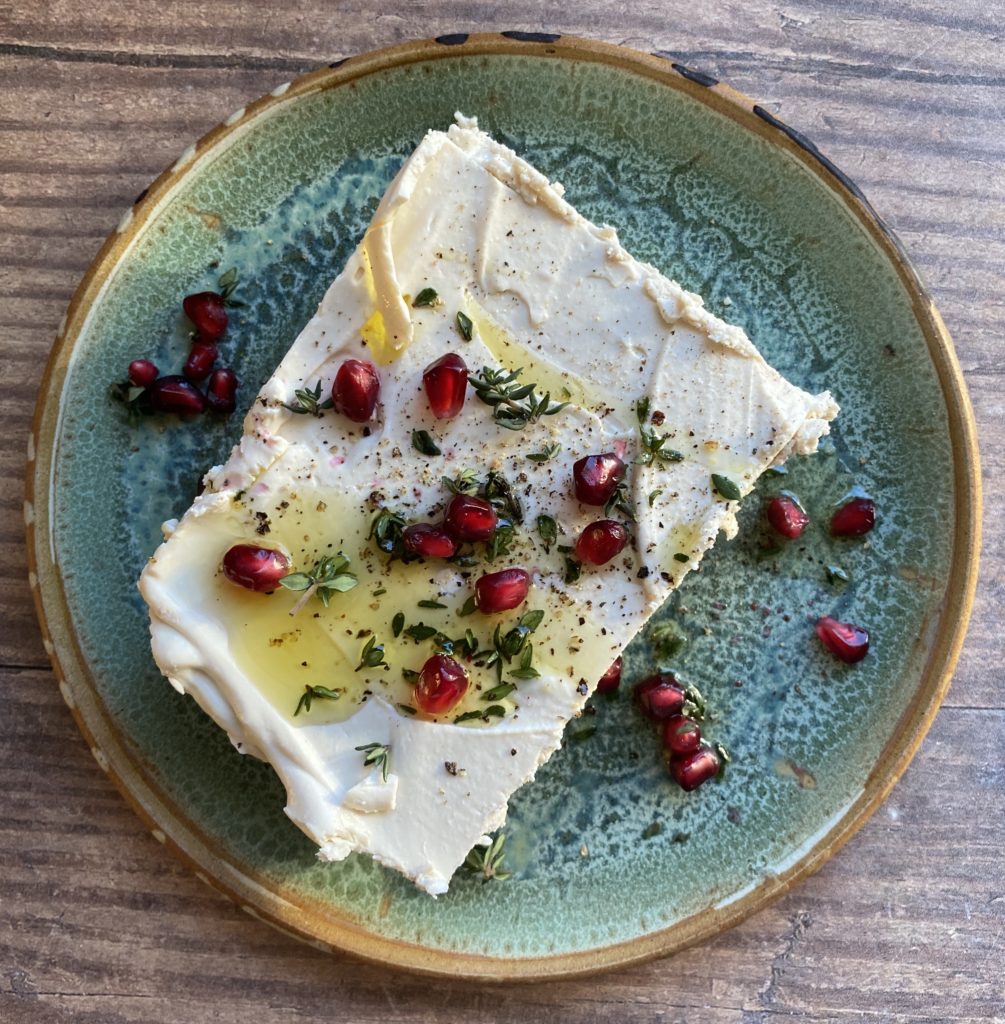
Tofeta is an essential in our dairy free home. If you don’t eat dairy and find shop bought vegan cheeses a bit disappointing (not to mention full of processed junk) then this tangy feta cheese is the answer to your prayers. It’s made from extra firm tofu (a really healthy, whole food ingredient) and coconut oil to give it that creamy texture and to firm it up into sliceable, crumbly, melty feta. Flavoured simply with salt, lemon, garlic and vinegar, you’ll be amazed at how close to feta this cheese tastes! Crumble over pasta or salads, cube up into a classic Greek salad with sliced tomato, cucumber, red onion, basil and olives, spread into sandwiches or on toast/crackers… however you would normally use feta, this substitute will work!
TOP TIP – find some unscented/flavourless coconut oil or your feta will taste a bit coconutty.
Liz x
Ingredients
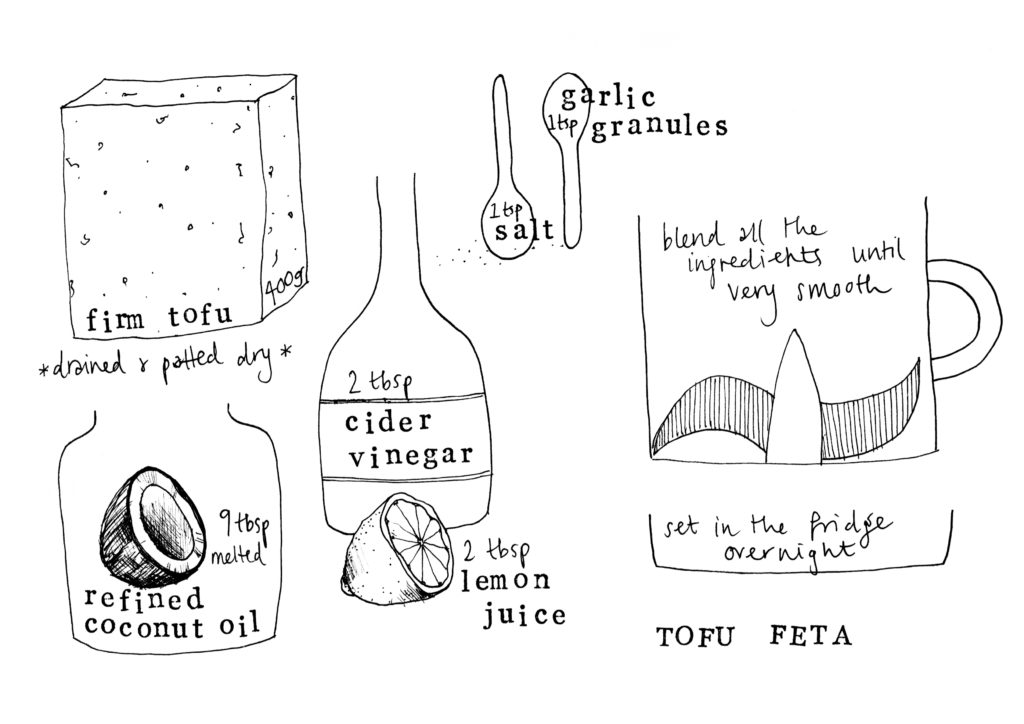
400g extra firm tofu
9 tbsp coconut oil (flavourless is best here)
2 tbsp lemon juice
2 tbsp vinegar (apple cider or white wine vinegars work best here)
1 tsp garlic granules
1 tsp salt
Method
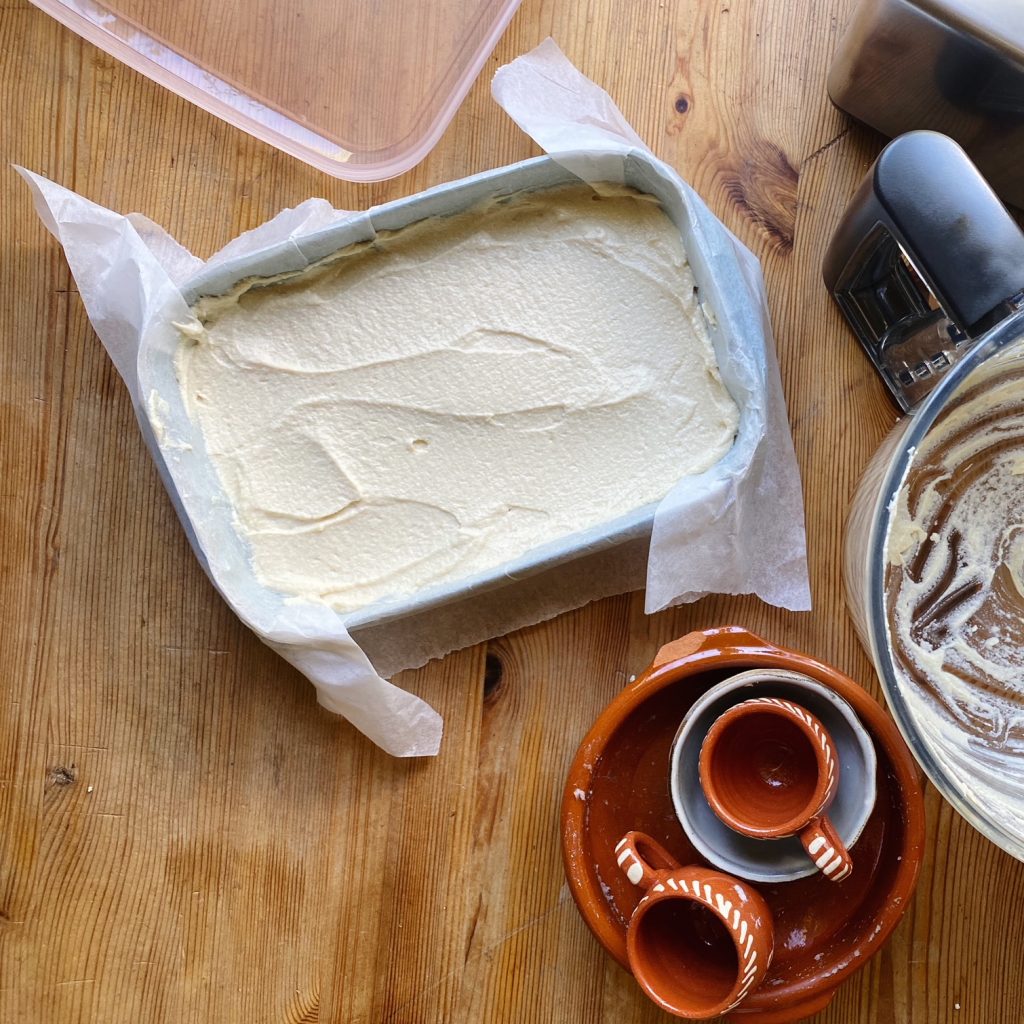
Start by pressing as much water as you can out of the tofu. This will ensure a nice crumbly, sliceable feta. If you can’t be bothered to do this step, not to worry, you’ll end up with a spreadable feta which is so delicious and useful too! To press the tofu, chop it into chunks and put it in a sieve over a bowl. Then place another bowl, which fits inside the sieve, on top and then place something heavy in the bowl like a big jar of pickles. Leave this set up to drain for an hour or so in the fridge. Then squeeze each chunk by hand before placing it in the food processor.
Add all the other ingredients to the food processor and blend until silky smooth. You will need to stop the machine and scrape don the sides half way through.
Line a plastic tub with baking parchment and smooth the tofeta mixture into it. Put the lid on and set in the fridge until solid.
Then carefully tip the feta onto a clean board and slice or crumble as you like. This tofeta will stay fresh in the fridge for 4 days. Enjoy!
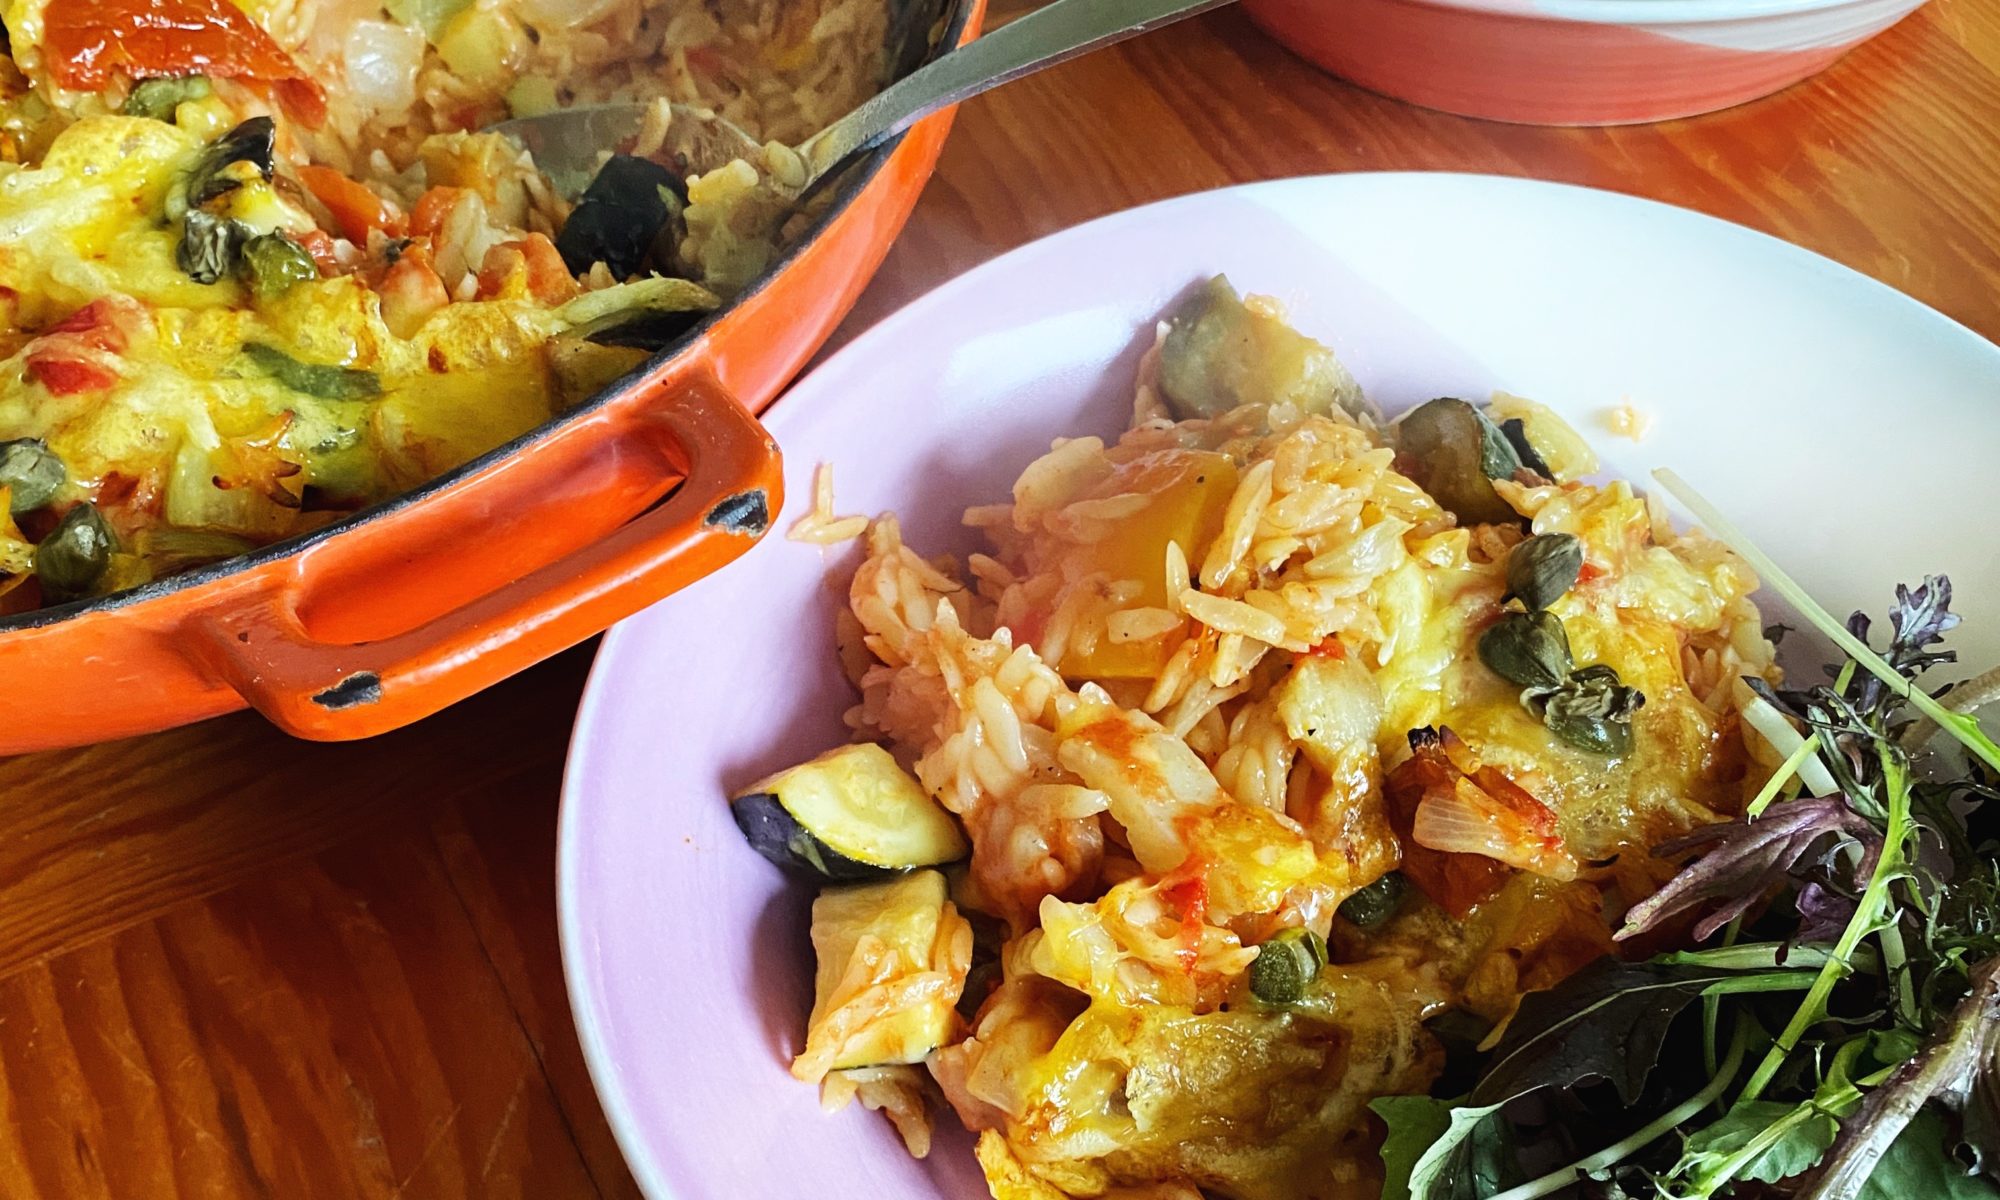
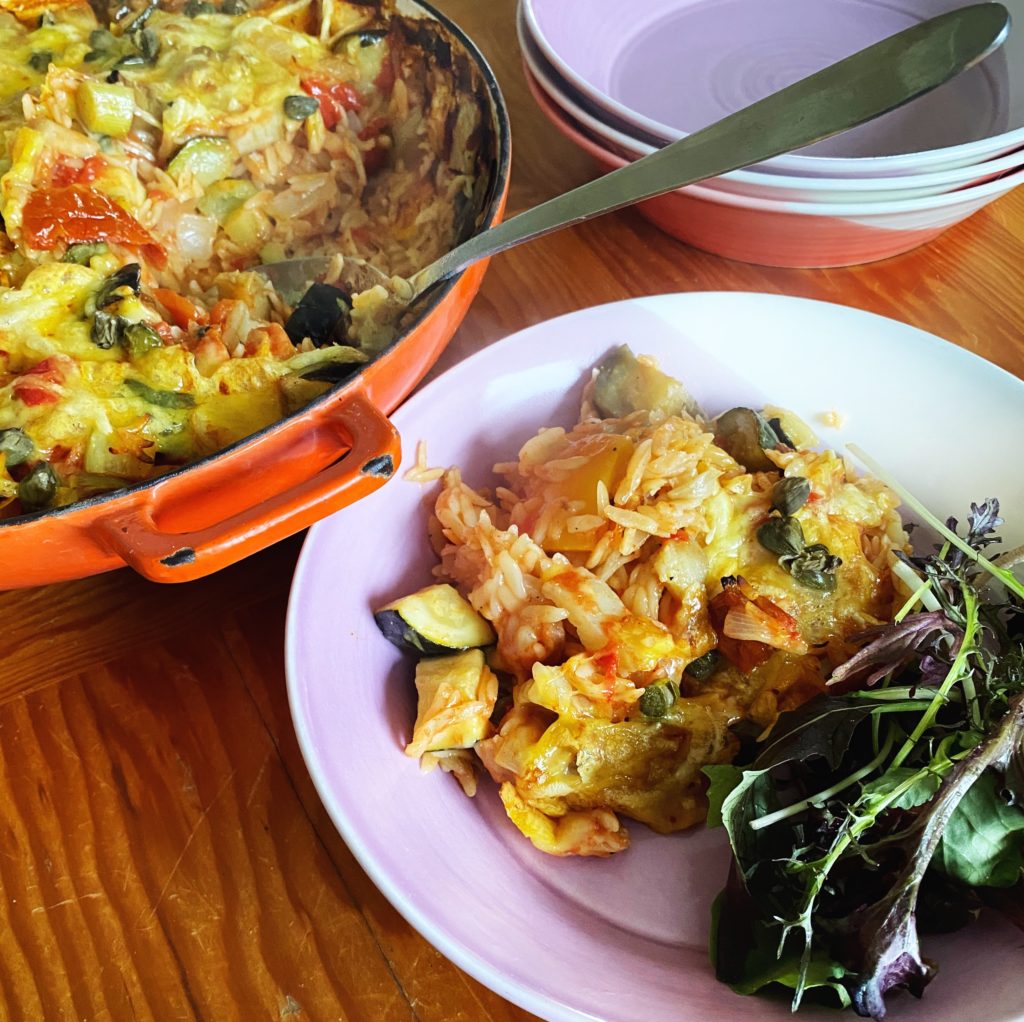
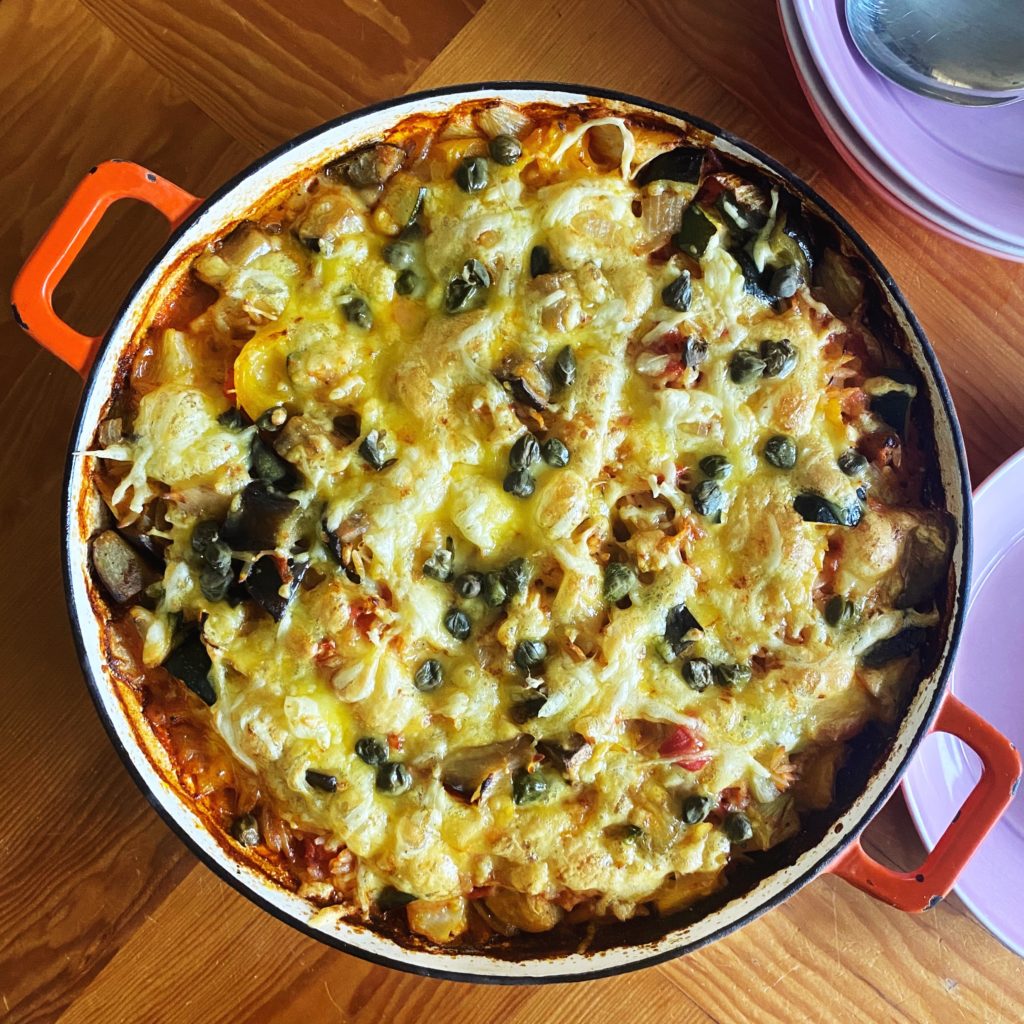
One pot suppers are my favourite types of suppers. Not just for the lack of pots and pans to scrub, although let’s be honest, that is the main reason, but also because it’s just so satisfying, pulling a dish out of the oven and onto the centre of the table and watching everyone tuck in. This baked orzo recipe, like pretty much all of my recipes, is super-flexible. Use it as inspiration rather than instruction and tweak it with any vegetables you have in your box this week. Orzo is simply rice shaped pasta. I often pop a drained tin of beans or lentils into the mix too for some added fibre and protein. Let us know how your version went in the comments.
Liz x
Find organic store-cupboard ingredients as well as fruit and veg here – we deliver to every address in Ireland and Northern Ireland.
Ingredients (serves 4-5)
4 tbsp olive oil
2 onions – diced
6 cloves of garlic – diced
roughly chopped vegetables of your choice (I went ‘Med-veg’ style and used – 1 aubergine, 1/2 a fennel bulb, 2 courgettes, 1 yellow pepper)
added extras to taste – olives, capers, sun-dried tomatoes, a drained tin of beans/lentils/chickpeas…
grated cheese (or vegan cheese – we sell a range or make my tofu-feta recipe) to finish
Method
Pre-heat your oven to 200C and find a large oven and hob safe pan with a lid. If you don’t have one, you could use a roasting dish and some tin foil – roast rather than sauté the vegetables.
Sauté the diced onion and garlic with the olive oil for 5-10 minutes or until starting to soften and colour.
Add the chopped vegetables, season with salt and pepper and sauté for a further 10 minutes until not fully cooked through, but just starting to caramelise on the outsides.
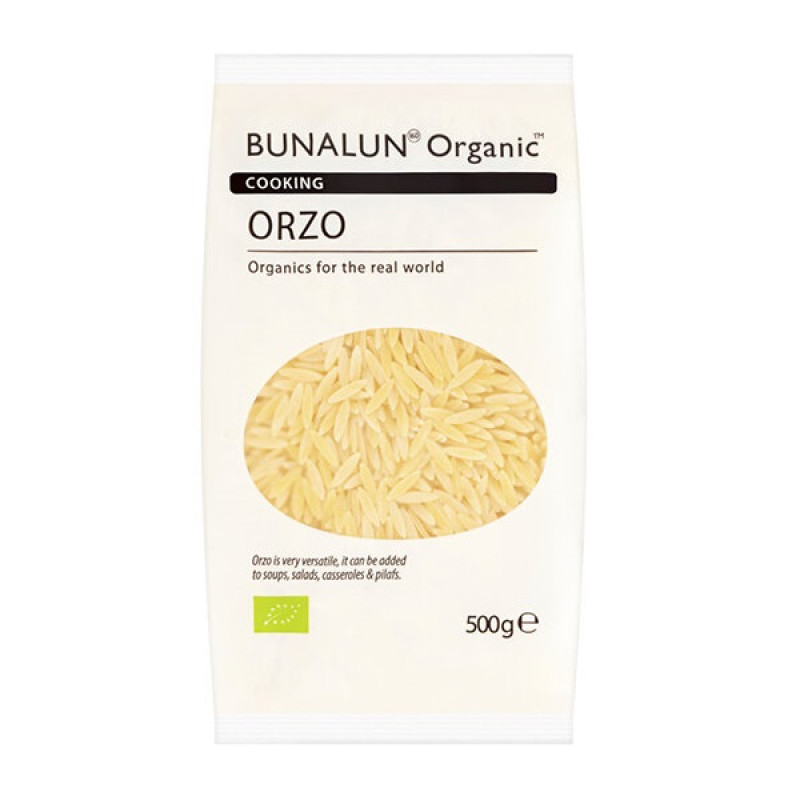
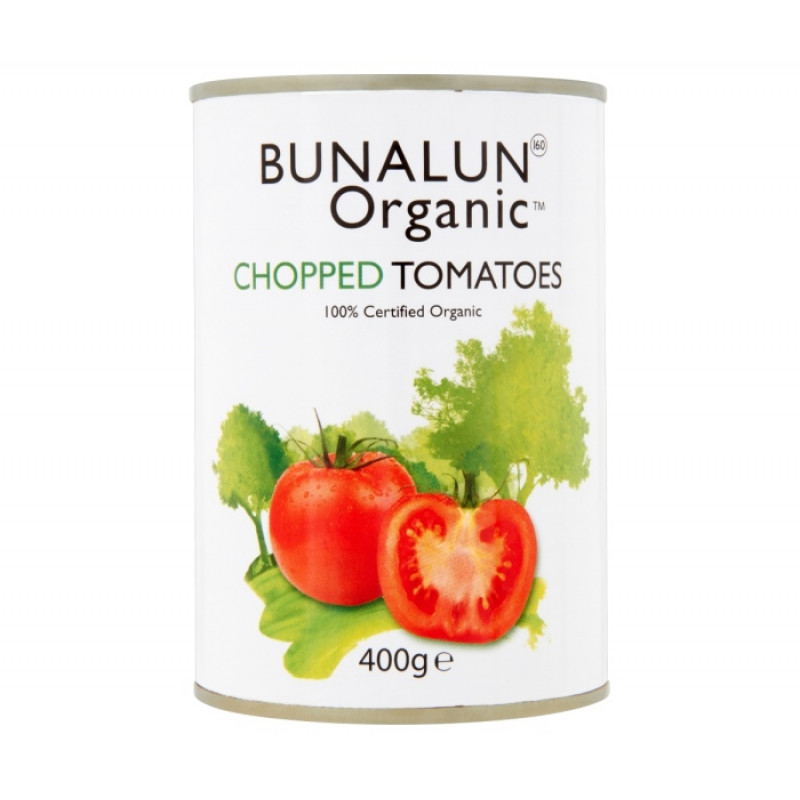
Pour the orzo into the pan along with the lemon and tin of chopped tomatoes. Swirl the juices out of the tin into a measuring jug until you have 500ml of water and add that to the pan too.
At this point you may wish to add some extra ingredients like herbs, olives, capers, chopped sun-dried tomatoes, a drained tin of butterbeans etc…
Stir well to combine the ingredients then place the lid on the dish and put it in the oven to bake for 20-30 minutes or until the pasta has absorbed all the liquid.
Remove the lid and add a generous sprinkle of grated cheese. Return the dish to the oven with the lid off for 5 minutes or until bubbling and starting to take on some colour.
So you’ve made my kimchi and you’ve got a lot of brine left over in the jar after eating it up. Here’s one delicious way to use up that potent, beneficial bacteria infused liquid. Whatever you do, don’t throw it away! If you don’t fancy making this fermented cashew nut cheese with it, drizzle it over rice or noodles or add it to your Bloody Mary in place of tabasco!
Here’s the simple method. If you don’t have your own homemade ferments to inoculate the nuts, then we sell raw, unpasteurised, organic, Irish ferments here which you can add to your next fruit and veg order. You don’t have to use kimchi brine, any left over brine from a fermented product will work.
Liz x
Ingredients
Cashew nuts (or use any creamy nut or seed like sunflower seeds or almonds)
No need for exact measurements. Just put a volume of cashews nuts that you want in your strongest blender.
Add brine from a ferment. It doesn’t really matter how much you add, as long as it is raw and unpasteurised it should have enough bacteria to kick start the fermenting process. Adding more brine will create a stronger flavour of the ferment and a looser, creamier cheese. Less brine will create a thicker cheese.
Blend the nuts and brine until completely smooth and creamy. Taste and add salt to your liking.
Then scrape the cashew cream into a very clean jar. Try to keep it tidy, use a flexible spatular to scrape down the sides and a piece of kitchen paper to wipe around the sides.
Put the lid on the jar and leave it at room temperature in a shady part of your kitchen to ferment to your liking. This could take anywhere between 12 hours and a week depending on how active your starter brine is and how warm your kitchen its. Just keep an eye on it. You’ll notice air bubbles forming as it ferments.
Give it a taste and if it’s sufficiently tangy then it’s ready to be stored in the fridge for about 2 weeks. Use it on crackers, toast or bagels, wraps and sandwiches, as a dip with salad and crudités… anywhere you like soft, creamy, tangy cheese. Enjoy!
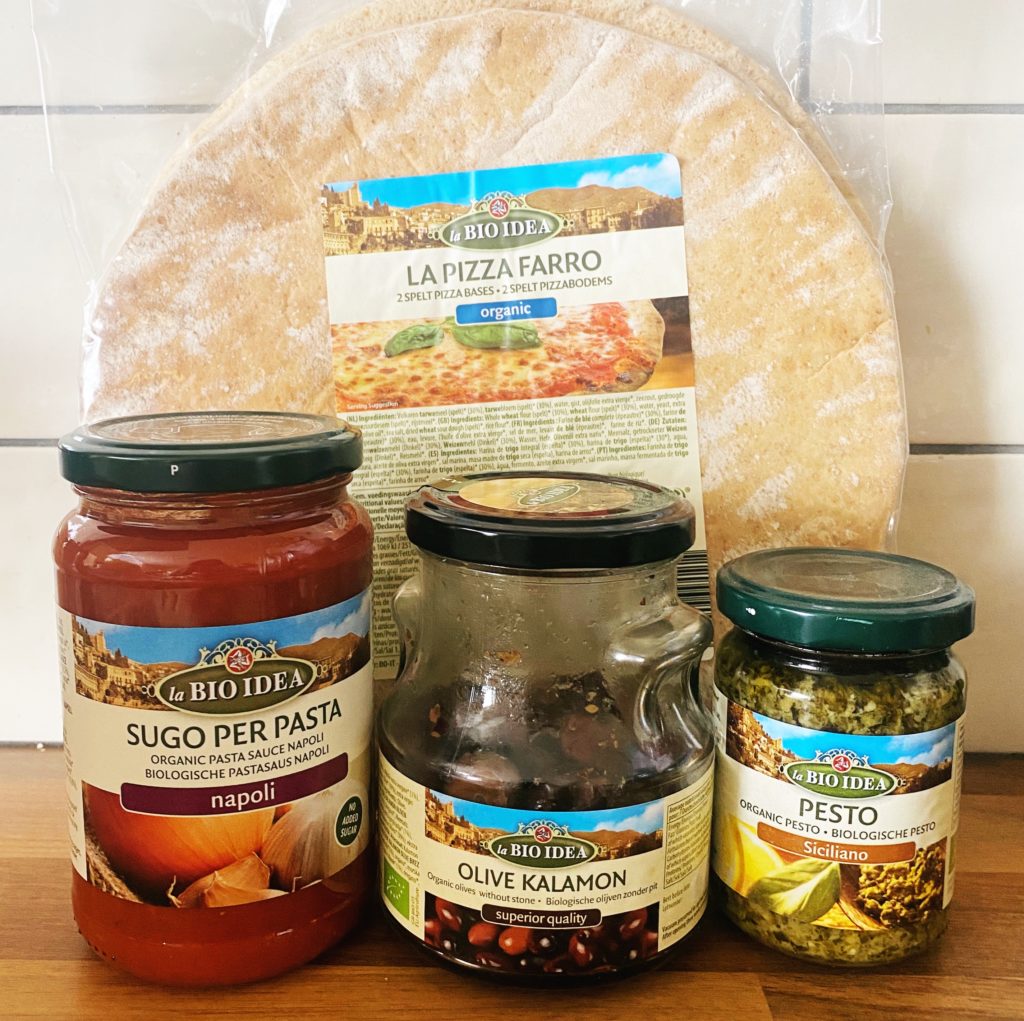
A couple of minutes to put together and just 10-15 minutes to bake. Way faster than a takeaway pizza, cheaper, and dare I say it, more delicious? Tailor your pizza exactly to your taste with our easy pizza bases (we sell gluten free ones too), sauces, olives, pesto, vegetables and selection of cheeses (including vegan cheeses). This is also the perfect fun meal to make with kids.
Add the ingredients to your next organic fruit and veg order from us and give yourself a night off. We deliver to every address in Ireland. Liz x
Preheat the oven to 200C fan. Get a couple of baking sheets ready and line with baking paper for ease.
Open the pizza bases and place them on the baking sheets.
Spread with three heaped tbsp of tomato sauce on each pizza base. Add some dollops of pesto for little herby flavour bombs.
Scatter over your favourite pizza toppings – olives, roasted vegetables, cheese – then pop the pizzas in the oven until hot and bubbling and just starting to take on some colour. Around 10-15 minutes.
Serve slices with torn fresh basil leaves, a fresh salad and glass of organic wine for the perfect Friday night fakeaway!
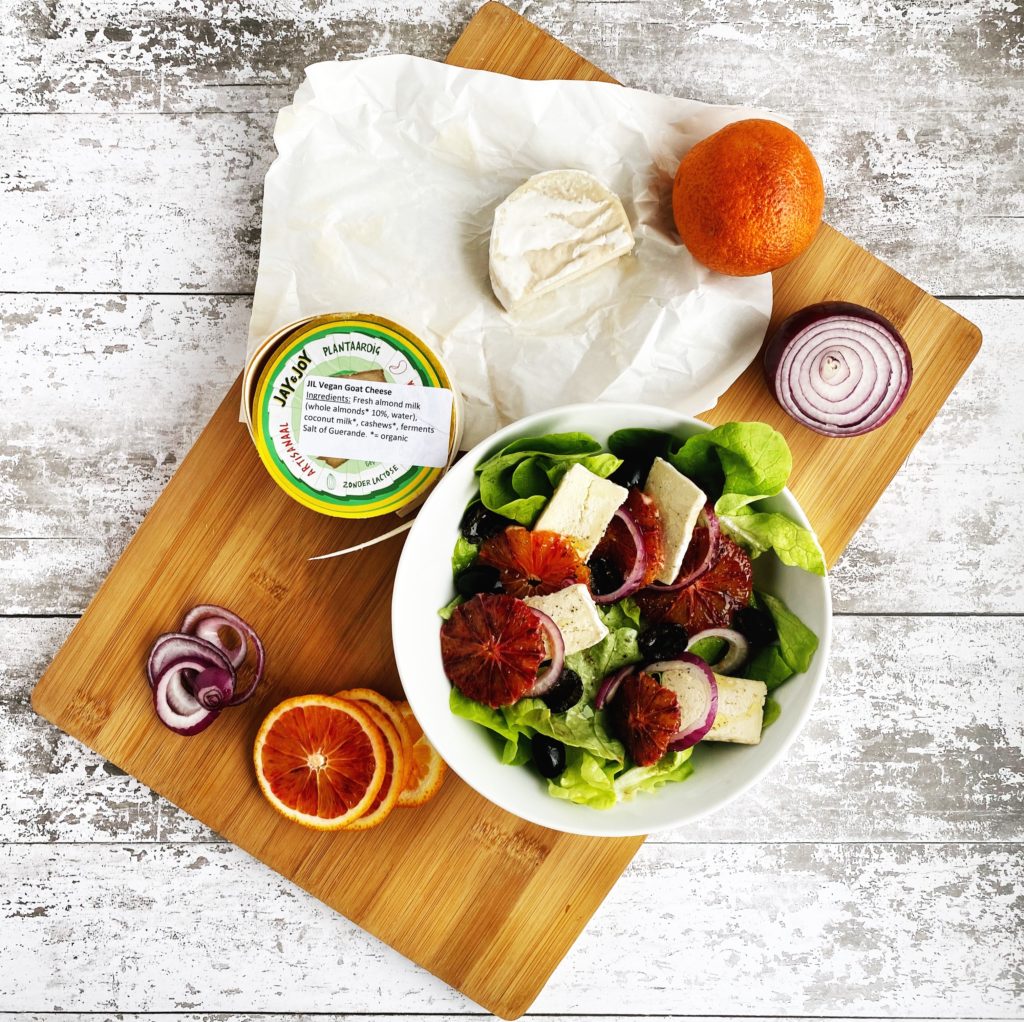
Have you tried the Jay and Joy range of vegan cheeses we sell yet? They are absolute game changers. There’s no doubt that there are some dodgy tasting plant based cheeses out there, but these are the real deal. We love that they use recognisable, all organic ingredients. We love that they are made using ancestral French cheese-making techniques. But most of all we love the flavour. Here are some serving suggestions to inspire you to make the most out of these delectable little boxes of cheese. Let us know your favourite way of eating them in the comments or over on our facebook group. We are always looking for new ways to enjoy our carefully curated organic products.
Liz x
*as always, words in bold are clickable links to our shop so you can easily add the ingredients to your usual order
Simple as that! The sweet tang of the oranges contrasts the olive oil, salty cheese and olives perfectly. Every mouthful a delight.
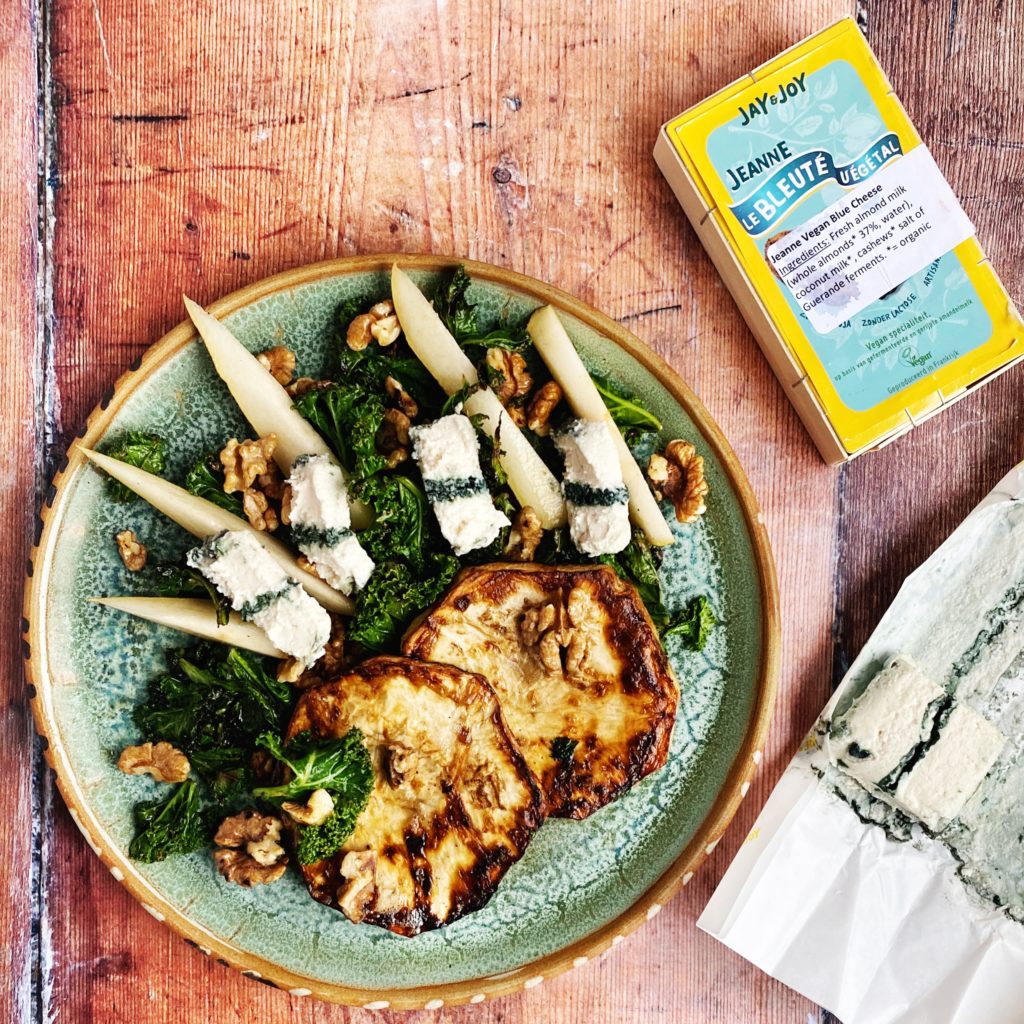
Celeriac Steaks, Kale, Blue Cheese, Pear, Walnut
Method (serves 2)
Slice 4 steaks out of the middle of a celeriac – about 1cm thickness each. Then trim off the skin and knobbly roots of each slice. (Reserve the leftover ends of the celeriac for soups/stews/risottos…)
Melt a tbsp of plant based butter with a tbsp of olive oil in a large frying pan over a medium high heat.
Then add the celeriac steaks and season them with a pinch of salt and some cracked black pepper. Fry on both sides until golden brown and tender – this takes about 10-15 minutes.
Keep the steaks warm, propped up in one side of the pan then add lots of rinsed and chopped kale to the pan. Stir fry to wilt for 3 minutes or so then taste and season if necessary (there may be enough seasoning already in the pan from the celeriac steaks and butter/oil).
Divide the cooked kale onto two warm plates, top with the celeriac steaks and then quickly toast two generous handfuls of walnuts in the now empty frying pan.
Add a sliced pear to each plate, the toasted walnuts and finish with little slices of Jay and Joy Blue Cheese.
The balance of sweet pear, buttery celeriac, crunchy nuts and salty blue cheese is absolutely gorgeous. I hope you really enjoy it!
Baked Brie, Caramelised Red Onion & Thyme Toast
Method (serves 2)
Melt a generous tbsp of plant based butter and a tbsp of olive oil in a frying pan.
Add one peeled and sliced red onion and a pinch of salt and fry on medium for about 10 minutes or until it starts to collapse and caramelise.
Add four peeled and chopped cloves of garlic and fry for another 5 minutes or so.
Then to help the caramelisation, add a tsp of brown sugar and season with some black pepper and a tsp of fresh thyme leaves. Fry for another minute or so to bring the flavours together.
Meanwhile cut and toast two slices of sourdough bread.
Put the toast in a baking dish, divide the caramelised onion between the two slices and top with slices of Jay and Joy Brie.
Drizzle with a little olive oil and put the baking dish in a hot oven or under the grill for a few minutes. This vegan brie does not melt like regular brie, but warming it up really brings the dish together.
Scatter with a few more fresh thyme leaves and enjoy! Crunchy toast, sweet caramelised onion, creamy cheese and fragrant thyme…so good!
The ‘dip, dress, sprinkle’ chapter of my book is probably the most useful chapter. It’s one I refer to the most and it’s those little extras, the condiments, crunchy toppings and delicious dressings that really make meals go from ‘good’ to ‘great’. At the end of the chapter is this tofeta recipe which is really simple but incredible! It’s crazy how like feta it is!
Tofu is a really nutrient dense, brilliant food, wrongly vilified as bad for humans and the environment, it’s nothing new and has been eaten by healthy cultures for around 2000 years. Most soy grown for human consumption is not grown in deforested areas (unlike the vast majority of soy which is grown for animal feed). If you buy organic tofu like the one we sell, you can rest easy knowing it is not genetically modified and is grown in a sustainable way.
Use this tofeta as part of your cheeseboard at Christmas, top a homemade pizza with it (roast beetroot or squash, red onion and tofeta is a brilliant winter pizza topping, especially with wilted spinach or kale in the tomato sauce), layer it in your lasagna, top a moussaka with it, or make my festive cranberry and tofeta cigars. They make a great starter – or make them a little smaller and they are perfect for nibbles on a canape tray with drinks.
Open out a pack of filo pastry onto a clean chopping board or work surface. Most shop bought filo is incidentally plant based but check the label.
Cut the pastry in half (or quarters if you would like smaller cigars) with a large, sharp knife.
Brush one sheet of pastry with olive oil, then spread a tsp (or half tsp if making smaller cigars) of cranberry sauce onto the pastry in a neat line about the size of your little finger, centred but about 5cm away from the left edge.
Place a little finger sized slice of tofeta onto the line of cranberry sauce then fold the 5cm left edge over it.
Fold the top and bottom sides over each other then brush them with more olive oil and roll up the pastry, left to right, into a cigar shape.
Brush the outside of the cigar with a little more olive oil and place it, seam side down, on a lined baking sheet. (I use this compostable baking parchment or a re-usable one).
Repeat until all the pastry is used up. Then sprinkle with some optional sesame seeds and bake at 180C for around 15-20 minutes or until they are golden and crispy. They are lovely served warm or cold.