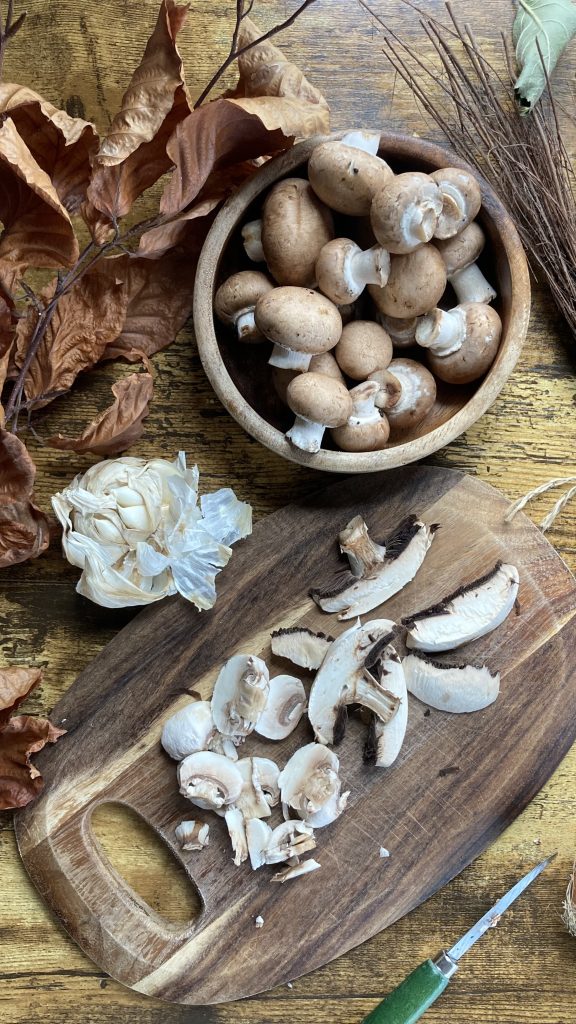
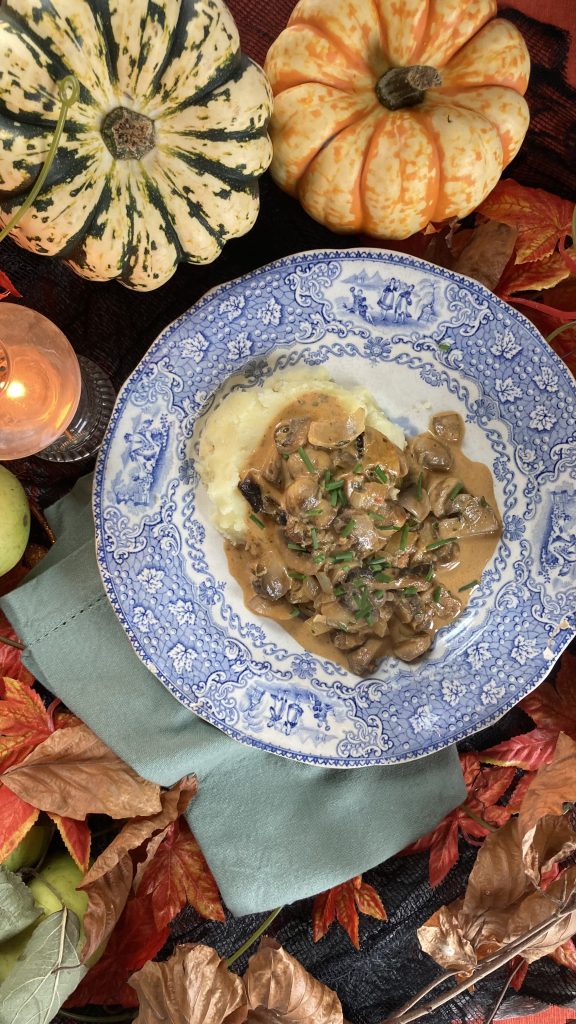
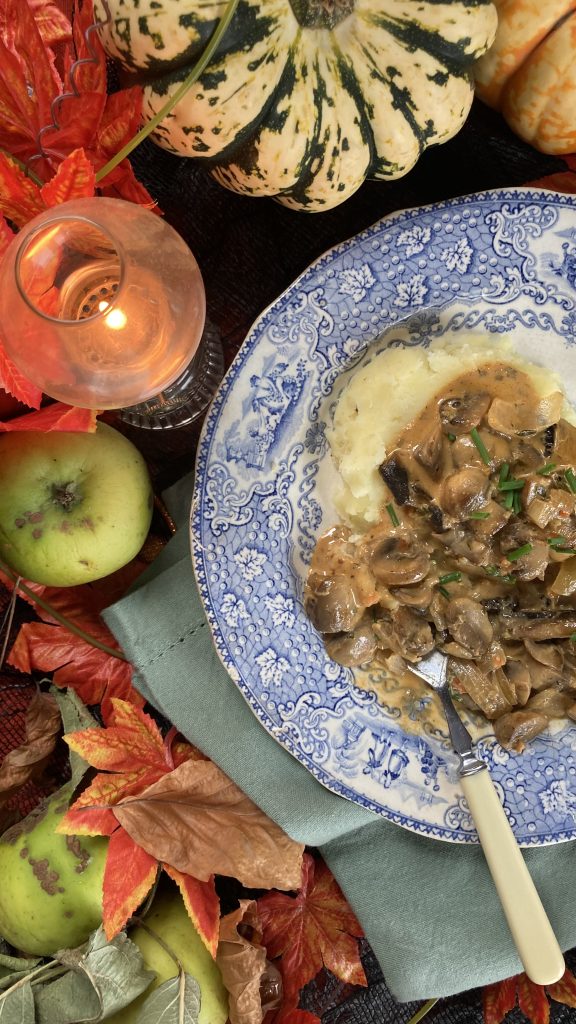
This is such a versatile recipe, as this creamy Mushroom dish serves well with potatoes, rice, pasta, and it’s even delicious served alongside some toast. Cooked mushrooms are a great source of B vitamins and antioxidants. When preparing mushrooms for cooking, avoid washing them with water, as their porous nature causes them to absorb moisture, which can negatively affect their texture and flavour during cooking.
Place a large frying pan over a medium heat. Add the butter. Once it starts to melt, add the mushrooms and onion. Stir to combine. Turn up the heat and cook for 5 minutes, stirring regularly.
Add the garlic, paprika, mustard, lemon, and thyme to the pan. Season with a little salt and pepper. Stir to combine and add the stock. Simmer gently for 15 minutes.
Stir though the cream and simmer for a further minute or two.
Serve straightaway with a scattering of freshly chopped chives.
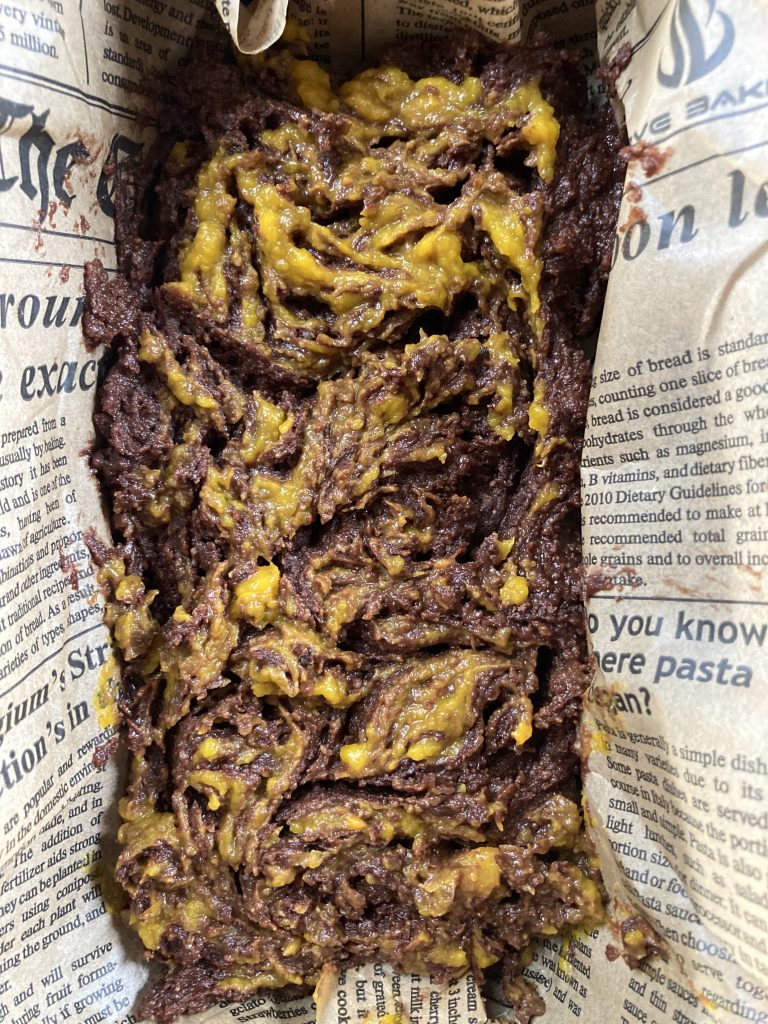
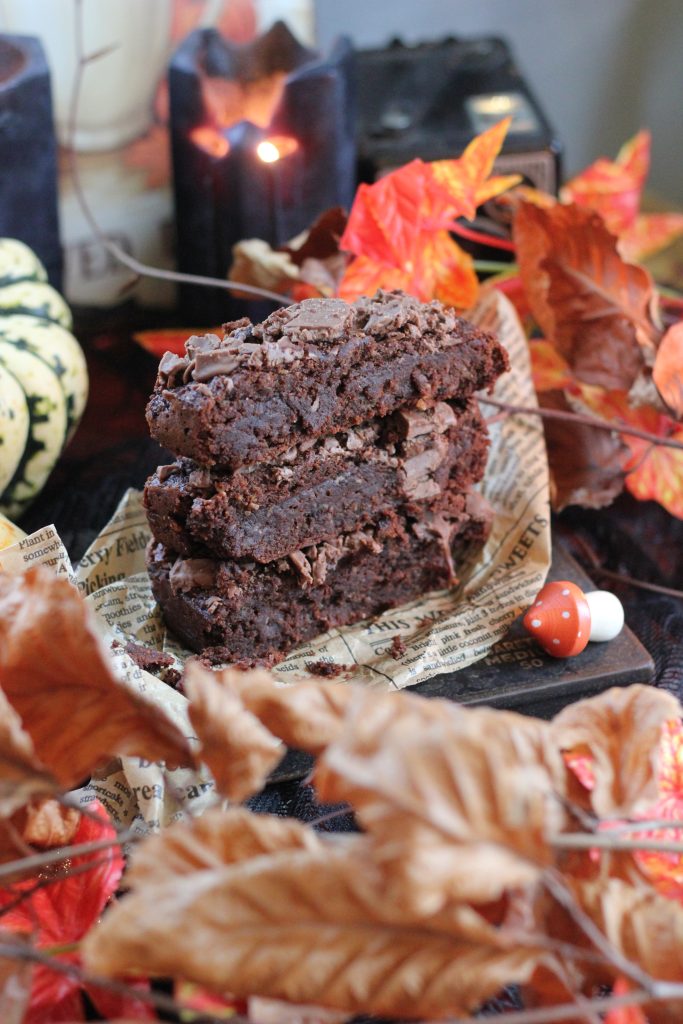
These Chocolate Orange Pumpkin Brownies make for the ultimate autumn treat. They are rich, fudgy, and bursting with flavour. Made with wholesome ingredients, they’re gluten-free, vegan, and come together in minutes. This seasonal snack is packed with flavours of deep chocolate, zesty orange, and velvety pumpkin in every bite.
Preheat the oven to 200°C/fan 180°C /Gas Mark 6. Line a 2lb loaf tin with greaseproof paper.
Add all the ingredients, apart from approx. 1 tablespoon of the pumpkin purée to a large bowl. Mix to combine. Add to the lined tin. Dot the saved purée on top and using a skewer combine with the chocolate mixture.
Place in the preheated oven for 25 minutes.
When hot from the oven, scatter over the chopped chocolate. Leave to cool fully before cutting. Store in an airtight container for up to 3 days.
Pumpkin Purée
Method
Preheat the oven to 200°C/fan 180°C/Gas 6. Cut one small pumpkin into half. Place the pumpkin pieces on a large baking tray, skin side up, and place in the hot oven for about 40 minutes. Take from the oven and once it has cooled a little, scoop out the seeds, peel away all the skin, and any bits that may have charred, and pop the pumpkin pieces in a food processor. Blend until smooth. Transfer to a bowl and allow to cool before using. The pumpkin purée will keep well for 3 days when covered in the fridge.
I had a remarkable revelation in the supermarket the other day. As I was browsing the fresh produce aisle as I always do when in a supermarket, I noticed something that really caught my eye.
It was actually quiet refreshing for a change. Reviewing each of the labels on the citrus products, they were clearly marked with the chemicals/fungicides that had been applied to the skin of the oranges, lemons, limes and mandarins. A few weeks back I was wondering if the pesticides that were used in growing carrots were highlighted on the pack would we change our behaviour?
And how is it that it comes down to the organic farmer to prove his/her produce is chemical free, why doesn’t the conventional produce list all the chemicals used in the growing of the crop? Well at least with citrus fruit we have the post-harvest treatments clearly outlined, this is the law in the EU.
It was quite a timely consideration as during the week we had one of our annual organic inspections and we were informed a sample of our produce will be sent away for screening for a mind-blowing list of chemicals (870 last time), more on that at a later date.
Anyway, back to the oranges. I am not sure that many people notice the chemicals though as it is hidden away in small print, nevertheless showing all these postharvest fungicides and wax treatments is a very good thing, as we can make more informed choices about our food. It is also worth noting that it is stated on all the labels that the skin is not suitable for eating!!
Here are some of the chemicals I found on the labels and their scientifically linked safety considerations. Also this is for an individual chemical most of the fruit I examined at up to 4 different treatments per piece of fruit.
1) Imazalil: Possible endocrine effects. The EFSA (European food safety authority) has evaluated imazalil repeatedly; the substance has raised endocrine/ecotoxicity questions in the past. Carcinogenicity concerns: possible/likely carcinogen based on animal data.
2) Thiabendazole EFSA peer-review concluded thiabendazole can affect thyroid hormone systems in animals. That is an important regulatory finding. Carcinogenicity/reprotoxicity: animal studies have shown some reproductive/developmental effects at high doses.
3) Pyrimethanil: Some experimental studies show reproductive or developmental effects in animals at high doses.
4) Fludioxonil: EFSA identified fludioxonil for endocrine-related effects.
5) Boscalid: It can be persistent in the environment
6) Azoxystrobin: Some studies indicate potential for oxidative stress and endocrine-related effects in experimental systems.
I am sure there are more, and this excludes the waxes that are also used to coat most conventional citrus fruit.
Not an entirely benign concoction, and not a cocktail of chemicals that I would particularly like to have on my food, thank you very much. I am sure you are wondering how an orange is not suitable for vegans. Well, one of the waxes that can sometimes be used, in particular E904 or Shellac (this is a resin secreted by a bug!), make the fruit unsuitable for vegans!
So, if you do buy conventional citrus fruit, please note again that it is advised that the skin is basically inedible or unsafe due to these chemicals (read the labels it actually states it there) so please don’t use the zest for cooking, much better to choose organic, and if you want to steer clear of these and other chemicals better where you can to choose organic entirely.
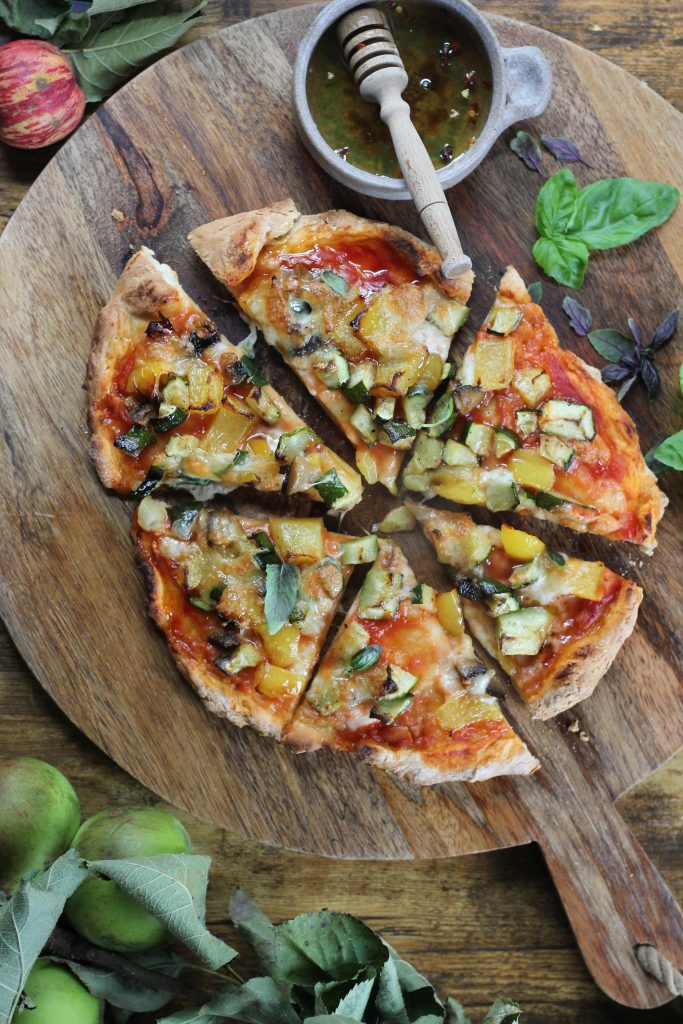
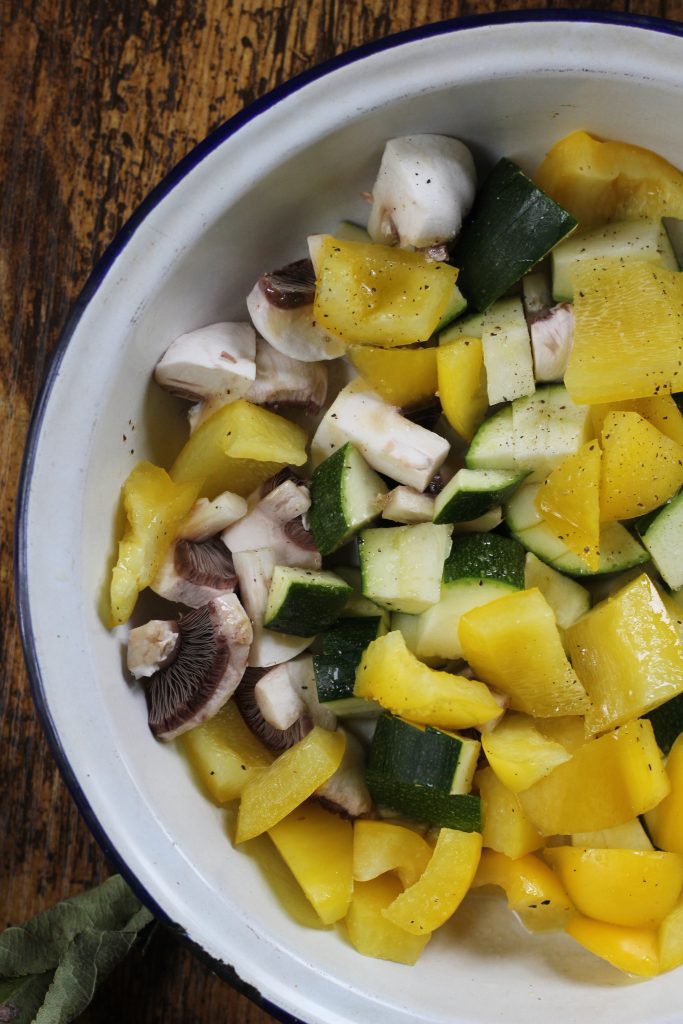
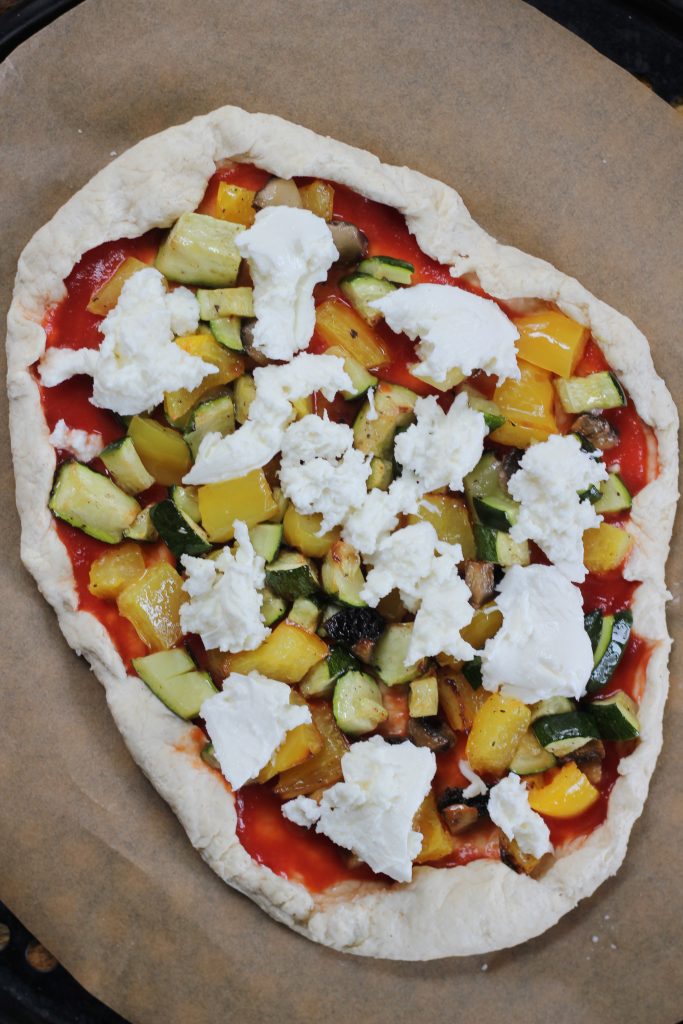
This delicious pizza is packed full of flavour and nutrients. The base is simply some self raising flour with yogurt and a little salt, which comes together with ease, and pairs so perfectly with the veggie-loaded topping. I’m using mushrooms, pepper, and courgette, but any soft vegetables could be used in their place.
These pizzas are best enjoyed straight from the oven but can be saved in an airtight container in the fridge to enjoy the next day, either cold or heated through.
To a medium-sized ovenproof dish, add the mushrooms, pepper and courgette. Drizzle over the olive oil and season with salt and pepper. Toss to combine. Bake in the preheated oven for 15 minutes.
In a large bowl, combine the flour with the salt and add the yogurt. With your hand or a fork, bring the mixture together to form a ball of dough. Cut into two halves.
Transfer to a floured board and roll each ball out to make the pizza bases.
Gently make a border for each pizza by gently folding the edges over. Divide the pizza sauce between the two pizzas. Top with the roasted vegetables and dot over the mozzarella.
Place in the preheated oven for 25-30 minutes, until it is cooked through, golden and bubbling.
Serve straightaway with a drizzle of honey and a scattering of basil leaves.
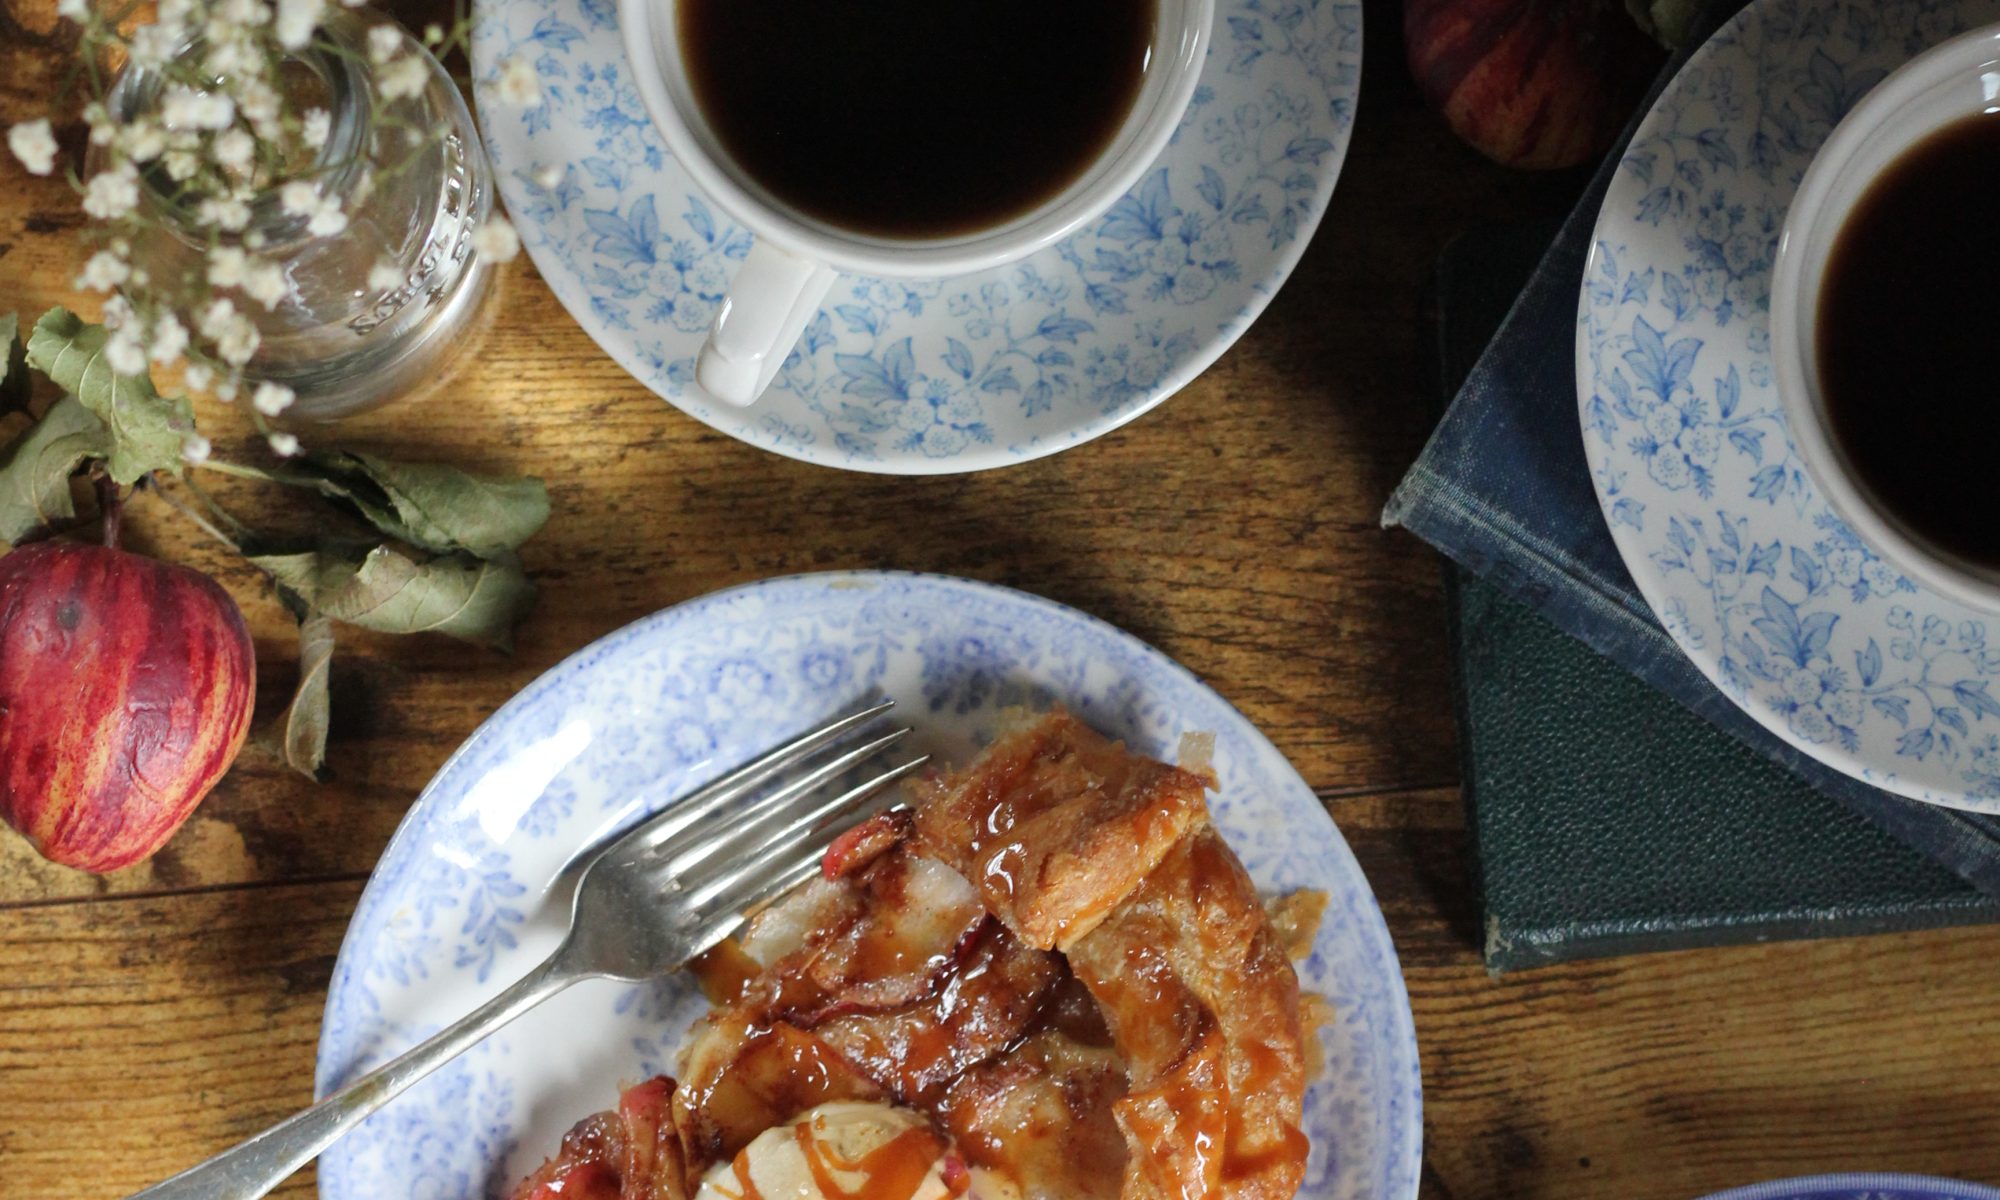
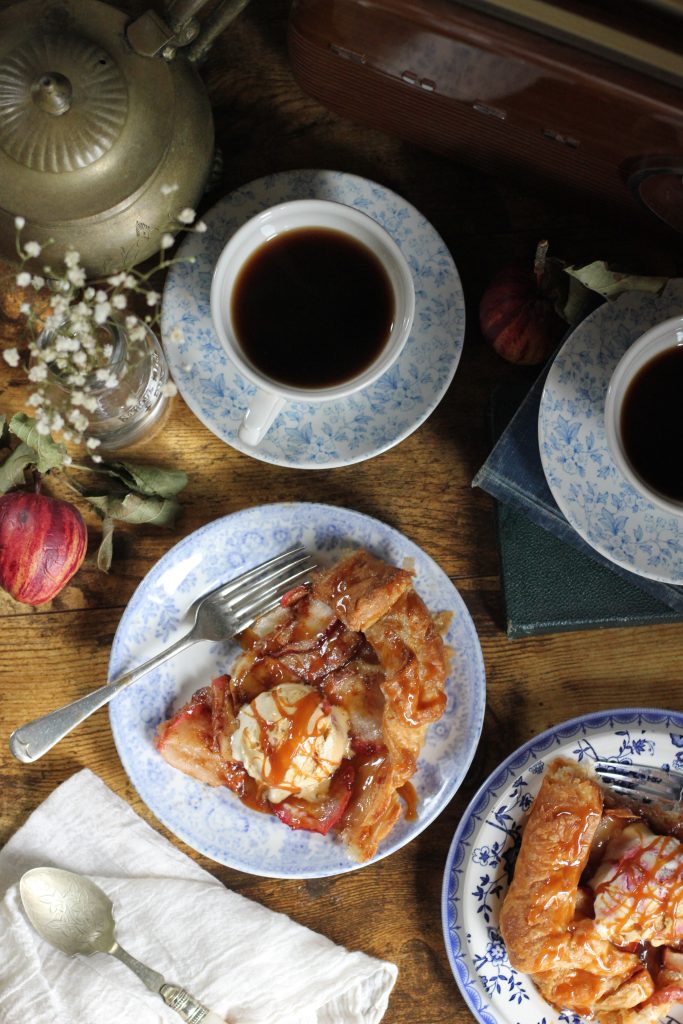
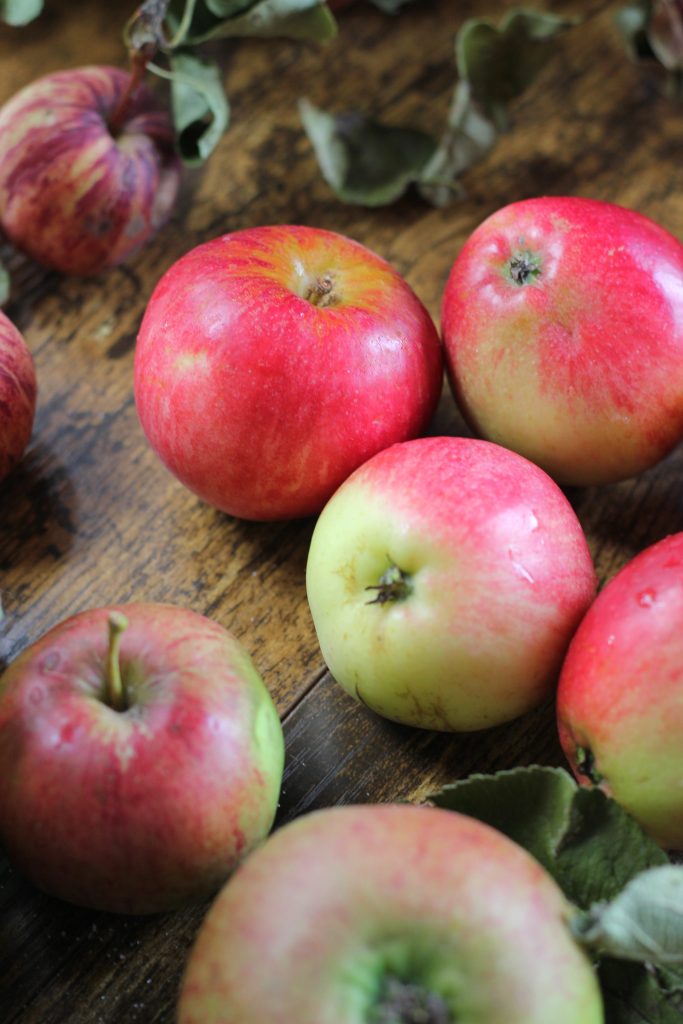
If you are looking to treat yourself or loved ones to a delicious, autumnal, easy-to-make bake, this Caramel Apple Galette is the dessert for you. The star ingredient is our in-season Irish apple, and few other ingredients are needed to make this impressive dish.
This galette is best served straight from the oven with a good dollop of ice cream and an extra drizzle of caramel.
Take the puff pastry from the fridge 30 minutes before using.
Preheat the oven to 200°C/fan 180°C/Gas mark 6. Line a large baking tray with greaseproof paper.
To a large bowl, add the apple slices, caster sugar and cinnamon. Mix to combine.
In a small bowl, mix together the butter, sugar and cinnamon.
Unroll the pastry onto the tray. Spread an even layer of the butter mixture, leaving a border around the butter mixture. Top with an even layer of the apple slices. Bring the edges of the dough up and overlap a little over the filling to create a border.
Bake in the preheated oven for 30 minutes.
When hot from the oven, dust with icing sugar and drizzle over the caramel sauce.
This vibrant noodle soup is packed with fresh, nutrient-rich, seasonal vegetables such as mushrooms, courgette, and purple sprouting broccoli, all simmered in a light, flavourful stock. Once all the vegetables are prepared, this dish comes together in minutes, making it the perfect meal for busy weeknights or cosy weekends.
Heat the oil in a large saucepan, over a medium heat. Add the mushrooms, onion and courgette. Add the chilli flakes and season with a little salt and pepper. Stir to combine and cook for 3-4 minutes, until the vegetables are beginning to soften.
Stir through the garlic. Add the stock, ketjap manis, noodles and broccoli. Cover with a lid and simmer gently for 10 minutes.
Take from the heat and stir through the scallions. Serve straight away, topped with fresh chilli, scallion, and some sesame seeds.
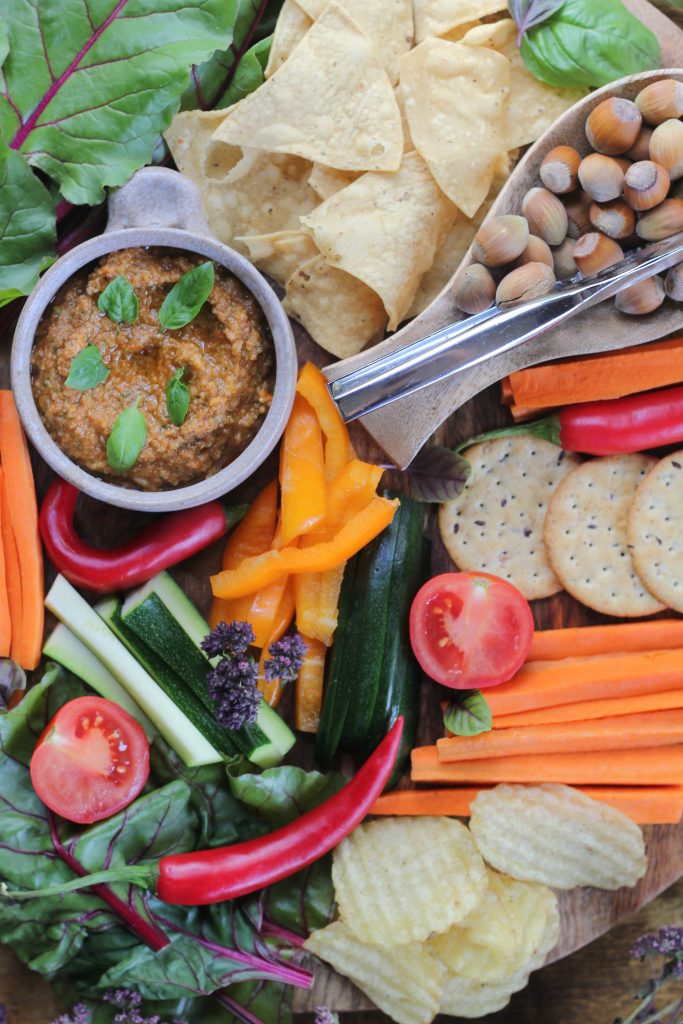
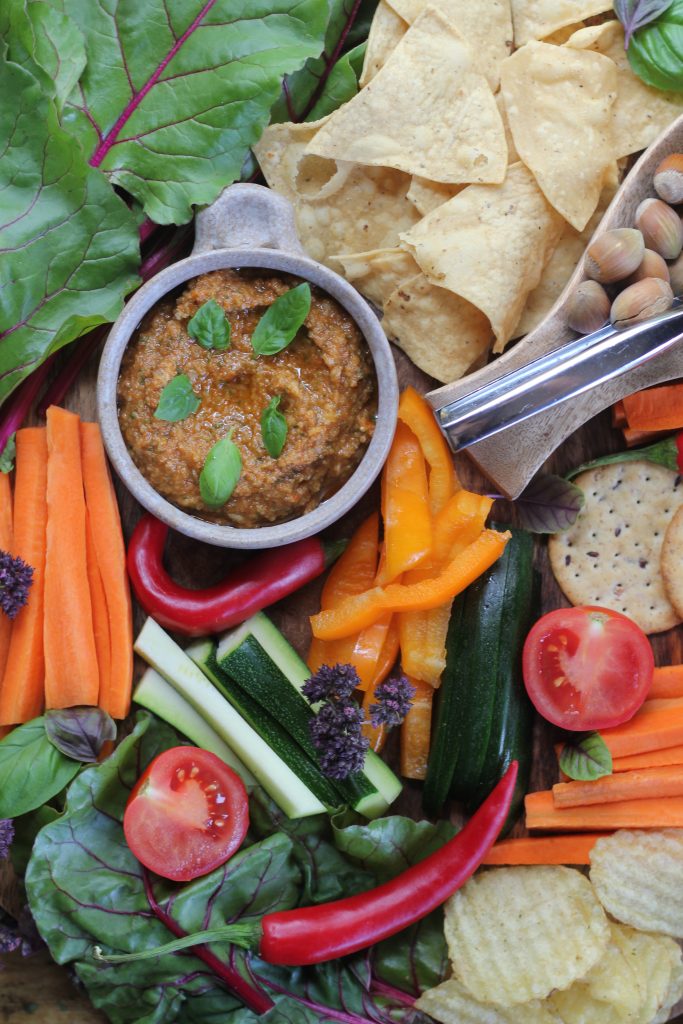
At last week’s farm walk, I set-up a beautiful display in the middle of the farm shop, using the best of fresh produce. Tucked in-between the prepared fruit and vegetables, I included a tray of mini energy balls, and some scrumptious dips. This sun-dried tomato pesto was by far the most requested recipe, and for good reason. It’s rich and flavoursome, and makes for the perfect accompaniment to crudites, but it can also be served with pasta, roasted vegetables, or as a delicious sandwich filler.
To ensure this dish is as tasty as possible, use a good quality jar of sun-dried tomatoes. Some tend to be quite salty and will ruin the overall taste of the pesto. Also, organic garlic will always taste superior too, so seek it out when you can.
This Tomato Bruschetta makes for a delicious lunch or tea. It is packed with fresh flavours and plenty of nutrients too. Irish-grown tomatoes are now in-season and they really are a taste sensation. When making this dish, make sure to choose a really good quality bread. When it comes to the salad leaves, dress them lightly just before serving. This keeps the greens fresh and vibrant, preserving their texture and letting the pure flavours shine without turning limp or soggy. Enjoy the iconic taste of Ireland’s finest tomatoes in every bite!
Add the chopped tomatoes to a bowl with the basil. Drizzle over the olive oil and vinegar. Add a sprinkle of sea salt. Stir to combine and leave to one side.
Place a griddle pan over a high heat. Add a little drizzle of olive oil to both sides of the slices of bread. Add to the hot pan and toast until nicely browned. Take from the pan and rub each piece with the clove of garlic.
When ready to serve, add the lettuce leaves to a bowl, drizzle over the oil and honey, and add a squeeze of lemon. Toss to combine.
Place the bread on two plates and divide the tomato mixture, with the juices, to the top of each slice. Evenly top with the dressed salad leaves. Sprinkle over the fresh herbs and enjoy straightaway.
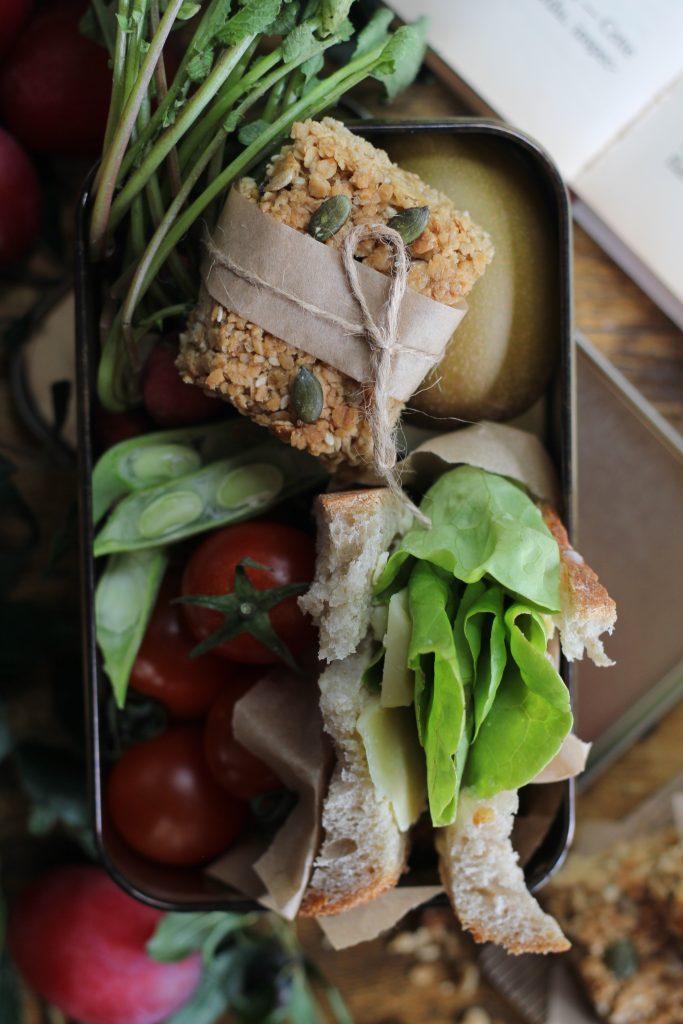
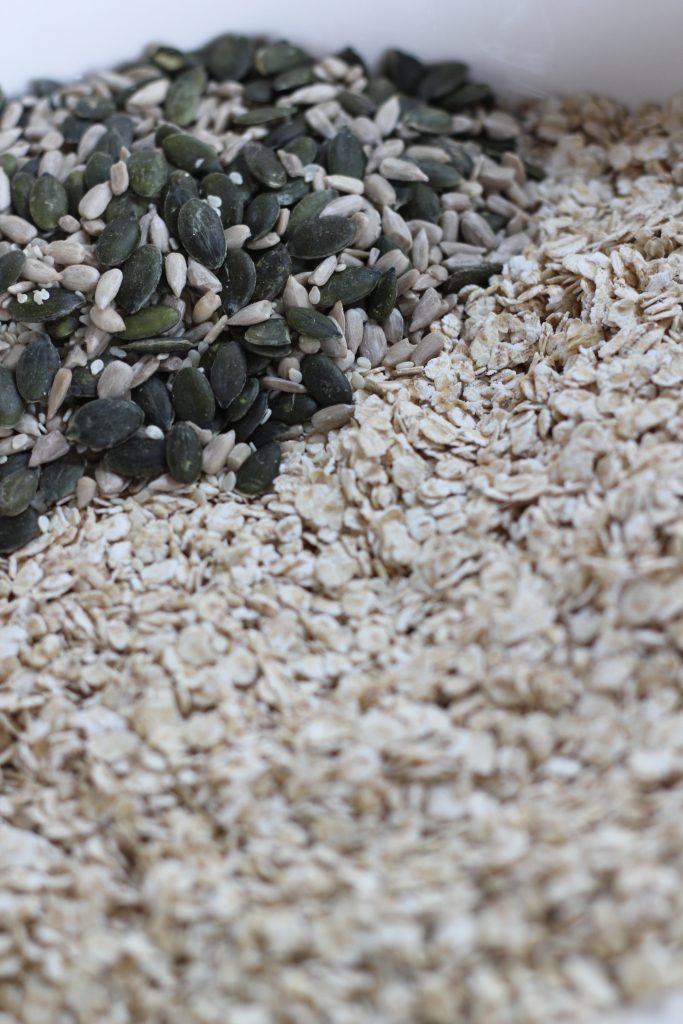
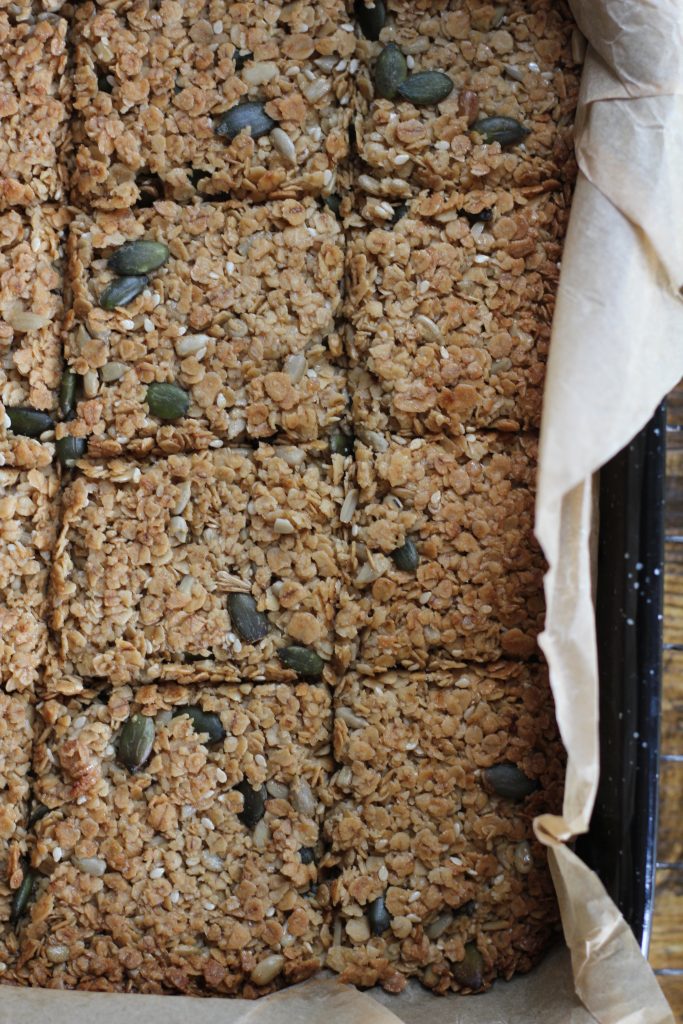
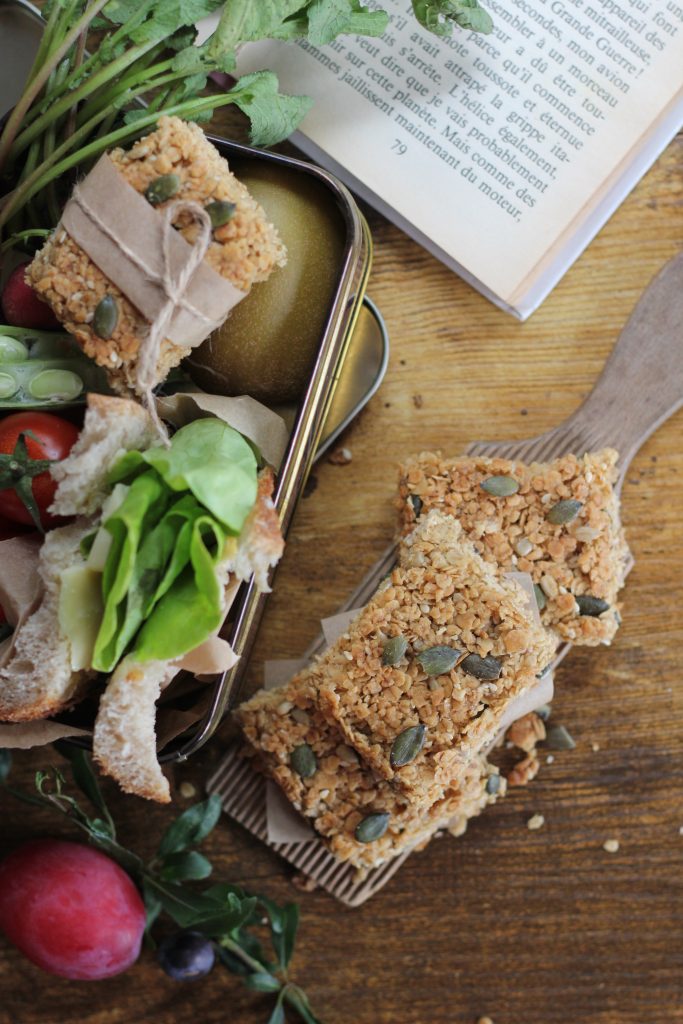
These multi-seed flapjacks make for a delicious addition to any lunchbox. They keep well in an airtight container for up to five days, and they also freeze well too. Once cooled, add to a freezer-proof container, and freeze for up to three months. To defrost, simply take what’s needed from the freezer and defrost overnight at room temperature in an airtight container. I’ve added a mix of pumpkin, sesame, and sunflower seeds, which add extra nutrients, flavour, and texture to the flapjacks.
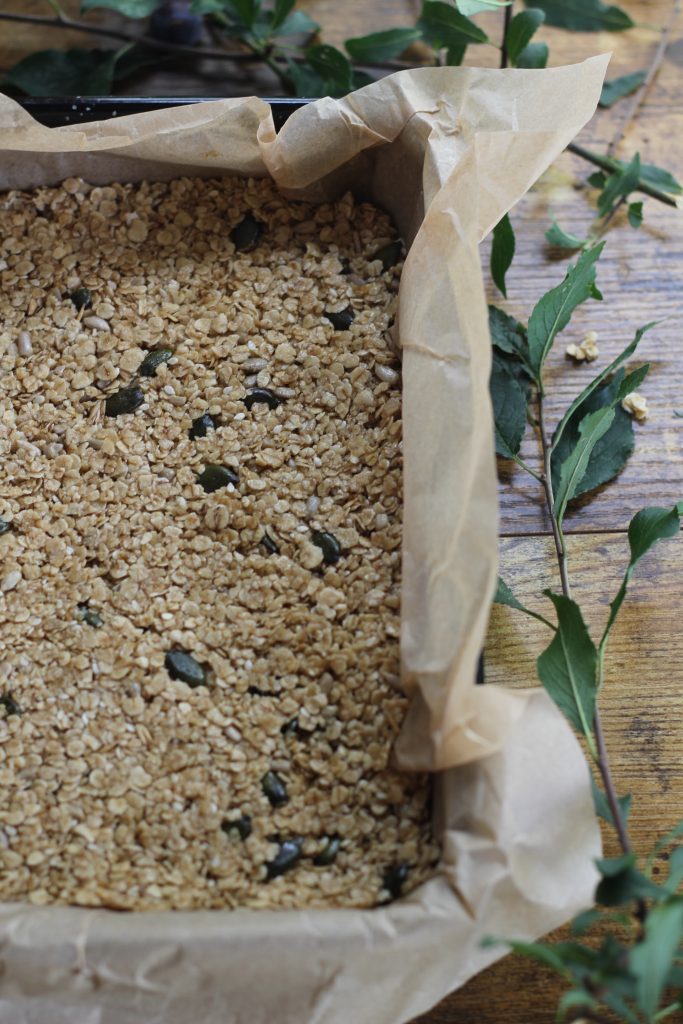
Preheat the oven to 200°C/fan 180°C/Gas 6. Line a 20cmx20cm baking tin with greaseproof paper
In a small saucepan, over a low heat, melt together the butter, sugar, golden syrup, and vanilla.
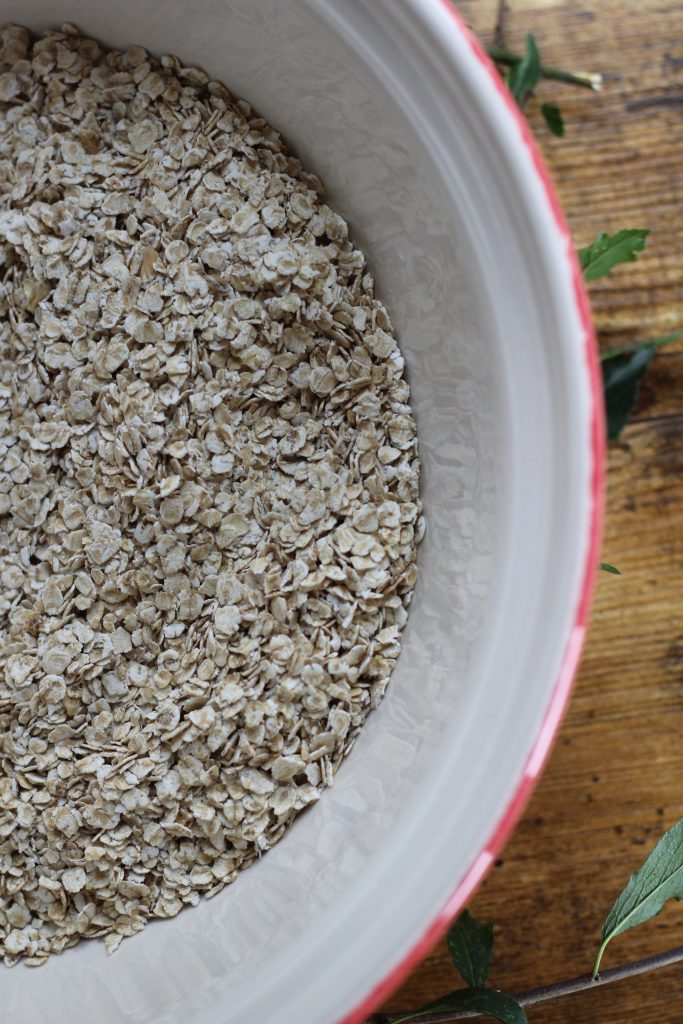
Once melted, take from the heat, stir through the oats and seeds, and stir to combine.
Transfer into the lined tin and press down well. Bake in the preheated oven for 18 minutes.
Take from the oven and place the tin on a wire rack. Carefully score 16 squares. Leave to cool completely in the tin before cutting fully and transferring to an air-tight container for up to five days.
Start your morning with a burst of wholesome goodness in this vibrant breakfast blueberry bowl. This delicious breakfast is built around juicy Irish-grown blueberries, which are bursting with flavour right now. I’ve paired them with a mix of fresh fruit from my Green Earth Organics box; whatever’s ripe and ready goes in! To add a bit of crunch and a touch of indulgence, I’ve whipped up a quick homemade granola that’s as simple as it is tasty. It’s fresh, nourishing, and a great start to the day!
Preheat the oven to 180°C/ fan 160°C / gas mark 4.
Combine all the ingredients in a large bowl. Line a baking tray with greaseproof paper and carefully add an even layer of the mixture, pressing it into place with the back of a spoon.
Bake for about 10 minutes, stirring a few times while it bakes. Remove and allow to fully cool before using or storing in an air-tight container for up to 1 week.