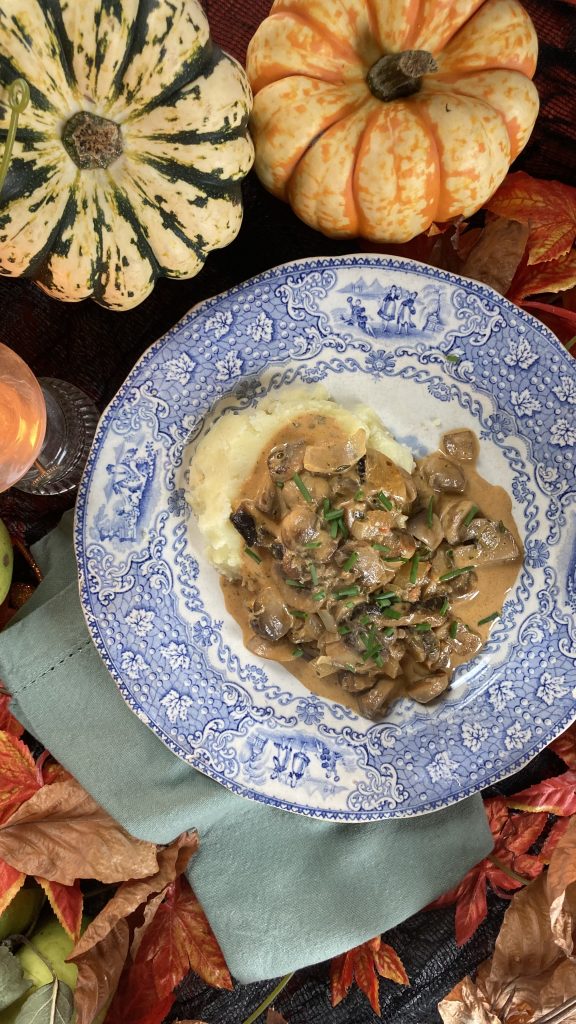
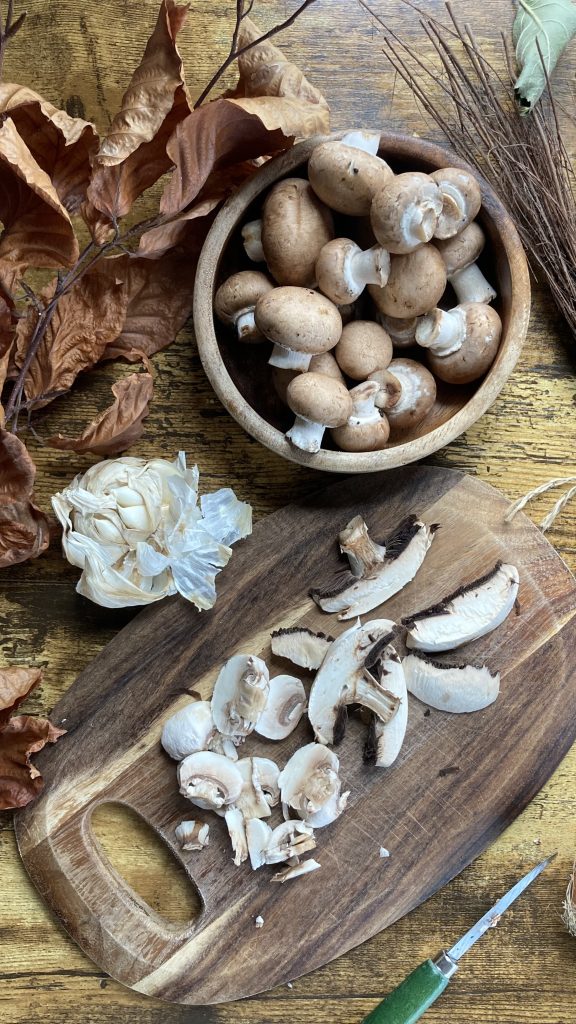
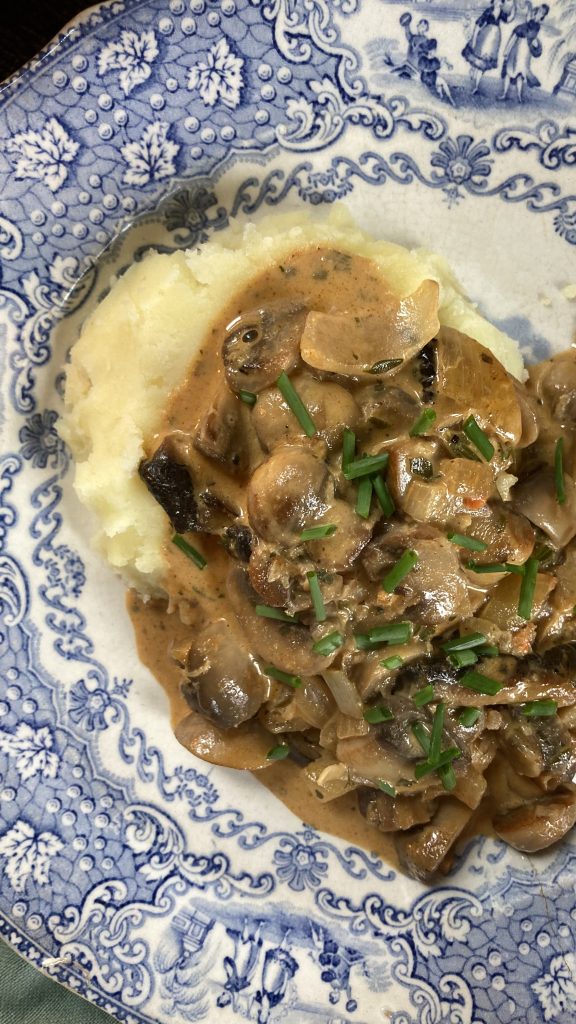
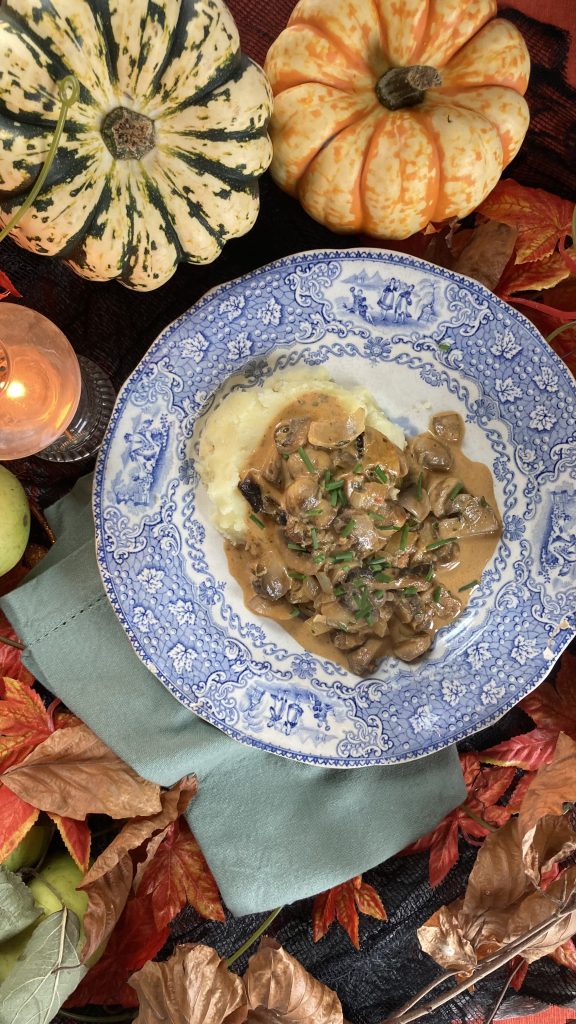
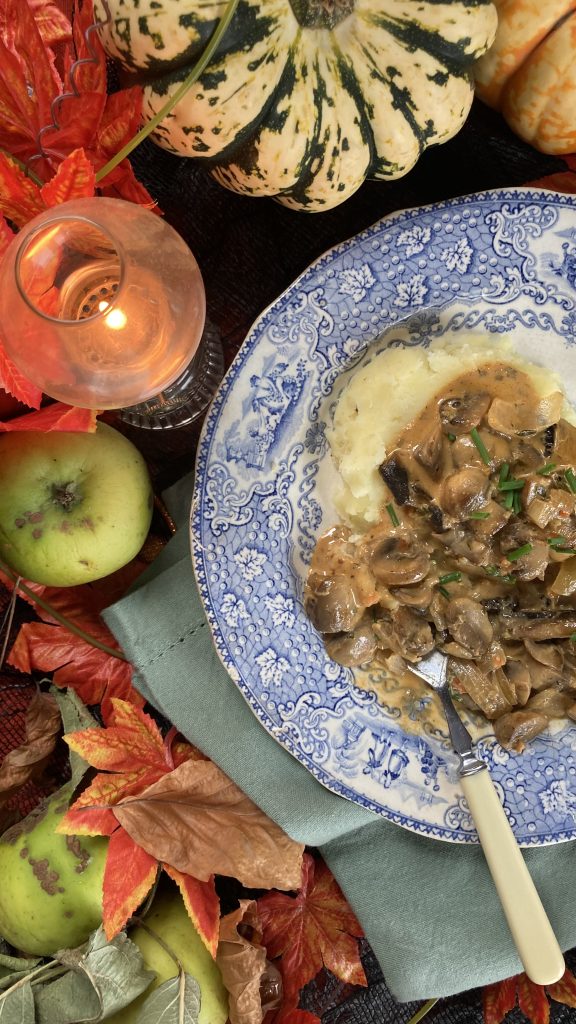
This is such a versatile recipe, as this creamy Mushroom dish serves well with potatoes, rice, pasta, and it’s even delicious served alongside some toast. Cooked mushrooms are a great source of B vitamins and antioxidants. When preparing mushrooms for cooking, avoid washing them with water, as their porous nature causes them to absorb moisture, which can negatively affect their texture and flavour during cooking.
Place a large frying pan over a medium heat. Add the butter. Once it starts to melt, add the mushrooms and onion. Stir to combine. Turn up the heat and cook for 5 minutes, stirring regularly.
Add the garlic, paprika, mustard, lemon, and thyme to the pan. Season with a little salt and pepper. Stir to combine and add the stock. Simmer gently for 15 minutes.
Stir though the cream and simmer for a further minute or two.
Serve straightaway with a scattering of freshly chopped chives.
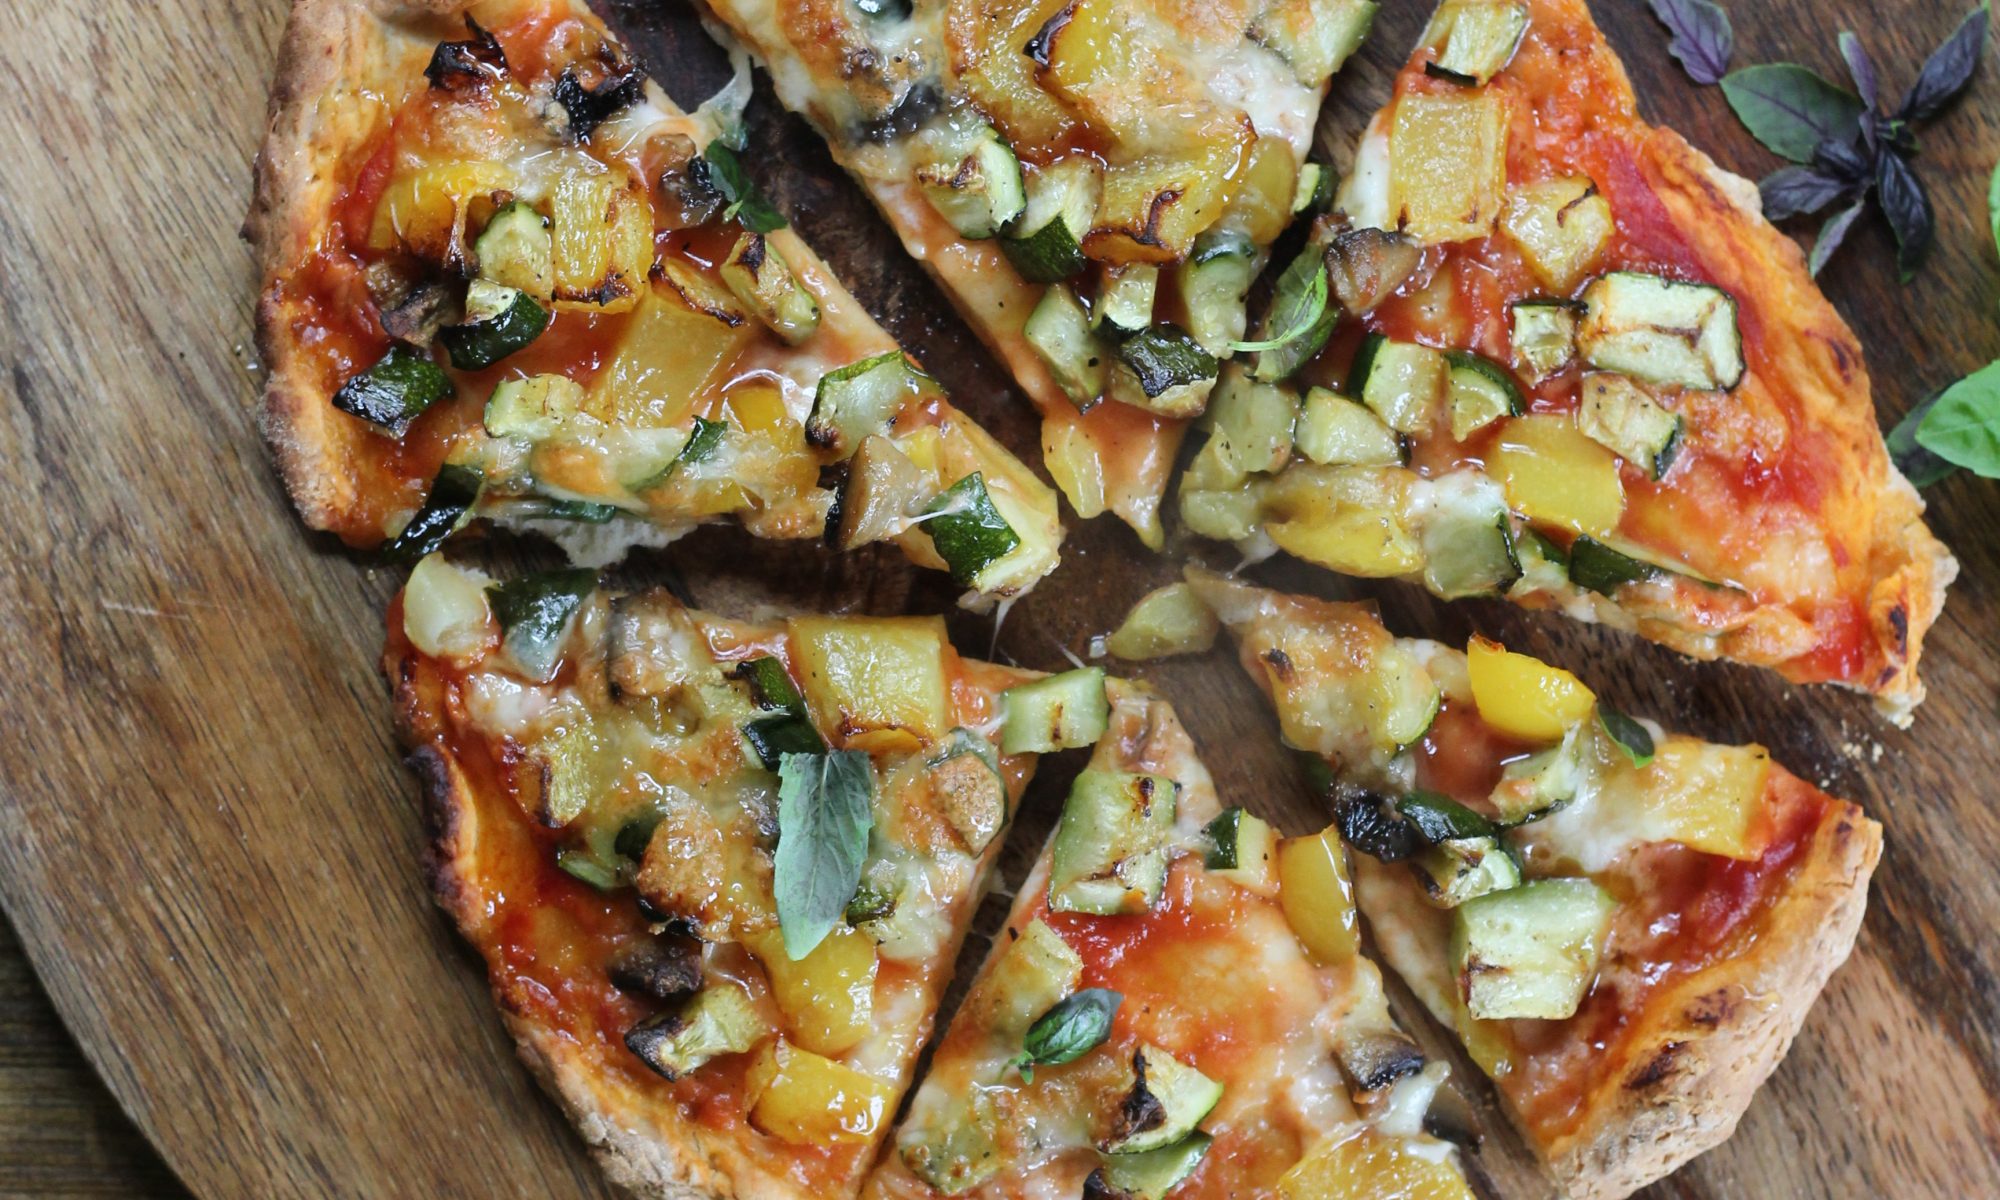
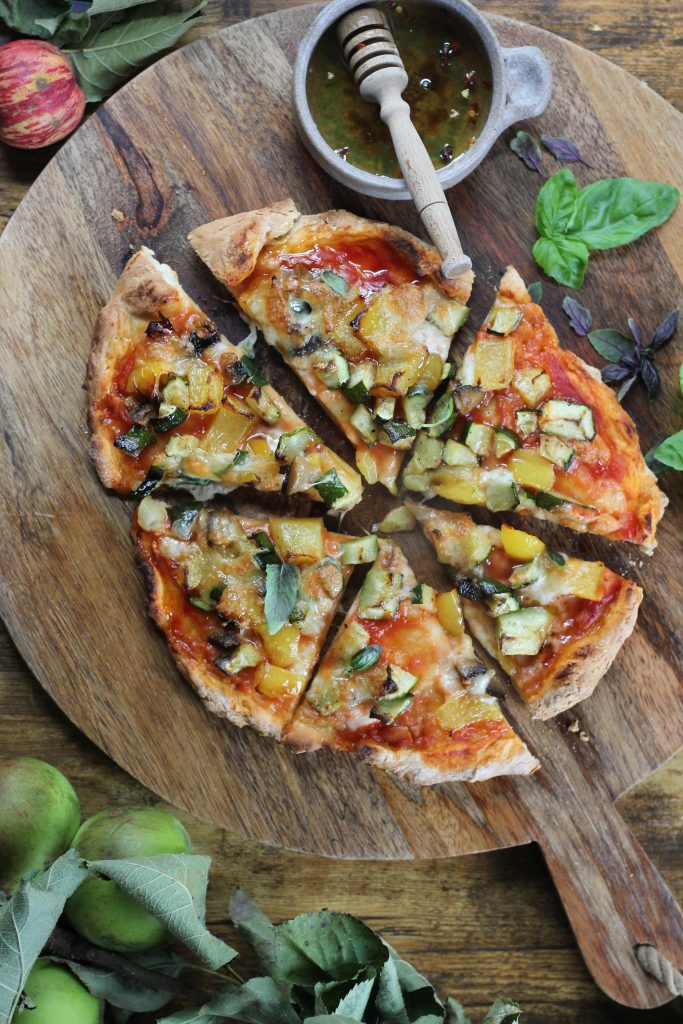
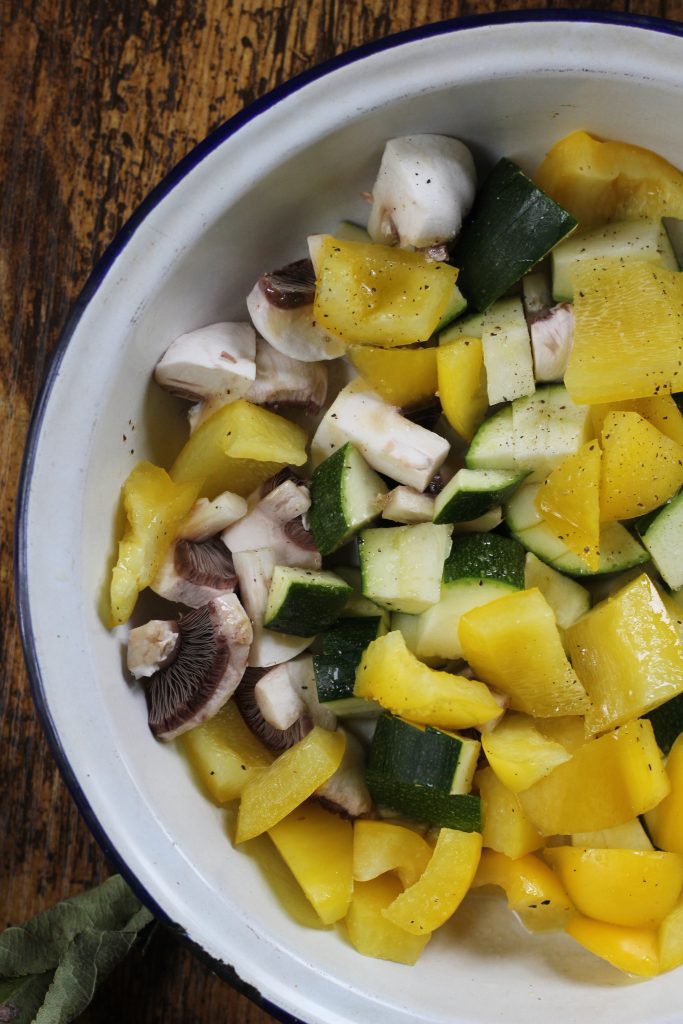
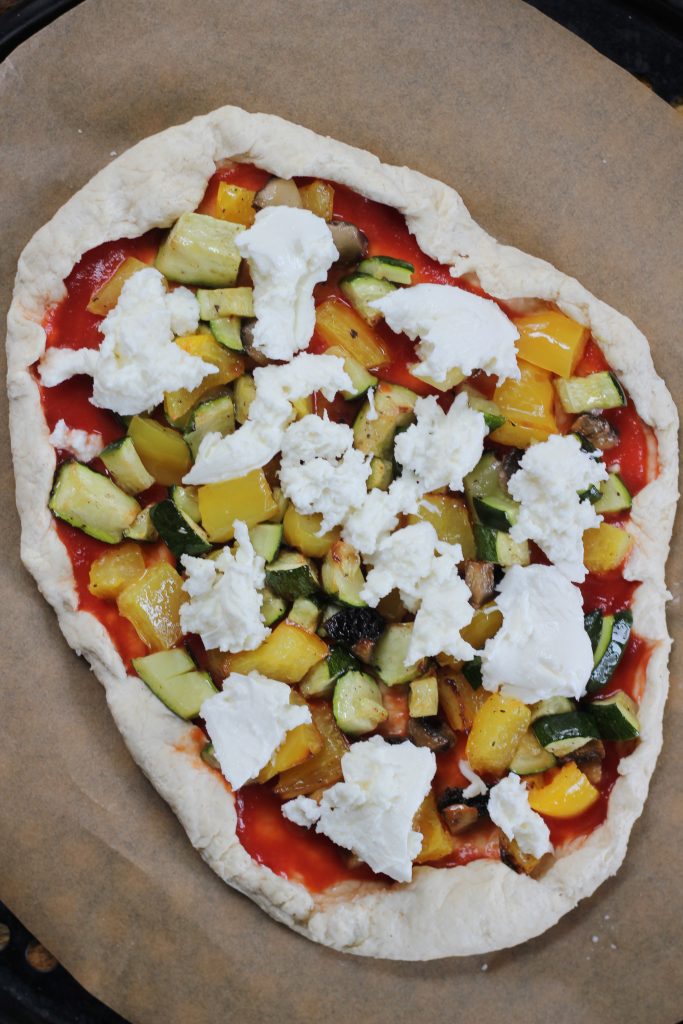
This delicious pizza is packed full of flavour and nutrients. The base is simply some self raising flour with yogurt and a little salt, which comes together with ease, and pairs so perfectly with the veggie-loaded topping. I’m using mushrooms, pepper, and courgette, but any soft vegetables could be used in their place.
These pizzas are best enjoyed straight from the oven but can be saved in an airtight container in the fridge to enjoy the next day, either cold or heated through.
To a medium-sized ovenproof dish, add the mushrooms, pepper and courgette. Drizzle over the olive oil and season with salt and pepper. Toss to combine. Bake in the preheated oven for 15 minutes.
In a large bowl, combine the flour with the salt and add the yogurt. With your hand or a fork, bring the mixture together to form a ball of dough. Cut into two halves.
Transfer to a floured board and roll each ball out to make the pizza bases.
Gently make a border for each pizza by gently folding the edges over. Divide the pizza sauce between the two pizzas. Top with the roasted vegetables and dot over the mozzarella.
Place in the preheated oven for 25-30 minutes, until it is cooked through, golden and bubbling.
Serve straightaway with a drizzle of honey and a scattering of basil leaves.
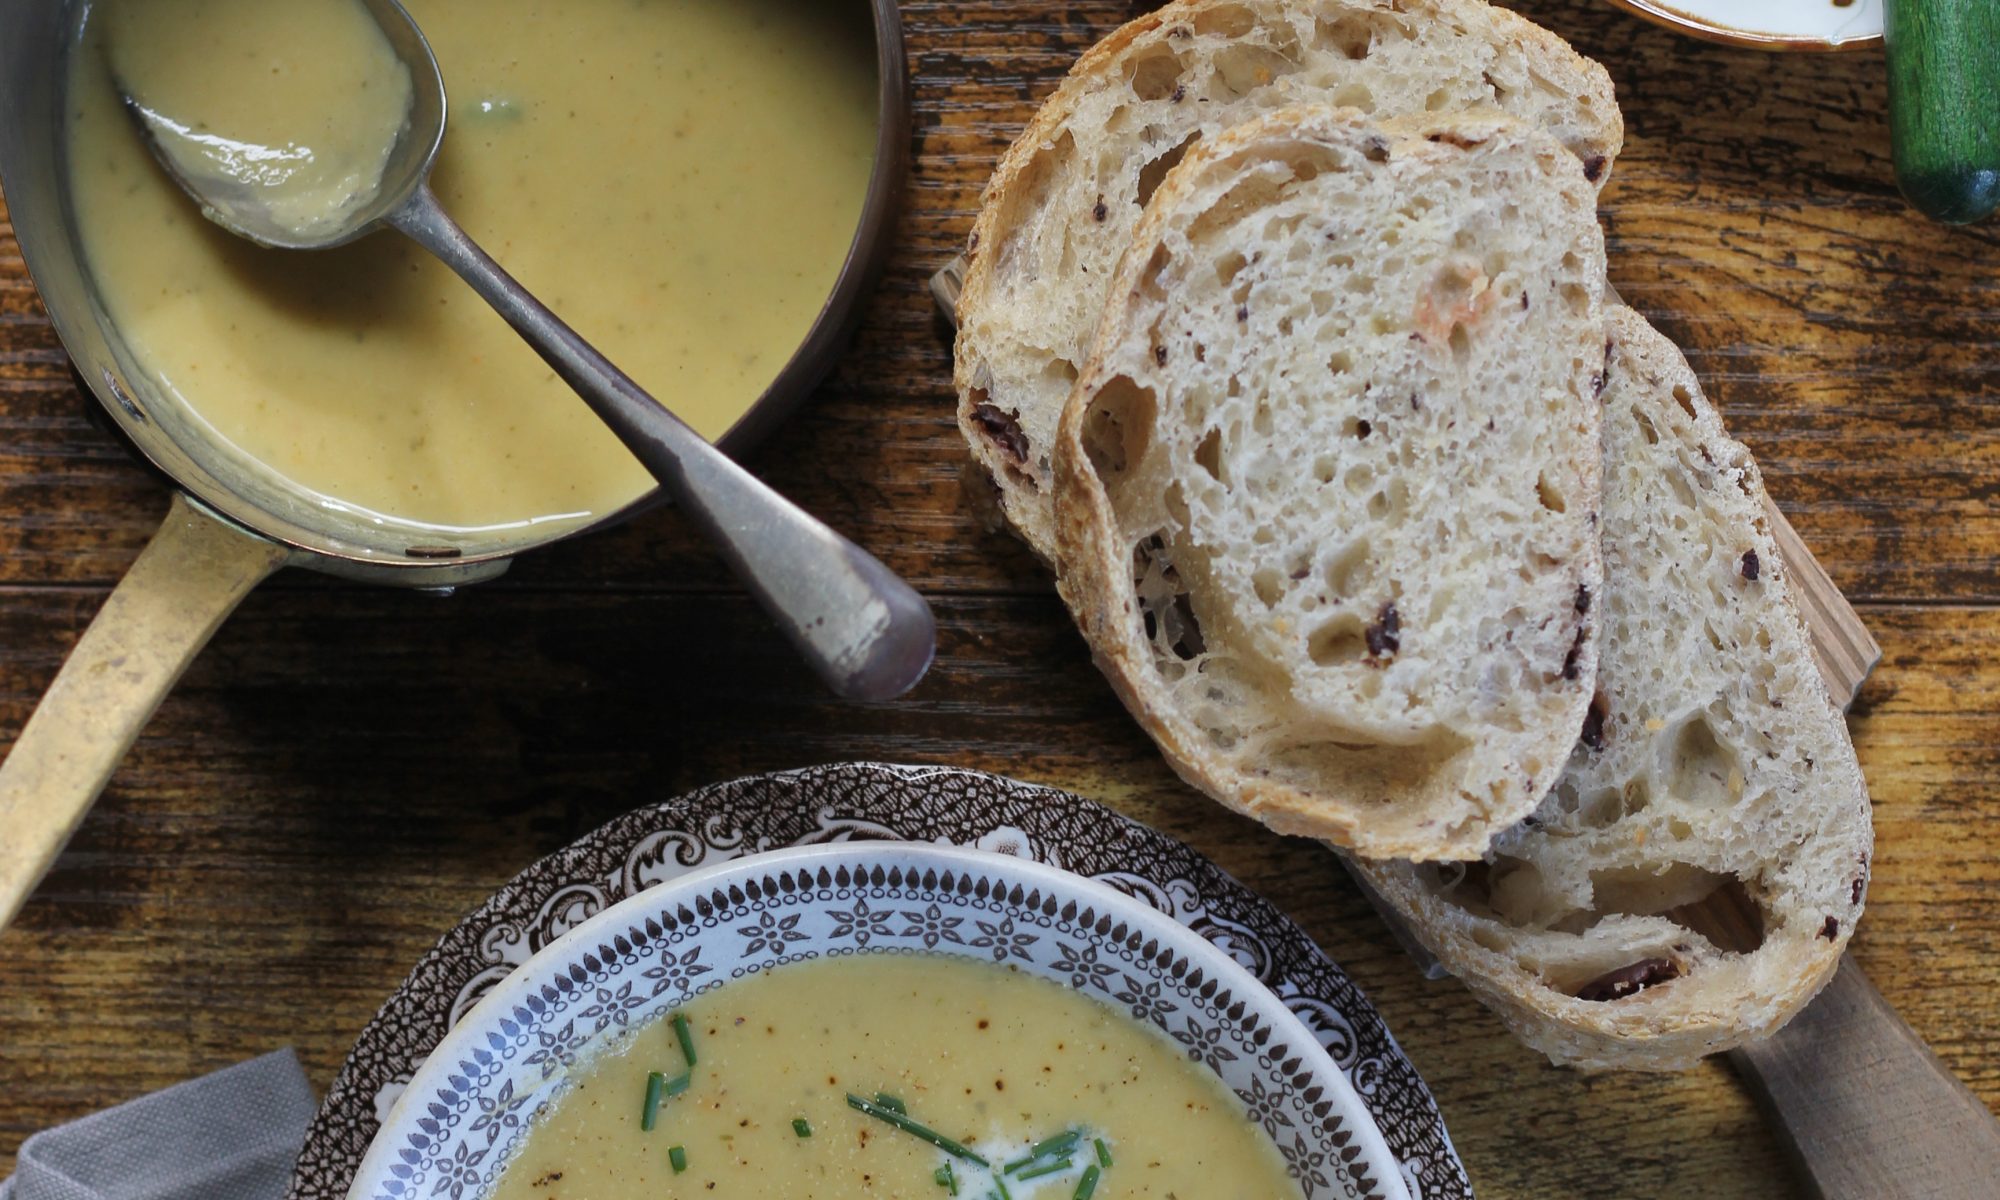
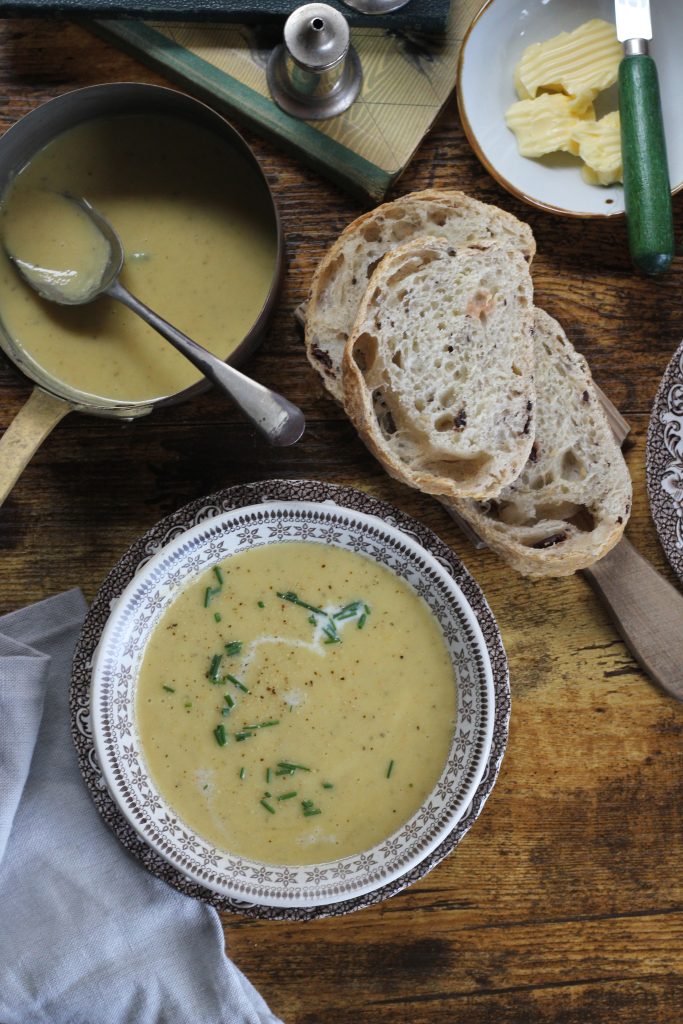
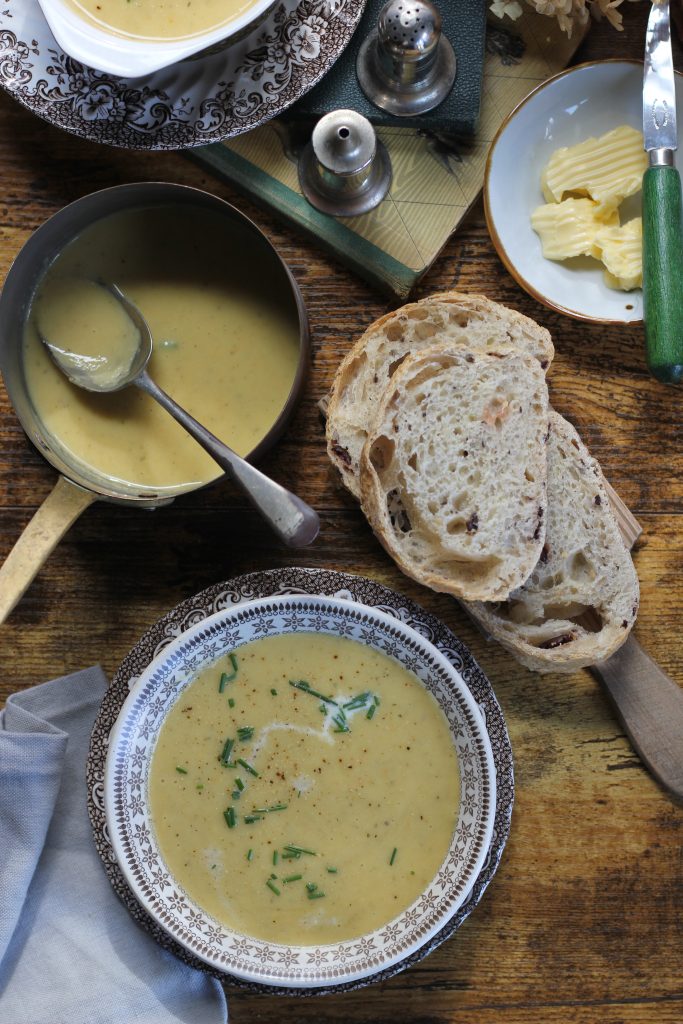
With the weather turning colder and the evenings drawing in, there’s nothing more comforting than a bowl of hot, homemade soup. I’m using freshly harvested parsnips from the farm which are sweet, earthy, and at their peak right now. Both parsnips and apples are in season here in Ireland, making this the perfect time to bring them together in a warming, autumnal dish. The gentle heat of curry spices pairs perfectly with the natural sweetness of the parsnips and apples, creating a soup that’s both nourishing and full of flavour.
Melt the butter in a large saucepan over a low heat. When it begins to foam add the parsnip, onion, apple, and garlic. Season with a little salt and a few grinds of pepper. Stir to combine with the butter.
Place a butter wrapper or a piece of greaseproof paper over the vegetables, to help them sweat. Cover with the lid of the saucepan. Sweat over a low heat for about 10 minutes, making sure the vegetables don’t stick to the bottom of the saucepan.
When the vegetables are soft but not coloured, stir through the curry powder, and add the stock. Turn up the heat a little and continue to cook for another 15 minutes or until the vegetables are soft.
Add the cream and using a hand blender or a food processor purée the soup until it is smooth. Taste and season, if necessary.
Pour the soup into serving bowls and garnish with a little drizzle of cream and some finely chopped chives.
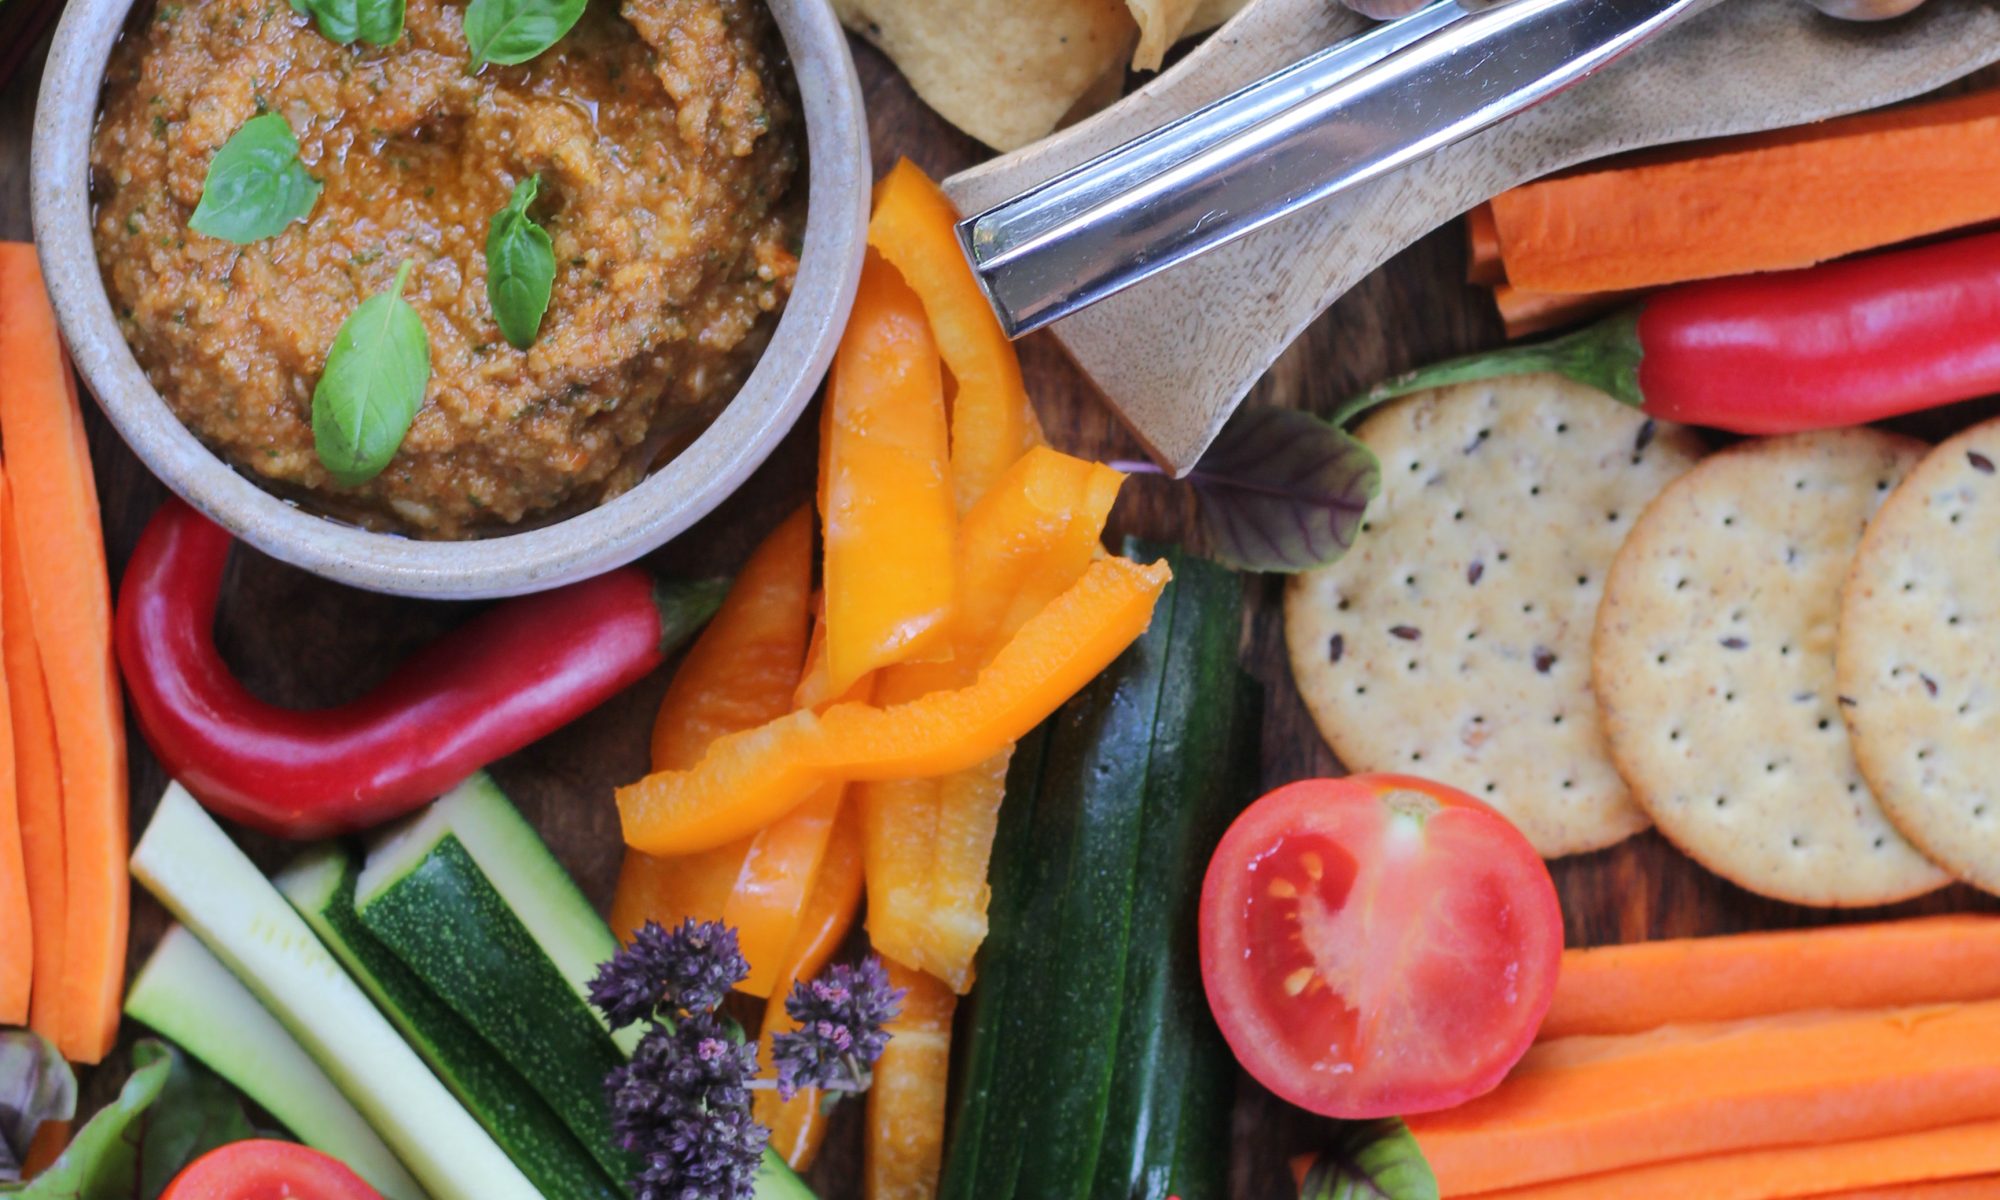
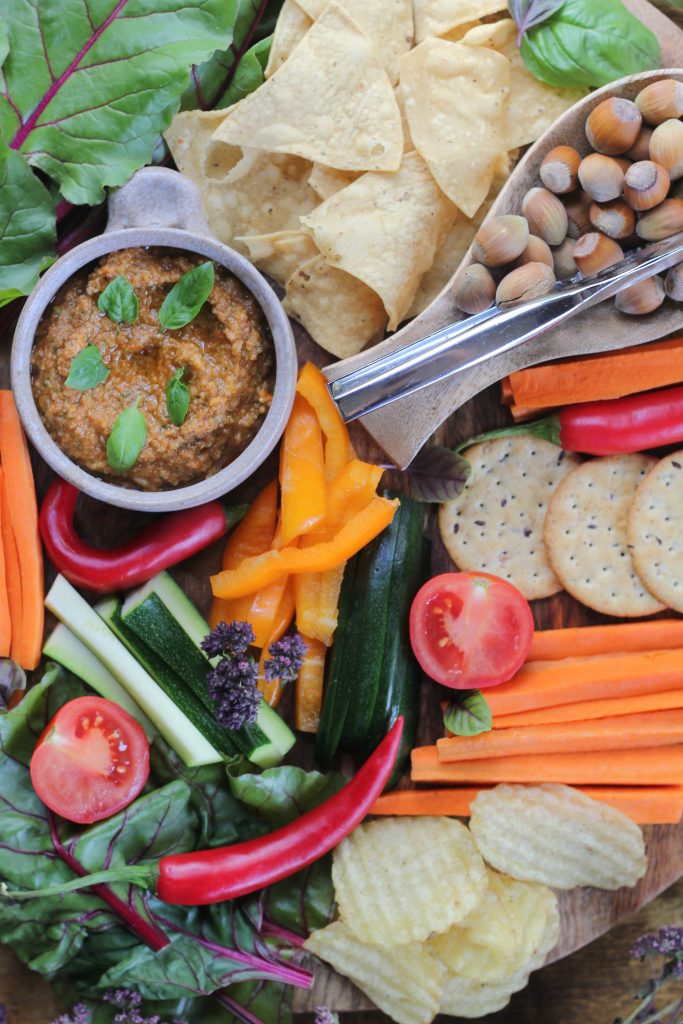
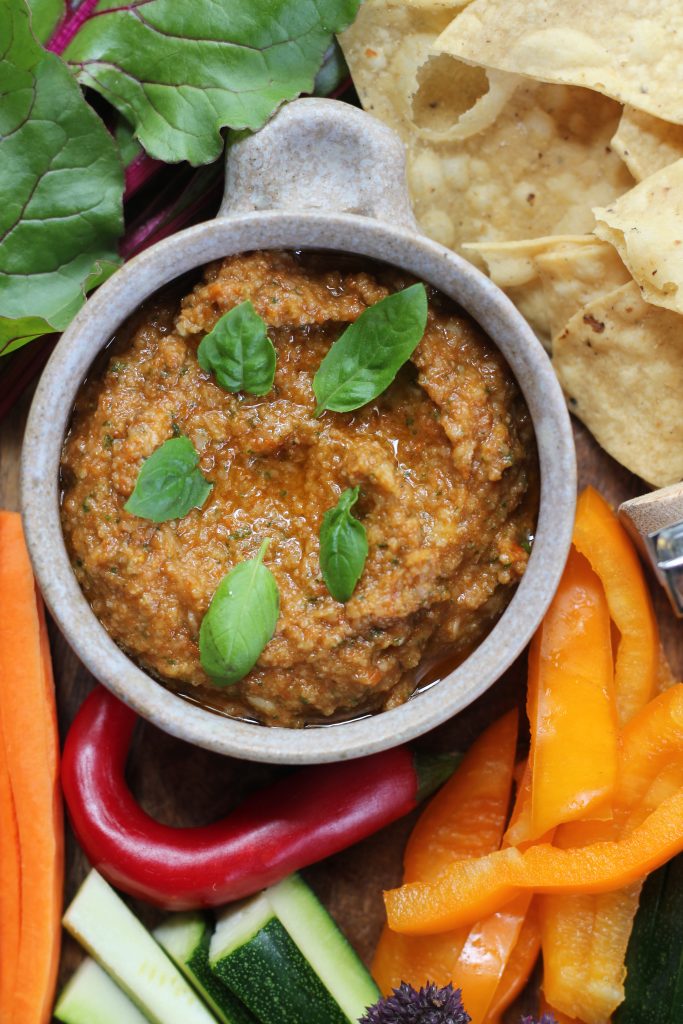
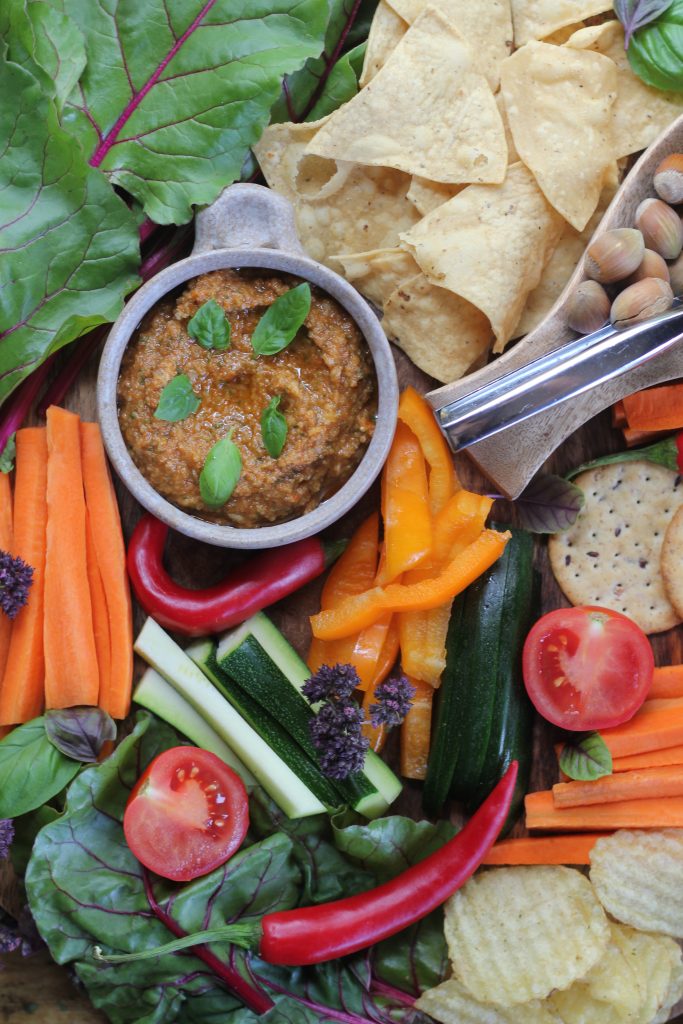
At last week’s farm walk, I set-up a beautiful display in the middle of the farm shop, using the best of fresh produce. Tucked in-between the prepared fruit and vegetables, I included a tray of mini energy balls, and some scrumptious dips. This sun-dried tomato pesto was by far the most requested recipe, and for good reason. It’s rich and flavoursome, and makes for the perfect accompaniment to crudites, but it can also be served with pasta, roasted vegetables, or as a delicious sandwich filler.
To ensure this dish is as tasty as possible, use a good quality jar of sun-dried tomatoes. Some tend to be quite salty and will ruin the overall taste of the pesto. Also, organic garlic will always taste superior too, so seek it out when you can.
This Tomato Bruschetta makes for a delicious lunch or tea. It is packed with fresh flavours and plenty of nutrients too. Irish-grown tomatoes are now in-season and they really are a taste sensation. When making this dish, make sure to choose a really good quality bread. When it comes to the salad leaves, dress them lightly just before serving. This keeps the greens fresh and vibrant, preserving their texture and letting the pure flavours shine without turning limp or soggy. Enjoy the iconic taste of Ireland’s finest tomatoes in every bite!
Add the chopped tomatoes to a bowl with the basil. Drizzle over the olive oil and vinegar. Add a sprinkle of sea salt. Stir to combine and leave to one side.
Place a griddle pan over a high heat. Add a little drizzle of olive oil to both sides of the slices of bread. Add to the hot pan and toast until nicely browned. Take from the pan and rub each piece with the clove of garlic.
When ready to serve, add the lettuce leaves to a bowl, drizzle over the oil and honey, and add a squeeze of lemon. Toss to combine.
Place the bread on two plates and divide the tomato mixture, with the juices, to the top of each slice. Evenly top with the dressed salad leaves. Sprinkle over the fresh herbs and enjoy straightaway.
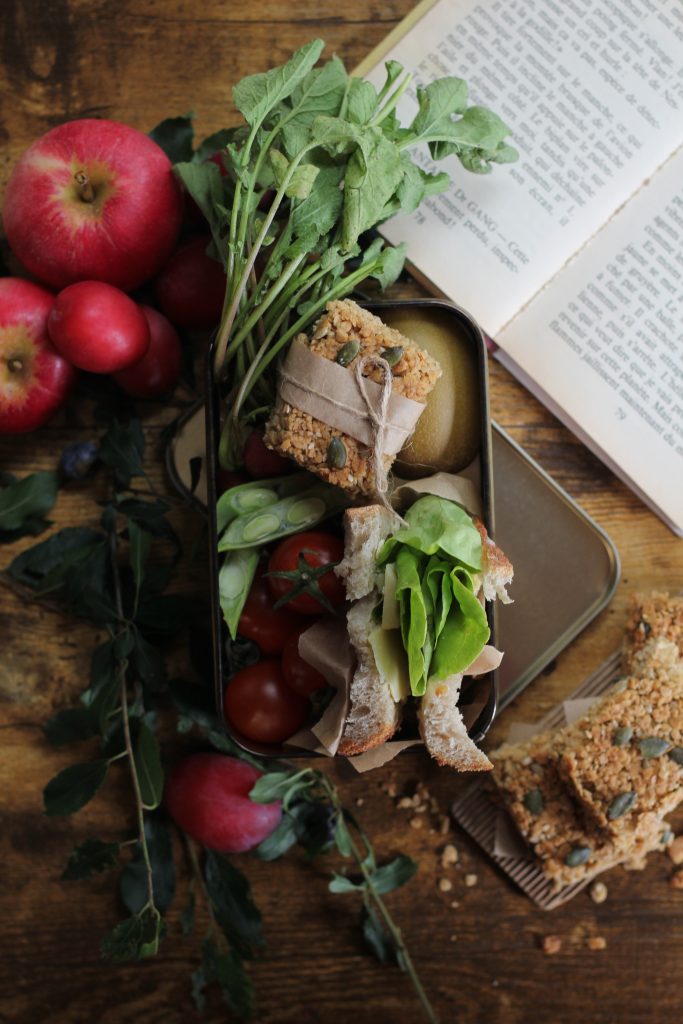
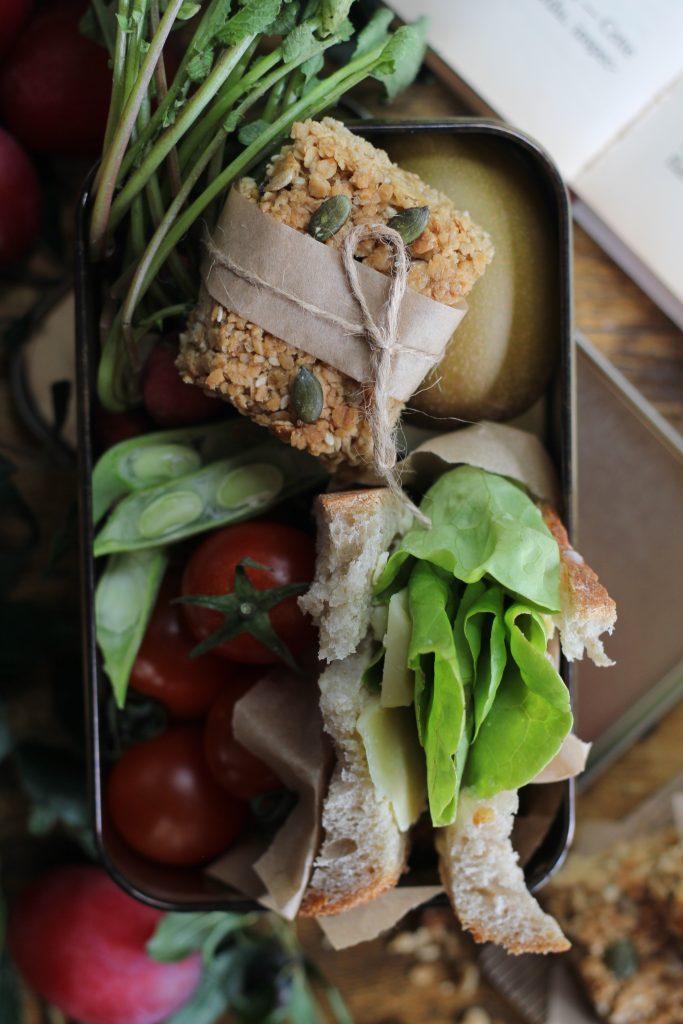
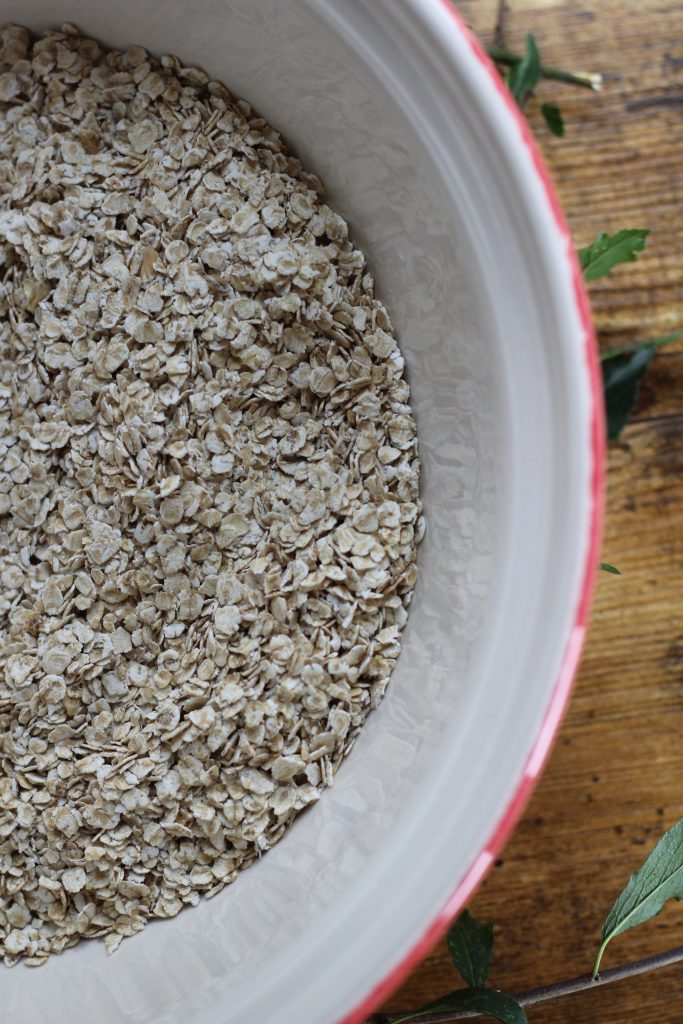
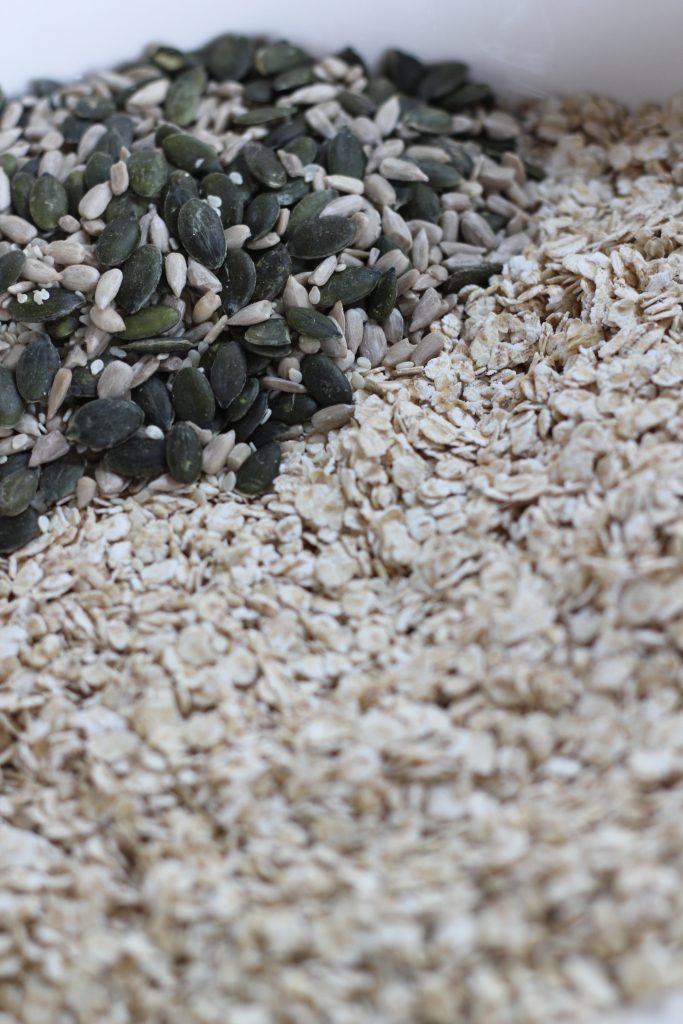
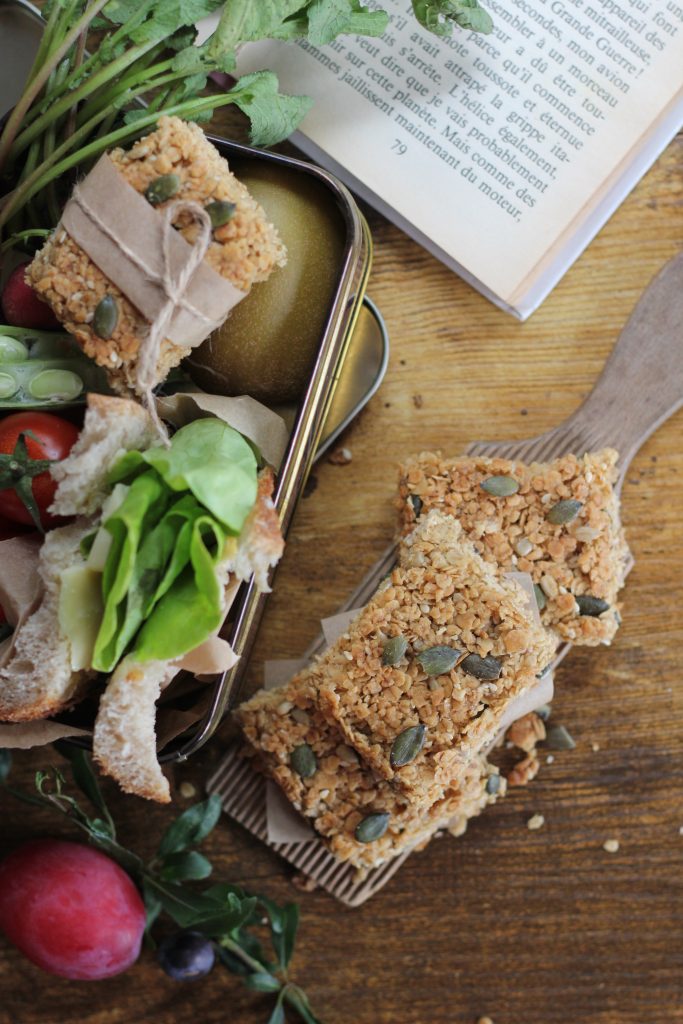
These multi-seed flapjacks make for a delicious addition to any lunchbox. They keep well in an airtight container for up to five days, and they also freeze well too. Once cooled, add to a freezer-proof container, and freeze for up to three months. To defrost, simply take what’s needed from the freezer and defrost overnight at room temperature in an airtight container. I’ve added a mix of pumpkin, sesame, and sunflower seeds, which add extra nutrients, flavour, and texture to the flapjacks.
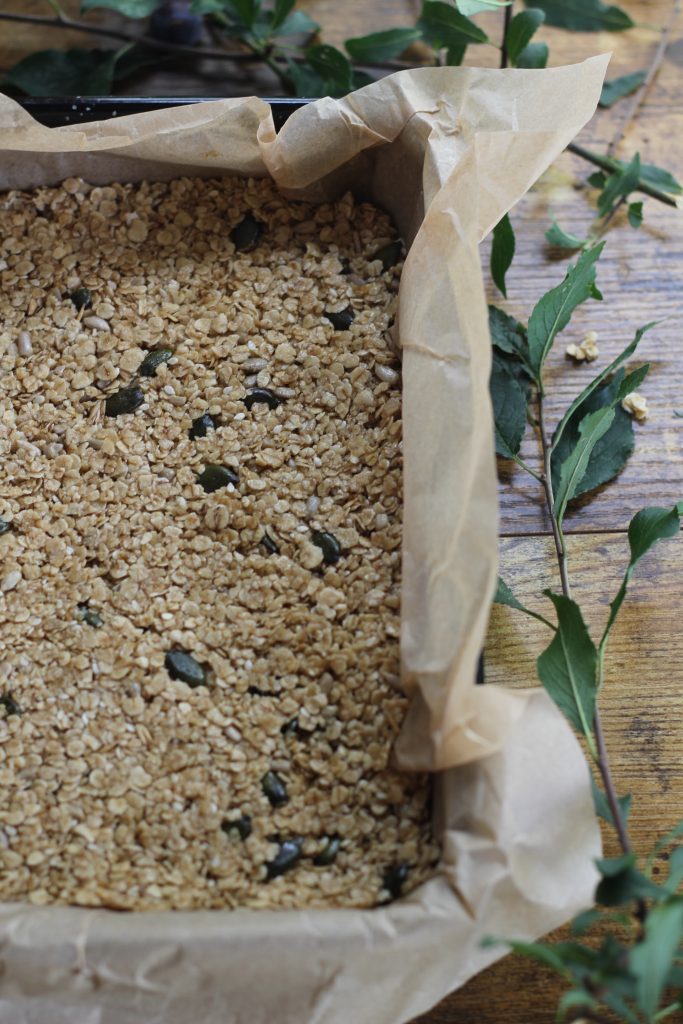
Preheat the oven to 200°C/fan 180°C/Gas 6. Line a 20cmx20cm baking tin with greaseproof paper
In a small saucepan, over a low heat, melt together the butter, sugar, golden syrup, and vanilla.
Once melted, take from the heat, stir through the oats and seeds, and stir to combine.
Transfer into the lined tin and press down well. Bake in the preheated oven for 18 minutes.
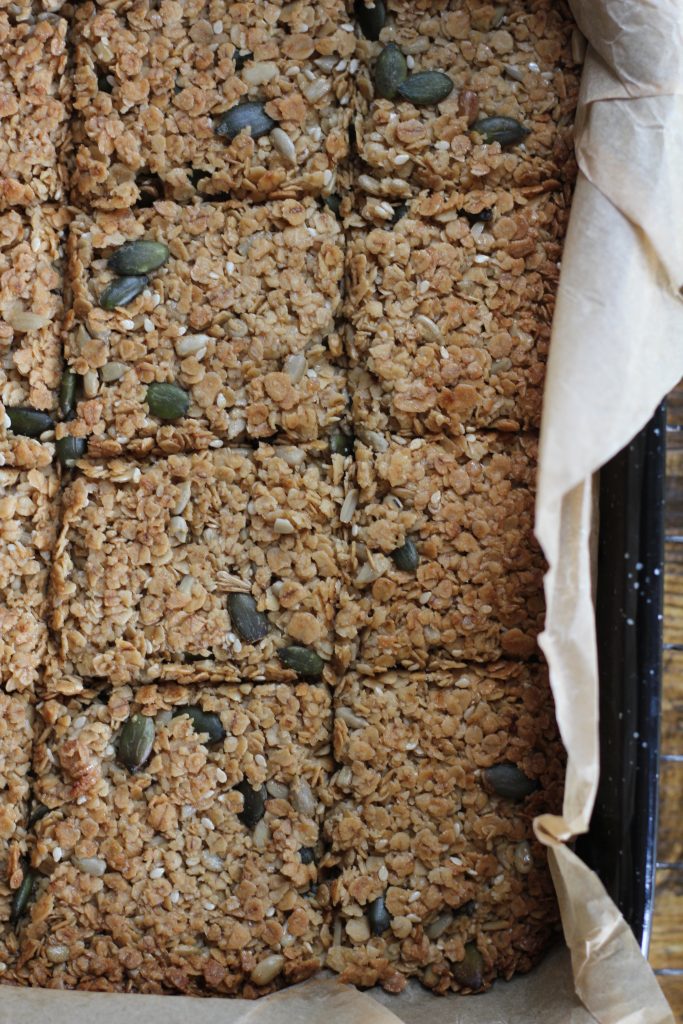
Take from the oven and place the tin on a wire rack. Carefully score 16 squares. Leave to cool completely in the tin before cutting fully and transferring to an air-tight container for up to five days.
We’ve asked by many for advice on what to do when you’re faced with an abundance of seasonal vegetables. Pickling is a great way to preserve a harvest, or you could turn a bounty into a stash of jams or chutneys. Cake or muffin recipes, using carrot, beetroot, or courgette, such as the recipe we shared last week, can be baked, cooled, and popped in the freezer to enjoy at a later stage. While a tray of roasted vegetables can be enjoyed fresh or added to stock to make a soup, which could then be cooled and refrigerated or saved in the freezer for another time.
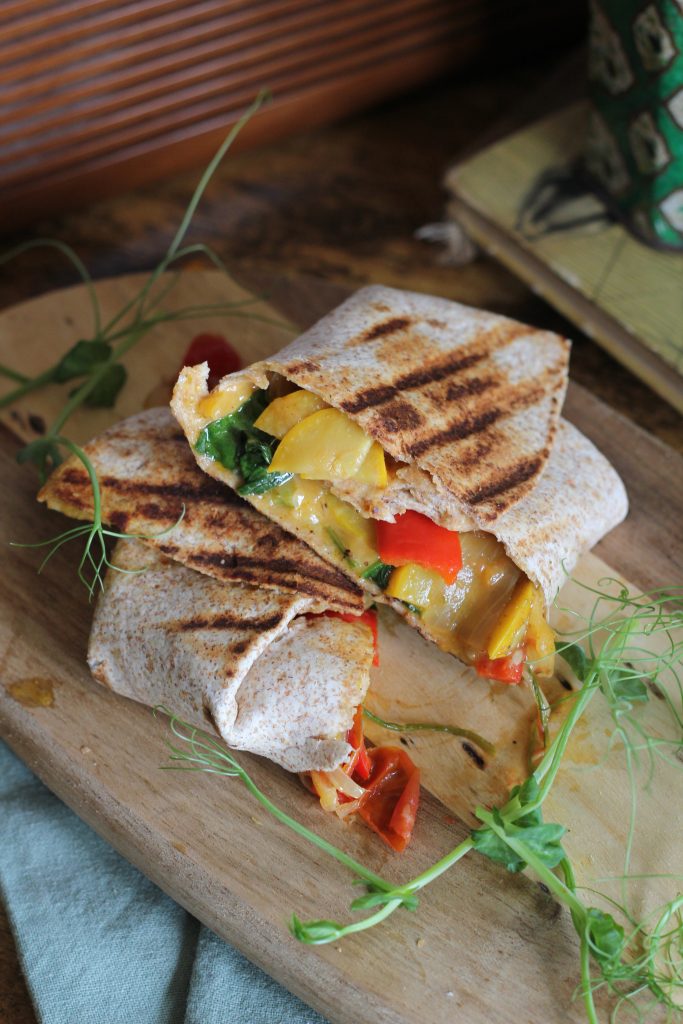
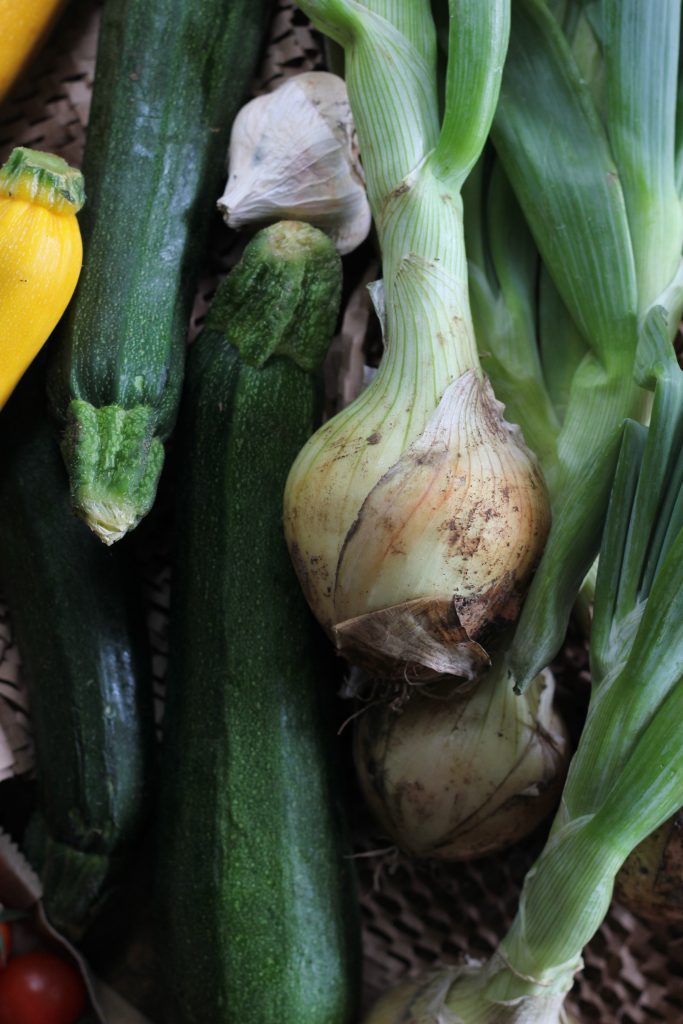
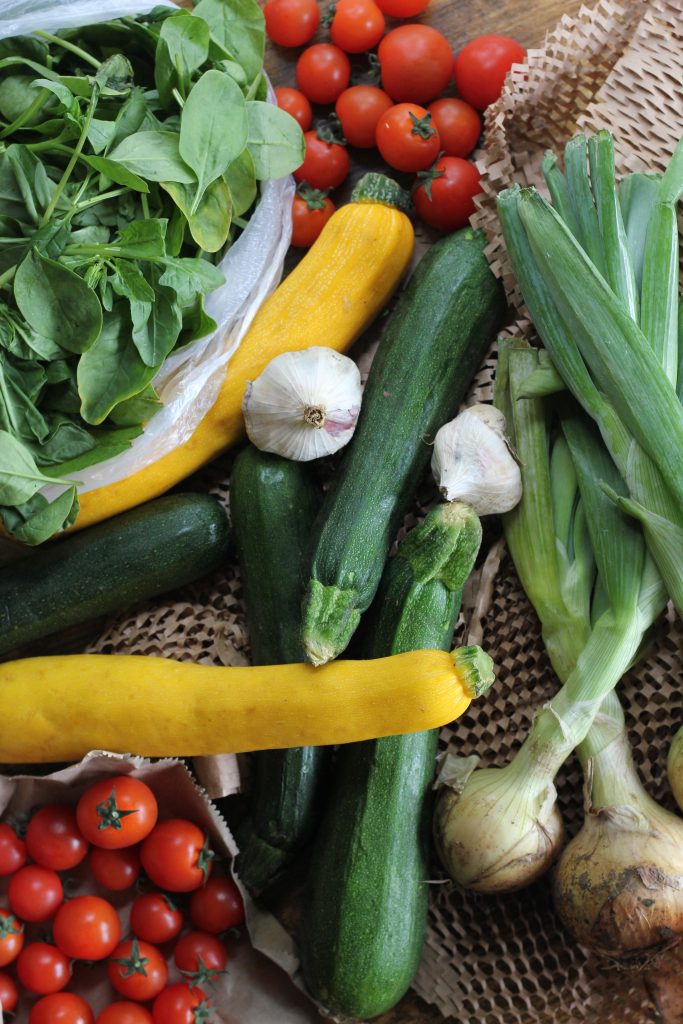
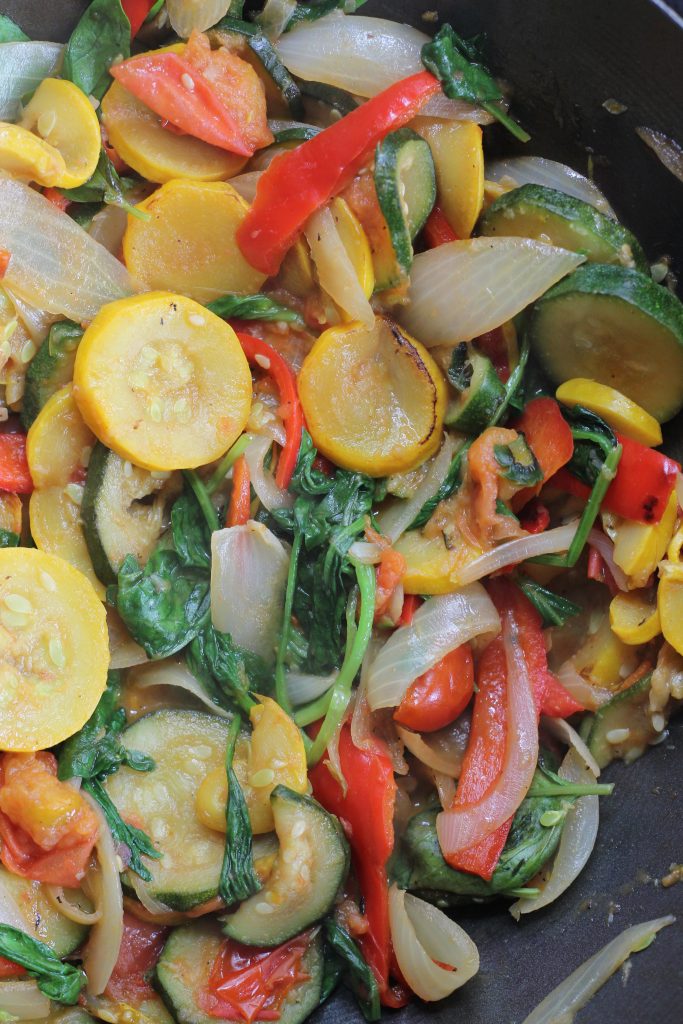
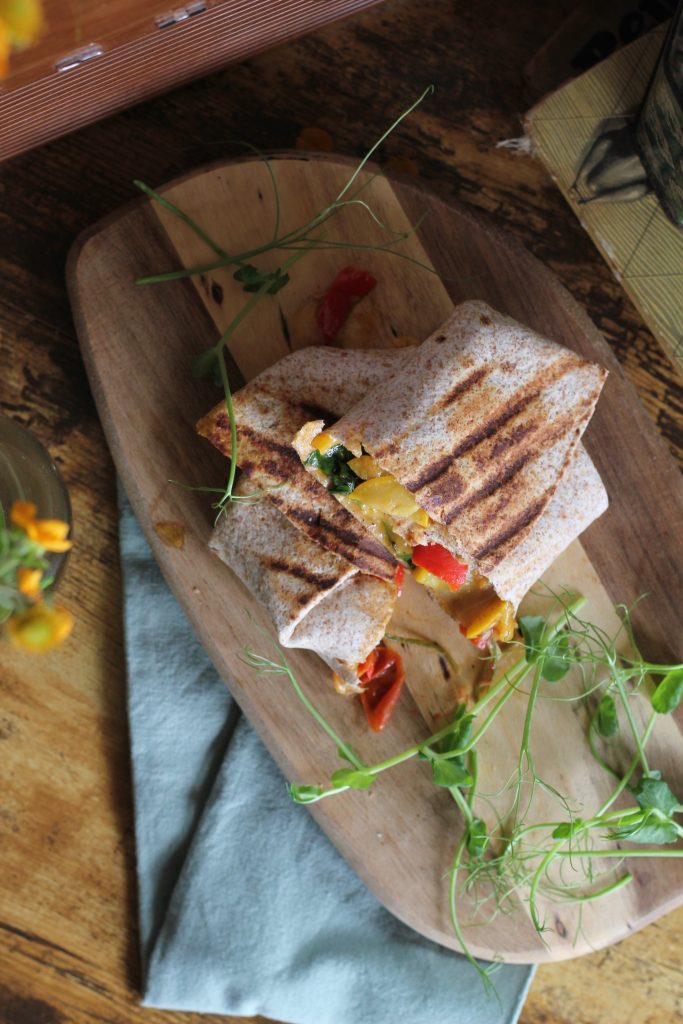
This mixed vegetable stir-fry can be enjoyed with rice or pasta but is particularly tasty when served in a wrap with the addition of pesto and cheese. Either assemble on the cold pan, before turning on the heat under, or assemble on a plate and transfer to the hot pan. Serve alongside a green salad for a delicious seasonal lunch.
Start by preparing all the vegetables. Add the olive oil to a large frying pan or wok and stir fry the courgette, pepper, and onion for about 5-7 minutes.
Add the tomatoes and garlic. Season with salt and pepper. Stir to combine and continue to cook for another few minutes, until the tomatoes have started to break down. Add the spinach and the roughly torn basil leaves. Stir through and after about a minute take from the heat.
To make the wrap, add a teaspoon of pesto evenly to a wrap, top with a layer of grated cheese and a good serving of the stir-fried vegetables. Fold in the side of the wrap over the filling and roll, tucking in the edges.
Add a little olive oil to a clean pan over a medium heat. Once hot, add the wrap and cook on each side for about 3 minutes. Serve warm and enjoy immediately.
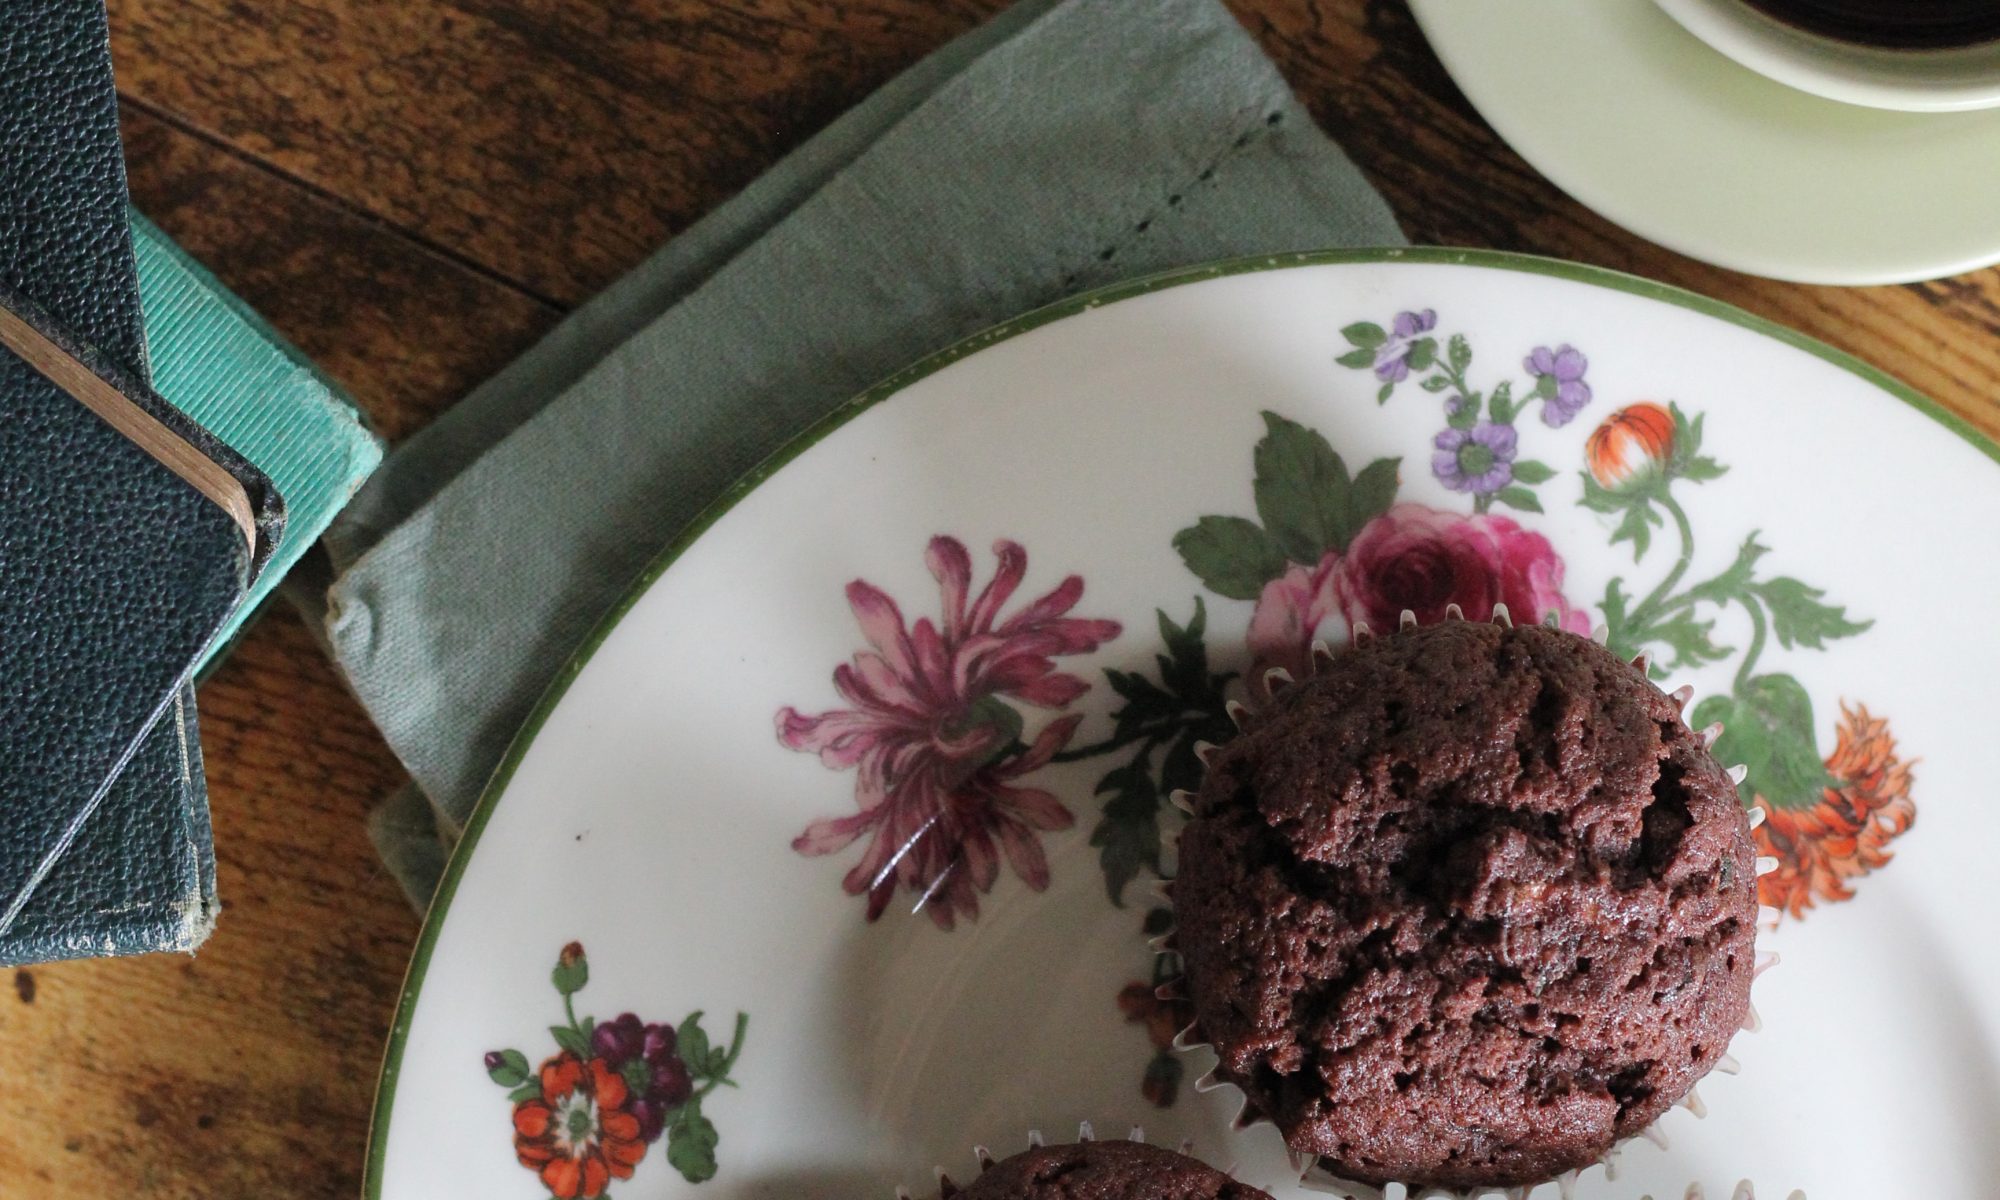
These rich, fudgy chocolate muffins have a secret ingredient—courgette! Baking with seasonal vegetables isn’t just tasty, it’s better for the planet. When you eat what’s in season, you cut down on long-distance transport and reduce your carbon footprint. While choosing pesticide-free produce, helps to protect pollinators, soil health, and our water sources.
So next time courgettes are in abundance, skip the waste and bake something delicious. Small choices, like this, make a big difference.
Pre-heat the oven to 200°C/ fan 180°C/gas mark 6. Line a 12-hole muffin tin with muffin cases.
Sieve the flour, sugar, cocoa powder, and mixed spice into a large bowl.
Add the courgette and stir well with a wooden spoon until thoroughly combined with the dry ingredients.
In a jug, lightly whisk together the eggs with the oil. Add to the dry ingredients and stir well until all the ingredients are well combined. Stir through the chocolate chips.
Divide the mixture between the prepared muffin cases.
Bake in the preheated oven for 20-25 minutes, until risen and golden. To test if the muffins are cooked insert a metal skewer and if it comes out clean the muffins are ready. Remove from the oven and leave to cool in the tin for 10 minutes before turning out onto a wire tray.
Store in an airtight container for up to three days. These muffins also freeze well – on the day they are baked, once fully cooled, store in the freezer in a freezer-proof container for up to three months.
I guarantee this will be the quickest dinner you will make this week and once you use local tomatoes it will be the most delicious too. It is now Irish tomato season and there are many ways to enjoy tomatoes at their best. Simply sliced with a sprinkling of salt has always been a favourite, but fresh in-season tomatoes are fantastic when lightly cooked and have the ability to instantly elevate a simple pasta dish.
Most fruit and vegetables are more nutritionally beneficial to us in their raw form. However, research has revealed that cooking tomatoes not only increases the level of lycopene, which is a powerful antioxidant in the tomatoes, but it also makes it easier for the body to absorb.
This delicious dish takes minutes to prepare and is packed with nutrients.
Grating of cheese, such as parmesan, grand padano, or a dairy-free alternative
Basil leaves
Black pepper
Garlic bread, optional
Method
To a large bowl, add the chopped tomatoes, basil, olive oil, sugar, chilli flakes, and a little salt and pepper. Stir well to combine. Cover and leave for about 2 hours to allow the flavours to mingle together.
Cook the spaghetti according to the pack’s instructions, in a large saucepan of salted boiling water.
Add the butter to a large frying pan, over a high heat. Once melted pour in the marinaded tomatoes. Stirring all the time, cook for about ten minutes, until the tomatoes are cooked and have become sticky.
Drain the spaghetti, saving about 4 tablespoons of the cooking water. Add the water to the pan. Stir well to combine. Allow to bubble for about a minute before adding the spaghetti. Stir well to completely coat the spaghetti in the sauce.
Serve immediately with a good grating of cheese, a few basil leaves and some freshly grated black pepper.
What a week, we went from having one of our lowest weeks in terms of customers to the highest ever, it was amazing, we couldn’t believe it, and to be completely honest it nearly broke us.
But the team that are working here pulled out all the stops, they were amazing, every single person.It is hard to know where to start to say thank you, for the kind wishes, and thoughts, the orders, the words and energy, every single one meant a great deal.
I can tell you honestly that unless you get big and specialise in one particular crop or two or are really small and it is just you (and neither of those scenarios when it comes to food production are easy either) then it is nigh impossible to make the farming of multiple crops on 20 acres work, and we are not new to this.
So, this year when all the stars aligned and the weather and the farm team and the fertility and the machines and everything worked as will happen every once in a rare while it is fantastic. But then to finally have the crops in the field and to not have a way to sell them it is demoralising. July and August are our toughest months to try and keep sales coming in to keep the farm and the business going.
Thank you for all the suggestions of what to do, we have tried most over the years and our experience with say supply to supermarkets has not been a positive one and I would prefer to close up shop that to go back to that. They do say “never say never” but for me it’s a no.
Ultimately if I have to blame somebody or something for why it is so difficult, it is the supermarkets (Now I know throwing blame around is never a very progressive or useful way to live, I also know we all need and use supermarkets), but our food has ultimately been devalued and fresh produce is classed as something that must be ultra cheap (and I get it that it is hard and the cost of living is real).
But here is the thing, we have the most amazing heads of broccoli grown organically and I am not 100% sure how much each head cost to grow but I do know with all our crops in fine fettle and with the farm in full flow, and with everything aligned and with us charging the prices we are, we find it very difficult to make the proverbial ends meet on the farm. But after the week we have just had and with the farm harvest at least for now looking so promising, I am cautiously hopefully that there is light at the end of the 20-year-old tunnel.
So if you can continue to help us, July and August are the months that we struggle for all the reasons I have said last week, they are the two key months for harvest and it is so important that we have homes for all the lovely veg we and the other Irish organic growers we buy from have in abundance at this time of the year.
So, thank you again, thank you from everybody here, you have made a massive difference, and as always, we would not be able to do what we do without your support.