Asian Noodle Bowl w/ soy roasted parsnips

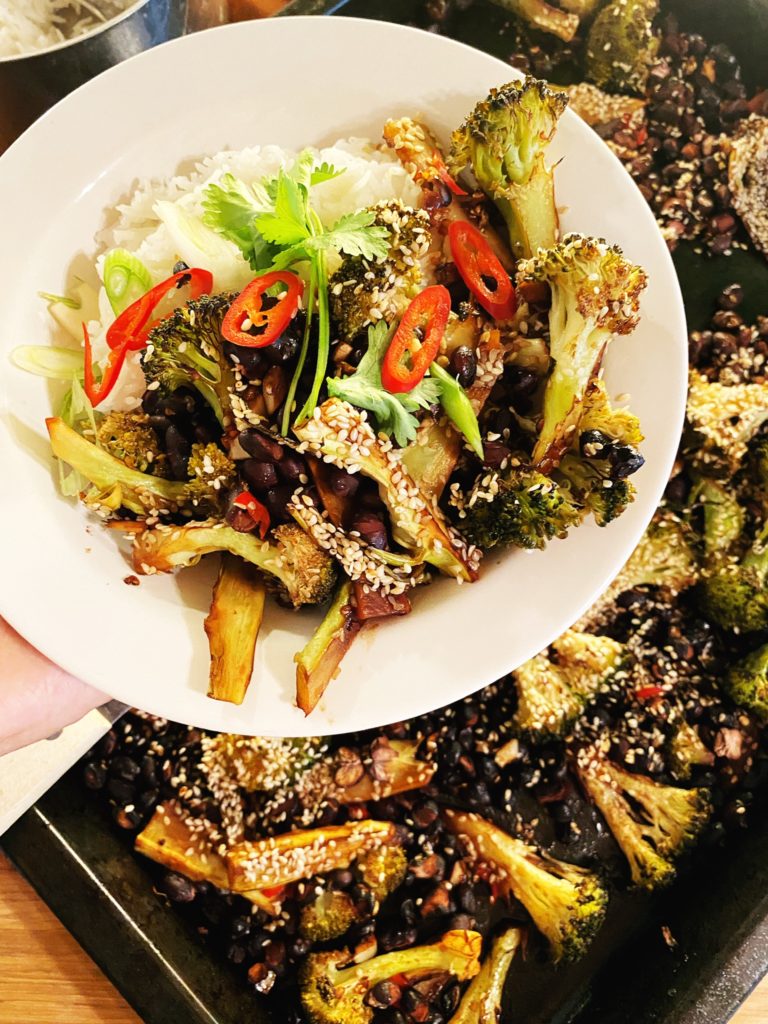
This dish makes for and tasty quick supper. Noodle bowls are a great way to use up leftover veggies. They work well for cooked veg and grated or thinly sliced raw veg too as well as using soft herbs to finish it off.

It’s a great dish too if you’re fighting winter colds, just amp up the ginger and garlic to ward off the sniffles!

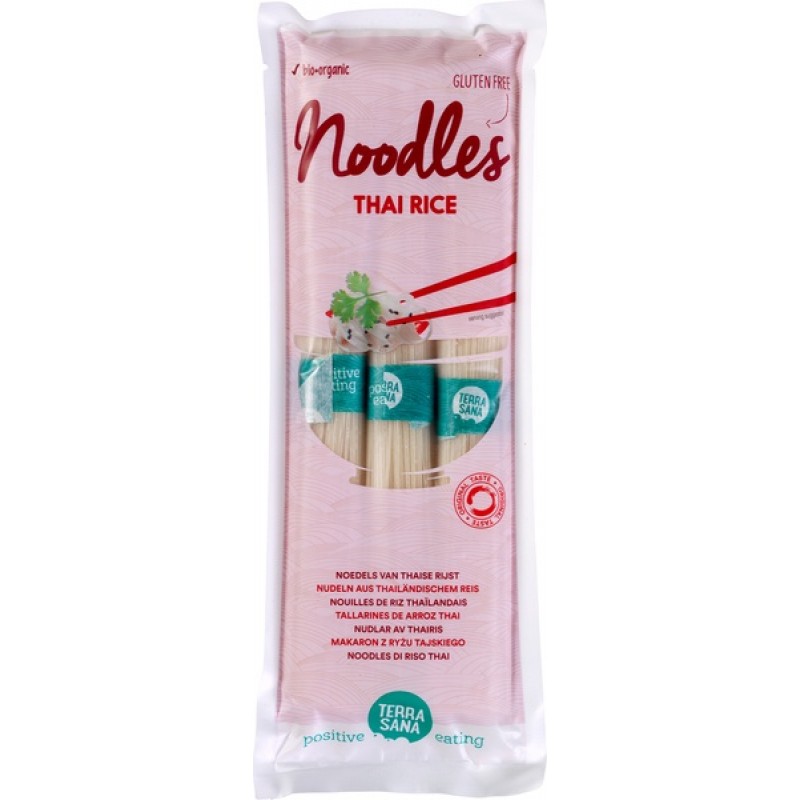
Any noodles will do, Chinese thin ones, rice noodles or even spaghetti, if you are stuck.

Lou 🙂

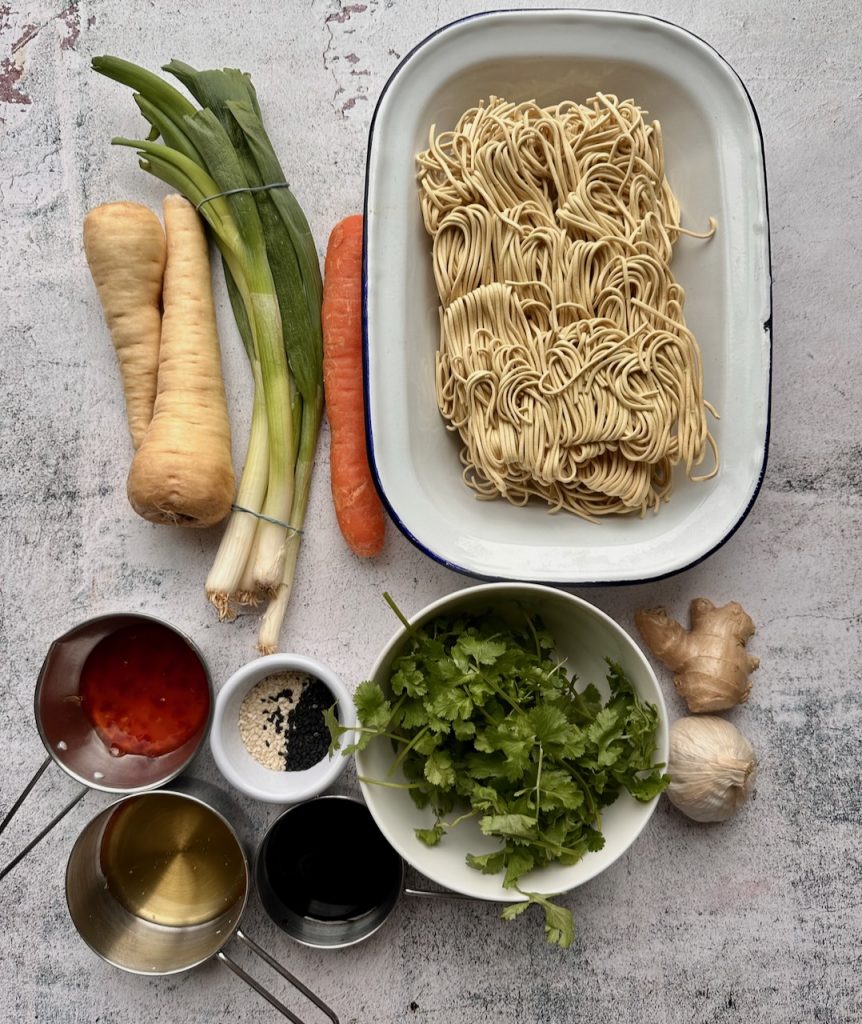
Ingredients: serves 2

  • 2 parsnips, chopped
  • 2 tablespoon soya sauce
  • 1 tsp oil
  • 2 tablespoon maple syrup
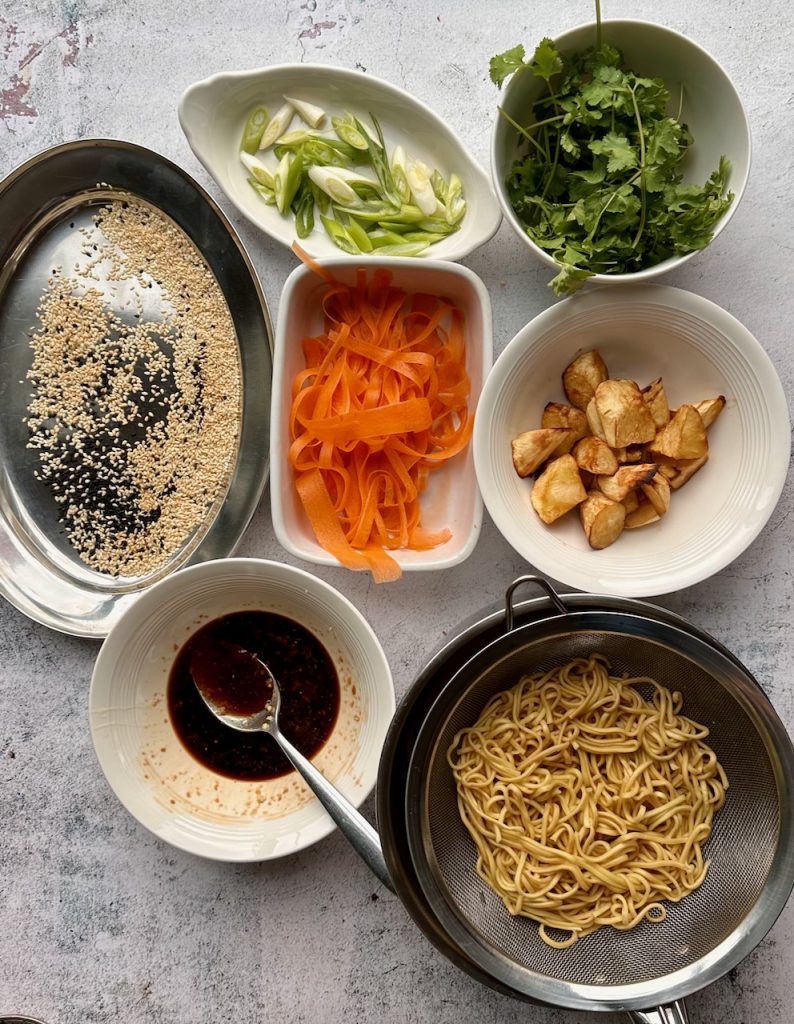
  • 1 carrot, peeled into ribbons
  • 2 spring onion, sliced
  • 2 tablespoons fresh coriander, chopped
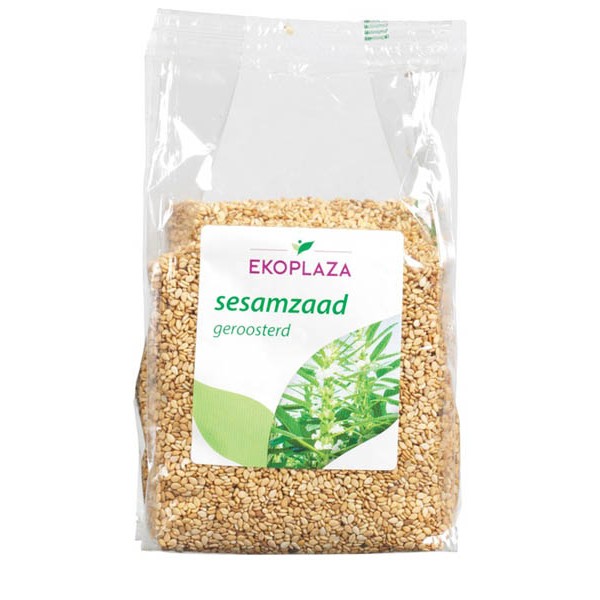
  • 2 tablespoons of sesame seeds to sprinkle on top
  • 200g noodles – cook as per packet
  • For the sauce:
  • 1 tsp oil
  • 6 tablespoons soy sauce
  • 3 tablespoons sweet chilli
  • 2 tablespoon honey or maple syrup
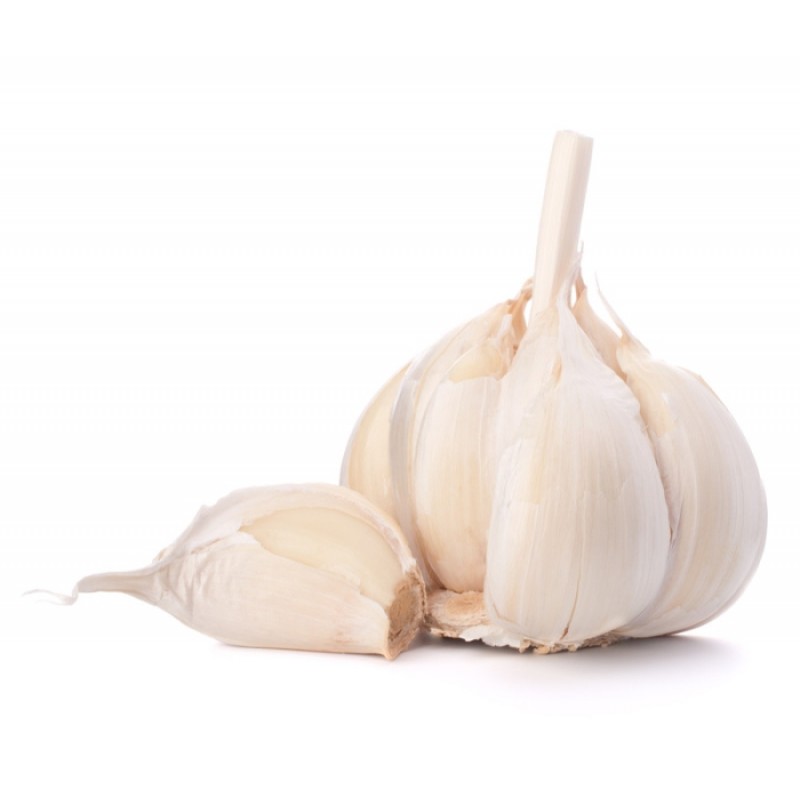
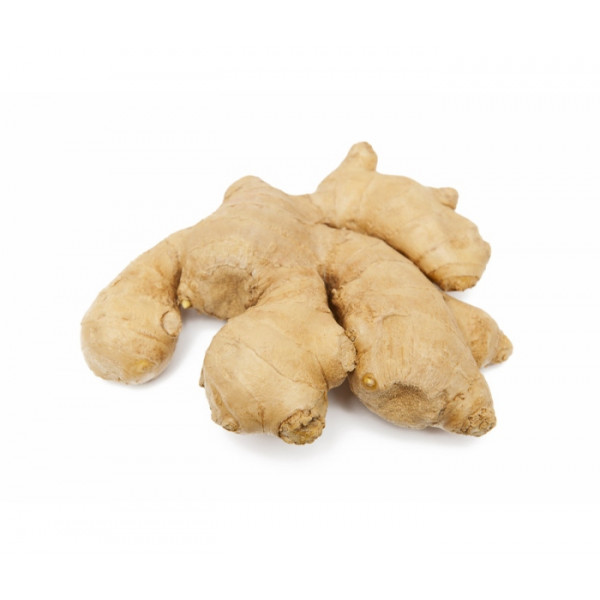
  • 2 tablespoons fresh ginger, grated (about 1/2 inch)
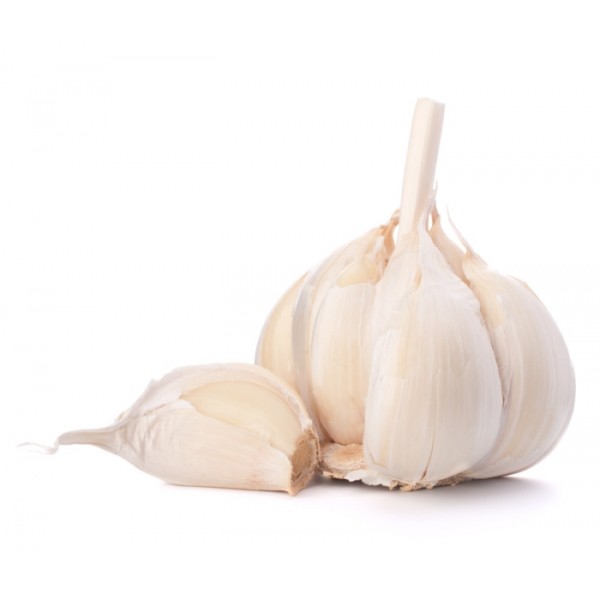
  • 1-2 fat clove garlic, grated
  • salt and pepper to toaste

Method:

  1. Preheat the oven 180c.
  2. Prepare the parsnips first. Clean them and chop into chunks add to a bowl.
  3. Add 2 tablespoon of soy sauce, a teaspoon of oil and 2 tablespoon of maple syrup to the parsnips, toss to coat and roast in the oven for 15-20 minutes until cooked. (Alternatively air fry at 170c for 12 minutes approx) Toast the sesame seeds in the over at the same time for 5 or so minutes.
  4. In the meantime cook noodles as per the packet- usually 8 minutes in boiling salted water.
  5. Clean the carrot and peel it into ribbons, set aside.
  6. Chop the spring onions into long fine sliced, and roughly chop the coriander.
  7. To make the sauce add the soy sauce, oil, sweet chilli sauce, honey to a bowl. Add in the grated ginger and garlic, add salt and pepper if needed. Whisk well.
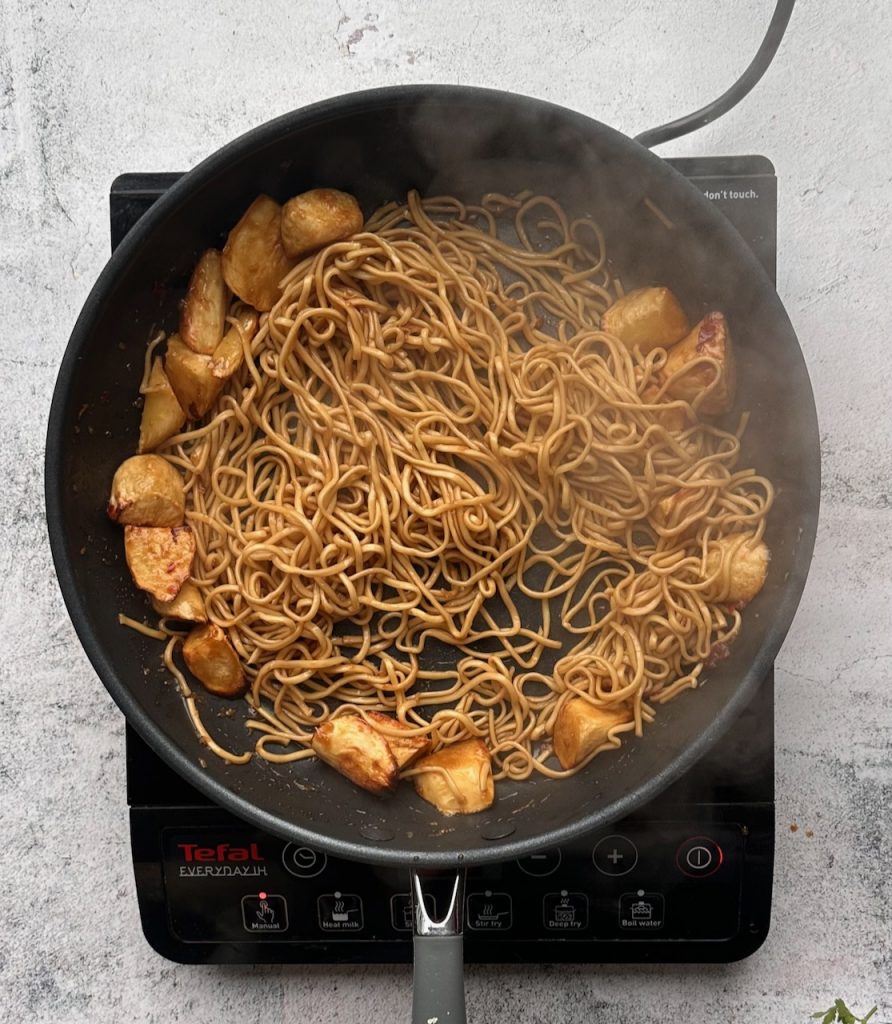
  8. Heat a frying pan on a medium heat, add in the sauce stir and cook for 1 minute, if it catches add a dash of water.
  9. Add the cooked noodles, toss to coat, add the roasted parsnips. Toss to mix.
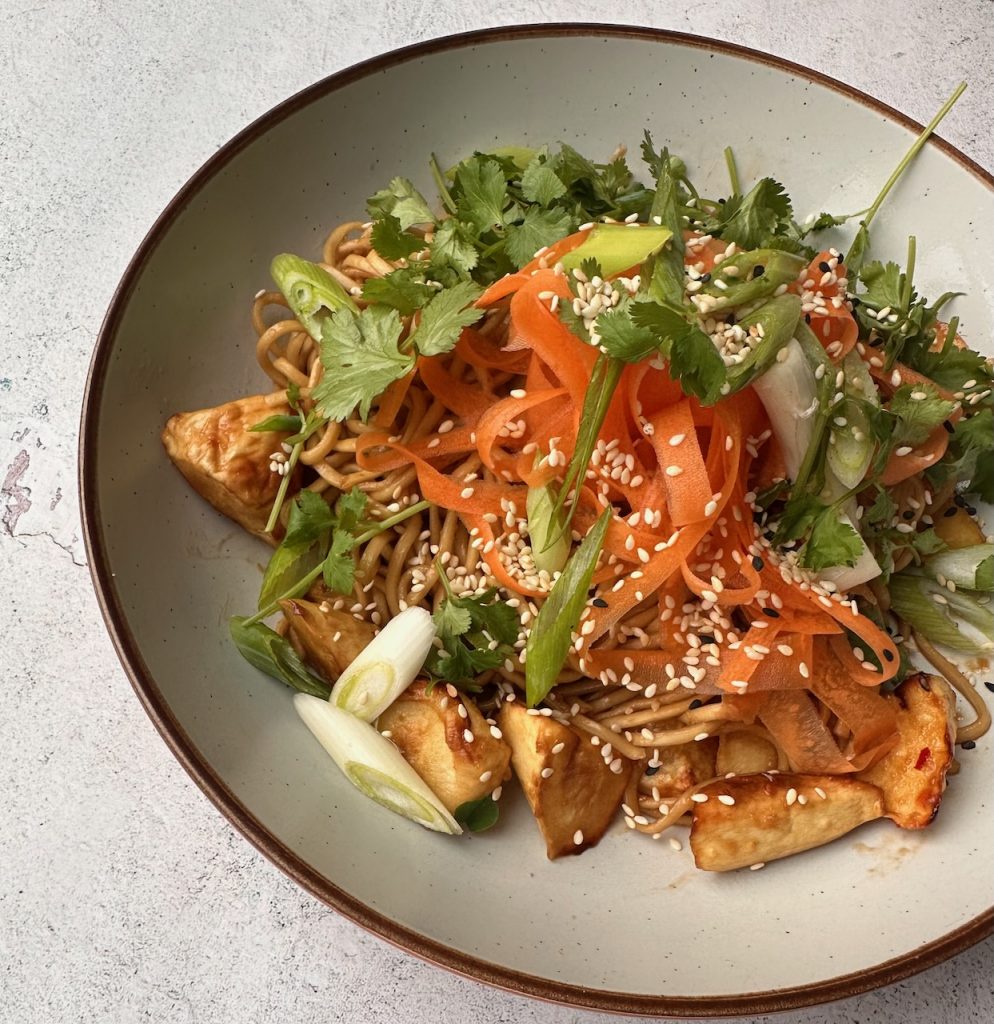
  10. Divide between 2 serving bowls.
  11. Top with carrot ribbons, chopped spring onion and coriander and sprinkle with toasted sesame seeds.

Turmeric & Ginger Paste

I always try to keep a jar of this fresh paste in the fridge. It is so handy for making golden milk in the evenings and I love stirring a spoon through my morning porridge. Turmeric and ginger have many amazing health benefits, I started eating this to help manage my knee pain, but I stuck with this paste because it’s actually very delicious! We stock fresh, organic turmeric and ginger roots in the shop so you can easily add some to your next order.

Liz x

Ingredients (don’t need to be exact)

  • a large thumb of fresh ginger
  • a similar amount of fresh turmeric
  • 1 heaped tbsp coconut oil (this helps your body absorb the turmeric and ginger)
  • 4 or 5 tbsp maple syrup (or your choice of sweetener)
  • 1 tsp ground cinnamon
  • 1/2 a tsp black pepper
  • 1/4 tsp ground cloves
  • a splash of water

Method

  1. As you are using organic turmeric and ginger, you don’t really need to peel them, but if you would like to, use a teaspoon to scrape off the skin and get into the awkward nooks and crannies without wasting too much flesh. Roughly chop and add to a small, strong food processor.
  2. Add the rest of the ingredients and blend into a smooth, thick paste.
  3. Pour the paste into a very clean jar and keep in the fridge. Use within 3 weeks. You can also freeze the paste in ice cube trays to keep it fresher for longer.

How to use:

Add a spoon or two to a mug of hot milk and drink in the evening after a long day, especially if you are feeling achey. I like mine topped with a sprinkle of cinnamon.

Blend a spoon with banana, ice and milk to make a golden smoothie. Kids love these!

Simmer a spoon into your morning pot of porridge. Top with coconut flakes and cinnamon or your favourite fruit and nuts.

  • Do not consume high amounts of turmeric if you are pregnant. Consult a doctor if you are concerned that turmeric will interact with other medication or health problems.

Savoy Cabbage & Leek Kimchi

This is an Irish take on the traditional, spicy, fermented side dish from Korea, kimchi. The most common kimchi is traditionally made with Chinese leaf (or Napa) cabbages, but we love to make seasonal versions all year round with our incredible range of Irish cabbages. This recipe would work with any cabbage but my favourite cabbage for kimchi has got to be the beautiful Savoy. With its beautiful ruffled edged, crinkly leaves and deep ridges, it is the perfect vessel to hold the spice paste and it is hardy enough to keep its shape even after fermentation. We have a wonderful harvest of savoys this year, why not add some extras to your next order and give fermenting a go!

Fermenting vegetables can sound a little strange and like a lot of work. But it is actually a very simple way to preserve excess vegetables (just a case of salting or submerging vegetables in brine and leaving them to do their thing at room temperature for a week or so) and it is incredibly beneficial to our health. Fermented vegetables contain trillions of live beneficial bacteria which enhance our gut health. This has a positive knock-on effect to our entire wellbeing. As well as being easy and super-healthy, fermented vegetables are completely delicious! They have a complex flavour and cut through rich foods, think ‘salty pickles’. Just the thing for finishing off a dish or popping into a salad or sandwich. We have jars of ferments on the table for pretty much every meal. Kimchi, of course, goes particularly well with rice bowls and ramens or rolled into sushi, but we are a bit addicted to ‘kimcheese’ toasties. Kimchi is also amazing on peanut butter toast or as a side with macaroni cheese. How do you eat kimchi?

Liz x

Ingredients

  • 1 savoy cabbage
  • 1 leek
  • natural sea salt
  • 1/2 bulb garlic
  • 4 red chillies (or to taste)
  • 1 large ‘thumb’ of fresh ginger (or to taste)

Method

  1. First clean your work surface and the tools you will need – Find a large jar or several smaller jars and wash them and their lids well with dish soap. Rinse throughly with very hot water. Leave to air dry on a clean tea towel. Find your largest mixing bowl, or if you don’t have a very big one, use a large stock pot or plastic storage box. Clean it very well as above. Clean a large chopping board and knife and a small blender too. Now you are ready to start.
  2. Pull a few of the tough, outer leaves off your cabbage, rinse and put to one side for later. These will be your ‘followers’ which will be important later. Rinse the rest of the cabbage, slice the leek in half lengthways, keeping the root end intact, and rinse out all the mud. Rinse your chillies and thumb of ginger too.
  3. Chop the cabbage into quarters, remove the core from each quarter and thinly slice it and add it to the bowl. Then cut the rest of the cabbage into bite sized chunks and add them to the bowl. Chop up the leek into chunks too and add it to the bowl with the cabbage.
  4. Now you need to add salt. If you want to be very precise, you can weigh the chopped cabbage and leek, work out what 2% of that weight is and use that amount of salt. Or you can do it by taste. I normally start with a heaped tbsp of salt for a whole cabbage and a leek. Mix it well and give the veg a bit of a squeeze and a massage, then taste. They should just taste pleasantly salty. Add more salt if needed, our cabbages are pretty big at the moment so you may well need to. Then let the salted vegetables sit while you make the spice paste.
  5. Peel the garlic, slice off the stalks of the chillies and slice the ginger. Add them all to a small blender and blend into a paste. You may need to add a splash of water to help it blend.
  6. The salt in the cabbage and leek will have started to draw out liquid from the vegetables and create a brine in the bottom of the bowl. You can help this along by giving the vegetables another massage. The vegetables will wilt and decrease in volume and should look quite wet. When you pick up a handful and squeeze, lots of lovely brine should drip down into the bowl. Then you know you are ready to mix in the spice paste and pack your jars.
  7. Use a wooden spoon or gloved hands to mix the spice paste into the salted vegetables. Be careful not to get any of the spice paste on your skin or in your eyes as it can really sting. Then start packing your jar/s.
  8. Do a small amount at a time and firmly press it into the jar ensuring there are no air pockets. Use gloved hands or a clean rolling pin or spoon to help you pack it firmly into place. Keep going until you have either used up the mixture or you have a couple of inches of headroom left in your jar. You don’t want to over-fill the jar as during fermentation the brine can bubble over and escape, making a bit of a mess in your kitchen.
  9. Now you need to figure out a way to hold the vegetables safely down under the brine. Any veg exposed to air on the surface are likely to catch mould. So first use the outer leaves of the cabbage, that you saved at the beginning, to tuck the vegetables in so they won’t float up during fermentation. Take your time and press the edges of the leaves down around the insides of the jar to ensure there are no gaps for the chopped bits to escape through.
  10. When you are happy that your ‘follower’ leaf has done its job, you can add a weight to hold everything down under brine. This needs to be something food safe that won’t react with the salt. So glass is best. A small water glass or ramekin which fits inside your jar and can be pinned down with the lid is good. Or fill a clean pesto jar or similar with water, make sure the metal lid isn’t touching brine, and pop that in. Other weight ideas are a large, very clean (boiled) beach pebble (just make sure it is not a limestone/chalk) or a ziplock bag filled with water.
  11. Place the lid loosely on your jar so that gases can escape during fermentation but no bugs/dust can get in. Or you can put the lid on tight and ‘burp’ your jars every day by opening and closing them to release built up gases. If you have a clip-top jar like mine, you can simply remove the rubber seal during fermentation.
  12. Put the jar on a tray or plate on your work surface out of direct sunlight. Let it ferment for 1 week then it should have transformed into a tangy, delicious pickle! If you would like to ferment for longer then you can of course, just find a cooler part of your house like a basement so that it ferments slowly. When you are happy with the flavour you can remove the weight and ‘follower’ and pop the jar into the fridge where it will keep for 3-12 months.
  13. Make your kimchi last well by decanting it into smaller, very clean jars and just eat one jar at a time. This way the pickle will be exposed to less air. Also, never double dip when eating your kimchi as this would introduce new bacteria from your mouth into the jar. Enjoy!
Here you can see the weight holding the cabbage leaf ‘follower’ down, which pins all the chopped vegetables safely under brine. This is after 1 week of fermenting at room temperature.

Bang Bang Broccoli & Black Beans

We are harvesting so much broccoli from our fields at the moment! Expect lots in your set boxes or add some to the ‘build your own’ box for a special reduced price. Broccoli is brilliant! Broccoli is a good source of fibre and protein, and contains iron, potassium, calcium, selenium and magnesium as well as the vitamins A, C, E, K and a good array of B vitamins including folic acid. A real Irish super-food! I’ll be steaming some batches to put in boxes in the freezer to add to loads of different meals. Here’s one of our favourite family meals that uses a lot of broccoli.

Bang bang chicken is a traditional Sichuan dish of poached chicken which is then ‘banged’ to shred it and dressed in a spicy sauce. It’s a refreshing dish served with julienned cucumber. This is my plant-based nod to that classic. Definitely not authentic, but delicious none-the-less. It’s really simple. Nutritious broccoli and black beans are drenched in a spicy sauce, sprinkled with sesame seeds and then roasted. You can serve it with rice or noodles, or it’s delicious as a warm salad with spiralized courgette.

Liz x

Ingredients (serves 4)

  • 2 heads of broccoli
  • 2 tins of black beans
  • 4 tbsp maple syrup
  • 4 tbsp lime juice (or vinegar)
  • 4 tbsp vegetable or toasted sesame oil
  • 4 tbsp soy sauce (or tamari if you need gluten free)
  • 6 garlic cloves
  • a big thumb of ginger
  • fresh red chillies to taste
  • 6 tbsp sesame seeds
  • scallions, fresh coriander and extra chillies to serve
  • rice or noodles to serve

Method

  1. Preheat your oven to 200C and find a large roasting tray, or two trays if you don’t have a very large one. You want to be able to spread the ingredients into a single layer.
  2. Trim as little as possible off the stalks of the broccoli. Just a sliver off the end is usually enough – those bits can go in the compost bin. Then cut the whole stalk away from the florets, slice it in half lengthways and then slice each half into long, thin strips. Put them in the roasting dish. Then cut the heads of the broccoli into bites sized florets and add them to the roasting tray too.
  3. Drain the tins of black beans and add them to the tray. Then make the dressing.
  4. Mix the soy sauce, oil, lime juice/vinegar and maple syrup in a bowl. Finely dice the chilli, garlic and ginger and add them to the bowl. Mix well and then pour the dressing over the broccoli and black beans.
  5. Use your hands to mix the sauce into the broccoli and beans, then spread the ingredients out into a single layer. Sprinkle with the sesame seeds and put the tray into the oven to roast for just 20 minutes or until the broccoli is tender.
  6. Meanwhile cook your rice or noodles and prepare the toppings. Slice scallions, coriander and extra red chillies.
  7. Serve in bowls and enjoy hot or cold. We like to make an extra batch of the dressing with toasted sesame oil but without the raw garlic and ginger to drizzle over the finished dish too to make it extra juicy and spicy.

Pak Choi Kimchi

Like all fermented vegetables, kimchi is incredibly good for you. Luckily it’s mind-blowingly delicious too…and very easy to make yourself. I’ve made it with pak choi, seaweed and little radishes this time but you can play around with the ingredients and make it your own. Use local, seasonal vegetables for the best results. Here’s my quick tutorial video so you can see how easy it is to make yourself. Loads more fermenting inspiration in my book which is available to add to your veg order here. Any questions? Pop a comment down below and I’ll get back to you asap. Liz x

Ingredients

  • 2 large pak choi
  • 2 bundles of radishes
  • 1 handful of dried seaweed
  • 1 tbsp natural salt
  • 3 fresh chillies (or dried to taste)
  • 1 thumb of fresh ginger
  • 6 cloves of garlic

Method

Gather and rinse your ingredients. Find a large jar, a chopping board, a sharp knife, a spoon, a rolling pin, a blender, a mixing bowl and a small jar or glass that fits snugly inside your large jar. Ensure all your equipment is nice and clean – no need to sterilise.

Reserve an outer leaf or two from your pak choi. These will be used as ‘followers’ at the end of the recipe.

Slice the rest of the pak choi into bite sized pieces and put them in the large bowl.

Thinly slice the radishes and add them to the bowl too.

Rinse and slice the seaweed too (if you are using nori, no need to rinse first) and add it to the bowl.

Add the salt to the bowl and use your hands to tumble the ingredients and evenly disperse the salt. Sit the bowl to one side to give the salt time to dissolve and start drawing brine out of the vegetables.

Meanwhile make the spice paste. Take the green stalks off the chillies and roughly chop them. Put them in a blender. Peel and chop the ginger and add that to the blender too. Peel the garlic and then blend the 3 ingredients together into a bright space paste.

Taste the salted vegetables and add more salt if needed. They should taste pleasantly salty and should now look wet and wilted. If they are too salty, add some more vegetables eg grated carrot or another pak choi.

Mix the spice paste through the salted vegetables. Be careful not to get any on your bare skin. Wear gloves or use a spoon.

Then pack the mixture carefully and firmly into the large jar. Use the rolling pin to tamp down each new layer to ensure no air pockets are left in the jar. Leave at least an inch or two of head room in the jar.

Now cover the chopped vegetables with the ‘followers’ (the leaves you reserved earlier). Tuck everything neatly in under the brine. Use the spoon to help tuck the leaves down the sides of the jar and ensure no little floaty bits are above the brine.

Weigh down the ‘followers’ with a small glass/jar/ramekin. See the video above for more details.

Then close the jar – if you are using a clip top jar, remove the rubber seal to allow gases to escape, otherwise just close a regular jar loosely or remember to ‘burp’ the jar every day to allow gases to escape by briefly opening and closing it.

Put the jar on a tray or in a bowl to catch any overspill and set it on a dark shelf to ferment at room temperature for at least one week. Keep an eye on it. Does it need burping? If so, do it over the sink! Have the gases caused the veg to rise up above the brine? If so push the weight down to expel and air bubbles and get everything neatly under brine again.

After one week at room temperature, taste your kimchi. It should be tangy, spicy and delicious. If you are happy with the tang-level, remove the weight and pop the jar in the fridge. It should last well for at least one month, if not many more.

*Tips to make your fermented food last longer in the fridge: No double dipping! Consider transferring the ferment to smaller jars before refrigerating.

10 Minute Chia Jam

Traditionally made jam needs lots of sugar, boiling, simmering and pectin to help it set. My chia jam recipe is far easier. All you need is fruit, sweetener and chia seeds and you can whip up a quick jam in less than 10 minutes. Not only is it far simpler to make than regular jam, but it is actually remarkable healthy! Chia seeds are incredibly nutritious – think fibre, protein, minerals and omega 3s – and they naturally want to become a jelly-like substance. As they absorb liquid, they swell up and create a little jelly bubble around themselves. If you prefer a smoother jam then just blend it up in a smoothie maker or with an immersion blender before putting it in jars.

The only downside of making chia jam rather than traditional jam is that it doesn’t last as long. But you can freeze it in portions or just make smaller batches and use them up within a week. As it’s so simple and quick to make, it’s really no bother to make lots of little batches as you need them. This also provides opportunity for playing around with seasonal fruit and fun flavour combinations. Today I made raspberry, pear and ginger chia jam. My favourite is probably a classic cherry chia jam…especially on almond butter toast. What combos will you try? Let me know in the comments.

Liz x

Ingredients

  • about 2 mugs of fruit of your choice (I went for 3 ripe pears and a mug of frozen raspberries)
  • the juice of 1/2 a lemon
  • 4 tbsp chia seeds
  • maple syrup to taste (or sweetener of your choice)
  • optional added flavours (I went for some freshly grated ginger but leave plain or match your added flavour to your fruit eg apple and cinnamon, rhubarb and vanilla, plum and star anise, raspberry and rose petals…)

Method

Prep your chosen fruit (rinse, peel and core or deseed/stone if needed) and put it in a pot. Add a generous squeeze of lemon juice and if you like, some natural flavourings like ginger, vanilla, rose, cinnamon…

Put the pot on the highest heat and bring the fruit to a rapid boil then turn down and simmer for 5 minutes or so until mushy. If your fruit is quite dry (eg apples) you may want to add a splash of water. Stir well with a wooden spoon as you go.

Mash the fruit to your desired consistency, take the pot off the heat.

Sweeten with maple syrup or another sweetener to your taste and add the chia seeds.

Stir well then allow the chia seeds to absorb the liquid.

Pour the hot mixture into a jar, put the lid on and once it’s cool keep it in the fridge and eat within a week.

It’s brilliant on toast or dolloped onto porridge or yogurt for breakfast. You can sandwich a sponge cake with it or make jam tarts. Enjoy!

Turmeric & Ginger Paste

A page from my book – available to add to your order on Greenearthorganics.ie here.

Turmeric is an incredible, powerful ingredient. It’s many, scientifically proven, health benefits including being an anti-inflammatory and antioxidant are very interesting to read up on. Anecdotally, I have terrible knees from a combination of hyper-mobility, multiple dislocations and corrective surgery that went badly wrong, and I find, when I remember to have a tsp of my turmeric paste at least a few times a week, be that in porridge, smoothies or golden milk, my knees do feel less swollen and painful at the end of the day. As a chef, I love it for it’s vibrant colour and interesting flavour. Curcumin, the compound responsible for most of turmeric’s potential health benefits, unfortunately doesn’t absorb well into the bloodstream so I always add black pepper and oil to anything with turmeric in to increase it’s bioavailability. You can read about the science behind the bioavailibity of turmeric here. So don’t leave the black pepper and coconut oil out of the recipe!

Turmeric & Ginger Paste and three things you can make with it – golden smoothie, turmeric latte and golden porridge – watch the video at the end of this blog to see how!

Ingredients

Method

Peel the turmeric and ginger roots using the edge of a teaspoon.

Slice the roots against the direction of the fibres and put them in a strong blender.

Add coconut oil, ground cinnamon, ground cloves and ground black pepper.

Cover the ingredients with maple syrup and then blend until smooth.

Transfer the mixture into small jars and refrigerate. They should last in the fridge for about a month, so freeze what you won’t use up in that time. Use the frozen turmeric paste within 6 months of making it.

Did you make this recipe? Let us know how it went in the comments or over on our friendly Facebook group. Don’t forget to share this blog post with your friends. Liz x