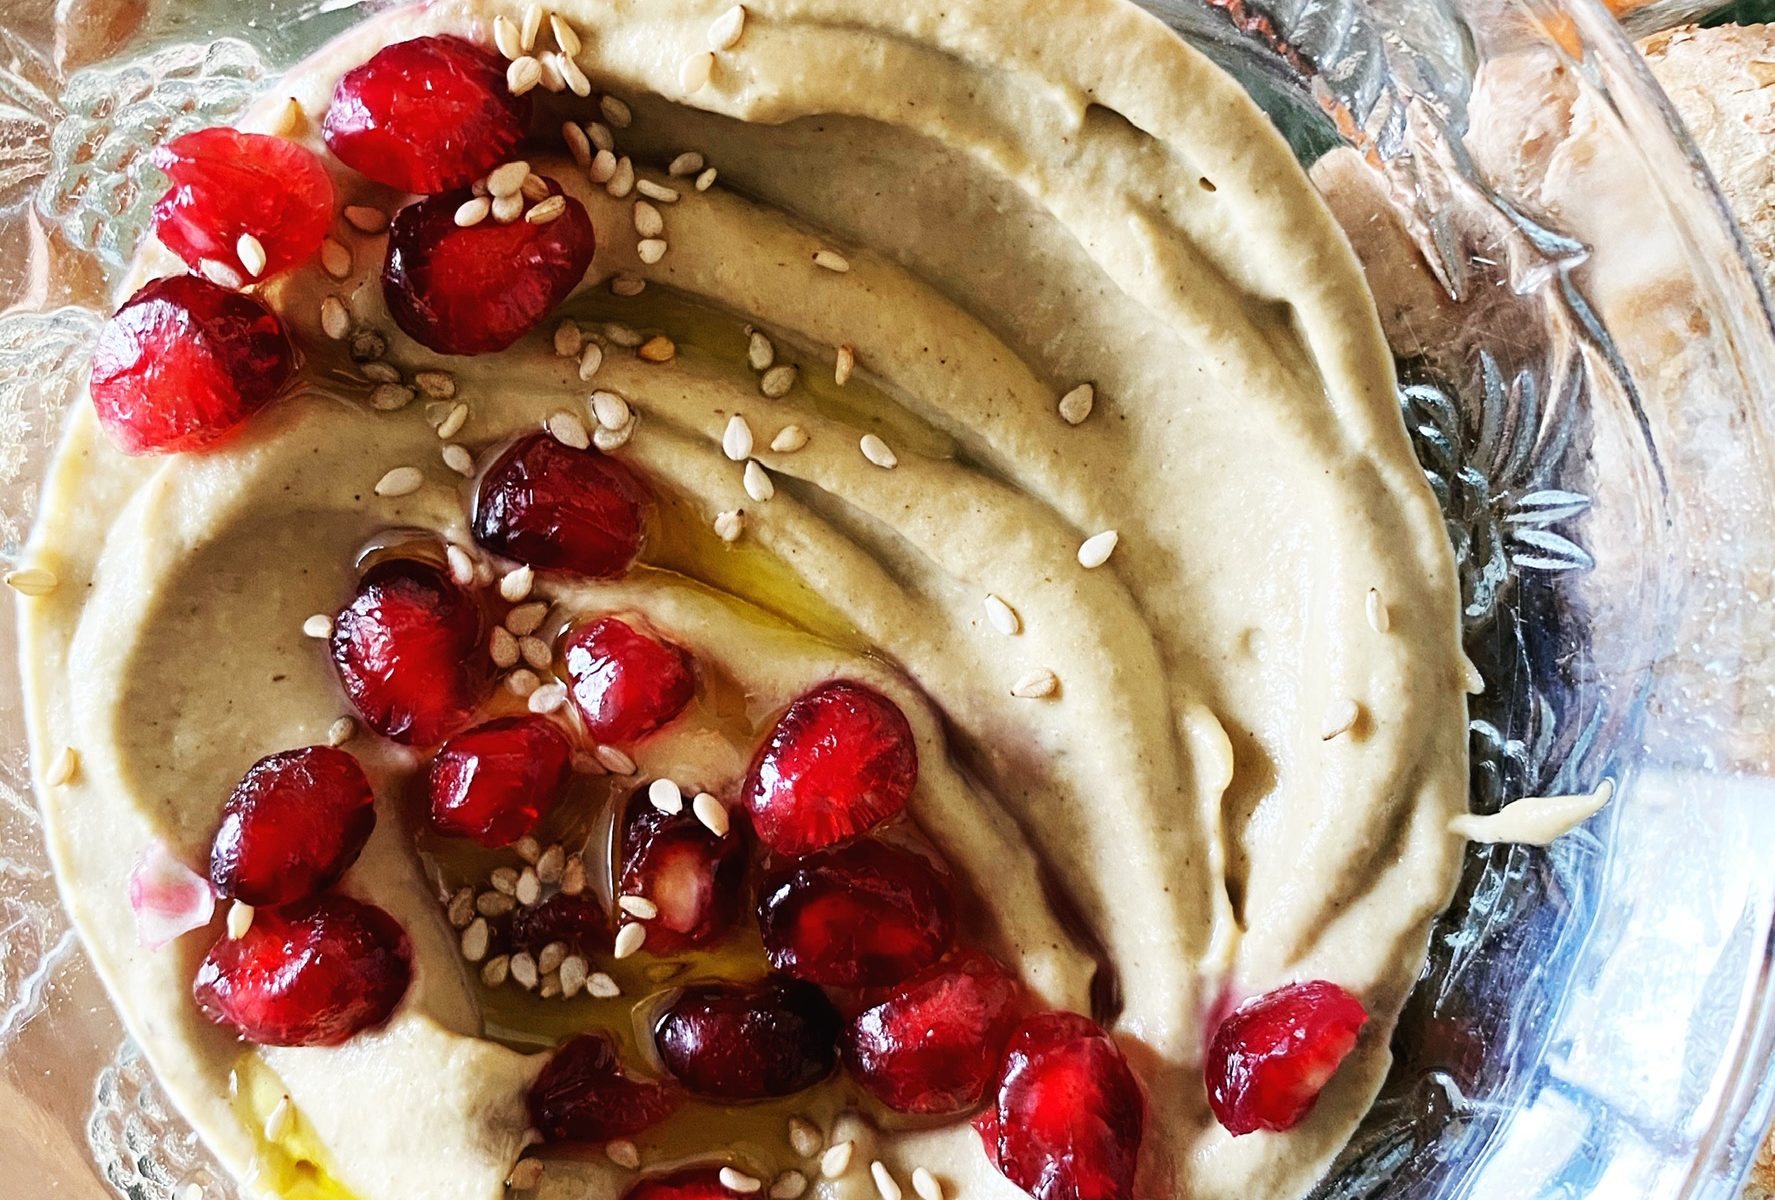
Babaganoush is similar to hummus, but made with aubergine rather than chickpeas. It’s softer, silkier and deliciously smokey! I always pop a few aubergines on the barbecue to make this dip. You can grill them in a hot griddle pan or roast them in the oven instead, but they won’t be as smokey. You’re looking to really blacken them on the outside and let them collapse and get silky soft in the middle. The blackened skin is then peeled off, then the flesh is blended (or mashed if you like more texture) with garlic, tahini, lemon and olive oil. Here’s my recipe for one aubergine. Serve with grilled or raw veg, salads, on toast or with pitta bread strips to scoop it all up.
OPTIONAL EXTRAS? A pinch each of cumin and smoked paprika and some pomegranate seeds and sesame seeds for garnishing.
Method
Grill or barbecue the aubergine until it’s completely soft inside and the skin is burnt and blackened.
Allow it to cool enough to handle, then slice it in half lengthways and scoop all the flesh out into a bowl to mash or blender to blend smooth. Scrape the skin carefully to get every bit of aubergine into the mix. Those bits nearer the skin have the best, smokey flavour.
Add the garlic (crush or finely grate first if mashing rather than blending), olive oil, tahini and lemon.
Blend or mash into a spoonable mixture, then taste and add salt and more lemon to taste.
Spoon the mixture into a small serving bowl and top with a drizzle of extra virgin olive oil and optional extras like pomegranate seeds, sesame seeds, smoked paprika, cumin…
Enjoy scooped up with flatbreads or toasted pitta bread and salads.
This romesco sauce is THE MOST delicious accompaniment to barbecued vegetables, it is our take on the special sauce used during calçot festivals in Catalonia (where barbecued large leek/scallion-like vegetables are dunked in romesco in their thousands). We make it on repeat all summer! It’s silky, nutty, savoury, sweet and smokey. Dunk freshly grilled vegetables or bread in it or even use it as a stunning pasta sauce. Spread it into wraps or sandwiches, smear it on a plate and top with salads and grilled veg, or just eat it with a spoon! You’ll fall for this sauce hard so let us know your favourite way to eat it.
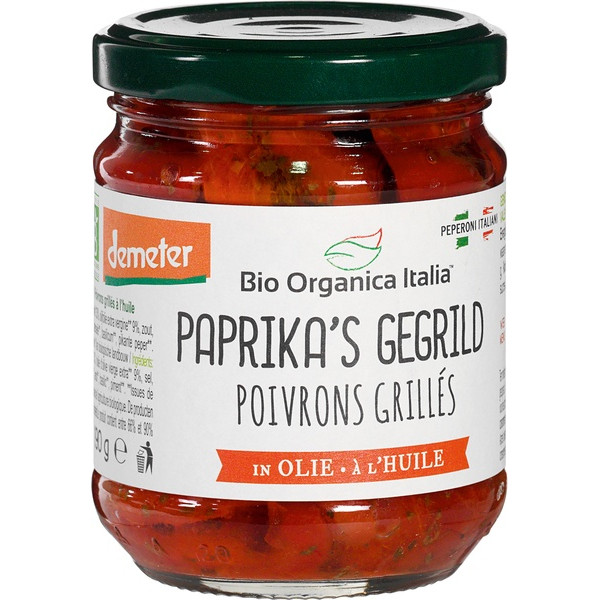
There are as many traditional recipes as there are cooks in Catalonia and if you’re a fan of romesco you may notice bread, hazelnuts and tomatoes are missing from this one. Of course you should feel free to add them back in, but I love the undiluted, smokey roasted pepper flavour of our recipe. Use roasted or barbecued red peppers and good olive oil, or for ease, one of our new jars of organic ready roasted peppers in oil. We also sell bulk bags of organic almonds (and hazelnuts) in compostable packaging. Sherry vinegar is traditional in this Catalonian recipe, but actually, we love using the raw, organic, Irish, apple cider vinegar from Clashganny Farm in Co. Waterford instead. It’s gorgeous stuff, why not add a bottle to your next order?
Liz x
Ingredients
1 190g jar of roasted peppers & the oil*
*OR* 2 roasted/grilled red peppers & 4 tbsp olive oil
1 clove of raw garlic, peeled
1 tbsp smoked paprika
2 tbsp vinegar (sherry or apple cider)
1 handful of roasted almonds (about 50g)
a pinch of salt
Method
Roast the almonds in the oven until they just start to take on some colour – for about 5 minutes – or toast them in a dry pan on the hob.
If you are roasting/grilling your own peppers, cook them on a high heat until the skins are blistered and the flesh is soft. Then cool and peel off as much of the blackened skin as you can, remove the stem and seeds. Otherwise just use one of our jars of grilled peppers.
Put all the ingredients into a blender and blend into a silky, smooth sauce.
If you like a thicker sauce, with more of a hummus-like texture, you can simply add more toasted almonds and blend again.
Taste and adjust the seasoning if needed with more salt, smoked paprika or vinegar.
Keep the sauce in a jar in the fridge and use within a week.
Have you tried a purple sweet potato yet? They are absolutely stunning and oh so delicious! I can never resist a baked sweet potato with a smokey bean chilli so here’s my quick and easy recipe. I’ve served it with lots or gorgeous garlicky kale spiked with lime too. So yum! What will you make with your purple sweet potatoes? I’m thinking purple gnocchi next, or maybe a purple sweet potato pie! Liz x
Ingredients (serves 4)
4 purple sweet potatoes
1 onion
1 tbsp oil
4 garlic cloves
1 tsp each cumin seeds, ground coriander, smoked paprika and chilli flakes
1 tin chopped tomatoes
1 tin kidney beans
1 tin black beans
2 limes
another tbsp of oil
4 large handfuls of kale
4 more garlic cloves
salt and pepper to taste
Method
Scrub the sweet potatoes, prick them with a fork, pop them in a roasting dish and get them in a 200C hot oven to roast – they should only take about 30 minutes.
Meanwhile make the smokey bean chilli. Dice and then sauté the onion and garlic in the oil until soft and taking on some colour.
Add the spices and sauté for a few minutes to toast them and bring our their flavours.
Add the tin of tomatoes. Half fill the tin with water then swirl out all the tomatoey juices into the pot.
Drain and rinse the two tins of beans and add them to the pot to simmer. Cook for 15 minutes or so then taste and adjust the seasoning with salt and pepper.
Meanwhile make the garlic and lime kale. Rinse the kale and tear the leaves away from the stems. Put the leaves in a bowl and the stems on the chopping board.
Finely chop the kale stems and the extra 4 cloves of garlic. Sauté them together in the tbsp of oil until soft. Then add the kale leaves and the juice of a lime. Season with salt and pepper and sauté for about 3 minutes to wilt the kale. Taste and adjust the seasoning if needed.
Serve the baked potatoes with the bean chilli and kale. Add a drizzle of olive oil and a squeeze of lime to the middle of each baked potato. Enjoy!
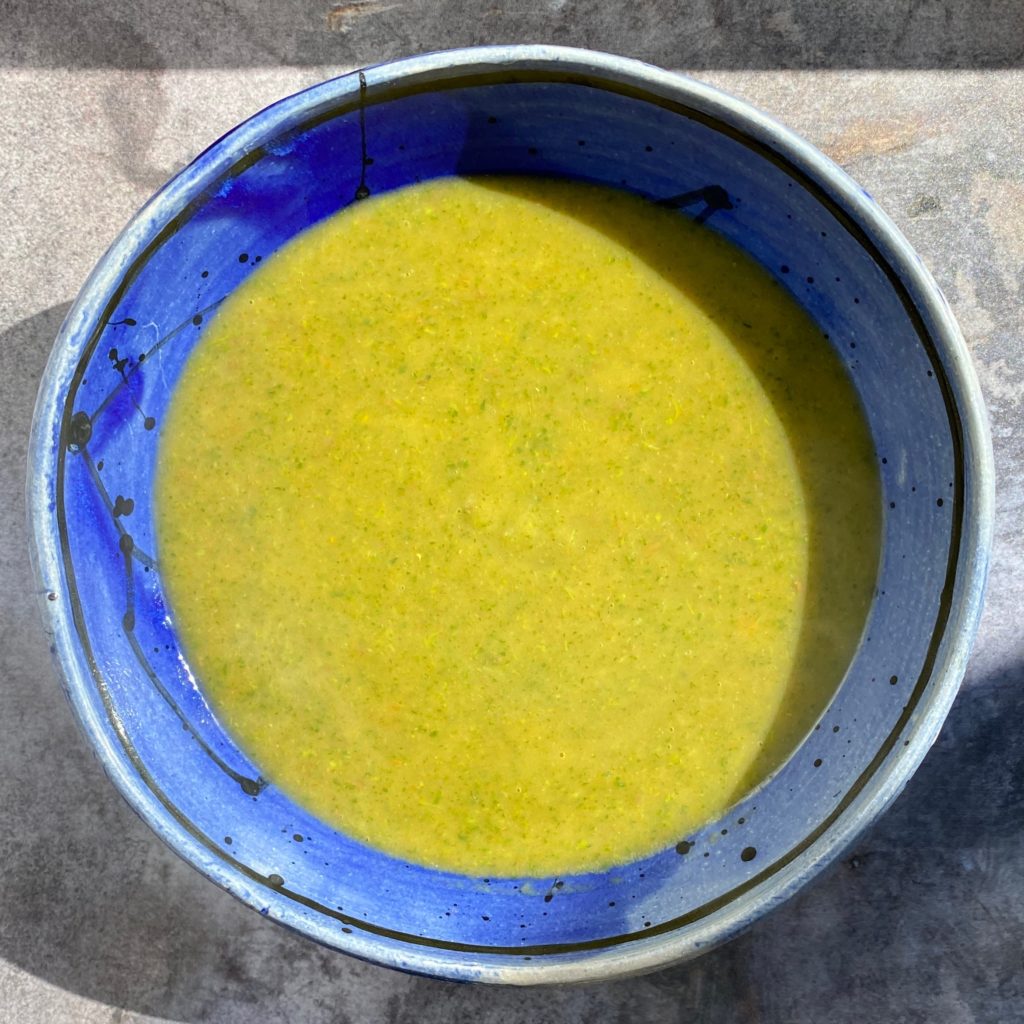
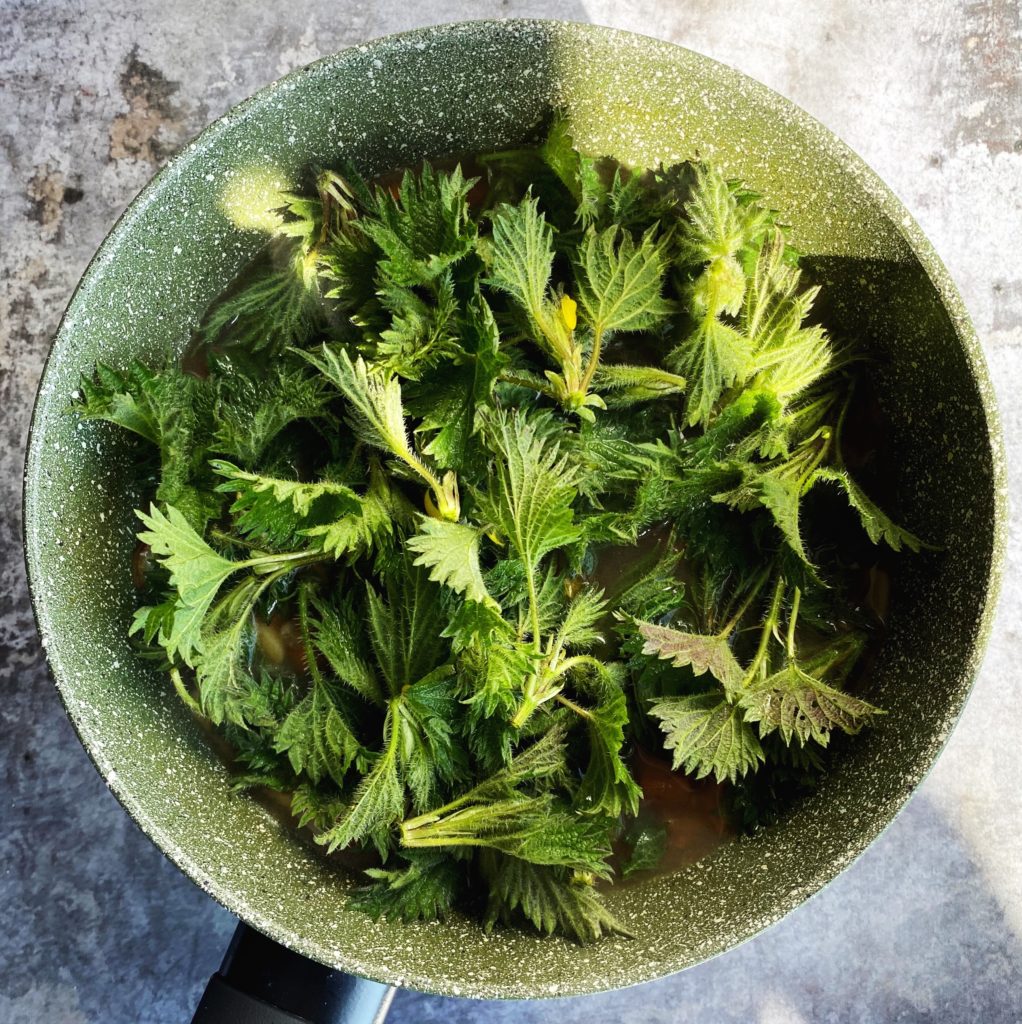
Stinging nettles are easy to identify and one of the most nutritious wild foods out there. Spring is the perfect time to forage for these tender and tasty greens. Studies suggest that eating nettles may reduce inflammation, hay fever symptoms, blood pressure and blood sugar levels — among other benefits. And they are so delicious! Why not grab some gloves and a colander and head out to gather some free food for your lunch? Just pick lots of the tender top 4-6 leaves, the tips of the nettles, like in the photo above. Then when you’ve filled your colander, take it home and give the nettle tips a good rinse. Always pick nettles away from polluted roads sides and avoid places that may have been sprayed.
Here’s my simple nettle soup recipe but you can do so much more with nettles. Pesto, salsa verde, add them to quiches, pies, stews… use it like spinach basically. I love nettles in a spanakopita type filo pastry pie. Share your favourite nettle recipe with use below in the comments? Liz x
Ingredients (serves 4)
1 tbsp oil
1 onion
2 or 3 carrots
4 cloves of garlic
2 potatoes
1 stock cube
4 large handfuls of nettle tips
the juice of half a lemon
salt and pepper to taste
Method
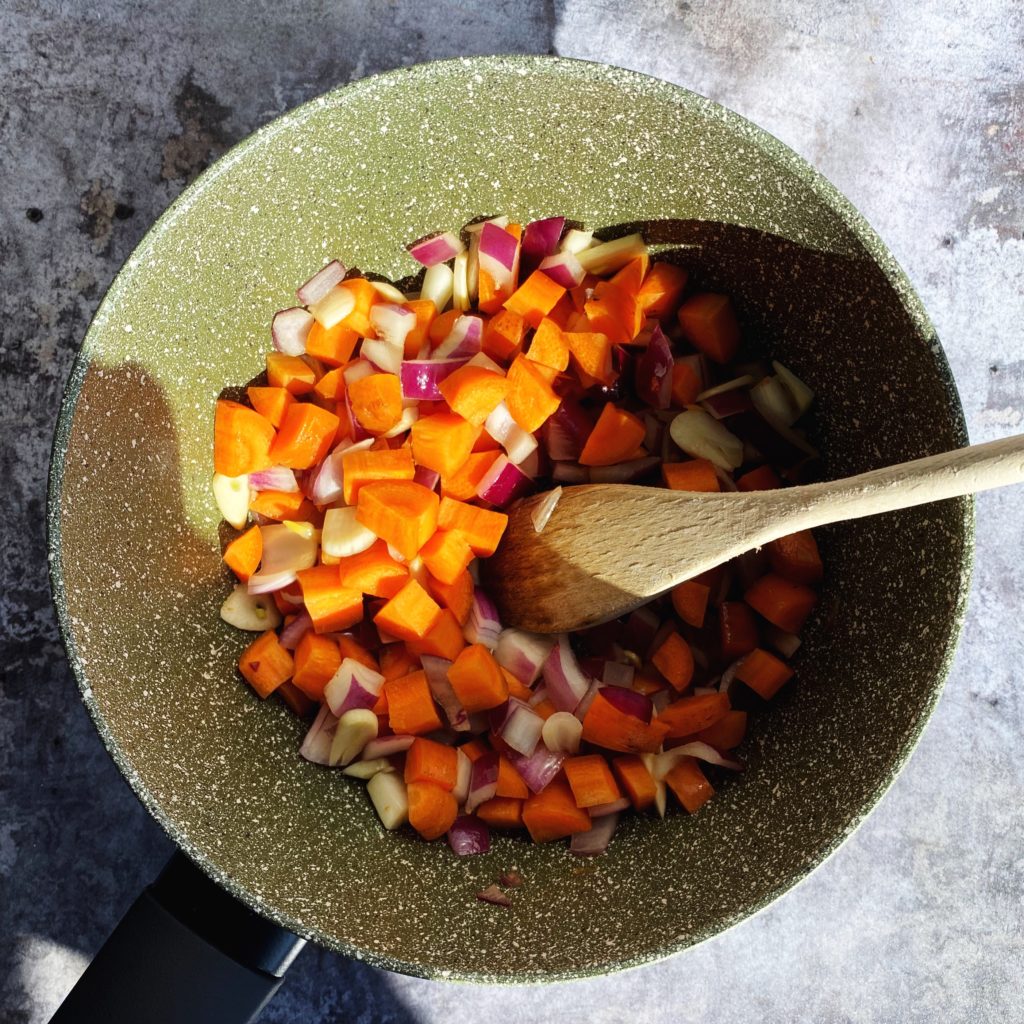
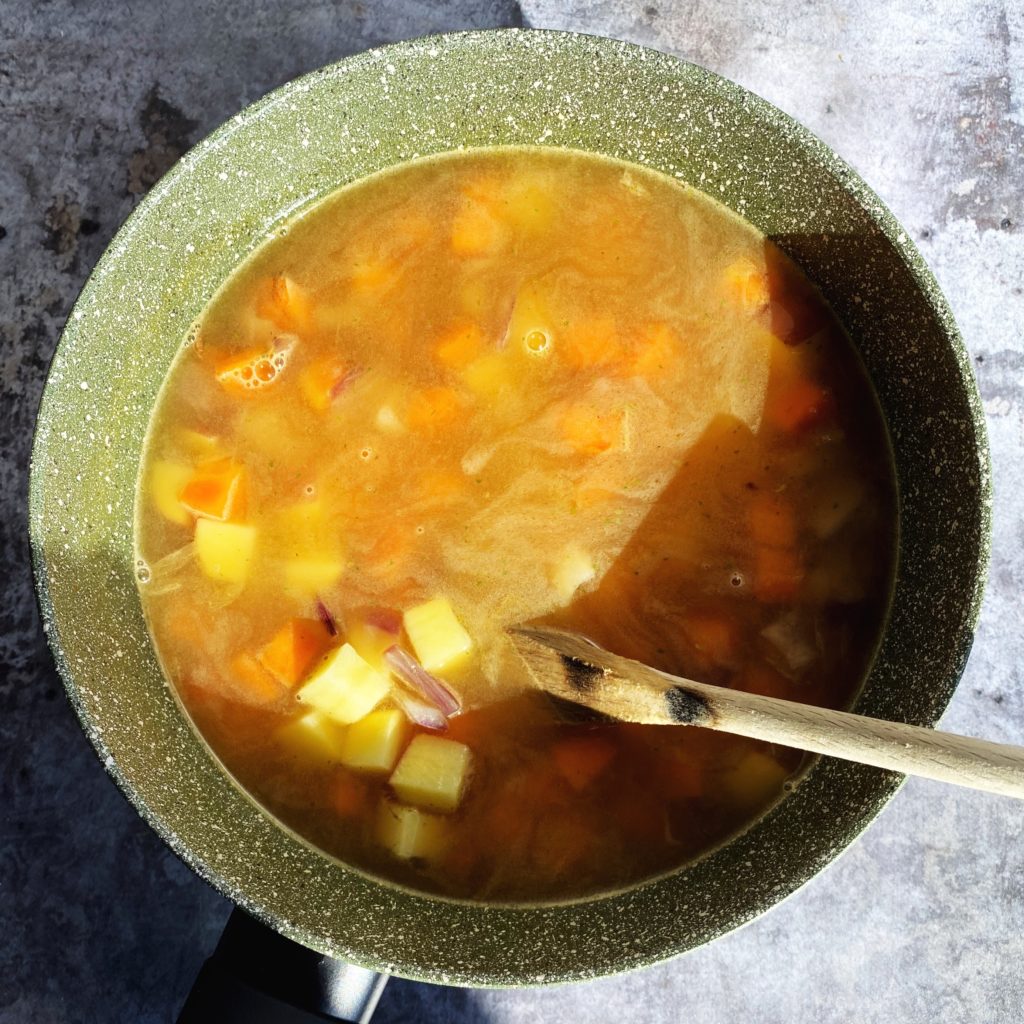
Dice and sauté the onions, garlic and carrots in the oil until just softening and starting to take on some colour.
Then dice and add the potatoes to the pot and generously cover the vegetables with water. Crumble in a stock cube and simmer with the lid on until the potatoes are soft.
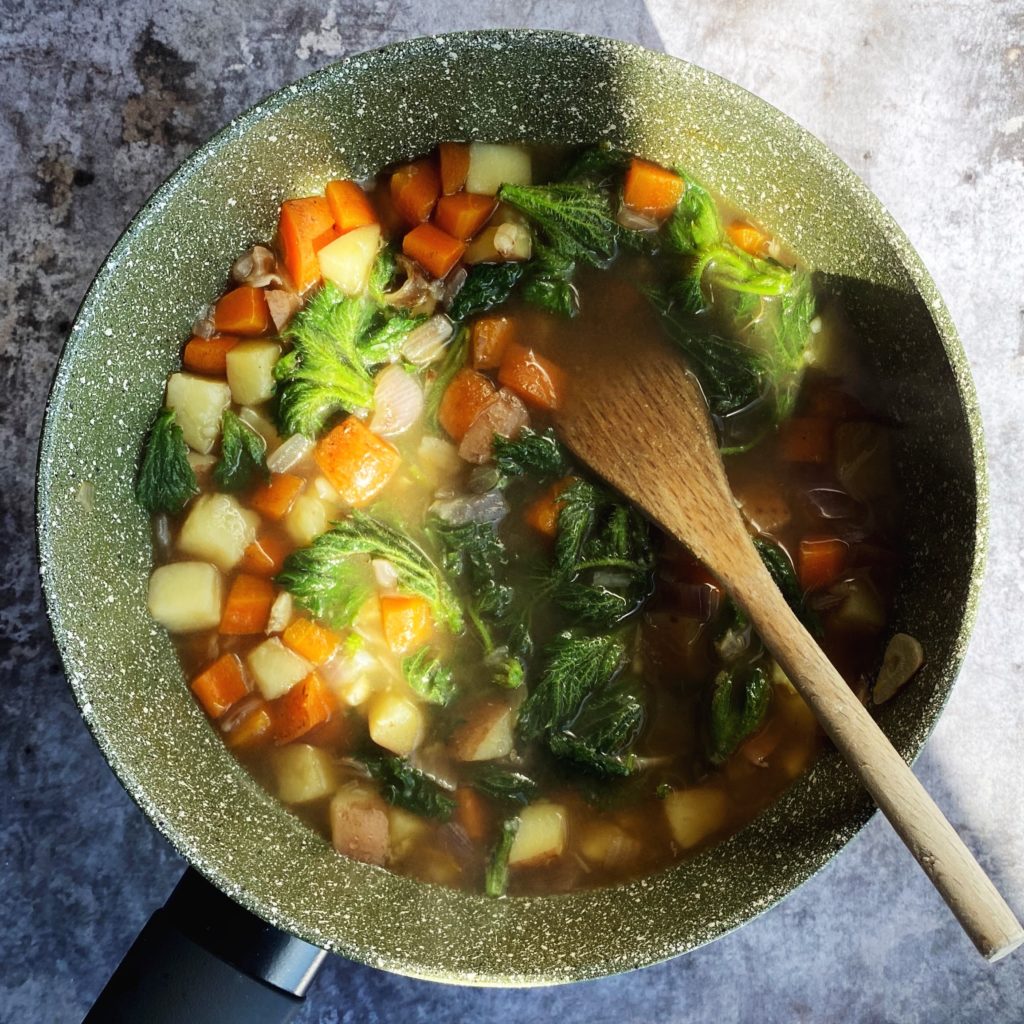
Add the rinsed nettle tips to the pot.
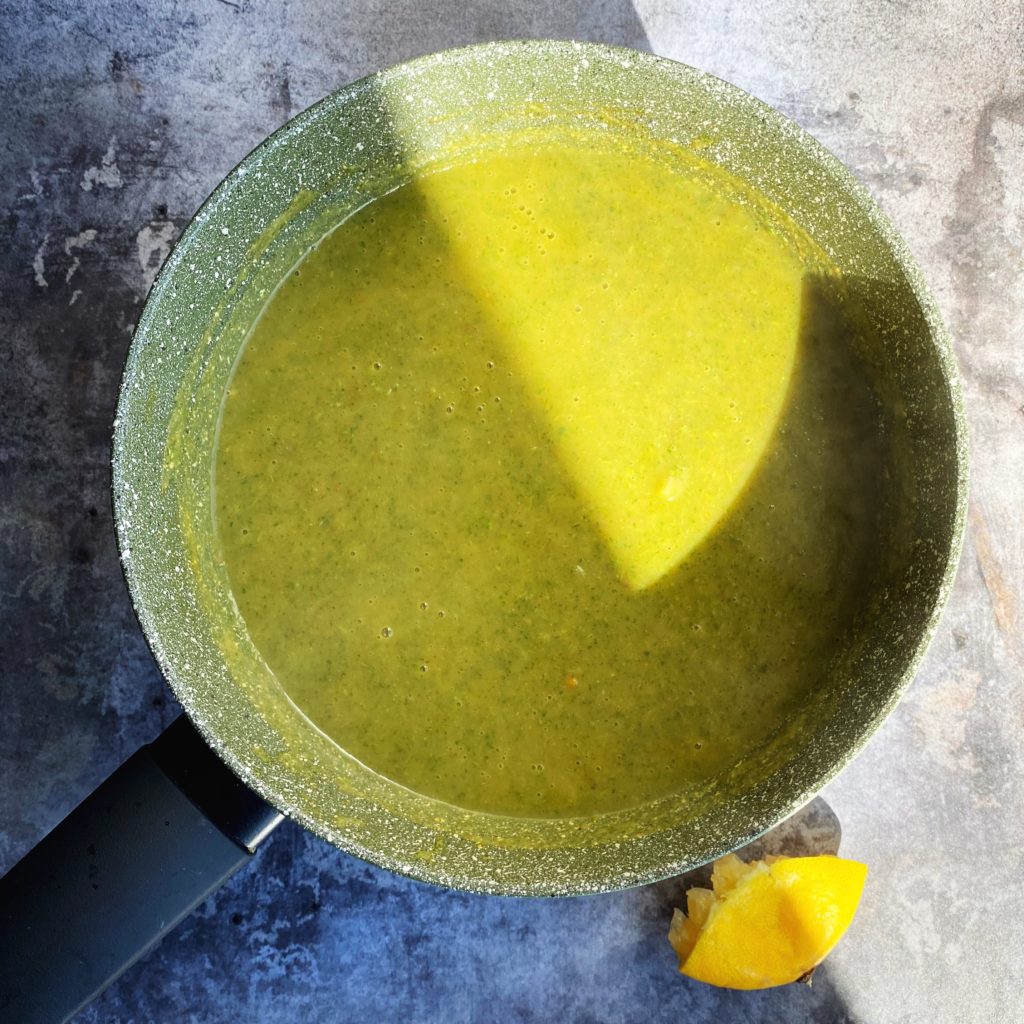
Stir the nettle tip into the soup and simmer for just 2 or 3 minutes. Then add the lemon juice and blend the soup with an immersion blender. Taste and adjust the seasoning as needed with salt and pepper.
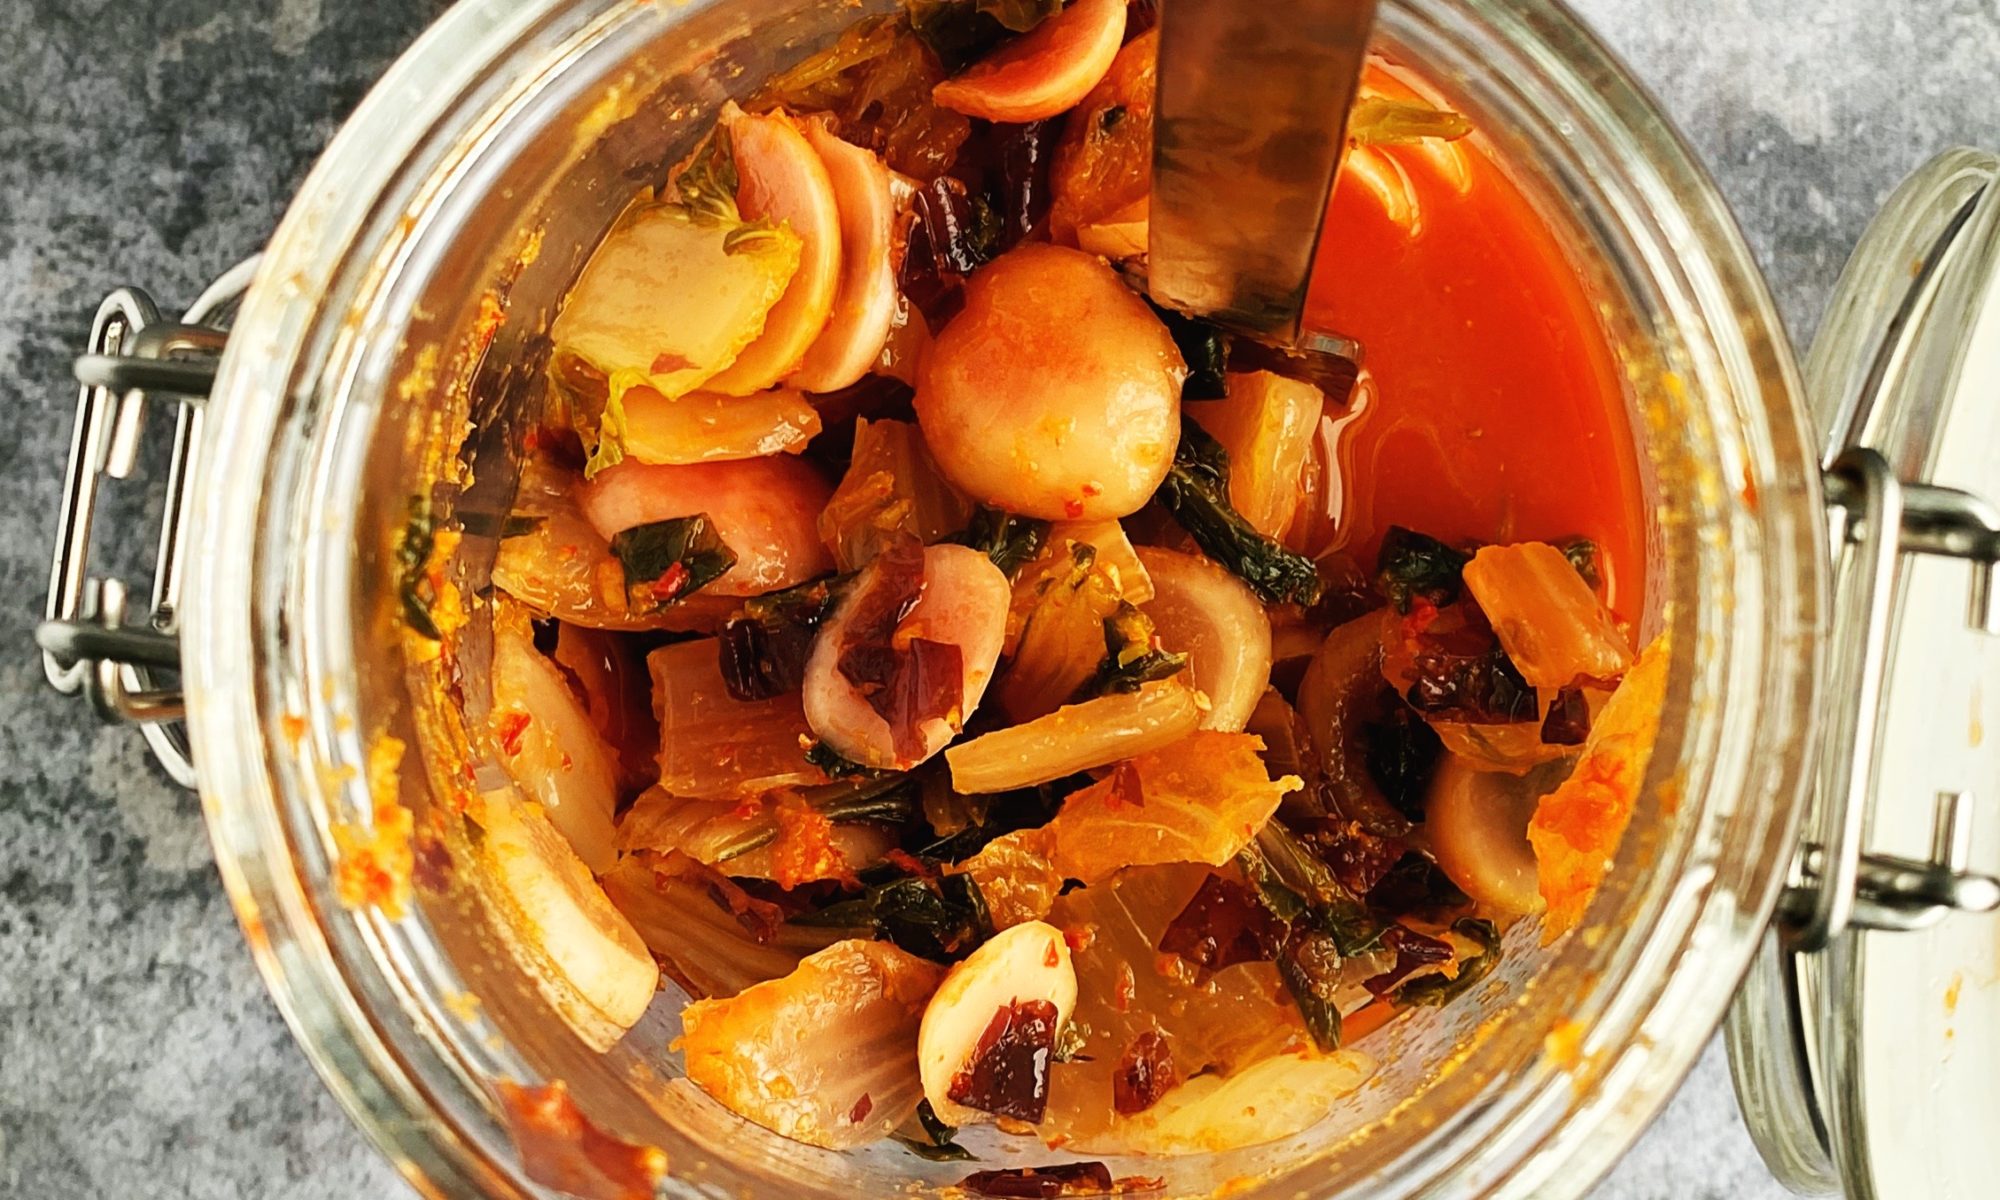
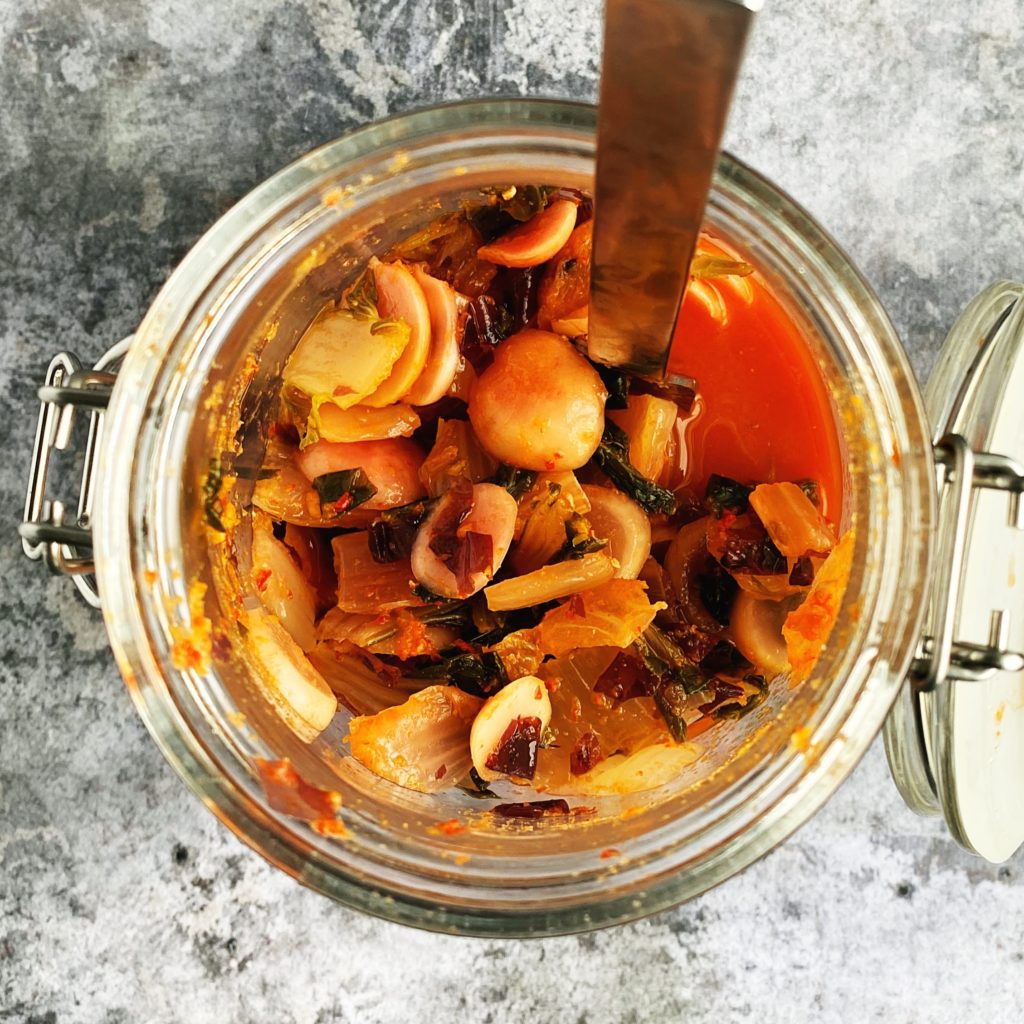
Like all fermented vegetables, kimchi is incredibly good for you. Luckily it’s mind-blowingly delicious too…and very easy to make yourself. I’ve made it with pak choi, seaweed and little radishes this time but you can play around with the ingredients and make it your own. Use local, seasonal vegetables for the best results. Here’s my quick tutorial video so you can see how easy it is to make yourself. Loads more fermenting inspiration in my book which is available to add to your veg order here. Any questions? Pop a comment down below and I’ll get back to you asap. Liz x
Ingredients
2 large pak choi
2 bundles of radishes
1 handful of dried seaweed
1 tbsp natural salt
3 fresh chillies (or dried to taste)
1 thumb of fresh ginger
6 cloves of garlic
Method
Gather and rinse your ingredients. Find a large jar, a chopping board, a sharp knife, a spoon, a rolling pin, a blender, a mixing bowl and a small jar or glass that fits snugly inside your large jar. Ensure all your equipment is nice and clean – no need to sterilise.
Reserve an outer leaf or two from your pak choi. These will be used as ‘followers’ at the end of the recipe.
Slice the rest of the pak choi into bite sized pieces and put them in the large bowl.
Thinly slice the radishes and add them to the bowl too.
Rinse and slice the seaweed too (if you are using nori, no need to rinse first) and add it to the bowl.
Add the salt to the bowl and use your hands to tumble the ingredients and evenly disperse the salt. Sit the bowl to one side to give the salt time to dissolve and start drawing brine out of the vegetables.
Meanwhile make the spice paste. Take the green stalks off the chillies and roughly chop them. Put them in a blender. Peel and chop the ginger and add that to the blender too. Peel the garlic and then blend the 3 ingredients together into a bright space paste.
Taste the salted vegetables and add more salt if needed. They should taste pleasantly salty and should now look wet and wilted. If they are too salty, add some more vegetables eg grated carrot or another pak choi.
Mix the spice paste through the salted vegetables. Be careful not to get any on your bare skin. Wear gloves or use a spoon.
Then pack the mixture carefully and firmly into the large jar. Use the rolling pin to tamp down each new layer to ensure no air pockets are left in the jar. Leave at least an inch or two of head room in the jar.
Now cover the chopped vegetables with the ‘followers’ (the leaves you reserved earlier). Tuck everything neatly in under the brine. Use the spoon to help tuck the leaves down the sides of the jar and ensure no little floaty bits are above the brine.
Weigh down the ‘followers’ with a small glass/jar/ramekin. See the video above for more details.
Then close the jar – if you are using a clip top jar, remove the rubber seal to allow gases to escape, otherwise just close a regular jar loosely or remember to ‘burp’ the jar every day to allow gases to escape by briefly opening and closing it.
Put the jar on a tray or in a bowl to catch any overspill and set it on a dark shelf to ferment at room temperature for at least one week. Keep an eye on it. Does it need burping? If so, do it over the sink! Have the gases caused the veg to rise up above the brine? If so push the weight down to expel and air bubbles and get everything neatly under brine again.
After one week at room temperature, taste your kimchi. It should be tangy, spicy and delicious. If you are happy with the tang-level, remove the weight and pop the jar in the fridge. It should last well for at least one month, if not many more.
*Tips to make your fermented food last longer in the fridge: No double dipping! Consider transferring the ferment to smaller jars before refrigerating.
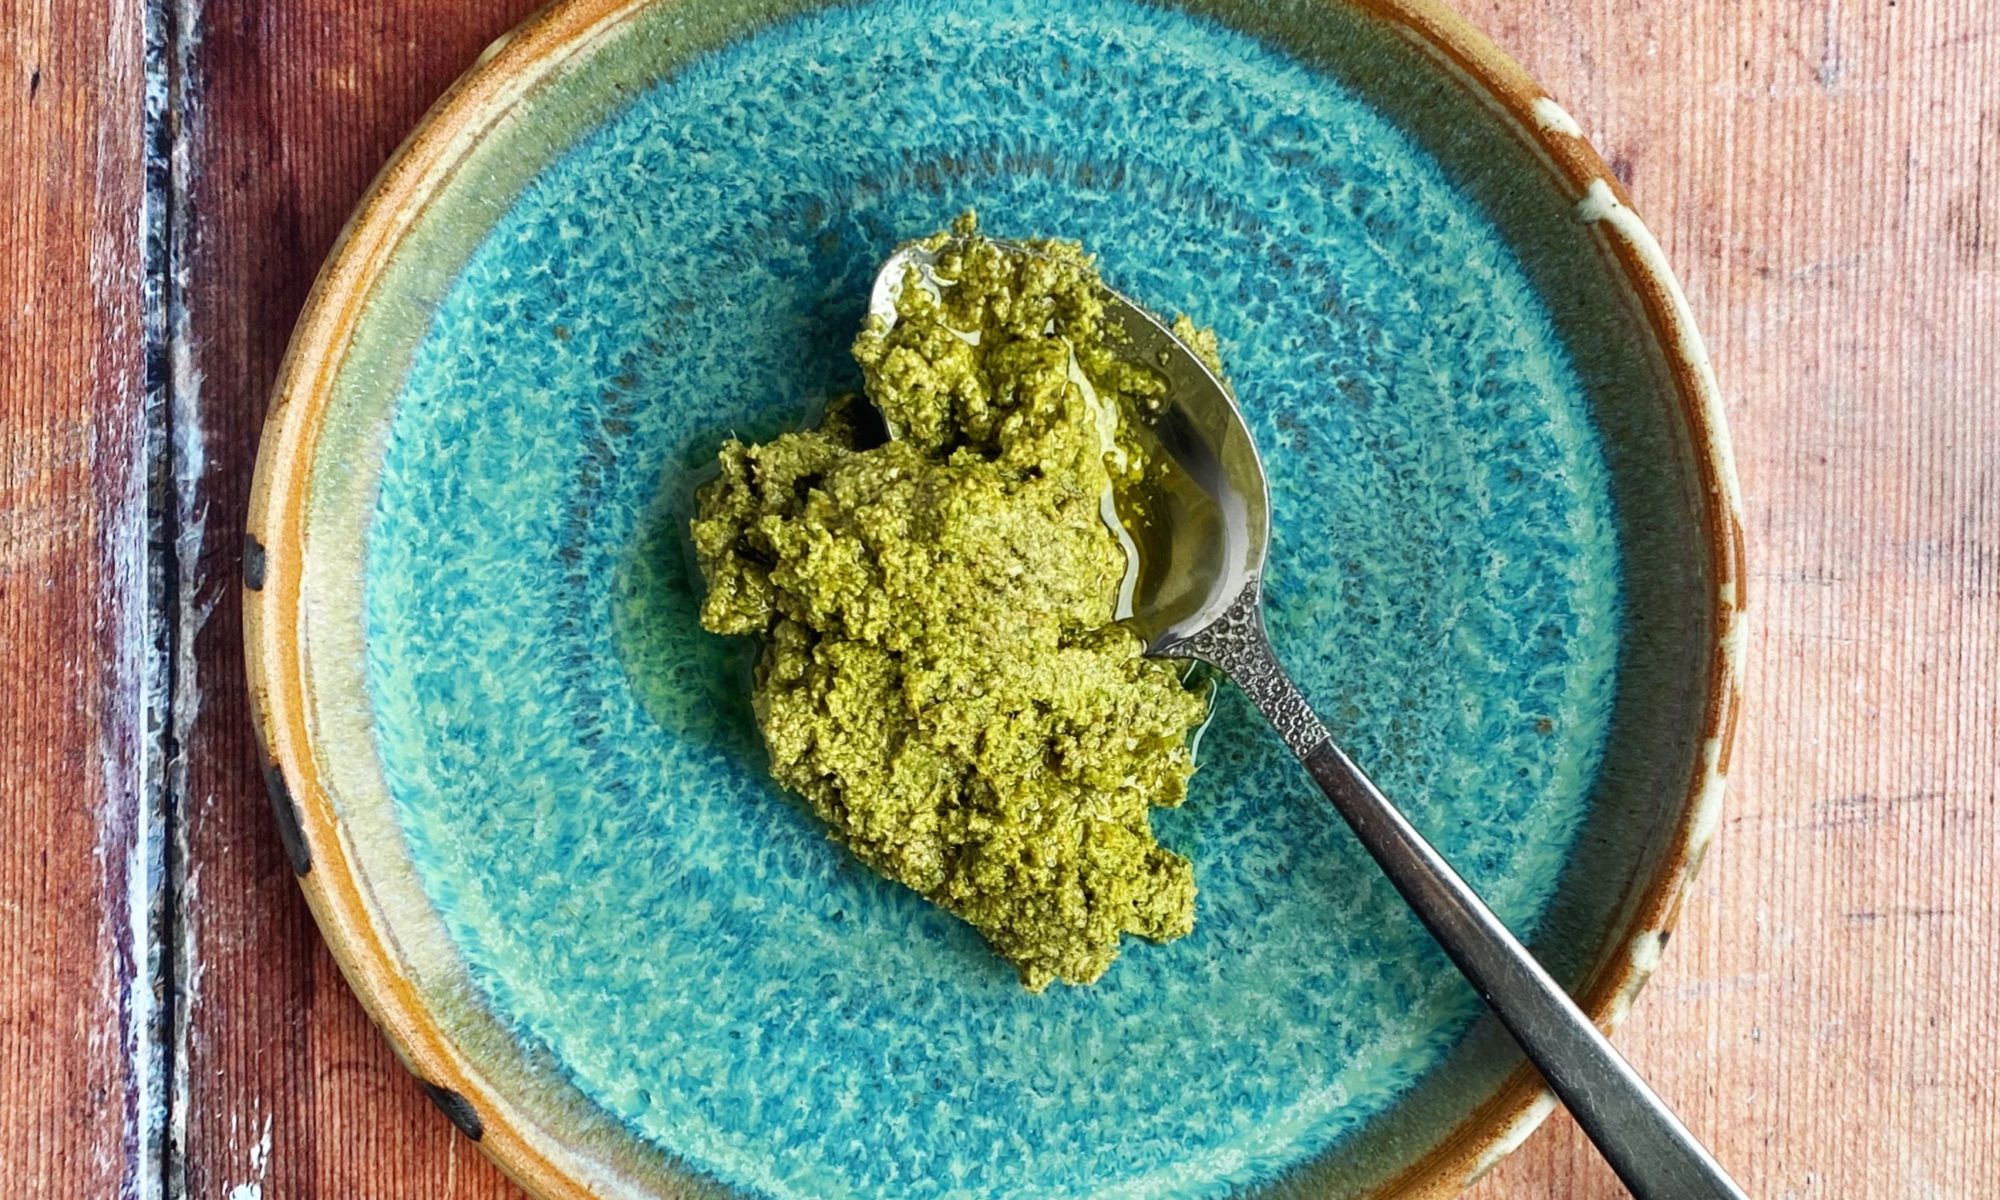
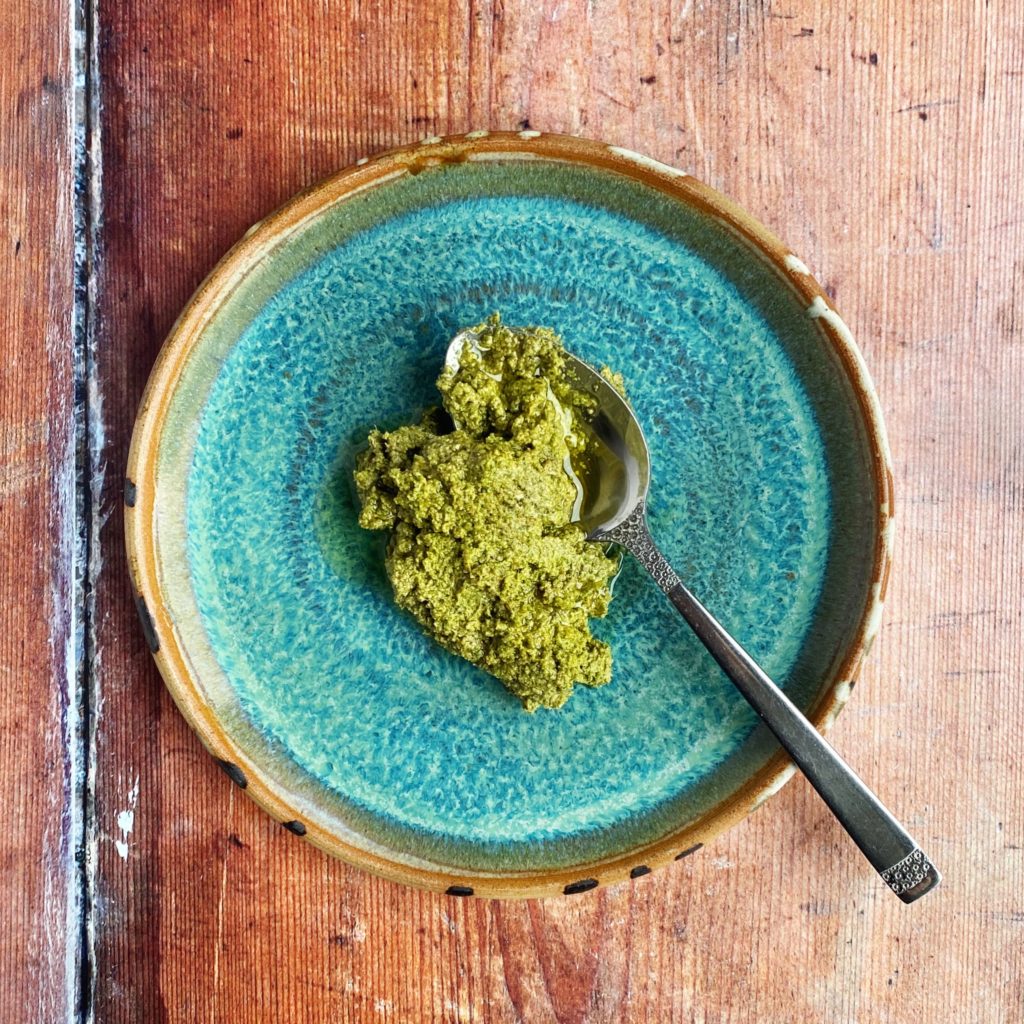
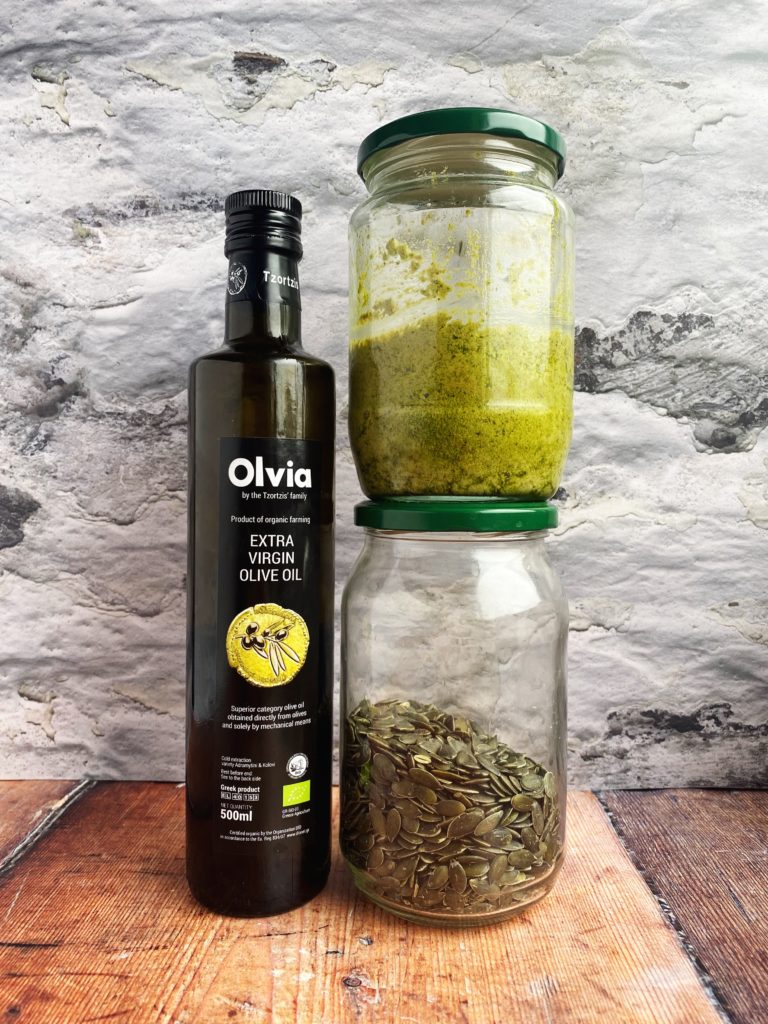
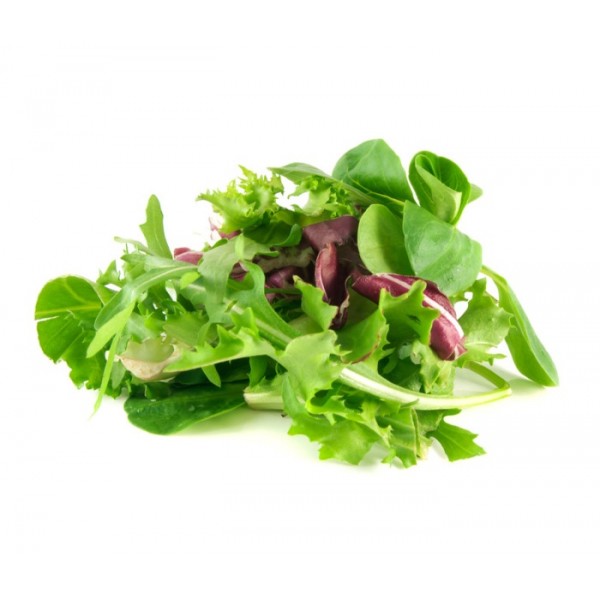
One of the most common ingredients that get wasted are salad leaves. The mixed bags of salad leaves really don’t stay fresh long, really they should be eaten within 3 days. So if you don’t get around to eating a salad, perhaps the weather changed and you were more in the mood for a hot meal, there are a few ways you can use them up in a different way. Whatever you do, don’t throw that bag of slightly sad looking leaves away! Salad leaves can be blended into a soup in place of spinach or watercress or make this very flexible salad bag pesto! If you have any fresh herbs around the place, chuck some of those in too.
Read more about food waste in my blog post on the subject here. Liz x
Ingredients
mixed salad leaves (and odds an ends of fresh herbs if available)
sunflower and pumpkin seeds (or any nuts or seeds you like)
lemons
garlic
olive oil
salt
nutritional yeast (or odds and ends of cheese)
Method
I’ve deliberated not given amounts as pesto is a very fluid recipe. You can taste and adjust it as you go. You should aim to have around half the volume of the mixture as nuts or seeds. So if you have about a mug full of salad leaves that need using, toast about half a mug of nuts or seeds.
Toast the nuts or seeds in a dry frying pan to bring out their flavour. Allow them to cool.
The put them in a food processor. I used a blender because my food processor is broken – it works ok but I prefer a food processor for pesto because I don’t want the mixture to be too smooth in the end.
Add a crushed or grated glove of garlic, a shake of nutritional yeast, a big pinch of salt and all the salad leaves.
Then add lemon juice (you can add the zest of the lemon too if you like, or save it in the freezer for something else). Start with a small amount of lemon juice, you can always add more later.
Add a very generous amount of olive oil. A quality extra virgin olive oil is best for pesto.
Pulse the mixture, scrape down the sides and pulse again until you reach a loose, rough paste. Add more olive oil as you go if needed.
Taste and adjust the seasoning with more salt of lemon juice as you like. Then store in a clean jar in the fridge. To make it last longer, cover it with a thin layer of olive oil to protect it from the air. Use it up within a week.
Pesto is not just for pasta! Use it for a dip, stir it into hummus or mayo, spread it into wraps or sandwiches, toss it through roasted veg or steamed greens, dollop it on your grainy salads…
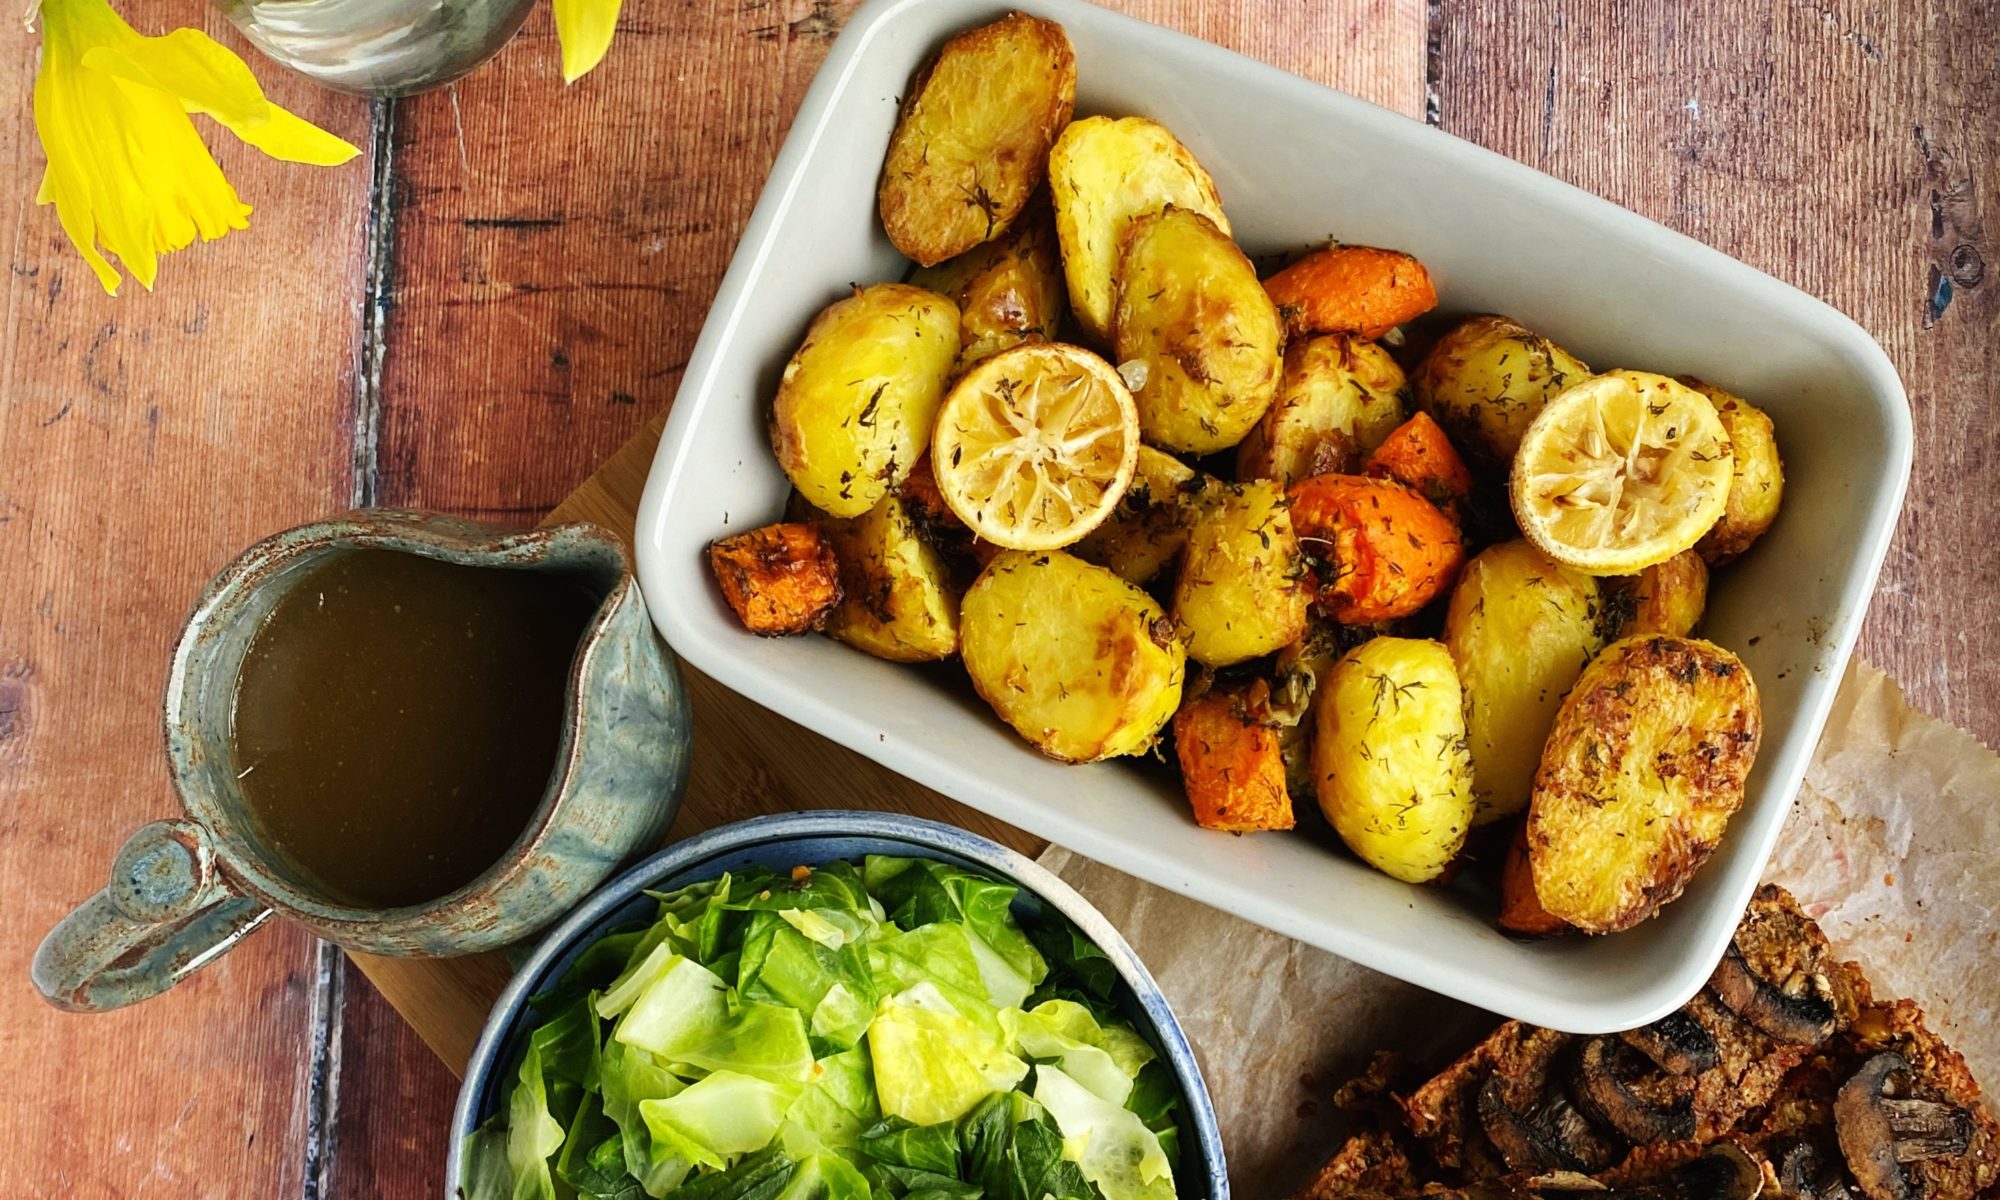
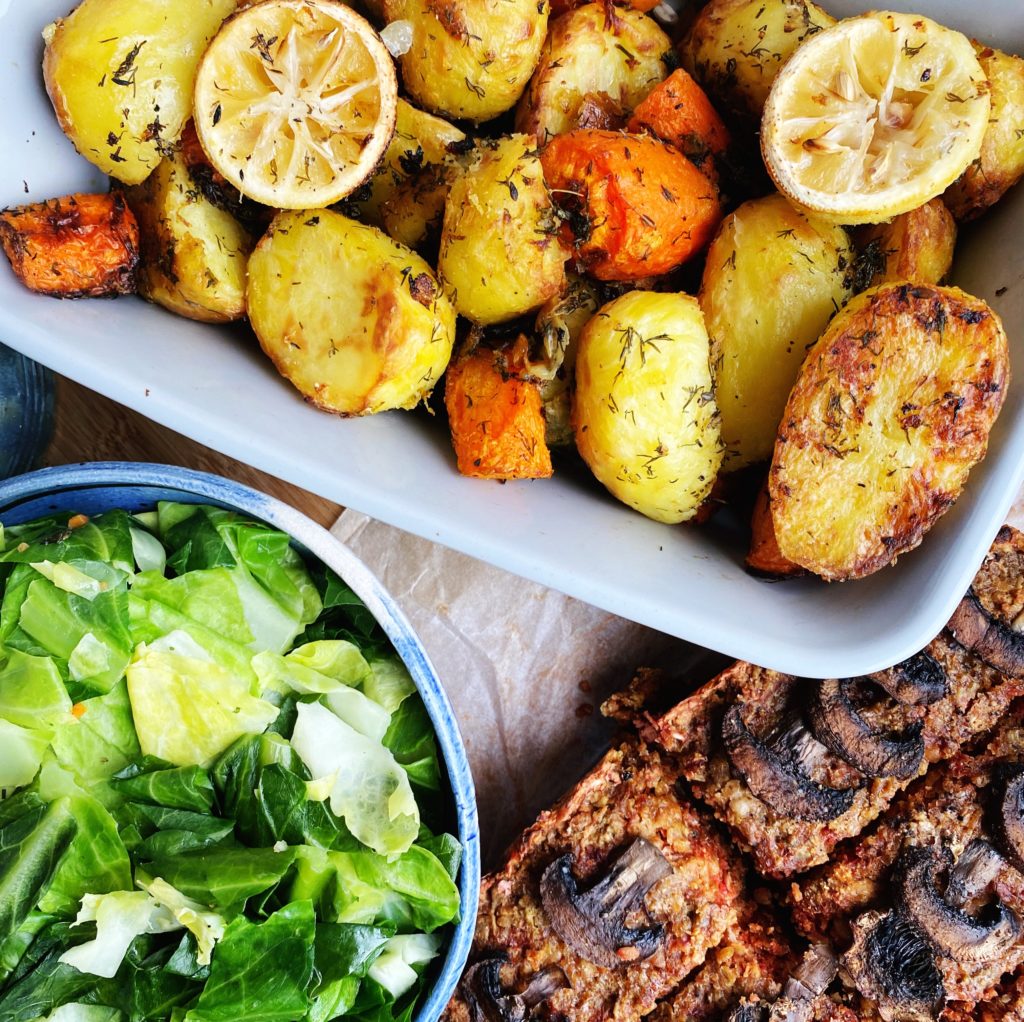
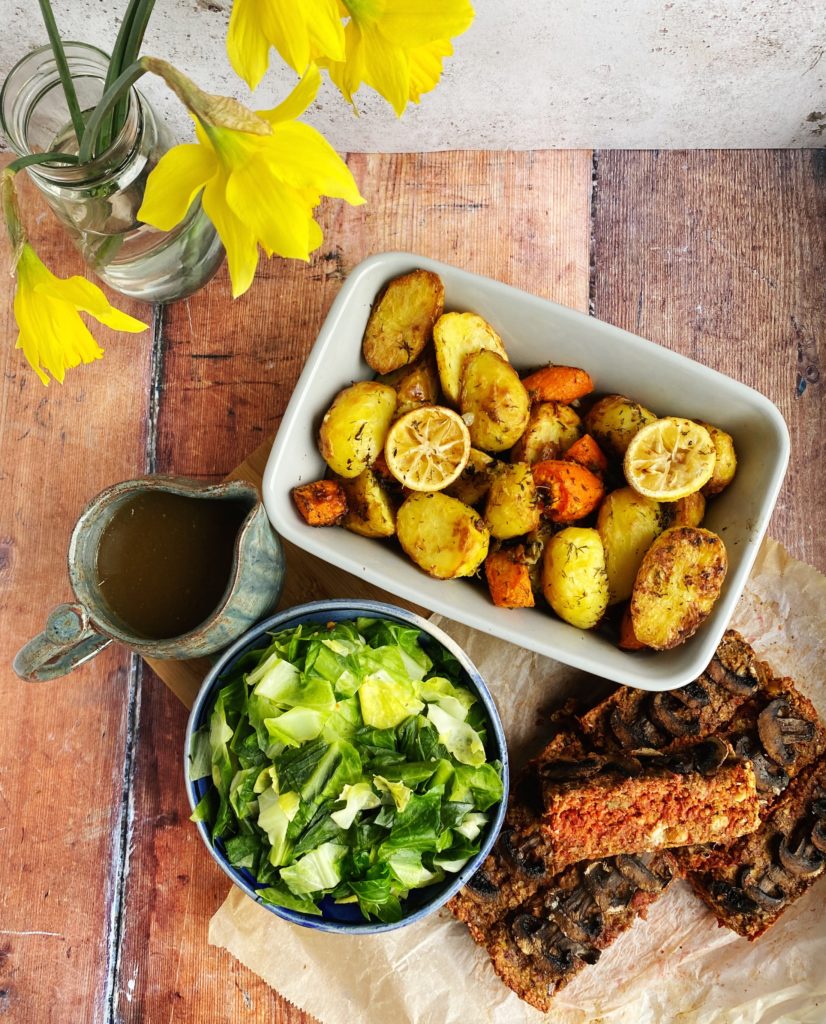
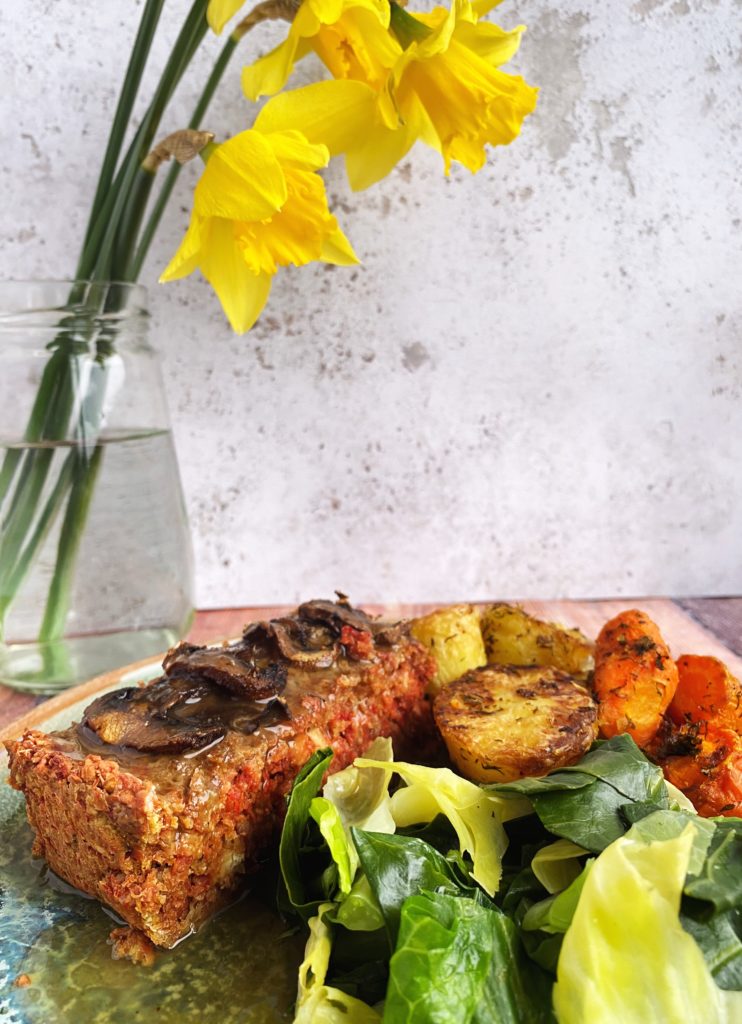
A roast on Sunday doesn’t have to be a big faff. Here’s a quick and easy recipe for a delicious beetroot and butterbean loaf with lemon and herb roast veg, spring greens and gravy. Liz x
*You can get all the ingredients from our online shop delivered straight to your door. Just click on any bold words to be taken to the item to add to your cart. We deliver to every address in Ireland.
Turn your oven to 200C. Find your biggest roasting dish and put it in the oven to heat up too.
Peel the potatoes and carrot, cut them into large chunks and just cover them with water in a big pot. Put the lid on the pot and get them on the stove to boil.
Meanwhile make the beetroot and butterbean loaf:
Toast the sunflower seeds in a dry frying pan and add them to a blender with the linseeds and oats. Pulse until coarsely combined, but still with some texture.
Grate the beetroots into a mixing bowl on the fine side of the grater. Add the drained tin of butterbeans to the bowl too.
Add the oat, sunflower seed and linseed mixture to the bowl, season well with salt and pepper (you could also add additional flavourings here like lemon zest, crushed garlic, herbs).
Using one hand, squish the mixture together into a stuffing-like mixture. You may need to add more oats as you go if your mixture is too wet. When you are at stuffing texture taste the mix for seasoning ad adjust as needed.
Then put the mixture into a baking dish or loaf tin lined with baking paper. Top with slices of mushroom a drizzle of olive oil and some salt and pepper. Then pop the dish in the oven to bake.
By now the potatoes and carrots will be par boiled so move them off the heat. Finely chop a generous couple of handfuls of herbs and put them into a bowl with the zest of a lemon, 3 crushed garlic cloves, salt, pepper and enough sunflower oil to bring it into a loose sauce.
Remove the hot, large roasting dish from the oven and drizzle it with sunflower oil. Use a slotted spoon to move the potatoes and carrots onto the hot tray and keep all the water in the pot (you’ll need this to cook the cabbage and make gravy with later).
Add the garlic/lemon/herb oil to the roasting dish of potatoes and carrots and stir to coat the veg in the mixture. Cut the zested lemon in half and add it to the roasting tray. Return the dish to the oven and get on with the greens and gravy.
Add a stock cube to the water that the carrots and potatoes were cooked in. Then rinse and chop the cabbage and add it to the pot to poach in the stocky water. When it is still slightly undercooked, use the slotted spoon to pull out the cabbage and keep it in the pan you used earlier to toast the sunflower seeds (you’ll use this to re-heat and finish cooking the cabbage when the beetroot loaf and roast veg are nearly done).
Then make the gravy. Put a tsp of dried mushrooms into the stock and bring it to the boil. You can also dip the bowl that you mixed the lemon/garlic/herb oil for the roast veg in and get all those flavours added to the gravy.
Mix the cornflour with a little cold water into a smooth paste in a cup. Then add that to the stock and simmer and stir until it has thickened into a gravy. Taste and adjust the seasoning if needed. I like to add a couple of tbsp of soy sauce to add a punchy umami flavour. You may wish to add a splash of wine or a spoon of recurrent jelly to your gravy. When you are happy with the flavour and texture of your gravy you can pour it into a jug through a sieve and keep it warm.
The beetroot and butterbean loaf and roast veg should be ready after about 40-60 minutes in the oven. Just keep an eye on them. Then re-heat the cabbage and gravy and serve!
An image from my cookbook, Cook Draw Feed (available to add to your cart here)
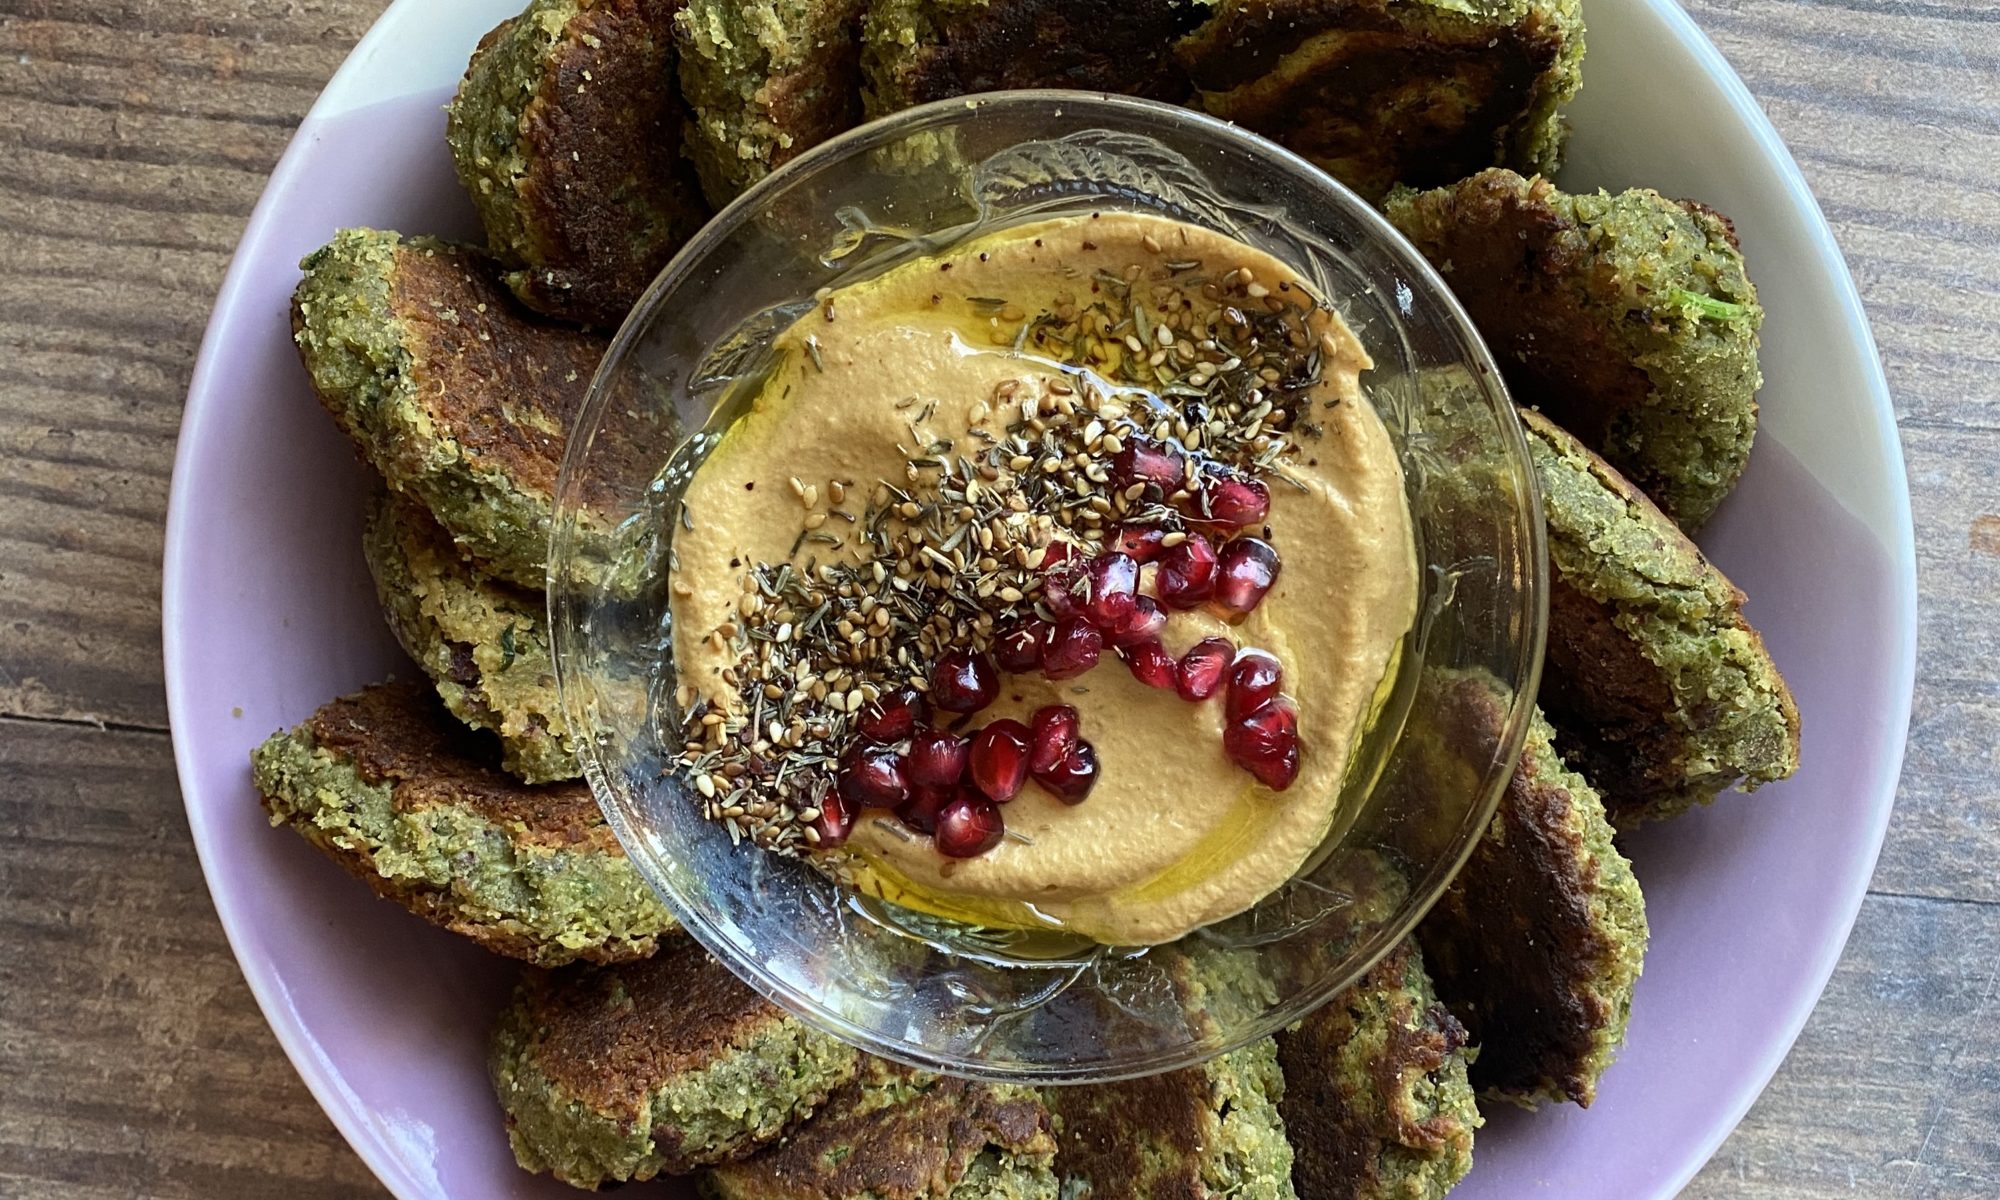
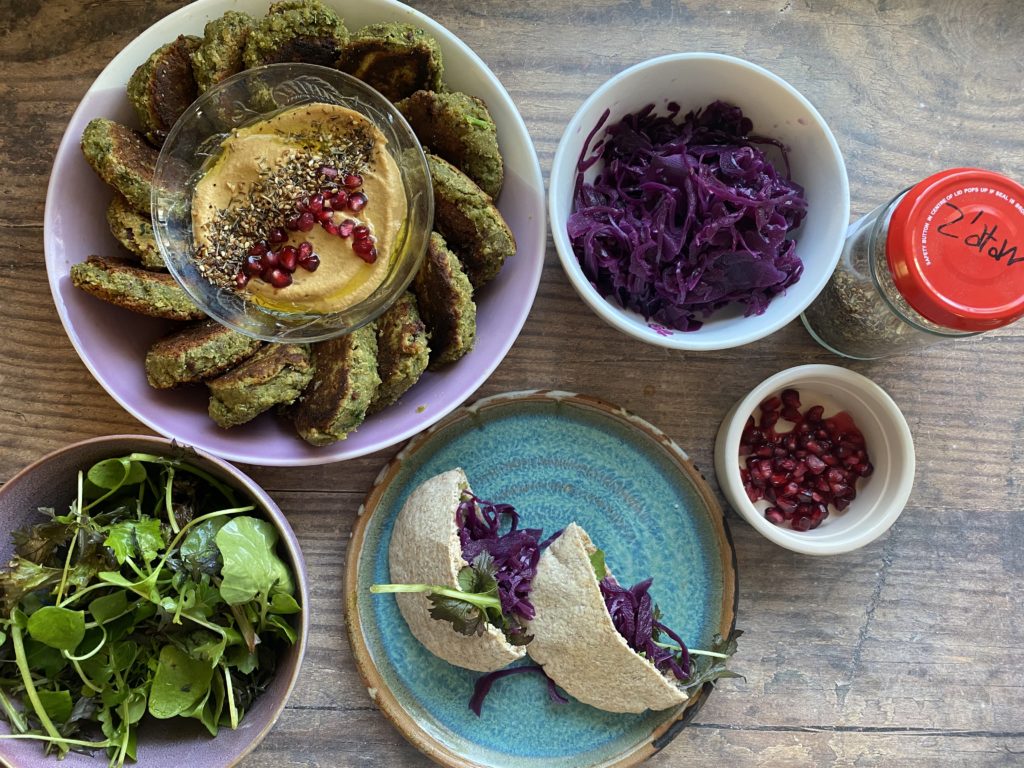
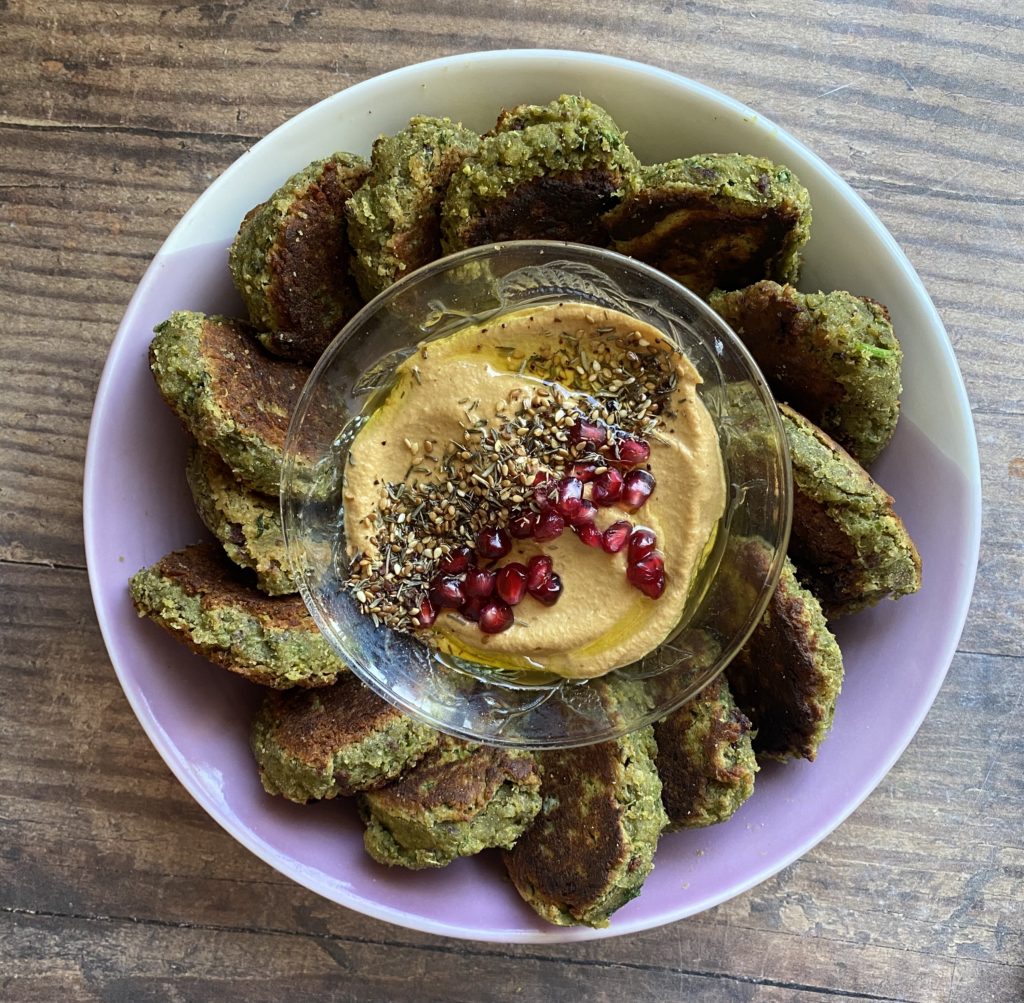
A classic vegan stalwart, the falafel, but this time with a festive twist. It’s perfect for Christmas sandwiches with some hummus, ruby red sauerkraut and peppery green leaves, or as part of a festive buffet. Middle Eastern food lends itself very well to festive flavours with its liberal use of sweet and warming spices. Or maybe it’s because baby Jesus hailed from that part of the world? Well, whatever the reason, I find myself craving lots of tangines, tabbouleh, hummus, harissa, falafels, baklava, pomegranates etc this time of year.
My festive falafel would make a nice little Christmas starter served on some leaves with a dip (a smokey baba ganoush or a spicy harissa perhaps), a sprinkle (some crunchy hazelnut dukka or a zingy z’atar) and some juicy red pomegranate seeds.
My kids also love a falafel as a burger. Just make them into burger sized patties and serve them in a bun with whatever toppings you like and with a side of potato wedges. Here I’ve served it as a lovely lunch with toasted pitta breads, salad, babaganoush, z’atar and sauerkraut.
Enjoy! Liz x
Ingredients (makes around 15 – 20 falafels)
1 can of chickpeas – drained (reserve the aquafaba to make this cake?)
180g cooked, peeled chestnuts (carefully pierce each nut and roast or boil until soft, then cool and peel)
Pulse all the ingredients except the gram flour and sunflower oil together in a food processor until combined into a rough paste then taste for seasoning. Add more salt, pepper or spices if needed.
Stir through enough gram flour to make a manageable dough. Be careful not to make the dough too dry though.
Then heat up a heavy bottomed frying pan with a generous slick of sunflower oil.
Form the dough into little balls – I find the easiest way to do this is to use two dessert spoons – and drop them into the pan of hot oil.
Turn the heat down to medium-high and once the falafels are cooked on the bottom, flip them over with a spatular and squish them down into little discs. Cook them on the other side until golden brown. You may wish to flip them once more to cook the first side a little longer.
Repeat until all the dough is used up and keep the falafels warm. Then serve with salad, dips and breads to your liking.
Baba Ganoush
I often have an aubergine in my weekly large veg box from the farm so I made a baba ganoush this time. It’s very easy. Simply roast the aubergine in a very hot oven until it’s beautifully charred, smokey and silky soft all the way through. Then once it’s cool enough to handle, remove the skin and pop the flesh in a food processor with a small clove of garlic, a tbsp of tahini, a tbsp or two of lemon juice, a big pinch of salt, a small pinch each of smoked paprika and ground cumin and a drizzle of extra virgin olive oil. Then blend until smooth, taste for seasoning and adjust as needed.
Z’atar
Z’atar is a stunning Middle Eastern sprinkle, so perfect with falafel and dips. I make my own very simply with an even blend of toasted sesame seeds, dried thyme and sumac. The combination of toasty sesame seeds, herby thyme and zingy sumac is so delicious. It’s well worth hunting down some sumac and making some yourself.
Did you make this recipe? Let us know how it went in the comments. Don’t forget to share the recipe with your friends and tag us if you take a photo of your creations on Instagram or in our Healthy Eating facebook page. We love to see our recipes leave the screen.
If you like this recipe you’ll love my book! Add it to your next veg box delivery here.
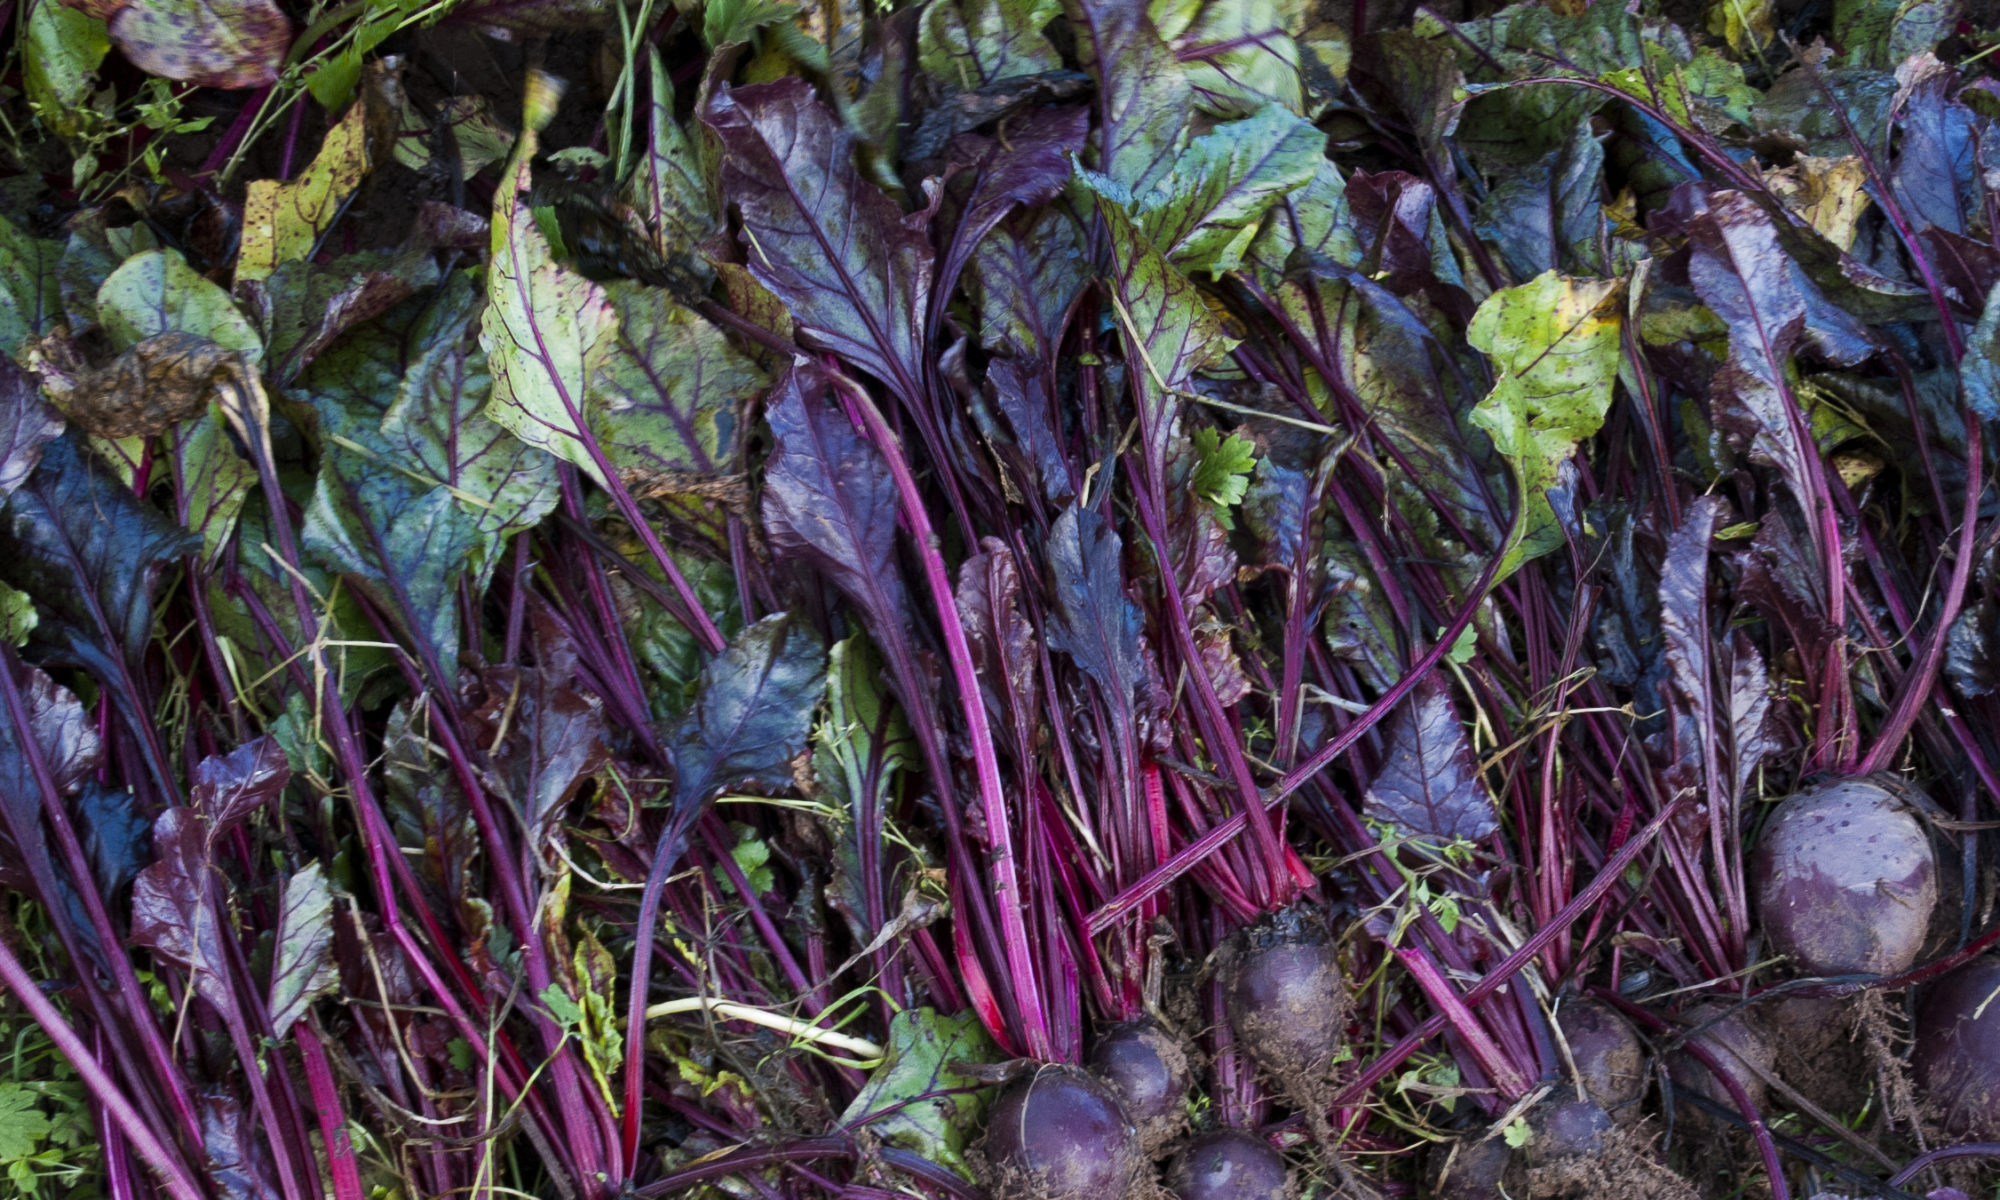
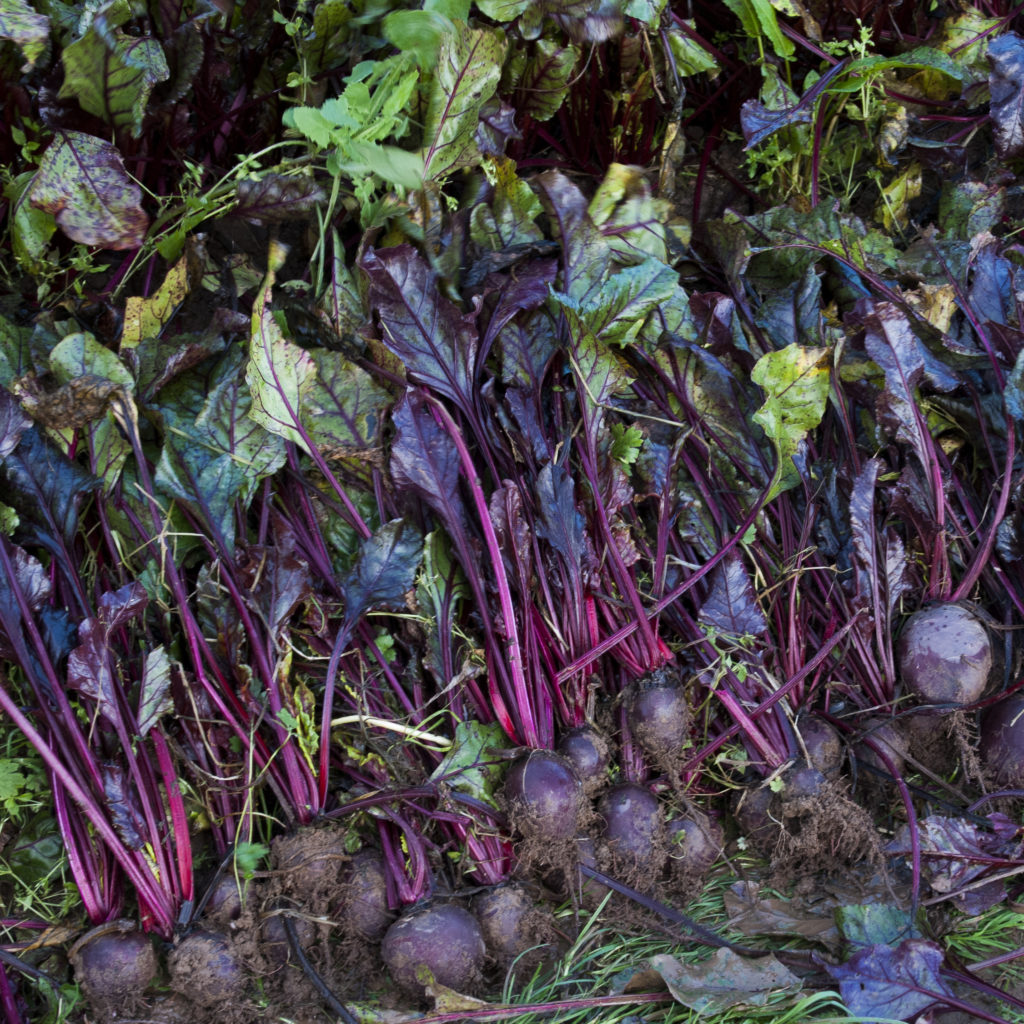
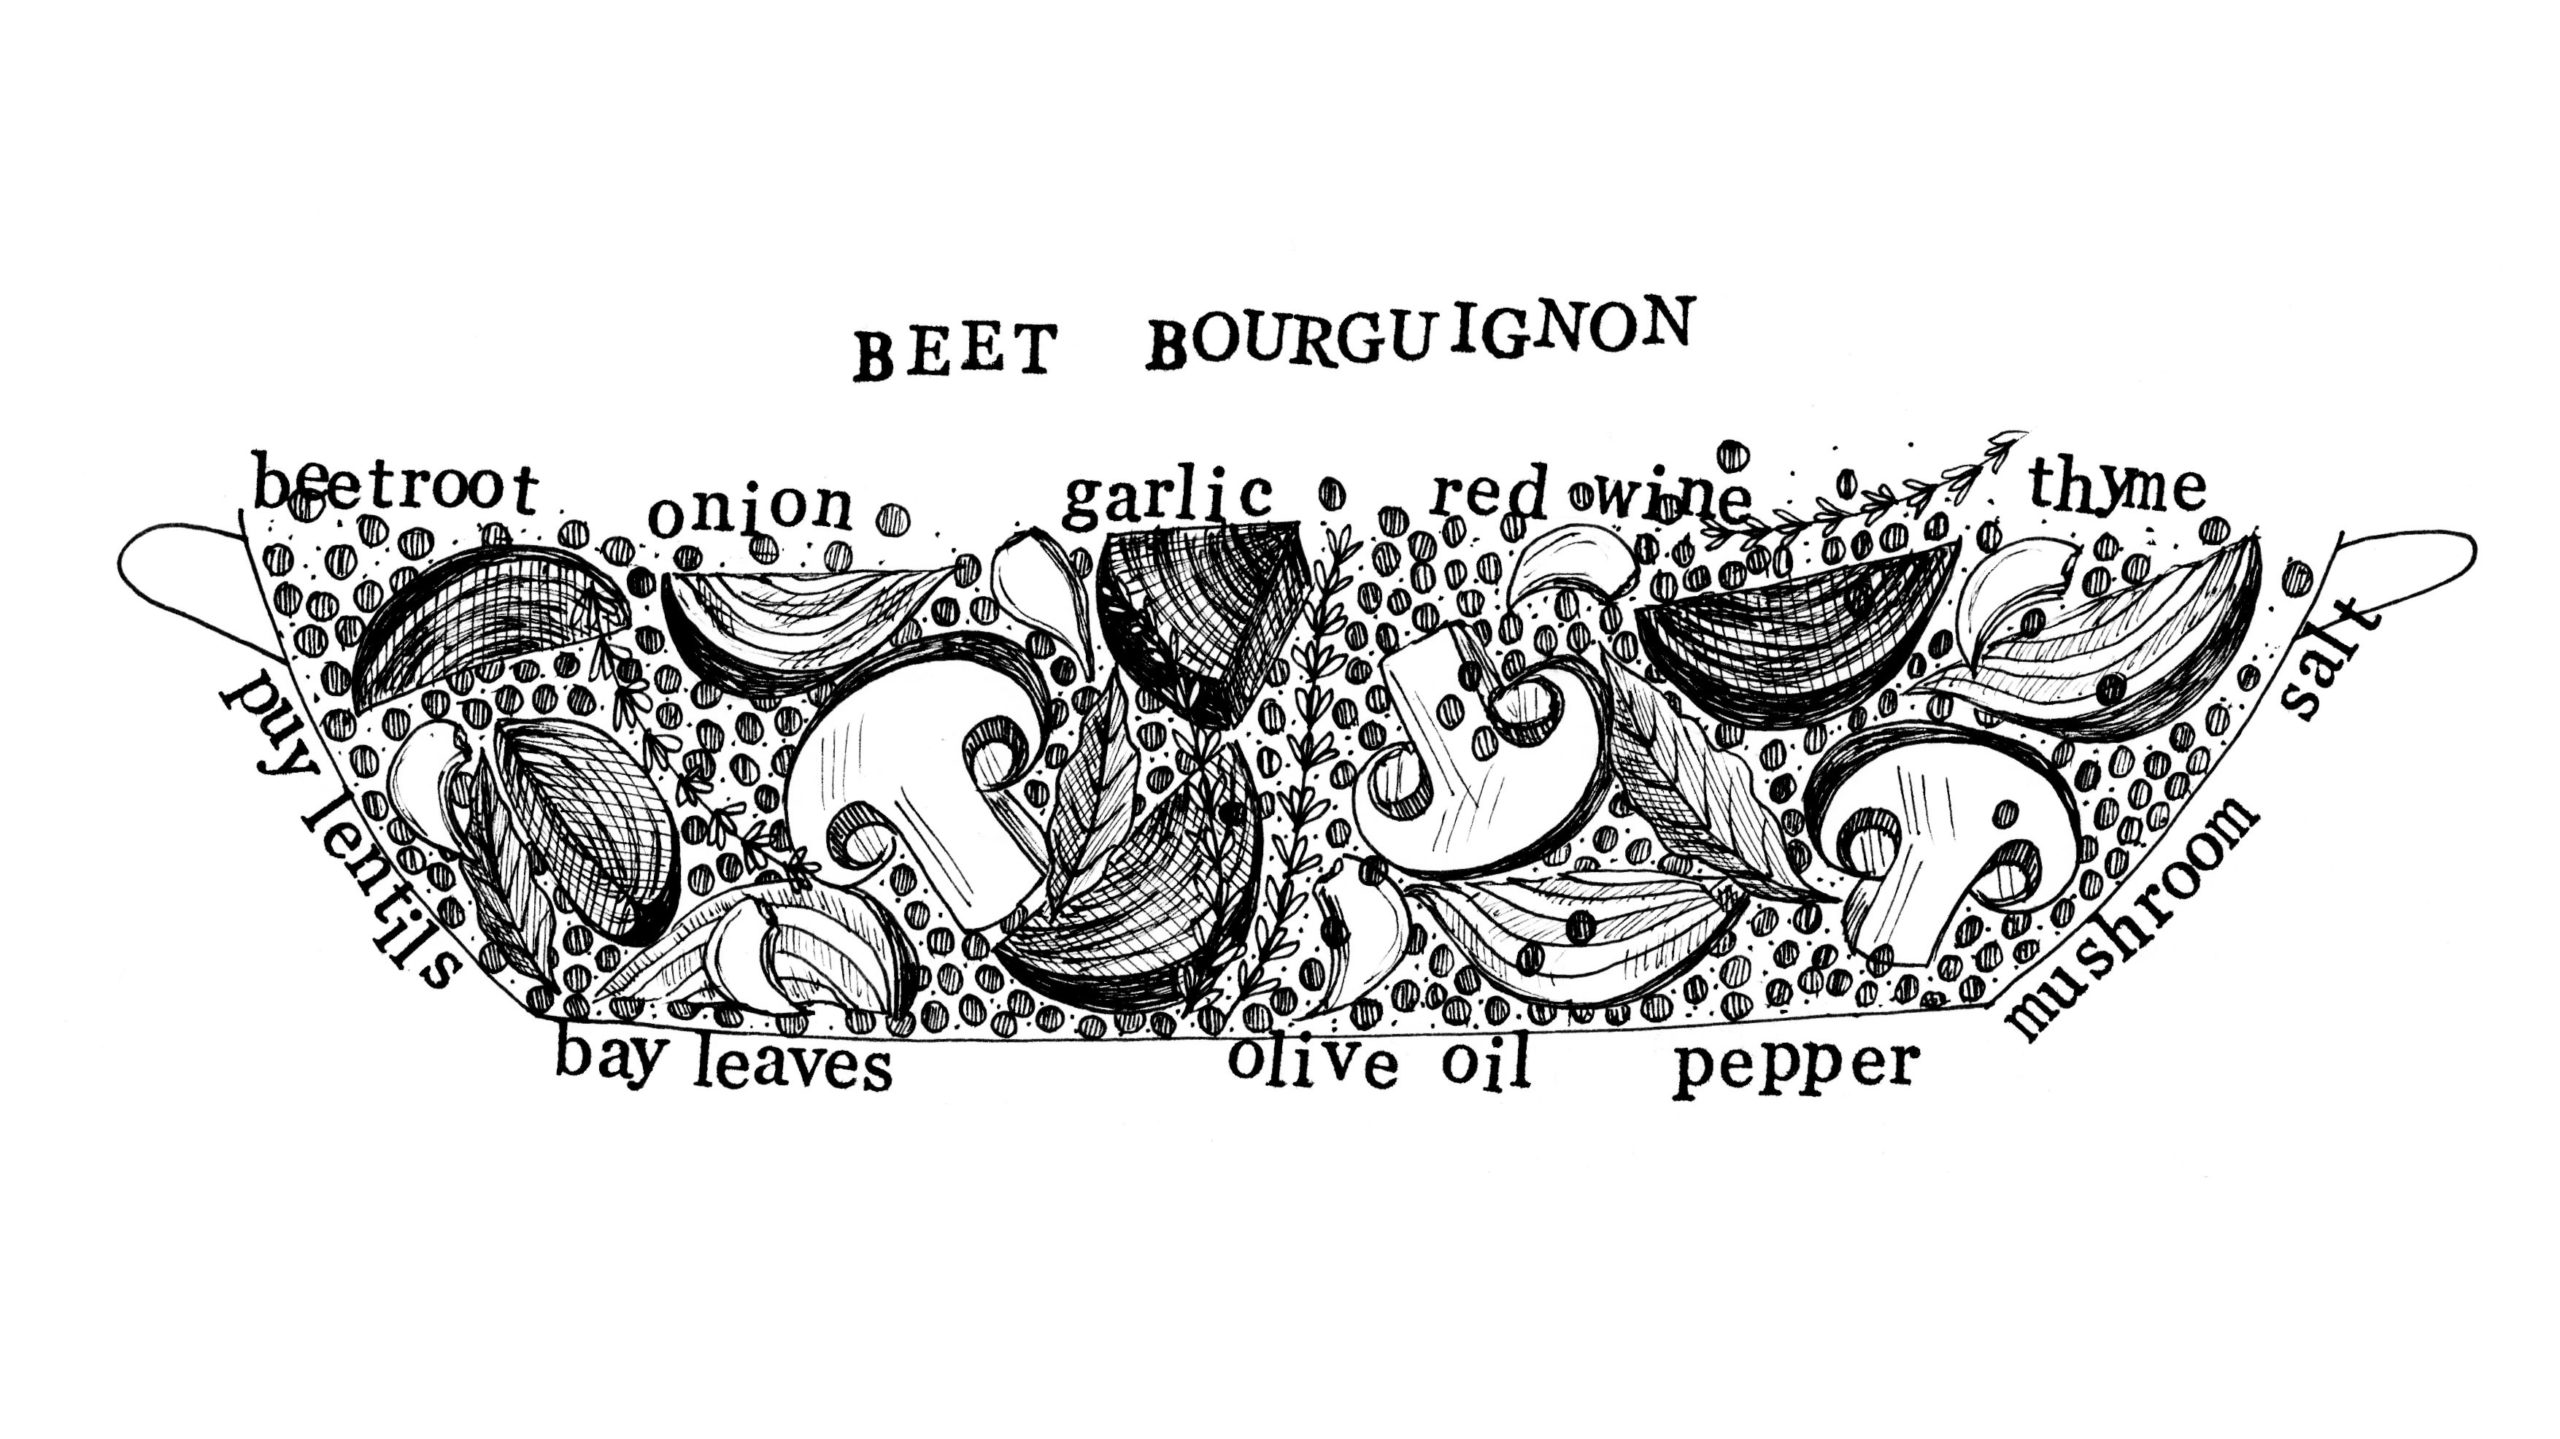
This is my plant based take on the classic French stew. Beetroots have a beautifully earthy, almost bloody quality which seeps and simmers into a spectacularly rounded sauce. I roast wedges of beetroot and onion, chunks or whole mushrooms and whole, peeled cloves of garlic before starting the lentil stew to create a complexity of flavour you wouldn’t get from simply simmering everything together.
Roasting caramelises the edges of vegetables and brings little sweet and smokey flavours and textures to the finished dish. It’s those layers of flavour…the outer edges that caramelise, the middle that is sweet and soft, the simmering richness, the fragrance of bay and thyme leaves, the tang and texture of red wine…that make a simple stew into a memorable meal. Serve on mashed potatoes or with good bread, some wilted greens, whatever is in season, and a dollop of Dijon mustard. Enjoy in front of a fire on a chilly winters evening with a glass of red wine. Liz x
Turn your oven on to 200C and put the beetroot, onion, garlic cloves and mushrooms in an oven and hob safe pot. Drizzle a tbsp or so of olive oil over the vegetables, season them generously with salt and pepper and mix well.
Roast the vegetables in the oven until they take on some colour and start to soften. This should take around 30 minutes. Take the pot out of the oven and stir the vegetables every 10 minutes or so to ensure each vegetable feels the full force of the heat and gets a little caramelised.
Then bring the pot onto the hob and add the mug of lentils, the thyme, bay leaves and mug of wine. Get the pot on to simmer and add the water or stock.
Let the dish simmer until the lentils are cooked through. This should take around 30 minutes. Keep an eye on it, you may need to add more water or stock if it starts to dry out.
Taste for seasoning and add more salt or pepper as you like. Then serve with good bread or mashed potatoes and some wilted greens.
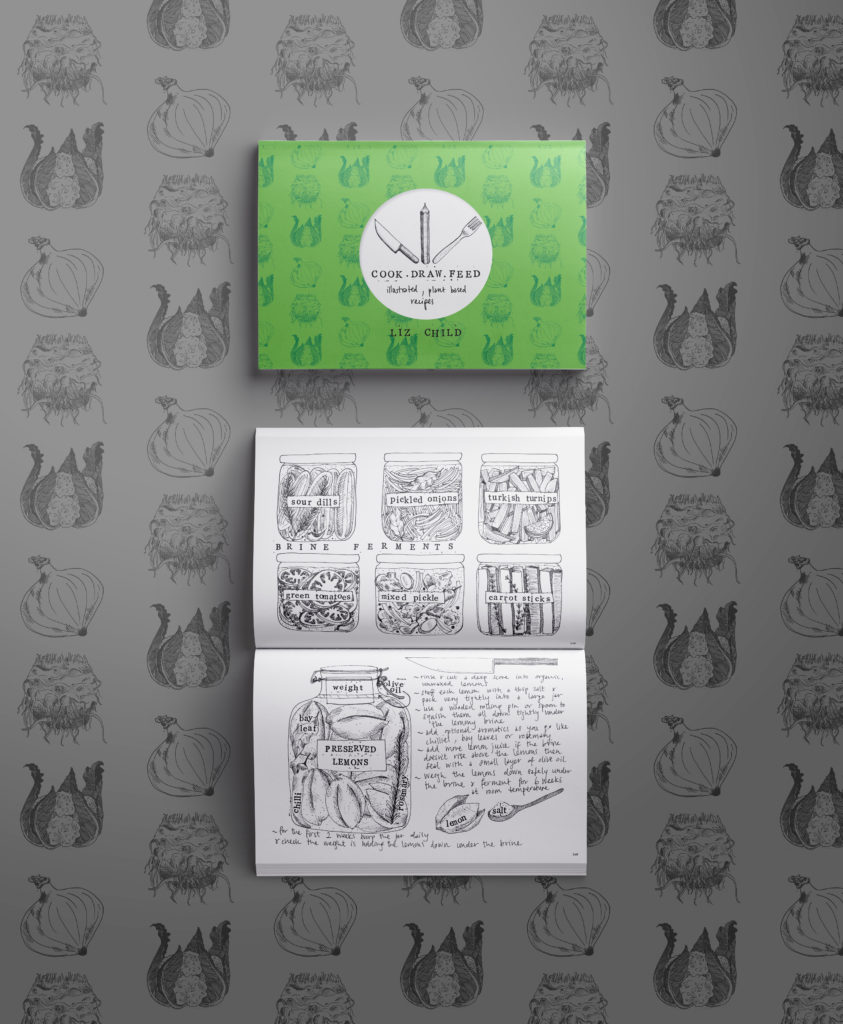
Illustrations from my cookbook, Cook Draw Feed. Available to add to your next order here.
Did you make this recipe? Share it with us and your friends on our Facebook page or tag us on Instagram. We love to see our recipes leave the page. If you like this recipe, you’ll love my book. It’s available to buy from the farm shop here.