Orange & Fennel Salad

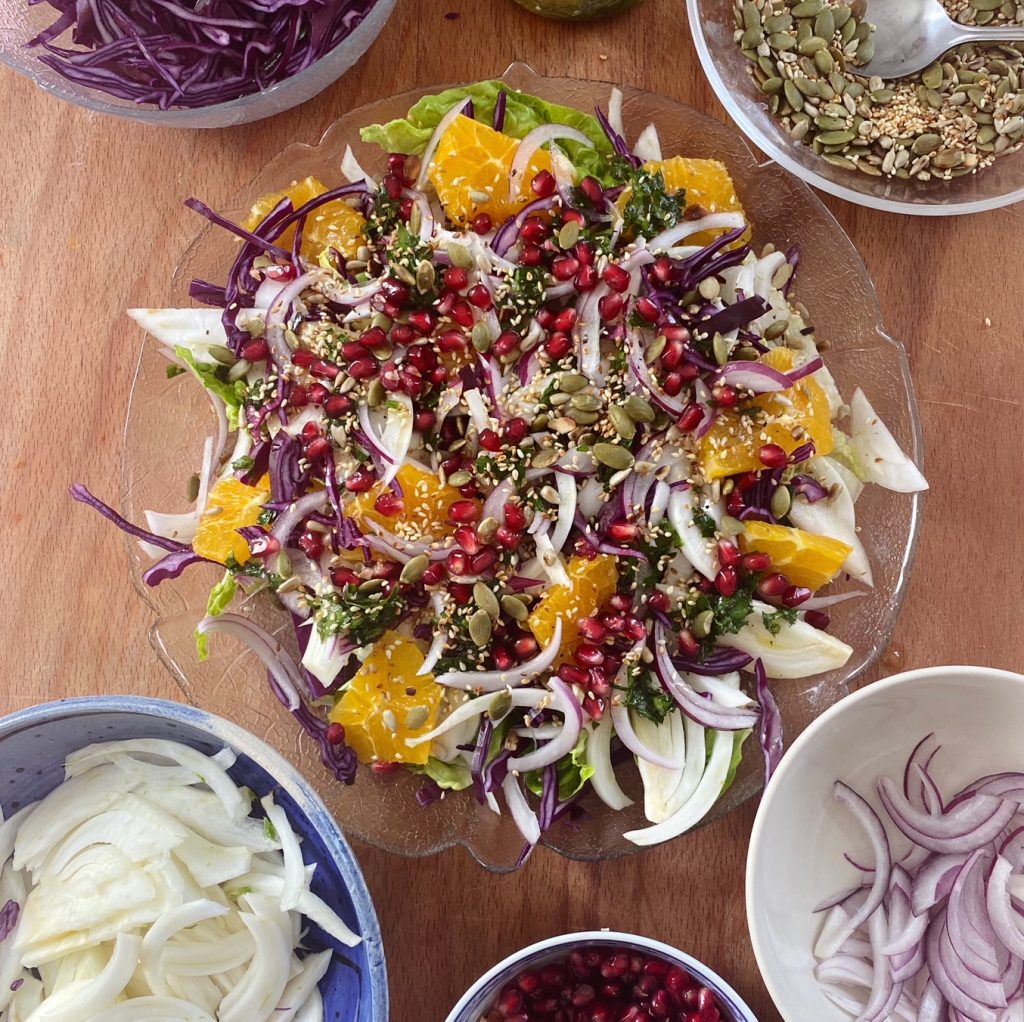
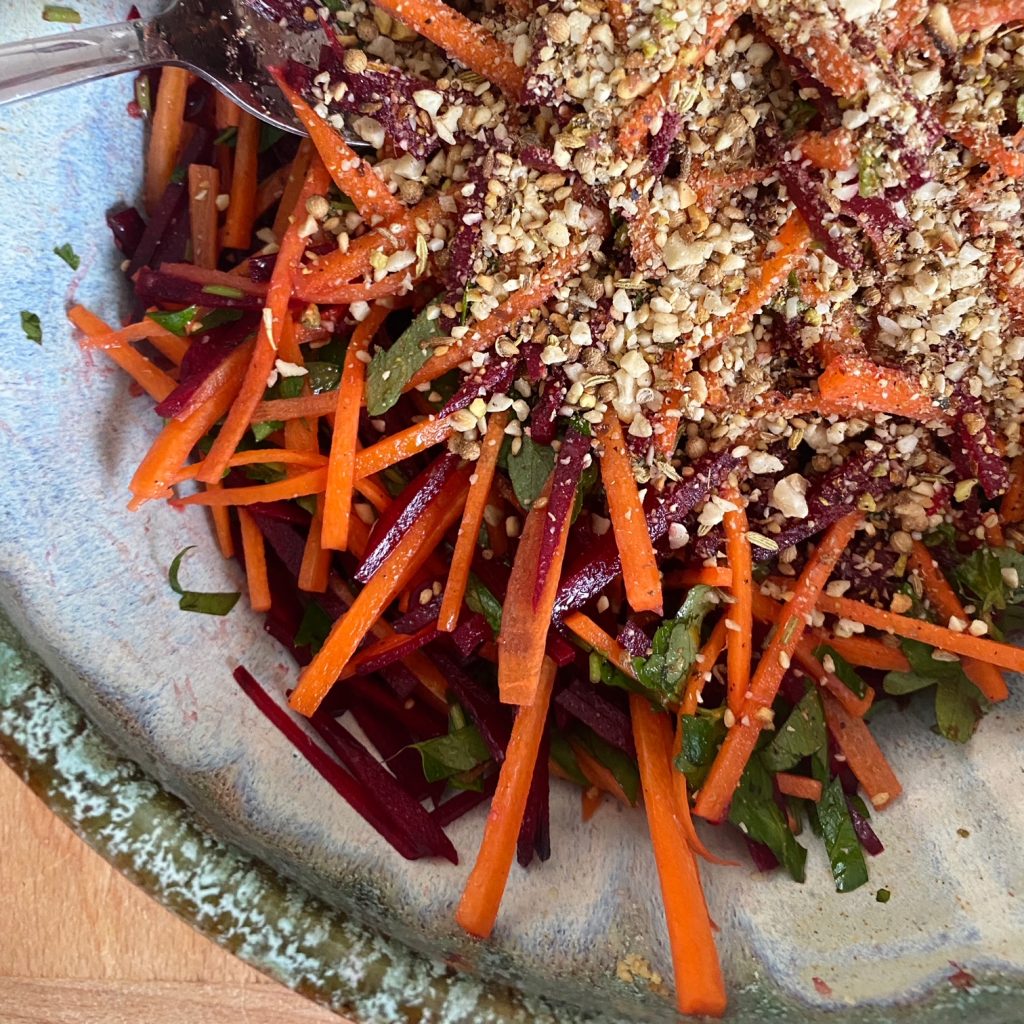
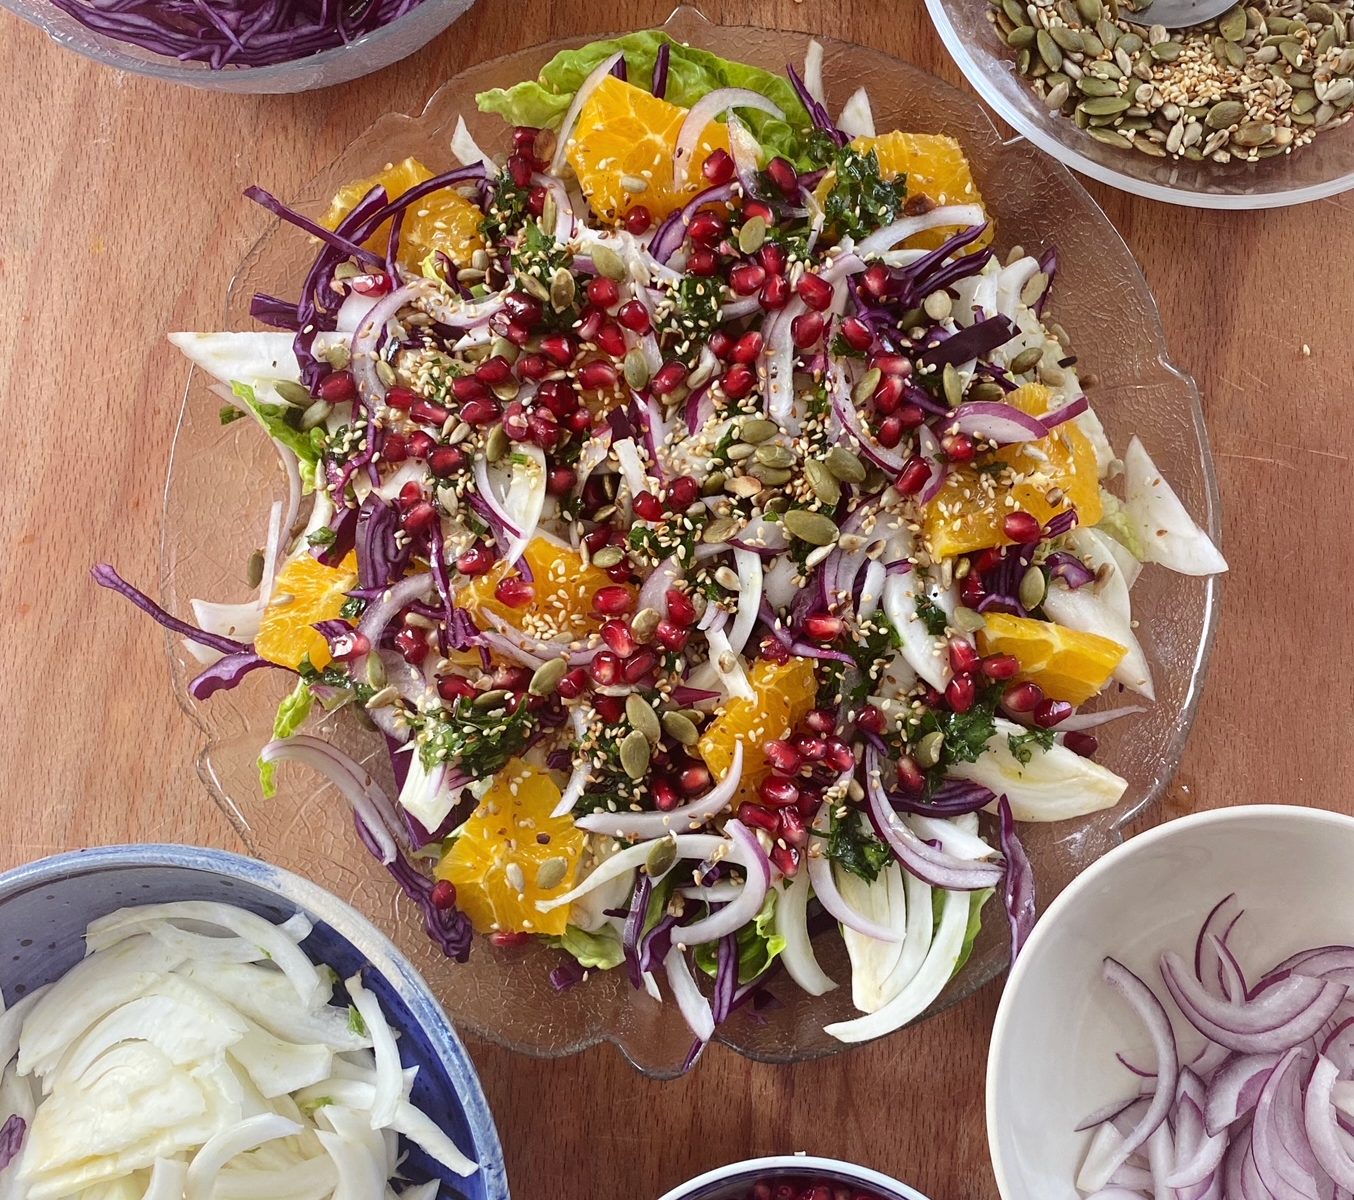
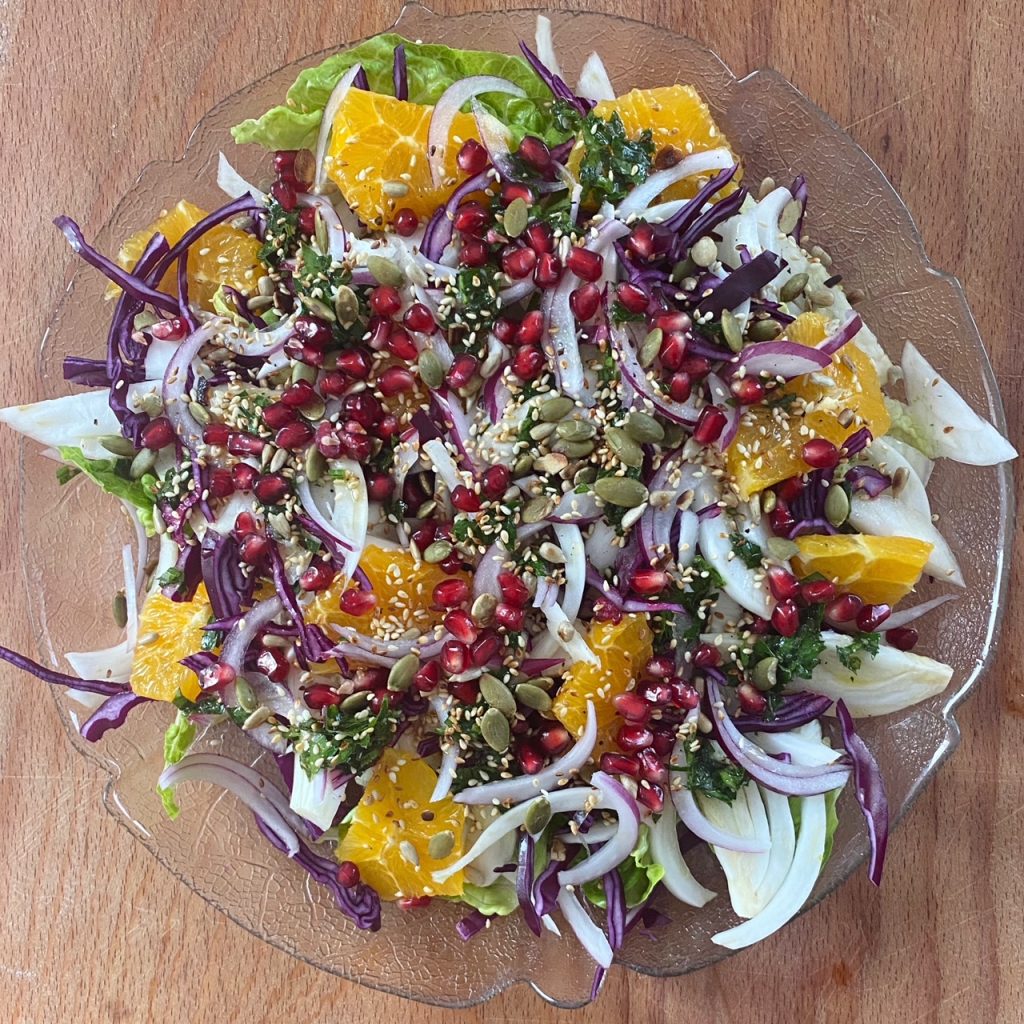
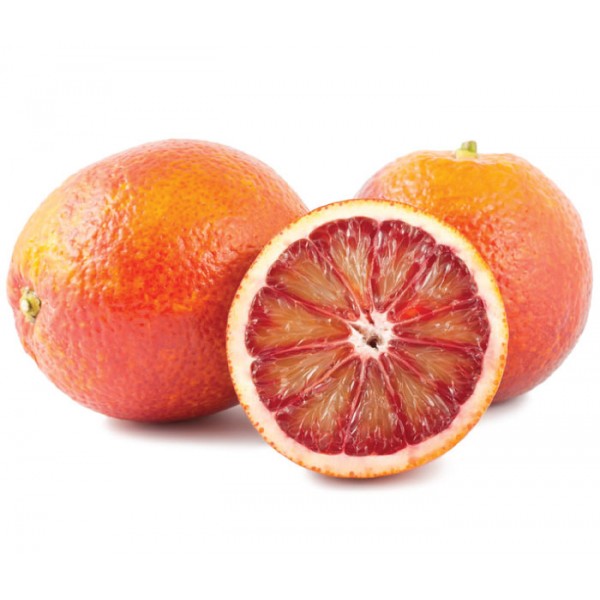
This colourful winter salad is so beautiful. We eat with our eyes first and this salad is a riot of colour and flavour. It is fresh and crunchy with juicy sweet bursts from the oranges and pomegranate seeds. Perfect for when you are a bit fed up of soups and stews and need something light and fresh. Orange and fennel go so well together, we like to eat this salad with some salty olives or cheese crumbled on top, it makes a marvelous meal on it’s own, or of course you can enjoy it as a side. Blood oranges have just come back into season so I highly recommend making this salad with these.

Liz x

Ingredients (for 2)

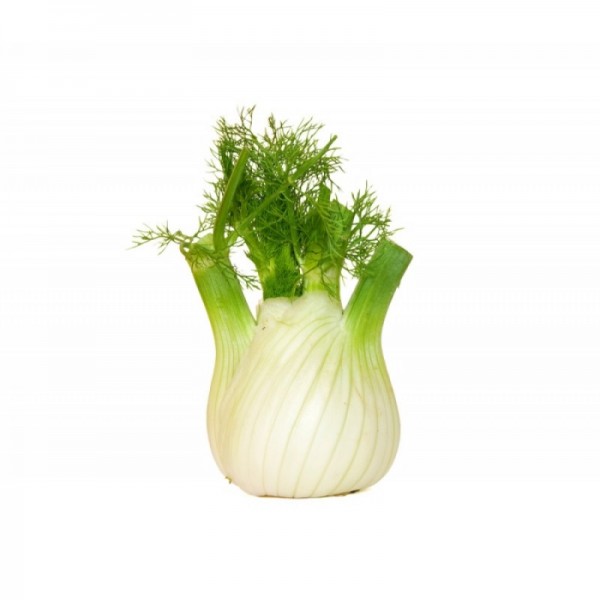
  • 1/2 a fennel bulb, thinly sliced
  • 1 orange, skin sliced off, flesh sliced
  • a wedge of cabbage, thinly sliced
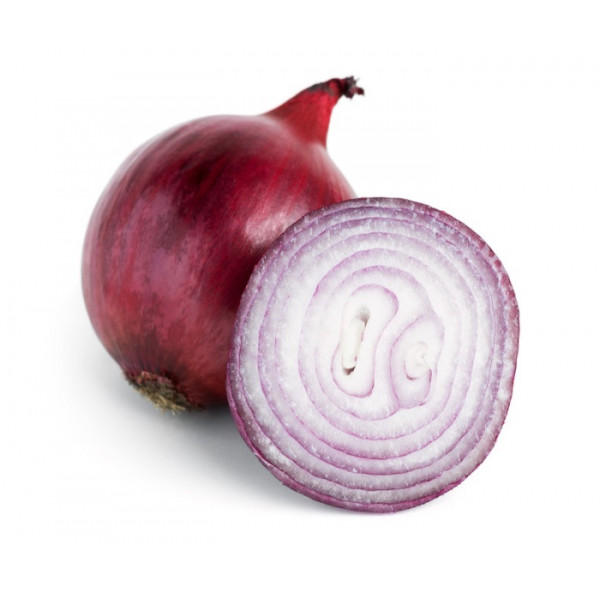
  • 1/4 red onion, thinly sliced
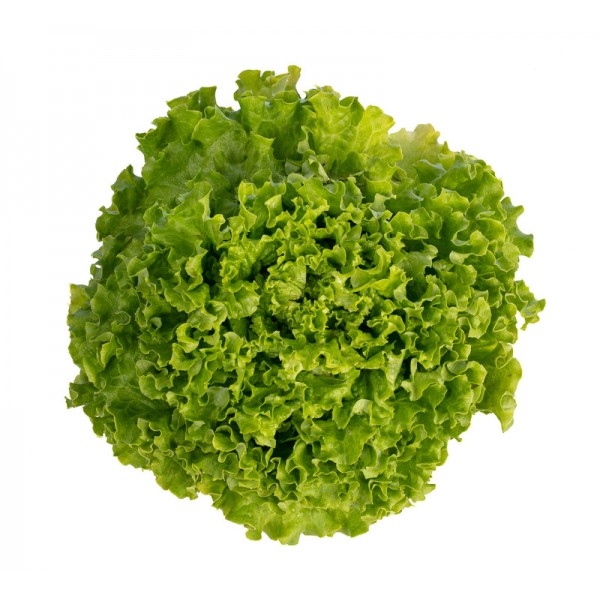
  • lettuce leaves, washed, dried and torn
  • herby salad dressing (blend a handful of parsley, the juice of 1/2 a lemon, 3 tbsp extra virgin olive oil, 1/2 a garlic clove, salt and pepper to taste)
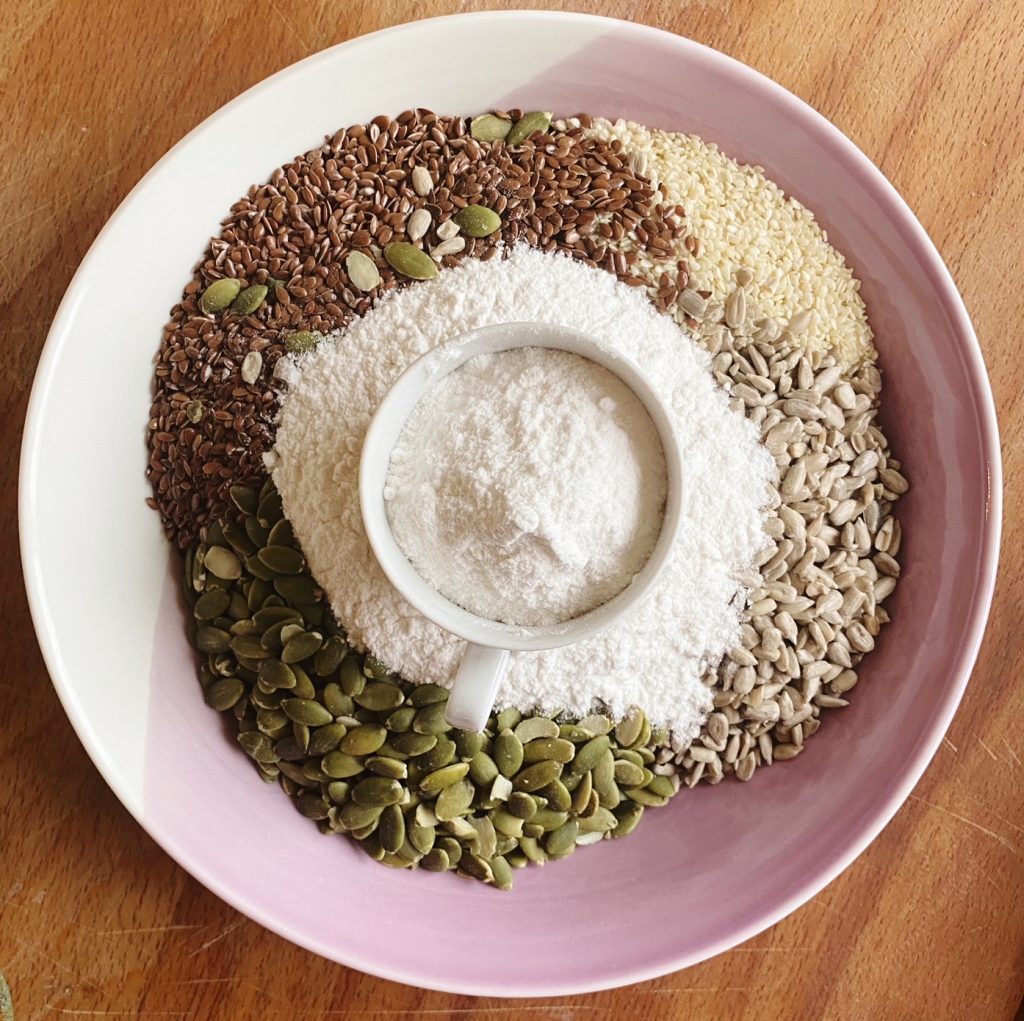
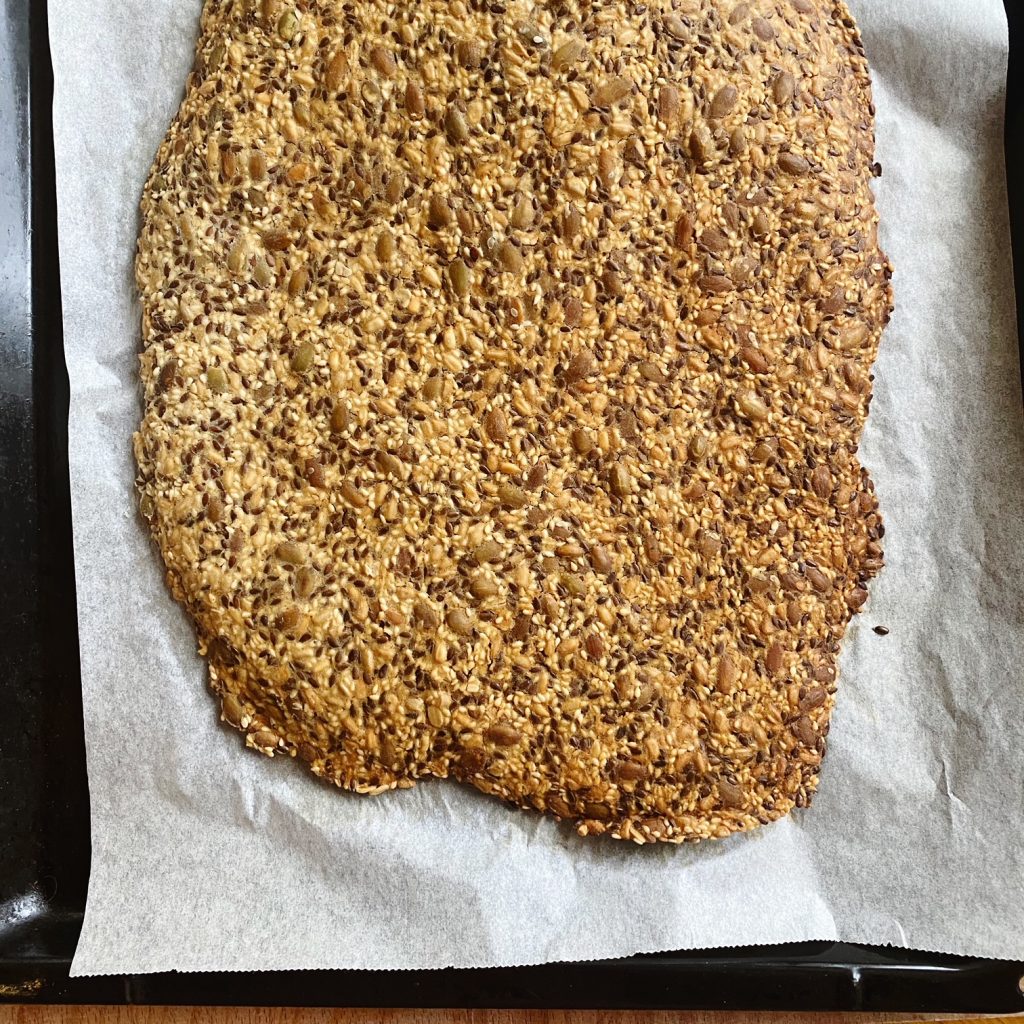
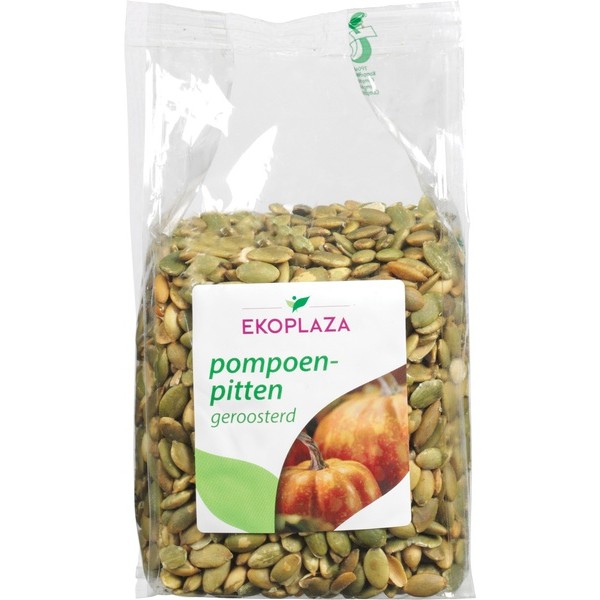
  • pomegranate seeds and toasted pumpkin, sunflower and sesame seeds to sprinkle

Method

  1. Cut all your vegetables and make the dressing. A handheld stick blender is the perfect tool to make salad dressings. Simply put all the dressing ingredients into a jug, insert the blender and blend into a sauce. Taste and add salt and pepper to your liking.
  2. Assemble the salad on a large platter for the best visual effect. Start with the lettuce leaves and drizzle them with a few tsp of the dressing. Then add the cabbage and fennel and more dressing. Place the orange slices evenly over the platter and sprinkle with the onion and the rest of the dressing.
  3. Finish with pomegranate seeds and toasted pumpkin, sunflower and sesame seeds. Now take to the table and enjoy!

Love Letter Cookies

These sweet cookies are so fun to make with kids around Valentines day. They are very easy, you can use any biscuit dough recipe you like, but we favour a slightly softened shortbread dough. Regular shortbread is a little crumbly for folding, so we make it a little more malleable with a few tbsp of oat milk. Any red jam works well, have you tried our cherry jam? We also stock Irish organic jams from Wexford. Enjoy!

Liz x

Ingredients

  • 100g sugar
  • 200g butter
  • 300g flour
  • 2 tbsp oat milk
  • jam of your choice

Method

  1. Make the biscuit dough in a food processor for ease. Cut the butter into cubes and tip into a food processor with the S blade attachment. Add the sugar and flour and pulse until the dough resembles wet beach sand. Add the milk and blend until the dough comes together into a ball. If you prefer to make the dough by hand, rub the butter, sugar and flour together with your fingertips in a large mixing bowl. Then add the milk and bring it together into a ball.
  2. Wrap and chill the dough in the fridge for 30 minutes. Meanwhile line a large baking sheet with baking parchment and heat your oven to 175C.
  3. On a floured work surface, roll out your dough to around a 3mm thickness. Cut the dough into as neat squares as you can. You could use a cardboard template if you like, or just freestyle it for a more homemade feel. I found squares around the size of your palm work well.
  4. Place a small tsp of jam in the center of each square and fold two opposite corners into the middle. Then fold the bottom corner up to the middle to make an envelope shape. Place the envelopes on the baking parchment. Bring any scraps of dough back into a ball and roll out and repeat until you have used up as much of the dough as you can.
  5. Any last scraps can be cut into little hearts. Place the heart onto the envelopes and then bake for 10-15 minutes or until the biscuits just start to take on some colour around the edges.
  6. Cool completely before enjoying! These can be stored in an airtight container and should stay fresh for 3 days.

Scandi-Style Seedy Crackers

These crackers are the best vehicle for a sliver of cheese or a savoury spread! Full of nutritious seeds, golden and toasty from the oven and perfectly thin and snappy. You’ll be making these again and again. This recipe is naturally gluten free, plant based and so so easy. A great way to ensure you are getting all the benefits of seeds – the omegas, the healthy fats and fibres… Any crumbled bits in the bottom of the jar are delicious sprinkled over a soup or salad too. Enjoy!

Liz x

Ingredients

~ use an espresso cup to measure for ease, or the amounts in grams below:

  • 1 cup sesame seeds (100g)
  • 1 cup flax seeds (100g)
  • 1 cup sunflower seeds (100g)
  • 1 cup pumpkin seeds (100g)
  • 2 cups rice flour (200g)
  • 1 tsp salt
  • 2 cups boiling water (350ml)
  • 2 tbsp good oil (eg extra virgin olive or cold pressed rapeseed)

Method

  1. Measure the seeds, salt and rice flour into a mixing bowl and mix well.
  2. Pour in the boiling water and oil and mix with a wooden spoon into a thick, sticky mixture. You may wish to add an extra splash of water if the entire contents are not incorporated into a sticky dough.
  3. Allow the mixture to rest for 30 minutes, the seeds benefit from absorbing some water. Meanwhile, find 3 large baking sheets and 4 sheets of baking parchment. Turn the oven to 175C.
  4. Line the baking sheets with the parchment. Divide the sticky, seedy dough between the 3 trays. Spread the dough out into a very thin, even layer, one tray at a time. The easiest way to do this is with the 4th piece of baking parchment. Lay it on top of the dough and use your hands to squish the dough out as evenly as you can. You can also use a rolling pin to help. The crackers should be no thicker than the pumpkin seeds.
  5. Carefully peel off the parchment on the top and use it to repeat the flattening/spreading process with the other two trays. Then get the trays in the oven.
  6. Bake for 30 minutes or until the crackers are browned and dried out. Allow to cool before carefully snapping them into shards and storing in an airtight container. Enjoy within 3 to 4 weeks.

Masala Omelette

This is up there with one of our top 5 breakfasts. It is so delicious and incredibly nutritious, I urge you to give this recipe a go. We replaced the eggs in this classic Indian breakfast with a chickpea flour batter here to keep it plant based. Chickpea flour has been used in Asian cuisine for hundreds of years, it is also full of fibre, protein and many vitamins and minerals. Such a useful ingredient, we also use it to make fritters, socca bread and to bind falafel and bean burgers – have you tried cooking with it yet? We stock an organic bag which you can add to your next fruit and veg order.

Liz x

Ingredients (per omelette)

  • 60g chickpea flour
  • 150ml water
  • large pinch of salt
  • chilli flakes to taste (or even better, use chopped fresh green chilli)
  • 1/4 tsp ground turmeric
  • 1/2 tsp garam masala (or any Indian spice blend you like)
  • 1 salad tomato, finely chopped
  • 2 tbsp finely chopped red onion or scallion
  • 2 tbsp finely chopped fresh coriander
  • 1 tsp good oil for frying (we use rapeseed)
  • 1 flatbread (we used tortilla bread here)
  • 1 tbsp mango chutney (or any Indian chutney you like, or natural yoghurt)

Method

  1. Whisk the chickpea flour and water together into a smooth batter. Then add the salt, chilli, turmeric and garam masala and whisk again.
  2. Stir in the tomato, onion and coriander. Meanwhile, heat up a pancake pan over a medium heat.
  3. Warm the flatbread on both sides in the dry pan, place on a plate. Then pour in the oil, swirl to coat the pan evenly. Pour the masala omelette mixture into the pan and swirl or spread in out with a spoon into a thin layer.
  4. Be patient and let the omelette cook slowly until it is set and golden on the bottom and almost dried out on top. You should notice small bubbles forming and popping. Carefully loosen the omelette from the pan and flip with a spatular.
  5. The second side should only take a minute. Spread the bread with the chutney then flip the omelette out on top. Roll up and enjoy whilst hot!

Parsnip Pilaf

This one-pot dish is sure to be your next family favourite. Fragrant with sweet and warm Persian spices, each bite is nourishing, cosy and so delicious! We hope you love this new way of eating our parsnips as much as we do. A mixture of rice and lentils makes this dish hearty and filling, and the parsnips, raisins, onions, parsley and pumpkin seeds all work together to make sure every bite is heaven with the different flavours and textures. It is gorgeous as it is or with yogurt and salad.

Liz x

Ingredients (serves 4-6 depending on sides)

  • 1 large red onion, peeled and sliced
  • 500g parsnips, scrubbed, trimmed and cut into bites
  • 2 tbsp olive oil
  • 1 tbsp cumin seeds
  • salt and pepper to taste
  • 250g rice, rinsed
  • 250g red/green lentils, rinsed
  • a handful of raisins (or any dried fruit you like)
  • 1 tbsp cinnamon
  • 1 tsp turmeric
  • 1/2 tsp ground cardamom seeds
  • the zest of a large lemon
  • 1250ml vegetable stock
  • chopped parsley and toasted pumpkin seeds to finish

Method

  1. Pre-heat your oven to 200C and find a large casserole dish with a lid.
  2. Tumble in the chopped onion and parsnips, drizzle over the oil and season with salt, pepper and the cumin seeds. Mix well and bake until the parsnips are soft – around 15 minutes.
  3. Meanwhile rinse the rice and lentils thoroughly, make vegetable stock (we stirred 2 tbsp bouillon powder into 1250ml just-boiled water) and gather the rest of the ingredients.
  4. Stir the rice, lentils, spices, lemon zest and raisins through the roasted parsnips and onion. Then pour in the vegetable stock and stir carefully once more.
  5. Place the lid on the dish and return it to the oven to bake for 30 minutes or until the rice and lentils are cooked through and have absorbed the liquid.
  6. Stir the chopped parsley and toasted pumpkin seeds through the dish and serve. Any leftovers are also delicious cold so pack them up into lunchboxes in the fridge. Enjoy!

Beetroot & Carrot Salad with Dukka

This fresh, sweet salad is the perfect vehicle for my favourite crunchy condiment, dukka. Dukka is an Egyptian dip/sprinkle made with toasted nuts, sesame seeds and spices. It is absolutely stunning – earthy, nutty, warmly spiced with the most intoxicating fragrance. Use it the traditional way as a dry dip (dunk bread in olive oil then into the dukka and devour) or as a crunchy topping for endless salads, soups, stews… you’ll find any excuse to use it once you have a jar in your pantry. Beetroots are in season now and perhaps eating them raw is the most delicious way? Let me know your favourite beetroot recipes in the comments.

Liz x

Ingredients

For the dukka:

  • 250g mixed nuts (or use just the traditional hazelnuts)
  • 4 tbsp sesame seeds
  • 2 tbsp fennel seeds
  • 2 tbsp cumin seeds
  • 2 tbsp coriander seeds
  • optional tsp of salt

For the salad:

  • 3 carrots, julienned
  • 3 beetroot, julienned
  • a large handful of chopped parsley
  • the juice of half a lemon
  • 3 tbsp extra virgin olive oil
  • a very small clove of garlic, crushed or finely grated
  • salt and pepper to taste

Method

  1. To make the dukka, toast the nuts in a dry, hot frying pan until they start to take on some colour. Stir often whilst toasting to avoid burning any. Allow the nuts to cool a little before tipping them into a food processor. Pulse to roughly chop the nuts before adding the other smaller ingredients.
  2. Toast the sesame seeds, fennel, coriander and cumin in the dry, hot frying pan next. They will start to pop and smell incredible. Tip them in with the nuts and pulse the processor again until you have a fairly uniform, crumbly mixture. Careful not to over-process, you want crunch and texture, not powder. You can add salt at this stage if you like too.
  3. Allow the dukka to completely cool before storing in a clean jar. Use within one month for optimum freshness and flavour.
  4. To make the salad, add the julienned carrots and beetroot to a salad bowl along with the chopped parsley. Mix the lemon juice, olive oil, garlic and seasoning and pour over the salad. Toss well and just before serving, sprinkle over the dukka. We ate it alongside a parsnip pilaf (next recipe) and some natural yoghurt.

Beetroot & Walnut Ragu

This plant based ragu is delicious, nutritious and has a gorgeous texture. The earthy sweet beetroots, wholesome lentils and crunchy, nutty walnuts all mingle perfectly to make a really delicious, vibrant pasta sauce. It is wonderful in layers in a lasagne too. If you are not a fan of beetroot, simply swap it for mushrooms and carrots. We do have a lot of brilliant beetroots coming out of our own fields now though, so this recipe is a great way to enjoy this locally grown, seasonal vegetable. Beetroots are brimming with goodness – iron, potassium, antioxidants and more!

Liz x

Ingredients (serves 6)

  • 2 tbsp olive oil
  • 1 onion, finely diced
  • 3 sticks of celery, finely diced
  • 250g beetroot, finely diced
  • 150g raw green/brown lentils, rinsed (or use two tins of cooked lentils)
  • 100g walnuts, crushed/crumbled into lentil sized pieces
  • 2 bay leaves
  • 4 cloves of garlic, crushed
  • 1 tsp fennel seeds
  • 1 tsp dried thyme
  • 1/2 tsp chilli flakes
  • 1/2 tsp oregano
  • 2 tbsp capers, finely chopped
  • 1 glass of red wine
  • 1 tin of chopped tomatoes
  • 2 tbsp tomato puree
  • salt and pepper to taste
  • 500ml vegetable stock

Method

  1. In a wide, heavy bottomed pan, on a medium heat, cook the onion, celery and beetroot with the olive oil and a sprinkle of salt and pepper. Stir often and after around 8 minutes, the vegetables should be softened.
  2. Then add the lentils, walnuts and flavourings (the garlic, capers, fennel seeds, bay leaves, oregano, chilli and thyme). Stir and cook for a couple of minutes to wake up the flavours in the seasoning. Then add the glass of wine and let it bubble until it is nearly evaporated.
  3. Pour in the tin of tomatoes, the tomato puree and the vegetable stock and pop the lid on the pot. Simmer for 30 minutes or until the lentils are soft and the sauce is rich. Stir occasionally to prevent sticking and keep an eye on the liquid levels, you may need to add a splash of water if it starts to look dry.
  4. Taste and adjust the seasoning if needed with more salt or pepper and serve over freshly cooked pasta. Enjoy!

Vegan Bibimbap Bowl

Bibimbap means mixed rice and we are totally in love with the concept and flavours of these colourful Korean bowls. We eat versions of this so often, it’s our go-to dinner when we are stuck for inspiration. They’re a great way to use up leftovers or odds and ends from your veg drawer too. Eat with hot sauce and kimchi – a spicy, sour fermented cabbage full of flavour and so much goodness for your guts – we stock a really good one or search here in the blog to make your own. Traditionally topped with a raw or fried egg, we prefer some scrambled tofu. Here’s the very loose and flexible recipe which you should totally make your own. Enjoy!

Liz x

Ingredients

  • Cooked rice (hot or cold)
  • kale, garlic, salt
  • mushrooms, soy sauce
  • carrots, sesame oil, soy sauce, lime juice, sesame seeds
  • scallions
  • silken tofu, salt, pepper, turmeric
  • kimchi
  • hot sauce

Method

  1. Cook rice or use leftover rice and make a cold bowl.
  2. Rinse your kale and strip out the tough stems. Finely slice the stems and place in a pan with a little oil and some sliced garlic. Sauté gently until they start to soften, then add the wet leaves and a sprinkle of salt. Stir fry to wilt the leaves, you may want to add a little splash of water to help them wilt.
  3. Slice the mushrooms and sauté with a little oil until they start to colour. Then add a splash of soy sauce and let the mushrooms cook for a few minutes until they are dark and delicious.
  4. Grate or julienne carrots. Mix them in a bowl with a splash of soy sauce, a drizzle of toasted sesame oil and a squeeze of lime. Sprinkle with sesame seeds.
  5. Scramble tofu by stirring silken tofu in a hot pan with some butter, salt, pepper and a pinch of turmeric. Break it up into lumps and sauté until it’s hot through.
  6. Slice your scallions and assemble your bowls. Start with rice then top with a portion of all the other sides. Stir and dig in!

Mushroom & Celeriac Stew

This stroganoff-inspired stew uses a not-so-secret ingredient that we are currently obsessed with. Blended beans! For a shortcut to a creamy, luscious, perfect-textured sauce, try blending beans! We have even started blending beans into our pasta sauces for extra creamy texture and nutrients. Beans are thrifty and so incredibly healthy. They are a great crop for the planet too, a real win win. Meaty mushrooms and tasty cubes of celeriac are simmered with this simple sauce to create a satisfying stew with complex flavours and the perfect silky texture, usually only achieved by low, slow cooking. This is wonderful winter food which will warm you up from the inside. Enjoy with rice or mashed potatoes and a side of winter greens.

Liz x

Ingredients (serves 4)

  • 2 tbsp olive oil
  • about 20 chestnut mushrooms, halved
  • 1/2 a celeriac, peeled and cut into bite sized cubes
  • 1 tin of kidney beans, drained
  • 1 tbsp bouillon powder
  • 1 tsp garlic powder
  • 1 tbsp smoked paprika
  • 1 tbsp tomato puree
  • 1 tbsp Dijon mustard
  • approx 300ml of cream or milk
  • salt and pepper to taste
  • fresh dill, cooked rice/potatoes & wilted greens to serve

Method

  1. In a heavy bottomed pot, sauté the mushrooms and celeriac with the oil and a sprinkle of salt and pepper. Cook over a medium heat, stirring often, until the vegetables are softened and have taken on a lovely golden colour. Alternatively, you could do this in the oven or airfryer.
  2. Place the beans, bouillon, paprika, garlic, tomato puree, mustard and milk/cream in a blender. Add salt and pepper to your taste and blend into a smooth cream.
  3. when your mushrooms and celeriac are cooked through, pour the kidney bean cream over them and simmer and stir to warm through. Taste and adjust the seasoning if needed.
  4. Serve over cooked rice or mashed potatoes and scatter over freshly torn dill and a good grind of black pepper. Enjoy!

Leek & Potato Gratin

We adore a classic potato dauphinois, there’s no better side on a cold, winters day. This twist with lovely leeks is so delicious! We all know that leeks and potatoes are made for each other, and this dish proves it once again. Use your favourite milk or cream, (we used oat cream here) but not too much or you’ll end up making soup. Here is a guide, but this is definitely one of those recipes where you should be flexible and feel your way with amounts. Enjoy!

Liz x

Ingredients (serves 4)

  • 800g potatoes, very thinly sliced
  • a 250g leek, halved lengthways then rinsed and cut into chunks
  • 500ml milk/cream
  • 1 tsp salt
  • pepper to taste
  • 1/2 tsp ground nutmeg
  • 1 tsp garlic powder (or a crushed clove of garlic)
  • 1 tbsp bouillon powder
  • 1 tbsp Dijon mustard

Method

  1. Turn your oven on to 200C and find a deep baking dish with a lid.
  2. Tumble in your cut potatoes and leek, separate the leek leaves so that they can be evenly distributed through the gratin.
  3. In a measuring jug, whisk together the rest of the ingredients then pour over the vegetables. Mix well to coat each slice in the seasoning then press down into an even layer.
  4. Place the lid on (or use baking parchment/foil/a flat baking sheet if you are using a baking dish without its own lid) and bake until the potatoes are soft. This usually takes around 30 minutes but test with a fork after 20 minutes.
  5. Remove the lid and bake uncovered for 15 more minutes to brown the top (and you can add cheese or breadcrumbs at this stage too if you fancy). Enjoy!