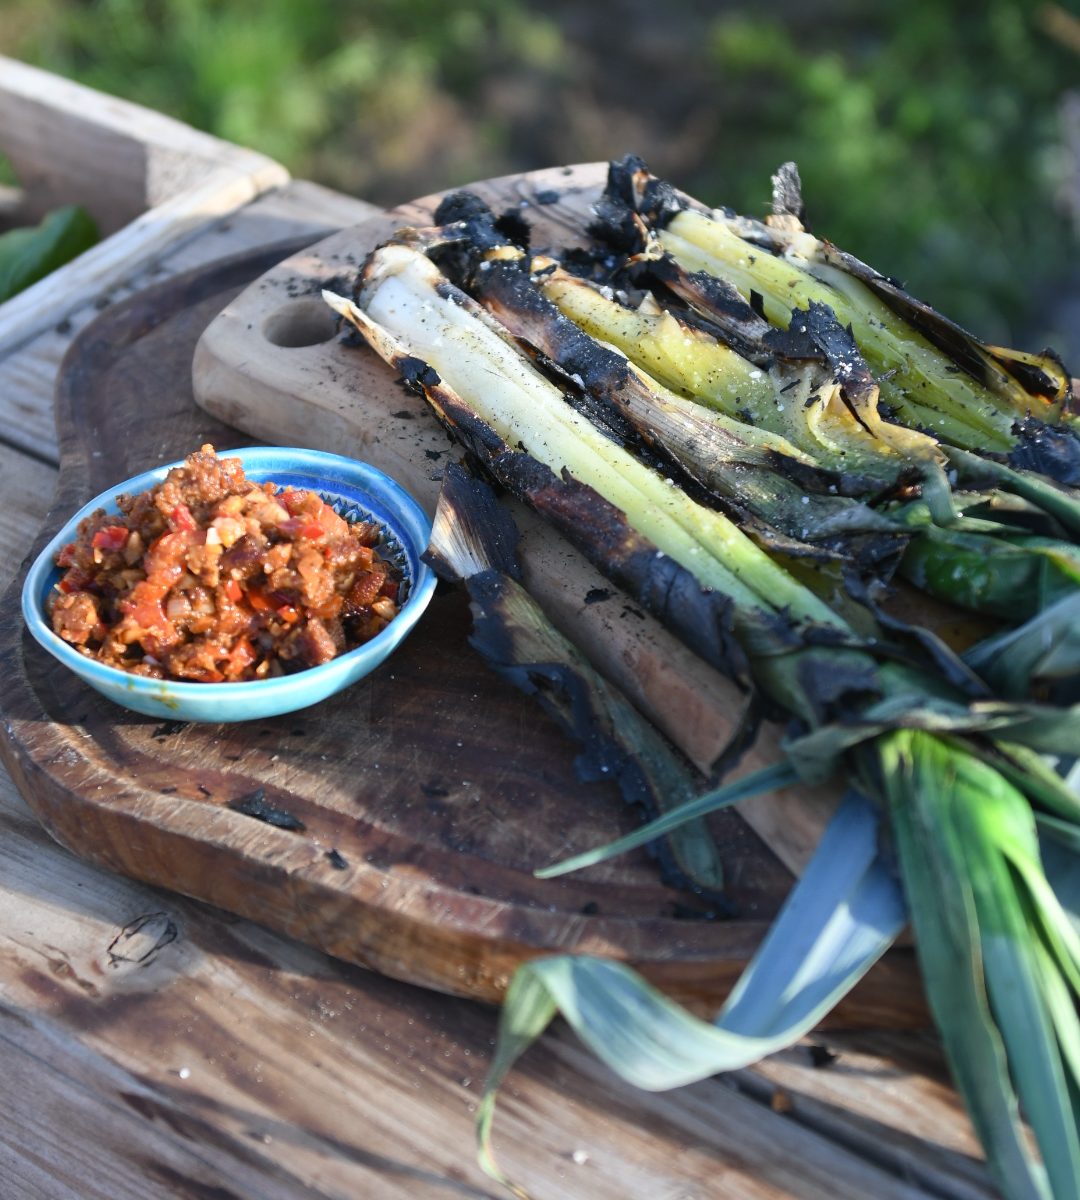
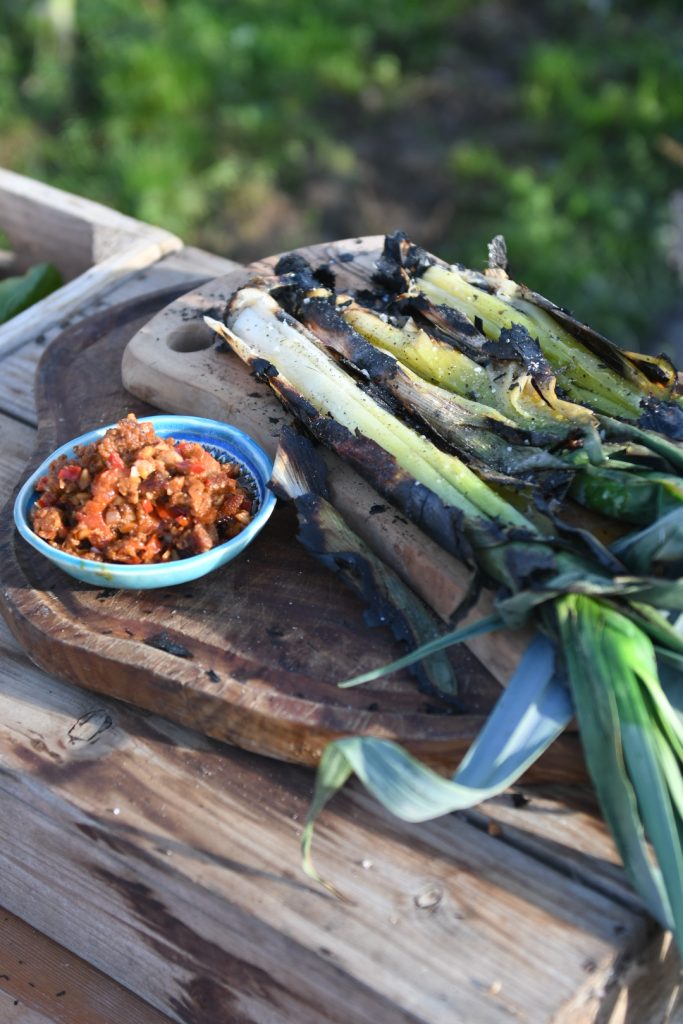
This smoky Catalan-style dish is all about the contrast of charred, sweet alliums and nutty, tangy romesco. Traditionally served with calçots, the sauce works beautifully with blackened leeks too – or with almost any grilled vegetable or fish. It’s so moreish you’ll want to spread it on toast.
4–6 leeks (about 1 large or 2 small per person), trimmed
Light olive oil
Sea salt and black pepper
Romesco sauce
2 cloves garlic, finely chopped
1 red chilli, chopped and deseeded
50g almonds or other nuts
50g stale or dry bread, torn
1 shallot or ½ an onion, finely diced
1 tbsp smoked paprika
350g roasted red peppers (from a jar or freshly roasted)
1 tbsp sherry or red wine vinegar
100ml olive oil
Method
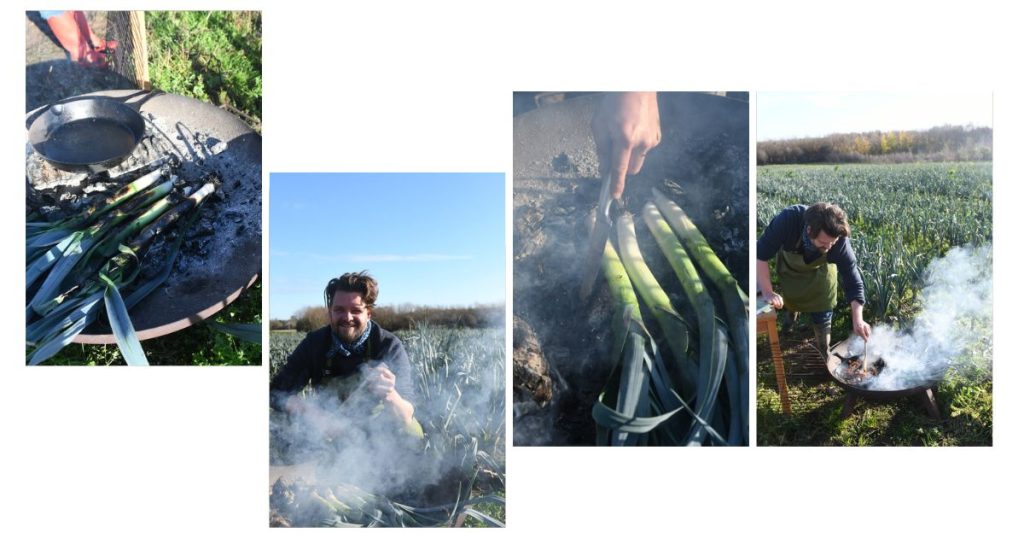
To cook the leeks, preheat a barbecue or grill to high. Rub the leeks lightly with olive oil and season.
Place them directly over the coals or under the grill, turning occasionally, until the outer layers are blackened and the insides are soft – about 10–15 minutes depending on their size. If cooking directly on the coals, brush off any ash before serving.
You can also roast them in a hot oven at 220C until tender and charred at the tips. Meanwhile, make the romesco sauce.
Warm a splash of olive oil in a frying pan and fry the. bread and almonds for a few minutes until golden. Add the garlic, chilli and onion and cook for another couple of minutes until fragrant, then stir in the smoked paprika.
Transfer the mixture to a blender with the roasted peppers and vinegar, then blend to a coarse paste. With the motor running, drizzle in the olive oil until you have a thick, spoonable sauce. Season with salt and pepper to taste.
Serve the hot blackened leeks piled on a platter with the romesco spooned generously over the top or served alongside.
Storage
The sauce will keep well in the fridge for up to a week, or longer if pasteurised in the jar.
I guarantee this will be the quickest dinner you will make this week and once you use local tomatoes it will be the most delicious too. It is now Irish tomato season and there are many ways to enjoy tomatoes at their best. Simply sliced with a sprinkling of salt has always been a favourite, but fresh in-season tomatoes are fantastic when lightly cooked and have the ability to instantly elevate a simple pasta dish.
Most fruit and vegetables are more nutritionally beneficial to us in their raw form. However, research has revealed that cooking tomatoes not only increases the level of lycopene, which is a powerful antioxidant in the tomatoes, but it also makes it easier for the body to absorb.
This delicious dish takes minutes to prepare and is packed with nutrients.
Grating of cheese, such as parmesan, grand padano, or a dairy-free alternative
Basil leaves
Black pepper
Garlic bread, optional
Method
To a large bowl, add the chopped tomatoes, basil, olive oil, sugar, chilli flakes, and a little salt and pepper. Stir well to combine. Cover and leave for about 2 hours to allow the flavours to mingle together.
Cook the spaghetti according to the pack’s instructions, in a large saucepan of salted boiling water.
Add the butter to a large frying pan, over a high heat. Once melted pour in the marinaded tomatoes. Stirring all the time, cook for about ten minutes, until the tomatoes are cooked and have become sticky.
Drain the spaghetti, saving about 4 tablespoons of the cooking water. Add the water to the pan. Stir well to combine. Allow to bubble for about a minute before adding the spaghetti. Stir well to completely coat the spaghetti in the sauce.
Serve immediately with a good grating of cheese, a few basil leaves and some freshly grated black pepper.
Every year it happens, we are waiting and waiting and then bang out of the blue it all starts again. I guess life is like that sometimes, we push and we shove and want to change things, and then when we finally just accept the ways things are (often because what we were doing was making no difference anyway) and least expect it things fall into place.
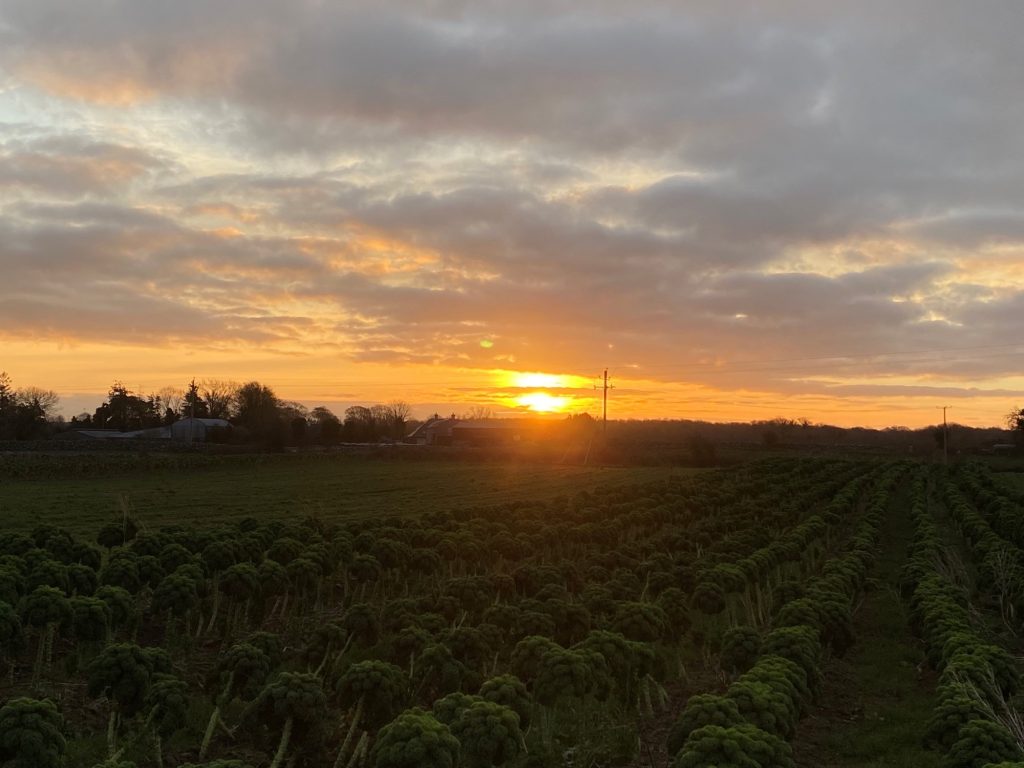
So it was this morning with my first farm walk in two weeks. We have been struggling with the dark closed in feeling of winter, and then this morning bright sunshine, singing birds, and life were evident all around.
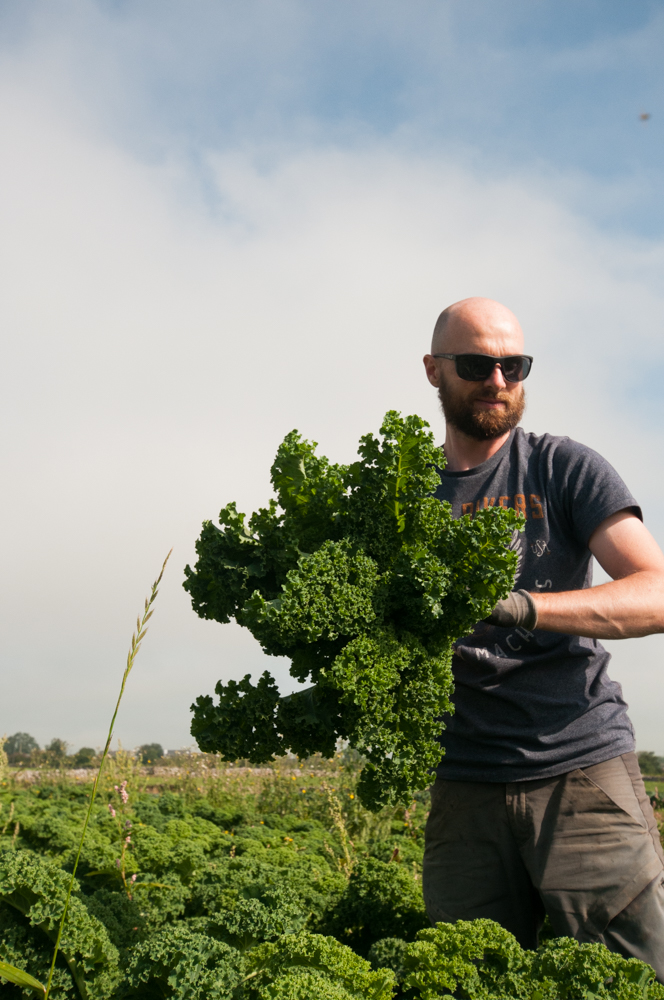
The crops need to have our focus again, they are flying. We have the best kale harvest in years, our leeks are amazing as is the purple sprouting broccoli.
We are out in the fields everyday but today we start in earnest after we have finally shrugged off winters cloak.
Nature is very subtle, we are always on the watch for change, and somehow just suddenly it changes without you noticing. Like a seed germinating, one day it is a seed and the next it is a plant is has germinated, just like that, this is the miracle and power of nature. It is the same with the kale regrowing, it just happens when the time is right. Or the birds singing a spring morning chorus they just begin, and wow were they out in force this morning.
I get excited at this time of the year, the start of a new growing season and the challenges and opportunities it brings fill me with hope for the year.
It is a natural cycle and as we emerge from the dark winter months there is a sense at least on the farm of a new slate, a fresh start, a chance to begin the journey anew.
Nature is wonderful like that, and up until this period in man’s history it has been stable and consistent. I read this morning that the Gulf Stream which here in Northern Europe we rely on for our stable weather patterns is not in good shape.
These complex global climate regulation mechanisms are hard to understand I would imagine, but there are clear signs that climate stability all over our one and only beautiful home is being compromised.
I do admit to getting frustrated with the slow pace of change, it doesn’t make sense to me. There is a phenomenal opportunity now to take the risk and invest in Green Energy, to cut consumption and do so much more. We as a small farm have done it, and we as a small country can do it.
But maybe it is like the kale regrowing or the seed germinating, you can’t force the seed to grow faster or the kale to appear faster, but all of a sudden without even noticing it has changed.
Maybe that is happening now too with movement to cut consumption, power our lives with green energy, moving to more plant-based diets, all these things are happening.
The most amazing thing is you are causing this change by supporting us.
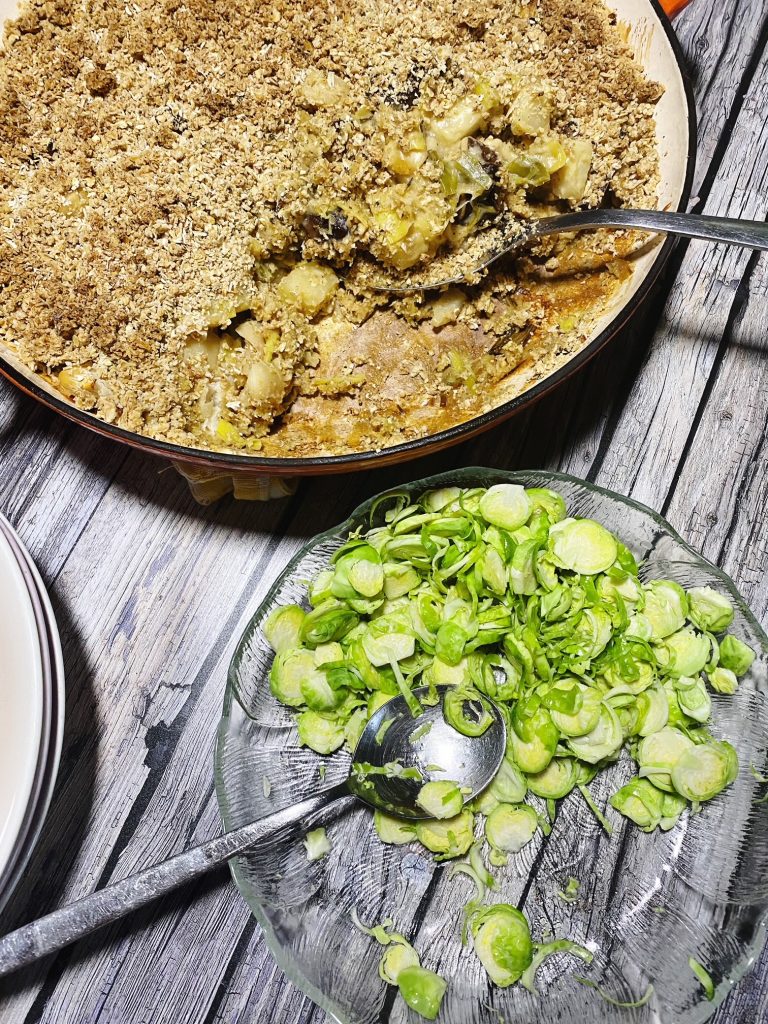
This savoury crumble is full of comforting winter vegetables and white beans. The creamy white sauce is made from seasoned oat milk thickened with a little cornflour. The oaty crumble is delicious and buttery (thanks to our new Naturli butter) and spiked with fragrant rosemary (use any winter herbs you like eg thyme or sage). Serve with a simple salad of shaved Brussels sprouts dressed with lemon and good oil. The not-so-secret ingredient which brings the dish together? Nutritional yeast! Fondly referred to as nooch, it brings a moreish, cheesy flavour to the party. What will you put in your savoury crumble?
As it’s gluten free day this week I’ve used certified gluten free oats in the crumble and gluten free Rude Health oat milk in the white sauce. If gluten isn’t an issue for you then of course you don’t need to worry about that, but if you are avoiding gluten then we can help with a range of gluten free groceries, conveniently delivered to your door.
Liz x
Ingredients (serves 6)
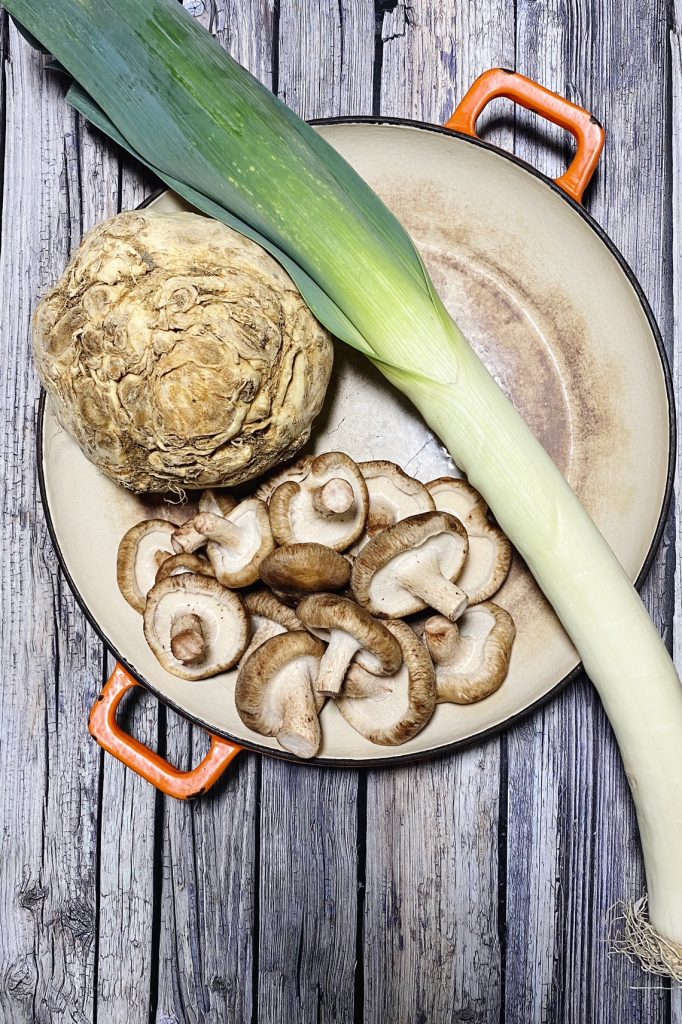
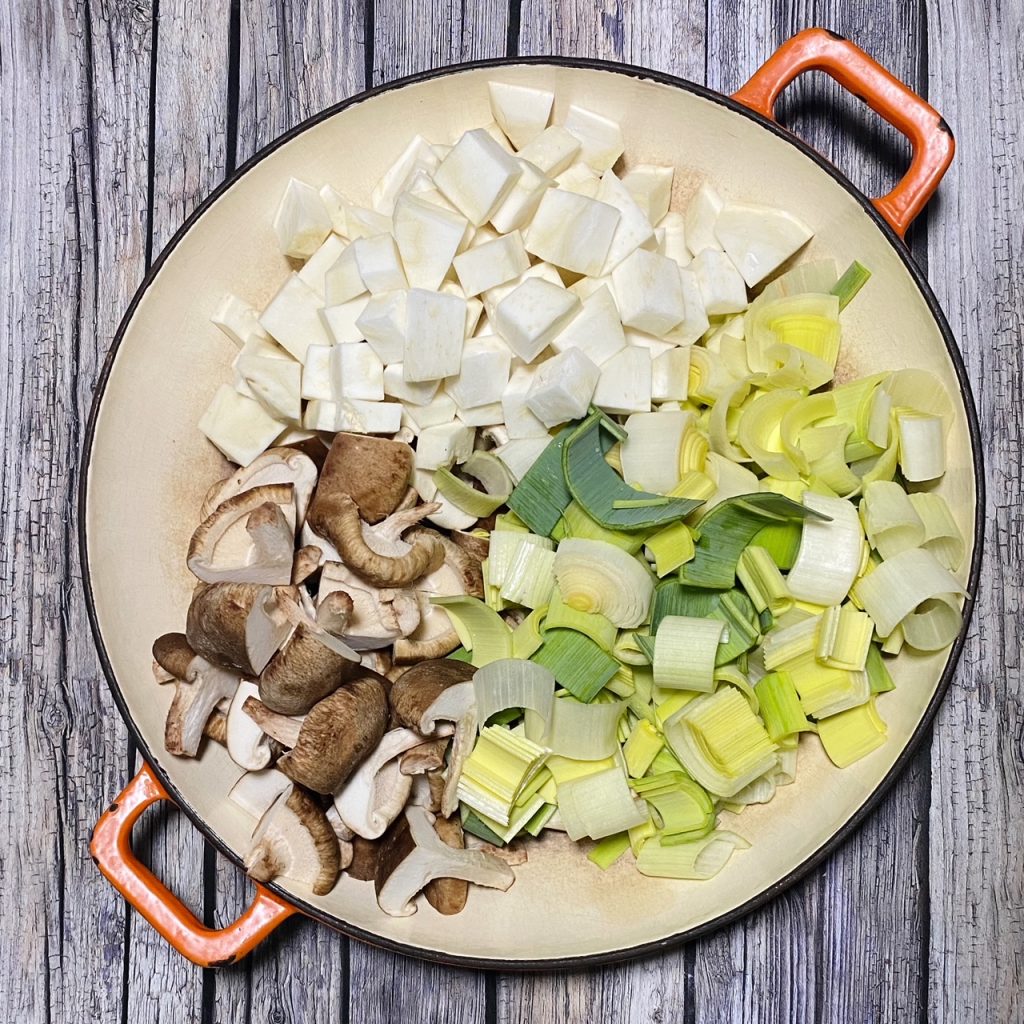
1/2 a celeriac, peeled and cubed
1 large leek, washed and chopped
300g mushrooms, halved or quartered
3 tbsp olive oil
salt & pepper to taste
2 tins of white beans, drained
White Sauce
2 tbsp cornflour (or flour of your choice)
2 tsp Dijon mustard
1/2 tsp ground nutmeg
a handful of nutritional yeast
salt and pepper to taste (about 1/2 tsp of each)
500ml gluten free oat milk (or any milk you like)
Crumble
250g gluten free porridge oats (or regular oats)
2 sprigs of fresh rosemary, stripped from stalk (or any winter herbs you like)
salt and pepper to taste – a generous pinch of each
a handful of nutritional yeast
100g butter (we use Naturli vegan blocks)
Method
Preheat your oven to 200C. Find a baking dish and tumble in your chopped celeriac, leek and mushrooms.
Season with salt and pepper and drizzle with olive oil. Mix well then put the dish in the oven to roast the vegetables while you prepare the white sauce and crumble. Remove the dish every 10 minutes to stir.
In a mixing jug, whisk the cornflour, nutritional yeast, nutmeg, Dijon mustard, salt, pepper and a splash of the oat milk into a paste. Then add the rest of the oat milk and whisk into a thin sauce. This will cook and thicken up later in the oven. Put to one side for now.
Make the crumble in a food processor with the blade attachment. Put the oats, rosemary, nooch, salt and pepper into the processor and blend into a rough flour. Chop the butter into cubes, add to the flour mixture and pulse into a crumbly texture.
When the vegetables are cooked through (this should take around 30 minutes) add the drained white beans and sauce. Stir well then top with the crumble and return to the oven for another 20 minutes or until bubbling and golden on top.
Serve with some seasonal greens. We like thinly sliced Brussels sprouts simply dressed with good olive oil and a squeeze of fresh lemon juice for some acidity and freshness to cut through the creamy crumble.
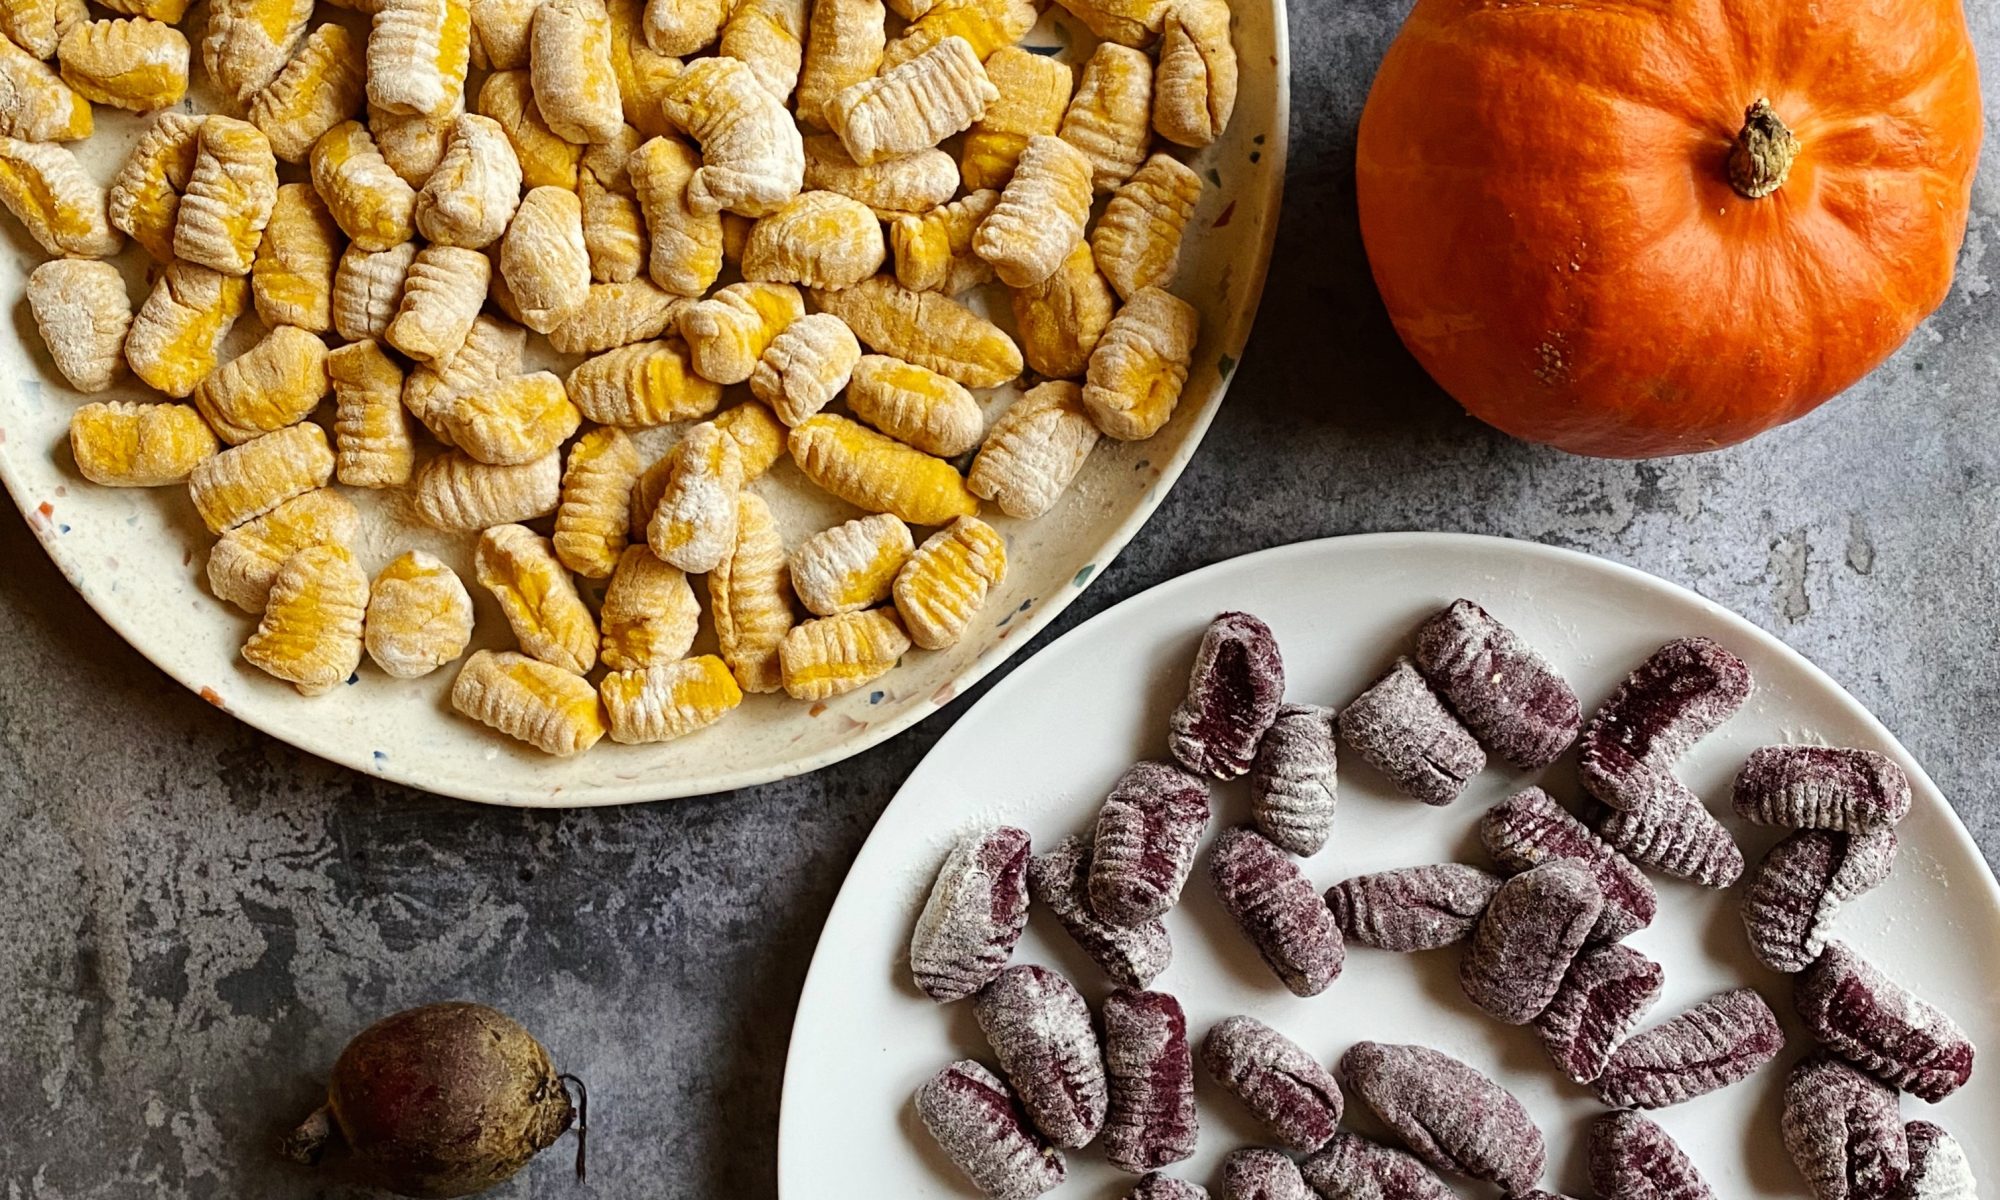
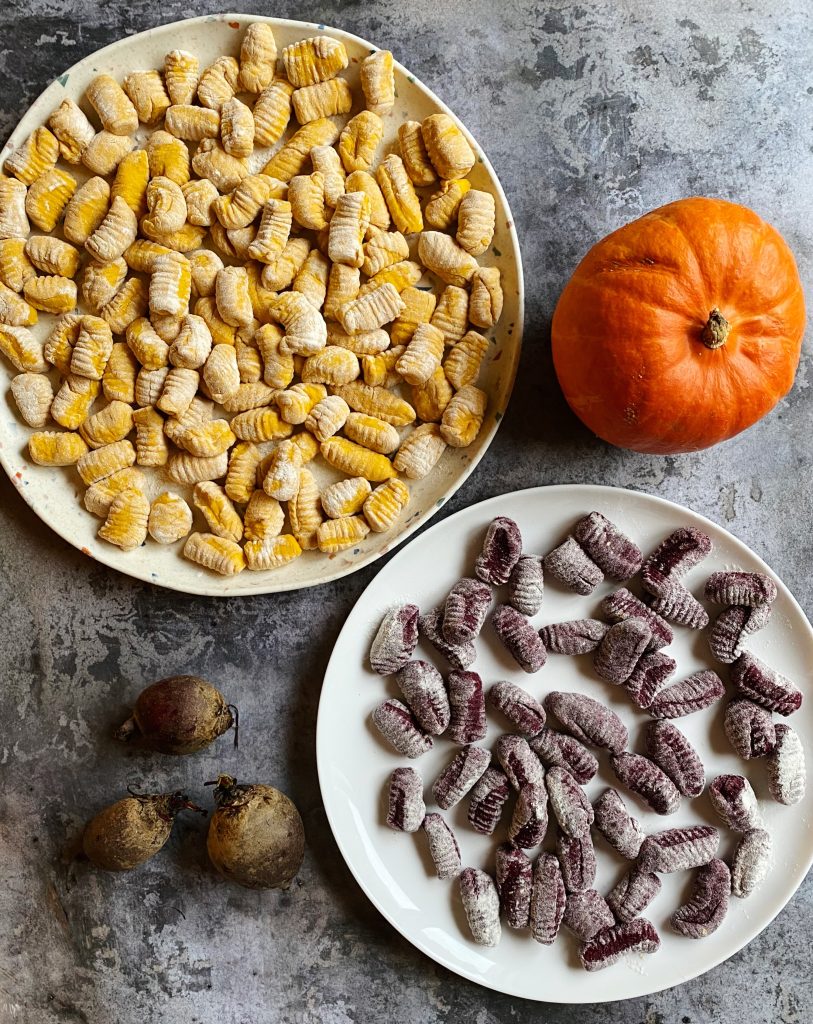
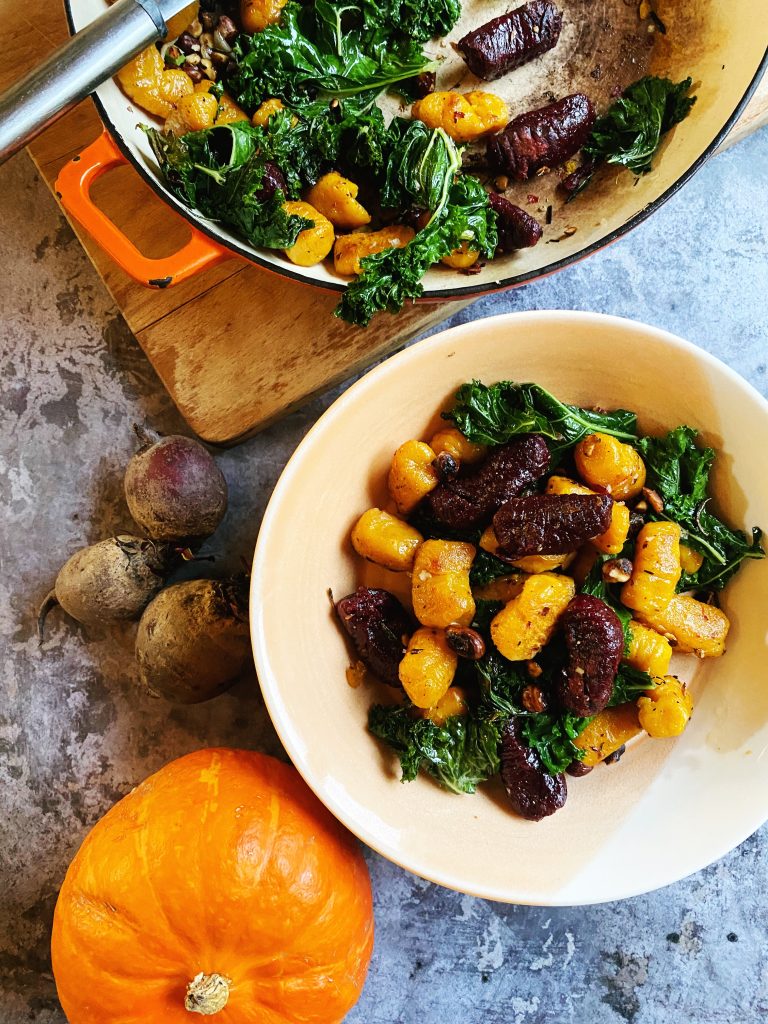
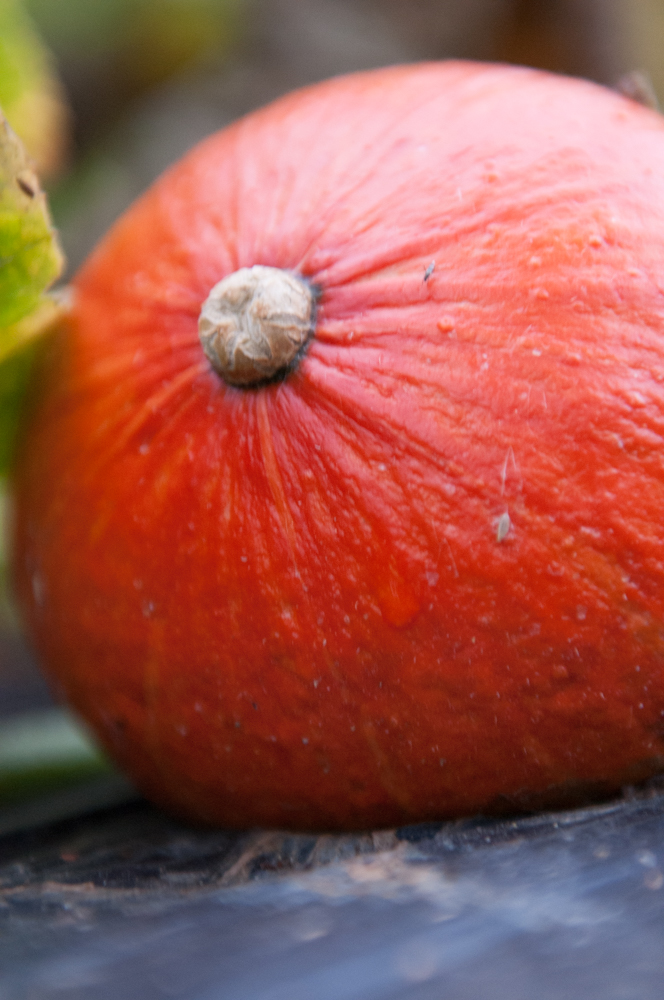
Gnocchi are easy to make but they do require a bit of time and a fair few steps. So save this recipe for when you have the time to really take your time and enjoy the process. These colourful autumn gnocchi are made with an exciting new harvest on the farm, uchi kuri squash, and our beautiful beetroot.
Serve simply sautéd with butter, garlic, herbs and kale, or make a rich tomato pasta sauce to pop them on. Here’s a 30 second video to show you the process, otherwise, read on below. Liz x
Ingredients (serves approx 8)
a small winter squash like our uchi kuri (or sub with a butternut squash)
8 small beetroots, or 4 large
salt & pepper to taste
4 tbsp olive oil
plain flour (or a gluten free plain flour blend) – amounts vary, see method below
6 cloves of garlic
6 sprigs of rosemary (or sage?)
enough butter (or more olive oil) to sauté
8 leaves of kale (sub with beetroot leaves if you have any fresh)
a few handfuls of hazelnuts (we sell compostable bags of organic hazelnuts here)
Method
Preheat your oven to 200C and get two baking dishes ready.
Chop your squash in half and scoop out the seeds. Chop the squash into chunks and put it into one roasting dish. Scrub the beetroots and chop them into chunks too. Put them into the other dish. No need to peel either of these lovely, organic vegetables.
Season both dishes with salt and pepper and drizzle with olive oil. Then get them into the oven to roast until soft. This usually takes around 20-30 minutes, just keep an eye on them.
Allow the roasted veg to cool a little, then blend the squash into a purée. Taste and slightly over-season with salt. It needs to be a little too salty as you will be adding a fair bit of flour next.
Add 4 large serving spoons of plain flour to the food processor and gently pulse the mixture together. Be very careful not to over-mix as this can make the dough tough. I do this in a large food processor with the ‘S’ blade attachment, but you can use a stick blender to purée then just fold in the flour in a large bowl. Add more flour as needed (amounts vary as different vegetables have different water content) until you achieve a soft dough.
Scoop the dough into a bowl, then repeat the process with the beetroot. You will probably find that the beetroot dough needs less flour.
Cut the dough into manageable portions. Generously flour a clean work surface and roll the dough into thick snakes. Cut the snakes into bite size pieces.
Gently roll each bite over a ridged gnocchi board or the back of a fork. Place the gnocchi onto large, floured plates or trays.
Bring a large pot of water to a rolling boil. Then drop the squash gnocchi in, in small batches. Boil briefly, just until they start to rise to the surface, then scoop them out with a slotted spoon and place in a tray, ready to sauté. Repeat this process until all the squash gnocchi are boiled, then do the same with the beetroot. Do the beetroot AFTER the squash so that the squash gnocchi don’t get stained pink.
At this point you can space out any gnocchi you won’t be needing right away on a tray and freeze. When they are frozen solid they can be tipped into a box in the freezer to use another day.
Gnocchi can be sautéed, roasted, boiled, baked in a sauce… I think they are best sautéed in butter or olive oil and winter herbs. Get a large frying pan on the hob with a very generous knob of butter, tumble in as many gnocchi as you like and sauté until hot and starting to take on some colour.
Add torn kale leaves, sliced garlic, rosemary and chopped hazelnuts to the pan and cook until the kale has wilted and the nuts are toasty. Season as needed and serve.
A while back somebody asked me, jokingly (at least I hope it was a joke, looking back now maybe it wasn’t, in which case I led them astray by my answer) ‘What corner of the farm did we grow pineapples and bananas in?’ My answer: ‘The far corner!’
Eating seasonal, eating Irish, eating local, all admirable aspirations and absolutely possible-ish. ‘Ish’ because it can be tough, and it can require a great deal of thought and understanding and commitment if you want to stick to these ideals all year round and not end up eating turnip at every meal from Nov-March!
Eating seasonally is much easier at certain times of the years than others and this is the best time to start. This year is turning out to be one of the best years ever for harvest. However it is not all good news and while we have always been committed to sourcing local and organic where possible. Sometimes it is difficult to meet everybody’s expectations.
I have just come off the phone with Richard Galvin our regular IRISH, seasonal apple grower and he has just told me the news that much of his crop was devastated with a late frost back in June and he will have few if any organic apples for us.
There is nothing we can do about this, similarly in a few weeks the IRISH organic tomato season will finish, and we will then rely on imported organic tomatoes. While growing tomatoes out of season is possible it is energy intensive.
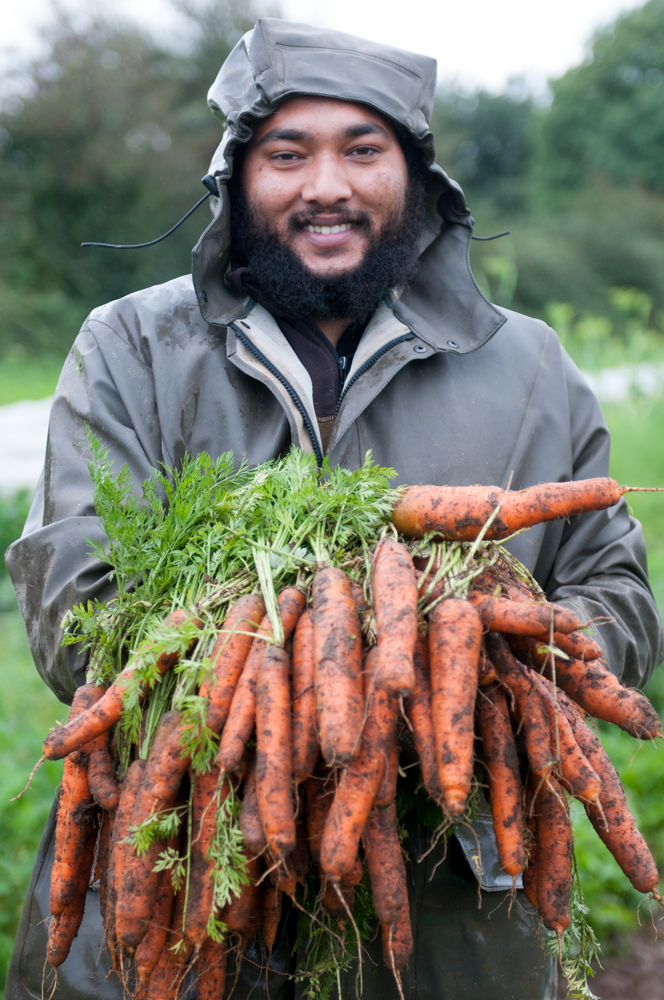
That being said, eating seasonal food can be remarkably rewarding. The harvest on our farm is now moving towards the more earthy IRISH crops that thrive in our climate and tucked in there are some real seasonal stars. It is maybe the taste of the first freshly harvested carrot, or the start of the purple sprouting broccoli season that really make me appreciate the ebb and flow of the seasons and its effect on our local food supply.
Following a strictly seasonal diet can be nearly impossible,but maybe using the old 80/20 rule might be a good idea here? Eating what is in season 80% of the time and eating what you want the other 20%.
But does taking a seasonal approach to food matter? Yes, it matters a lot, it matters for our planet and for our health. Seasonal organic food is usually fresher and therefore contains more nutrients, has been grown sustainably and has a smaller carbon footprint.
Even so, accepting that somethings just don’t grow in our country and some things only grow well in our country at certain times of the year is part of understanding our food landscape. We grow what we can here on our farm, but we still need to source bananas from the other side of the world.
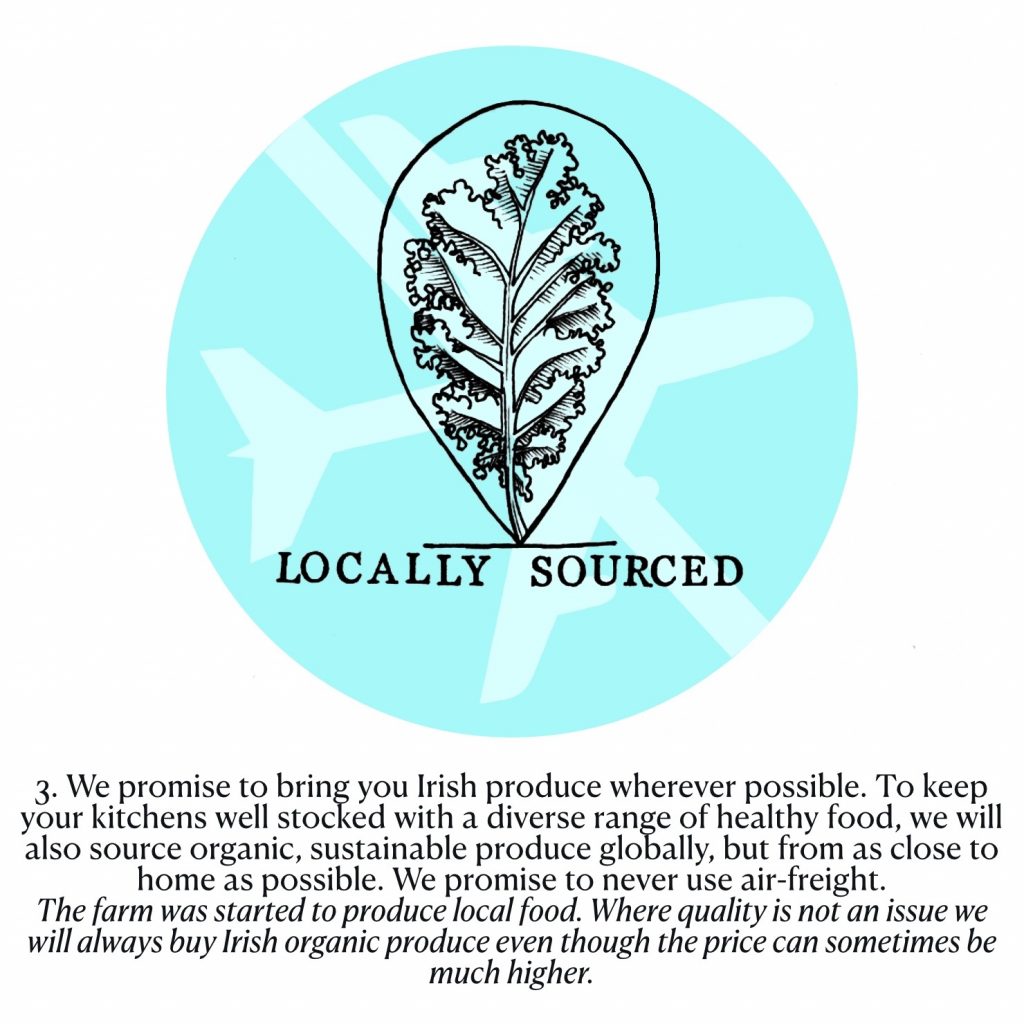
Where we need to import, we will always make sure our produce is organic, Fairtrade where possible and never airfreighted.
One of our 5 pledges for the planet.
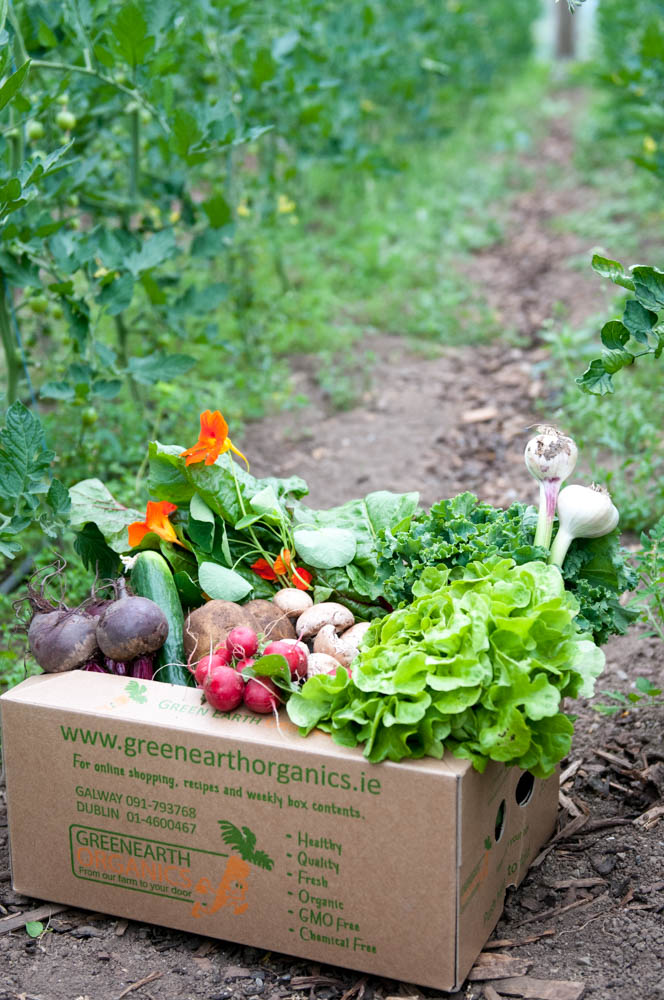
We have never had such a large range of local IRISH organic produce both from our own farm and from a host of other small organic farms across Ireland. Without any doubt right now is the perfect time to give seasonal eating a go.
I am also looking for to the start of the proper Italian Clementine and Lemon season, and my favourite is the blood orange season later in the year.
As always thanks for your support.
Kenneth
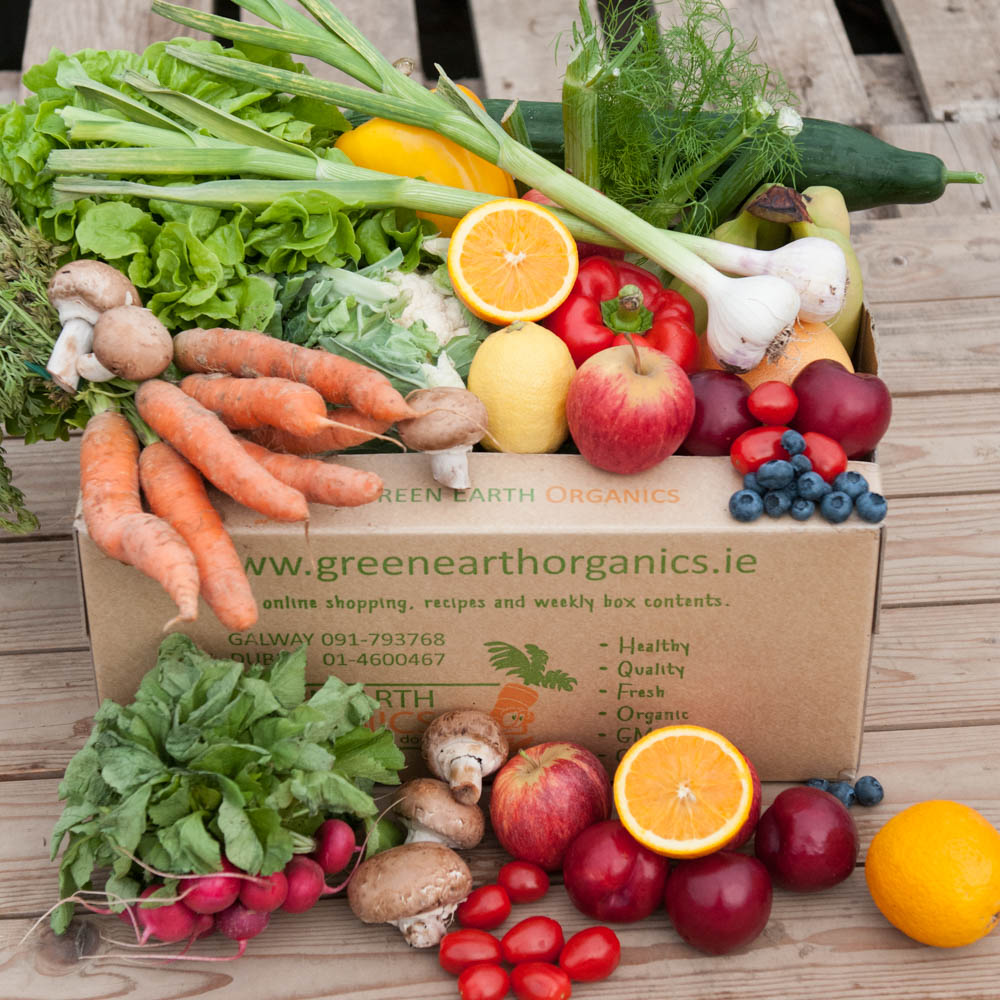
Get a box of locally grown veg (with some more exotic fruit thrown in for variety) here.
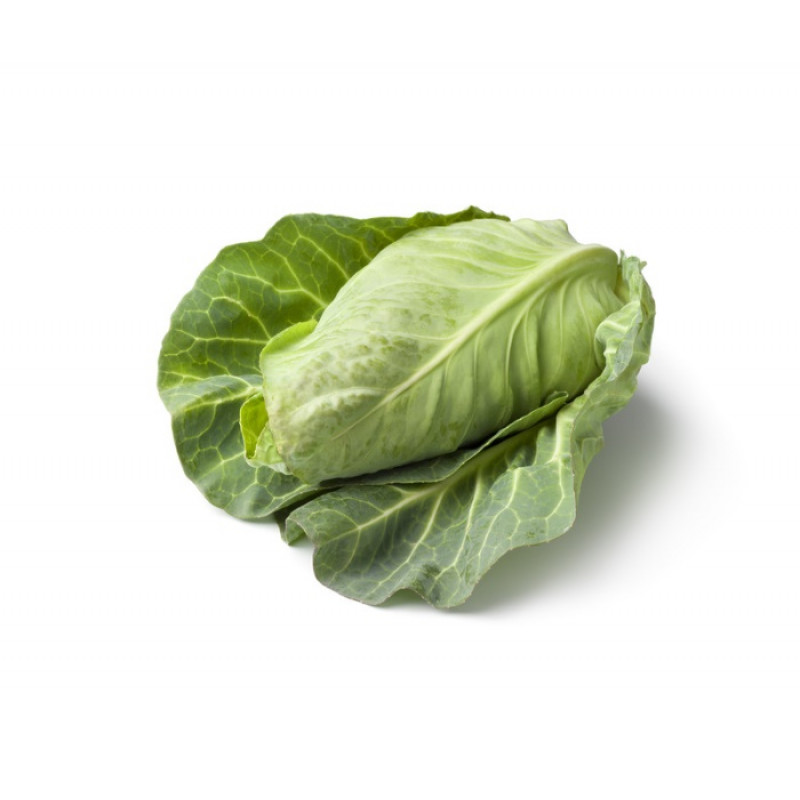
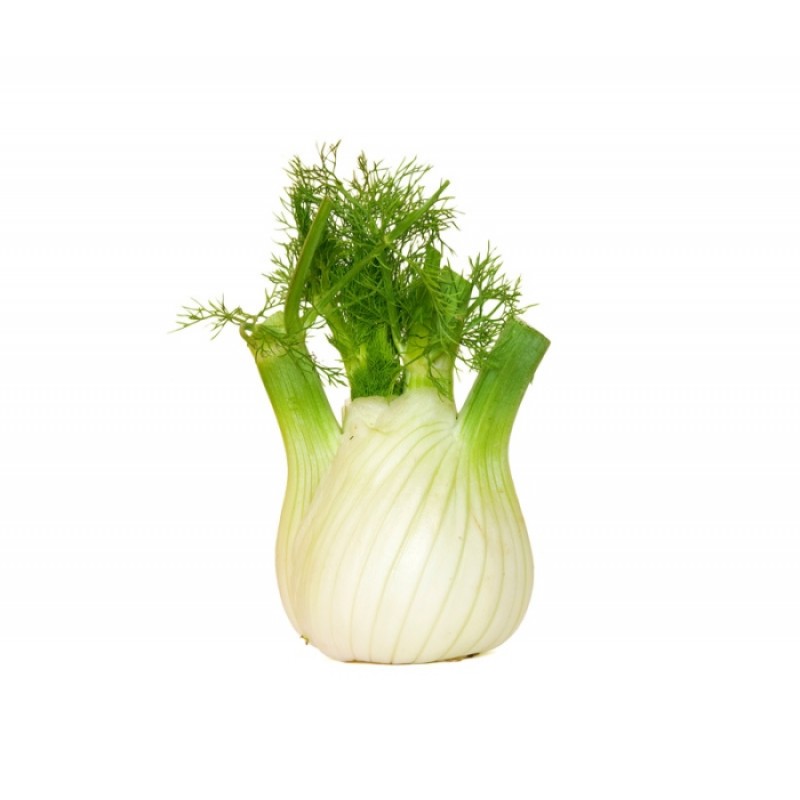
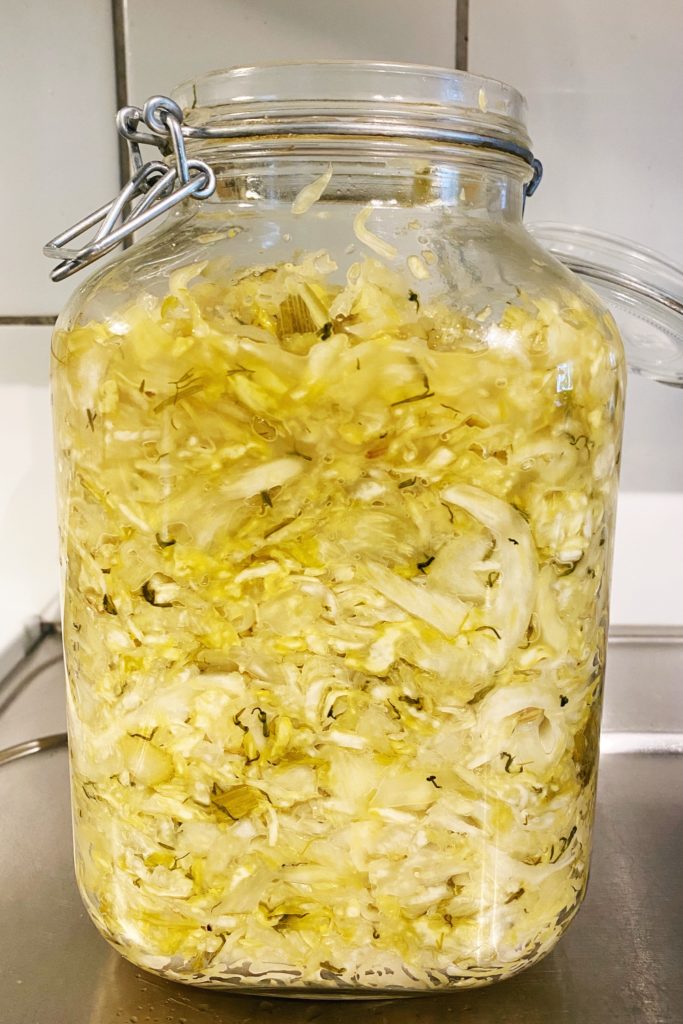
It’s that time of year when we have cabbages coming out of our ears. Sauerkraut is a really simple and safe way to not only preserve, but to also enhance the nutritional value of these humble vegetables. It just so happens that we have a bumper crop of fennel too so we’ve been making my favourite fennel and cabbage kraut on repeat, and you can too! All you need is a big glass jar, a smaller jar or glass that fits inside it, salt, cabbage and fennel.
Don’t be intimidated by the science behind fermentation. It can feel a little counter-intuitive to encourage microbes to thrive and multiply, but microbes are an essential part of us and part of a healthy world. We would not be here without them, and we certainly wouldn’t be able to grow our organic vegetables without them making our soil healthy and teaming with life. Eating fermented vegetables like this sauerkraut is scientifically proven to boost your gut health, which has a positive knock on effect to your overall health and wellbeing.
Sauerkraut is very simple. Just mix shredded cabbage (and fennel too in this recipe) with enough salt to make it pleasantly salty, pack it tightly into a clean jar and weigh it down so that the vegetables stay safely submerged in brine. Allow fermentation to happen at room temperature for about a week, then remove the weight and pop your jar of tangy, pickley goodness into the fridge to have as a side or sandwich filler to many meals over the coming months.
Find some large jars and give them a really good clean and a hot rinse. You can sterilise if you like but it is not strictly necessary.
Give your vegetables a rinse to remove any dirt. Carefully peel off and reserve a couple of outer leaves of your cabbage.
Finely shred your remaining cabbage and the fennel bulbs using a sharp knife, a mandolin or a food processor. Place the shredded vegetables into a large, clean mixing bowl.
Sprinkle over the salt then use your hands to tumble the salt through the shredded vegetables. Once it is evenly dispersed, start squeezing and massaging the salt with the shredded vegetables.
You will soon notice that the salt is drawing liquid out of the vegetables and the vegetables are decreasing in volume. Taste a spoon of the mixture and decide if you would like to add more salt or not. It should just taste pleasantly salty.
The mixture is ready to pack into the jar when it is very wet. You can test this by picking up a large handful and squeezing. There should be loads of lovely brine dripping from your hands into the bowl.
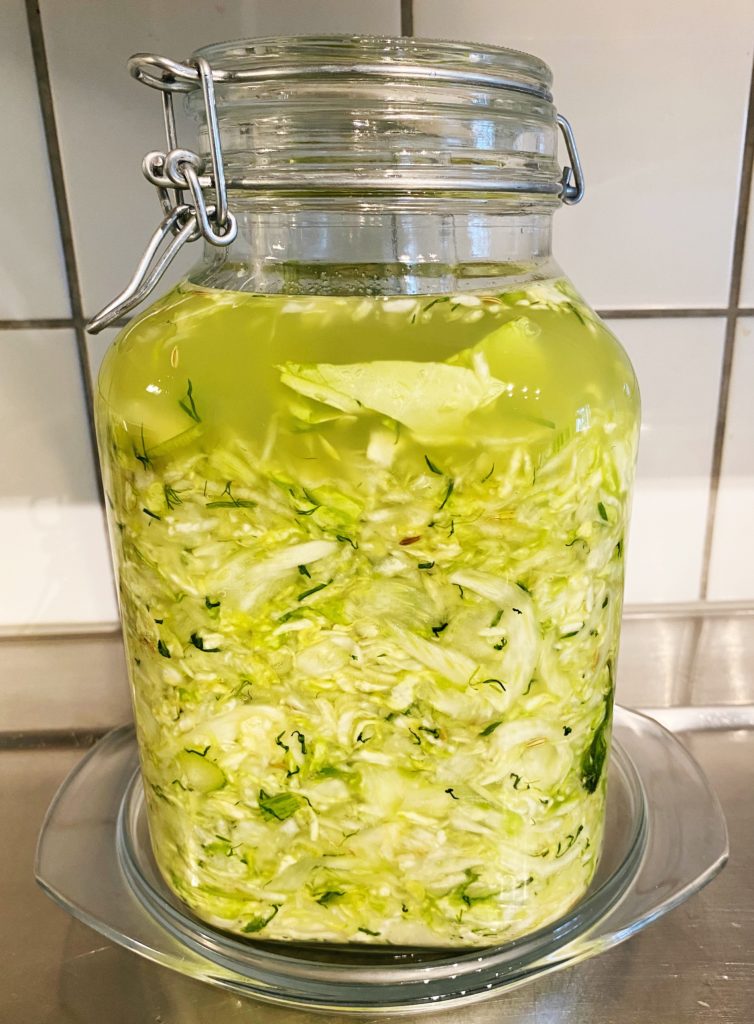
Pack the mixture very firmly into the jar. It’s best to do this a couple of handfuls at a time so that you can push down each layer nice and tight. You want to ensure that no air pockets are in the jar. Use your fist if it fits in the jar, otherwise a clean rolling pin is perfect for poking and packing down the mixture.
Keep going until you have used all the mixture or until you have at least an inch of headroom left in the jar. You don’t want to overfill it! But do include the brine that the salt has drawn from the vegetables. The more brine the better!
Now grab those outer leaves you reserved earlier. Break them to size, they should be just bigger than the surface area of the packed cabbage and fennel mixture. Tuck a leaf carefully into a jar and push it neatly over the shredded veg mixture but under the brine. The aim is to prevent any little bits of shredded veg from floating up to the surface of the brine and catching mould. The brine should rise above the cabbage leaf and all the shredded bits should be safely tucked underneath it. You may be able to push the edges of the cabbage leaf down against the sides of the jar to really tuck the mixture in. Try use a spoon or your fingers.
Pick off any floating bits of shredded vegetables and clean up your jar with a piece of kitchen paper or a clean tea towel. Then add a weight to weigh down the cabbage leaf which will keep everything safely submerged in brine. You can use anything that will be food safe and not be affected by the salt. So a smaller glass jar filled with water is good – just ensure the metal side does not touch the salty brine or it can corrode. Another good option is to use a small water glass or glass ramekin. If it fits right, putting the lid on the jar should pin the glass down and keep everything submerged.
Put the lid on the jar. If you are using a clip-top jar, remove the rubber seal first, this will allow gases to escape during fermentation and there will be non need to ‘burp’ your jars. If you are using a screw top jar you will need to ‘burp’ your jar twice a day by carefully loosening then tightening the lid. You should hear the gases escape and see bubbles rising to the top of the ferment.
Keep the jar on a plate or tray to catch any spills, at room temperature for 1 week. Not in direct sunlight. It’s best to ‘burp’ over the sink in case you have a very active ferment. It should be very active and bubbly between days 2 and 4/5 then it will calm down. If the action of the bubbles causes your ferment to rise above the brine, just use a clean hand or utensil to push everything back down under brine and carry on.
After a week your sauerkraut should be tangy and delicious. Remove the weight and the cabbage leaf. Replace the rubber seal if using a clip top jar, put the lid back on and place the jar in the fridge.
Your sauerkraut should stay fresh in the fridge for at least 3 months but often up to 1 year! To make it last well, do not double dip and move into smaller, clean jars as you work your way down the big jar. This means less air in the jar and less chance of it drying out and getting susceptible to mould.
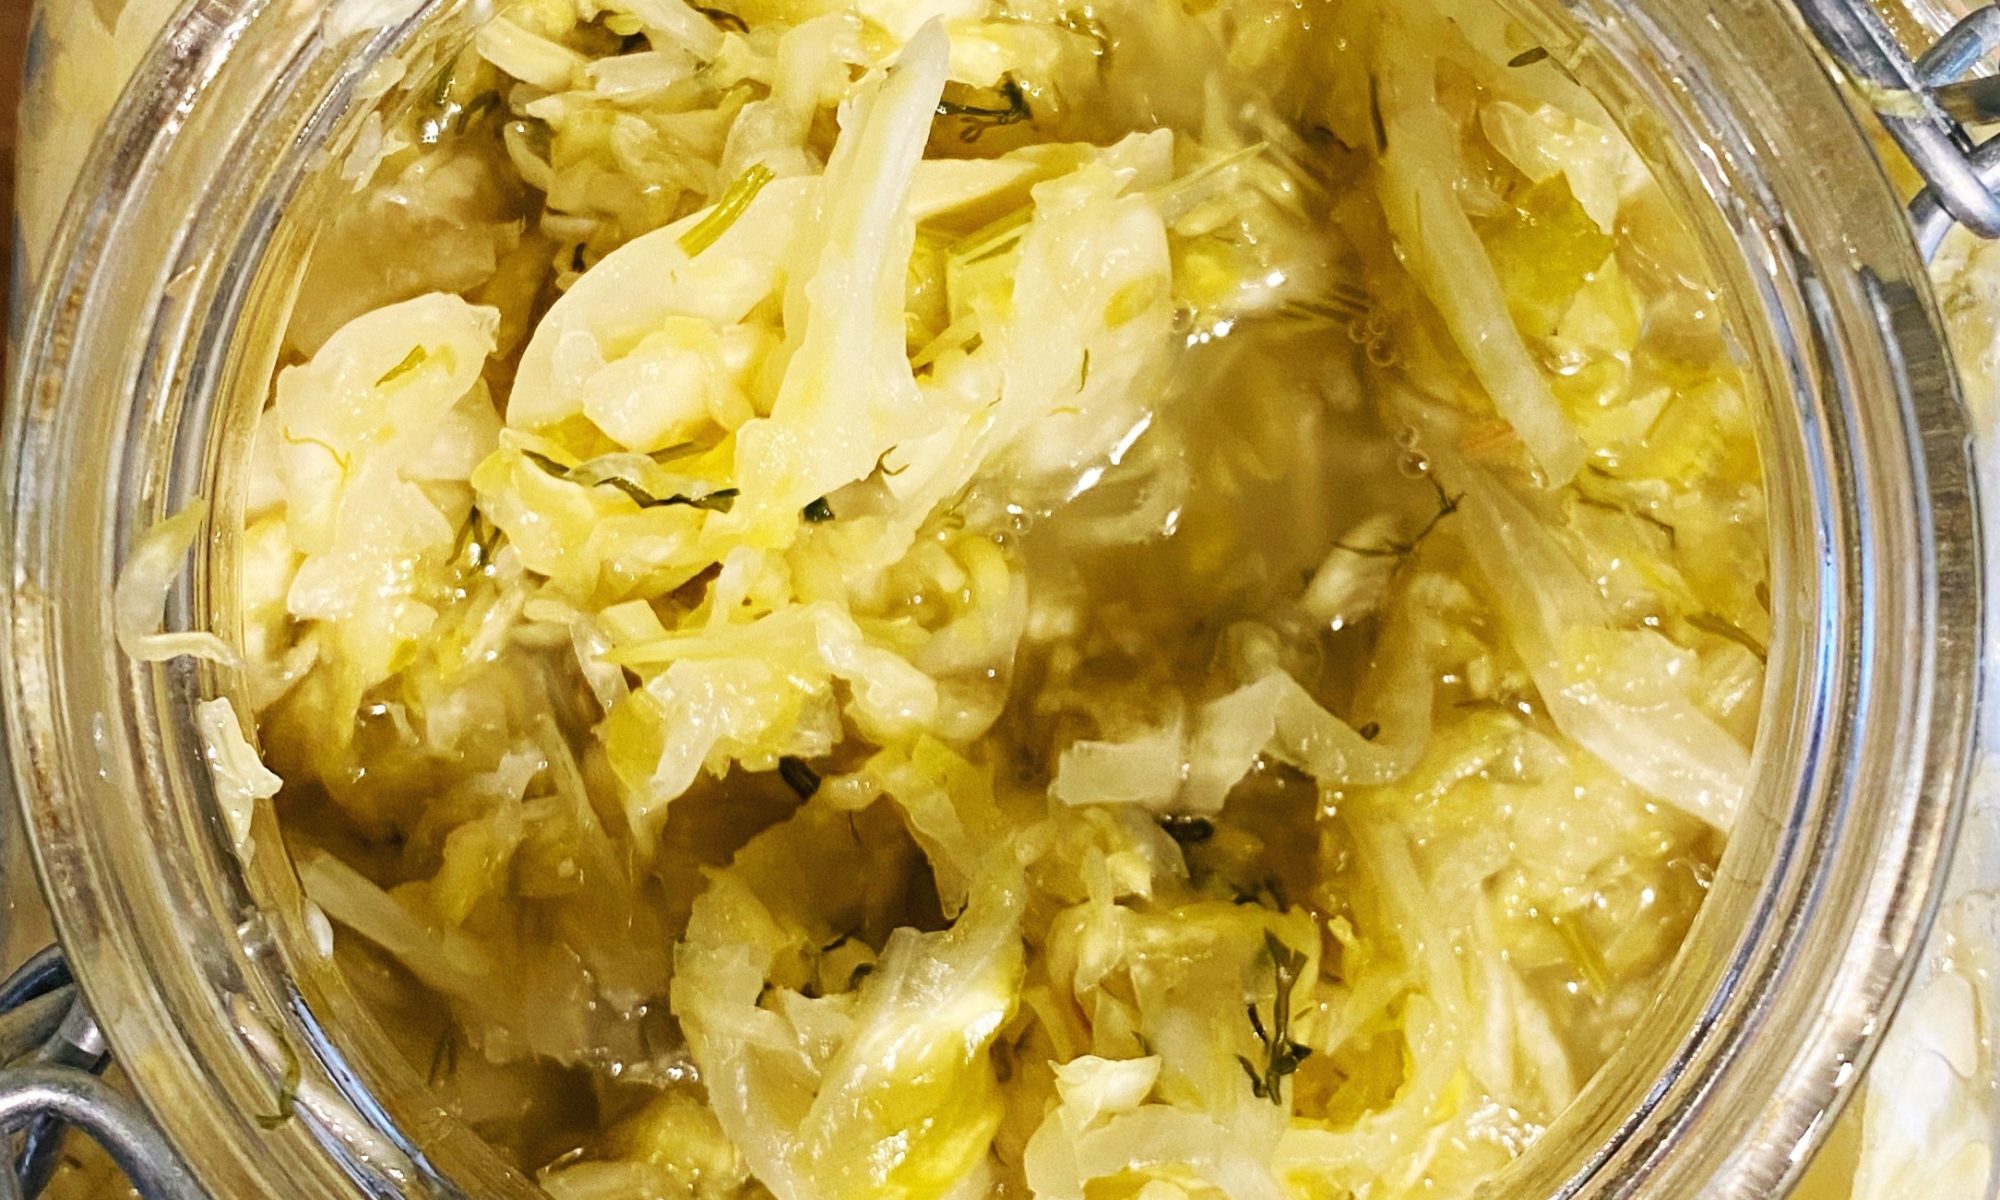
The just-packed jar before I removed the floating bits of cabbage and fennel. You can just about see the cabbage leaf and glass which is holding the bulk of the shredded veg under brine.The finished product after a week of fermenting at room temperature.
Lughnasa the Irish word for August represents the start of the harvest season and it is embedded in our culture and identity. It is a celebration of the harvest season, and both myself and Toby were having our own little festival in the field of clover here!
By September we are celebrating the fruits of many months of labour in the fields it is the true month of harvest.
Growing and harvesting your own food can be so rewarding. Watching the small seedlings transform into robust healthy plants that provide food is truly one of the many miracles of nature.
Sometimes, it seems that the food is an added bonus, and that the pleasure and the reward of working in the soil is enough. It feeds the soul. Research has shown that putting your hands in soil can help ease depression and being outside cheers people up.
Rekindling that connection with our food and the land is something that is central to our identity.
Our grand-parents knew what good food tasted like, they knew where their food came from and they knew how it was produced.
We have handed the control of our food to a handful of global corporations that run an efficient feeding machine, which has disconnected us from primary food production. Supermarkets have added a layer of separation that takes us another step further away from our food. In recent years they have seen the value in putting the smiling farmer on their walls in a weak attempt to give the impression that they are reconnecting us to our food.
We have relinquished not only this connection but the skills and ability to produce our own food.
We have become accustomed to the always available food culture, everything we ever need is always there on the supermarket shelves, plastic clad ready to be added to our shopping basket.
We have paid a high price for this choice and convenience.
If you are honest, what do you know about the food you are eating today for dinner? Where was it produced? How was it produced? How were the people treated that grew it? Difficult questions and mostly ones that don’t cross our minds.
However, the answers to these questions will not only open our eyes, they are the key to a shift in what we eat and how we approach our food. They can also lead to a healthier you and crucially a healthier planet.
We are right in the middle of harvest season now and it is wonderful. If you ever wondered if you could manage to eat with the seasons, then now is your best shot.
And if you don’t know why you might start eating seasonally here are the whys:
Reduce your carbon footprint massively.
Get more nutritious food. Freshly harvested food has a higher nutrient content.
Get an amazing taste experience “how food used to taste”
Support real local jobs.
Support the skills needed to grow our own food.
If it is organic you are supporting a system of food production that enhances biodiversity rather than degrades it.
So as with the traditional feast of Lughnasa why not get some good local food in, and celebrate the beautiful bounty of your gardens and our fields by a simple meal with family and friends.
Kenneth
Get a beautiful box of organic veg delivered to your door here.
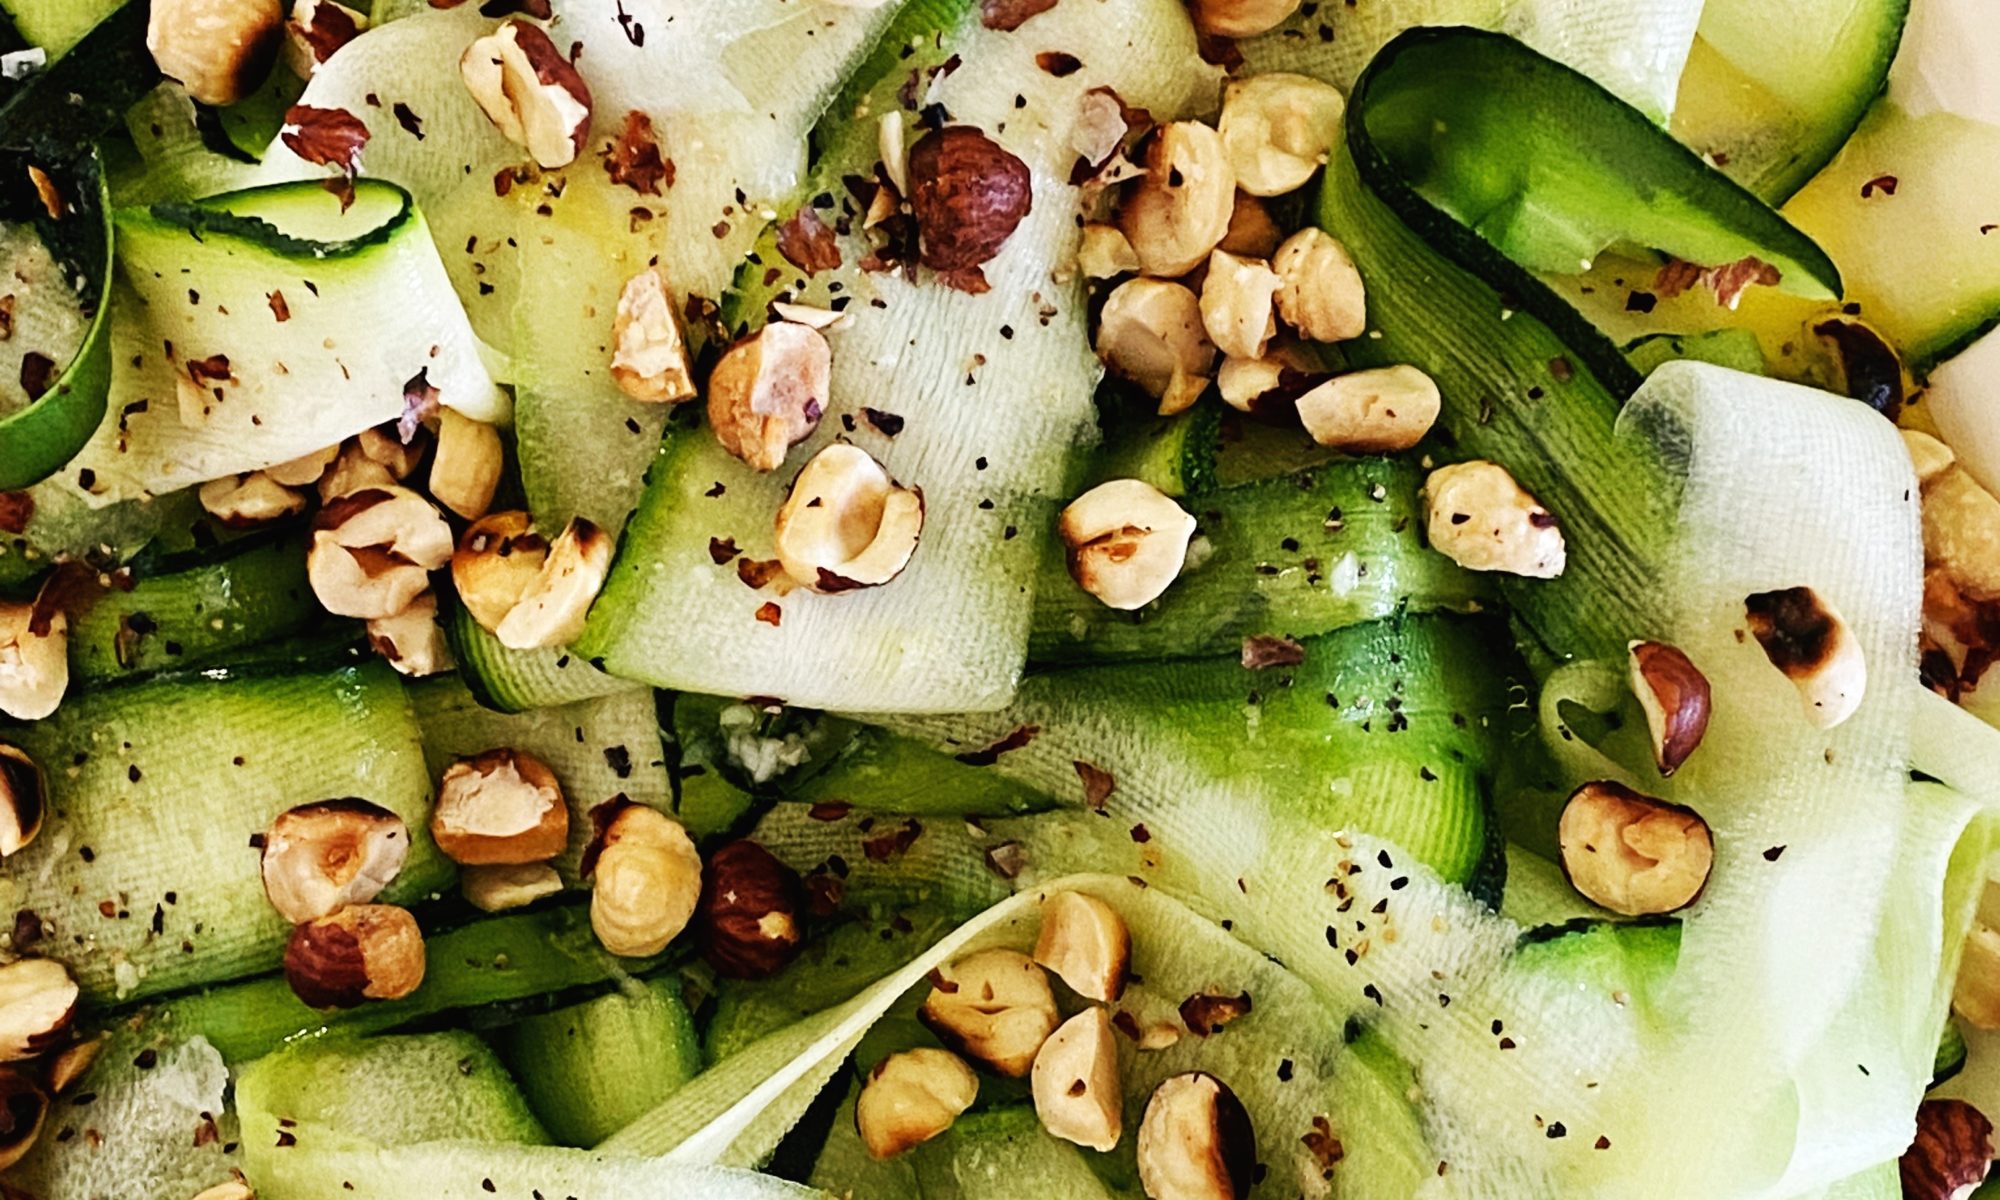
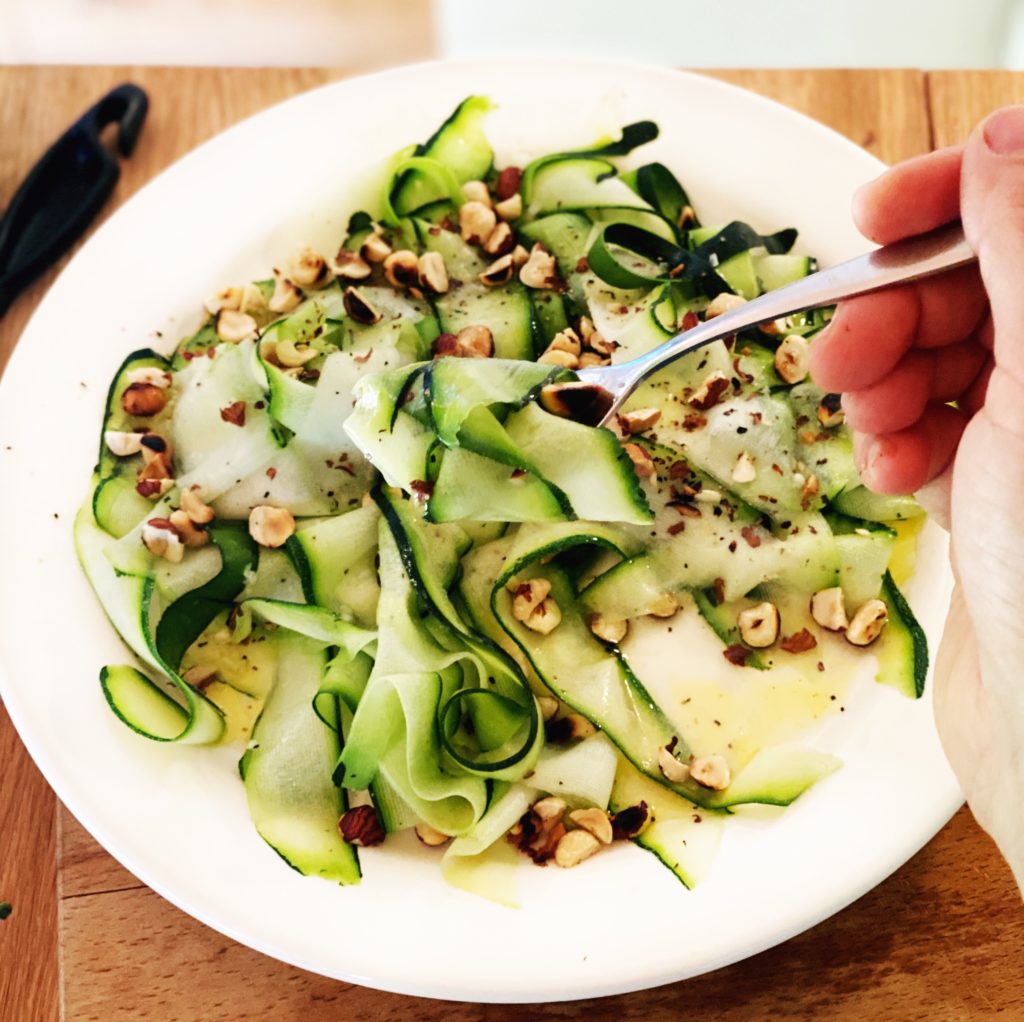
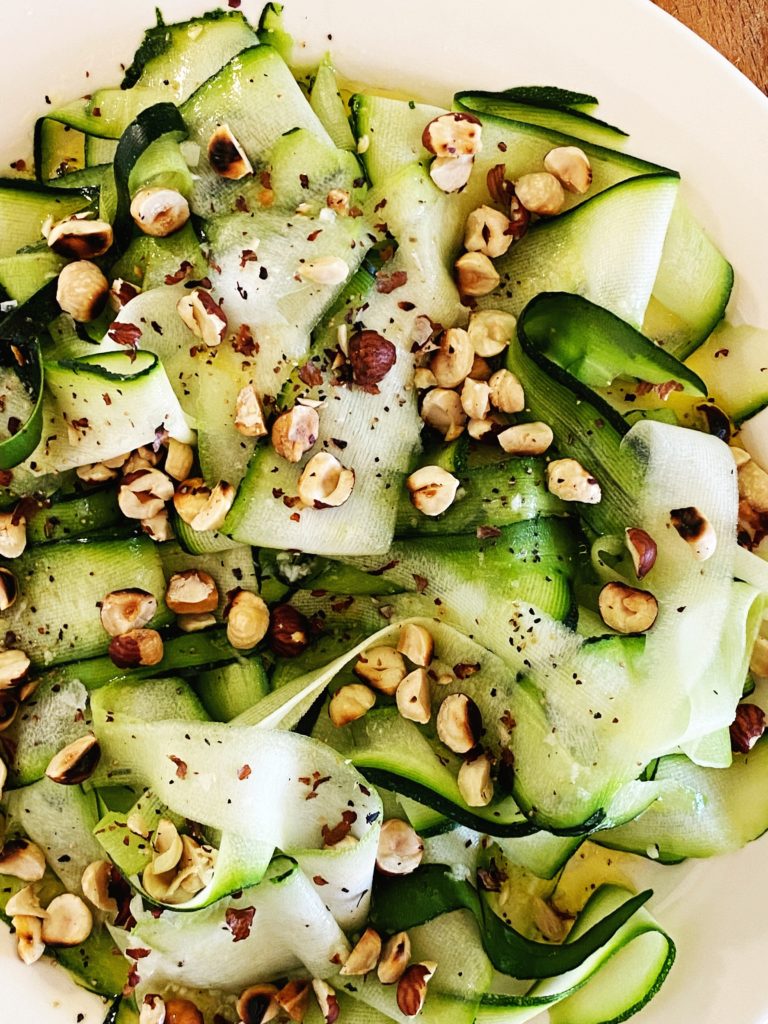
We are in the midst of a classic courgette glut on the farm. Next week we’ll add some free courgettes to all the boxes, we hope you enjoy them. Expect lots of courgette recipes to come your way. We’d love to know your favourite courgette recipes too please! Let us know in the comments or over on our community Facebook group. I’ll start us off with this super simple salad. It’s so easy to make (just a matter of combining raw courgettes with a lemony dressing, then scattering over some toasted hazelnuts) and oh SO delicious! I have this salad often this time of year as a side to pretty much any meal, or it’s brilliant stirred through freshly boiled pasta or bulked out with a drained tin of lentils.
Liz x
Did you know, our organic hazelnuts come in compostable bags?
Ingredients
Courgettes (2 small or 1 large)
2-3 tbsp extra virgin olive oil
the juice of half a small lemon (have you tried our new season verdelli lemons?)
1 small garlic clove, crushed
salt and pepper to taste
a handful or two of hazelnuts, toasted in a dry pan then roughly chopped
Method
Using a potato peeler, slice the courgettes into delicate, thin ribbons. For ease, slice them directly over a serving platter or large salad bowl.
Make the dressing by stirring together the olive oil, lemon juice and crushed garlic with a pinch of salt and pepper.
Drizzle the dressing over the courgette ribbons. You could toss the salad now to evenly coat the ribbons with the dressing, or just leave it drizzly.
Then toast the hazelnuts in a dry frying pan until nicely coloured. Tip them onto a board and carefully chop them up a bit to make them go further through the salad.
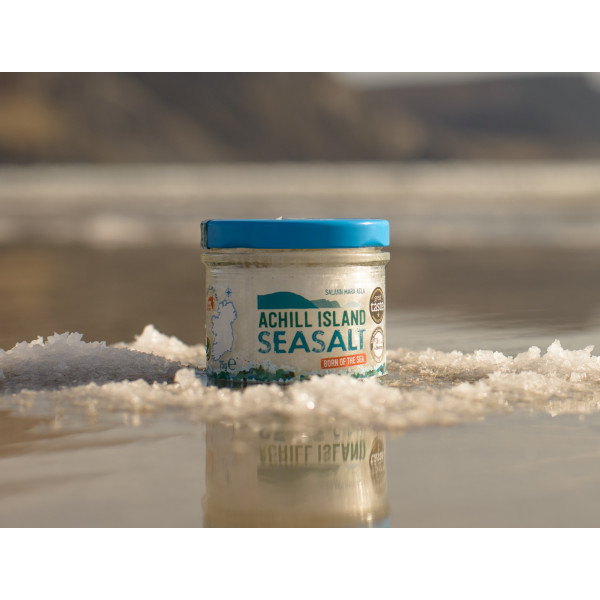
Scatter them over the dressed ribbons and finish the salad with a little sprinkle of flakey sea salt. We LOVE Achill Island sea salt for exactly this type of dish.
Enjoy as is as part of a salad buffet or alongside a BBQ. Or make it a light, refreshing meal by tossing through some freshly boiled pasta or a drained tin of cooked green lentils.
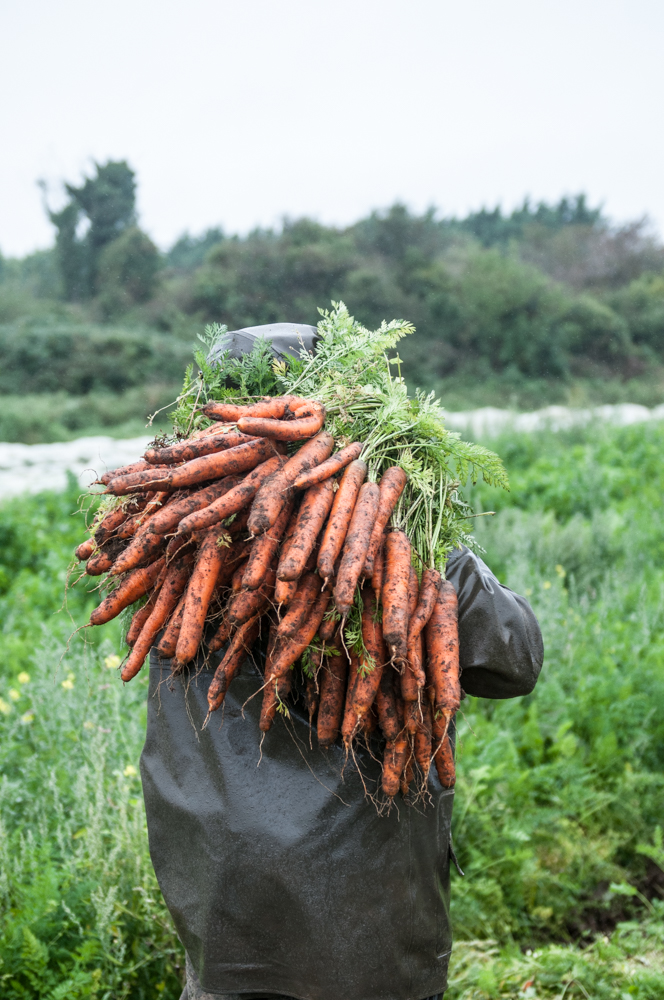
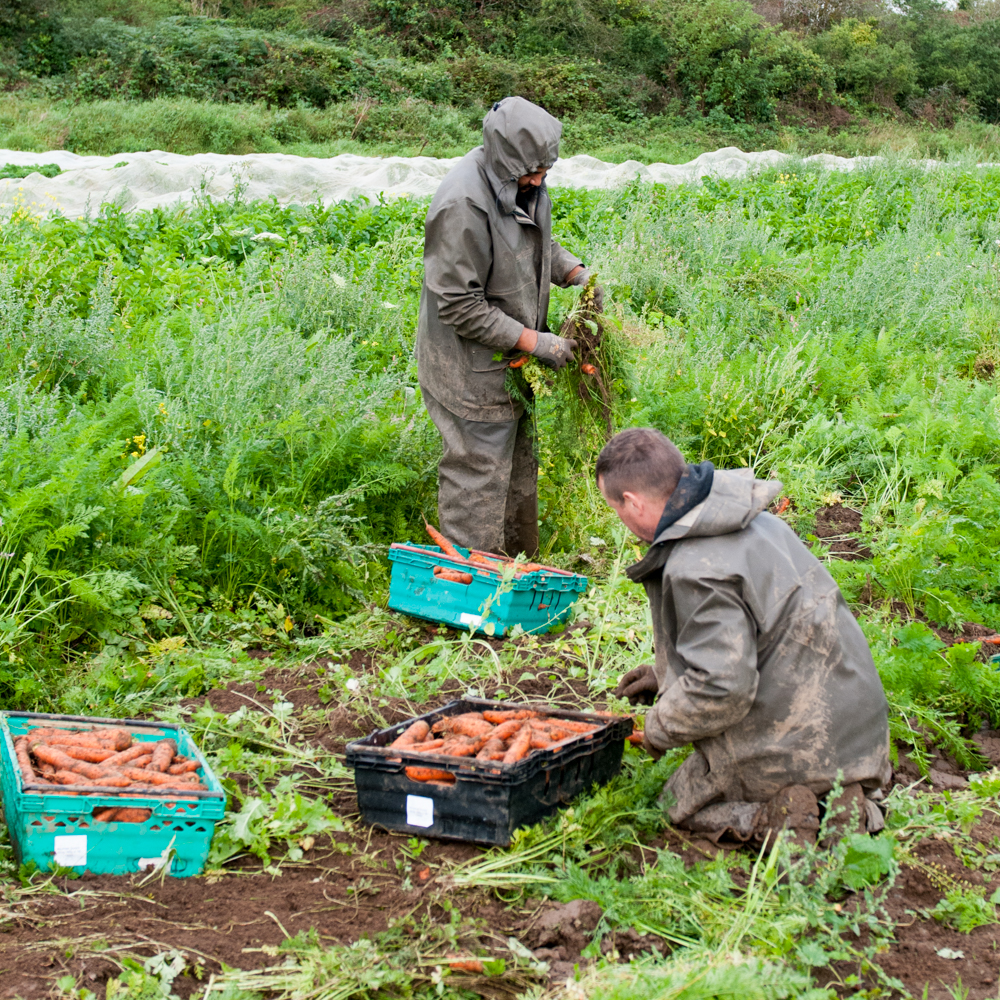
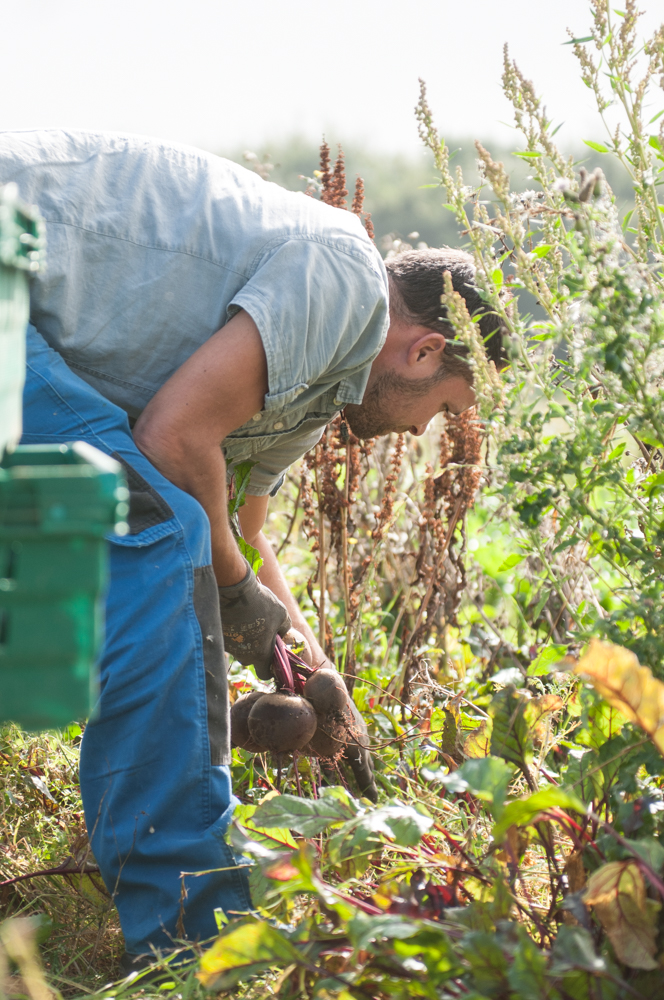
Carrots are such a staple you’d be forgiven if you’d never thought of them as the main event of a meal or barely even given carrots a second thought. But we love carrots over at Green Earth Organics and you’ll always find them in our subscription boxes. Covered in mud and fresh from the field here in Galway, I can honestly say these are the best carrots I’ve ever tasted. The scrubbed, plastic wrapped supermarket carrots just don’t compare. Muddy carrots seem to stay fresh longer and taste sweeter so if you get scrubbed ones, keep them in the fridge and use them in a week or so, the muddy ones are ok in a dark, cool kitchen cupboard or pantry for much longer.
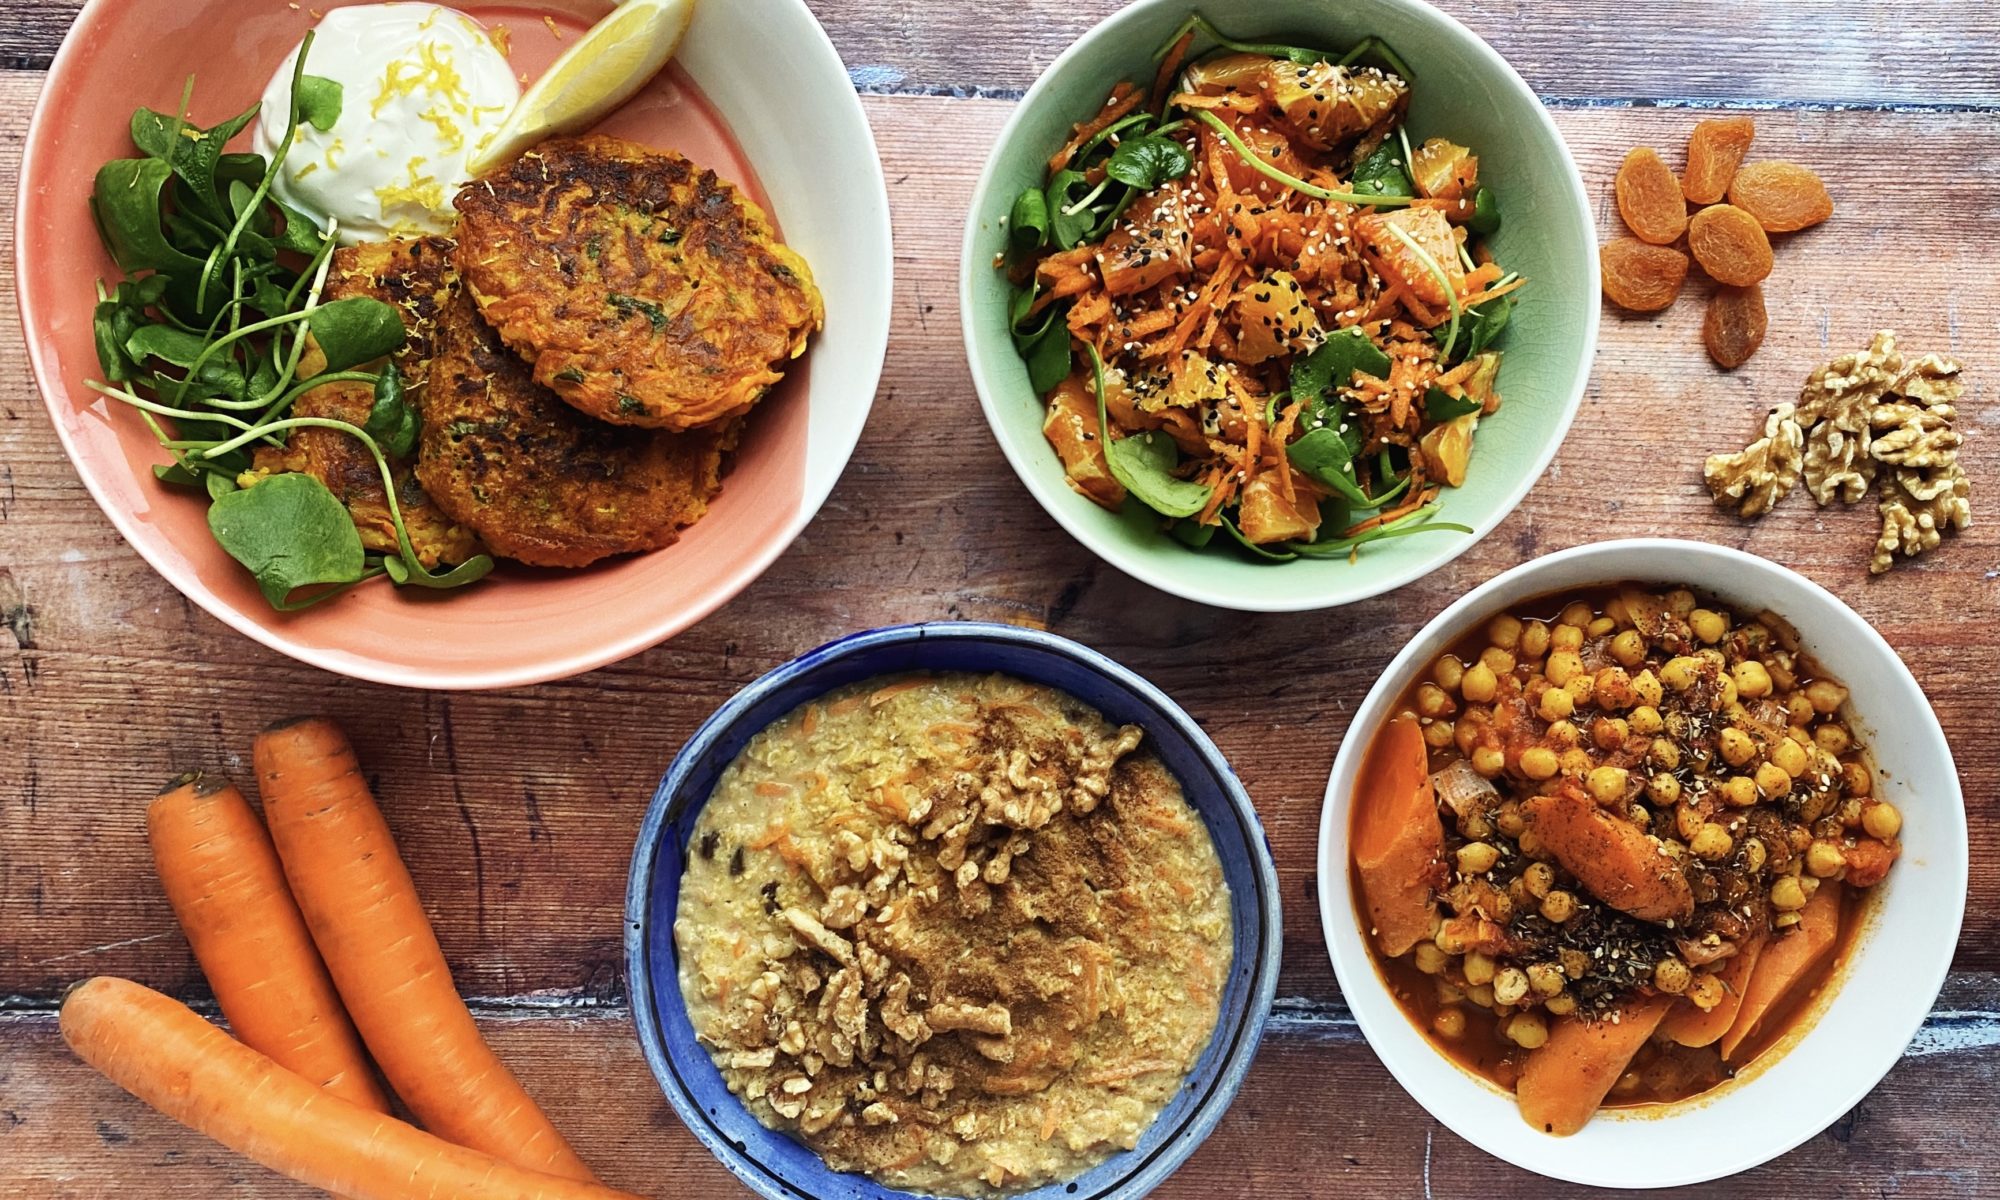
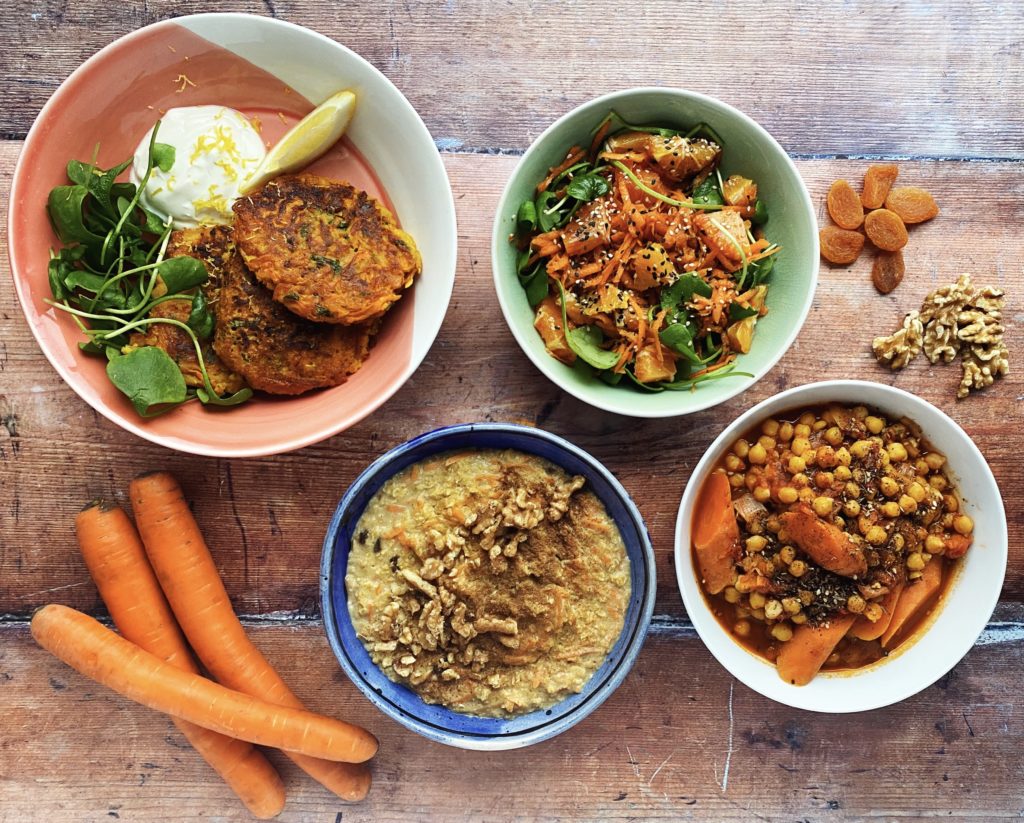
I’ve had quite a few requests for carrot recipes as that’s what most people seem to end up with as their next box is arriving – so here are four ways I cook carrots regularly. You can also click on my raw carrot cake recipe which uses a whopping 600g of carrot, my smoked carrot strips which are fabulous for breakfast with wobbly scrambled tofu or on a toasted bagel with cream cheese or my butterbean barleyotto topped with roasted carrots and carrot top pesto if you’d like further carroty inspiration. Please do share your favourite carrot recipes with us too – in the comments or over on our friendly facebook group. Liz x
Watch this ‘4 Ways With Carrots’ video (you can skip to the recipe you are looking for) or the recipes are below.
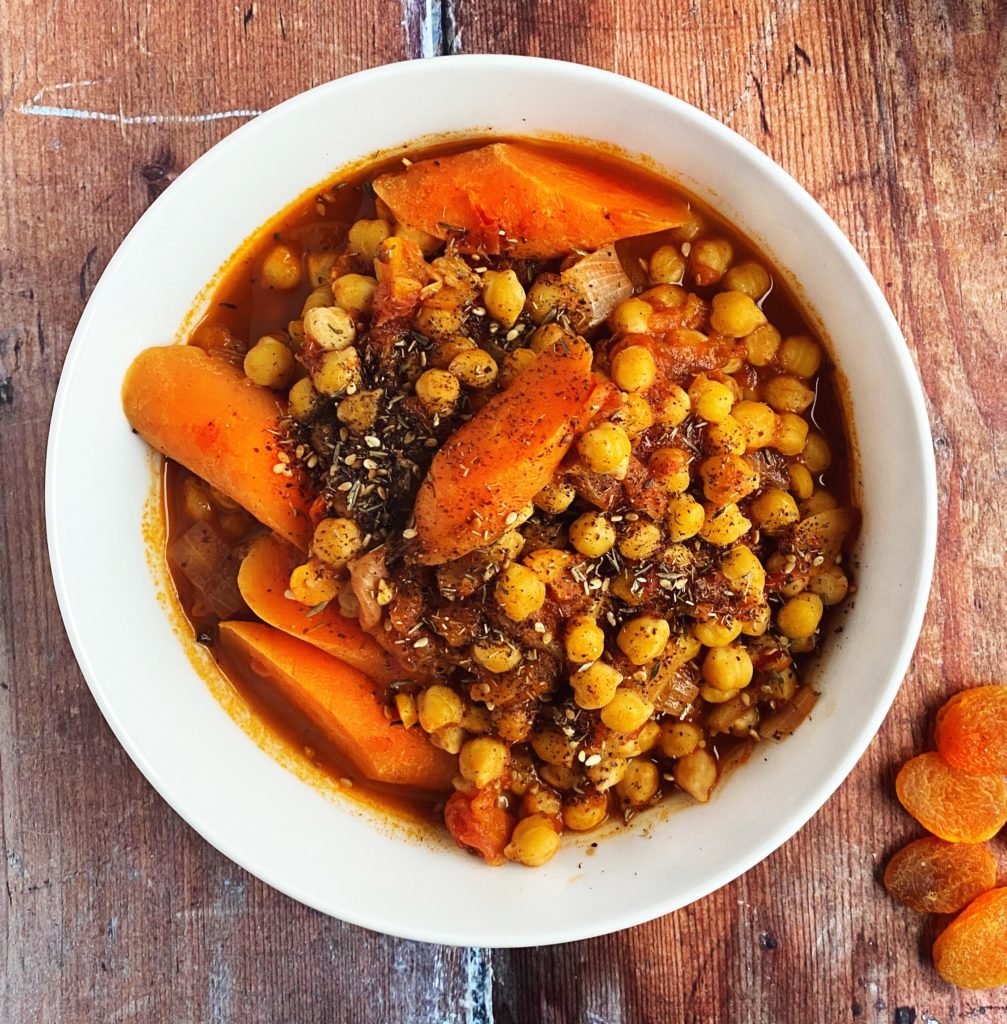
Carrot, Chickpea & Apricot Tagine
A warming Middle Eastern stew, simple to put together with punchy flavours from the chermoula paste.
Dice the onion and sauté it over a medium-high heat in a large pot. While it is cooking make the chermoula paste.
Crush the cumin and coriander seeds with a pestle and mortar until roughly broken up. Add the peeled cloves of garlic and crush some more. Then add the chilli flakes and smoked paprika and stir in 2 tbsp of olive oil. Finely dice the preserved lemon and stir it into the spices. Instead of using a pestle and mortar you could use a small blender and pulse the ingredients together into a rough paste.
Add the chermoula paste to the onions and stir for a few minutes to toast the cumin and coriander seeds. Once they are very fragrant, drain the tins of chickpeas and add them to the pot.
Chop the carrots into chunky slices and add them to the pot along with the two tins of chopped tomatoes and the tsp of ground cinnamon. Half fill the tomato tins with water and swirl out any remaining tomatoey juices into the pot.
Slice up the apricots and add them to the stew, season it really well with salt and pepper then put the lid on and simmer for an hour or so until the carrots are cooked through and the stew is rich and flavoursome.
Taste and adjust the seasoning as needed and serve with cous cous or rice or breads or even on it’s own. It’s fantastic with some freshly chopped parsley or coriander mixed through right before serving too. I’ve topped mine in the photo above with some homemade z’atar which is simply an even mix of toasted sesame seeds, dried thyme and ground sumac.
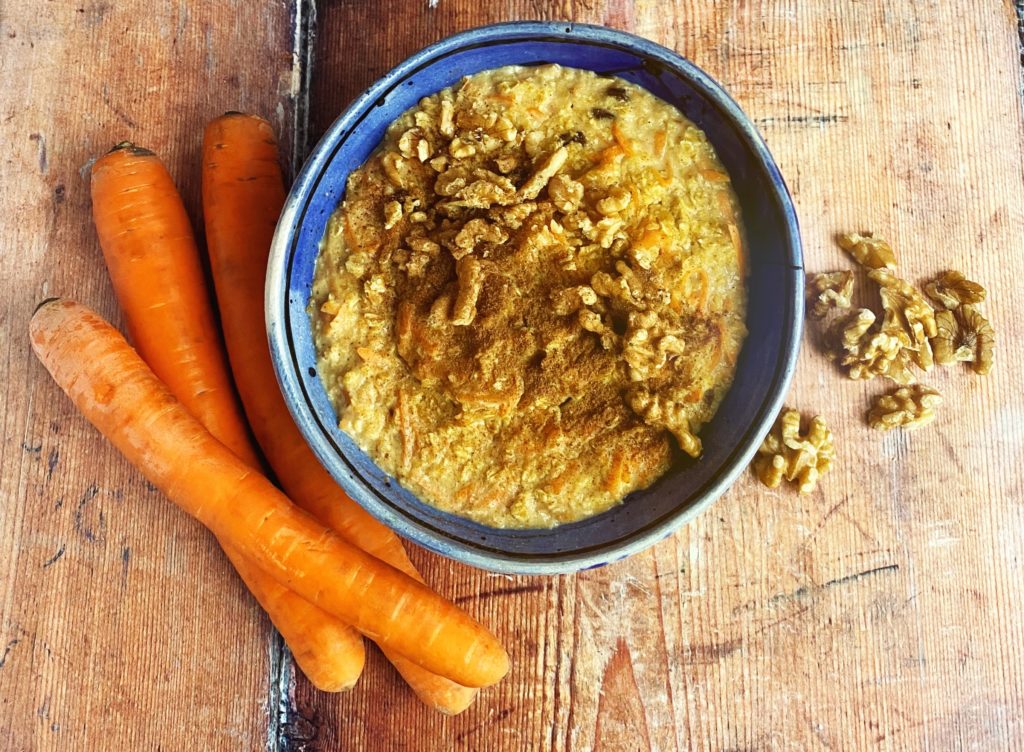
Carrot Cake Porridge
Sweet spices, grated carrot, creamy oats…delicious topped with walnuts on a cold morning.
walnuts and extra cinnamon/maple syrup to top the porridge
Method
Grate a carrot and put it in a small pot with the oat milk, oats, spices, raisins, oats and maple syrup.
Simmer and stir until hot and creamy, then serve topped with walnuts and a dusting of cinnamon. Add an extra drizzle of maple syrup if you like too!
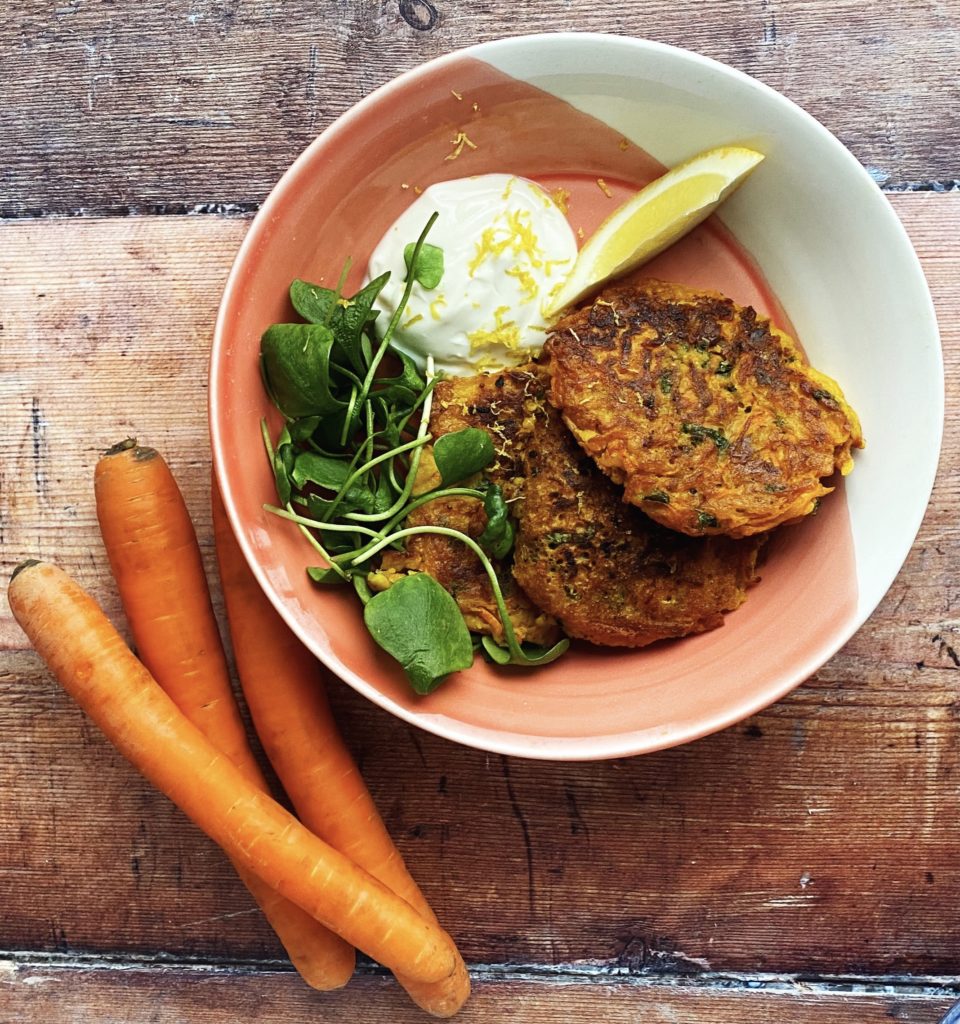
Carrot & Mint Fritters with Yogurt, Leaves & Lemon
Fritters are a fantastic light lunch with salad leaves and a simple dip. Or have them as a sandwich filler? Very versatile, use whatever herbs, spices and veg you fancy. This combination is especially delicious though. Tastes like Spring is around the corner!
Whisk the gram flour and water together into a smooth batter, then season it well with a big pinch of salt and pepper.
Stir in the grated carrot and chopped mint and then fry well spaced dollops of the mixture in a pre-heated to medium-high, well oiled frying pan. Fry on both sides for about 3-5 minutes per side or until golden brown and crispy and cooked through.
Serve hot with a couple of spoons of natural yogurt with a little lemon zested over it (lemon and mint work so well together), a few salad leaves and a wedge of fresh lemon to squeeze over the leaves and the fritters.
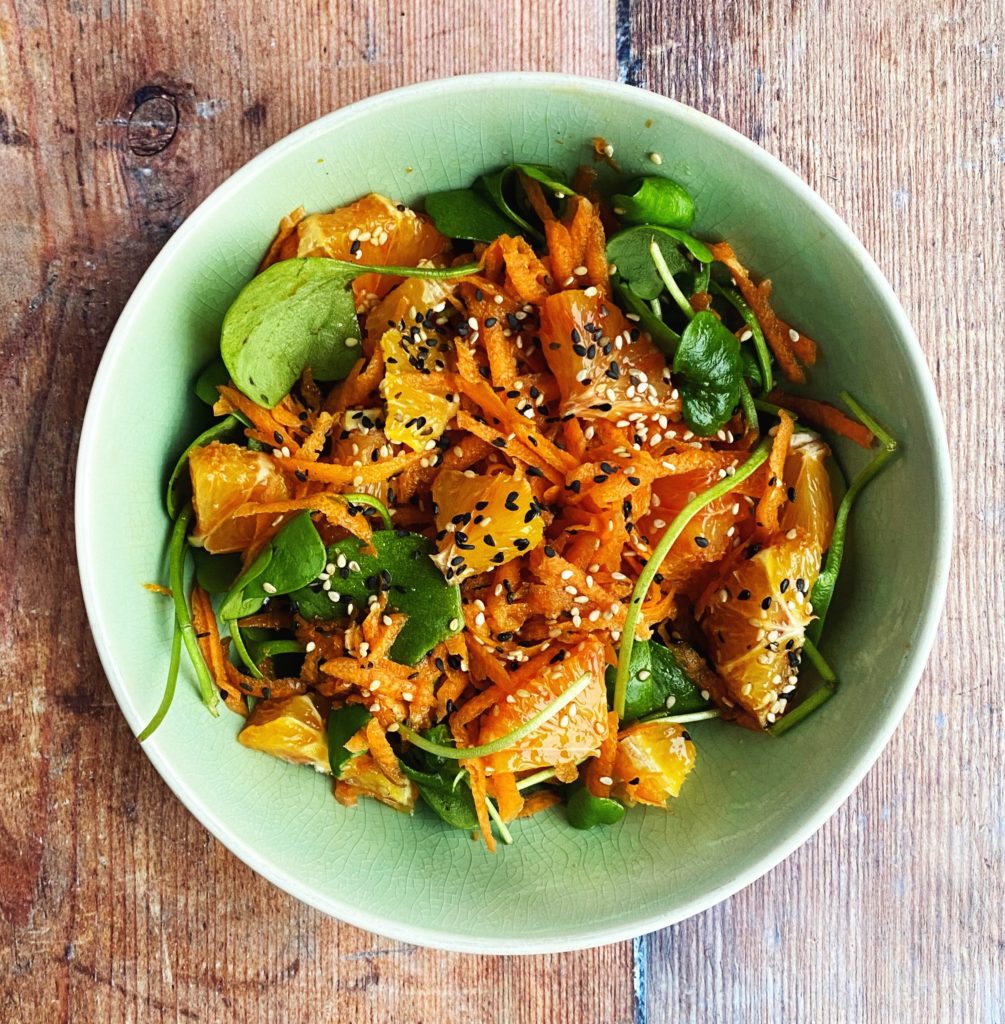
Carrot, Blood Orange & Sesame Salad
Toasty, salty, sweet, fresh and tangy – just the perfect combinations. This simple salad takes very little time to put together but has all the big time flavours!