We love oats in every way, when you eat them they release energy slowly over the next few hours and make for a great start to the day! However, porridge everyday can get a bit boring so we’ve added a few good ingredients to make this indulgent baked oats dish. Of course you probably won’t have chocolate oats everyday so give this a go at the weekend or to celebrate a special day! Serve as it is or with yoghurt and banana or ice cream and berries.
Cooking methods have evolved over the years. Traditional methods of steaming, boiling and roasting will remain but air frying is a new enough method and a great addition. I decided to hop on the air frying wagon a couple of months ago and have not regretted it one bit.
Air fryers are very economical to run and so efficient! And whats more they are great for cooking vegetables in a speedy tasty manor.
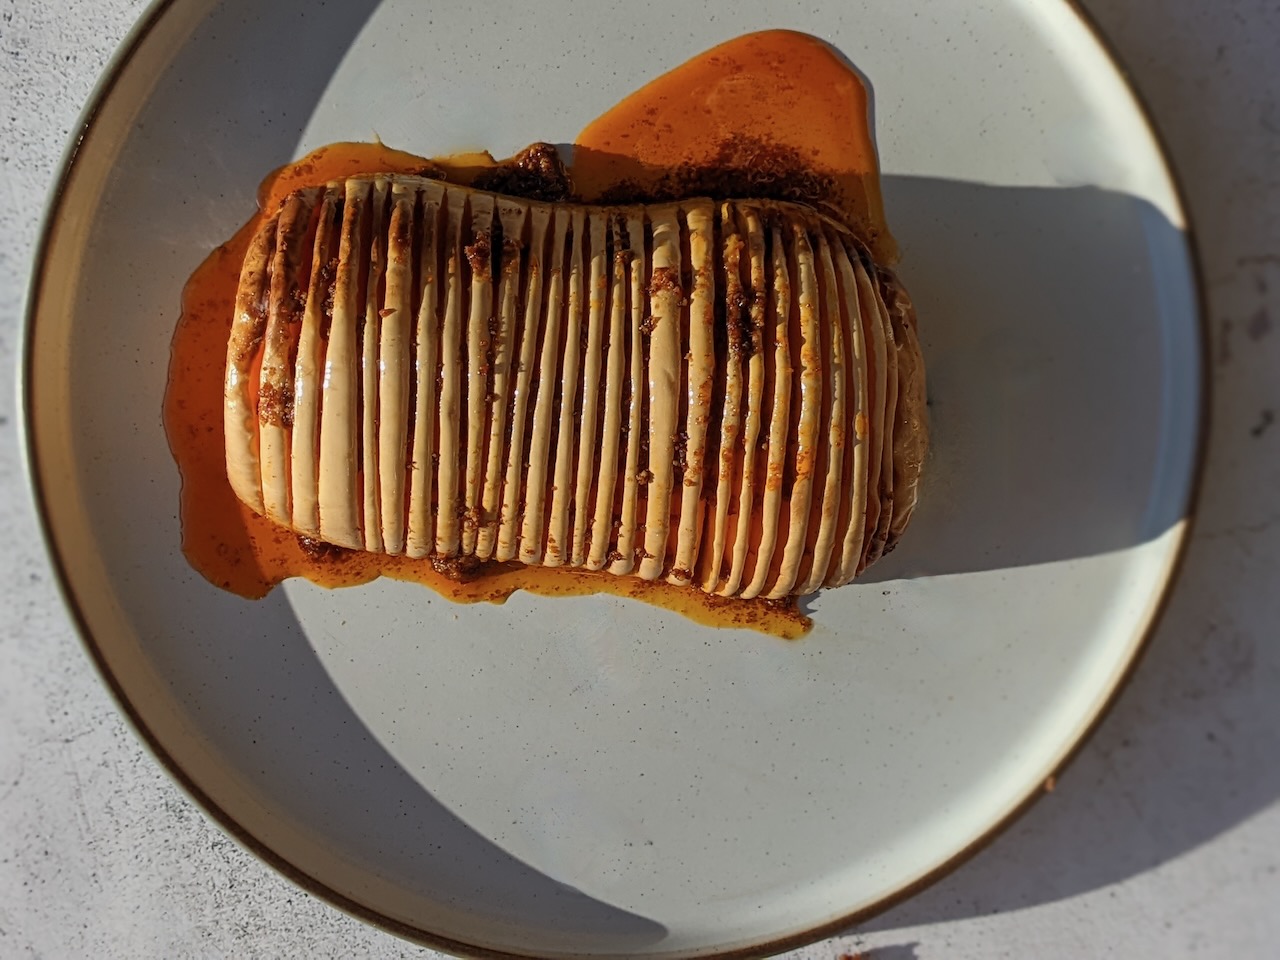
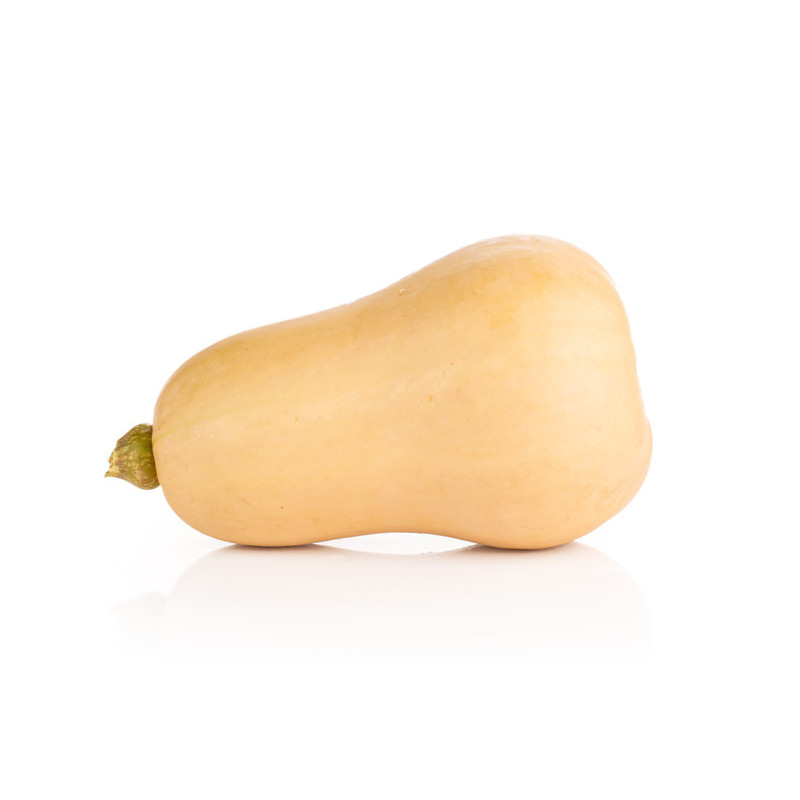
Butternut squash is a great winter veg, I spied the hasselback version and was dying to try it out. Basted in a spiced butter it is a delicious side dish. If you don’t own an air fryer you can make the same dish in a casserole or roasting dish in the oven, it will take about an hour at 180C.
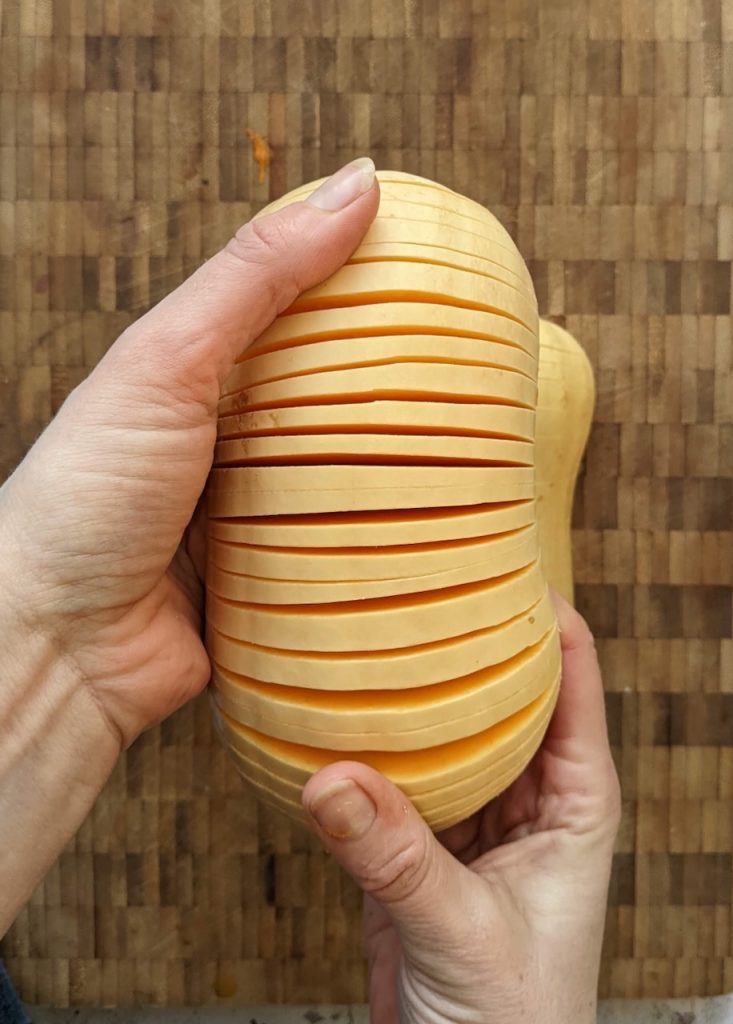
Carefully cut the butternut squash in half and scoop out the seeds.
You’ll need 2 chop sticks to make incisions in the squash. Take one half of the squash and place a chop stick on either side. Hold the sticks in place along with the squash with one hand and chop multiple thin slices with a sharp knife down as far as the sticks with the other hand. they should be about 4mm thick. Repeat with the other half of the squash.
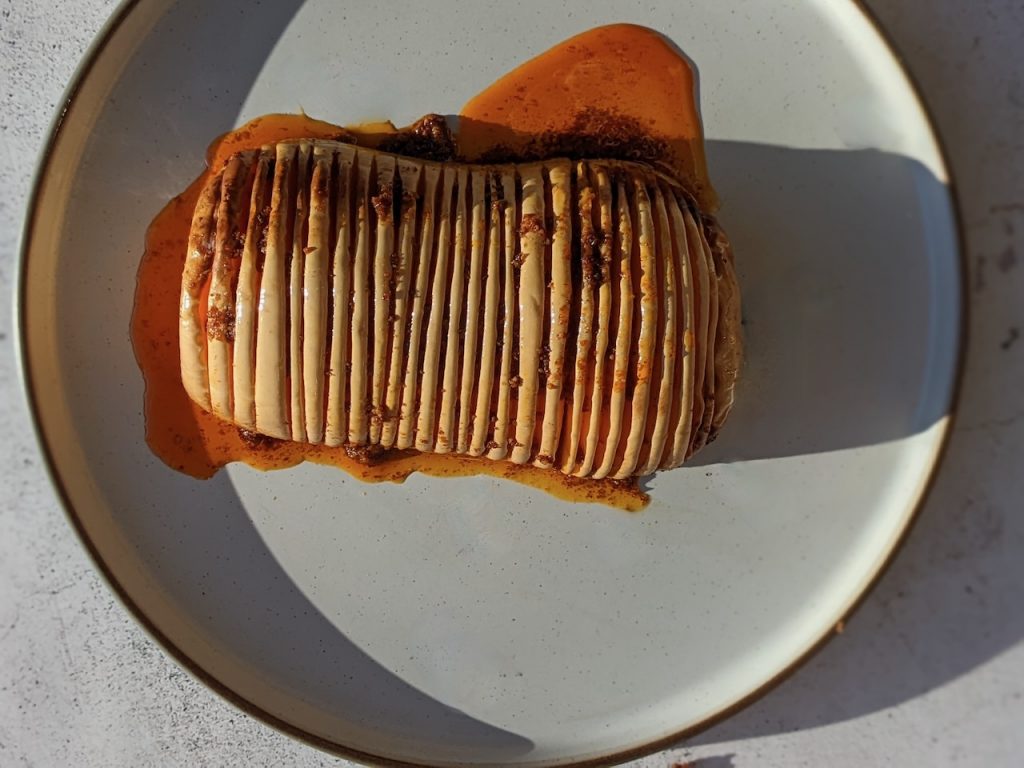
Melt the butter in a pot or microwave and add in the paprika, cumin, chilli, salt and pepper, give it a stir.
Remove the grill place and pour the spiced butter into the air fryer basket
Place both of the pieces of squash in the basket, flat side down in the spiced butter.
Air fry for 25 minutes, basting with the butter half way through.
Check the squash is fully cooked by piercing with the tip of a sharp knife.
When its fully cooked remove carefully from the basket, baste again with the spiced butter and serve.
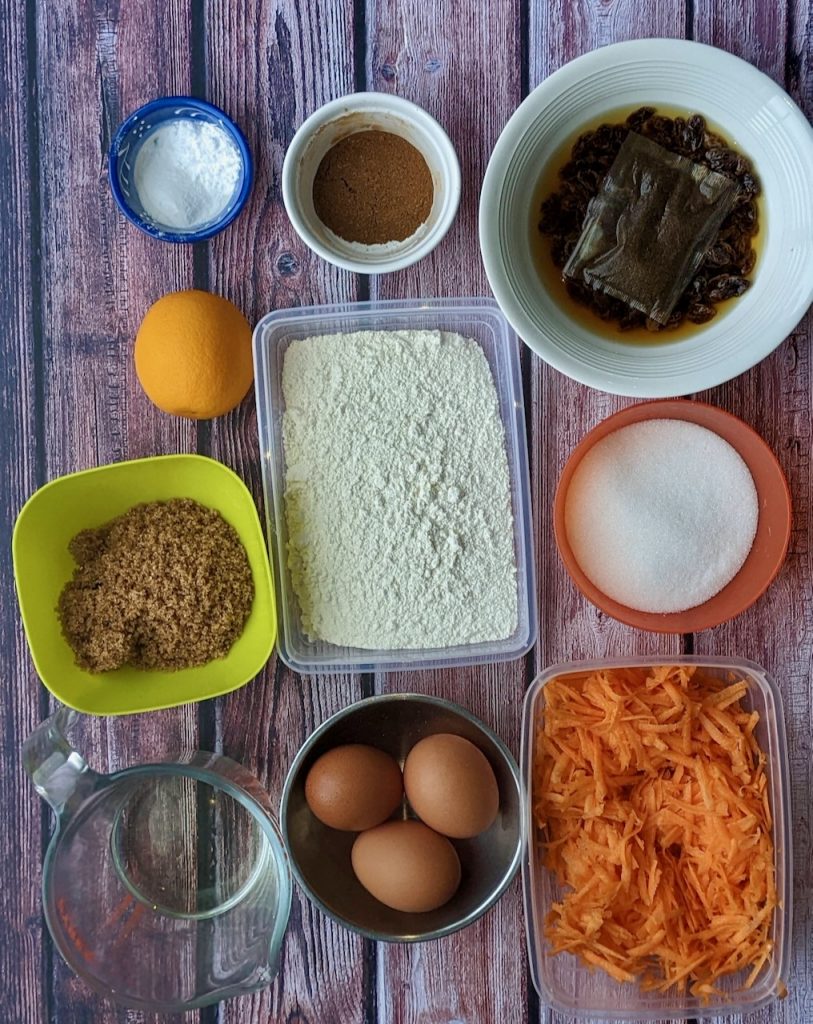
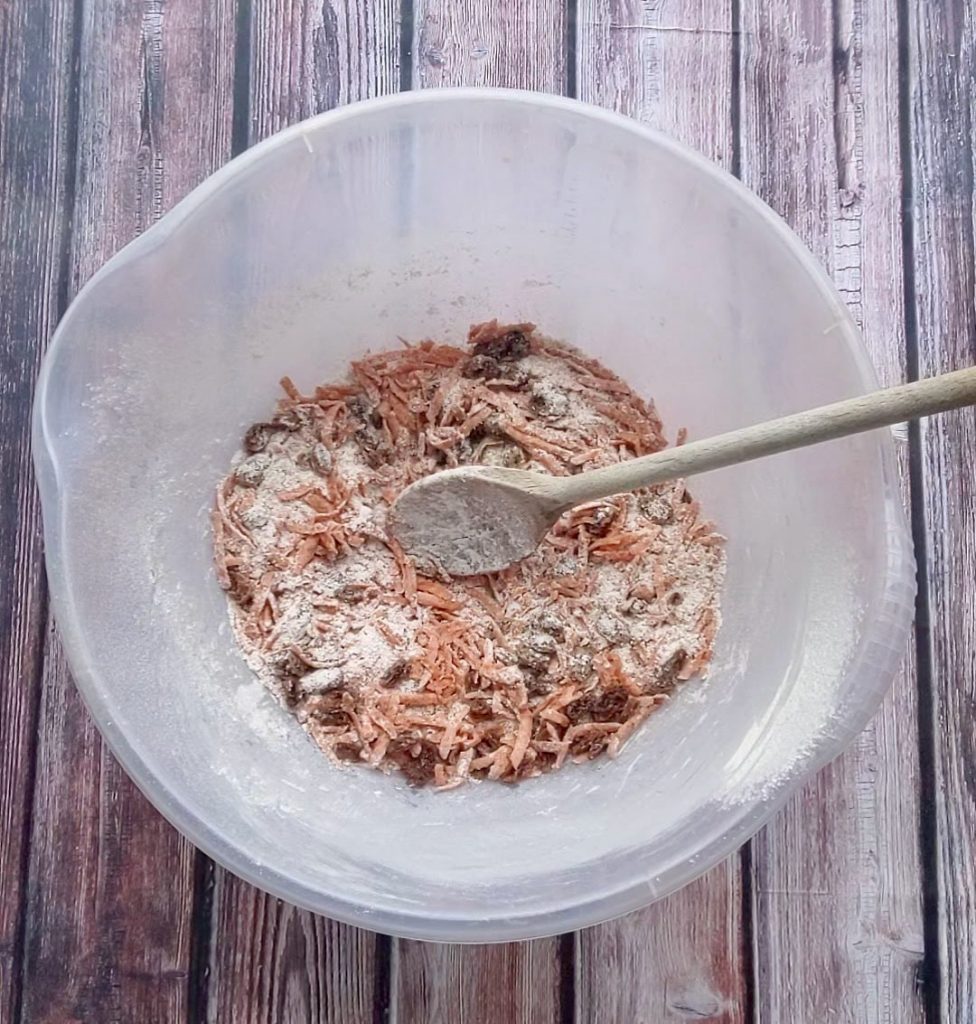
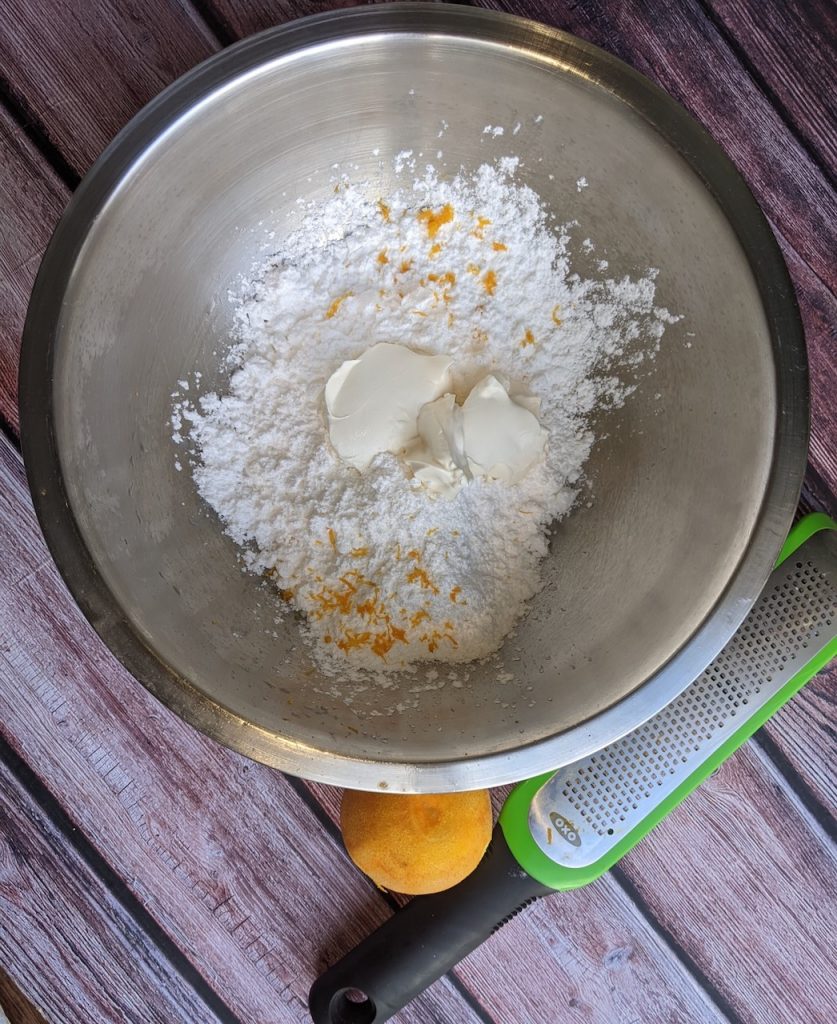
Classic carrot cake is hard to beat. Its spiced and moist and works so well with the cream cheese frosting. No one minds that theres a couple of carrots in there. It’s the acceptable vegetable cake.
Set a few carrots aside this week to make this cake the perfect partner with a pot of tea and a good old chat.
Tip: I like to soak the raisins in tea first to plump them up, it really makes a difference to the finished cake.
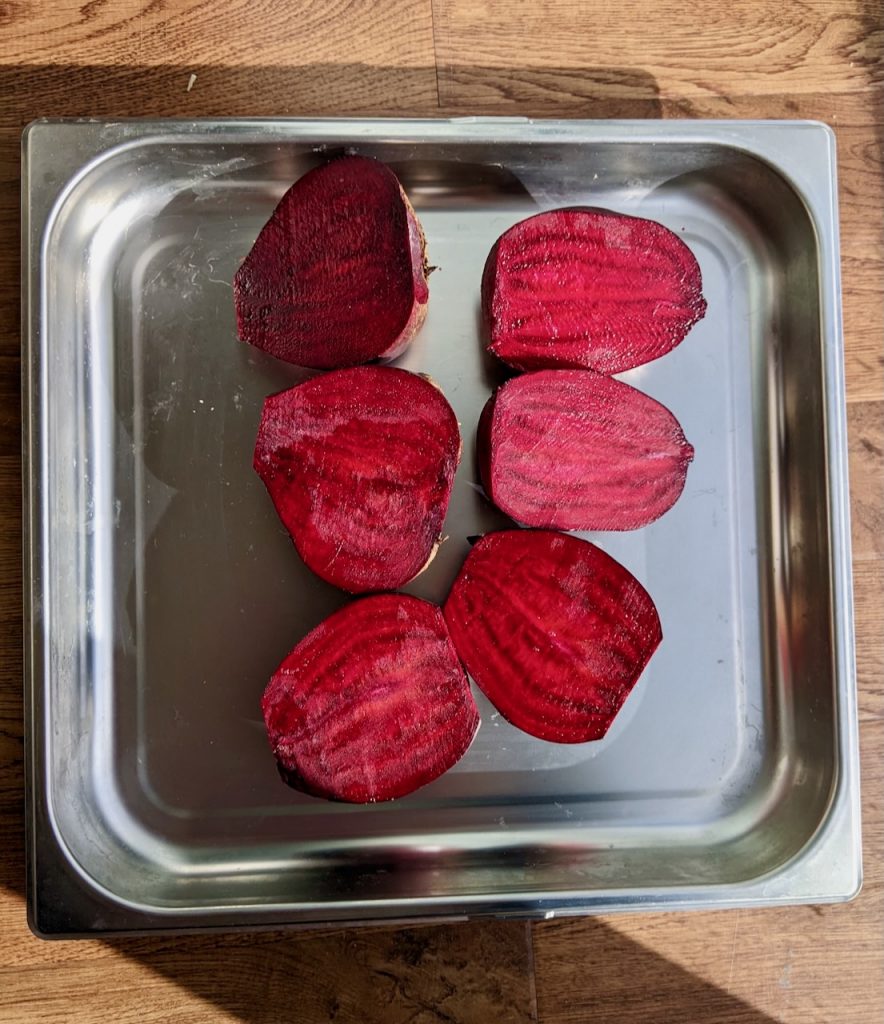
Growing up we always had baked and filled potatoes or mushrooms but never beetroot. In fact beetroot in our house usually came pickled in a jar. Beetroot usually gets the job as side veg but here it’s the star of the show.
Beetroots are an all year round veg, hearty and filling and full of goodness. If you get nice big beetroots in your box why not give this recipe a go. It’s sweet from the beets and salty from the feta and toasty from the spices. topped with crunchy walnuts its a complete meal.
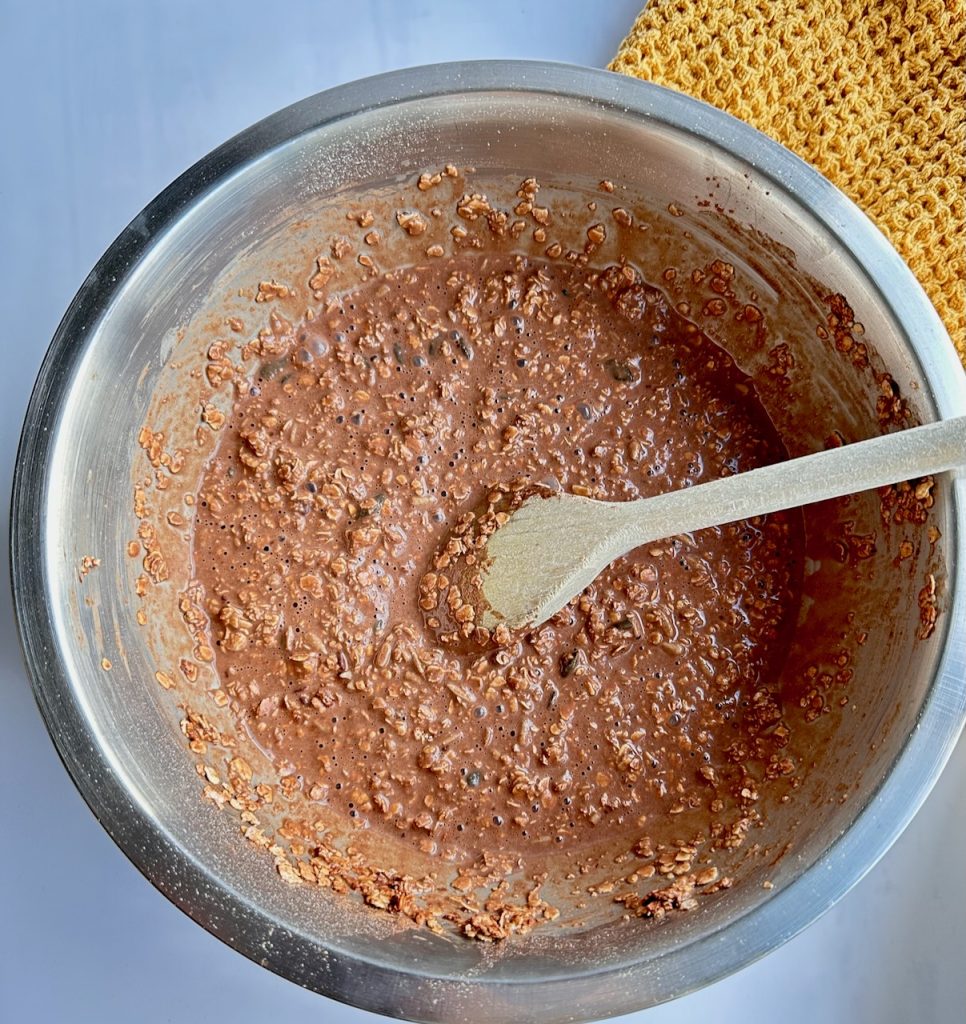
This cake has wholesome organic oats, eggs, fruit, yoghurt topped with more oats, seeds and coconut – there’s a bit of sugar for good measure but perfect for a breakfast treat!
Its an easy one to put together, no fancy equipment needed just a mixing bowl, a jug and a couple of baking trays. You could bake the streusel on top of the cake but we prefer it separate and sprinkled on top of the yoghurt.
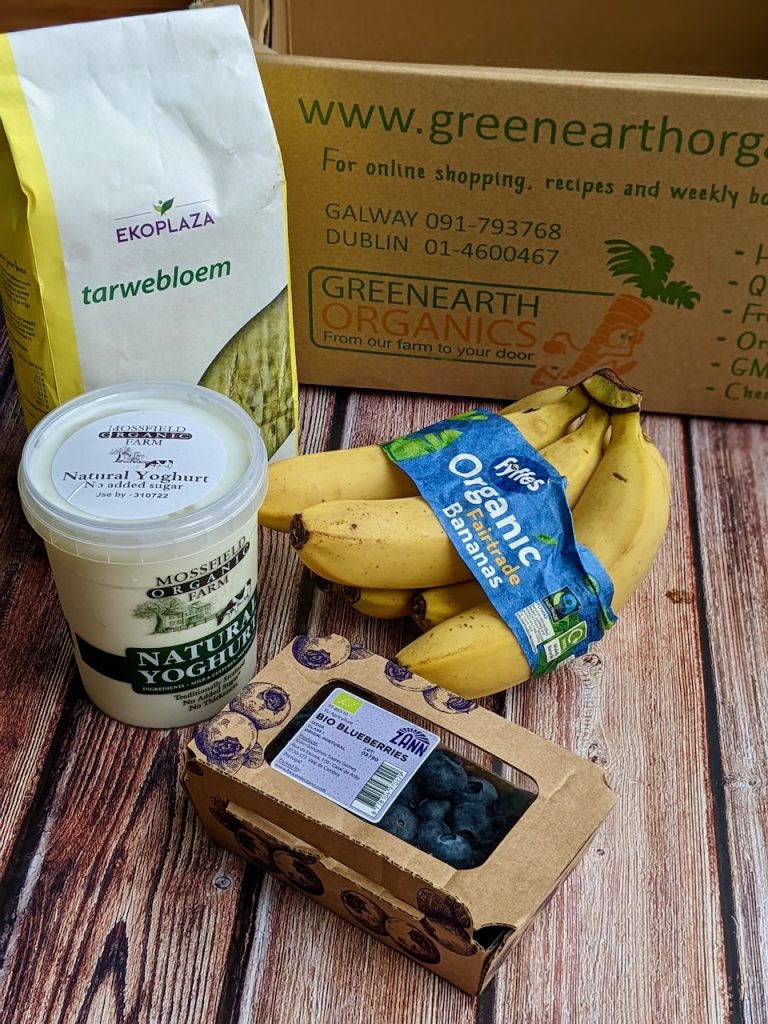
You can pick up most of the gorgeous organic ingredients in eco packaging in our online shop, see links below.
It makes 9 generous portions, make cake for breakfast.
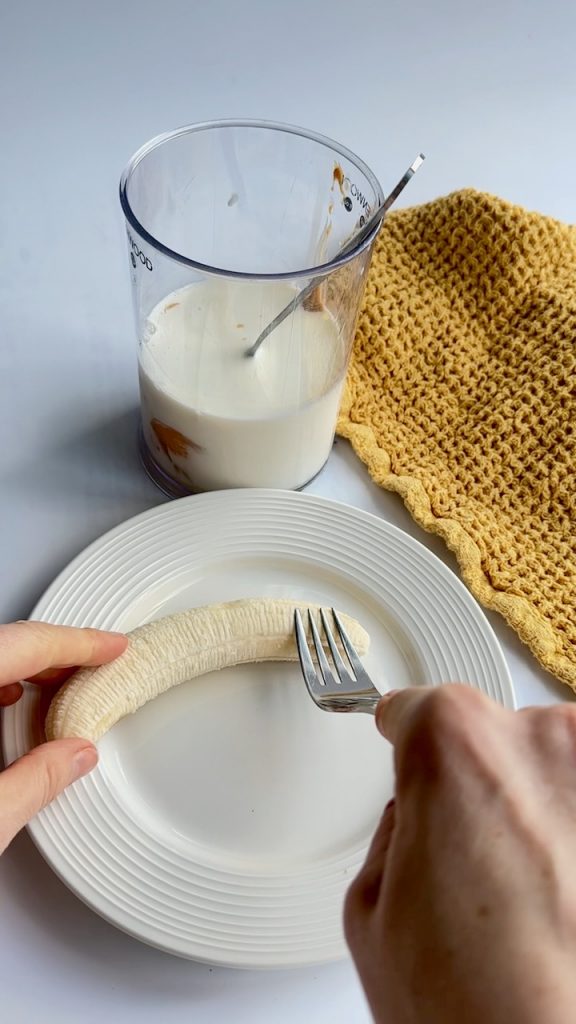
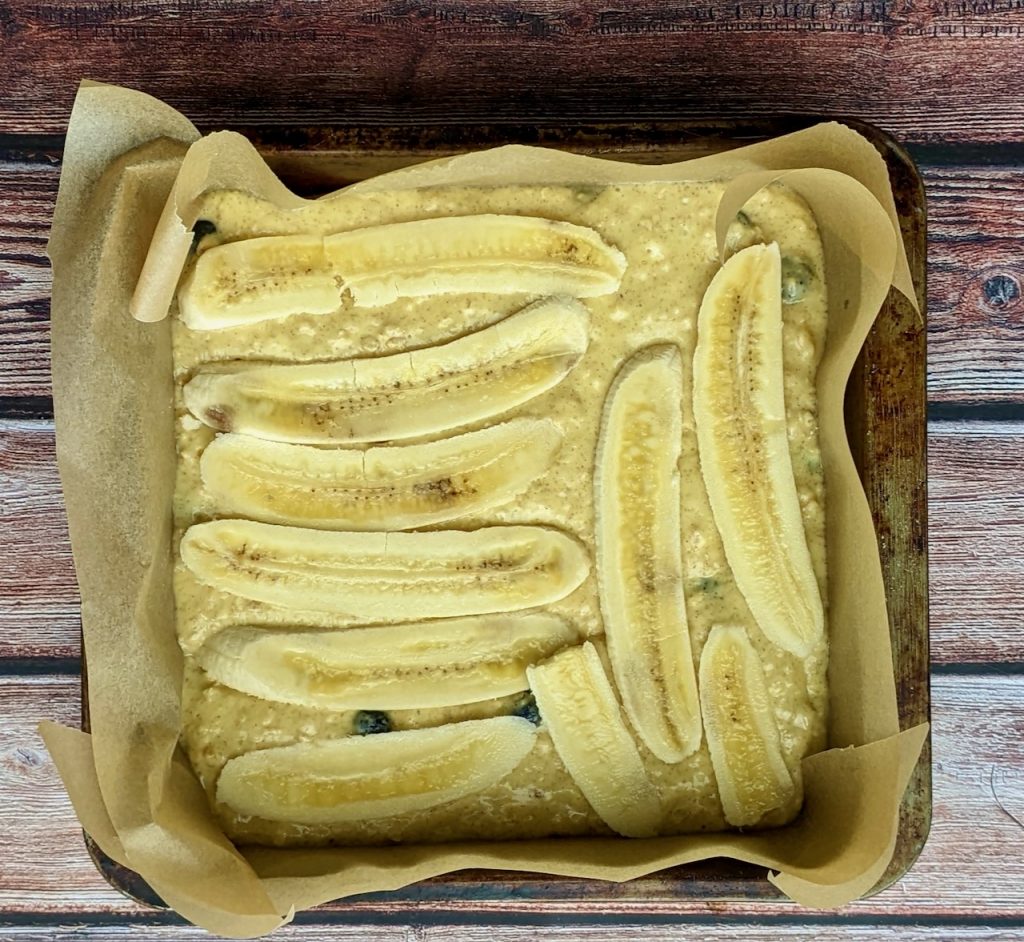
Optional – topping 2 medium bananas sliced lengthways (Warning they will go brown in time, if you’re not keen on brown bananas leave them off.)
Method:
-Preheat your oven to 180°C.
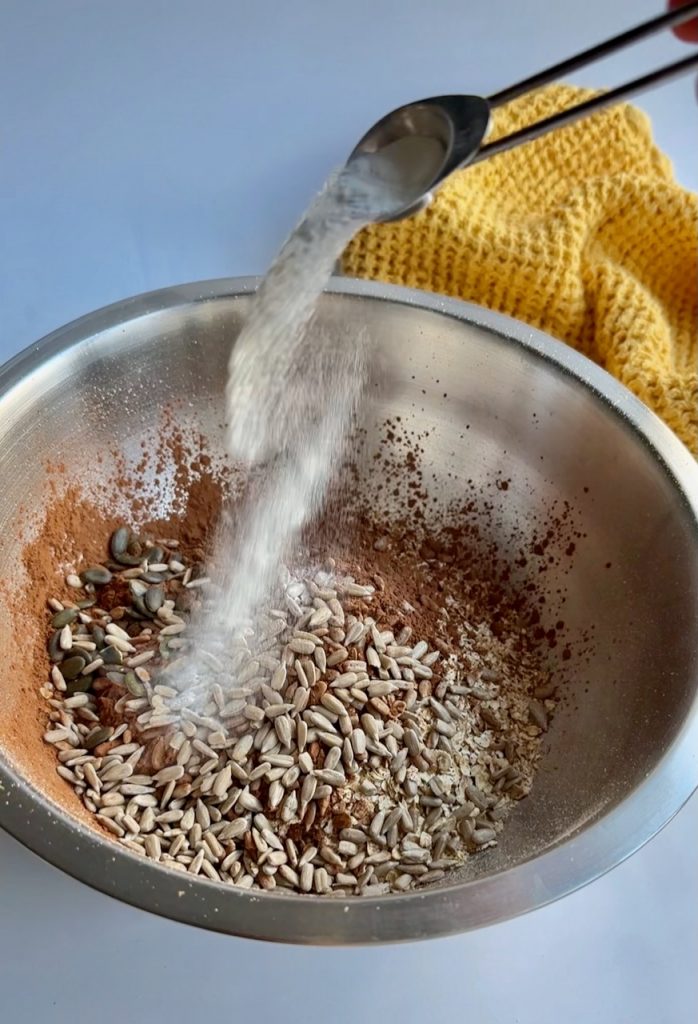
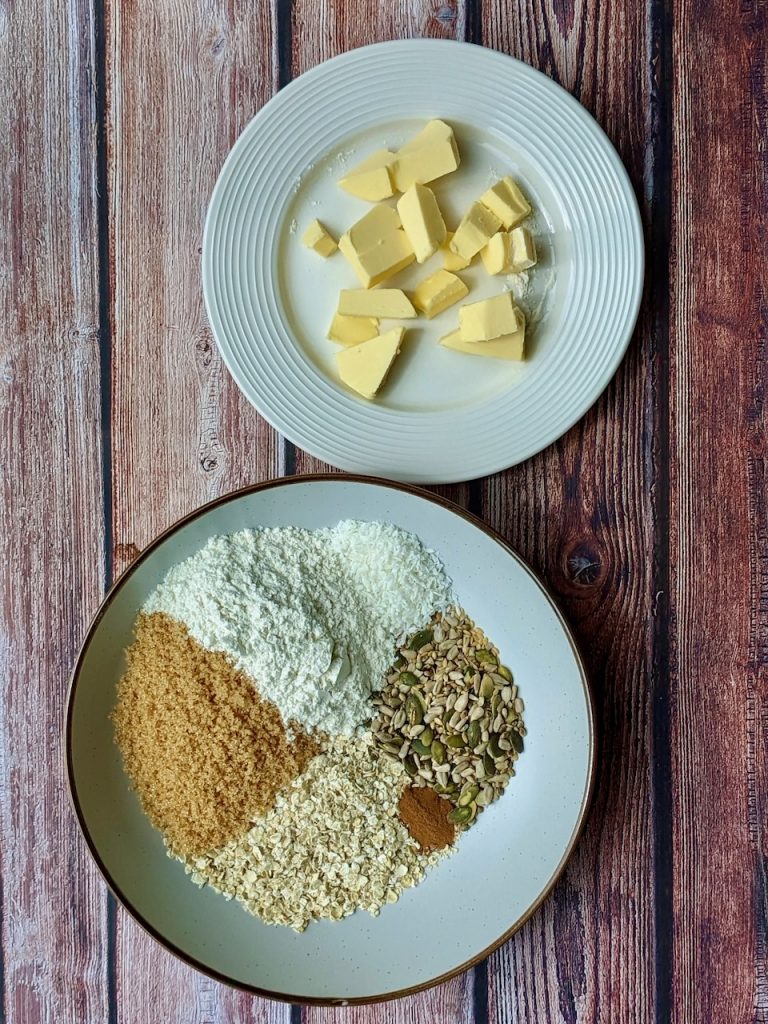
For the granola streusel:
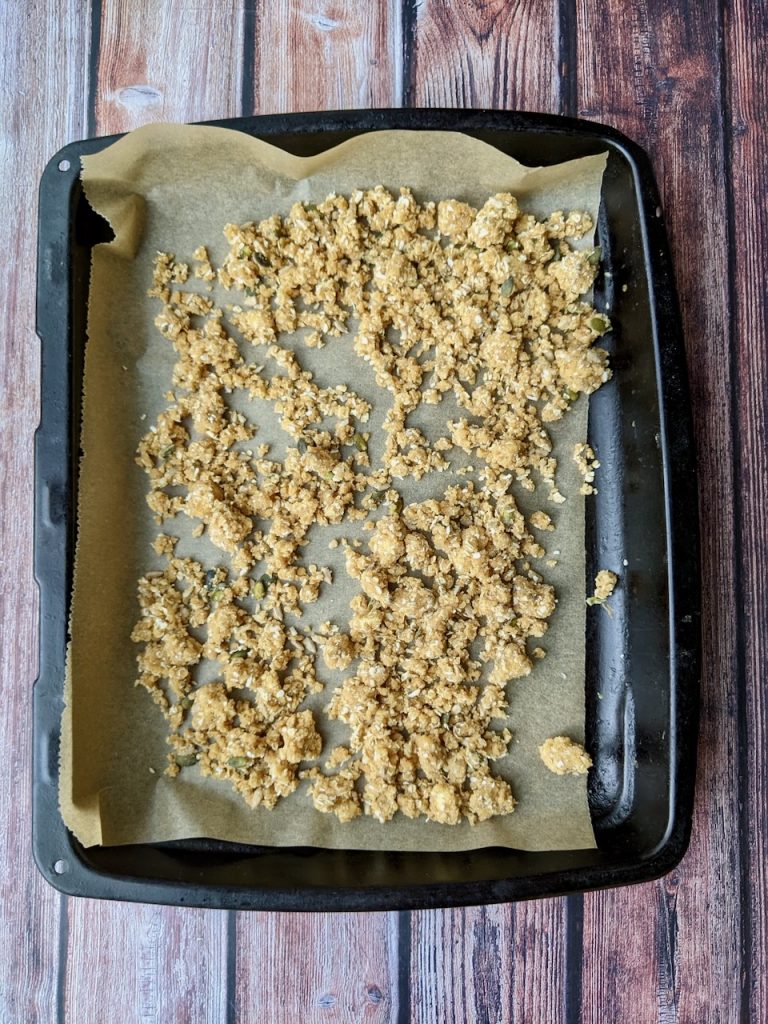
Line a large baking tray with parchment paper.
Add all the ingredients to a mixing bowl and work the butter into the dry ingredients with your fingers. Make sure there are no big lumps of butter.
Layer onto the baking tray and bake for 15 minutes. The streusel will look like a giant cookie, let it cool and then break up into pieces and put it into a bowl for later.
For the cake:
Line a 9×9 inch square tin with parchment paper.
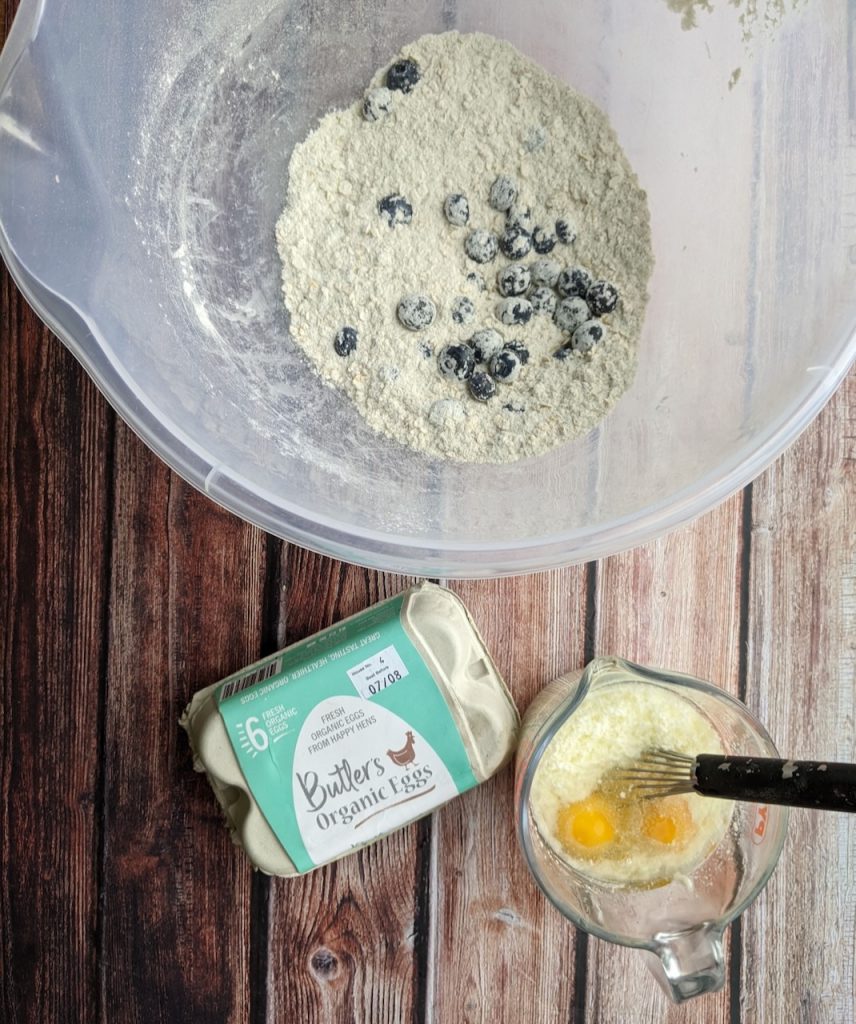
Measure all the dry ingredients.
Sieve the flour, baking powder, bicarb of soda, cinnamon and sugar into a large mixing bowl.
Add in the oats and give everything a good mix.
Add a small bit of flour to the blueberries and toss to coat.
Add the blueberries to the mixing bowl and gently fold in.
Add all the wet ingredients to a jug, the oil, yoghurt and eggs, mix well with a fork.
Pour the wet ingredients into the mixing bowl and mix until the flour is worked in, don’t over mix, some lumps are ok.
Pour into the square baking tray, top with sliced banana if using.
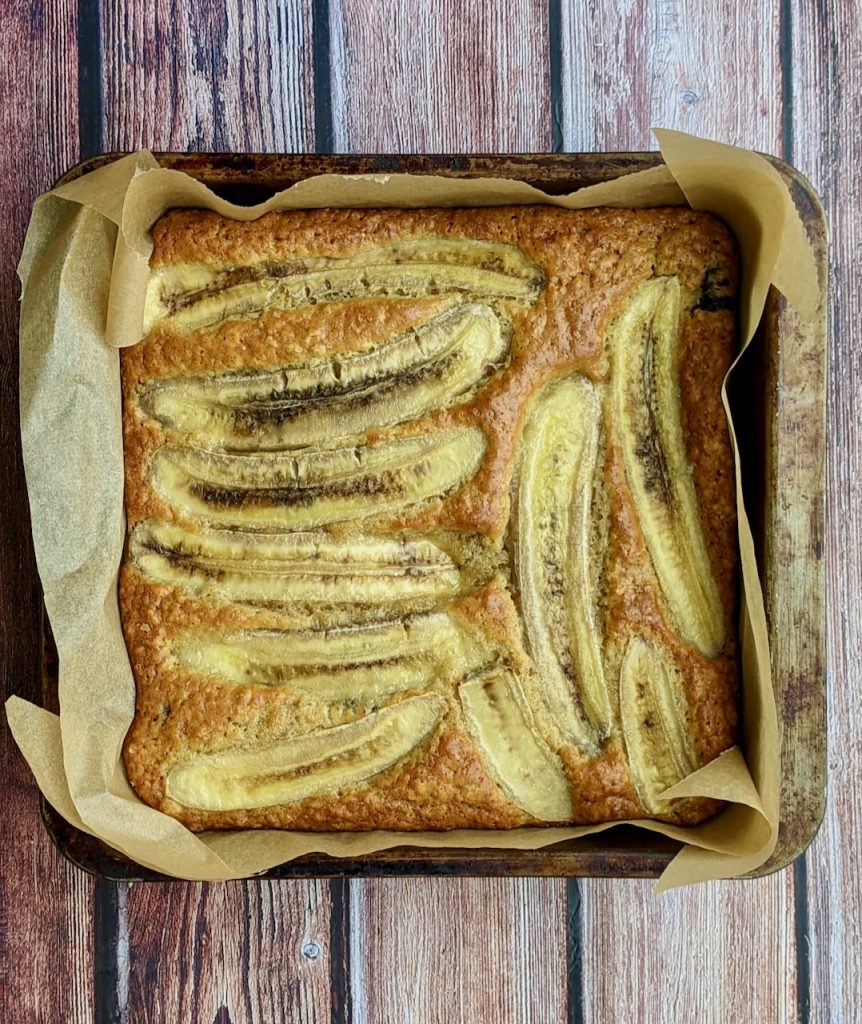
Bake for 25-30 mins. Check it’s cooked with a cocktail stick, if it comes out clean it’s done.
Allow to cool completely, then slice into 9 squares.
To seve:
Top a nice square slice of cake with organic yoghurt and top with a generous sprinkle of granola streusel.
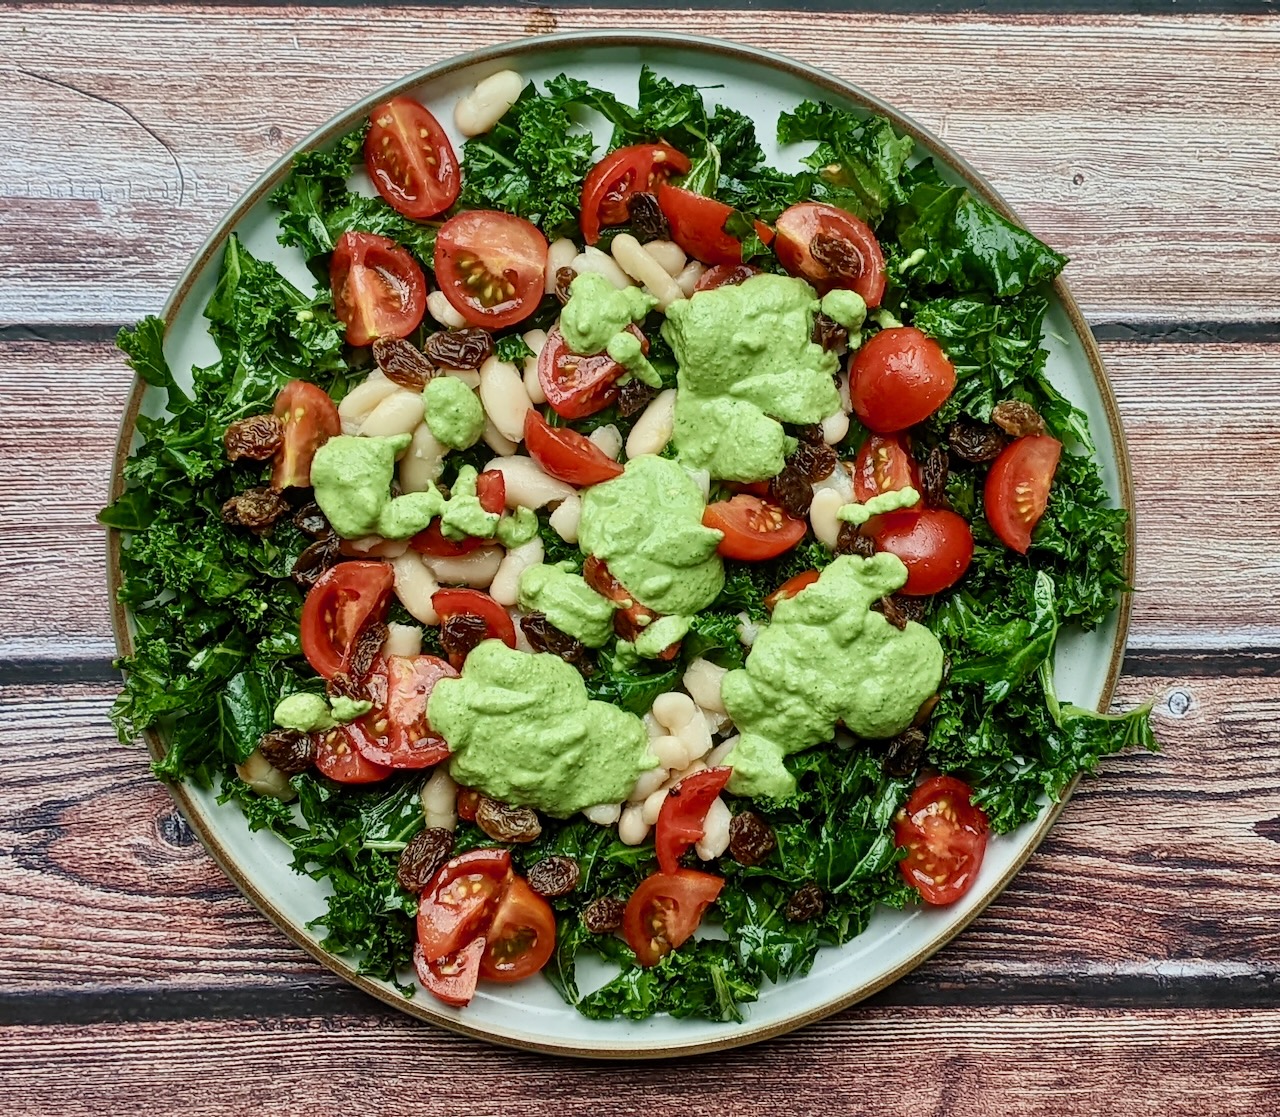
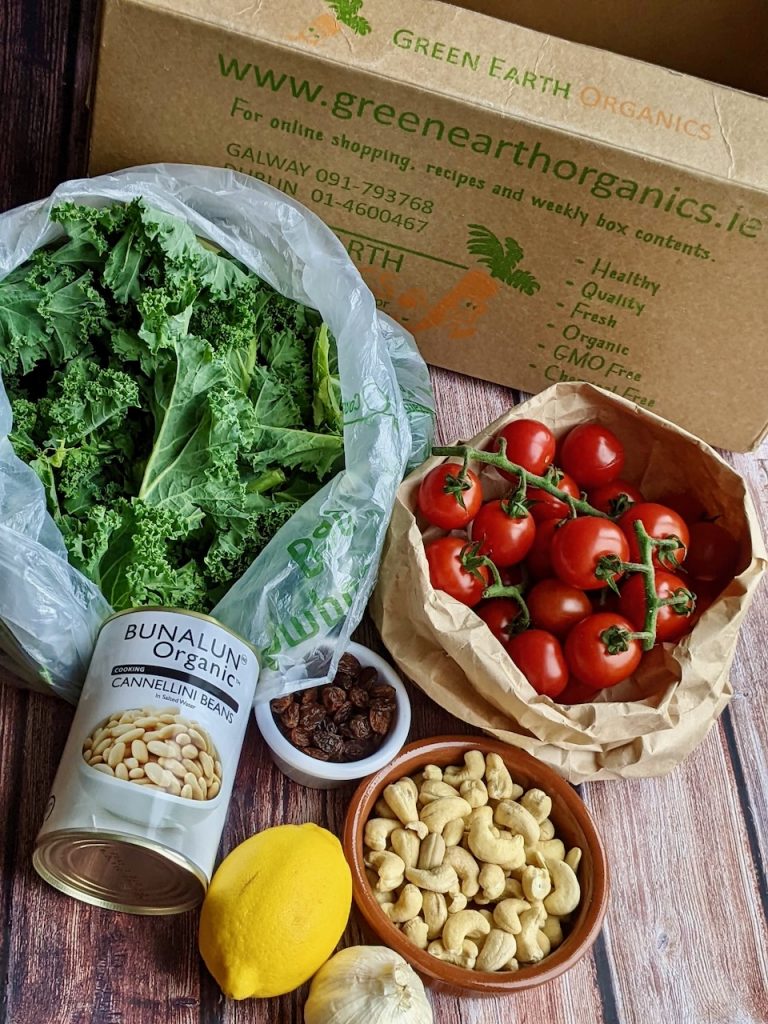
Simple summer salads dressed in a punchy dressing tick all the boxes! These Galway grown sweet cherry tomatoes are just delicious and bursting with flavour. The kale is coarse and crunchy and the dressing is fresh, punchy (from the garlic), vibrant and invigorating! #feelthegoodnesss
This is a gorgeous salad to eat solo or add a warm savoury pastry or some sourdough bread and cheese to make it a main meal.
To make the dressing measure the cashews into a bowl and cover with boiling water, set aside to soften for 15 minutes.
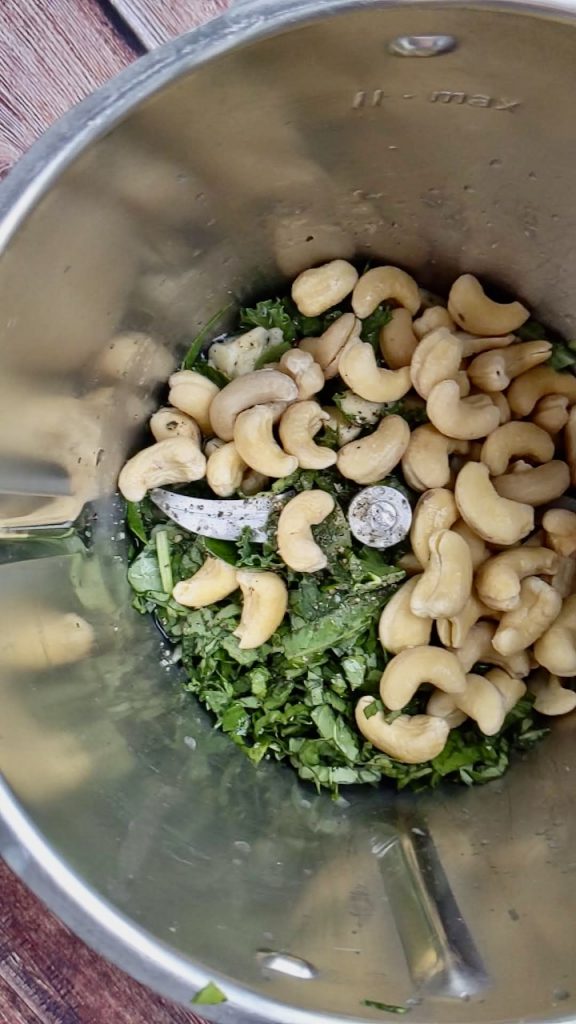
To a blender add the finely chopped kale, basil, chopped garlic, lemon juice, water, oil, salt, pepper.
Drain the cashews and add them to the blender too.
Blend until you have a vivid green dressing.
Taste the dressing, it will be punchy and zingy from the garlic. Add more salt, pepper or lemon juice if it needs it.
When you’re happy with it, add it to a bowl or jug.
To make the salad begin by rehydrating the raisins. Add them to a small bowl and cover with boiling water, set aside to soften.
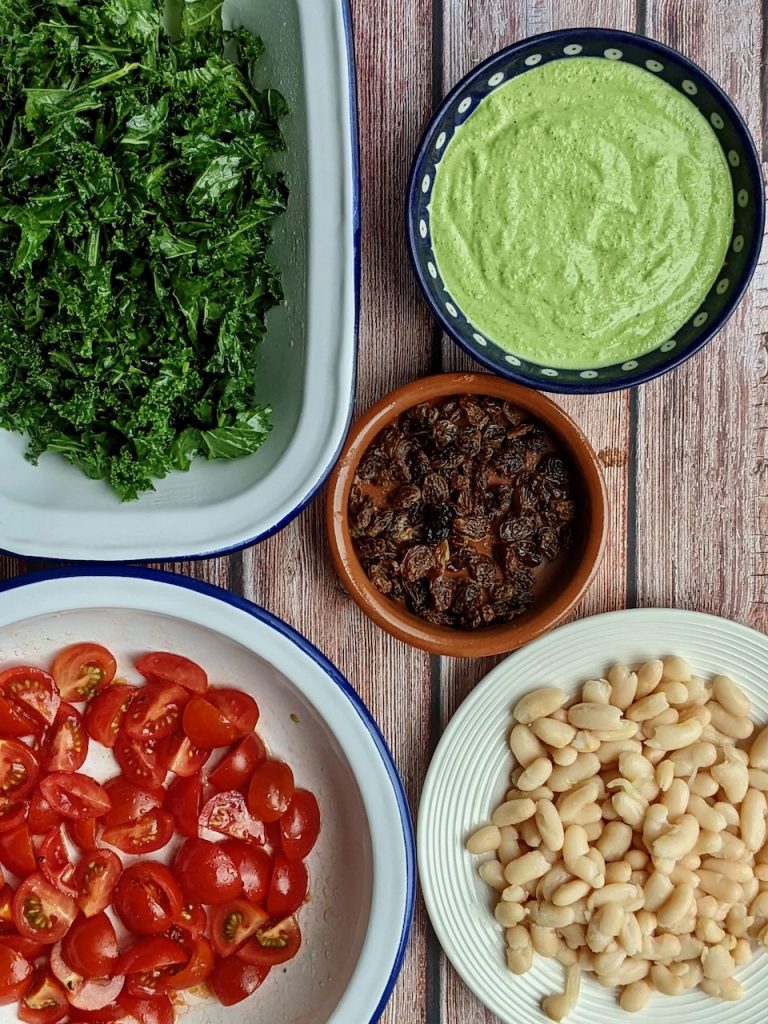
Next, chop the kale into small pieces and add to a mixing bowl. Drizzle over a small amount of oil, add salt and pepper and massage (give it a good squeeze) to soften the leaves, this makes it easier to eat.
Quarter the tomatoes and add them to a bowl, drizzle a small bit of oil over them, add a small pinch of salt and pepper and toss to coat.
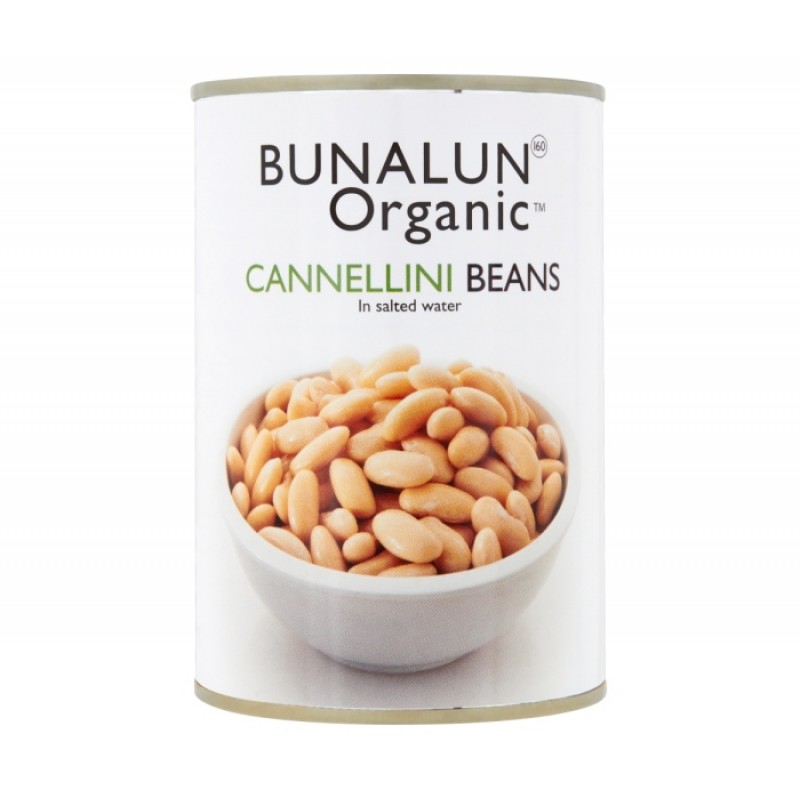
Drain the can of cannellini beans and the raisins.
To assemble, add the kale to a large serving plate, scatter over the tomatoes, beans, raisins and dollop the dressing on top.
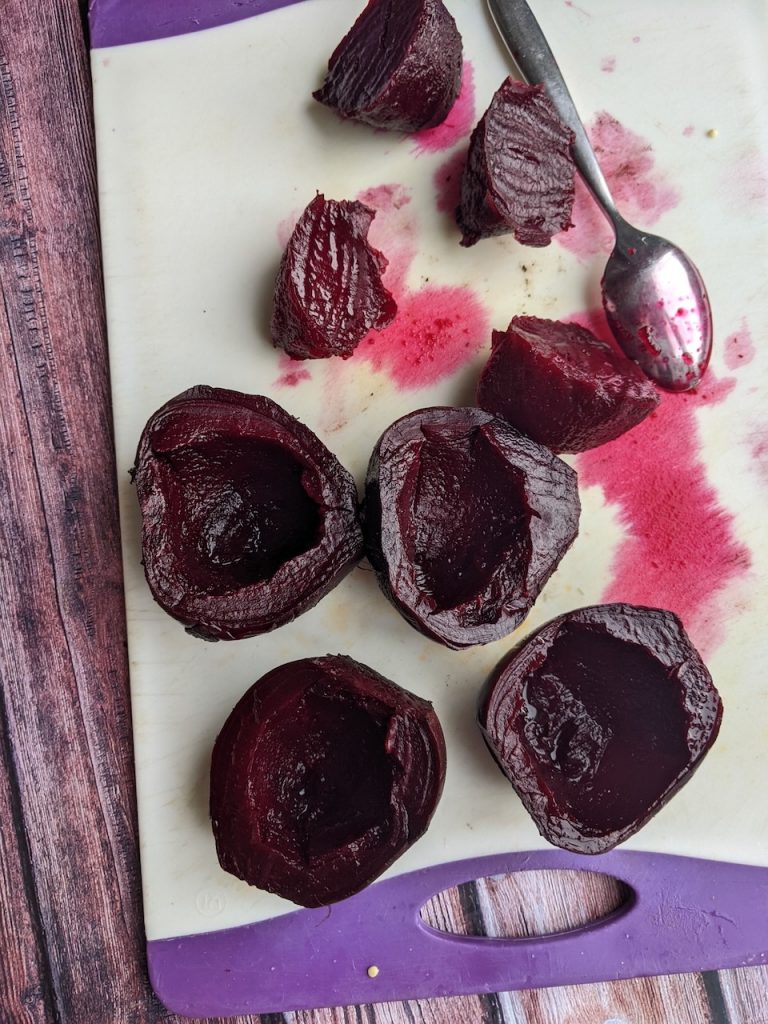
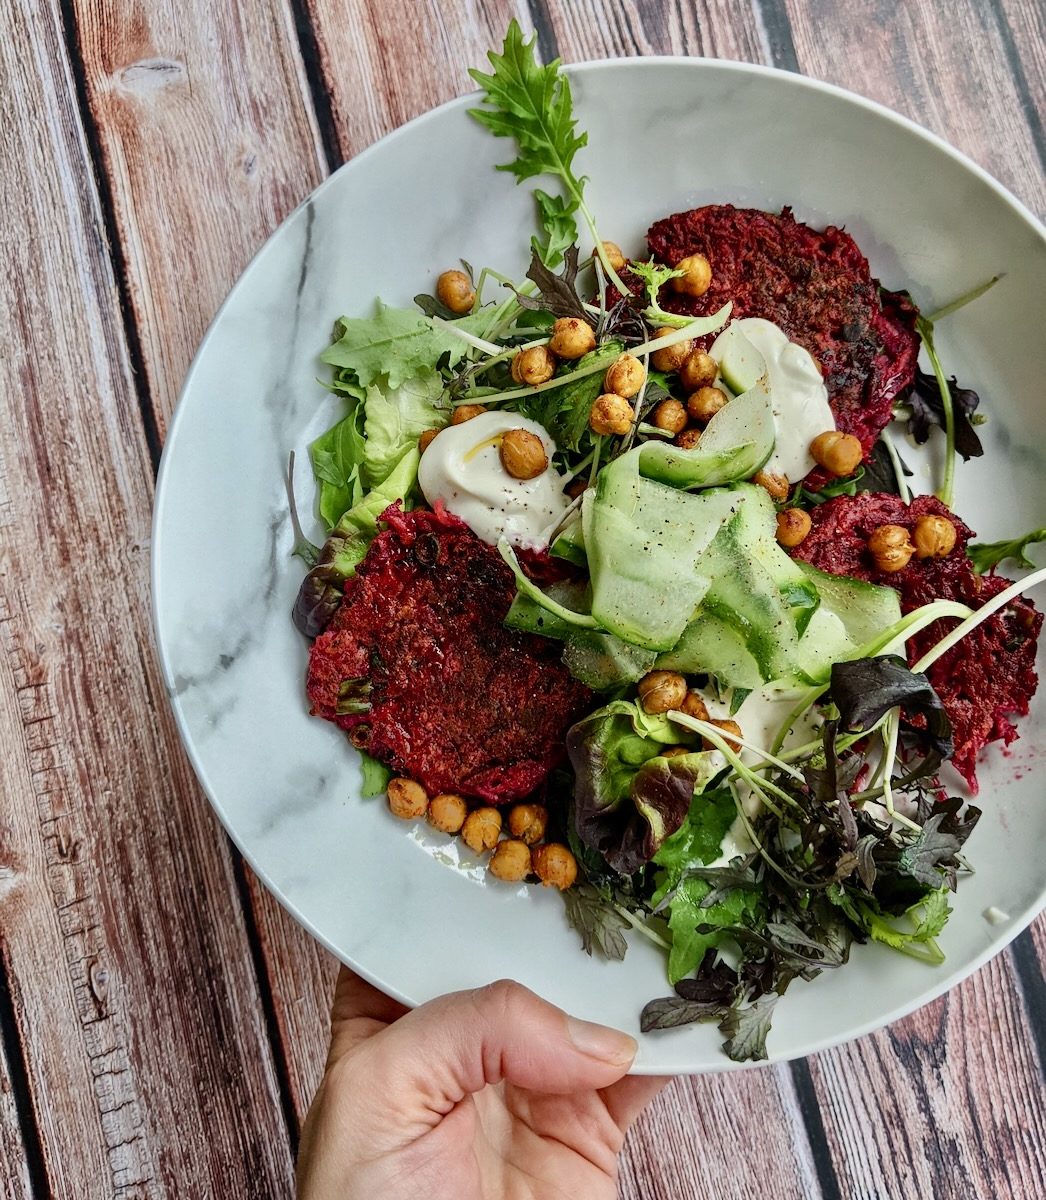
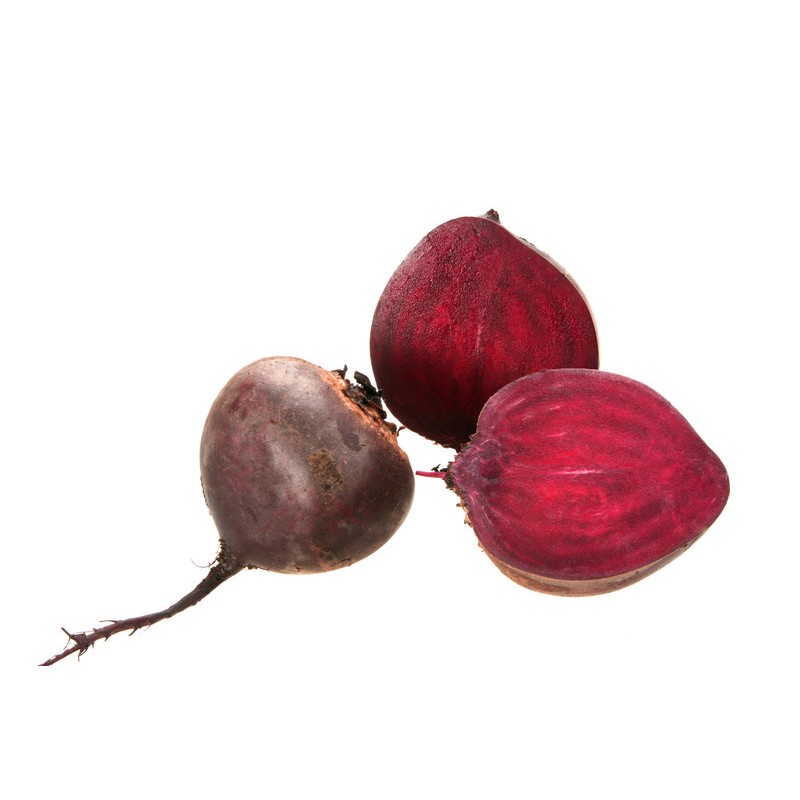
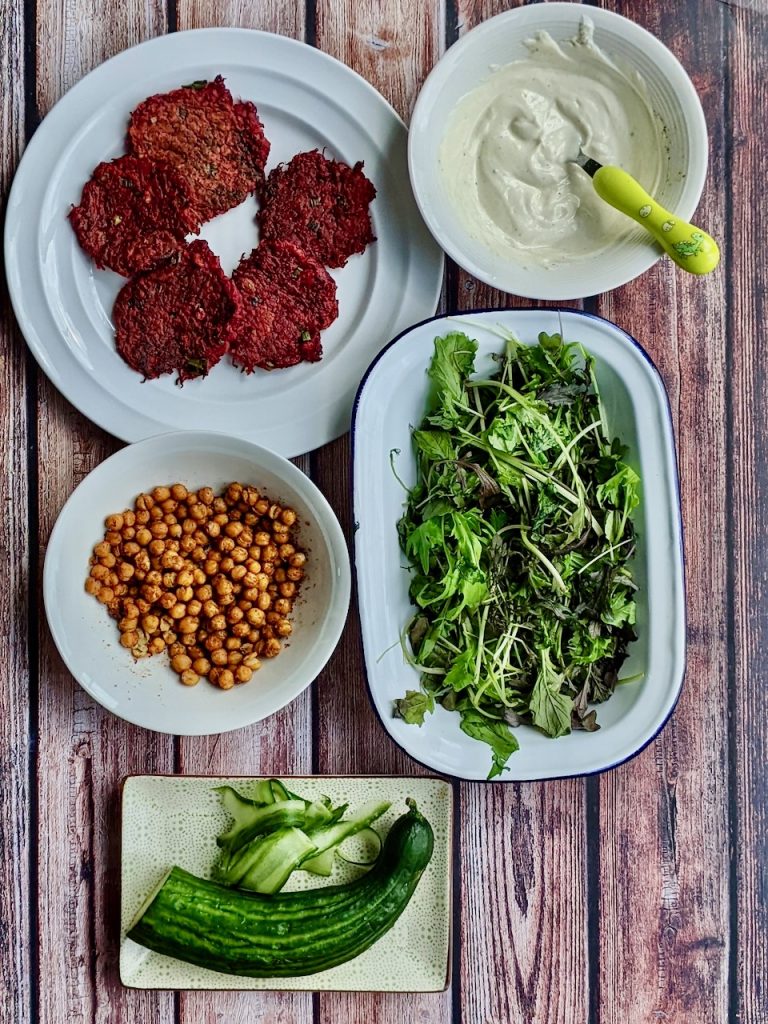
Beetroots grow very happily in Irish soil. They are earthy and sweet and juicy and full of flavour. You can boil, steam or roast them to eat as a wholesome side veg, to make into a puree or beautiful pink hummus. I love to grate them to use raw in a salad or they go perfectly in these tasty fritters accompanied by the grated carrot.
You can whip these fritters up in about 20 minutes. I recommend using the fine side of your box grater, they cook quicker that way. Eat them solo or add some crunchy chickpeas, local leaves and a tahini dressing to make it a meal.
By seasoning with salt and pepper you get the real taste of the vegetables. When you use quality ingredients the natural flavours shine through.
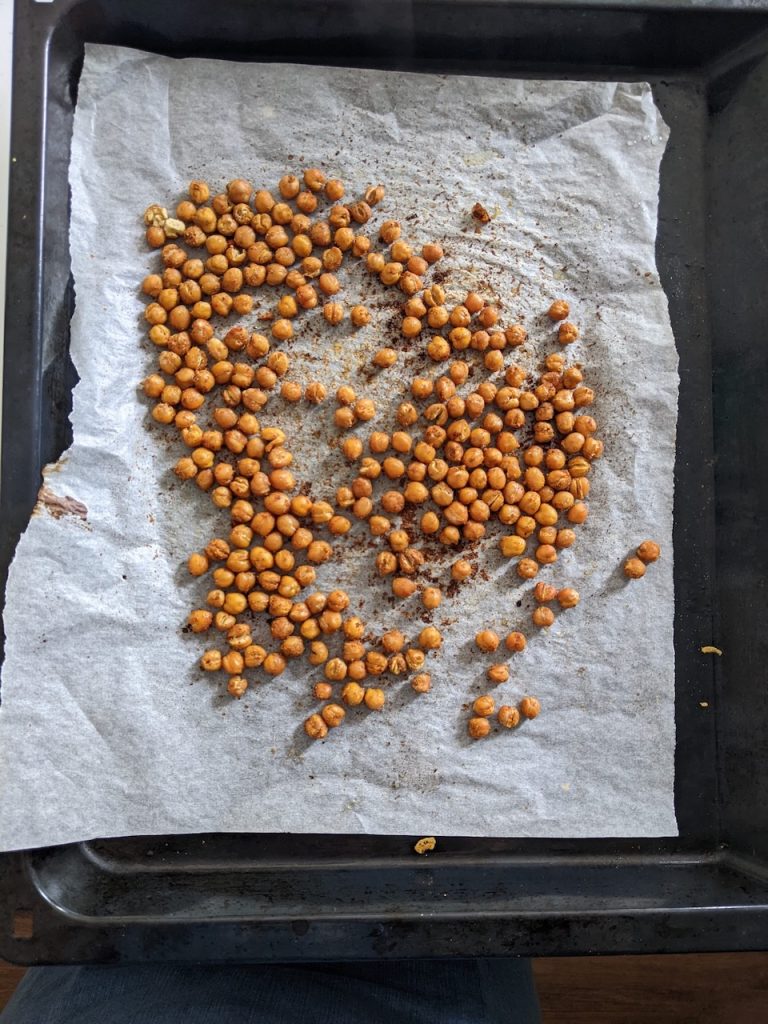
Open the can of chickpea and drain really well. Tip: You can reserve the aqua faba (chickpea juice) to make a sweet dessert like pavlova.
Pour the chickpeas onto a tray lined with parchment paper. Using kitchen paper dry the chickpeas really well.
Make up the spice mix by adding the paprika, cumin, coriander, salt and pepper to a small bowl. Mix with a spoon. Then sprinkle over the chickpeas. You can add more salt later if needed.
Drizzle with oil and roast in the oven for 30-40 minutes. Check and shake the tray every 10 minutes.
The chickpeas will be crunchy when you’ve roasted them. They are best eaten on the day they are roasted but if using the next day pop in the oven again for 10 minutes so they are warm and crunchy. Keep them in an air tight jar in your cupboard.
For the fritters:
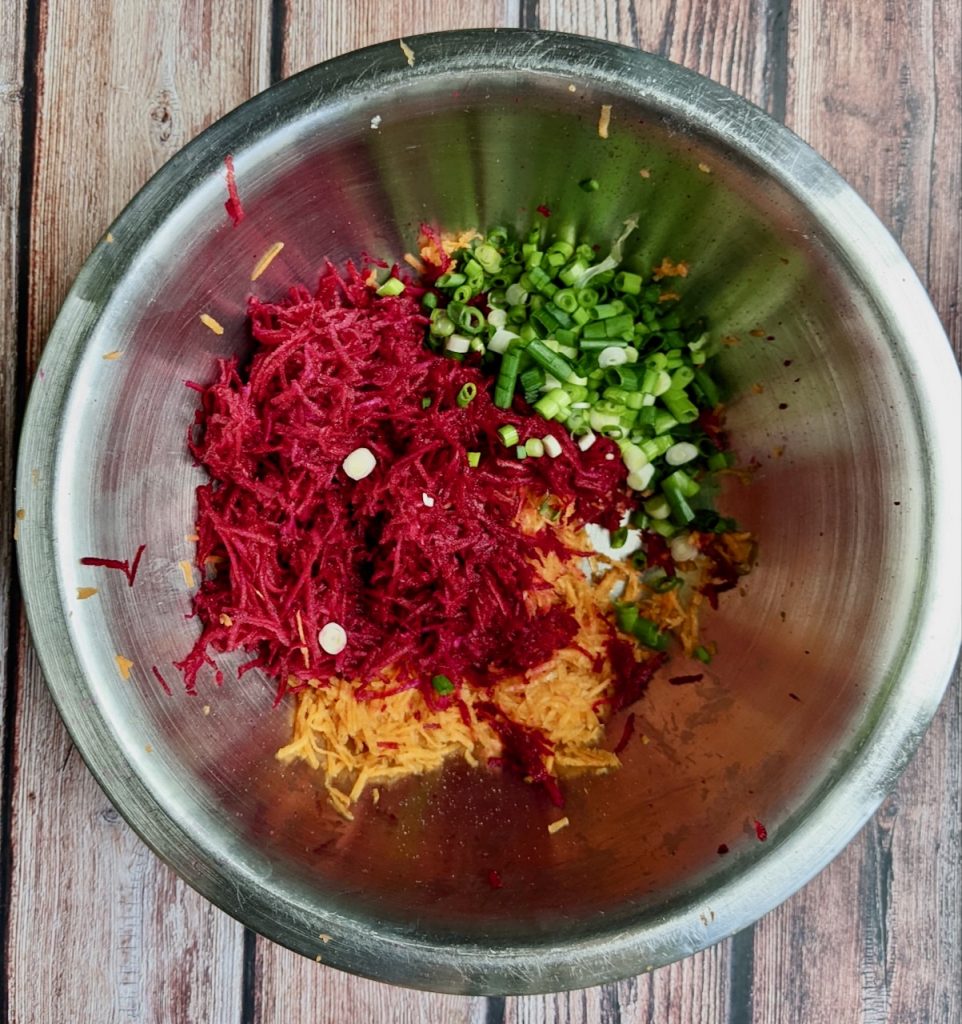
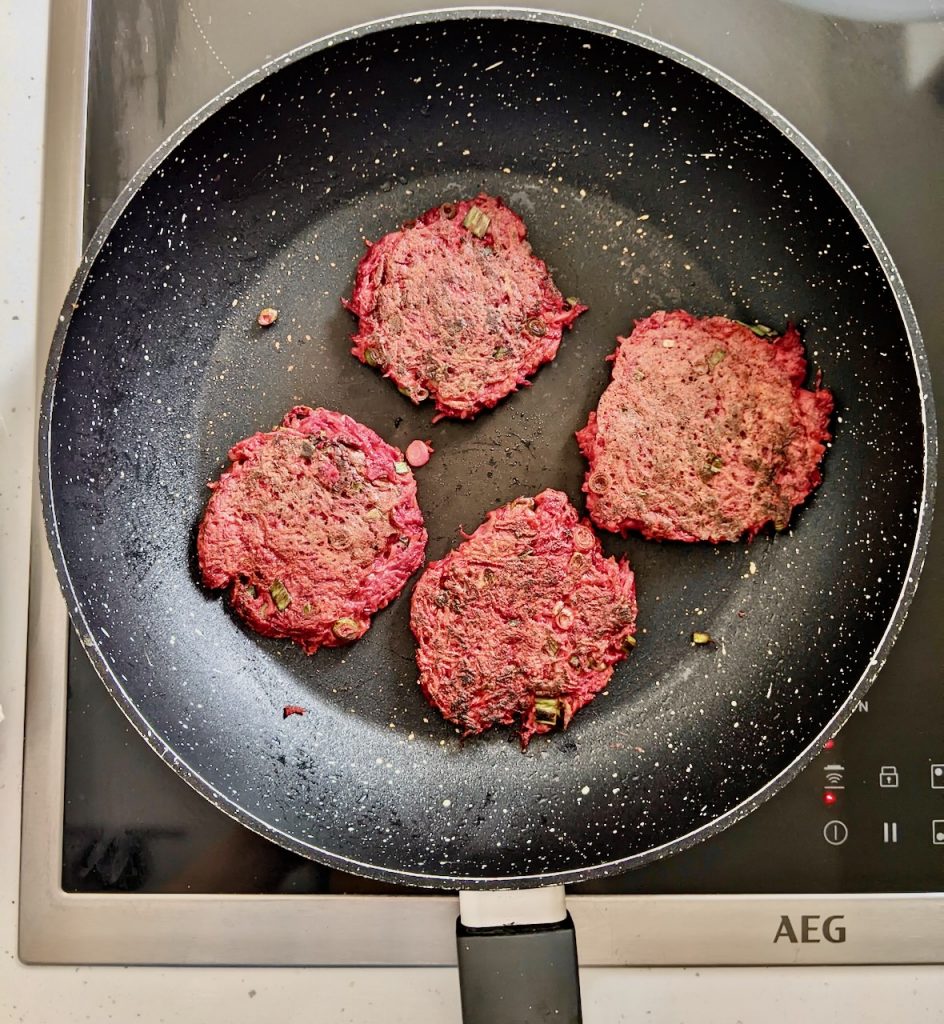
Begin by peeling and grating the beetroot and carrot, use the fine side of the box grater. Tip: Hold the raw beetroot with kitchen paper so your hands don’t turn pink. Add to a mixing bowl.
Finely chop the scallions and add this to the bowl. Crack in the egg, add salt and pepper, sprinkle in the flour. Fold all the ingredients together.
Warm a non stick frying pan on a medium heat, lightly oil. Add a spoon of the beetroot mix and flatten with the back of the spoon, cook 3 fritters at a time. Fry for a couple of minutes and flip and cook for a few minutes more. Remove with a spatula onto a plate lined with kitchen paper. Repeat with the rest of the mix.
For the tahini dressing:
Simply add the yoghurt, tahini, lemon zest and juice, maple syrup or honey, salt and pepper to a bowl and mix well with a spoon.
To serve:
Add some washed green leaves to a serving bowl, add 2-3 fritters per portion. Scatter on the chickpeas, dollop over the tahini dressing, peel some cucumber ribbons and bundle on tip and add a swirl of olive oil.
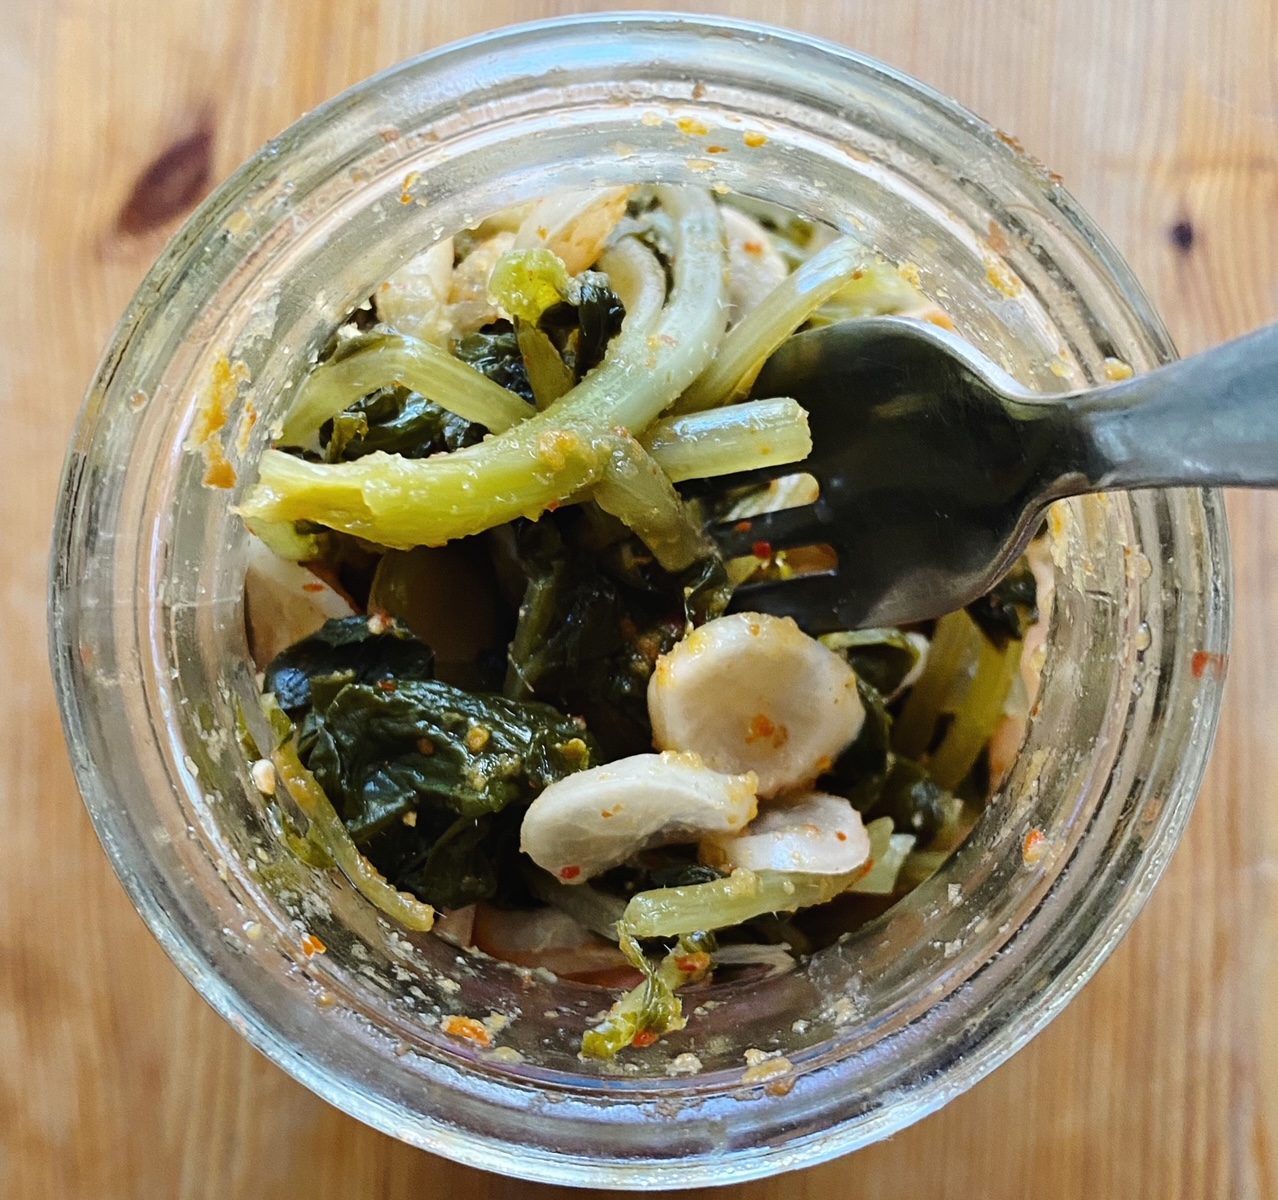
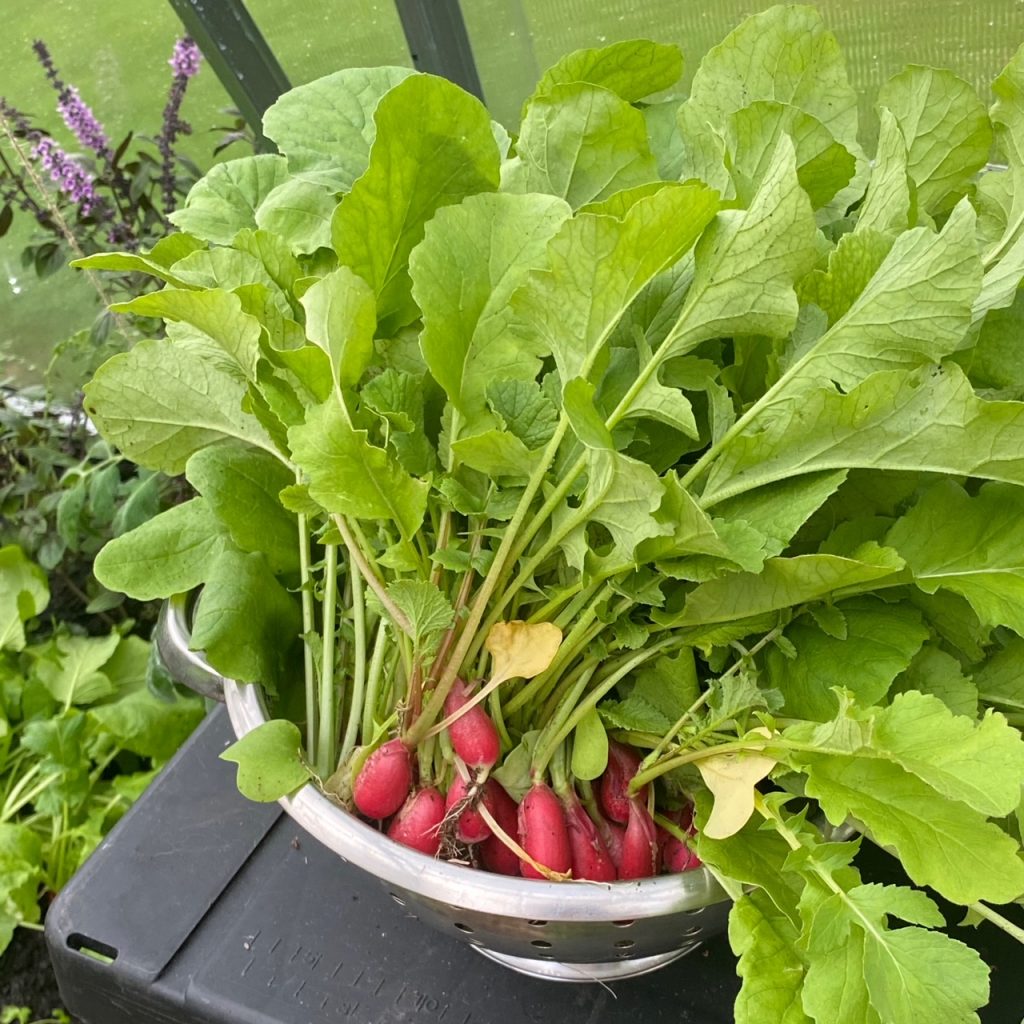
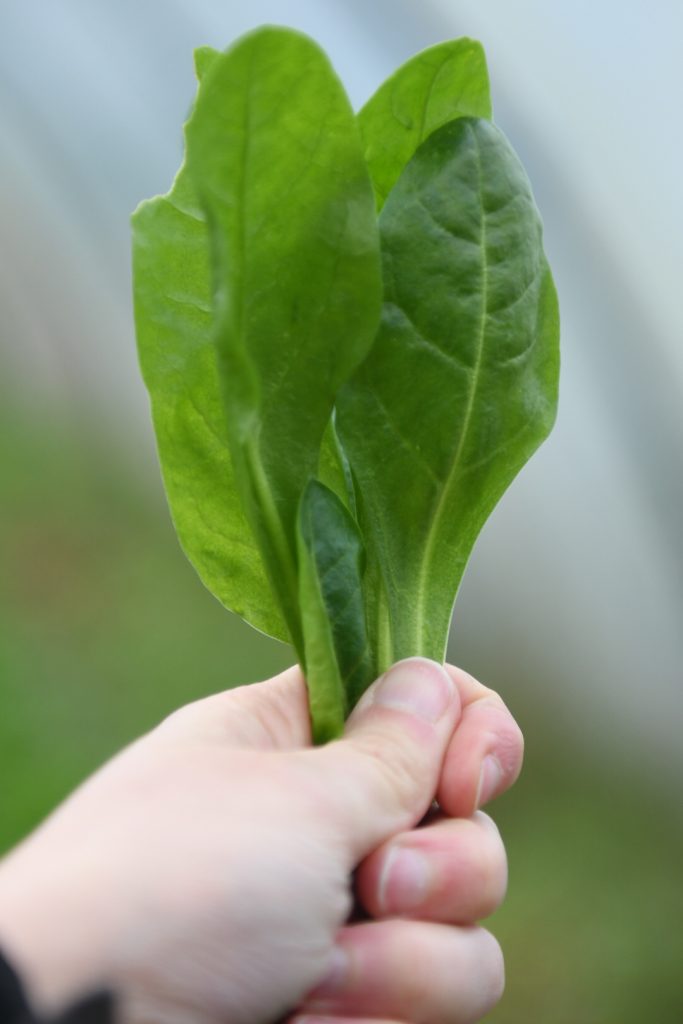
Did you know that radish leaves are edible? Get more bang for your buck (and save food waste) by eating them up! They are delicious and peppery, a little like rocket. Many people are not fans of their slightly bristly texture so, even though they are delicious fresh in a salad, you can also cook them in a soup or stew or as greens in a quiche or as a side dish with garlic. You can also blitz them up with nuts or seeds into a peppery pesto or ferment them as I have done here.
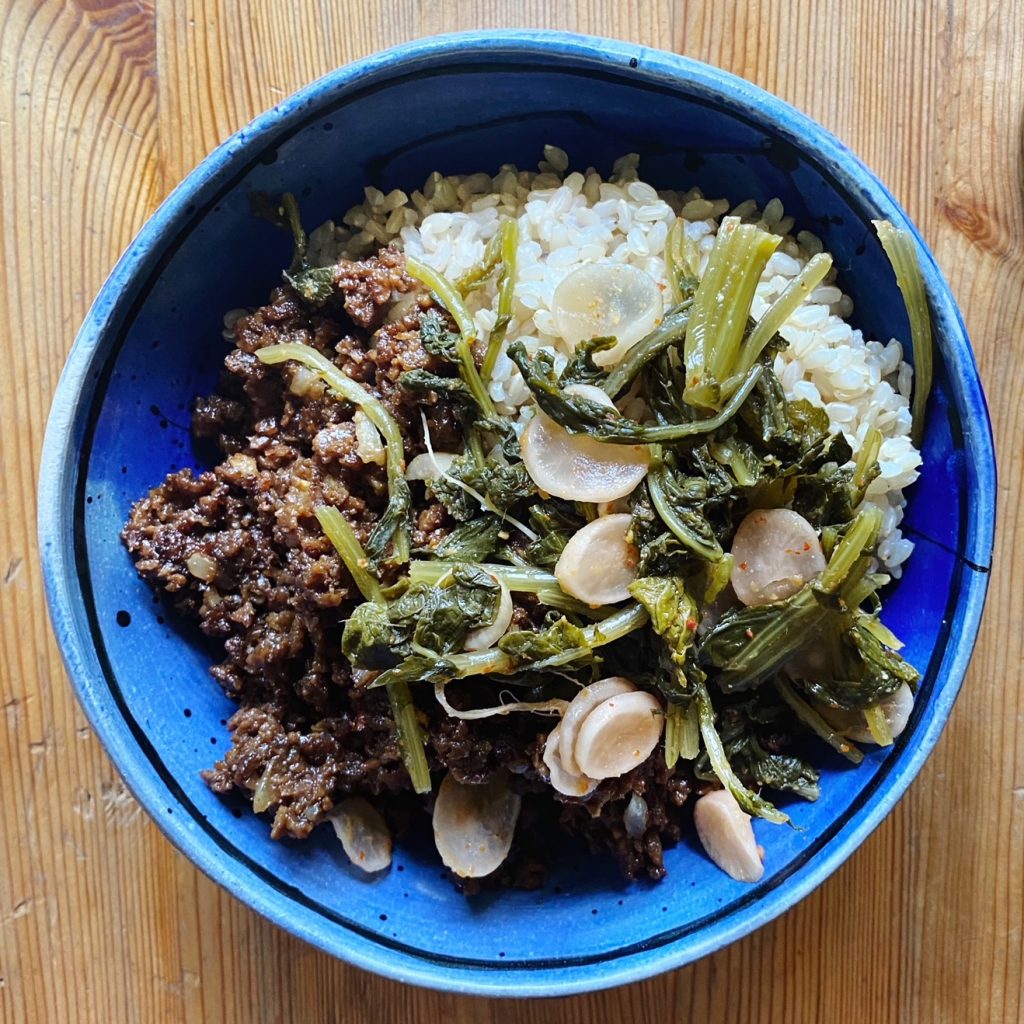
We are a little obsessed with kimchi in our house. We eat a lot of rice (or other grain) bowls and kimchi is just the thing to finish it off. If you’ve not had kimchi before, it is a tangy, spicy fermented condiment – a pickle of sorts – from Korea. Once you get a taste for it, you’ll be hooked, so it’s definitely worth learning to make your own. The health benefits of fermented foods are incredible too. Full of live, gut friendly bacteria to aid your digestion, nutrient absorption, mood and more! We do stock an organic kimchi here if you want to see how it is supposed to taste before you give making your own a go.
Liz x
Ingredients
radishes with leaves – washed and separated
salt to taste (or you can weigh your radishes and leaves, work out 2% of the weight and use that amount of salt if you prefer being precise)
garlic, ginger and chillies to taste
a couple of cabbage leaves to use as ‘followers’ which help keep the radishes submerged in brine
You will also need clean jars, a clean chopping board and knife and a large, clean mixing bowl.
Method
Chop the leaves and stems into 3 or 4 cm chunks. Place them in a large bowl and sprinkle with salt – enough to make them taste pleasantly salty. Mix gently with your hands to tumble the salt around and coat each leaf. You will soon notice that the volume of the leaves decreases and they start to look wet as the salt draws the liquid from the leaves and creates a delicious brine.
Thinly slice the radishes – you can leave on their cute tails which are also perfectly edible. Add them to the bowl and mix them in too. Taste a leaf, does it need more salt?
Now make a paste with fresh garlic, ginger and fresh or dried chillies. I use a small smoothie maker and add a good thumb of fresh ginger – sliced but not peeled – the cloves of half a bulb of garlic, peeled, and a good tbsp or two of chilli flakes or a couple of fresh red chillies. Do it to your taste, for example, make it extra garlicky and not so spicy if you like.
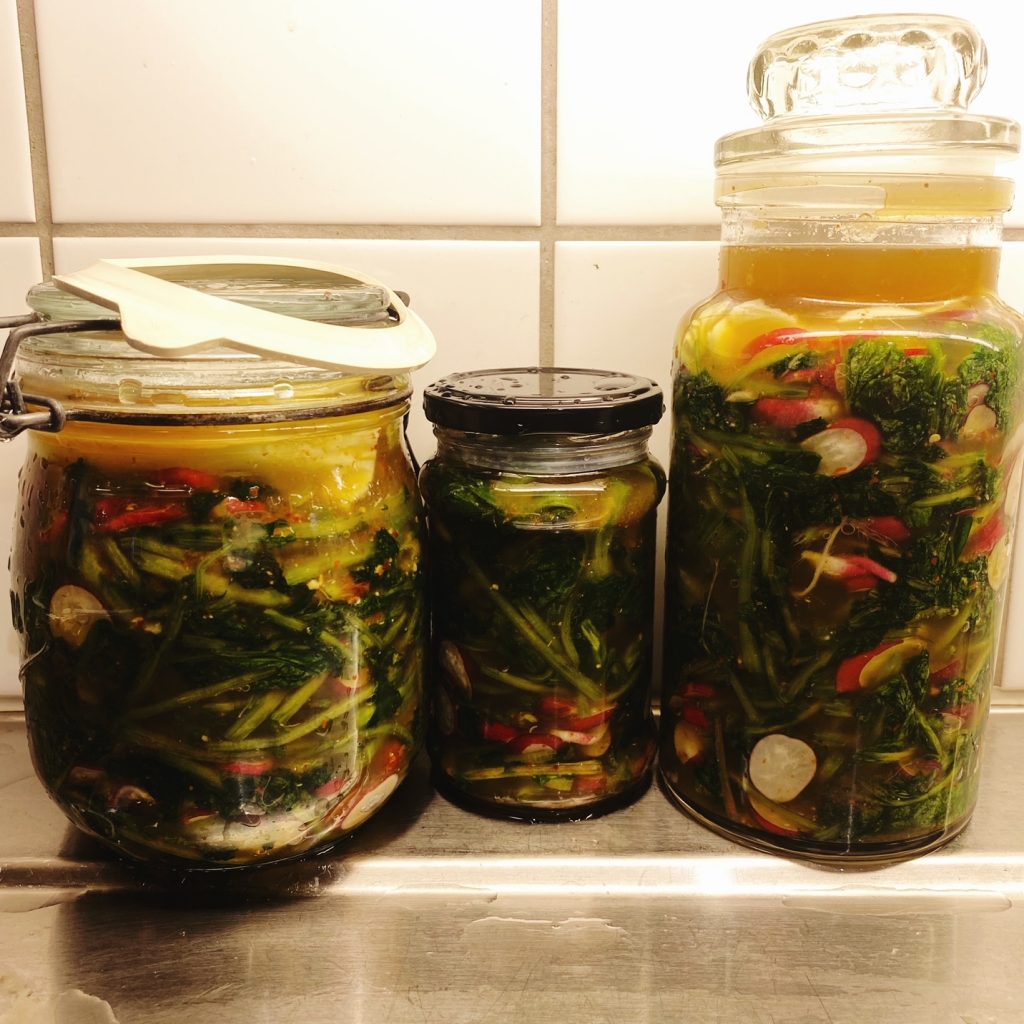
Stir the paste through the salted radish and then firmly stuff the mixture into clean jars. Push the mixture in very tightly, you want to avoid any air pockets in the jar. Pour in any brine that has collected in the bottom of the mixing bowl too. Ideally leave a couple of centimetres of head room in the jars. When you push down on the vegetables, brine should cover them.
Now tear a cabbage leaf to be slightly bigger than the surface area of the jar. Push it in over the kimchi mixture and tuck the chopped veg neatly under the brine. Then clean up the jars with a paper towel and loosely replace the lid to allow gases to escape during fermentation.
Place the jars on a plate or in a plastic box somewhere in your kitchen that doesn’t get direct sunlight. Allow the kimchi to ferment at room temperature for a week. Keep an eye on it, If the vegetables rise up above the brine, use a clean spoon to push them back down. Bubbling is normal, as is some of the brine escaping through the loose lids – hence the instruction to place the jars on a plate or in a box. You will undoubtedly notice a tangy, spicy aroma near the jars too – again this is normal and a good sign that things are fermenting as they should be.
Taste the kimchi. It should be tangy and spicy and salty and delicious. Now clean the jars up again and put the lids on tightly. Store in the fridge and enjoy!
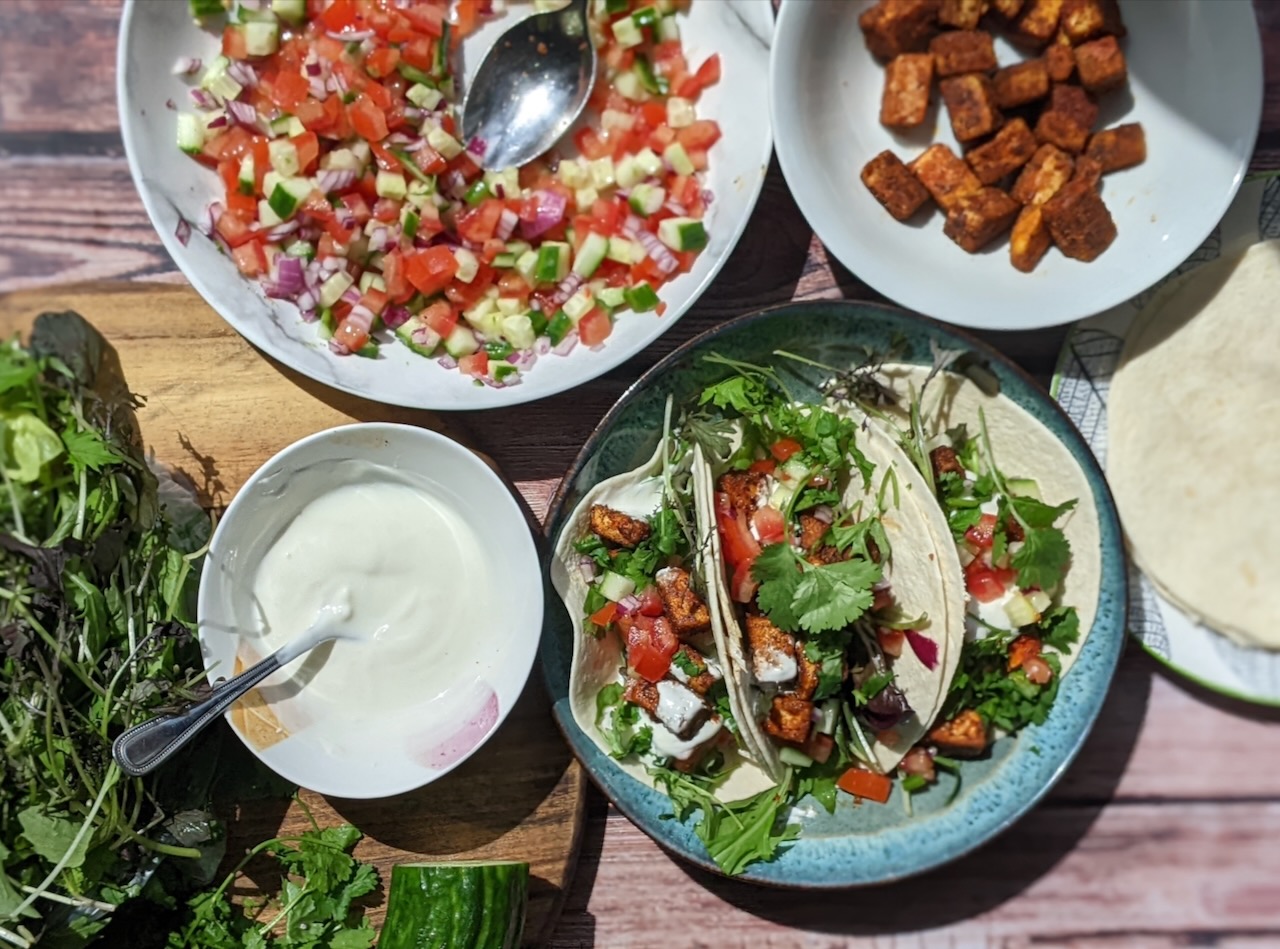
Tacos are perfect for summer eating, outdoor festivals and they’re great to make at home too #homemade! These tofu tacos are inspired by a recent trip to a music festival, while there, I tried some bean tacos but these tofu ones are really delicious and the salsa brings so much freshness and flavour. They work so well for a super tasty lunch or add some spiced rice to have for dinner.
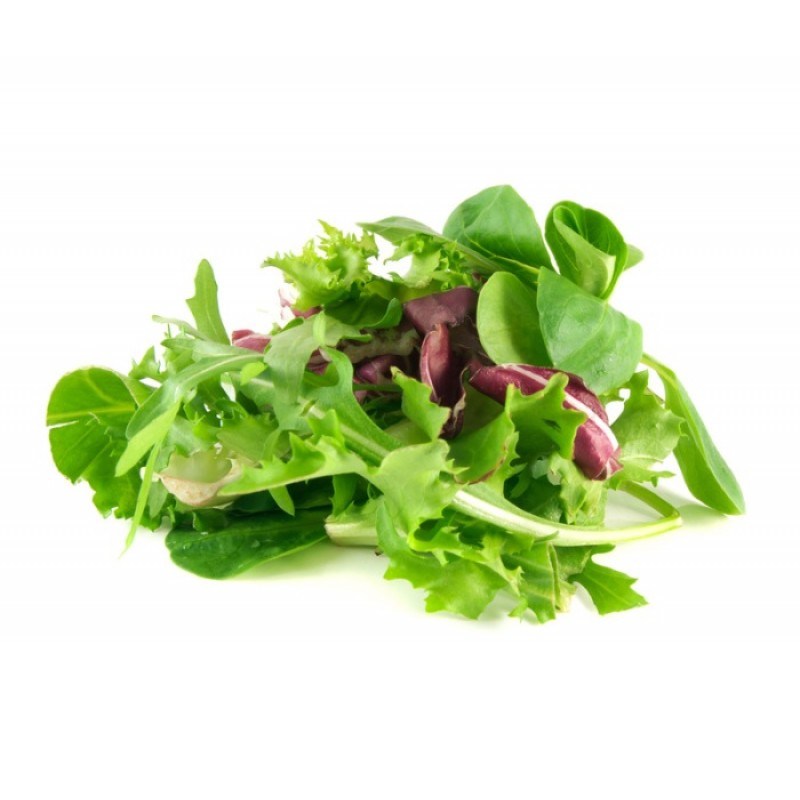
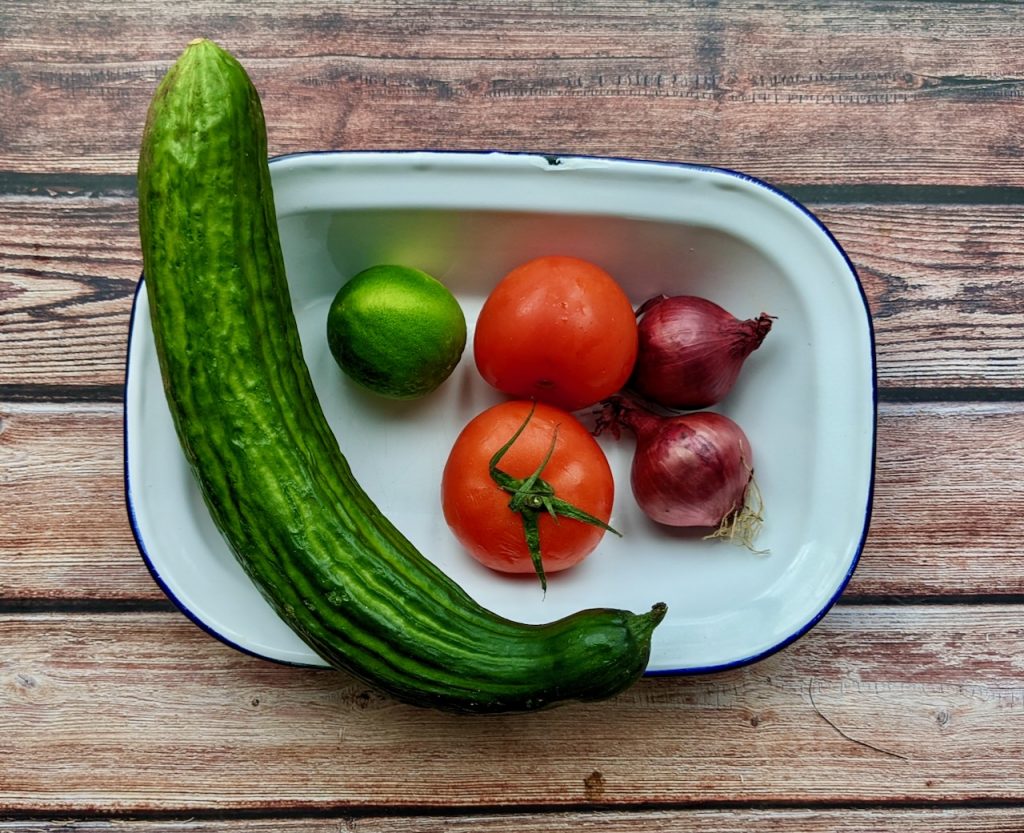
A bag of mixed Irish leaves that I picked up from the Green Earth Organics Saturday Farm Shop serves as the perfect paring along side the spicy tofu and zingy salsa. And I have to say, the salsa sings with the flavour packed organic tomatoes, local cucumbers and red onions!!
Open the packet of tofu, discard the liquid and it pat dry with kitchen paper.
Carefully slice into 1cm cubes and place in a bowl or container.
Pour the soy sauce or tamari on top and set aside to marinate for at least 20 minutes.
Next make the blackened spice mix, simply measure all the ingredients into a wide dish and mix well with a fork.
To make the salsa, with a sharp knife, cut the tomato into quarters and carefully cut out the seeds, reserve the seeds for a sauce or soup. Finely dice the flesh and place in a bowl. Repeat with the cucumber and red onion.
To the same bowl add the zest and juice of half a lime, olive oil, sprinkle in a pinch of salt and pepper and gently fold the ingredients together to complete the salsa.
To cook the tofu. Add the tofu to the container with the blackened spice mix and toss to coat.
Heat a non-stick frying pan on a medium to high heat. Add 2 tablespoons of oil.
When the oil is hot add half of the tofu. They should sizzle and not burn on the pan, carefully turn the tofu with tongs or a fork to cook on all sides. Lift onto a plate lined with kitchen paper. Repeat with the rest of the tofu.
To serve: Line up the tortilla wraps (you can warm them first if you wish) add some organic leaves, top with salsa, blackened tofu, sour cream and fresh coriander.
Food waste has always upset me and I think I get that from my mum. Pre-covid my mum was a regular in our packing shed, salvaging any waste produce for a variety of charities, she was the ultimate food waste champion.
Her generation was not one to waste anything.
It wasn’t until the plastic clad, sell more, always on, supermarket culture took over did we as a generation decide it was ok to dump food. Or was it really our decision? I think not. It was the supermarkets that decided for us and made it ok to waste food and to grade out perfectly good produce based on how something looks.
In our business we try really hard to keep food waste to a minimum. It can be challenging as we are dealing with so many different fresh items, and we have harvests and deliveries arriving everyday. We run 5 different cold rooms, and we run some at different temperatures to ensure the optimum temperature is maintained to keep produce fresh. We have also committed to not using plastic.
(Incidentally, just this week it has been shown that despite the Supermarkets railing on about it, plastic does not actually reduce food waste, it can actually increase it!)
But back to our story, we need to make sure you our customer gets the most amazing quality. Everything piece of produce gets inspected, and while sometimes the odd one gets through, we work really hard to deliver on our promise of only delivering amazing quality produce to your door.
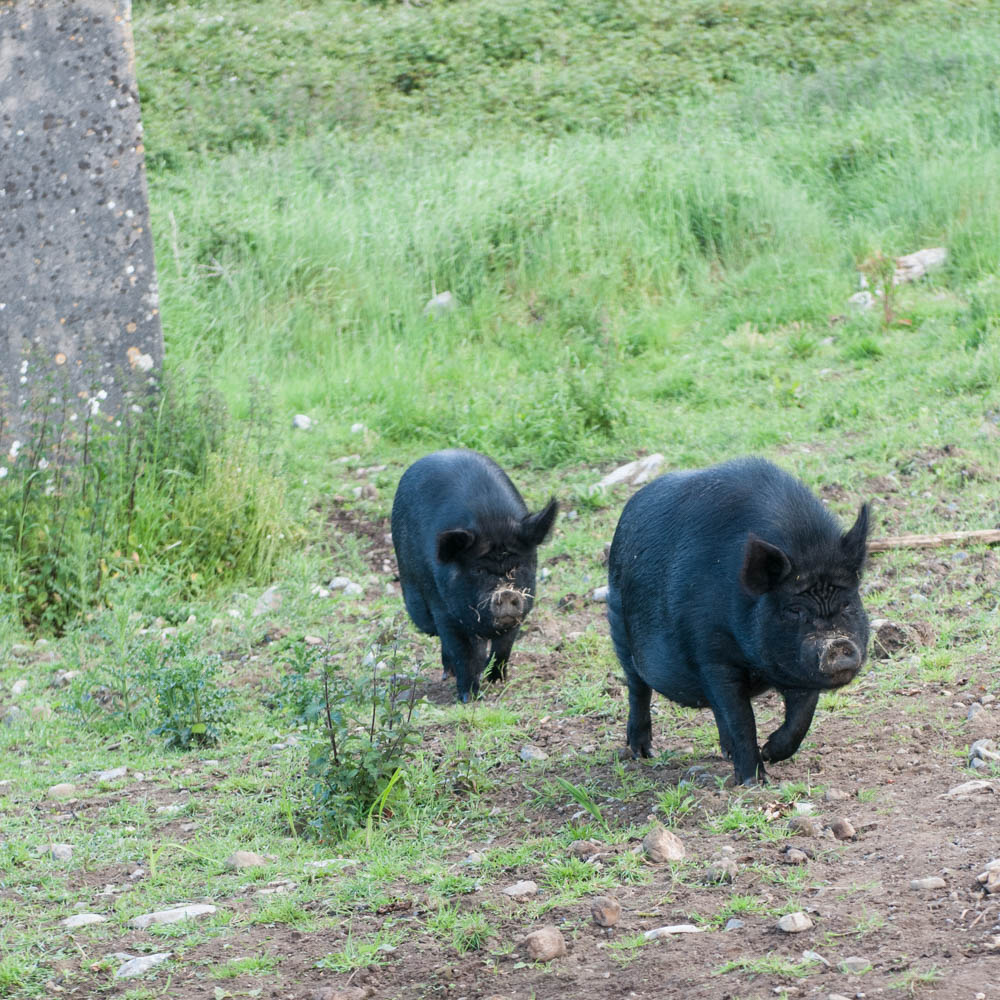
“Grade outs” : produce that we know will not make it to you our customers in first class condition, are left on a shelf in our packing shed and are generally used to make staff boxes and our team can help themselves. Finally, what is left, the stuff that we don’t eat ourselves usually ends up in Florence and George’s bellies (our rescue pigs!)
I always thought pigs would eat anything. As it turns out I was wrong. Pigs do indeed have some serious food preferences. I know because just over a year ago we took charge of two rescue pigs George and Florence. They have the run of an acre of mostly forested land and will live out their long and leisurely lives here on our organic farm. (Incidentally pigs can live until they are 20!).
Who would have known that pigs are fussy eaters? Well, I can tell you that they will not eat broccoli or kale, they are not partial to courgettes and apparently mushrooms do not tickle their palettes either.
It would seem then that they know what they like and what they don’t like. But when it comes to wonky shapes, and blemished skin they see only food.
I don’t know that supermarkets take food waste seriously. A couple of years ago, a person who would know told me about 12 pallets of pineapples that were dumped as a result of a supermarket quality inspection failing them because of some blemishes. This happens.
Maybe being that little bit more mindful of our food can go along way in reducing our food waste, and the funny thing is it can actually end up saving us quite a bit of money too.