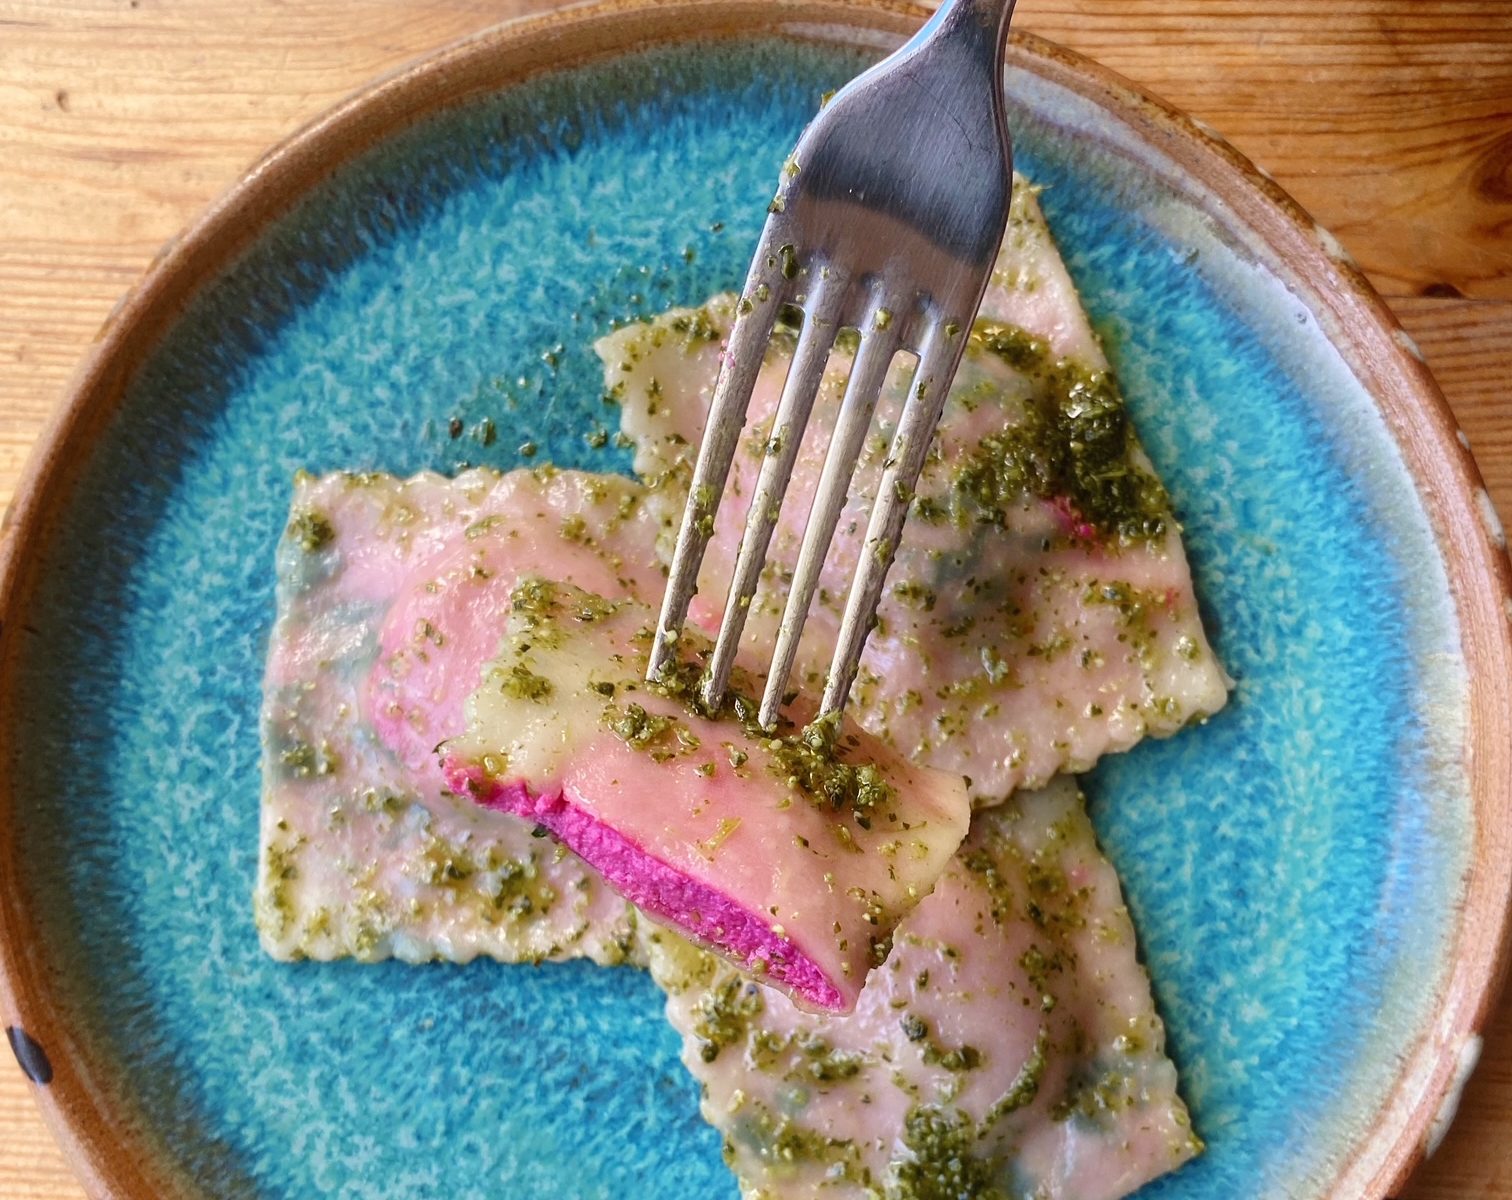
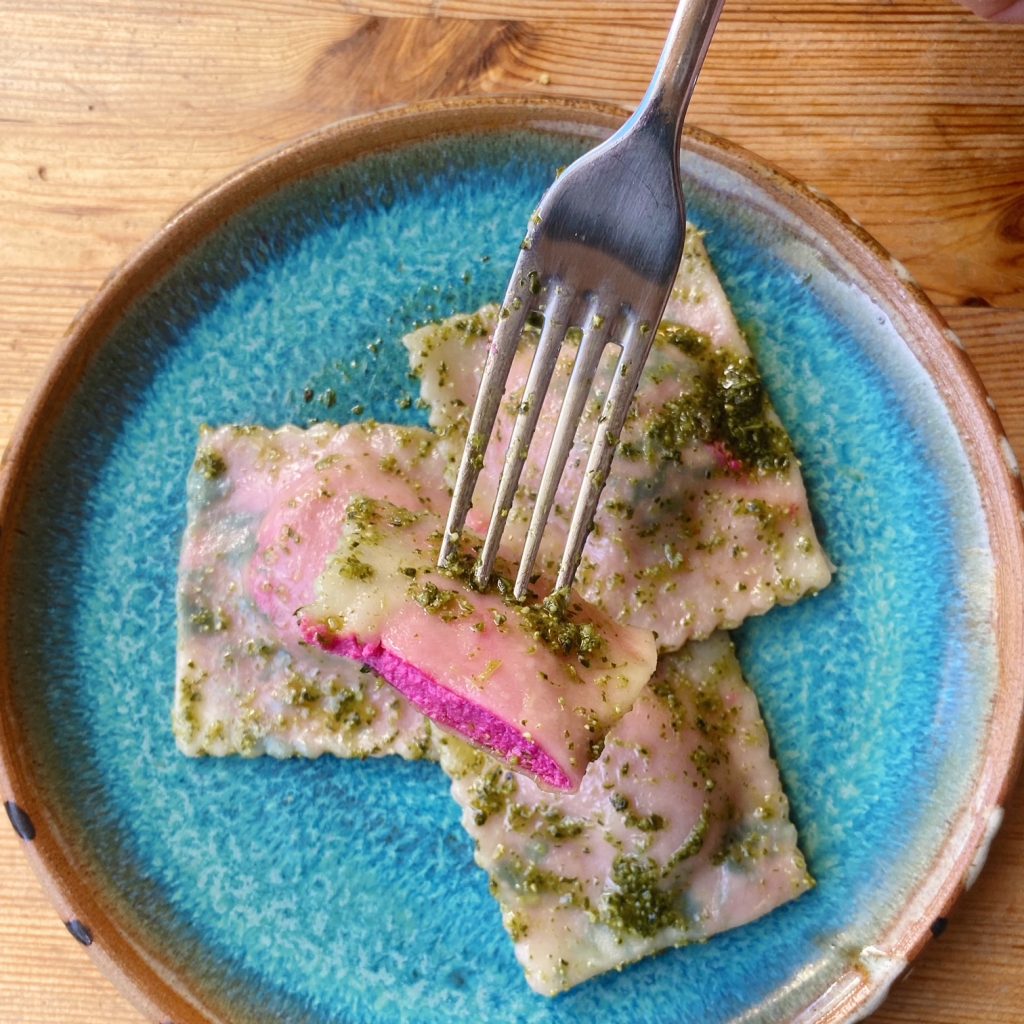
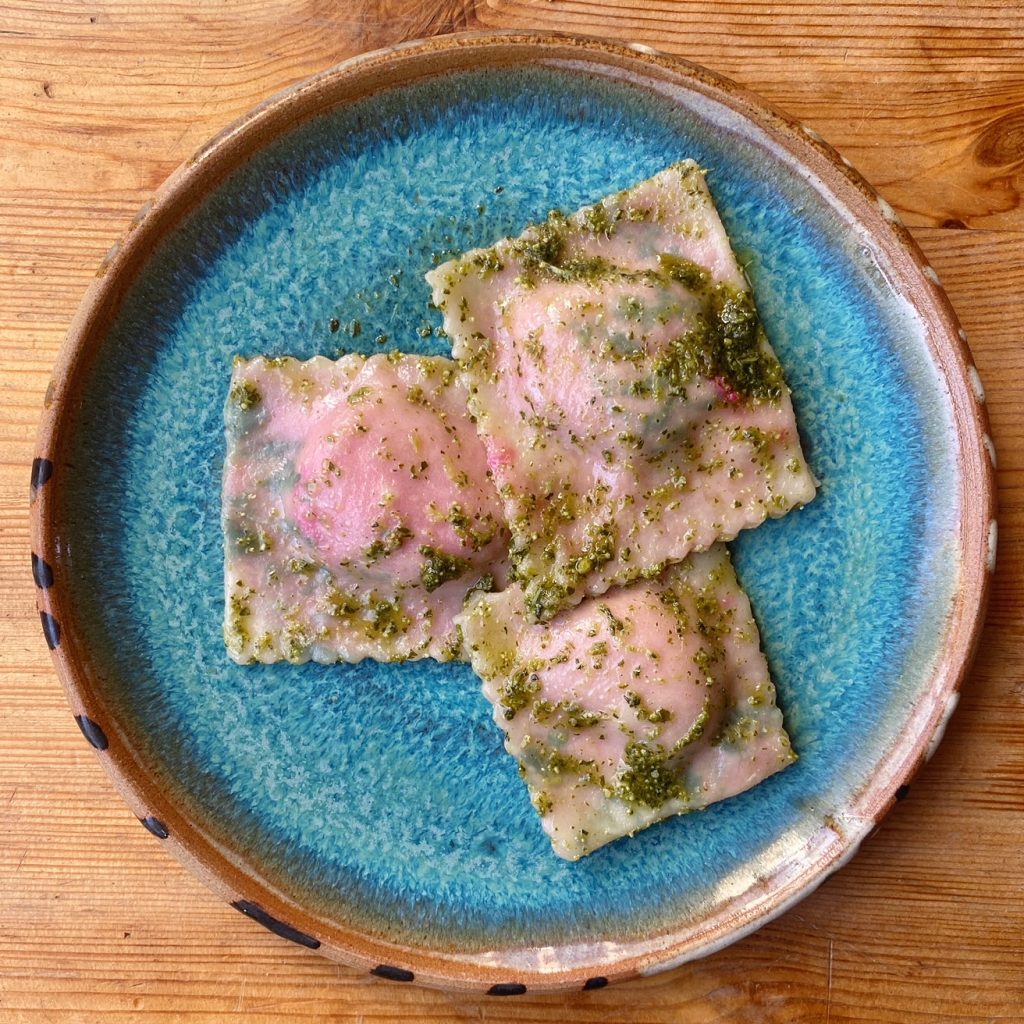
Wouldn’t this pretty pasta be perfect for Mother’s Day? It takes a little more effort than our usual recipes but the ingredients are few, simple and affordable (using our ingredients at the time of writing this blog, this cost €5.64 to make 30 pieces).
Liz x
Ingredients (makes around 30)
~ pasta • 300g fine flour • 1 tbsp olive oil • 1 tsp salt • 150ml water • parsley leaves
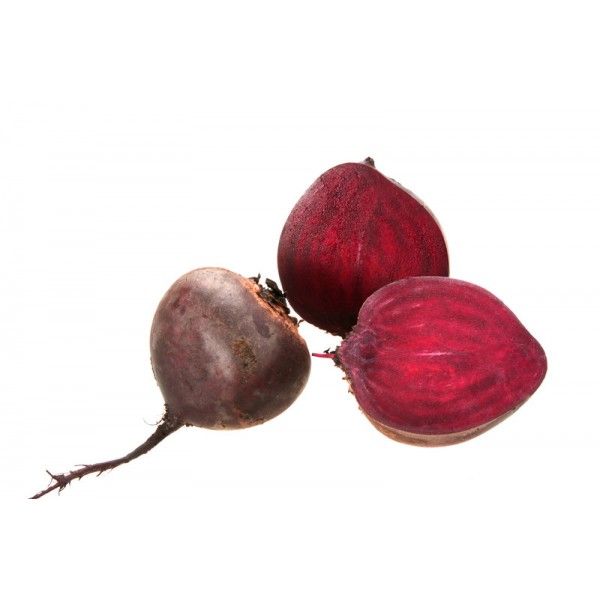
~ beetroot tofu-ricotta • 200g extra firm tofu • 1 small cooked beetroot • 1 clove of garlic • the juice of 1/2 a lemon • 1 tsp salt • 5 tbsp olive oil
~ 1/2 jar of pesto to serve
Method
Mix the pasta ingredients (except the parsley) into a shaggy, quite dry dough then knead it very well into a firm, smooth dough. This should take around 10 minutes of kneading. If your dough is too dry, wet your hands occasionally whilst kneading to incorporate just a little extra water. Rest the ball of dough in a bowl covered tightly with a damp tea towel.
Blend all the beetroot ricotta ingredients until smooth. Taste and adjust the seasoning if needed with more salt or lemon.
Roll your pasta dough out on a lightly floured surface. Once you have a large oval/rectangle, arrange some parsley leaves on one half and fold the pasta over. Now roll again into a very long strip, just over double the width of the size you want your ravioli. Get it as thin as you can – you should be able to read a paper through it.
Space teaspoons of the pink ricotta along one side, wet the other side to help it stick, then carefully fold the pasta over the ricotta blobs and use your fingers to seal around each one. Use a knife or pasta wheel to cut the ravioli and save any off-cuts, they are just as delicious!
Drop the fresh ravioli and off-cuts into boiling water, cook until soft but still with bite (around 3 minutes or so – test an off-cut) then scoop out with a slotted spoon, dress with pesto and serve!
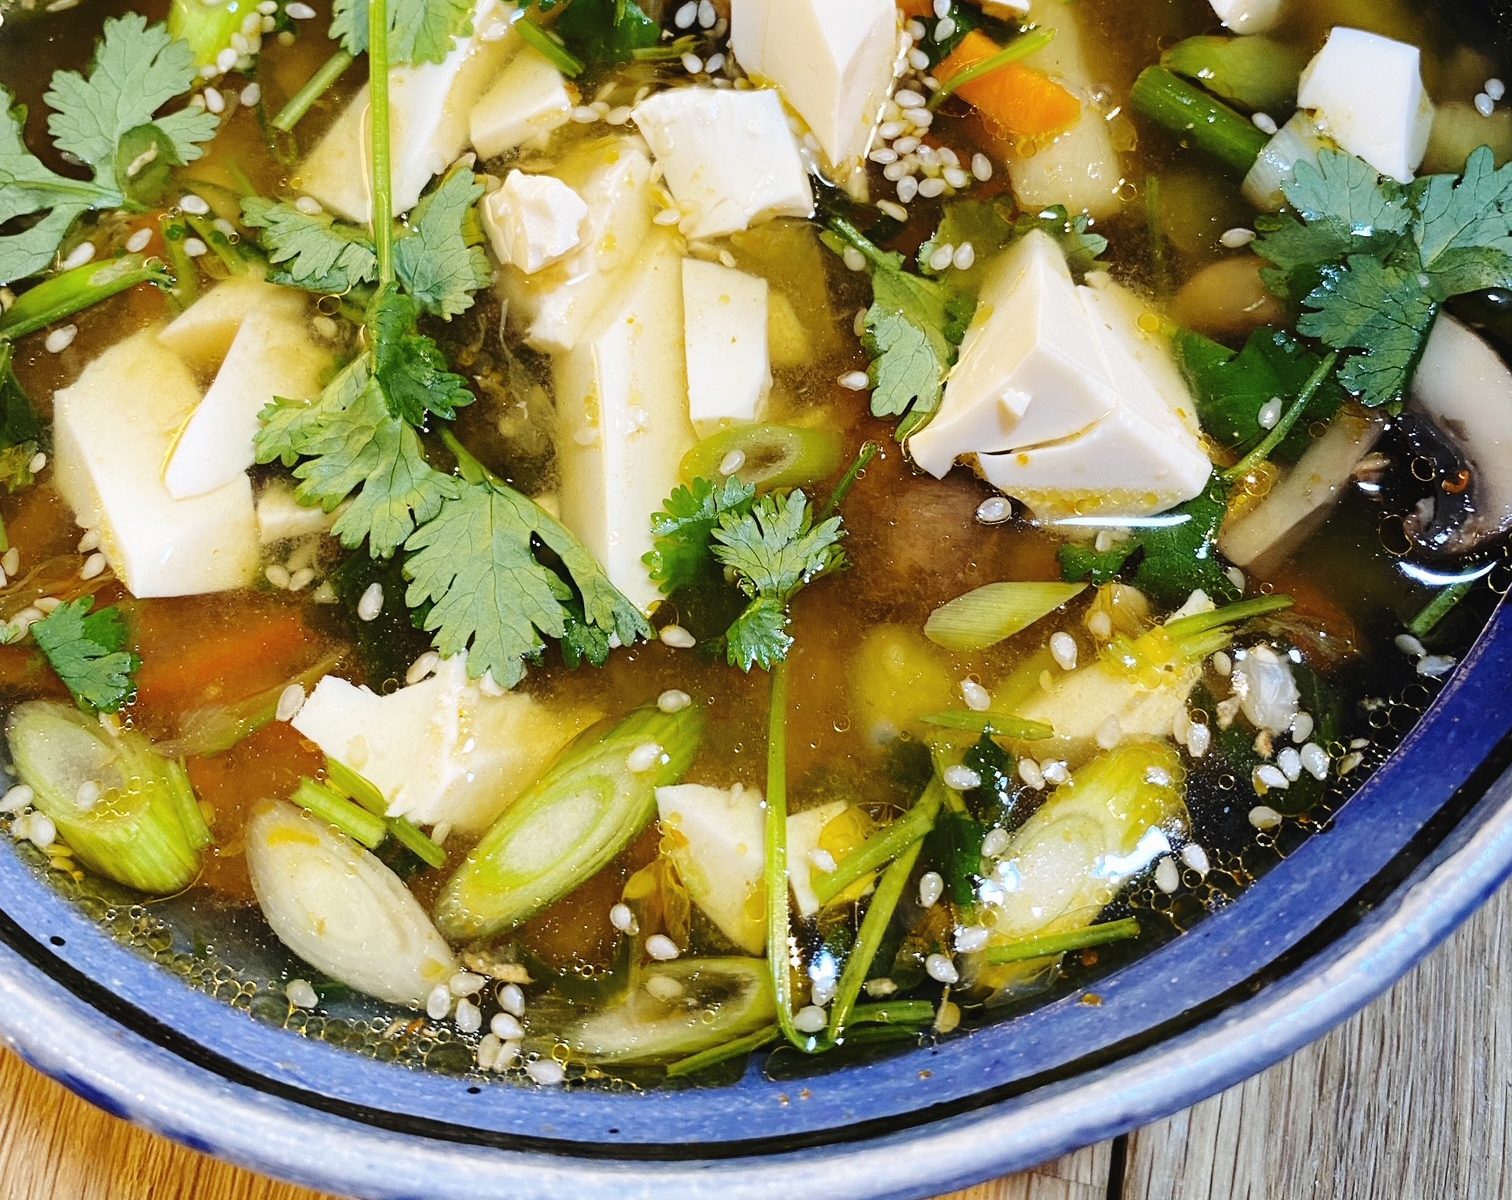
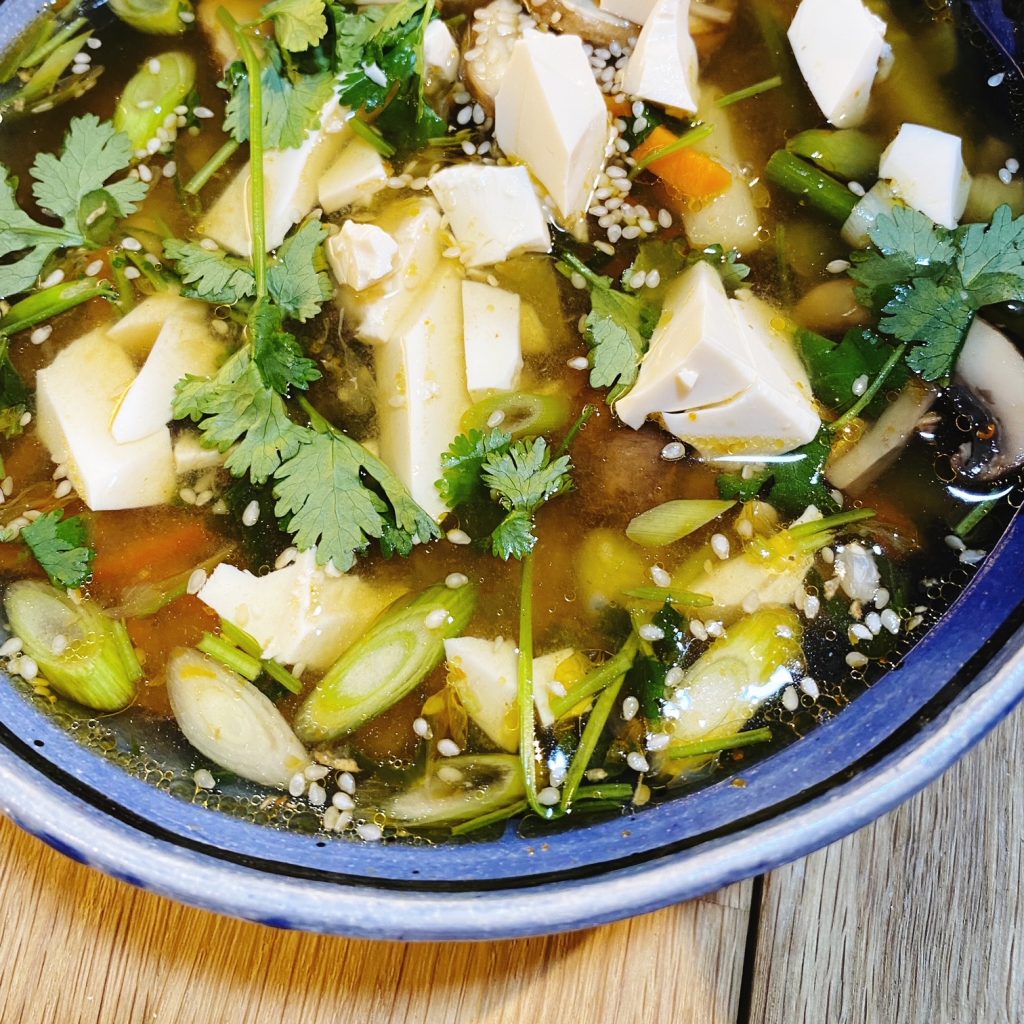
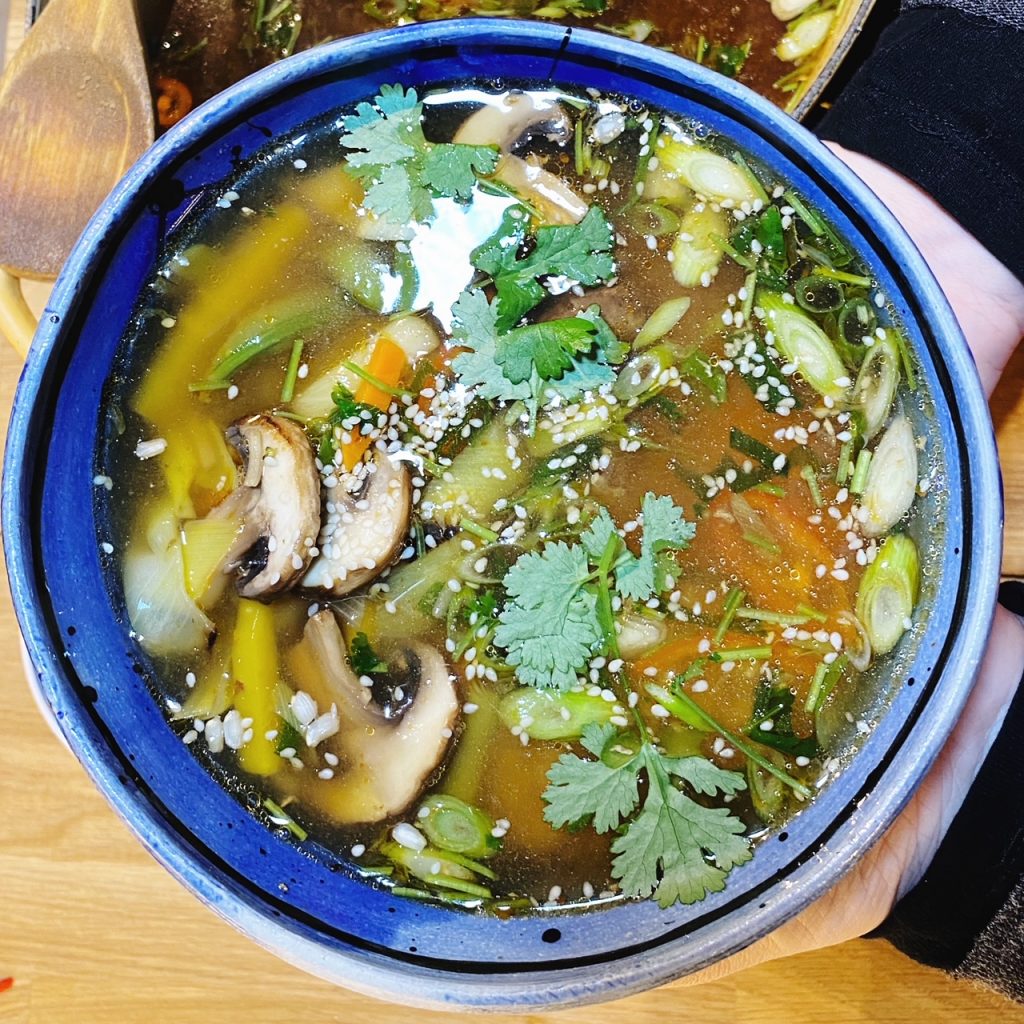
This soothing broth is what I make when we have a nasty cold going around. It’s a light, warm and comforting dinner any day of the week though. We call it ‘balance broth’ because it’s an attempt to perfectly balance the tastes sweet, salty, sour, bitter and umami. And because it makes an imbalanced day seem instantly more level. It’s funny how food can do so much more than fuel our bodies.
Do you have a go-to recipe which makes you feel good? I’d love to hear about it in the comments.
Liz x
Ingredients (serves 4)
2 litres of water
1 vegetable stock cube
1 tbsp dried seasweed, crumbled
1 tbsp dried mushrooms, crumbled
2 green tea bags
1 fat clove of garlic, finely grated
1 thumb of fresh ginger, finely grated
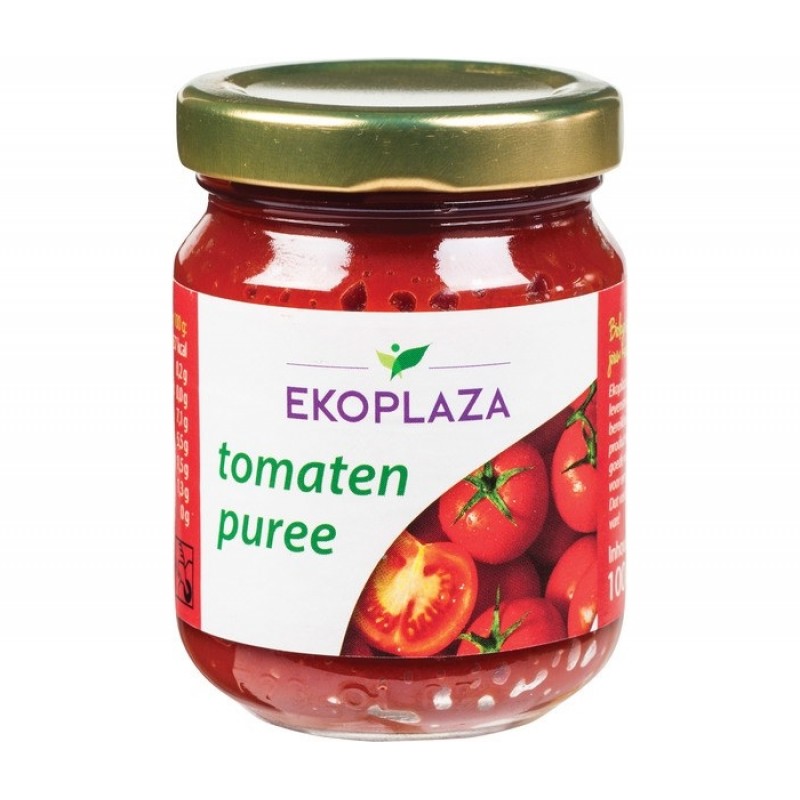
1 tbsp tomato purée
4 tbsp soy sauce (or tamari for gluten free)
1 tbsp maple syrup
1 lime, juiced
2 tbsp toasted sesame oil
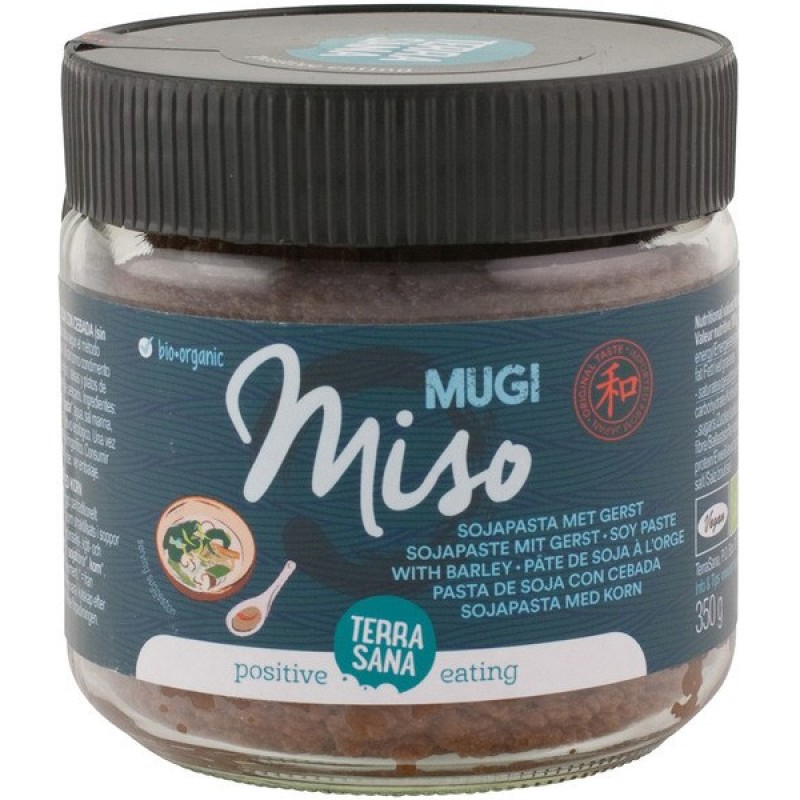
4 tbsp miso
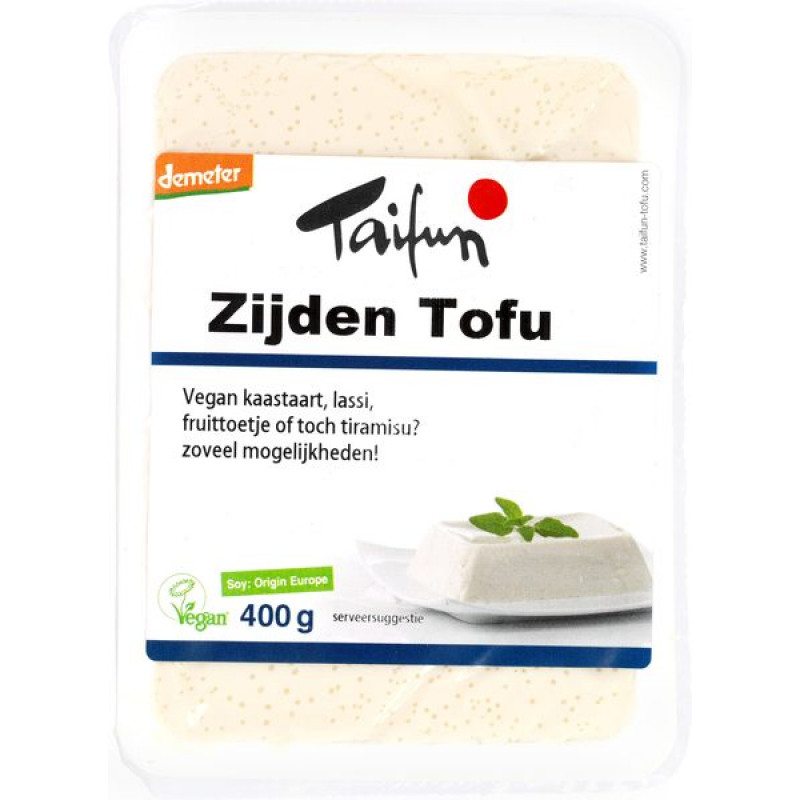
scallions, fresh chilli, sesame seeds, fresh coriander, rice or noodles, silken tofu and stir fried vegetables to serve
Method
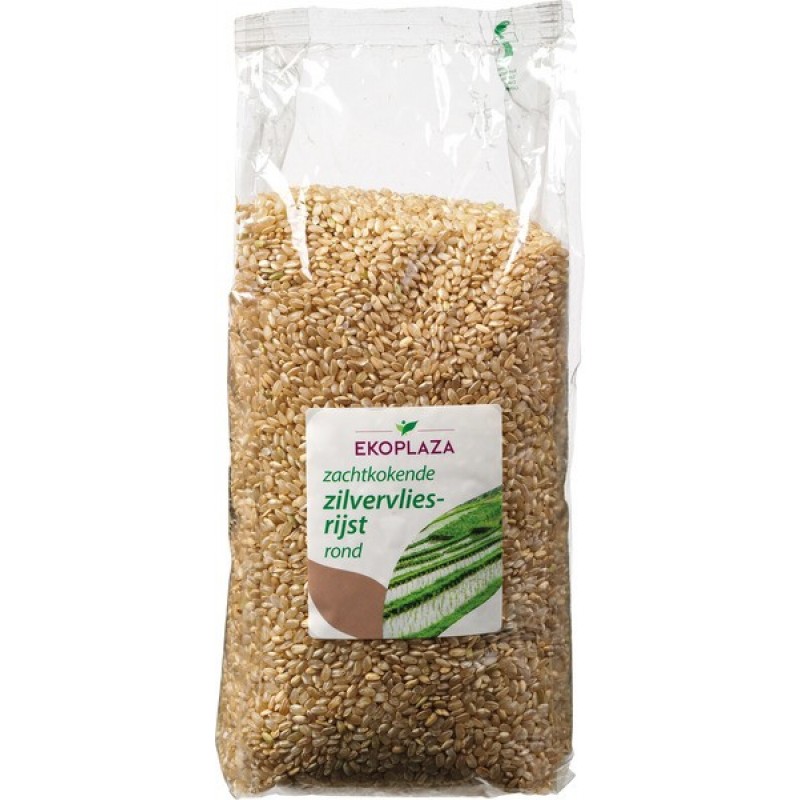
Prepare what you will serve your broth with first. Our favourite is nutty brown rice, stir fried seasonal vegetables and some simply chopped silken tofu.
In a large pot, simmer all the broth ingredients except the miso and toasted sesame oil for 10 minutes.
Remove the tea bags and turn off the heat. Allow the broth to cool a little then add the sesame oil and miso and stir. The slightly-cooler-than-boiling broth will ensure the beneficial bacteria in the miso will stay alive.
Taste the broth and balance it as you need with more salty soy sauce or more sour lime juice.
Then ladle the broth over bowls of rice, vegetables and tofu, sprinkle with sesame seeds, coriander, chopped scallions and chilli. Enjoy!
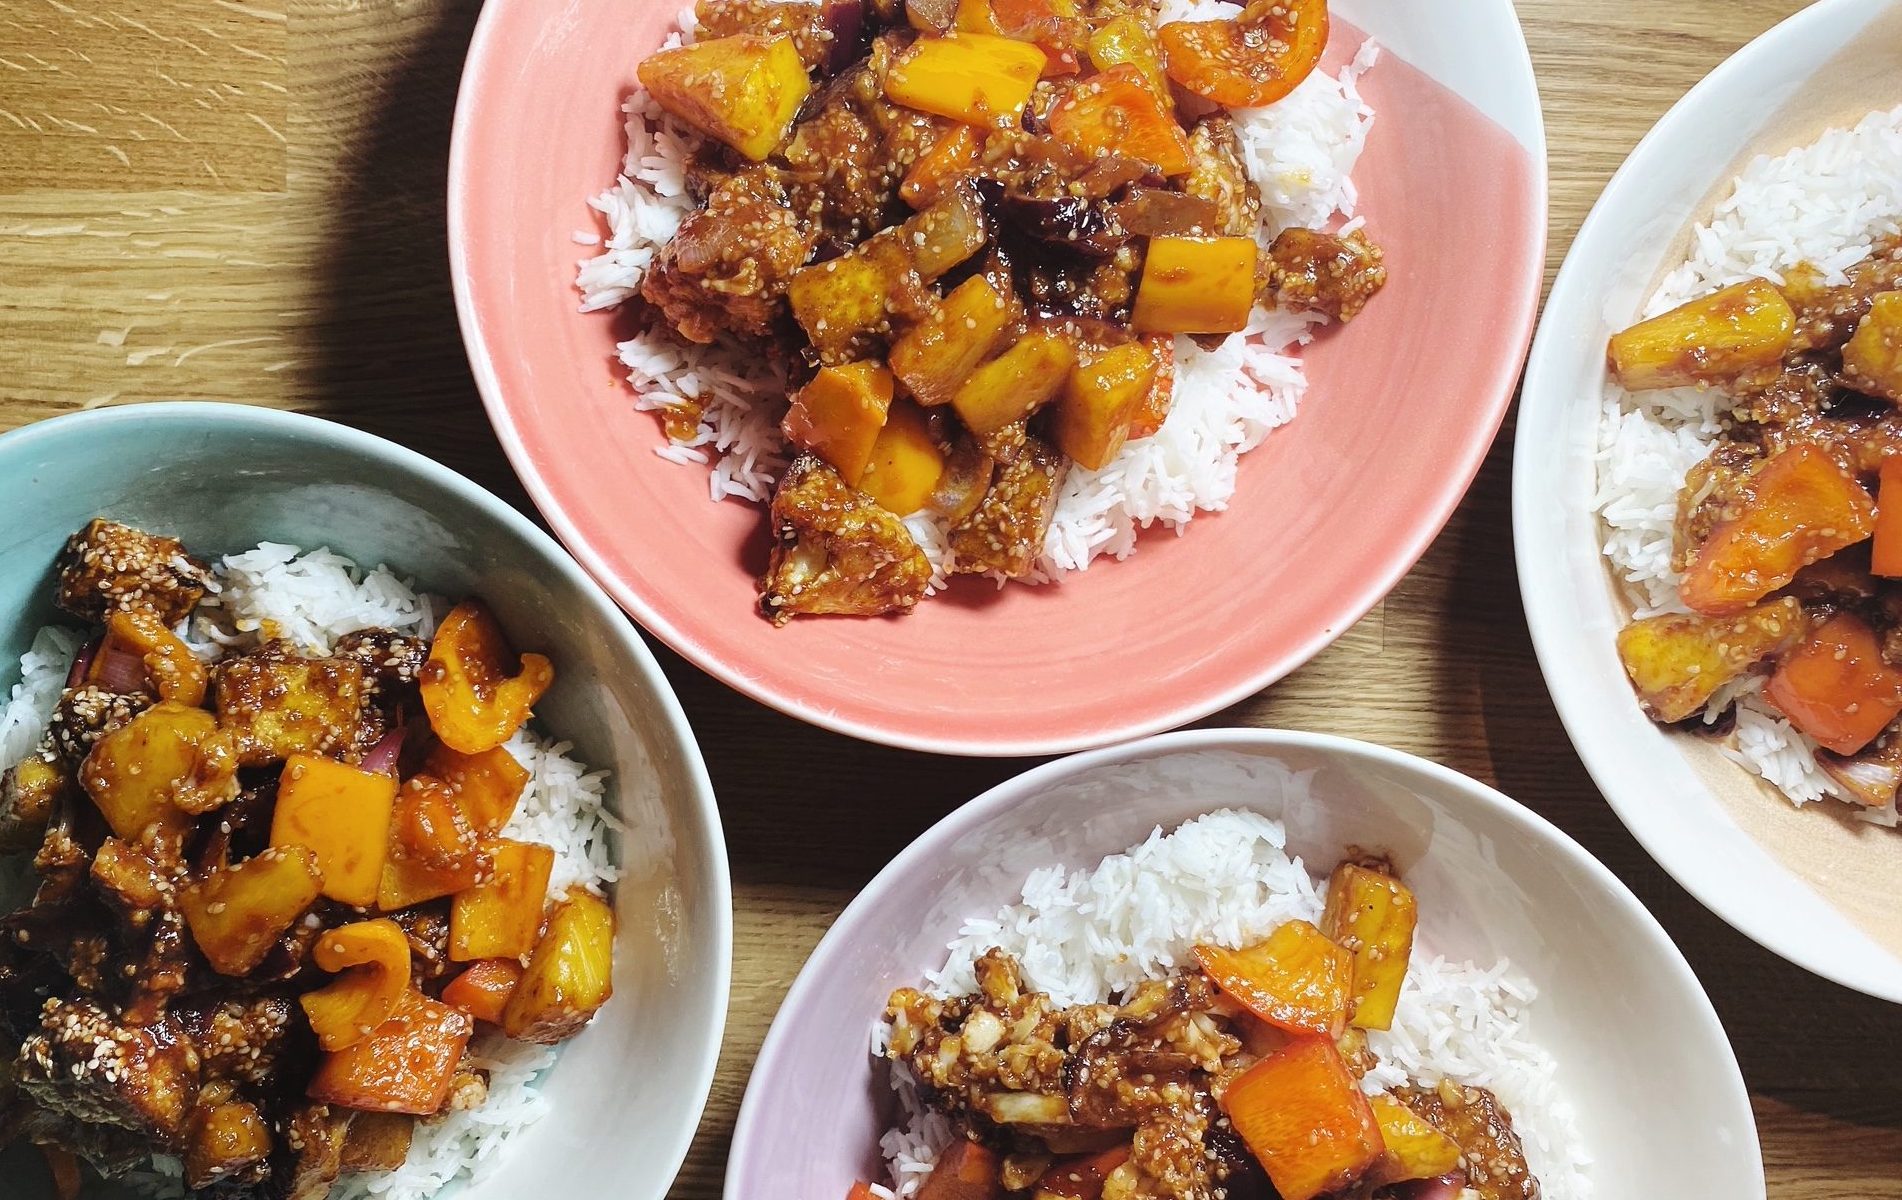
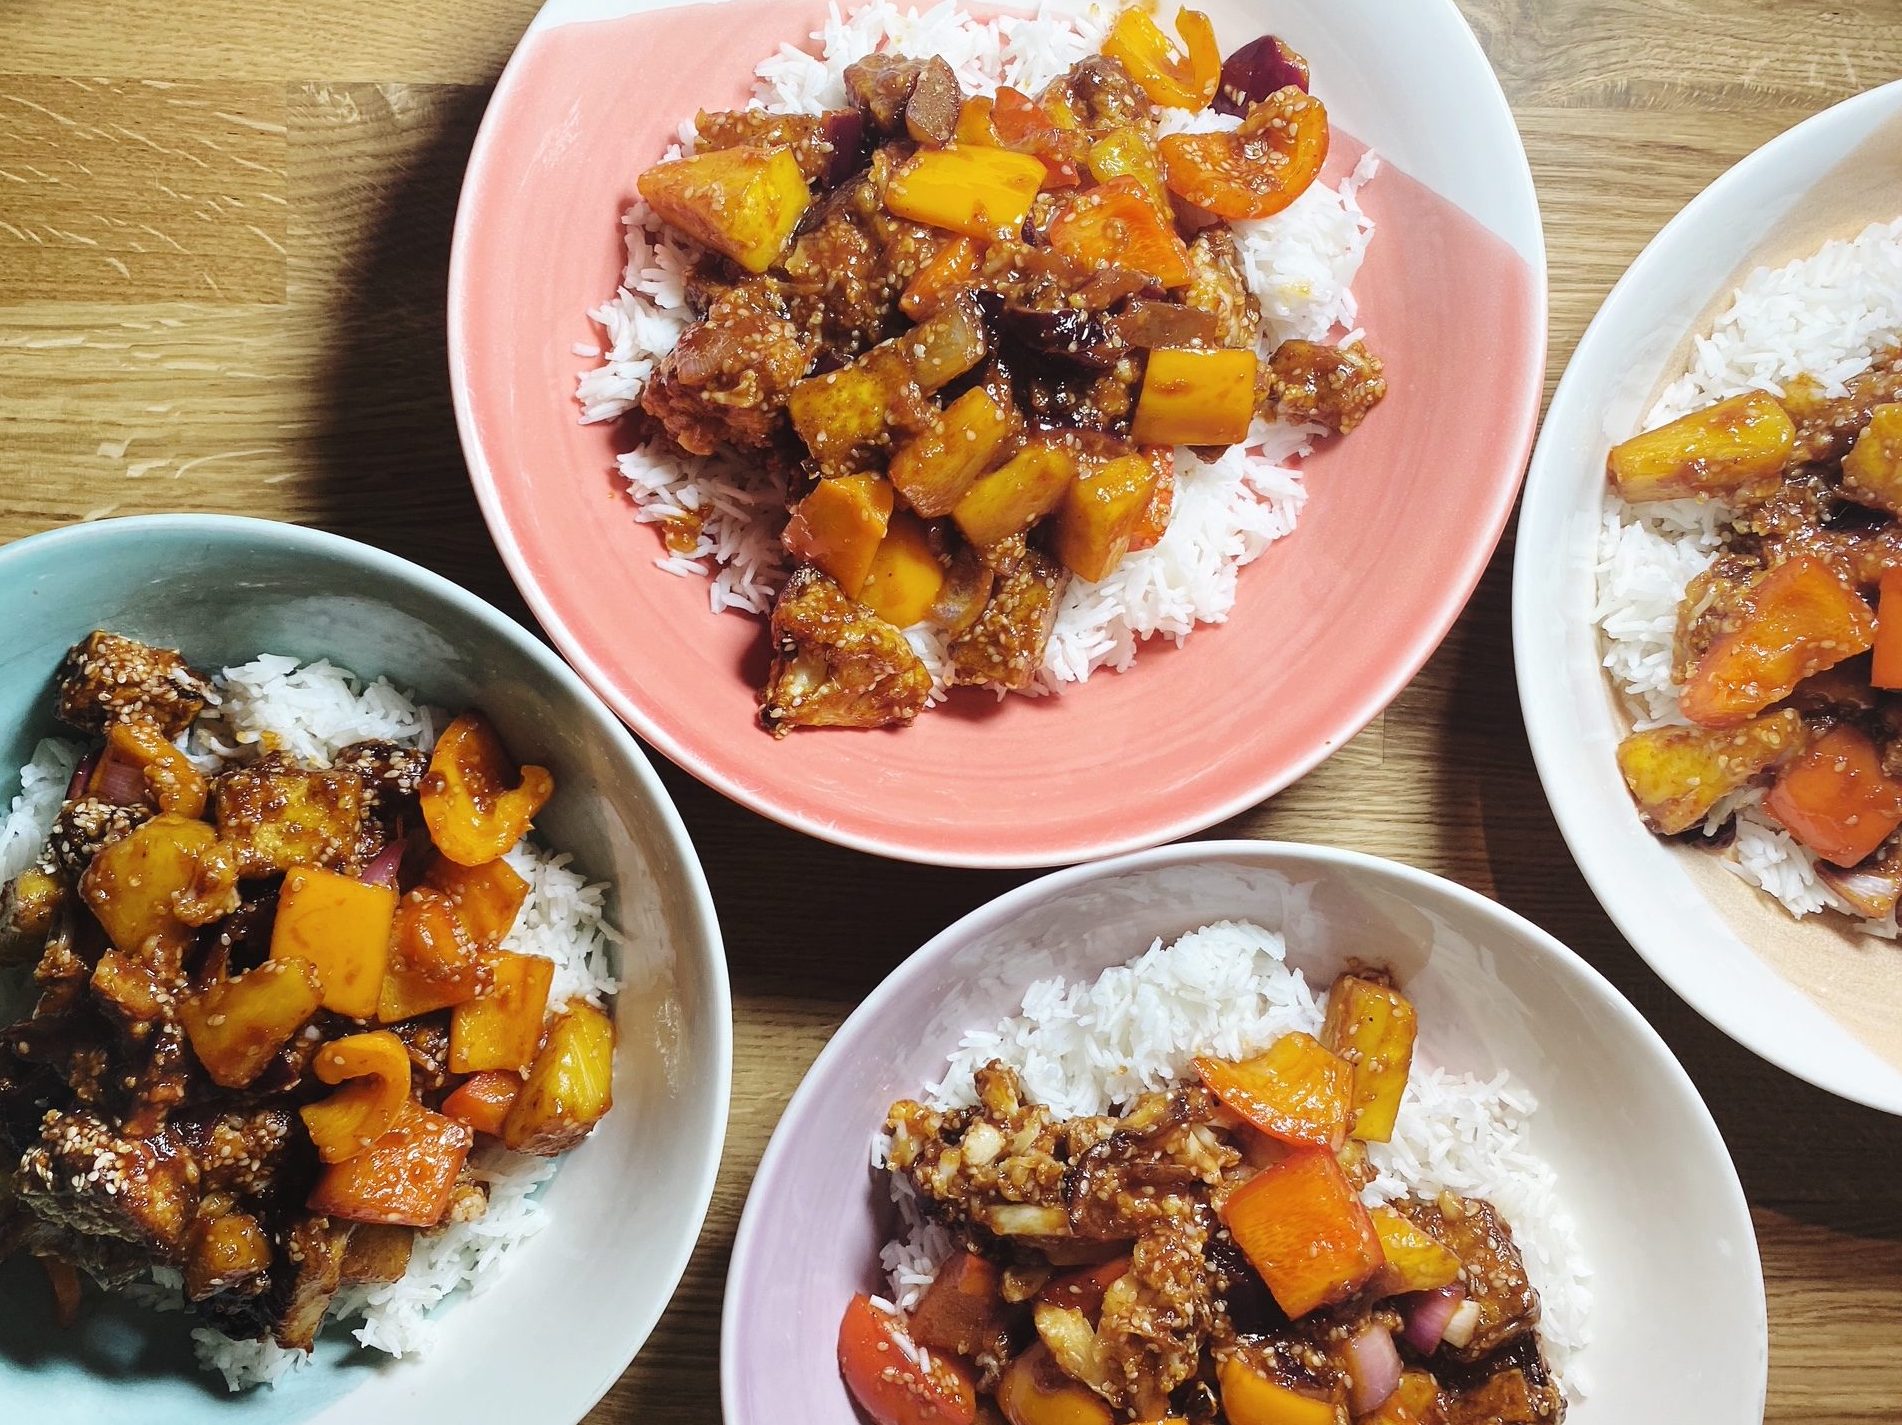
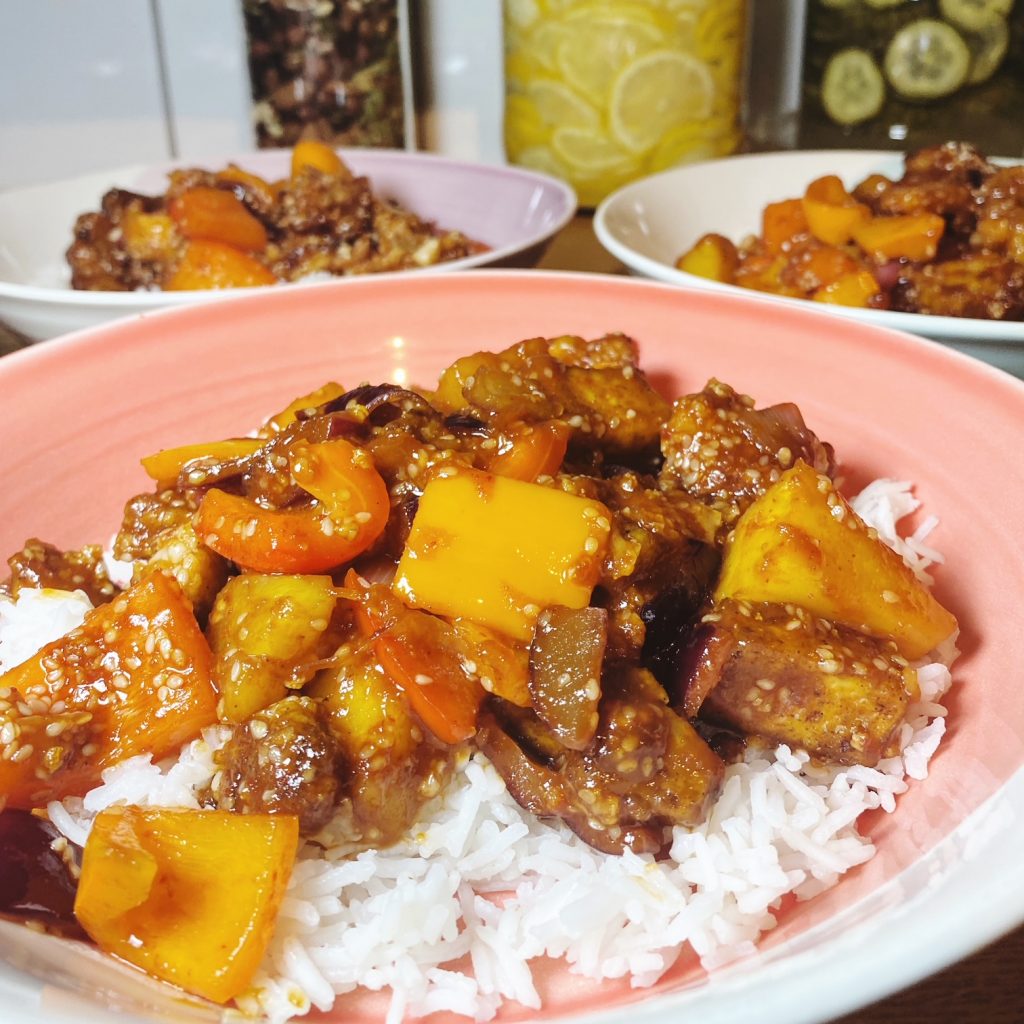
It’s Chinese New Year today and we will be celebrating with this homemade sweet and sour dish, a favourite from the takeaway. Delicious sweet and sour sauce is usually packed full of sugar and food colouring, this version uses maple syrup, still sugary but in a less refined-sugar way. The sourness is from vinegar and there is lots of delicious umami in the tomato puree and soy sauce. Crispy roasted tofu and cauliflower bring welcome texture and meatiness to the dish. Simple and delicious, enjoy!
Liz x
PS – get all the organic ingredients delivered to your door here.
Ingredients (serves 2)
1 block extra firm tofu
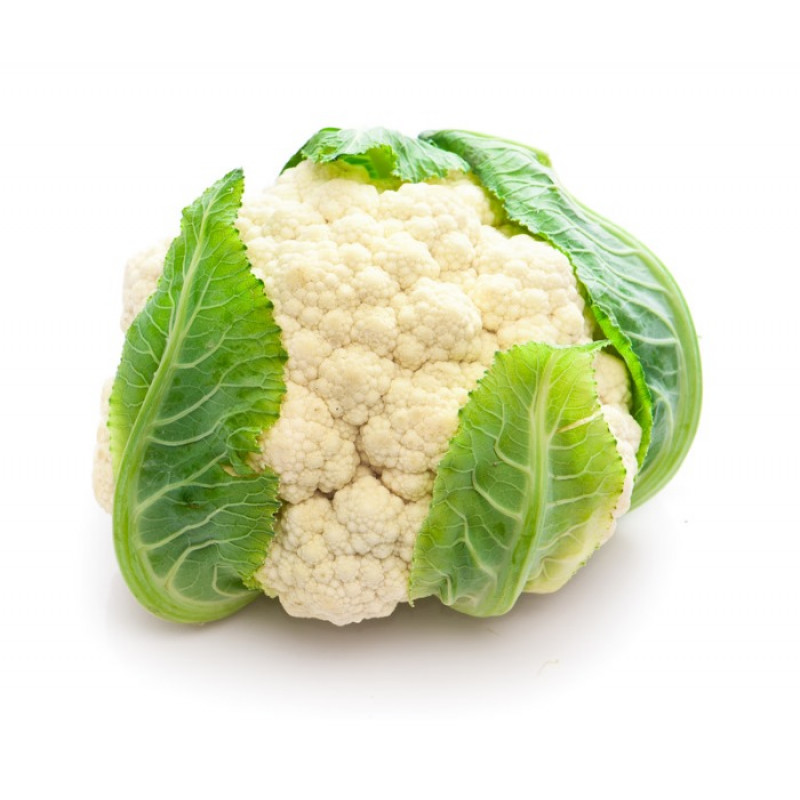
1/2 a small cauliflower
1 tbsp vegetable oil
1 tsp salt
2 tsp Chinese 5 spice
4 tbsp cornstarch
5 tbsp maple syrup
4 tbsp soy sauce (or tamari for gluten free)
3 tbsp vinegar (rice wine or apple cider)
2 tbsp tomato puree
1 tsp ground ginger
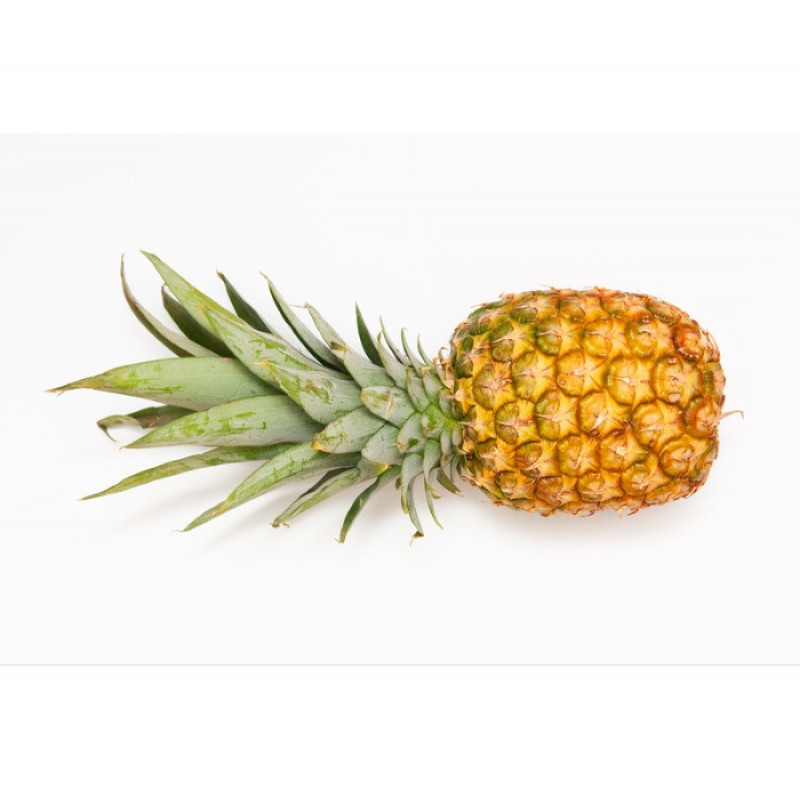
1/4 pineapple, peeled, cored & chopped
1 red pepper, deseeded & chopped into a chunky dice
1 red onion, peeled and chopped into a chunky dice
1 tbsp vegetable oil
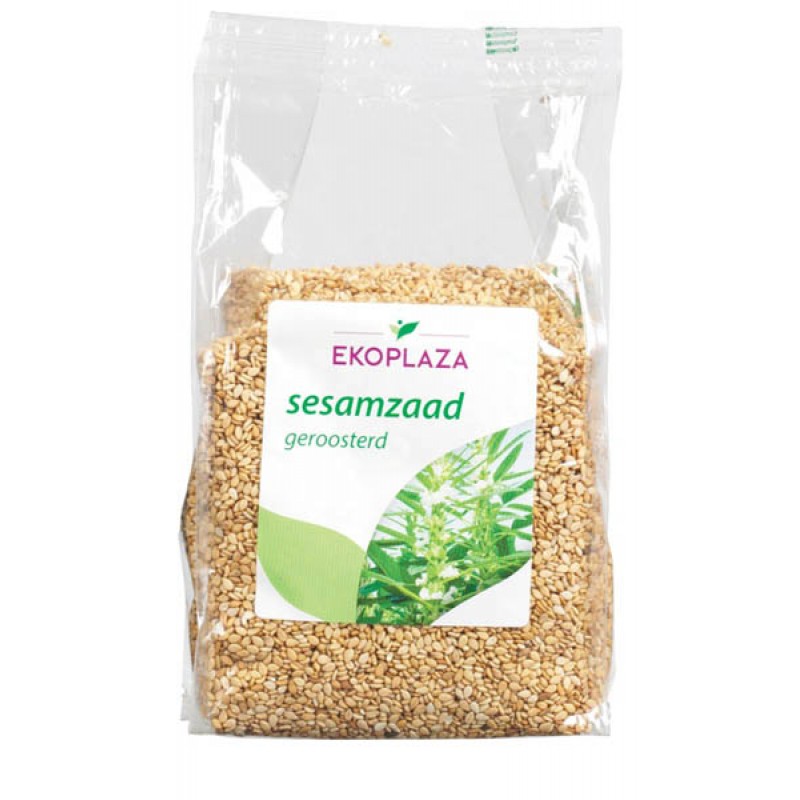
sesame seeds
cooked rice or noodles to serve
Method
Preheat the oven to 200C. Find a large roasting dish and line it with baking parchment.
Put the chopped cauliflower and firm tofu in a large mixing bowl. Drizzle with 1 tbsp of veg oil, sprinkle over the salt and 5 spice. Use a wooden spoon to mix well. Then sprinkle over the cornstarch and mix again ensuring all the pieces are coated in the floury seasoning. Tumble onto the lined tray, spread out evenly then pop it into the oven to bake and get crispy while you cook the sauce, stir fry and rice/noodles.
The cauliflower and tofu should take no more than 20-30 minutes so time cooking you rice or noodles accordingly.
In a small bowl, whisk together the sweet and sour sauce ingredients – the maple syrup, soy sauce, vinegar, tomato puree and ground ginger. Taste and tweak if you like with more of any of the ingredients.
Heat the tbsp of veg oil in a large frying pan/wok. When it’s nice and hot, add the chopped pineapple, pepper and red onion and stir fry until hot and starting to caramelise. Add the sauce and heat through.
Then remove the cooked cauliflower and tofu from the oven and stir them through the stir fry and sauce. Add a generous sprinkle of sesame seeds just before serving over rice or noodles and enjoy!
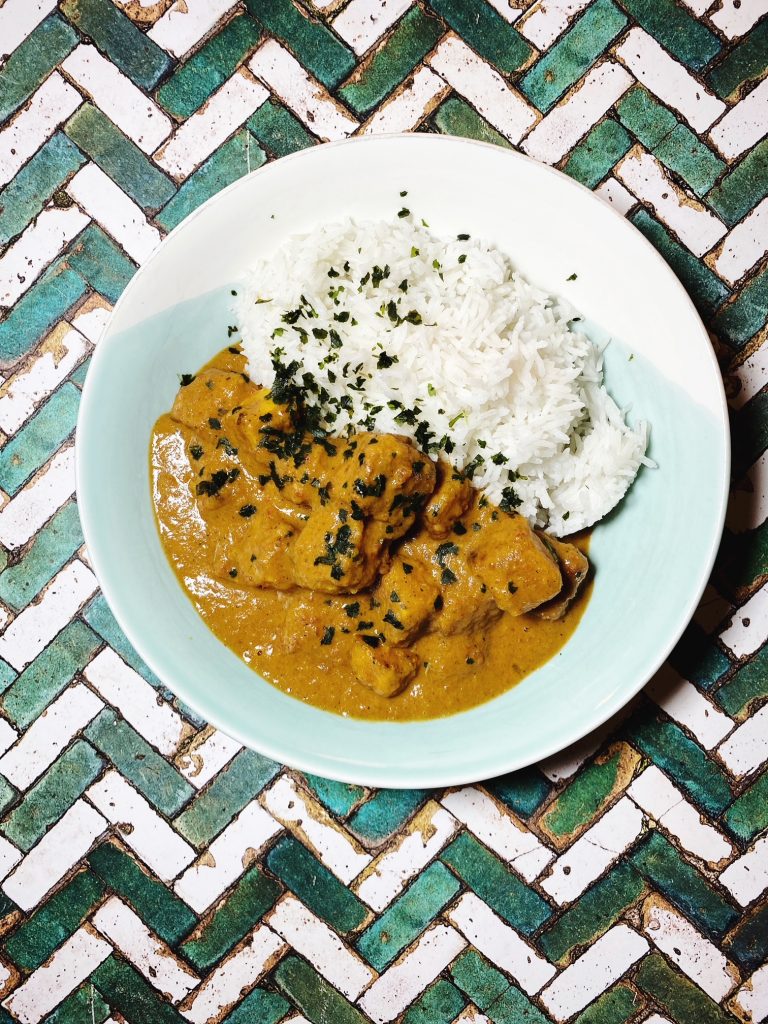
This is one of our favourite twists on an Indian takeaway. The traditional North Indian dish is ‘butter chicken’ and it’s all about that rich, creamy and buttery tomato gravy. It’s mildly spicy and savoury, popular with the whole family. This is the perfect store-cupboard supper too, just the thing for those days when you’re running low on fresh ingredients.
We have replaced the dairy in the traditional recipe with Naturli butter and creamy coconut milk. And in place of chicken, our extra firm blocks of organic tofu. We also love this recipe with cauliflower, chickpeas or chunks of aubergine or mushrooms in place of the tofu. Whatever you decide to cook and fold through this mouthwatering sauce, you are guaranteed to lick your plate clean. It’s that good!
Start with the sauce. Put the onion, garlic, spices and seasoning into a blender and blend into a thick paste. Fry the paste in a heavy bottomed, deep saucepan with the butter for 10 minutes or until dark brown and very fragrant.
Empty the two tins of tomatoes into the blender and blend them until smooth too. Add to the curry paste and simmer and stir for a further 10 minutes until the sauce is rich and slightly reduced.
Add the tin of coconut milk, stir and taste for seasoning. Keep the sauce warm while you cook the rice and tofu.
Drain your blocks of extra firm tofu and cut into bite sized cubes. If you are subbing with vegetables, cut into bite sized pieces and dunk in milk. In a wide bowl, mix the cornstarch, turmeric, salt and pepper. Tumble the tofu into the bowl and use your hands to mix well and ensure each piece is coated in the seasoning. (If you are using vegetables, dunk the veg in the milk first then roll in the seasoned cornstarch).
Heat up a large frying pan (or two) and add the butter. When it starts to melt, add the coated tofu (or vegetables) and cook on a medium-high heat until crispy and golden on the bottom. Then carefully turn the pieces to cook on the other side. Keep turning and cooking until the tofu (or vegetables) is golden brown, hot and crispy.
Fold the cooked tofu (or vegetables) through the warm curry sauce and serve with basmati rice and chopped coriander.
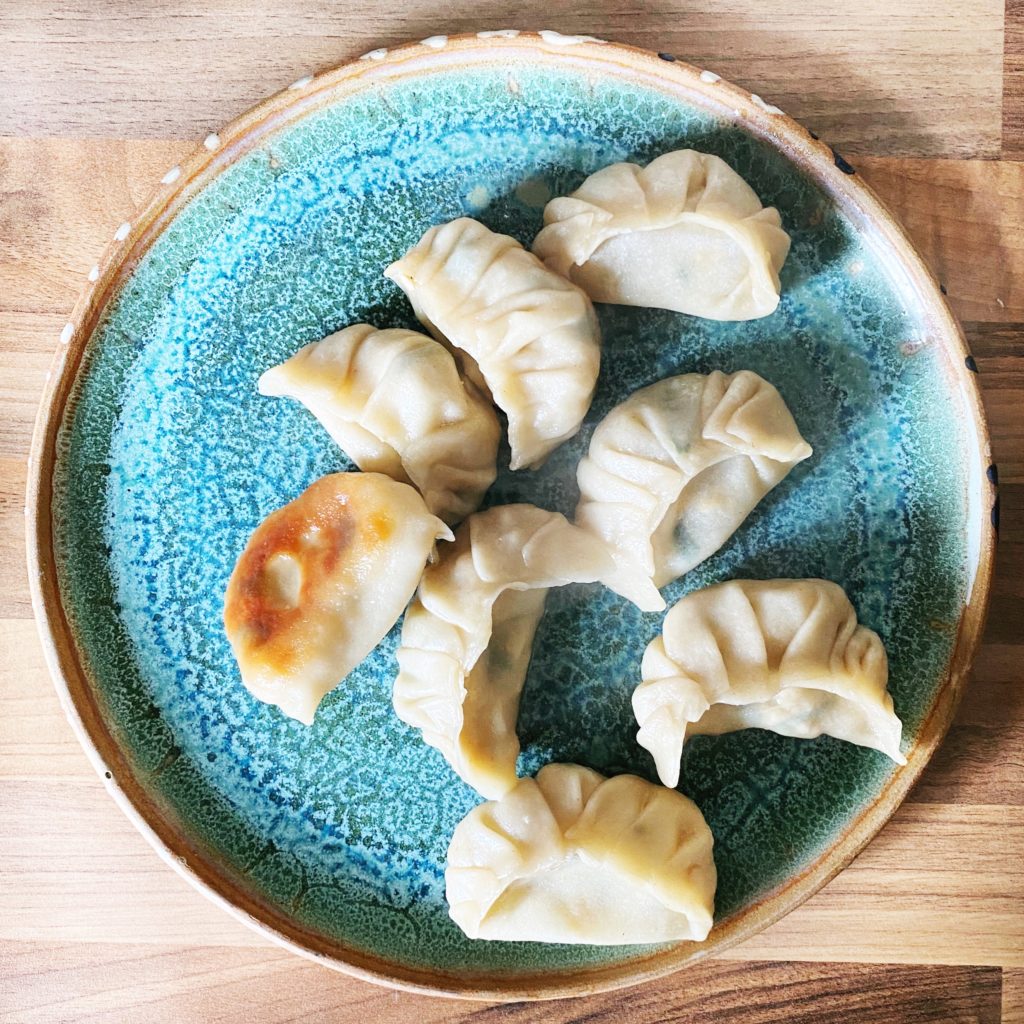
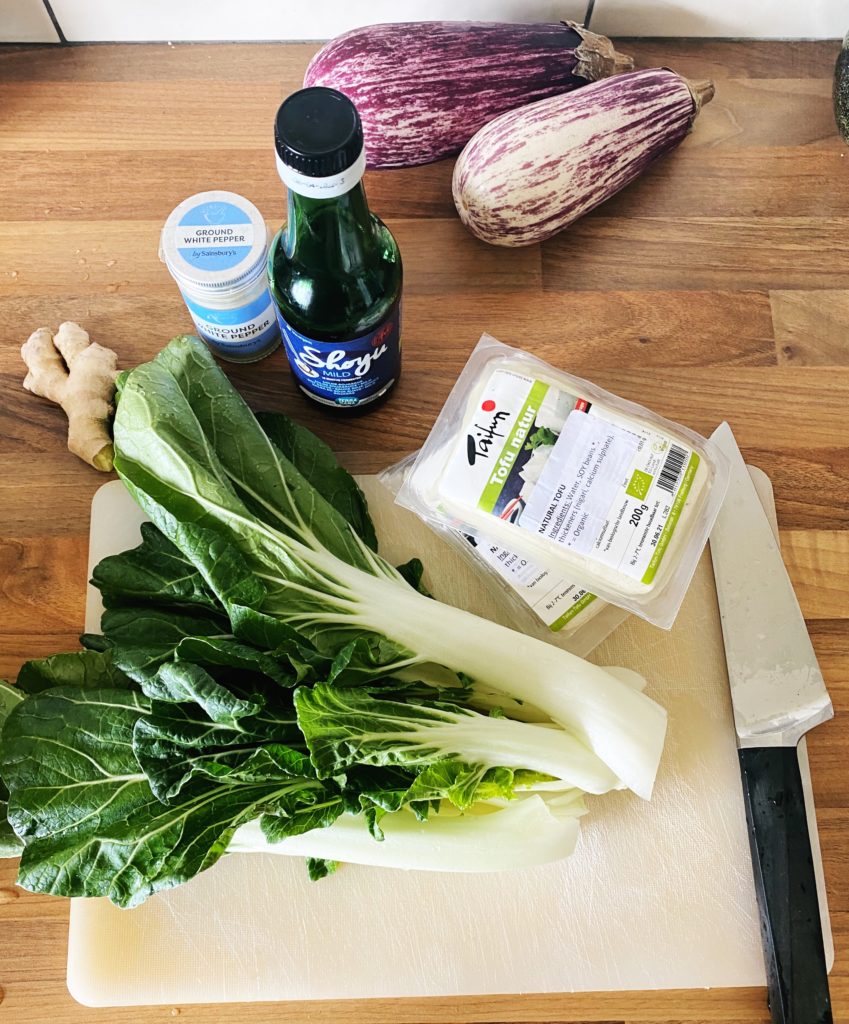
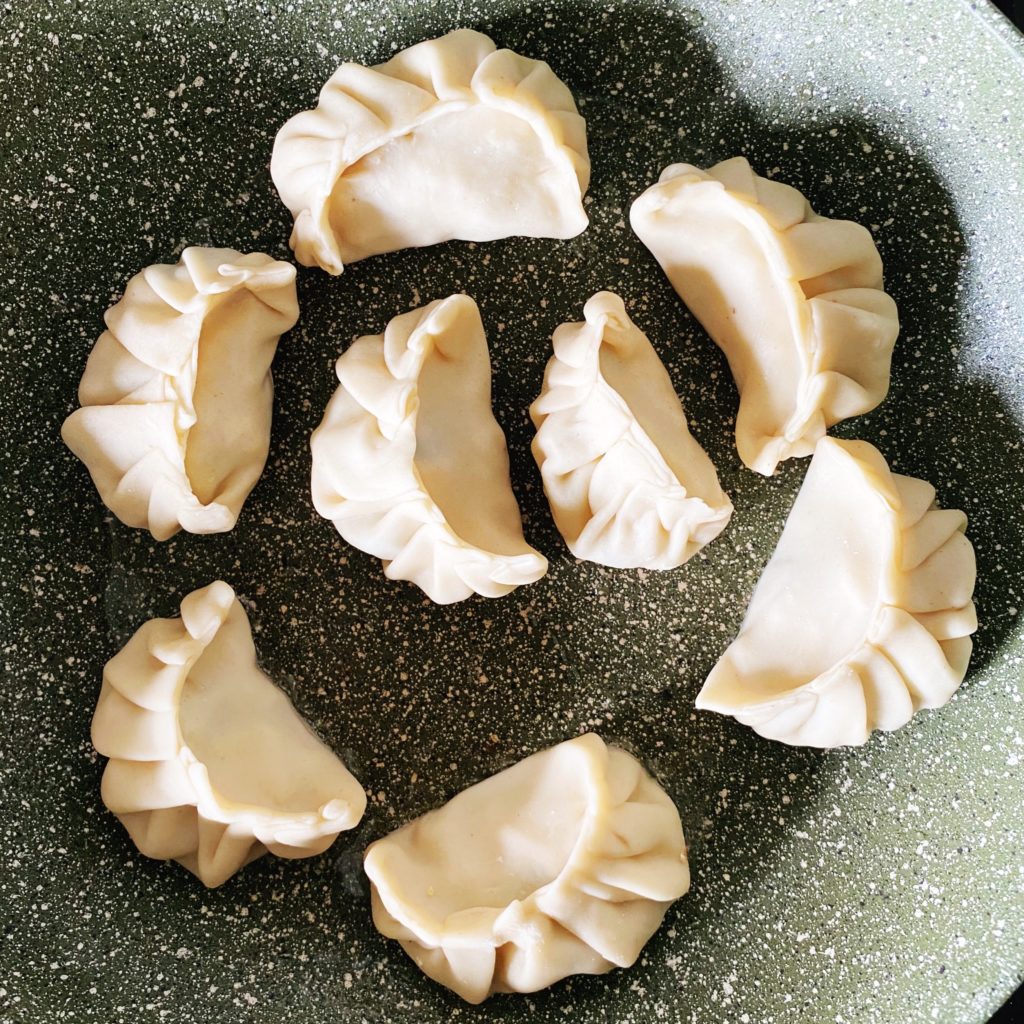
These dumplings are simpler to make than they look. Honestly! A basic dough made from flour, salt and water, an easy filling of sautéed pak choi and firm tofu and then a lot of fun rolling, filling and crimping. Put this recipe on your list of meditative kitchen moments.
I like them pot sticker style, where you fry the dumplings with a little veg oil until they have crisp, golden bottoms, then add some water and a lid and steam-fry them until they are juicy and tender. But you can pop them into a broth to simmer or even just steam them if you like. This kind of firm tofu filling is our favourite. If I have a jar of kimchi on the go, I just mix chopped kimchi, tofu, soy sauce and white pepper for an even easier filling with no need to pre-cook. Of course you can fill them with whatever you like. Just make sure the mix isn’t too wet.
Liz x
Ingredients (makes about 40 dumplings)
2 mugs of plain flour (strong flour works well too)
1 tsp salt
1/2 mug of freshly boiled water
1 pak choi
4 cloves of garlic – chopped
1 thumb of ginger – grated or finely chopped
3 tbsp soy sauce
3 tbsp toasted sesame oil
1/2 tsp white pepper
chilli flakes to taste
2 packs of extra firm tofu (400g total)
vegetable oil for frying
dipping sauces to serve – sweet chilli or a simple soy-sesame oil-lime juice mix?
Method
Start by making the dough as it needs time to rest before you start rolling.
Put the flour and salt into a bowl and stir in the boiling water.
Squish together into a firm dough with your hands, then move onto a clean work surface and knead well until the dough is smooth and stretchy. It should be quite firm too, not sticky.
Form the dough into a neat ball and put it back into the bowl. Then cover with a damp tea towel and leave to rest for 30 minutes while you make the filling.
Dice the stems of the pak choi and sauté in a frying pan with the sesame oil until softened.
Add the tofu to the pan. Scrunch it up with your hands into a small crumble. Then add the soy sauce, white pepper, garlic, ginger and chilli flakes. Stir and cook until well combined.
Shred the green leaves of the pak choi and add them to the pan. Stir fry for just a few more minutes until the leaves are wilted.
Transfer the filling to a bowl to cool down.
Cut the ball of dough into quarters, put 3 of the pieces back into the bowl and cover again with the damp tea towel so that they don’t dry out.
Roll the quarter of the dough you have out into a 2cm thick snake then chop it into 10 or so pieces.
Roll each piece into a ball the squash it down flat with the palm of your hand.
Then roll each piece into a thin circle, it needs to be just a couple of mm thick and as even and round a circle as possible.
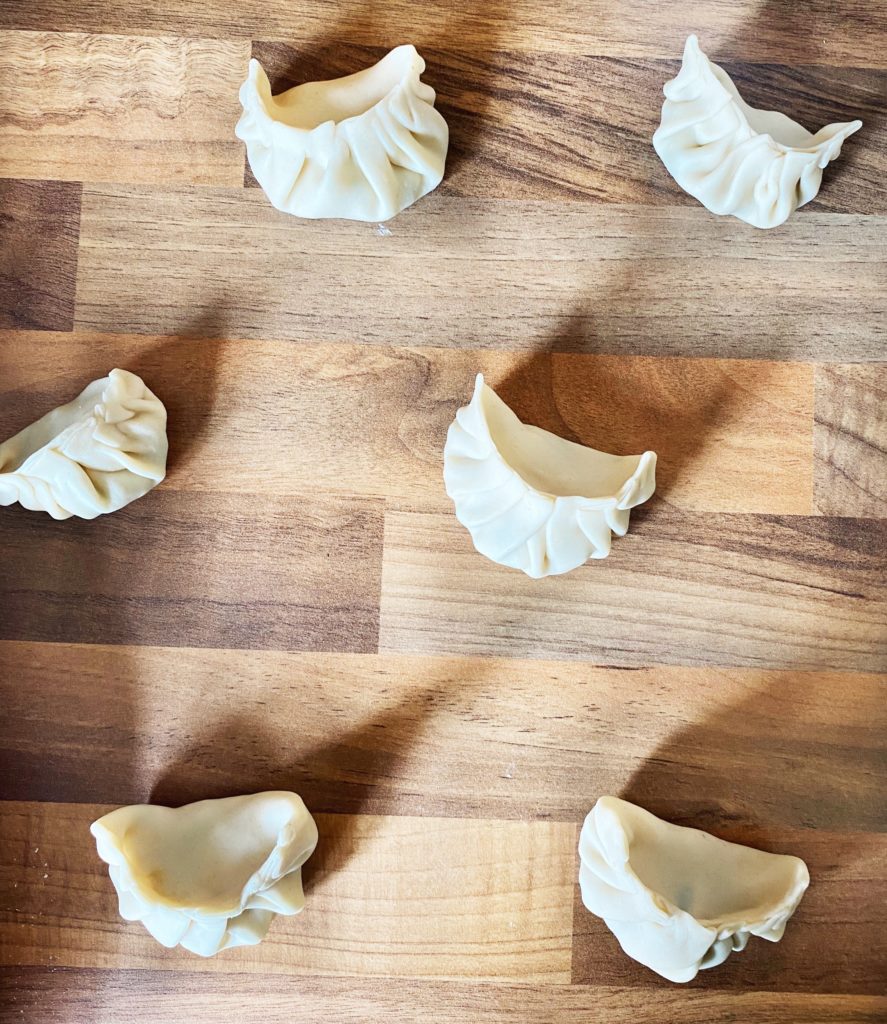
Then place a tbsp of filling in each circle and form the dumplings. There are loads of different techniques around. Have a watch of some youtube videos for inspiration.
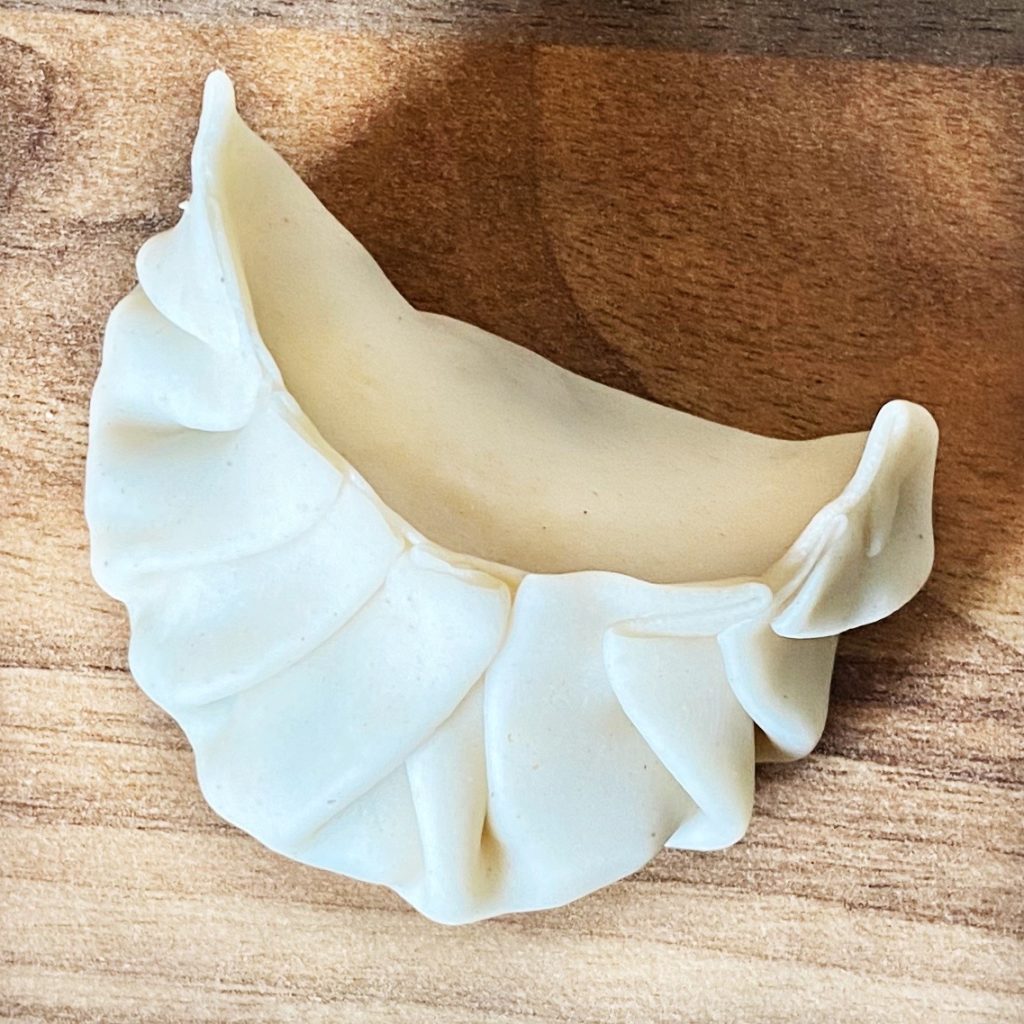
I like to place the circe and filling in the palm of my left hand, then using my right hand, fold the circle of dough over and pinch it at the top in the middle. Then pull and fold and crimp the right side towards the middle like in the photo below. Then transfer the dumpling to your right hand and do the same on the left side with your left hand.
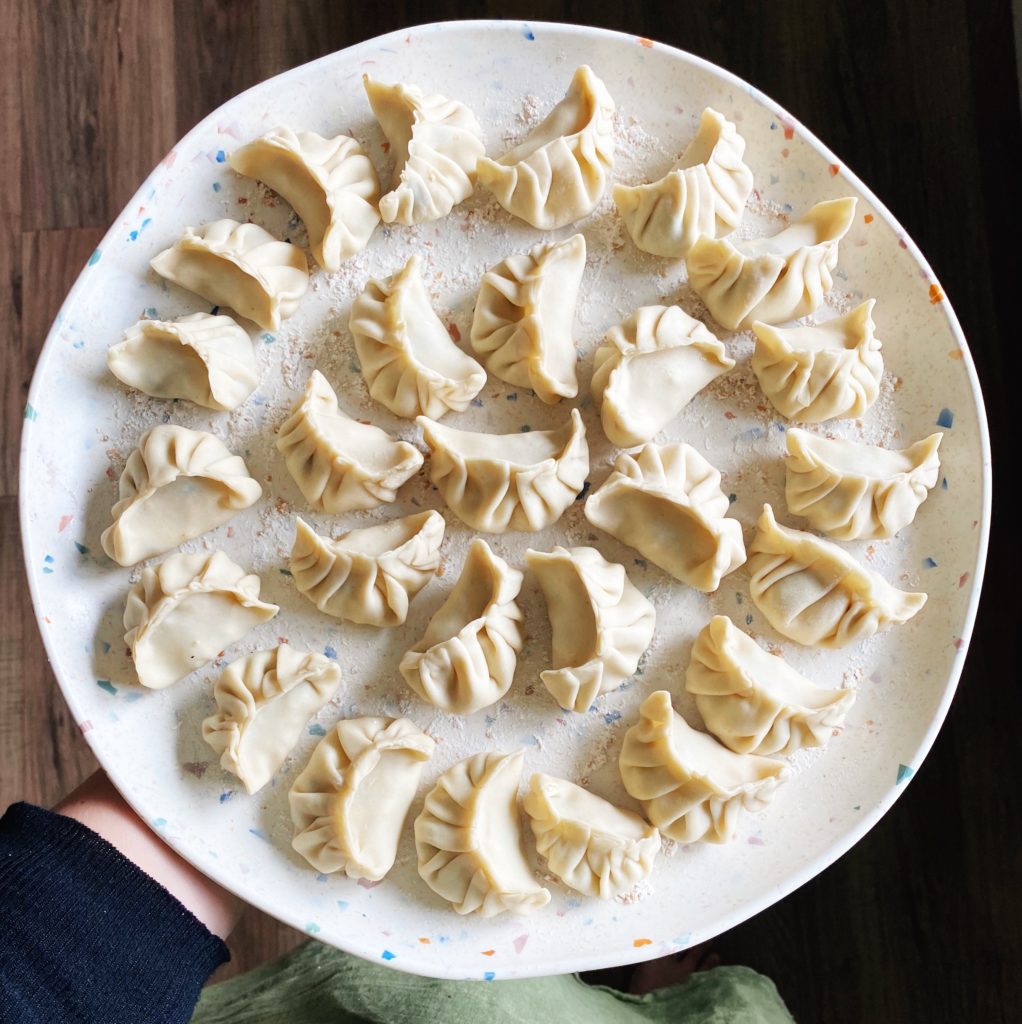
Once the dumpling is crimped and sealed, pinch firmly all along the seal to ensure it is secure. Then place it on a large tray that has been lightly floured (or lined with baking parchment).
Repeat with all the dough and filling. Ensure the dumplings are not touching each other as they will start to stick together if they do.
Then heat up a frying pan (one that has a lid) with a little vegetable oil to medium-high. Place as many dumplings, flat side down, into the pan that will fit. Allow them to cook until golden brown and crispy underneath.
Then quickly pour in a small glass of water – enough so that there is a cm of water in the pan – and pop the lid on so that the dumplings can steam and absorb most of the water.
Steam them with the lid on for 3 minutes then remove the lid and allow any excess water to evaporate. Then move the dumplings onto a plate to keep warm while you cook the rest in batches like this.
Serve with dipping sauces alongside steamed greens and other veggies, or with a stir fry, noodles, rice, miso soup, kimchi… anything like that. Enjoy!
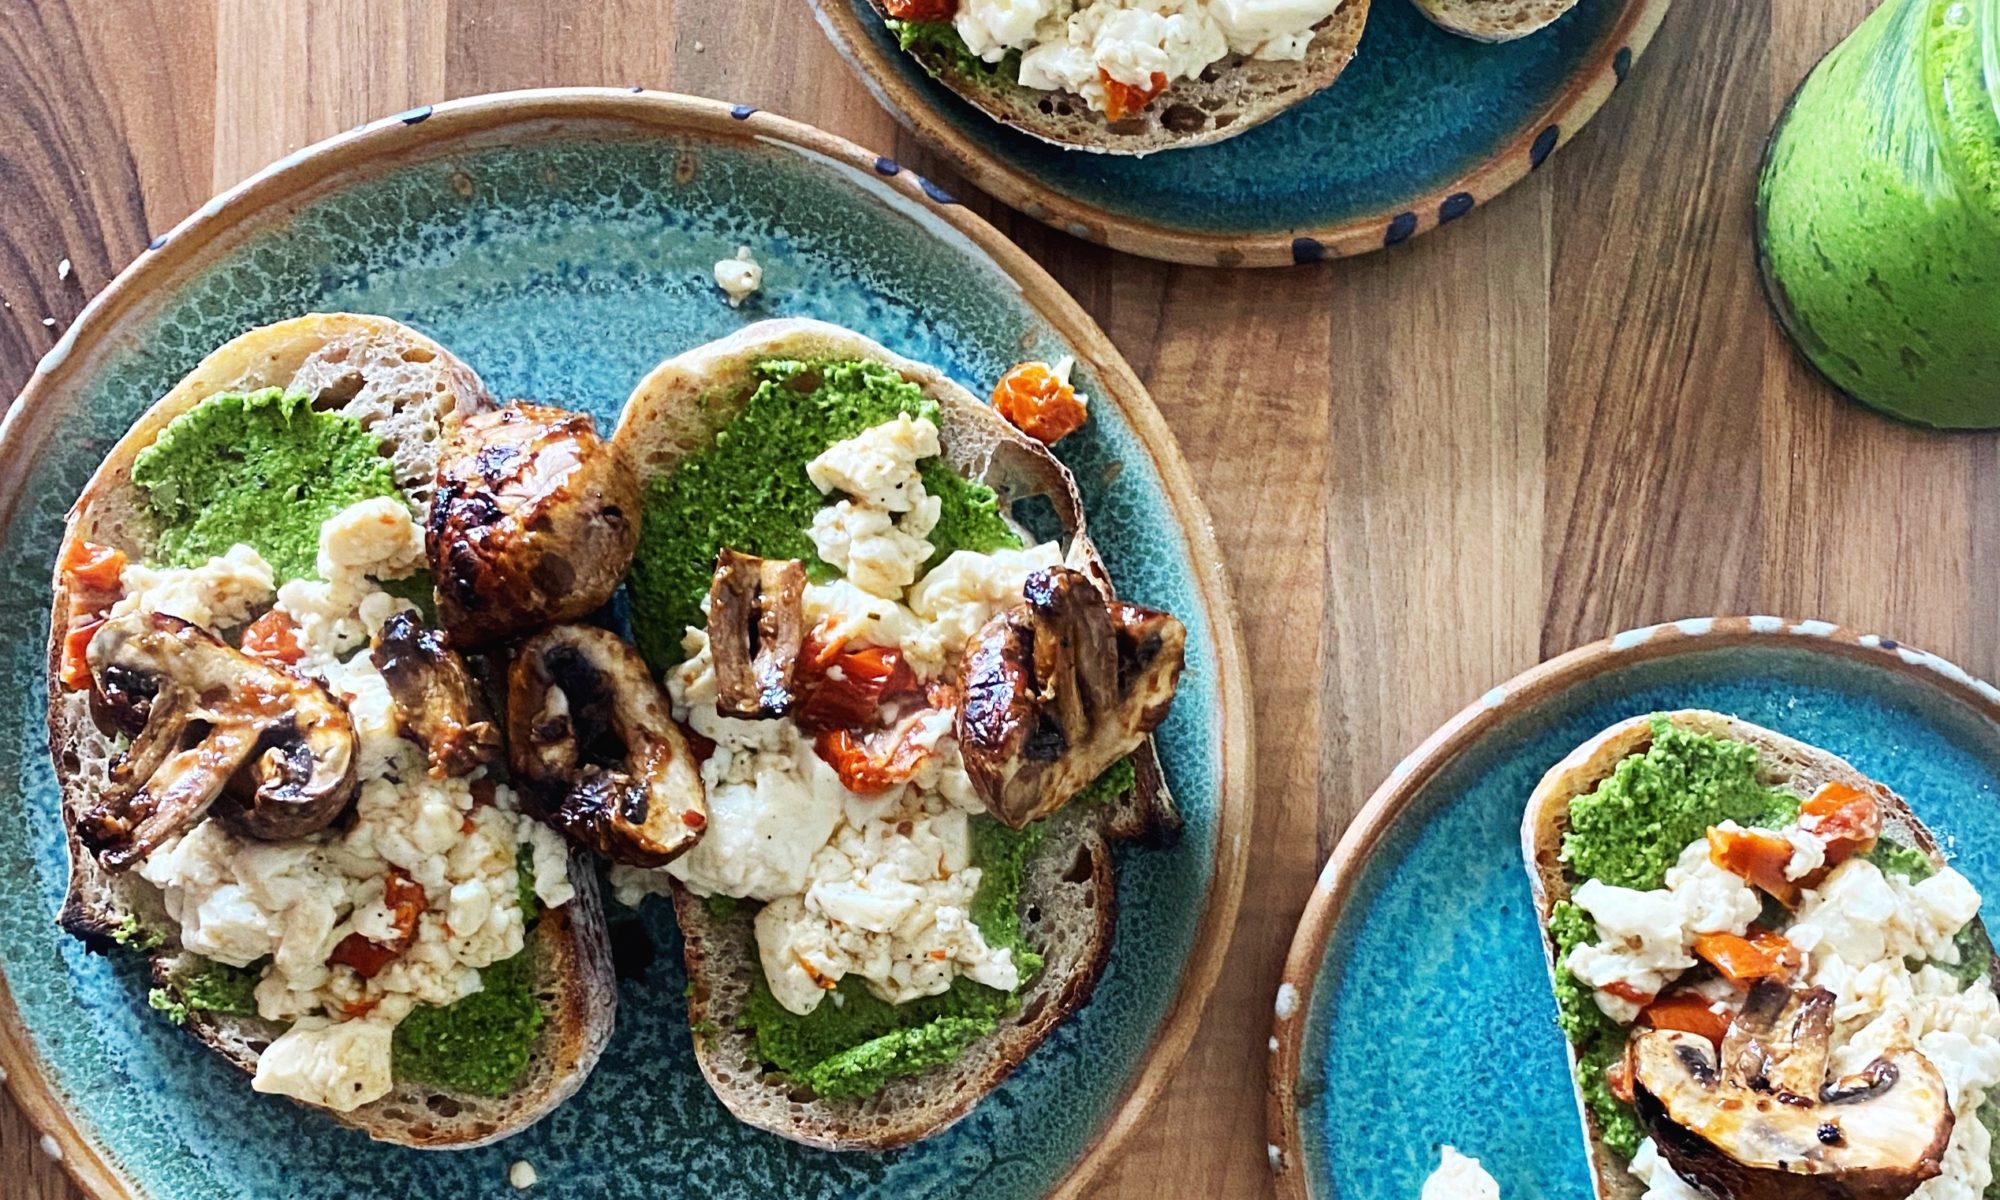
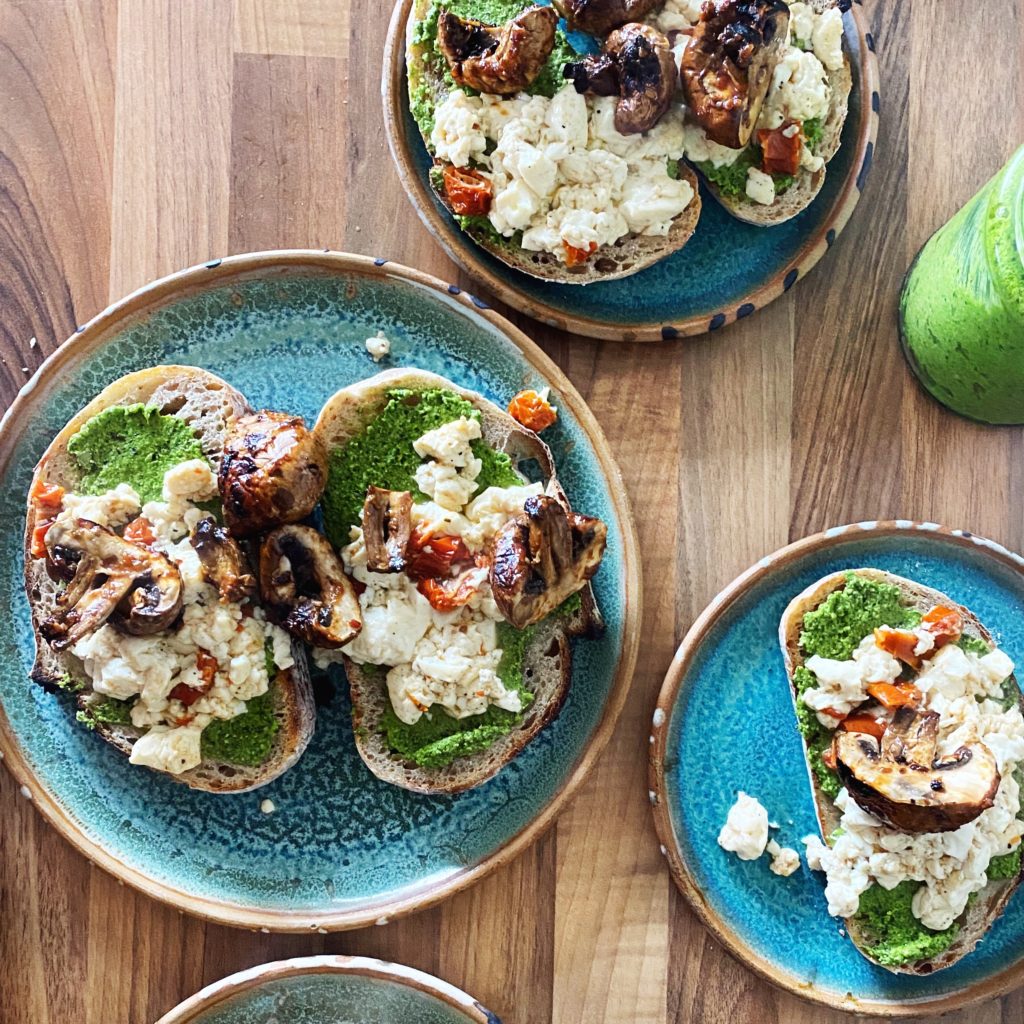
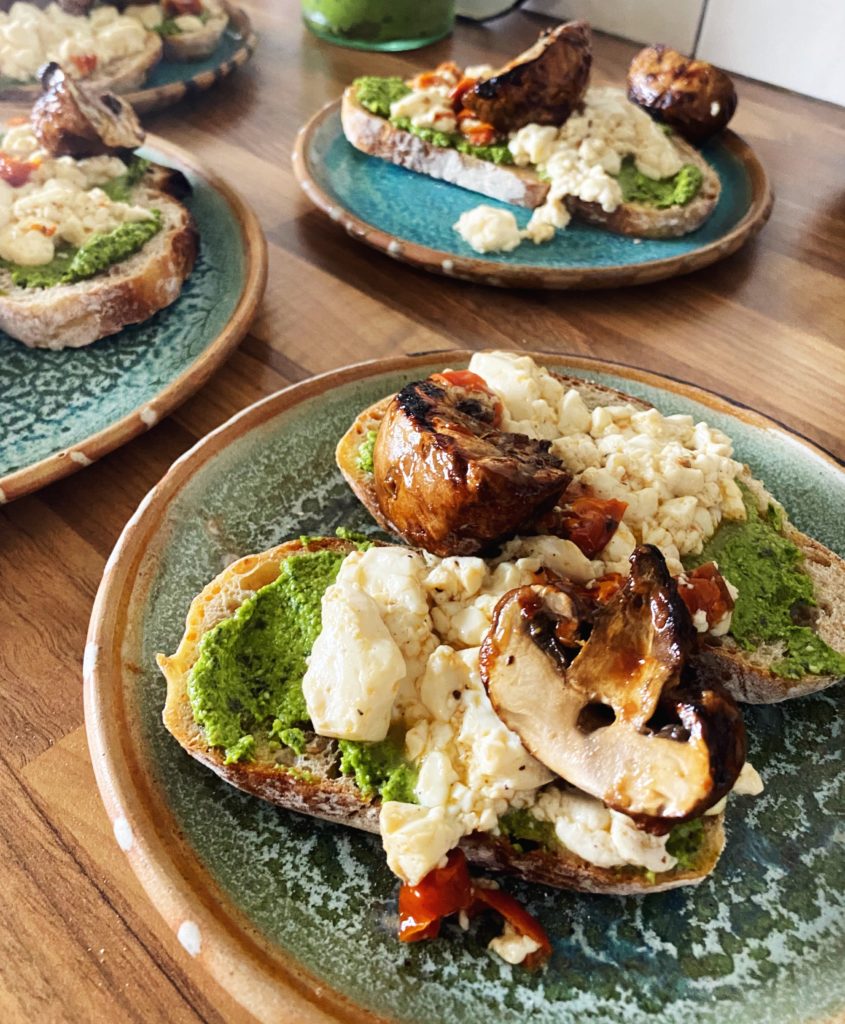
Weekends are for brunching and here is one of our favourites. The combination of fresh, vibrant green pesto, soft, wobbly scrambled tofu and juicy, umami mushrooms is just perfect!
You can make your own pesto very easily if you have a food processor or blender – I used my kale and pumpkin seed pesto that I’m making on repeat this time – or you can of course use a ready made one for ease. We sell a few organic jars of pesto in the grocery section of our shop. The scramble is simply a gently sautéed pack of organic silken tofu seasoned with salt, pepper and some chopped sun-dried tomatoes. And those gorgeous, meaty mushrooms are marinated with our new packs of umami paste then grilled.
What’s your favourite brunch? Are you a sweet or savoury person? Let us know in the comments.
Cut bread and pop it in the toaster ready to go. Heat up a griddle pan (or fire up the grill in your oven).
Slice the mushrooms in half and mix them with the umami paste and a drizzle of olive oil in a bowl. Then push them onto skewers and place them in a hot griddle pan (or on a tray under your grill) to cook whilst you get on with the scramble.
Heat up a knob of butter (or tbsp of olive oil) in a medium-high heated frying pan. Open your pack of silken tofu, drain off any excess liquid and then pop it in the pan. Break it up gently with a wooden spoon or a spatular.
Season the scrambling tofu with salt and pepper and then add the chopped sun-dried tomatoes. Keep the scramble moving and cook it for 5 minutes or so until it’s warmed through, but don’t break it up too much. It’s nice when there are still some larger pieces.
Meanwhile turn the mushrooms in the grill to cook the other side and then toast the bread.
Spread the toast with a thick layer of pesto, then divide the scramble and mushrooms between the plates.
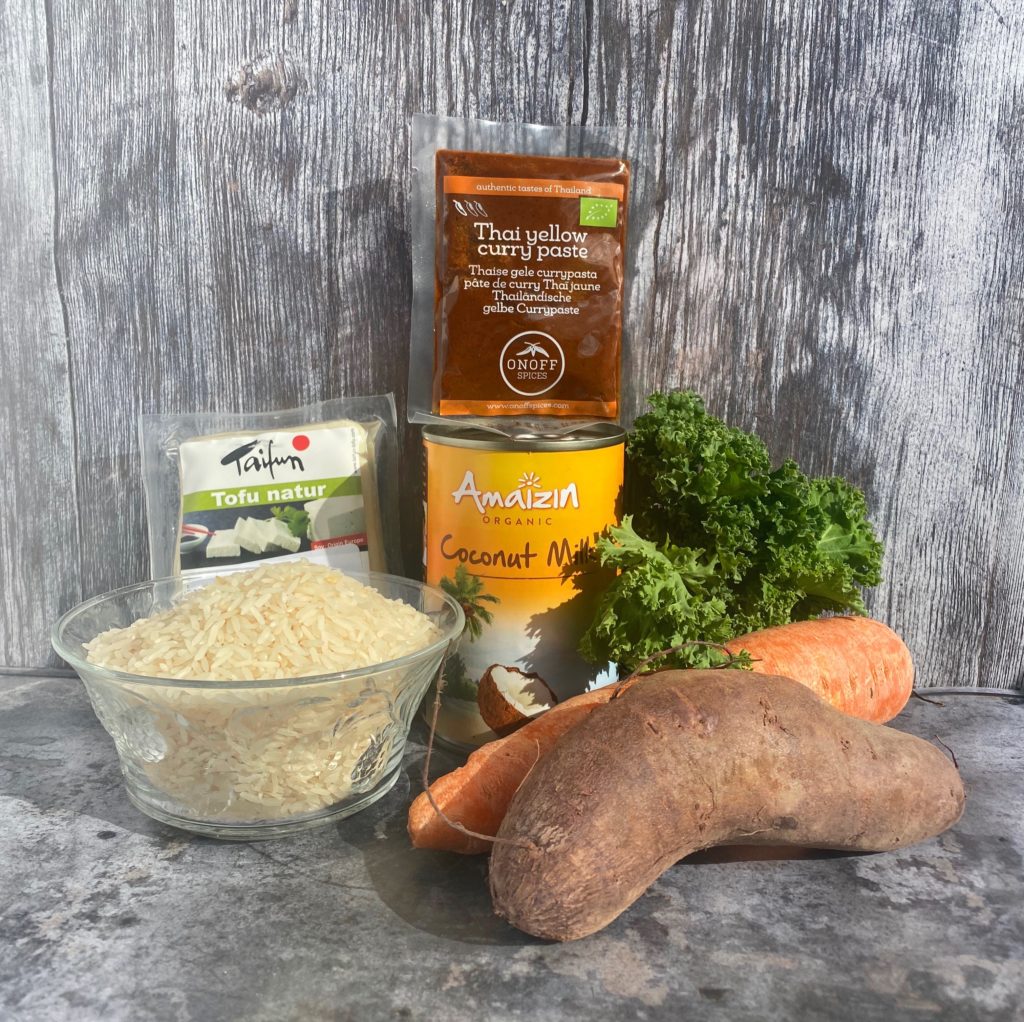
Being a chef, I do mostly make everything we eat from scratch, but Thai curry paste from scratch involves buying lots of specialist ingredients. Our organic sachets contain no nasty preservatives, have authentic, top quality ingredients and make life simple and delicious!
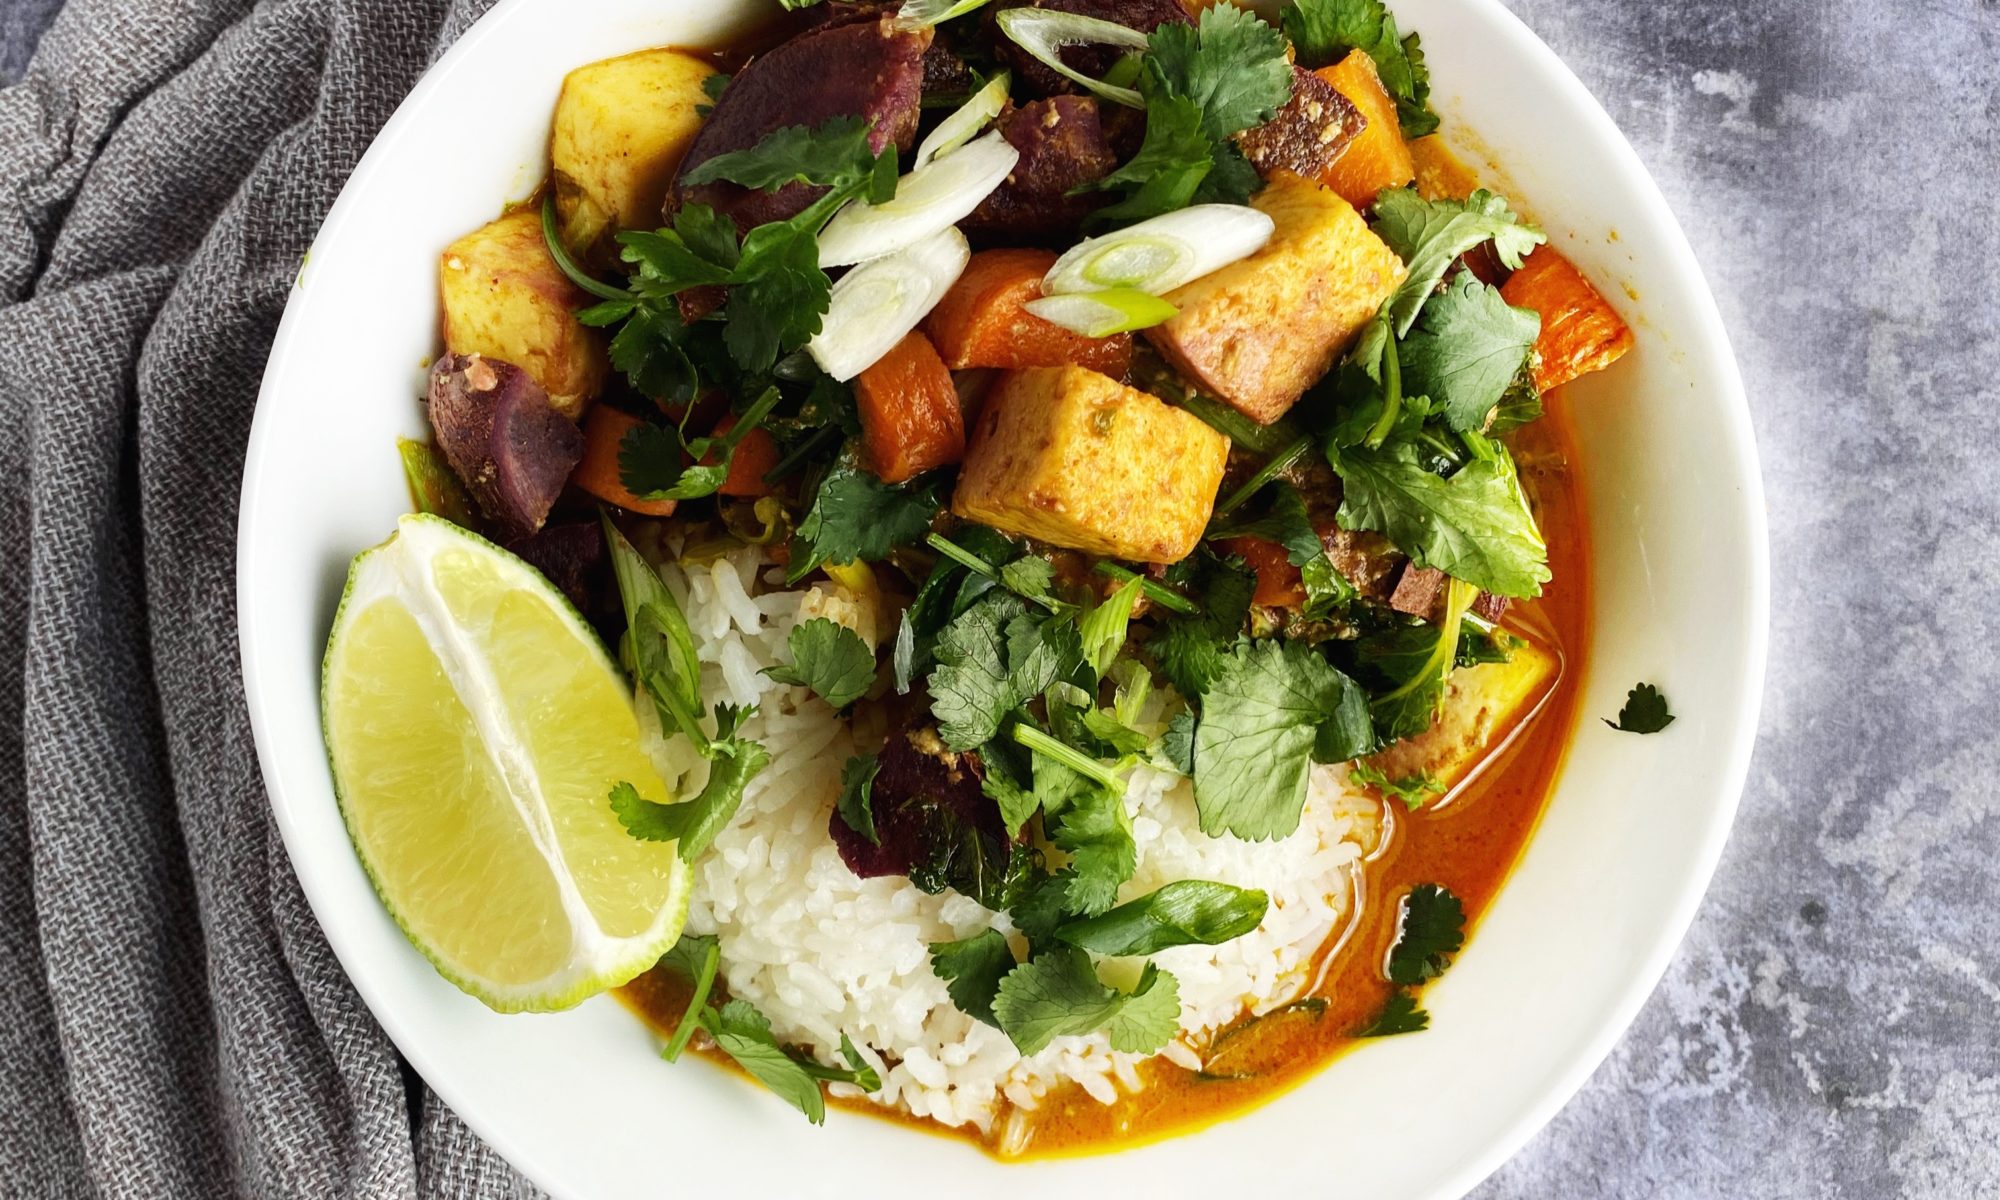
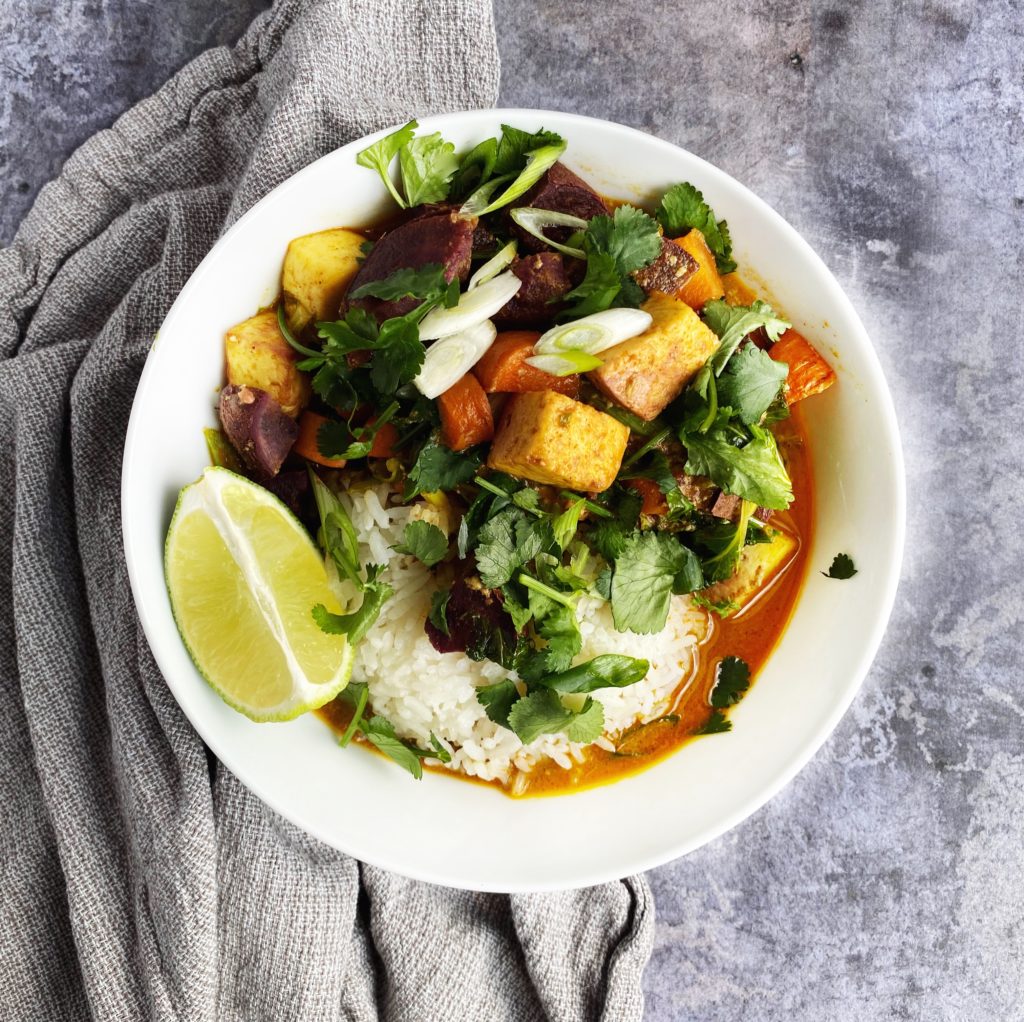
This is one of our most-made fakeaways at home. Thai yellow curry paste is absolutely delicious, quite mild so the kids love it, but absolutely packed with complex flavour. Simply simmer a sachet with a can of coconut milk, add some cooked veg and you’re good to hunker down with a steaming, vibrant bowl of Thai food. This quick method is so flexible, chuck whatever veg you have handy into the roasting dish with some firm tofu – cubed butternut squash, sweet potato, carrots, aubergine, peppers etc… and simmer any tender green veg with the sauce – asparagus, kale, spinach… I love it with fragrant jasmine rice or quickly boiled wide, flat rice noodles.
Let me know if you try any of our organic, ready made sauces and what your best recipes are with them. I’m working my way through them all to give you some fuss-free fakeaway ideas for those days we really can’t be bothered to cook from scratch.
optional toppings – fresh coriander, lime wedges, chopped scallions, toasted cashews or sesame seeds, salted peanuts, sliced red chilli…
Watch how I put the meal together here or read the method below.
Method
Preheat your oven to 200C. Cube up your tofu, carrots and sweet potato and add them to a roasting dish. Of course you should feel free to use alternative vegetables.
Drizzle the veg with a little oil and season simply with a big pinch of salt. Toss the vegetables with the oil and salt and put them in the hot oven to roast for around 20 minutes or until tender.
Meanwhile make the curry sauce. It’s as easy as emptying the contents of the sachet into a pot with the contents of the can of coconut milk. Turn the heat on and allow the ingredients to mingle and simmer.
Then put on your jasmine rice. For two people I measure out an espresso mug of rice into a fine sieve then give the rice a good rinse. Then tip the rinsed rice into a small pot with 2 scant espresso mugs of water. Put the lid on the pot and put it on the hob on the highest setting. As soon as the rice comes to the boil, turn the heat to the lowest setting and leave it to absorb all the water. Do not stir the rice or remove the lid. This whole process should take about 15 minutes for white jasmine rice – brown rice takes considerably longer.
While the rice is cooking and the veg is roasting, turn your attention back to the pot of curry sauce. You can add tender, fast cooking greens to the pot just before the veg is ready to come out of the oven. I used kale this time. Strip the leaves from the tough stems and slice the stems very thinly. Add them to the pot of simmering sauce to soften well before you add the leaves. Add the leaves 3 minutes before you take the veg out of the oven.
Once the roasted vegetables and tofu are cooked through, take them out of the oven and scrape them into the pot of curry sauce and kale and stir to combine. Taste for seasoning. You may wish to add some lime juice or salt.
Serve the curry and rice in bowl and top with chopped coriander, spring onions, chilli and lime wedges. Additionally add toasted cashews or salted peanuts for some welcome crunch. Enjoy!
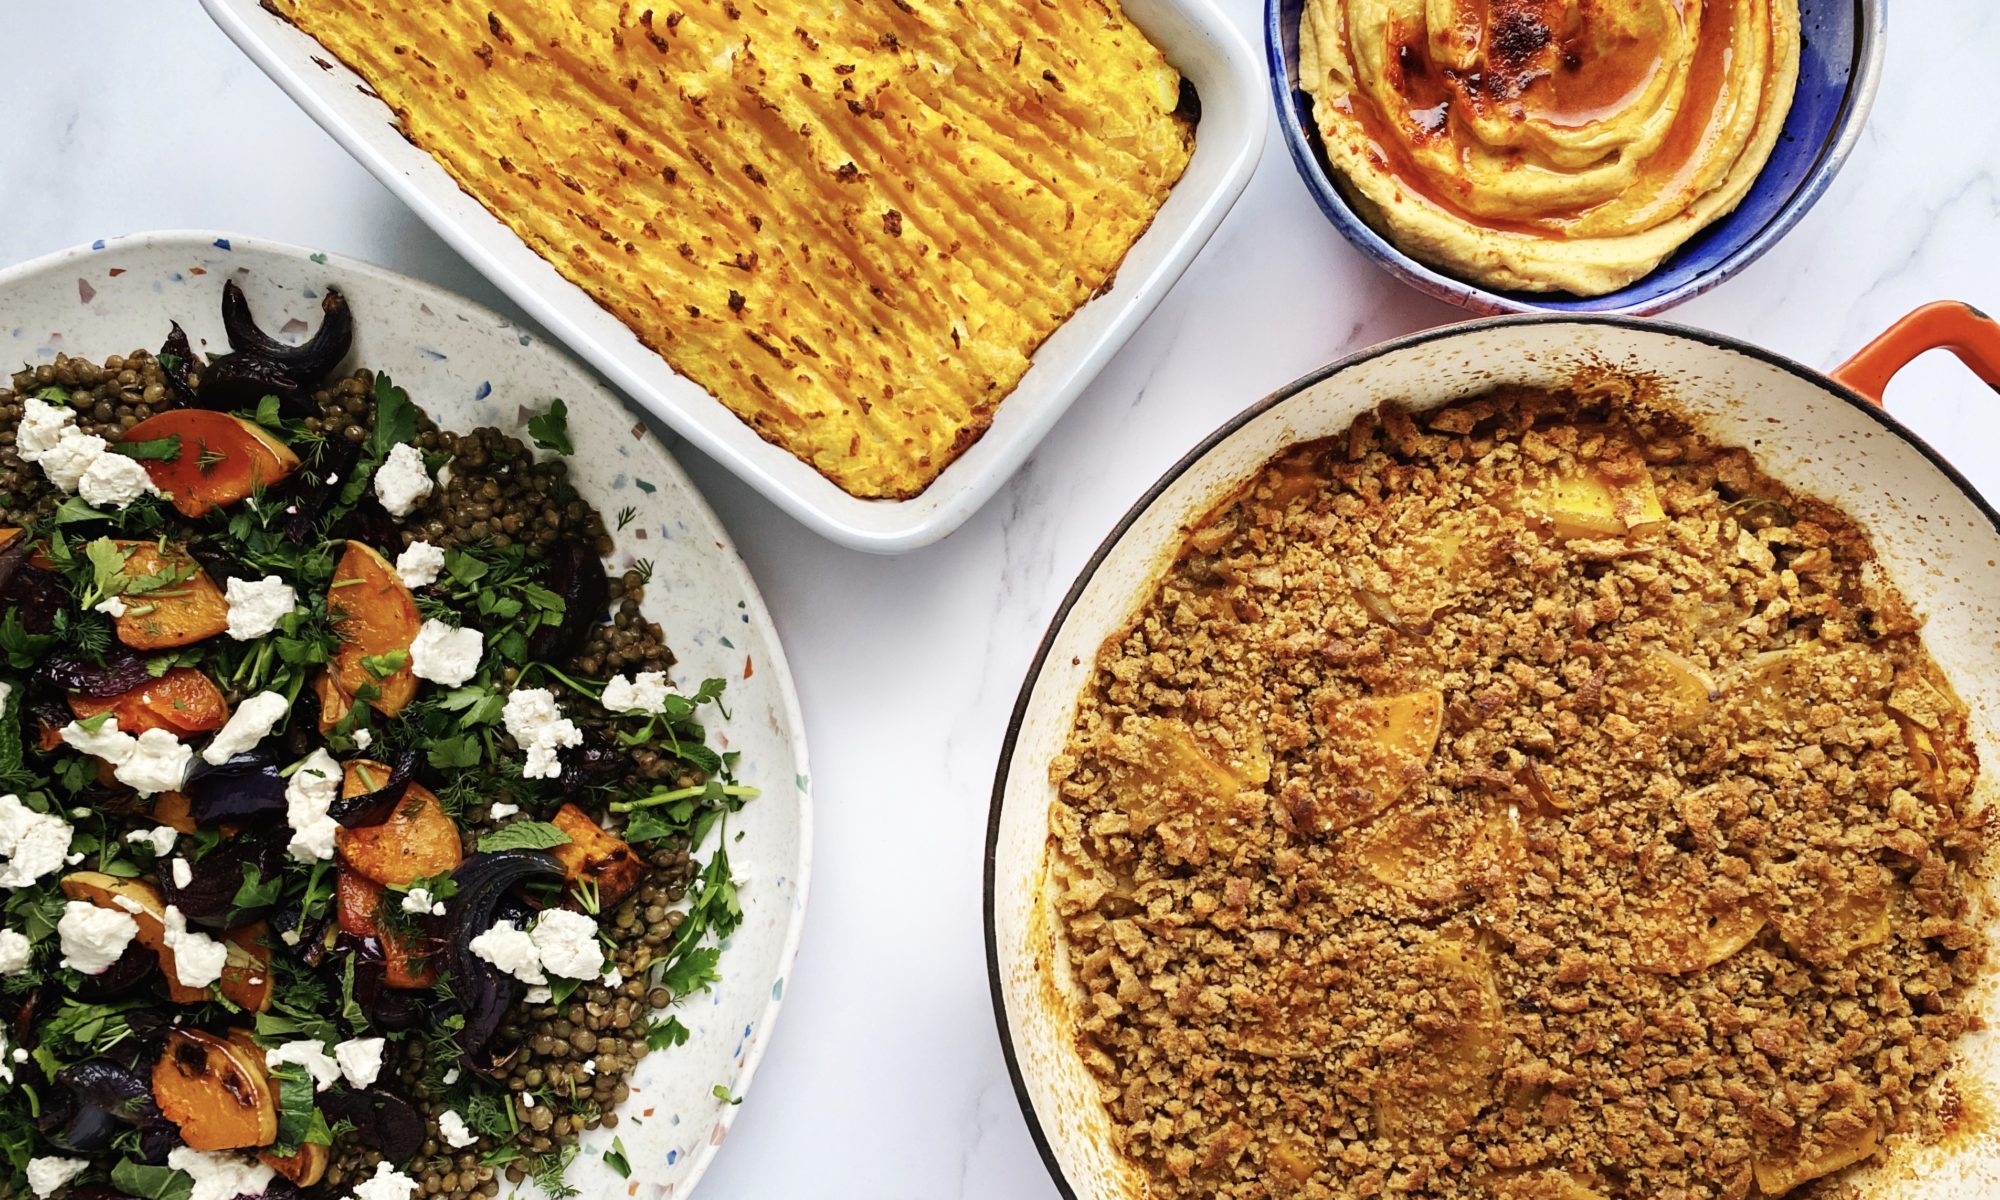
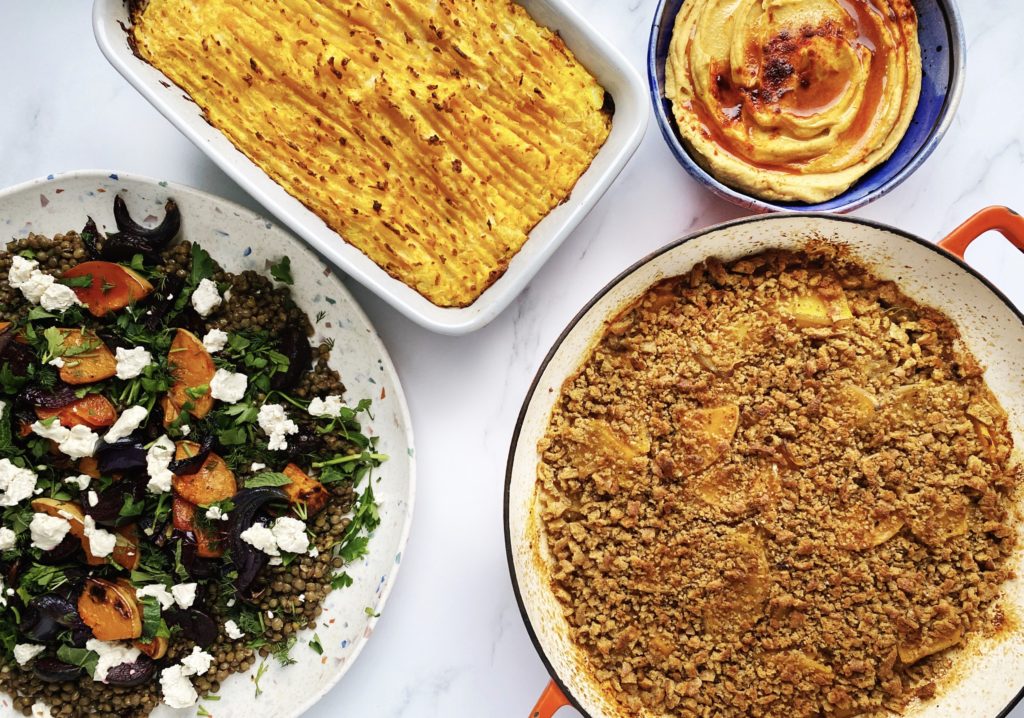
Butternut squashes are the most common squash that we deliver on repeat at Green Earth Organics and it’s no wonder. Organic vegetables just taste better! If you’ve ever been disappointed by a bland, watery supermarket squash, we urge you to try one of ours. These vibrant veggies are sweet and nutty and their fabulous flavour is more than matched by their incredible nutritional profile. Butternut squash is a great source of fibre, vitamins and minerals including A, B, C, E, calcium, magnesium and zinc.
Here are just 4 ways I cook a butternut squash regularly. Let us know your favourite butternut recipes in the comments or over on our friendly facebook group. We love to see what you’ve been making with our vegetables.
Head to our shop here to sign up for a veg box subscription or order from our wide selection of organic fruit, veg and groceries.
Liz x
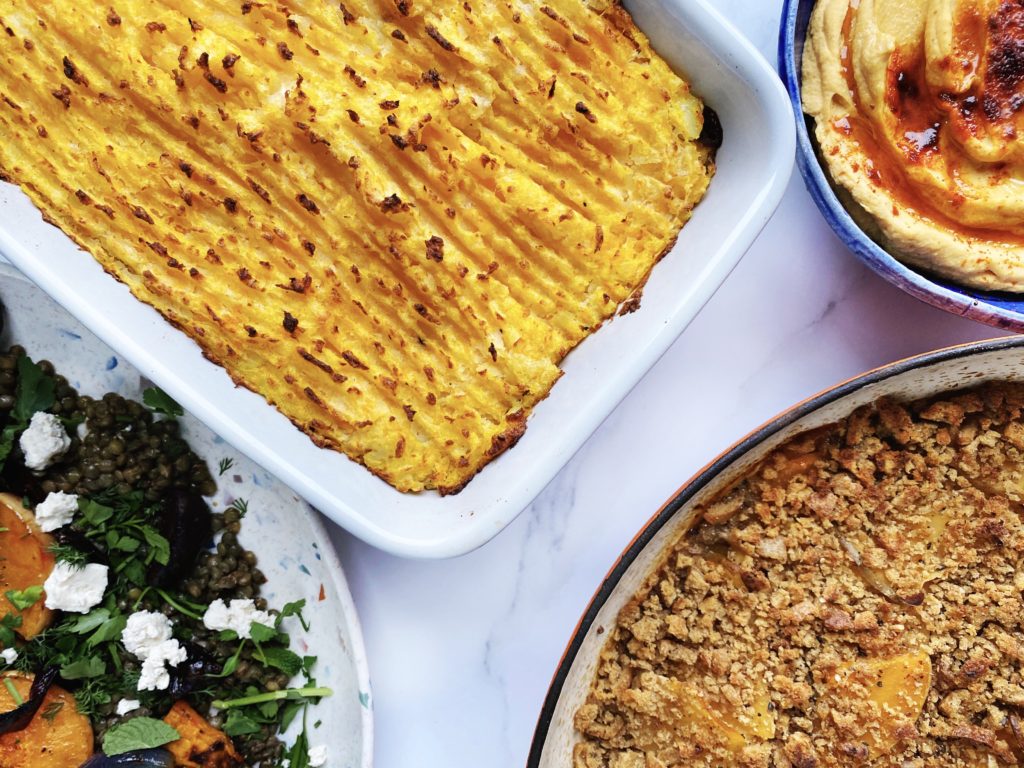
Lentil Pie with Squash Mash
Ingredients (serves 4)
1 onion, diced
3 cloves of garlic, crushed
10 diced mushrooms or two grated carrots or beetroots (use any base veg that is in season or a combination of veg that you like, diced or grated)
2 sticks of celery, diced
2 tbsp olive oil
1 vegetable stock cube or a big pinch of dried, crumbled mushrooms
1 mug of green/brown lentils (or two tins of cooked lentils, drained)
1/4 to 1/2 a butternut squash (or about 400g if you want to weigh it), peeled
a similar amount of potato as the squash, around 400g
salt, pepper and olive oil or butter for the mash – to taste
Method
Sauté the onion, garlic in a little olive oil over a medium-high heat until starting to soften and take on some colour.
Add the diced mushrooms/carrot/beetroot and celery and a big pinch of salt and sauté for a bout 5-10 minutes until they have cooked down a little.
If you are using raw lentils, add them now and the stock cub or dried, crumbled mushrooms and herbs if using. Cover with water and simmer and stir until the lentils are cooked through. Keep tasting and adding more liquid if needed.
If you are using pre-cooked lentils from a tin, add the stock/dried mushrooms/herbs and a mug of water and simmer the vegetables in that for 5 minutes first, then add the drained lentils to the pot and a touch more water if needed to make a nice (not too dry, not too wet) base for your pie.
Taste and adjust the seasoning if needed with salt and pepper. Pour the lentil pie mixture into a baking dish and preheat your oven to 200C.
Meanwhile peel, chop and boil the potato and squash together until soft. Drain and mash with salt, pepper and a little oil or butter. Taste for seasoning.
Top the lentil base with your sunny, butternut mash. Rough it up a little with a fork and drizzle with olive oil.
Bake for 20-30 minutes or until hot, bubbling and crisp and golden on top. Enjoy with seasonal greens.
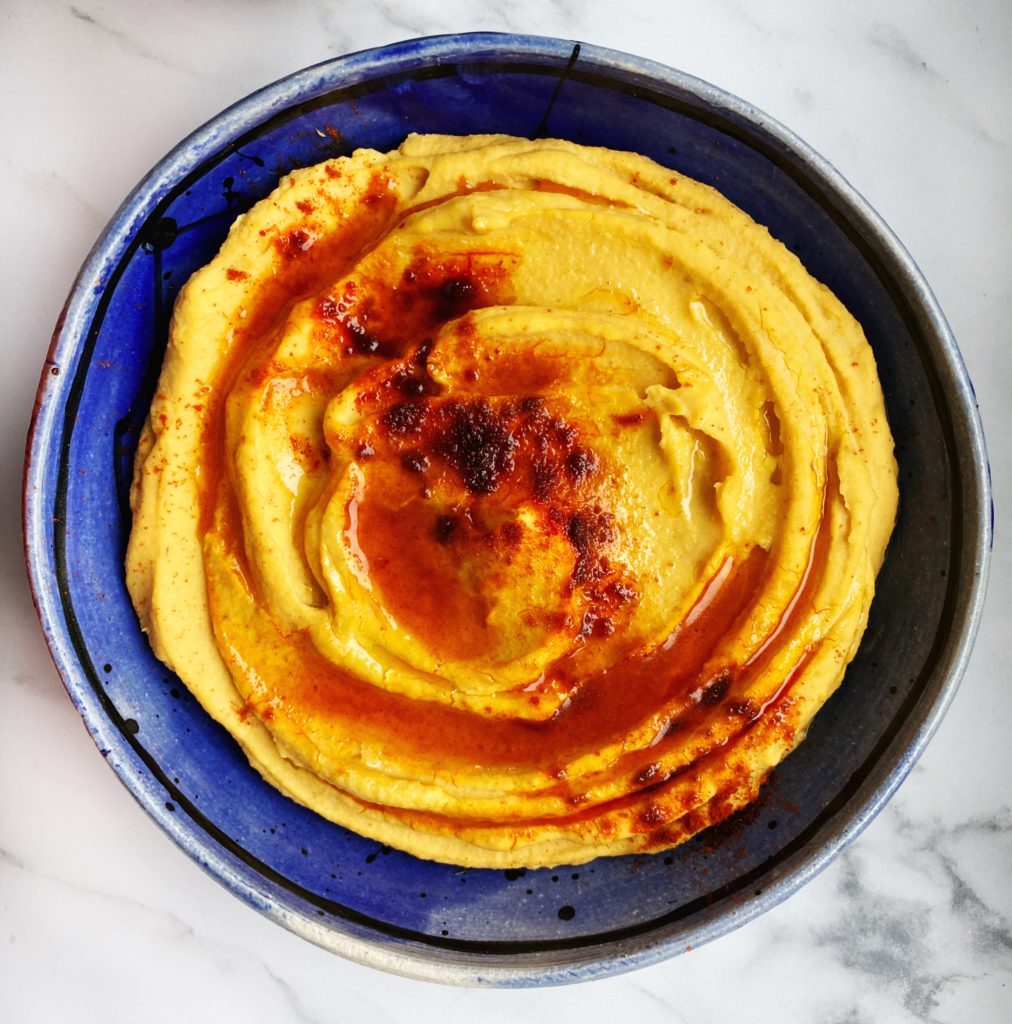
Butternut Squash Hummus
Ingredients (makes about 600g of hummus)
1 tin of chickpeas, drained over a jug to reserve the aquafaba
1 heaped tbsp tahini
1 clove of garlic, crushed
1/4 of a preserved lemon or the juice of 1 lemon
salt to taste
1/4 of a butternut squash (about 400g or so)
1 tsp cumin seeds
1 tsp smoked paprika and olive oil to drizzle
Method
Roast the butternut squash with a drizzle of olive oil, a tsp of cumin seeds and a pinch of salt until soft. This could take 20-3- minutes at 200C depending on the exact size of your squash, just keep an eye on it.
Place the drained chickpeas, preserved lemon, crushed garlic, tahini and cooked butternut into a food processor. If you are using lemon juice, start with the juice of half the lemon and see how you go.
Add a splash of aquafaba and a pinch of salt and blend into a smooth paste.
Taste and adjust the seasoning as you like with more lemon, salt, tahini, garlic as you prefer. If you like a lighter, fluffier hummus, add an extra splash of the aquafaba or some cold water and blend again.
Serve drizzled with extra virgin olive oil and a sprinkle of smoked paprika.
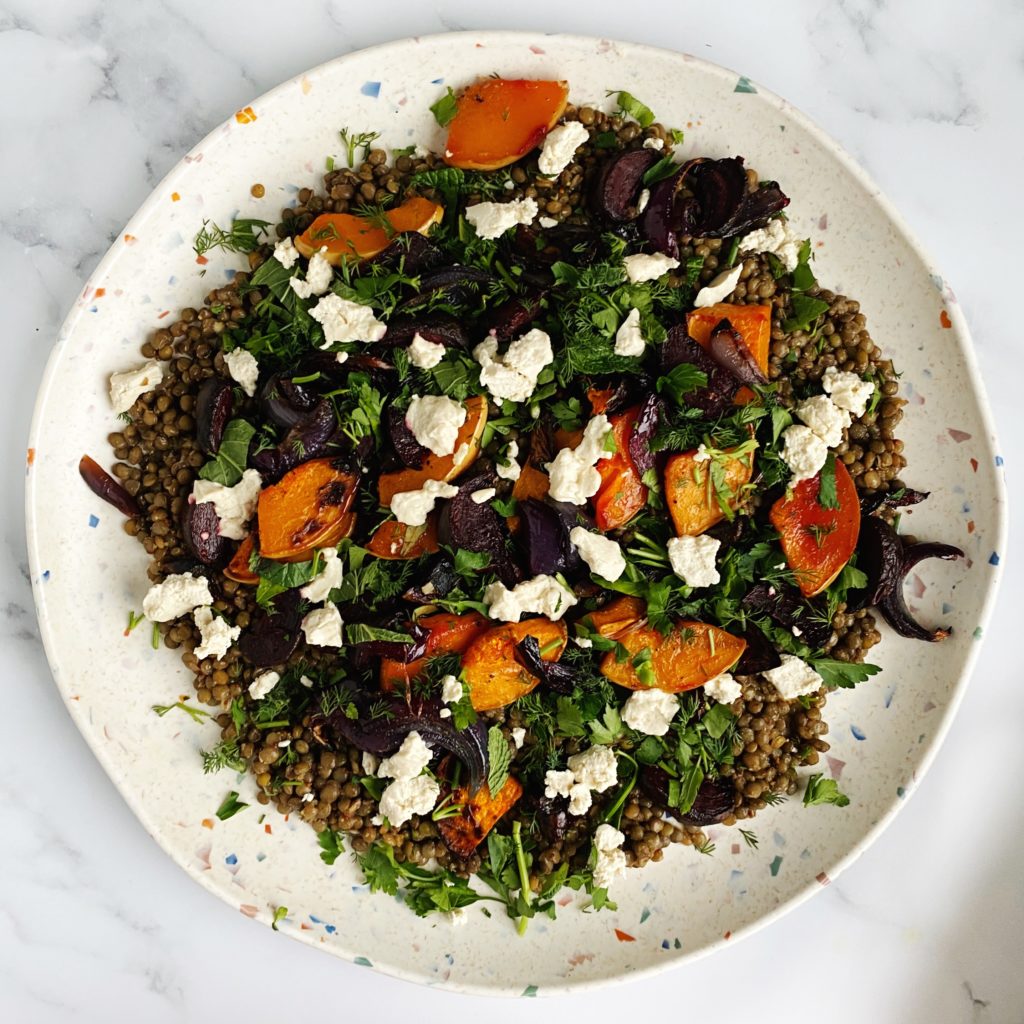
Butternut, Beetroot & Tofeta, Lentil Salad
Ingredients (serves 4-6)
1/4 of a butternut squash
2 beetroots
1 red onion
olive oil, salt and pepper to taste to season the above
1 mug of lentils boiled in 2-3 mugs of vegetable stock or water (or 2 drained cans of pre-cooked lentils)
dressing – 1 crushed clove of garlic, 1 tbsp wholegrain mustard, 1 tsp maple syrup, 2 tbsp apple cider vinegar, 3 tbsp extra virgin olive oil, pinch of salt
3 handfuls of chopped fresh herbs (dill, parsley and mint?)
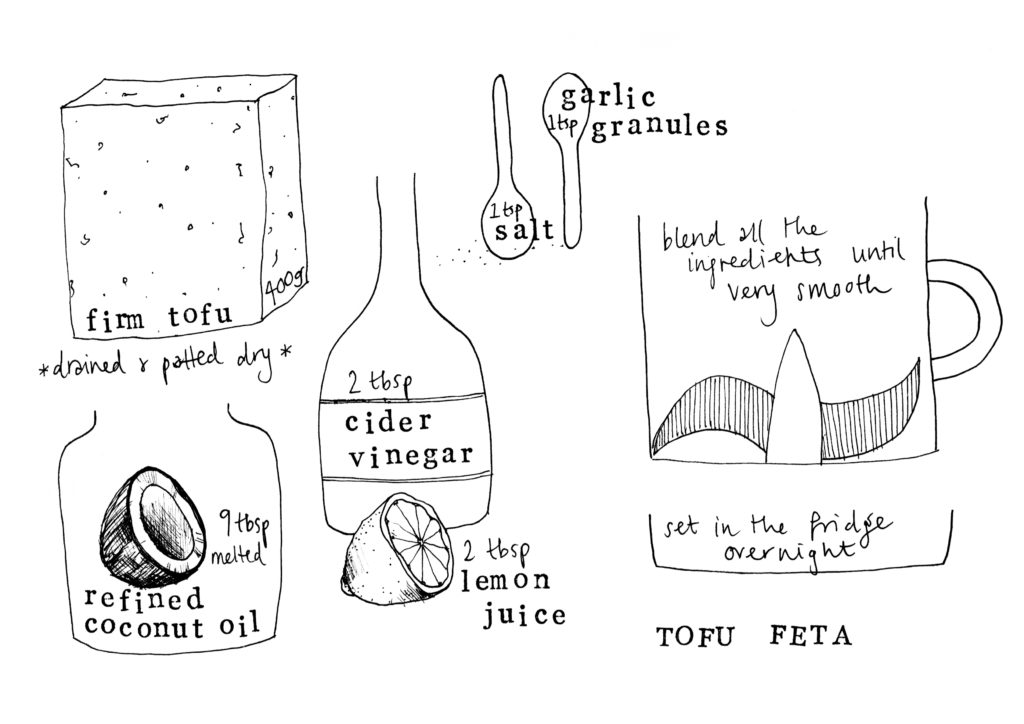
This dish is really special with the addition of my tofeta. You can find the easy recipe illustration in this bog post here or in my book which is available to add to your order here. Otherwise use whichever cheese you prefer or replace the feta with toasted nuts or seeds.
Pre-heat the oven to 200C and find a large baking dish.
Boil green lentils in stock or water until cooked through. Drain off any excess liquid and leave to cool while your prepare the vegetables, herbs and dressing.
Chop the squash, beetroots and red onion into slim wedges, season them with salt, pepper and olive oil, then roast them until they are soft and slightly charred.
Mix up the dressing ingredients and stir it through the cooked lentils.
Chop the fresh herbs then arrange the salad into a large salad bowl or platter.
Put the dressed lentils on the base, spoon over the roasted vegetables, scatter over the fresh herbs and crumble the tortes on top.
Enjoy warm or cold. This keeps well in the fridge for no more than three days. Keep the tofeta seperately and it will last longer.
Butternut & Swede Gratin
Ingredients (serves 4)
1/2 a butternut squash
1 small swede or half a large one
2 crush cloves of garlic
a small handful of wintery herbs like thyme/rosemary/sage
salt and pepper
olive oil
oat milk
4 or 5 handfuls of breadcrumbs (add chopped herbs and nutritional yeast to your breadcrumbs to make them more flavoursome – or replace the bread crumbs with crushed nuts/seeds)
Method
Pre-heat the oven to 200C.
Thinly slice the butternut and swede and mix them together in a large, lidded baking dish with the crushed garlic, a generous drizzle of olive oil and salt and pepper to your taste.
Pour in enough oat milk (or use cream for a richer gratin) to cover about a cm of the base.
Put the lid on the dish and bake until the vegetables are soft all the way through. This should take about 30-40 minutes.
Remove the lid and add a little more oat milk. Scatter over a thin layer of breadcrumbs, drizzle with olive oil and return to the oven for a further 10-15 minutes, lid off, to brown on top.
Serve with seasonal greens or as a side to a roast.
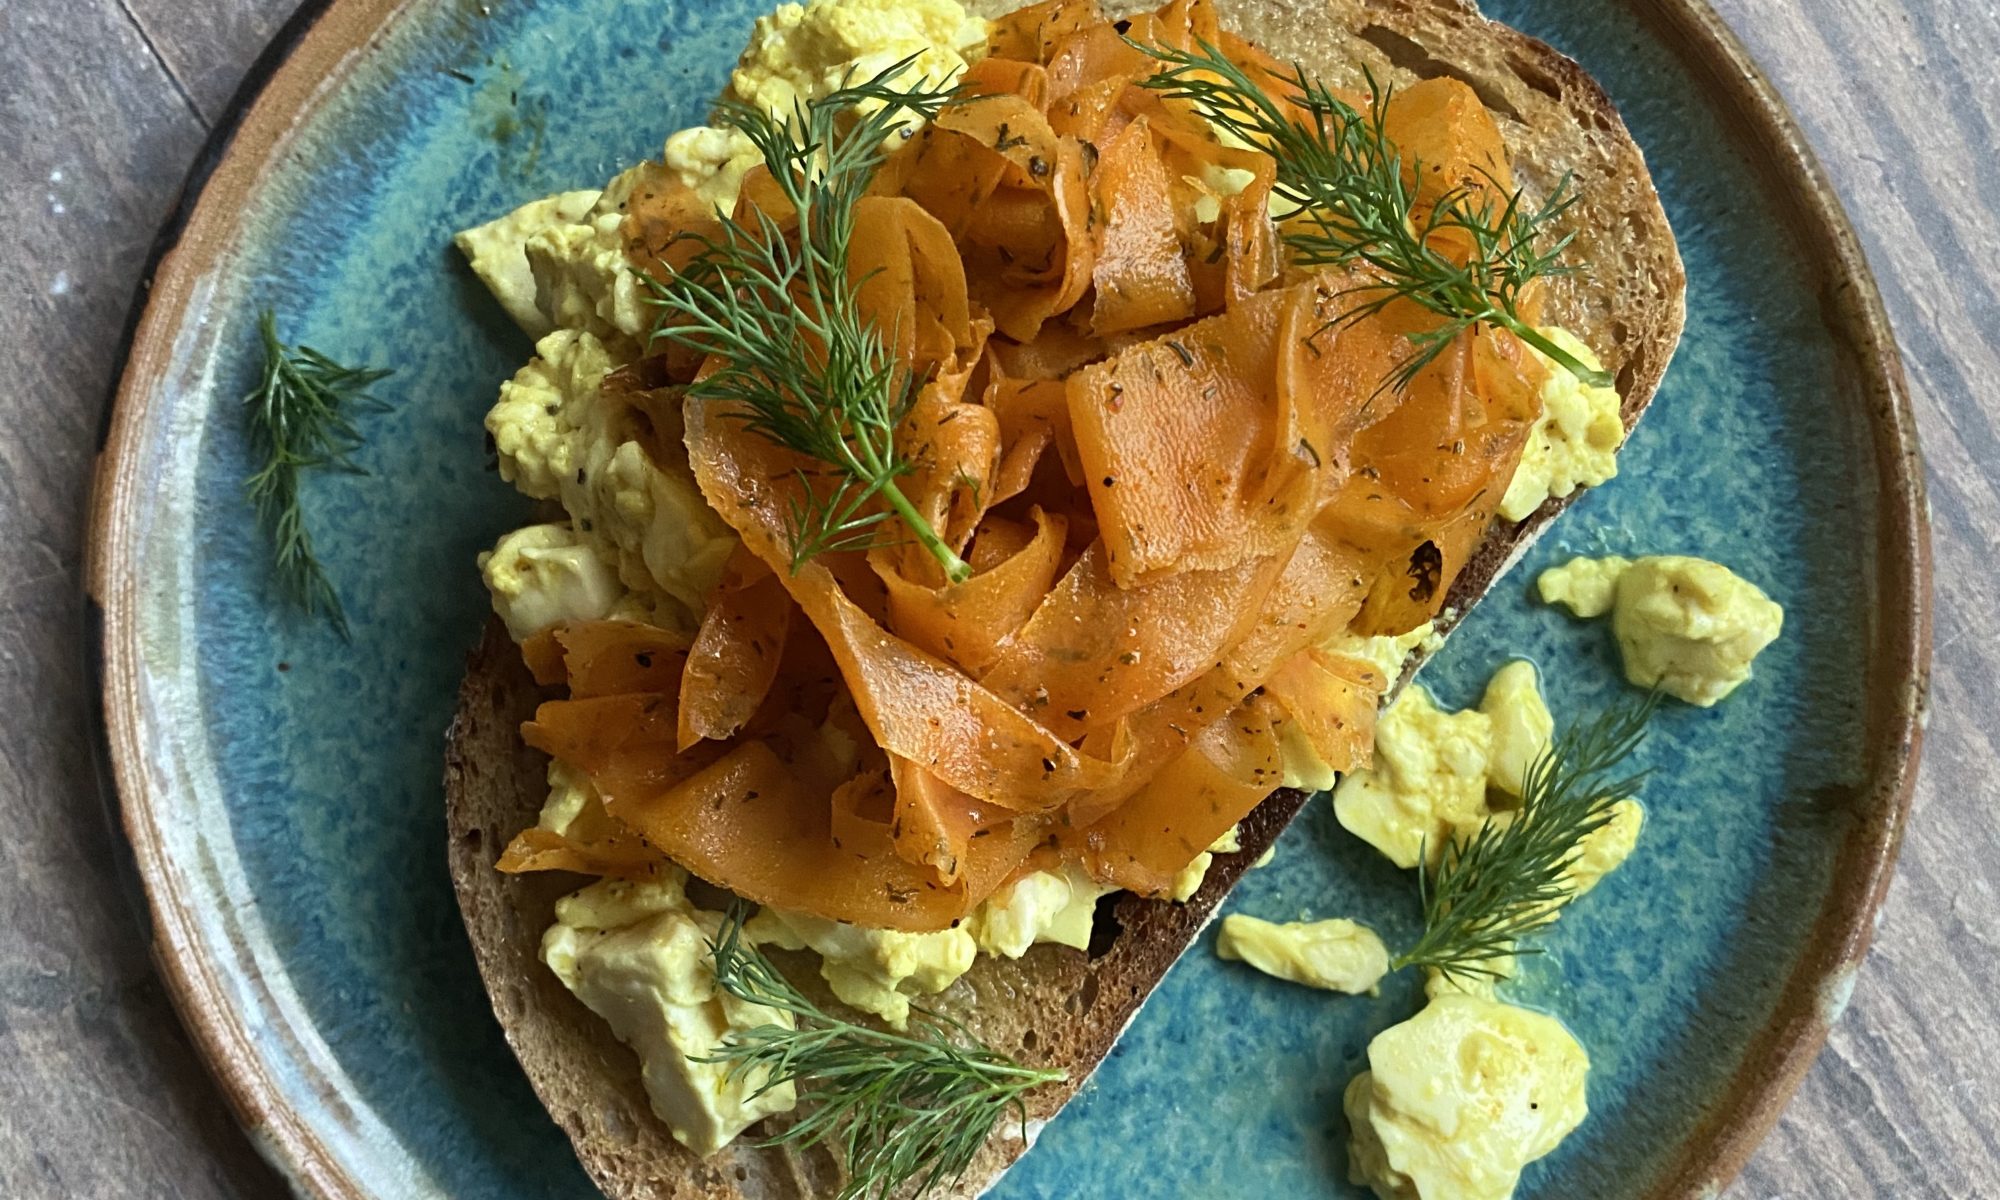
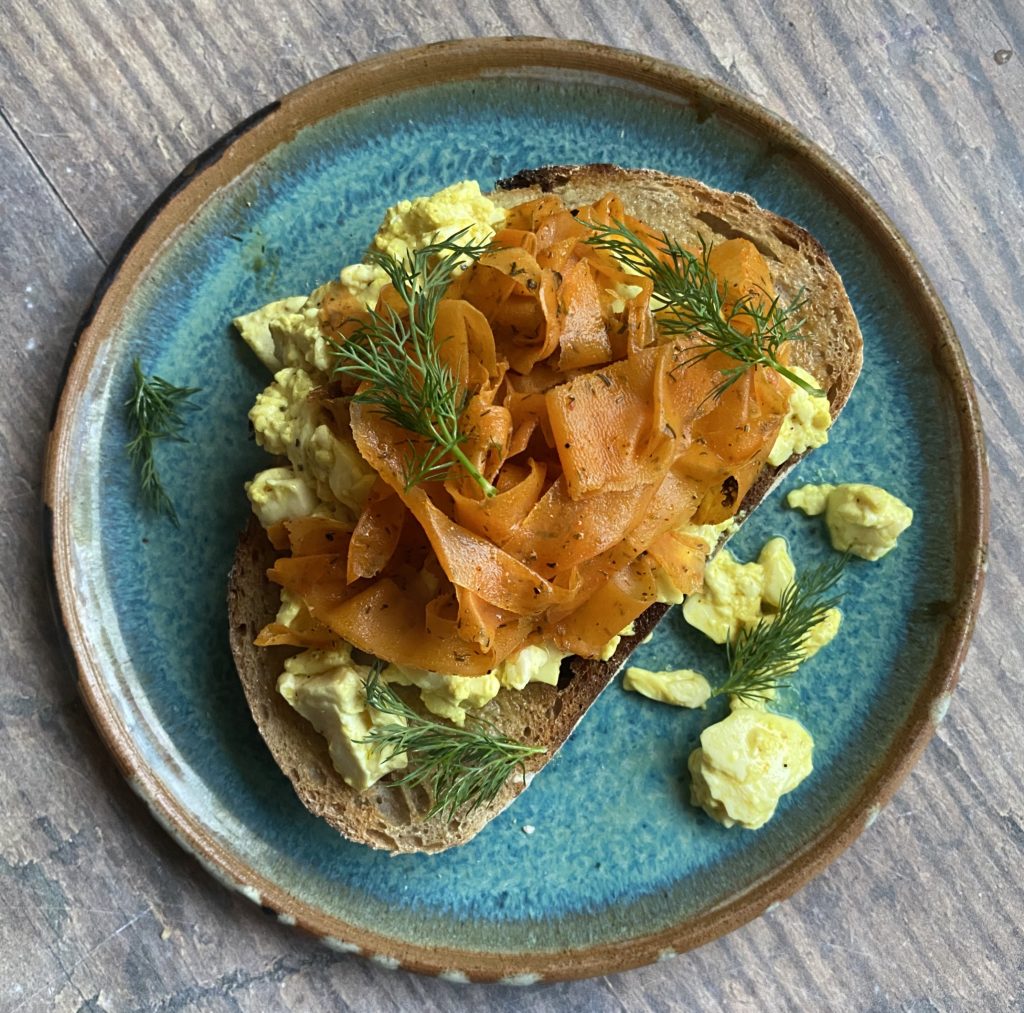
Arn’t we lucky that the worlds tastiest organic carrots are a staple in every weekly Green Earth Organics veg box? Here’s one way to use them up in something a little bit different. Before going plant based, smoked salmon and soft scrambled eggs was one of my favourite breakfasts, reserved for special occasions like Christmas morning, Mother’s Day birthdays and so on. So I’ve recreated the dish with smoked carrot strips and scrambled, wobbly, silken tofu. It’s honestly, so delicious! Especially when accompanied with a celebratory glass of fizz (we also do this alcohol free one).
Carrots are perfect for this dish, they’re just the right colour and texture. When steam-baked with all the salty, tangy, smokey flavours they get just soft enough, but at the same time hold their shape perfectly. And of course you can also use this part of the recipe in any dish where smoked salmon is required. On bagels with cream cheese and capers? Stirred through a creamy pasta? As part of a lazy sushi bowl?
Silken tofu is the best tofu to use for making scramble. I see a lot of recipes calling for firm tofu, but it’s much too dry. Scramble should be silky soft, wobbly and beautifully buttery. If you are really missing that eggy flavour, get hold of some black salt and sprinkle over a tiny pinch of that just before piling on the smoked carrots. It’s sublime!
As always, let us know in the comments or over on our friendly Facebook page if you make this dish. We love to see what you’ve been cooking! Liz x
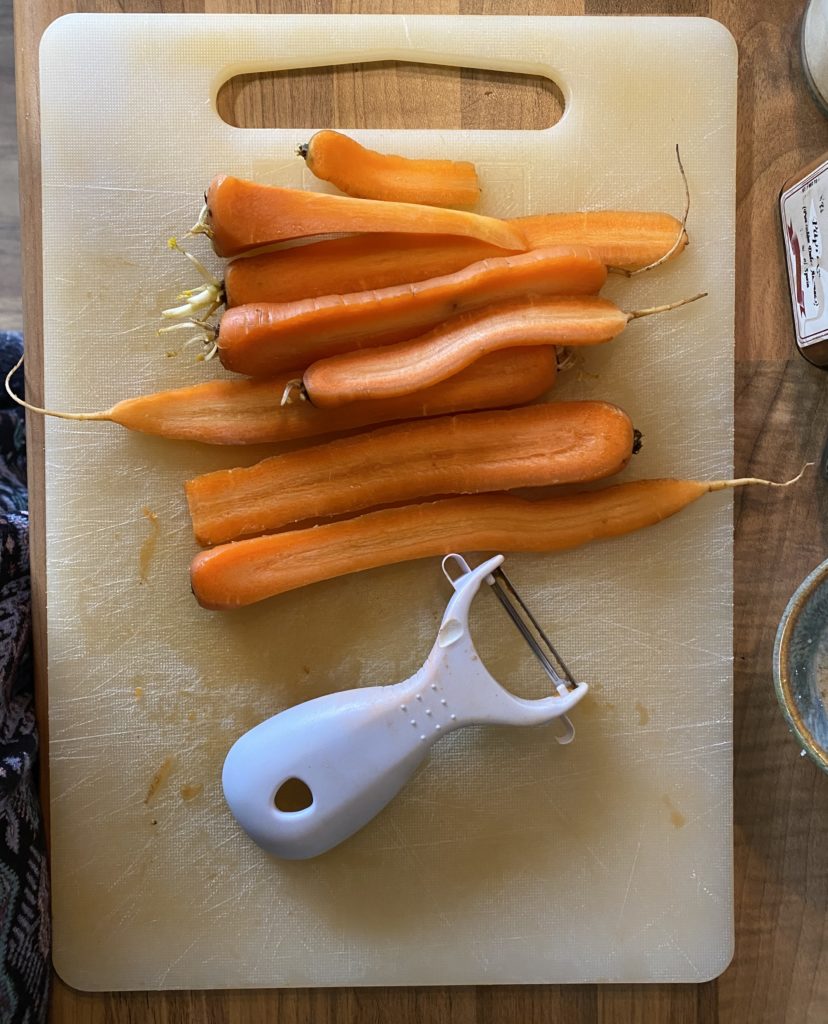
Scrub the carrots then use a peeler to cut as many long strips as you can out of them. You’ll be left with thick middle bits – just eat those with hummus or chop them up and stick them in a soup or a stew.
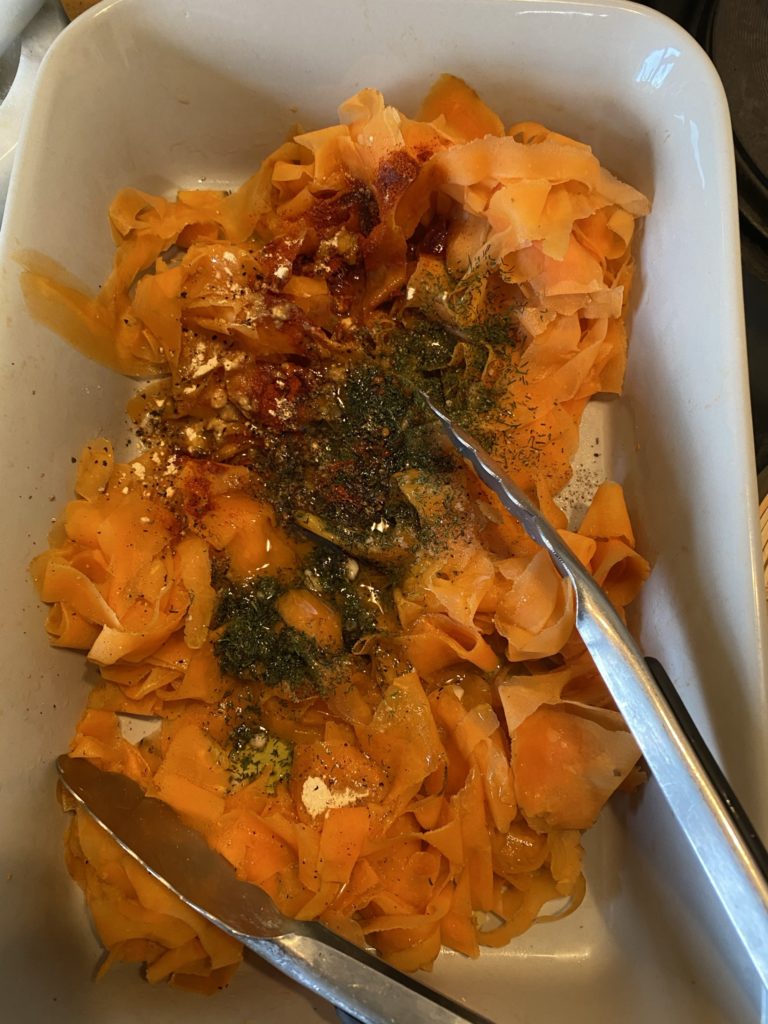
Then put all the ingredients in a small baking dish and toss the carrots strips well so that they are all evenly coated in the marinade.
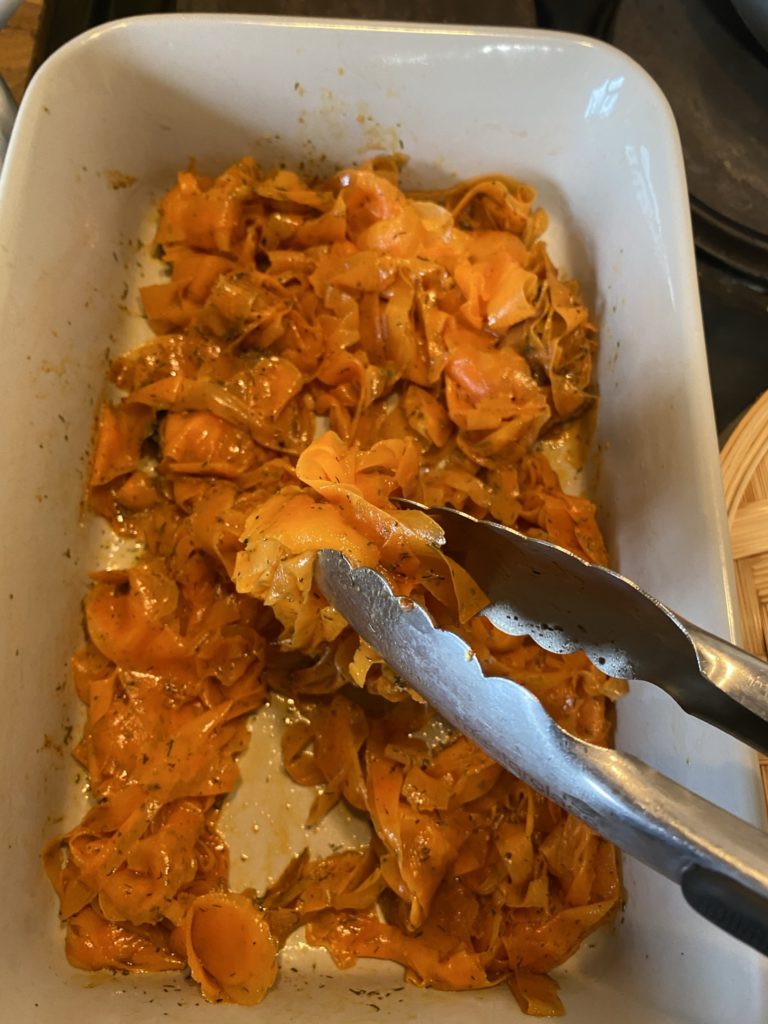
Cover the dish with foil or a baking sheet and put it in a preheated oven at 200C for 15-20 minutes or until the carrot strips are soft, but not too soft… Take the dish out every 5-10 minutes and stir to ensure the pieces of carrots on the sides of the dish are not getting over cooked.
Then put the steam-baked carrots and all the juices into a small box or covered bowl in the fridge overnight or for at least a couple of hours to marinade further.
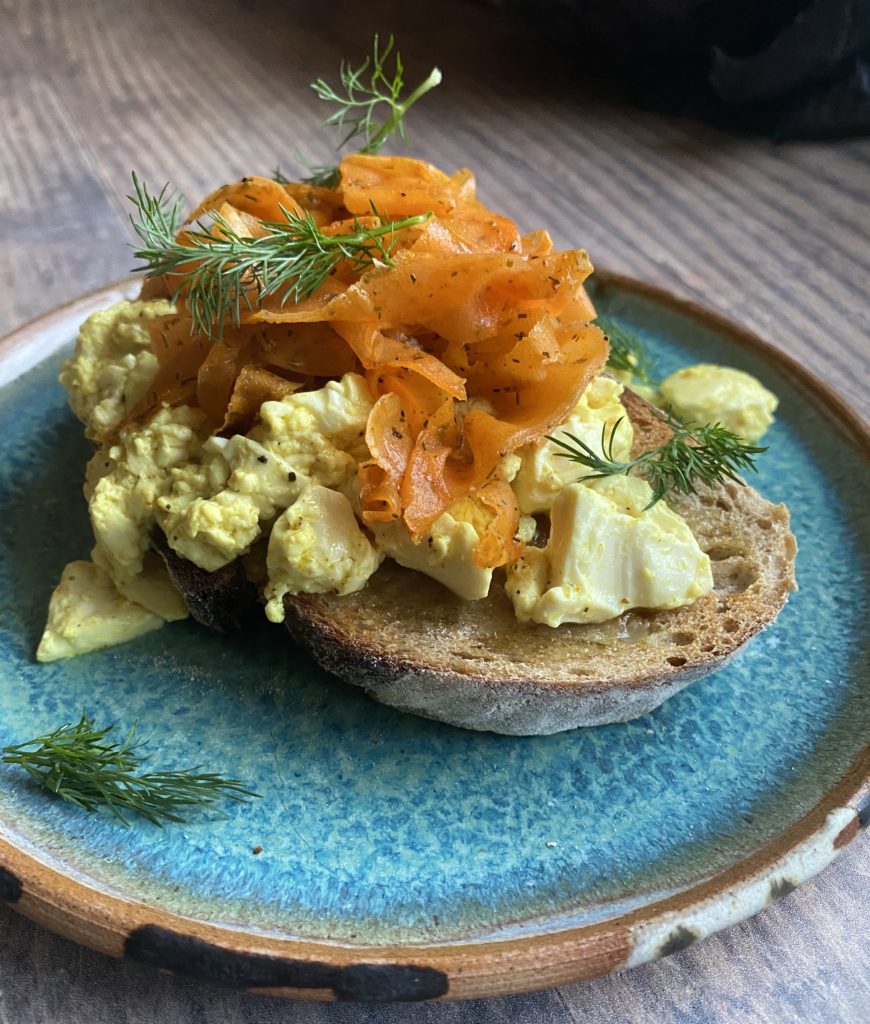
Serve piled up on buttery toast with scrambled tofu and sprigs of dill.
Scrambled Tofu
Making a wobbly, delicious scramble is easy with silken tofu. Simply heat up a knob of butter in a pan until it melts, add the contents of a pack of silken tofu (I really like the Clearspring Organic one), season it with salt, pepper and a pinch of ground turmeric and heat up. Stir gently to break up the tofu into little curds as you heat. Then serve it on buttery toast and add an optional sprinkle of eggy black salt.
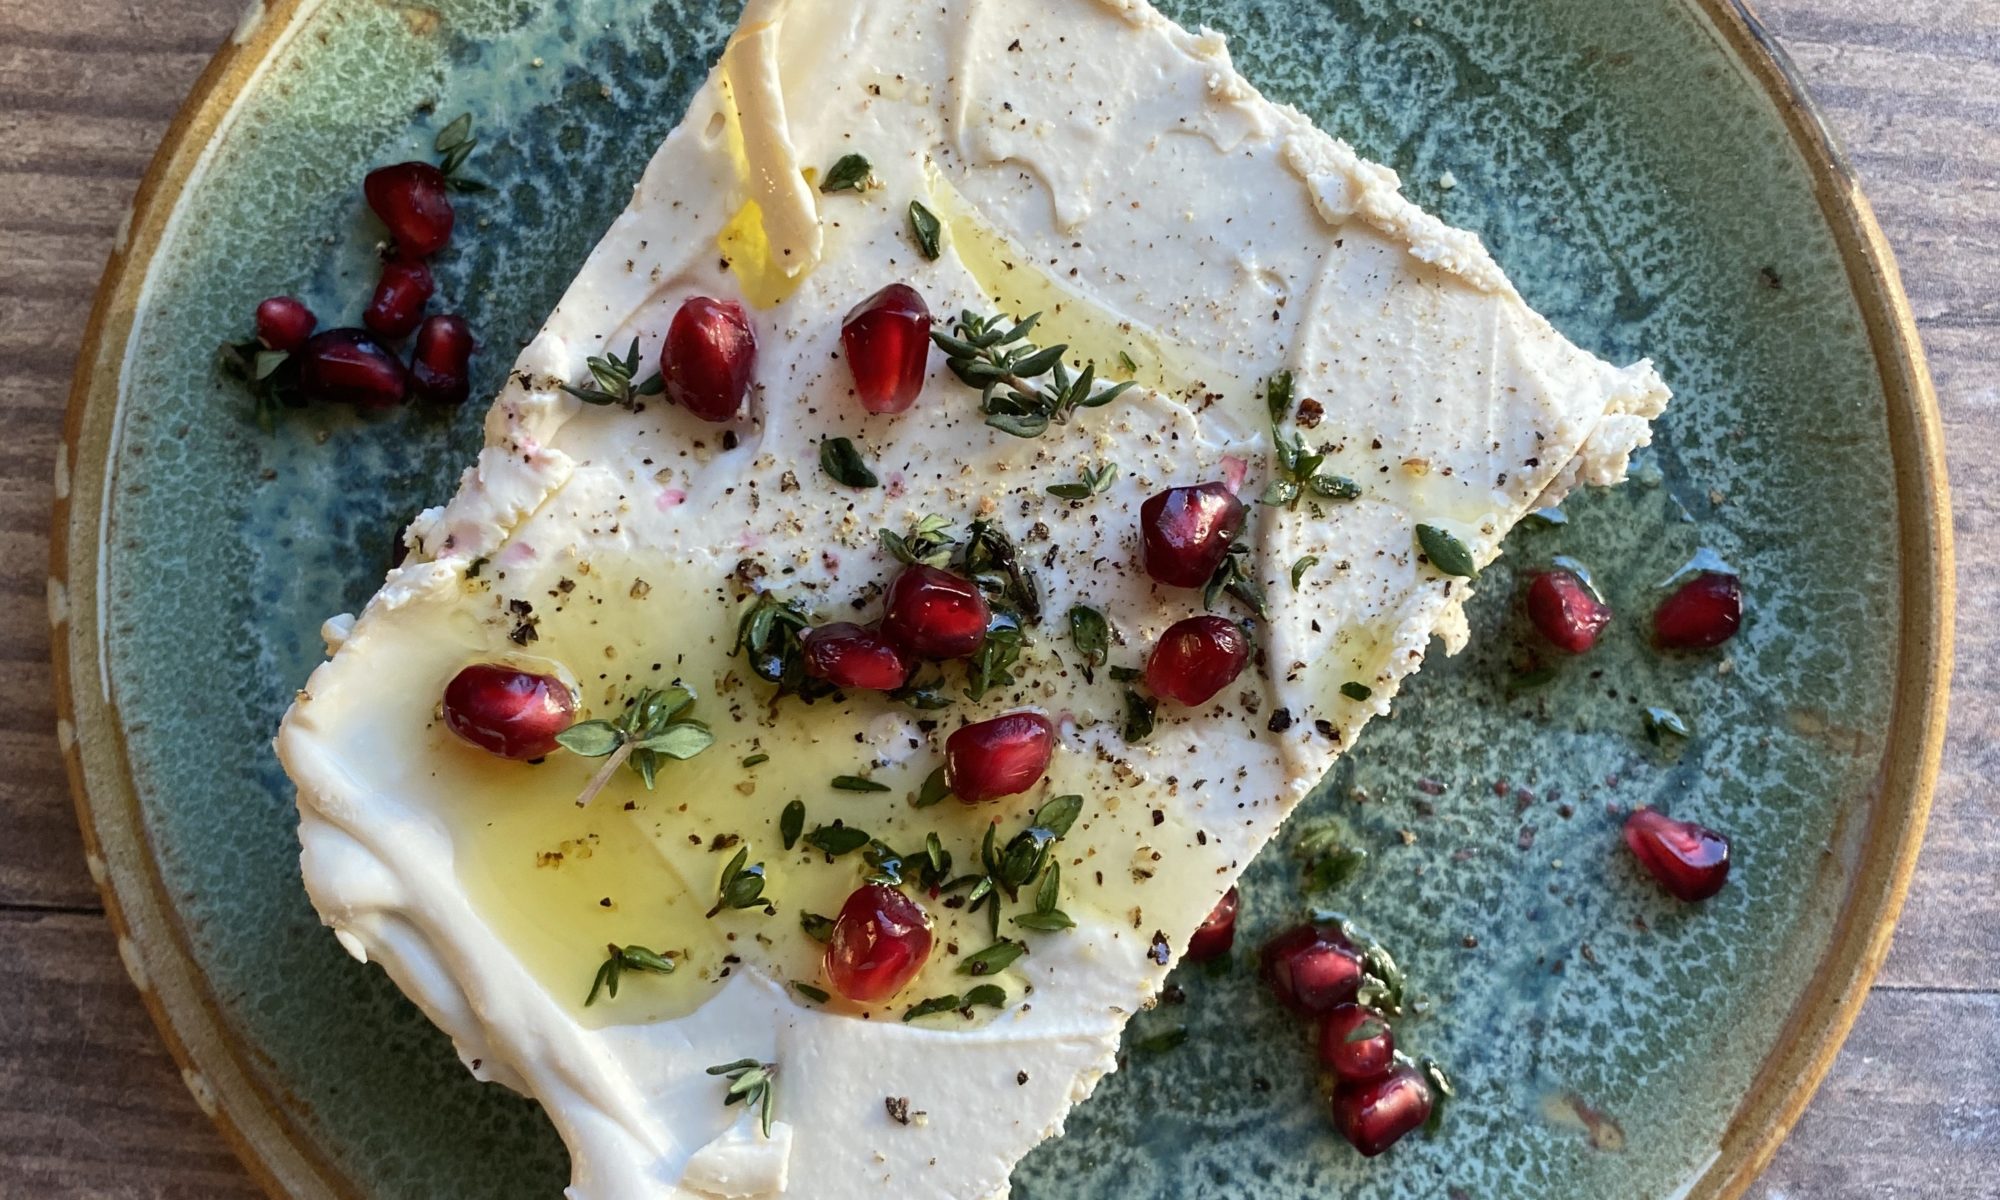
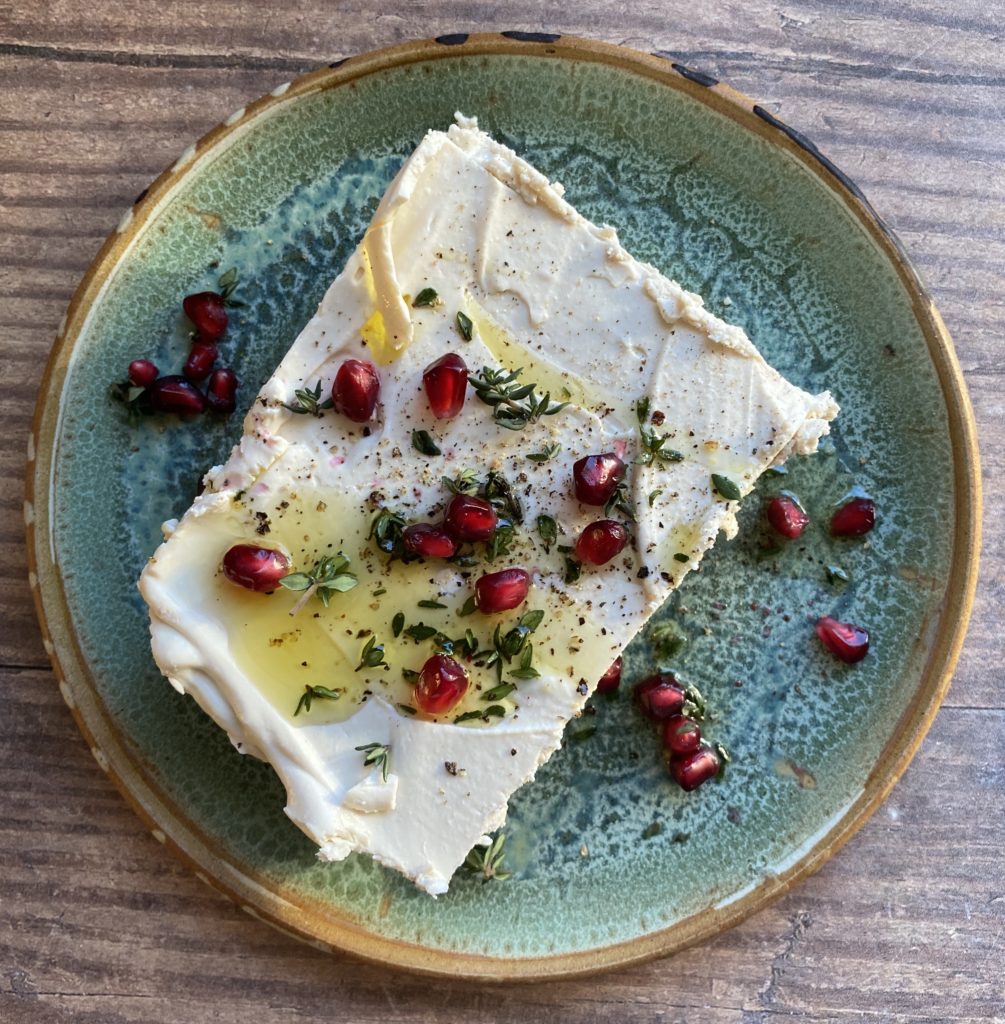
The ‘dip, dress, sprinkle’ chapter of my book is probably the most useful chapter. It’s one I refer to the most and it’s those little extras, the condiments, crunchy toppings and delicious dressings that really make meals go from ‘good’ to ‘great’. At the end of the chapter is this tofeta recipe which is really simple but incredible! It’s crazy how like feta it is!
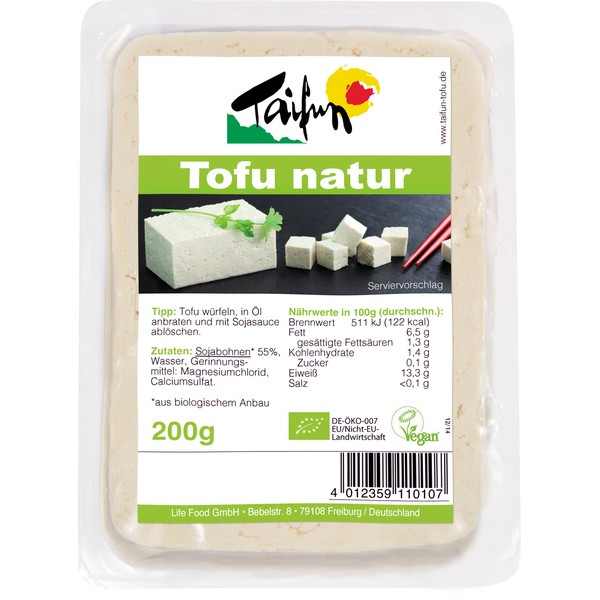
Tofu is a really nutrient dense, brilliant food, wrongly vilified as bad for humans and the environment, it’s nothing new and has been eaten by healthy cultures for around 2000 years. Most soy grown for human consumption is not grown in deforested areas (unlike the vast majority of soy which is grown for animal feed). If you buy organic tofu like the one we sell, you can rest easy knowing it is not genetically modified and is grown in a sustainable way.
Use this tofeta as part of your cheeseboard at Christmas, top a homemade pizza with it (roast beetroot or squash, red onion and tofeta is a brilliant winter pizza topping, especially with wilted spinach or kale in the tomato sauce), layer it in your lasagna, top a moussaka with it, or make my festive cranberry and tofeta cigars. They make a great starter – or make them a little smaller and they are perfect for nibbles on a canape tray with drinks.
Open out a pack of filo pastry onto a clean chopping board or work surface. Most shop bought filo is incidentally plant based but check the label.
Cut the pastry in half (or quarters if you would like smaller cigars) with a large, sharp knife.
Brush one sheet of pastry with olive oil, then spread a tsp (or half tsp if making smaller cigars) of cranberry sauce onto the pastry in a neat line about the size of your little finger, centred but about 5cm away from the left edge.
Place a little finger sized slice of tofeta onto the line of cranberry sauce then fold the 5cm left edge over it.
Fold the top and bottom sides over each other then brush them with more olive oil and roll up the pastry, left to right, into a cigar shape.
Brush the outside of the cigar with a little more olive oil and place it, seam side down, on a lined baking sheet. (I use this compostable baking parchment or a re-usable one).
Repeat until all the pastry is used up. Then sprinkle with some optional sesame seeds and bake at 180C for around 15-20 minutes or until they are golden and crispy. They are lovely served warm or cold.