When you go down to the supermarket today, read these labels..

I had a remarkable revelation in the supermarket the other day. As I was browsing the fresh produce aisle as I always do when in a supermarket, I noticed something that really caught my eye.

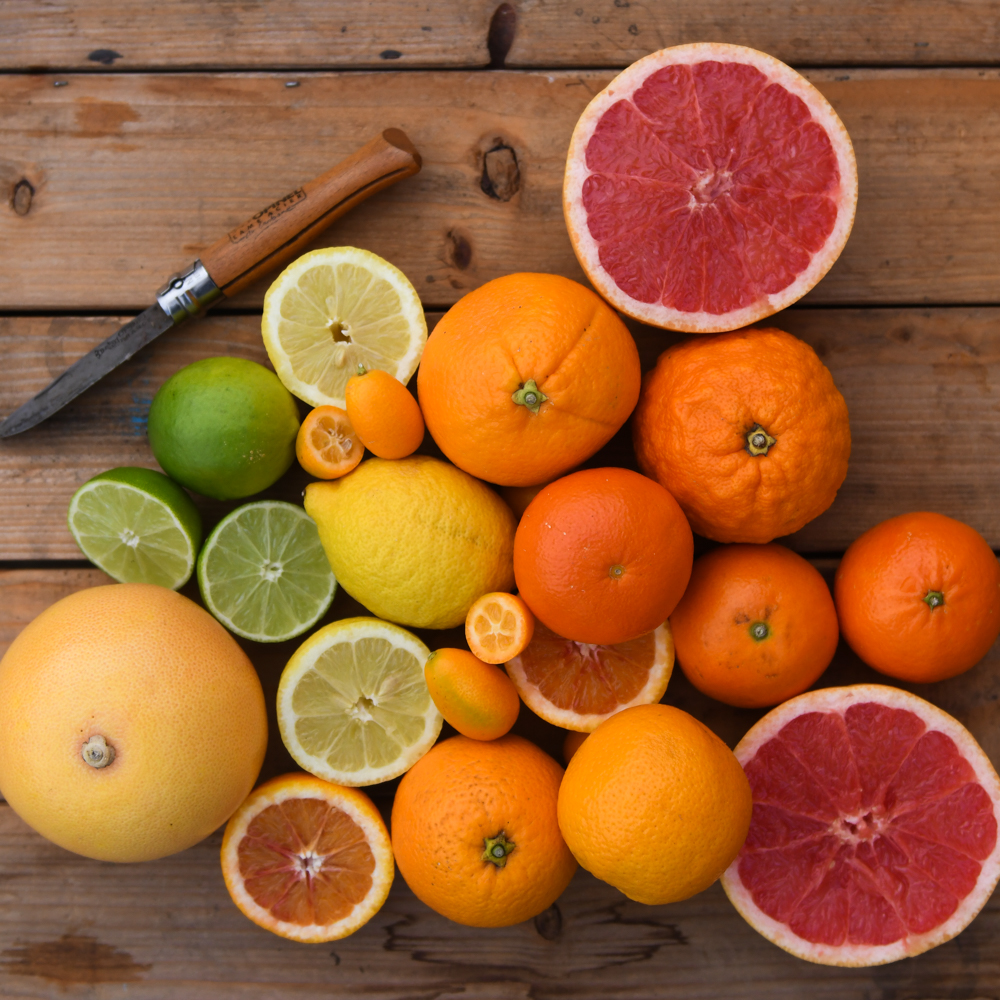
It was actually quiet refreshing for a change. Reviewing each of the labels on the citrus products, they were clearly marked with the chemicals/fungicides that had been applied to the skin of the oranges, lemons, limes and mandarins. A few weeks back I was wondering if the pesticides that were used in growing carrots were highlighted on the pack would we change our behaviour?

And how is it that it comes down to the organic farmer to prove his/her produce is chemical free, why doesn’t the conventional produce list all the chemicals used in the growing of the crop? Well at least with citrus fruit we have the post-harvest treatments clearly outlined, this is the law in the EU.

It was quite a timely consideration as during the week we had one of our annual organic inspections and we were informed a sample of our produce will be sent away for screening for a mind-blowing list of chemicals (870 last time), more on that at a later date.

Anyway, back to the oranges. I am not sure that many people notice the chemicals though as it is hidden away in small print, nevertheless showing all these postharvest fungicides and wax treatments is a very good thing, as we can make more informed choices about our food. It is also worth noting that it is stated on all the labels that the skin is not suitable for eating!!

Here are some of the chemicals I found on the labels and their scientifically linked safety considerations. Also this is for an individual chemical most of the fruit I examined at up to 4 different treatments per piece of fruit.

1) Imazalil: Possible endocrine effects. The EFSA (European food safety authority) has evaluated imazalil repeatedly; the substance has raised endocrine/ecotoxicity questions in the past. Carcinogenicity concerns: possible/likely carcinogen based on animal data.

2) Thiabendazole EFSA peer-review concluded thiabendazole can affect thyroid hormone systems in animals. That is an important regulatory finding. Carcinogenicity/reprotoxicity: animal studies have shown some reproductive/developmental effects at high doses.

3) Pyrimethanil: Some experimental studies show reproductive or developmental effects in animals at high doses.

4) Fludioxonil: EFSA identified fludioxonil for endocrine-related effects.

5) Boscalid: It can be persistent in the environment

6) Azoxystrobin: Some studies indicate potential for oxidative stress and endocrine-related effects in experimental systems.

I am sure there are more, and this excludes the waxes that are also used to coat most conventional citrus fruit.

Not an entirely benign concoction, and not a cocktail of chemicals that I would particularly like to have on my food, thank you very much. I am sure you are wondering how an orange is not suitable for vegans. Well, one of the waxes that can sometimes be used, in particular E904 or Shellac (this is a resin secreted by a bug!), make the fruit unsuitable for vegans!

So, if you do buy conventional citrus fruit, please note again that it is advised that the skin is basically inedible or unsafe due to these chemicals (read the labels it actually states it there) so please don’t use the zest for cooking, much better to choose organic, and if you want to steer clear of these and other chemicals better where you can to choose organic entirely.

As always thank you for your support

Kenneth

Marmalade

There’s nothing like homemade marmalade is there? The gorgeous scent of oranges filters through the house and brings some much needed sunshine into our winter kitchens. Citrus season is in full swing now and we have organic bitter marmalade oranges in stock now. Alway choose organic citrus fruit to avoid waxes and sprays.

Here’s the classic recipe I always stick to as it’s easy to remember by heart and never fails. But of course you can make it your own with different citrus. I’ll be making a batch of blood orange marmalade for sure (I may reduce the sugar a little for that batch as they are so naturally sweet), and maybe a kumquat one too!

Will you be making marmalade this season?

Liz x

Ingredients

  • 1kg Seville oranges (bitter marmalade oranges)
  • 2 lemons
  • 2 litres of water
  • 2 kg sugar

Equipment

  • a large, heavy bottomed pot
  • a cloth bag (I use a nut milk bag) or a square of muslin and some string
  • a medium sieve
  • 3 or more small plates
  • a wooden spoon
  • a jam funnel
  • jars – I reuse old jars
  • a ladle or small glass jug

Method

  1. Put the little plates into the freezer. Pour the water into your pot. Place the sieve over the pot and then open out the bag or muslin into the sieve. Scrub the oranges and lemons.
  2. Cut the fruit in half and juice them into the pot, ensuring you catch all the seeds and pith in your cloth bag or muslin. You want to keep all the seeds and pith as that’s where the pectin is which will make your marmalade set. Use a spoon to scrape out any remaining bits of pith and other citrus innards into the bag. Now tie the bag and place it in the liquid with the string attached to the pot handle to make it easier to extract later.
  3. Cut the skins in half again and then into thin strips. (You can leave out the lemon skins if you like but I like to add them in so nothing is wasted.) I use a serrated knife but any sharp knife should work. Take your time and get all the skins cut as evenly as possible. Enjoy the process. Place the cut skins into the pot.
  4. Bring the pot to a rolling boil then turn down the heat and simmer at a gentle bubble, for 2 hours or until the skins are soft. You can test them for doneness by squeezing one between your fingers. It should easily break apart. You should also notice that the liquid has reduced quite a bit too, that’s good.
  5. Now remove the bag of seeds and piths and put it in a bowl to cool down. Turn the pot to the lowest temperature.
  6. Pour the sugar into the pot, it will seem like an obscene amount but oranges are very bitter so it is needed I’m afraid. Gently melt the sugar on the lowest setting, take your time. Don’t stir too much, just a few times with a wooden spoon. Once the sugar is completely melted you will notice it doesn’t feel grainy on the bottom of the pot and when you pick the spoon out of the liquid you will not see any sugar crystals. It’s important to melt the sugar on a low temperature before turning the heat up to boil and set the marmalade. Don’t skip this step or your marmalade will come out grainy rather than the desired shiny jelly.
  7. Your bag should hopefully be cool enough to handle now. Pick it up and squeeze it over the pot. You want to extract as much of the cloudy, gelatinous stuff out through the bag as possible. Use a spatular or the wooden spoon to help scrape off the gel as you squeeze. Then stir it into the marmalade.
  8. Turn the heat up and bring the marmalade to a rolling boil. Boil hard for 15 minutes, keep an eye that it doesn’t boil over. Then turn the heat off, give the marmalade a stir and scoop off any unwanted scum that is stubbornly not re-incorporating into the mixture.
  9. Take one of the plates out of the freezer and place a spoon of the hot marmalade on it. Put it in the fridge for 3 minutes then do ‘the wrinkle test’. This is where you push your finger slowly through the marmalade to see if it has set. It should feel like jam and look wrinkly. If it has not set yet then return the marmalade to the boil and try again every 5 minutes until you are happy with the set.
  10. Sterilise your jam funnel, ladle, jars and lids. Then fill the jars with the marmalade whilst it is still hot. Screw the lids on tightly and leave them to cool and seal on your counter top overnight. Then label them with the date and keep in a cool, dark place for up to 12 months. Once opened, keep in the fridge. Enjoy!

Preserved Lemons

A preserved lemon from my last batch which I made about 9 months ago.

Preserved lemons are a very North African/Middle Eastern thing and so go well in tagines, whizzed into hummus and blended into spice pastes or marinades. They are absolute flavour bombs and once you get a taste for them you’ll be hooked. Luckily they are cheap and easy to make yourself. Apart from the stunning flavour, what I really love about them is that they are a great example of compleating (a waste free principle of eating the whole fruit/vegetable). The rind of the lemon softens during fermentation and is then the best bit! Although don’t waste the flesh and the liquor, all that can be used to pep up dressings, risottos, soups, stews…anything that needs some salty, lemony goodness.

Here’s a quick video explaining the process, it’s one of those recipes which is easier to learn through watching. Liz x

Ingredients

  • organic lemons (unwaxed)
  • natural salt
  • olive oil (optional)
Just after jarring. These need 4 weeks fermenting at room temperature before they are ready.

Method

Rinse the lemons and prepare a clean chopping board, knife, tablespoon and large jar. They don’t need to be sterilised, but make sure everything is well cleaned and rinsed. Clean your work surface well too.

Slice the ends off a lemon (just a small sliver from the end that was attached to the tree, and the other end if it looks like it needs it. If it’s fresh and in good condition then just leave the bottom end on) then cut a deep score into the lemon about 3/4s of the way down.

Stuff the lemon with a tbsp of salt and press it firmly into the jar using the rolling pin to help.

Repeat until you have filled the jar or run out of lemons.

There should be enough juice in the lemons to create a brine to cover them all when pressed down. If not, add some extra lemon juice.

Weigh down the lemons under the brine using a small glass or a glass weight. Then add an optional layer of olive oil to float on top of the lemons and seal them from exposure to air.

Put the lid on (I like to make sure my jar is full enough so that the action of putting the lid on top of the weight pins down the lemons under the brine) and place the jar on a shelf at room temperature to ferment for 4 weeks.

During the first week of fermentation you may notice bubbles forming. Just open and close the lid to release any gases that have formed. Keep an eye on the jar and if any lemons start to rise about the brine just push them back under and re-arrange the weight.

After 4 weeks you should notice a change in texture, colour and aroma. They are done. Keep the jar in the fridge and use within a year.

For ease of use, you could purée the fermented mixture in the jar and then just take out a spoon or so to add salty lemony flavour to many dishes.

Puréed preserved lemons for easy use.