Roasted Fennel, Tomato & Bean Pasta Sauce

Fresh fennel and tomato are made for each other, and for pasta. Fresh fennel is absolutely delicious raw, thinly sliced in salads. Its crunchy and sweet with a aniseed flavour which pairs perfectly with a zingy lemon dressing and lots of black pepper. But when you roast fennel, its a completely different thing. The sweetness caramelises, the aniseed flavour is still there but it’s muted, and the texture is gorgeous, it softens in the best way, a little like roasted onion. Mix with the richness of roasted tomatoes, lots of garlic and olive oil and you’ll be in flavour-heaven! Fennel and tomato pasta is a simple, rustic classic, often served with sausages, but we love it with butterbeans.

Liz x

Ingredients (serves 4)

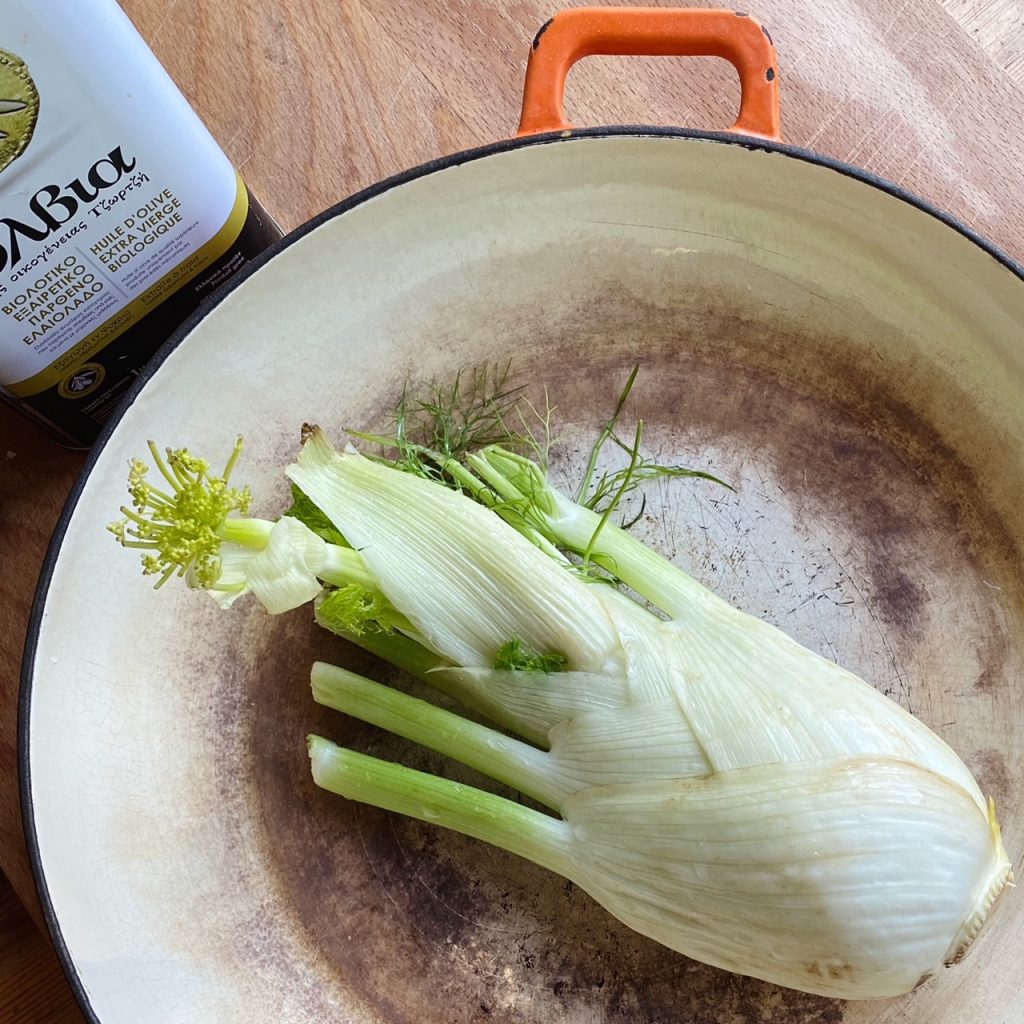
  • 1 fennel bulb, chopped
  • 1 tin chopped tomatoes
  • 1 tin butterbeans, drained
  • a couple of handfuls of chopped fresh tomatoes
  • 6 cloves of garlic, crushed
  • extra virgin olive oil – to taste, we recommend at least 6 tbsp
  • salt and pepper to taste
  • cooked pasta to serve

Method

  1. Turn your oven on to 200C. Chop up a fennel bulb and tumble into a wide roasting dish. Drizzle generously with 4 tbsp olive oil and season with salt and pepper. Mix well with your hands and place in the oven to roast for 20 minutes or so until softened.
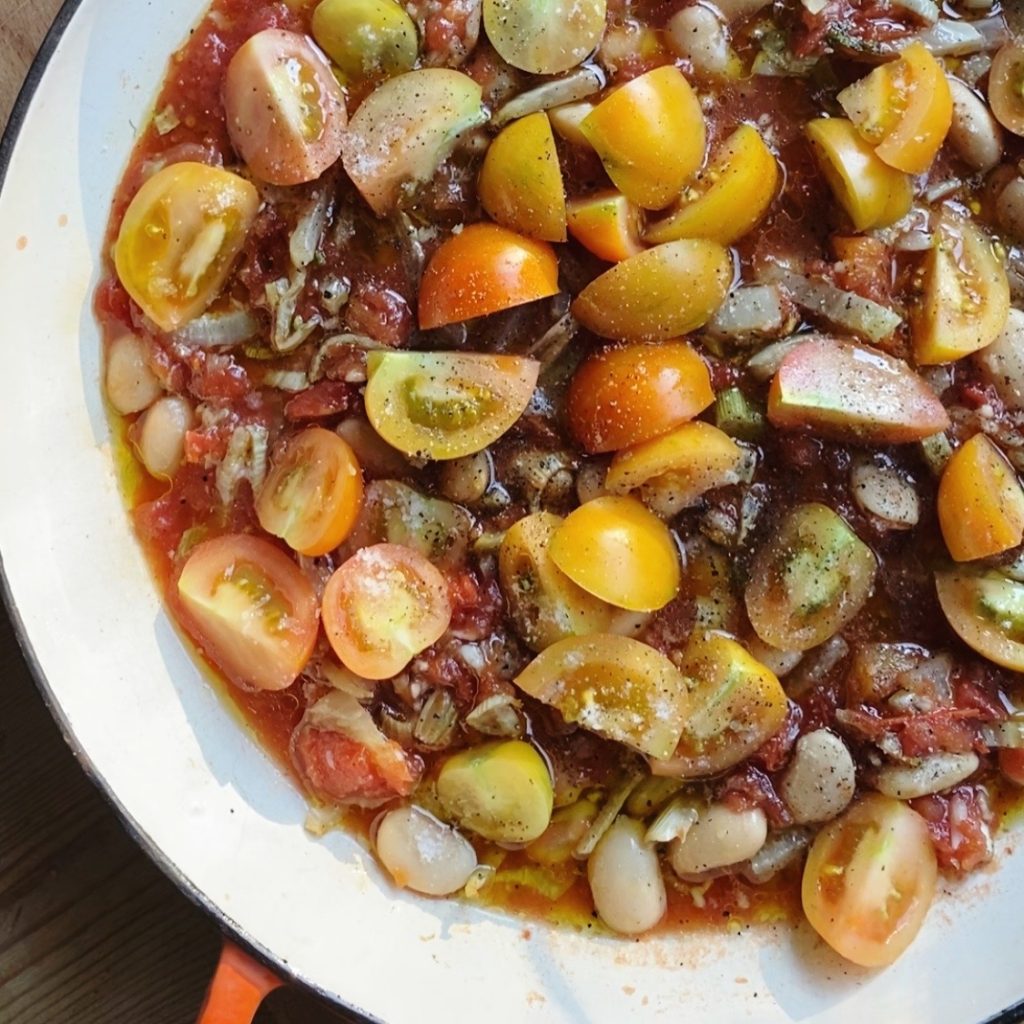
  2. Remove the dish from the oven and add the tin of tomatoes, crushed garlic and the drained tin of butterbeans. Mix well.
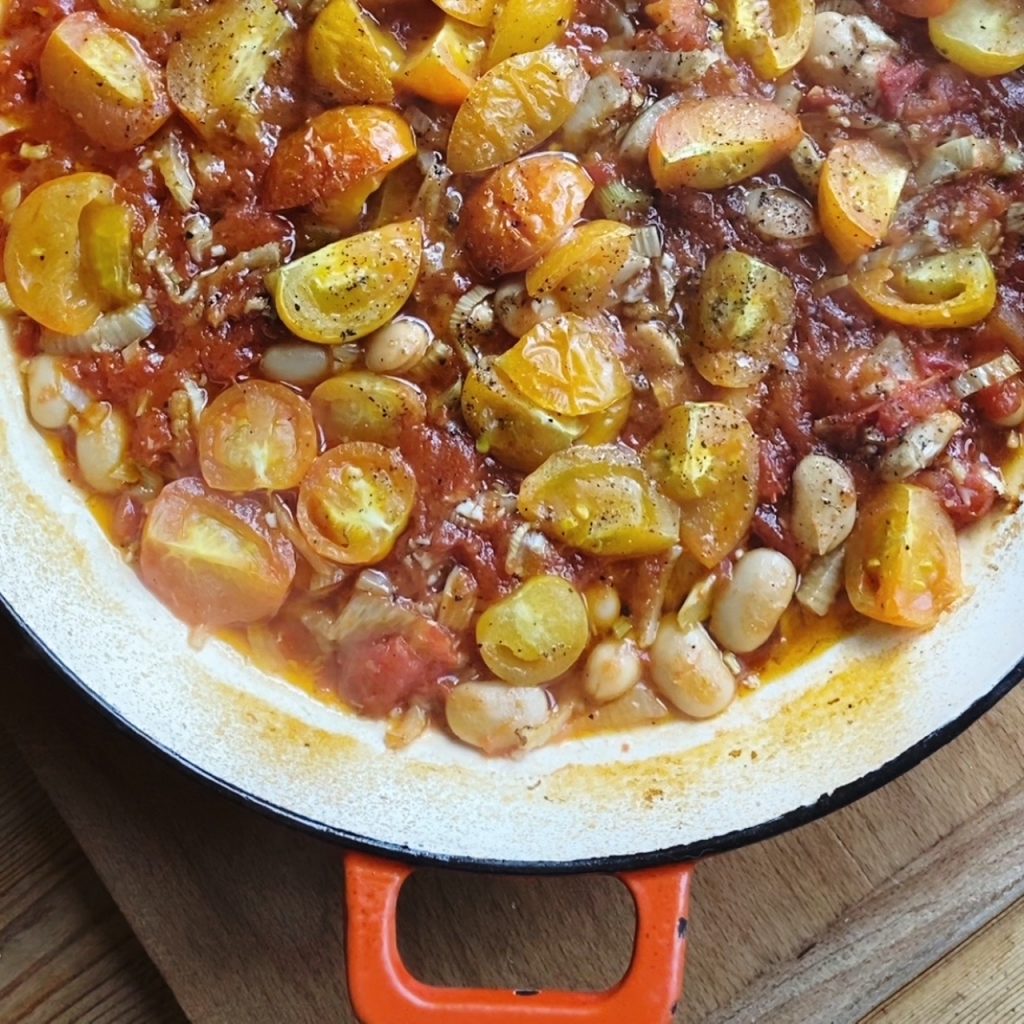
  3. Scatter over the fresh chopped tomatoes, drizzle with 2 more tbsp olive oil and season again with salt and pepper. Return to the oven for a further 20 minutes or so until rich and bubbling.
  4. Meanwhile cook your pasta. Then drain the pasta, stir through the sauce and enjoy!

Quick Pickled Courgettes

Got a glut of courgettes? We’ve got the recipes. As well as this classic quick pickle, a delicious solution for many excess veg, I’ve shared a fair few other courgette recipes. Just pop ‘courgette’ in the search bar and they’ll come up.

Quick pickles do what they say on the tin. They are quick and simple to put together and they are ready to eat in just a couple of days. You can definitely eat them earlier too, I just think the flavours develop better after a couple of days in the fridge. They last a long time too, especially if you sterilise the jar and close it while the vinegar solution is still hot. Keep the pickles in the fridge and don’t double dip and they should last for 2 months, if you don’t eat them up in that time… don’t store these pickles at room temperature unless you can them, which is a whole other process.

Pickled courgettes are so delicious in a sandwich or burger, with cheese and crackers or as a tangy, crunchy part of a salad. You can also flavour them however you like. Go herby with dill, spicy with chilli, use classic pickling spices, bay leaves, garlic, ginger…whatever you like! Enjoy! Liz x

Ingredients (makes 2 medium jars, around a litre volume)

  • 300ml apple cider vinegar (we LOVE Clashganny Farm’s organic ACV)
  • 300ml water
  • 2 tbsp salt
  • 2 tbsp sugar (optional but really nice)
  • flavourings of your choice – I used: 3 sliced cloves of garlic, 1 tsp ground turmeric, 1 tsp mustard seeds, 1/2 tsp black pepper
  • 1 courgette
  • 1/2 a white onion

Method

  1. Start by finding 2 small jars (or 1 big one? – it all depends on how much pickle you’re making or the size of your courgettes) and giving them a really good clean and hot rinse. Or you can sterilise them to be extra safe. Put the washed and rinsed jars in a clean sink then fill them with freshly boiled water from the kettle. Wait a minute then carefully empty the jars (use oven gloves or a folded tea towel so you don’t burn your hands). Let them air dry while you get on with chopping and heating up your vinegar solution.
  2. Measure the vinegar, water, salt and sugar into a small pan and heat it up while you quickly add the flavourings to the jars and chop the vegetables.
  3. Divide your flavourings between your jars. Then thinly slice the courgette and onion and divide them between the jars too. Lightly press the vegetables down into the jars to pack them in neatly, but don’t crush them. You should leave a couple of cm of room in the jar.
  4. As the vinegar solution comes to the boil, take it off the heat and pour it into the jars over the vegetables and flavourings. The solution should cover the vegetables. Give the jars a light tap on the work surface to remove any air bubbles that may be trapped between the layers of vegetables. Then screw on the lids whilst the jars are still hot. You may not use all the vinegar solution, or you may need to make a bit more.
  5. Allow them to cool then refrigerate. The pickles will be ready to eat in two days and will last in the fridge for 2 months.

Summer Fruit Crumble Slice

This fruity number is just the thing to pack into a tin and take round to a friends garden to have with a cuppa! Use any summer fruit you like, berries or stone fruit work well, and it’s best to cook the fruit down with a little maple syrup into a rough ‘jam’. Very soft fruit like strawberries, raspberries or plums could just be sliced and sprinkled raw on top of the biscuit layer before adding the crumble mix, but I do find a more jammy fruit layer helps the crumble mix stick to the biscuit a bit better. I tend to cover the dish in the oven with a baking sheet or a layer of baking parchment during the last 15 minutes or so to prevent it from browning too much. 

Liz 

Ingredients

  • 125g caster sugar
  • 250g butter/margarine
  • 375g plain flour
  • 100g porridge oats
  • 150g fruit
  • maple syrup to taste

Method

  1. Start by cooking 150g fruit in a small pan until just soft and starting to collapse. Taste and sweeten with maple syrup or any sweetener you like (if needed). Then put it to one side to cool while you make the biscuit dough.
  2. Pre-heat the oven to 175C and line a deep baking dish with baking parchment. I used a dish approximately 25x35cm but any medium sized baking dish will do. Just bear in mind, if it’s a smaller dish, the biscuit will be deeper so will need longer in the oven.
  3. Weigh out the butter, sugar and flour into a large mixing bowl. Rub it together with the tips of your fingers until you achieve a wet-beach-sand-like texture that comes together into dough when squeezed. A quicker way to do this is to pulse the ingredients together in a food processor with the ‘S’ blade attachment.
  4. Tip roughly 2/3rds of the dough into the lined dish and press it firmly into a neat, even layer. Ensure you get into the corners of the dish.
  5. Add the oats to the remaining 3rd of the dough and mix into a rough crumble.
  6. Spoon the fruit onto the biscuit layer and then sprinkle the crumble over the top. Lightly pat the crumble into the fruit.
  7. Then bake for approximately 30 minutes at 175C fan. The time can vary depending on your dish size. I tend to cover the dish with a baking sheet or extra piece of parchment for the last 15 minutes or so to prevent the crumble from browning too much. Just keep an eye on it and see if it needs it or not. No two ovens are alike in my experience!
  8. Remove from the oven and allow the biscuit to cool in the dish. Then carefully transfer it to a chopping board and cut it as you like. 
  9. You should end up with a melt-in-the-mouth shortbread base, a fruity layer and a        buttery, oaty, crumbly layer. Delicious!
  10. The biscuits keep well in an airtight container in the fridge for a week. Enjoy!

Simple Salsa

We are obsessed with salsas! Scooping up salsa with tortilla crisps has got to be one of the best ways to get kids to eat a load of fresh, raw veggies too. Putting out a big bowl of salsa and tortillas while the BBQ is getting going keeps everyone happy. And of course, salsa is a key ingredient in a taco. There are countless variations, enjoy playing around and finding a fun combination that you love. The version below is a super simple one which I know my whole family will love, but I also love adding fruit like diced pineapple, cherries, mango or peaches and adding finely sliced fresh chillies or a spoon of smokey chipotle chilli paste. Grilled corn and diced avocado are also stunning additions. Share your favourite combination with us in the comments?

Liz x

Ingredients (makes enough for a whole large bag of tortilla chips)

  • 4 tbsp extra virgin olive oil
  • 1 lime – juiced
  • 1 clove of garlic – crushed
  • a pinch of salt
  • 1 red pepper – diced
  • 1/3rd of a large cucumber – diced
  • 1/2 a punnet of honey drop cherry tomatoes – diced
  • 2 scallions – finely sliced
  • 1 bunch of coriander – chopped
  • *optional extras* chilli, avocado, grilled corn, cherries, peaches, mango, pineapple…

Method

  1. Pour the olive oil and lime juice into a large bowl.
  2. Add the crushed garlic and salt and mix well.
  3. Add the rest of the ingredients and mix with a spoon to coat them all in the dressing.
  4. Taste and add more salt if needed.
  5. Serve with a bowl of tortilla chips.
  6. Keep any leftovers in a tub in the fridge, salsa is even better the next day!

Babaganoush

Babaganoush is similar to hummus, but made with aubergine rather than chickpeas. It’s softer, silkier and deliciously smokey! I always pop a few aubergines on the barbecue to make this dip. You can grill them in a hot griddle pan or roast them in the oven instead, but they won’t be as smokey. You’re looking to really blacken them on the outside and let them collapse and get silky soft in the middle. The blackened skin is then peeled off, then the flesh is blended (or mashed if you like more texture) with garlic, tahini, lemon and olive oil. Here’s my recipe for one aubergine. Serve with grilled or raw veg, salads, on toast or with pitta bread strips to scoop it all up.

Liz x

Ingredients

  • 1 aubergine
  • 1 small clove of garlic
  • 1 tbsp tahini
  • a pinch of salt
  • 2 tbsp extra virgin olive oil
  • the juice of 1/2 a lemon (or a tsp of preserved lemon purée)
  • OPTIONAL EXTRAS? A pinch each of cumin and smoked paprika and some pomegranate seeds and sesame seeds for garnishing.

Method

  1. Grill or barbecue the aubergine until it’s completely soft inside and the skin is burnt and blackened.
  2. Allow it to cool enough to handle, then slice it in half lengthways and scoop all the flesh out into a bowl to mash or blender to blend smooth. Scrape the skin carefully to get every bit of aubergine into the mix. Those bits nearer the skin have the best, smokey flavour.
  3. Add the garlic (crush or finely grate first if mashing rather than blending), olive oil, tahini and lemon.
  4. Blend or mash into a spoonable mixture, then taste and add salt and more lemon to taste.
  5. Spoon the mixture into a small serving bowl and top with a drizzle of extra virgin olive oil and optional extras like pomegranate seeds, sesame seeds, smoked paprika, cumin…
  6. Enjoy scooped up with flatbreads or toasted pitta bread and salads.