Roast Potatoes, Sprouts & Clementines

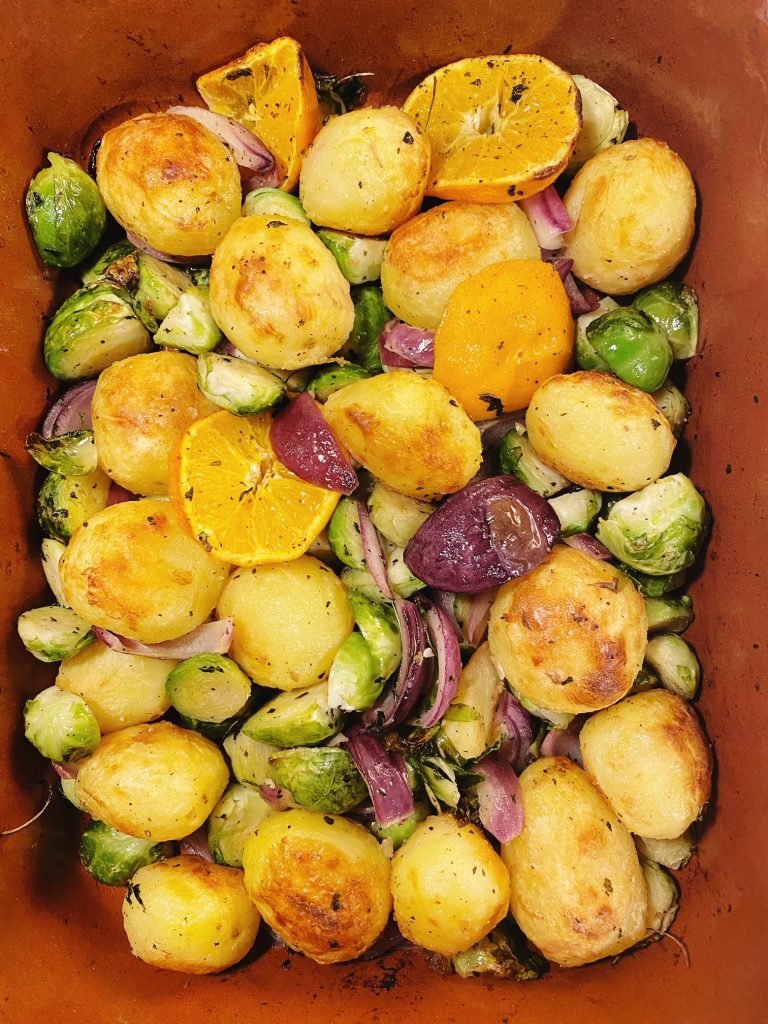
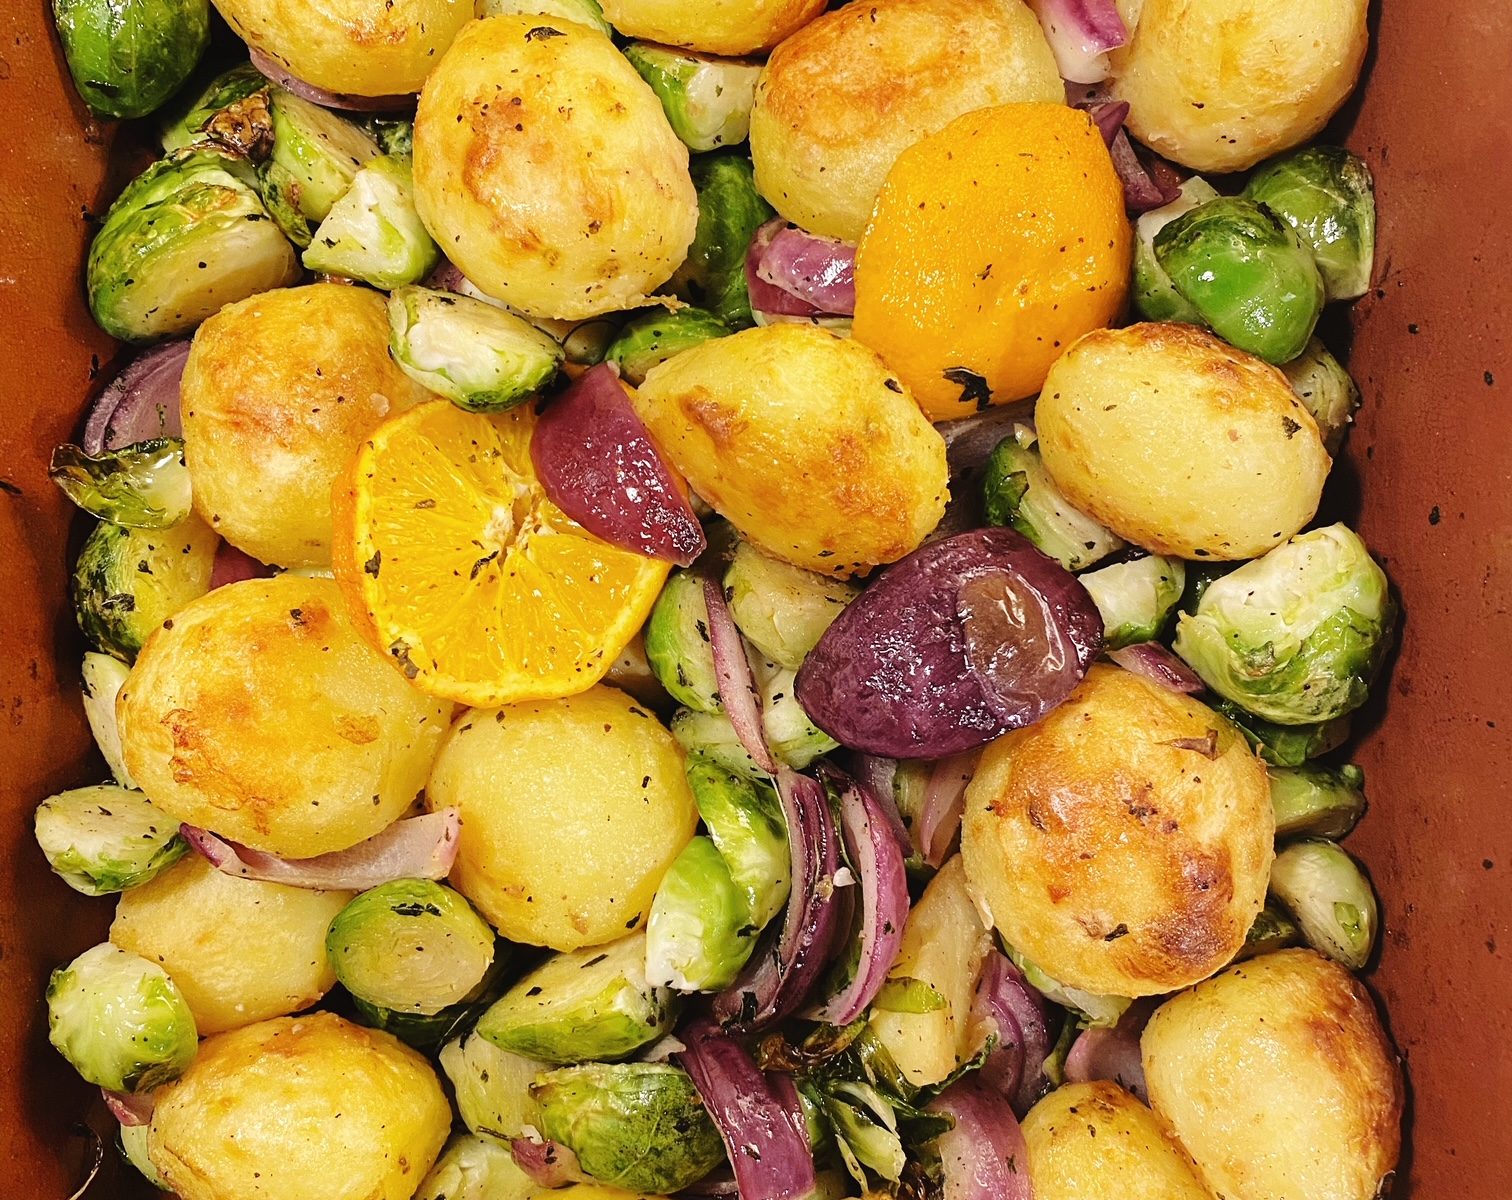
This is my favourite way to make really Christmassy roast potatoes. When the oven is full for a big roast dinner, it’s a great way to double up in one dish too. Brussel sprouts are best when roasted or sautéed rather than the traditional boil and flavouring them with red onion, sage and clementines just screams Christmas! Don’t forget to save the potato peels and make crisps! There’s a lot of flavour, nutrients and fibre in those organic peels.

Liz x

Ingredients

  • Potatoes – think X amount per person
  • Brussels sprouts – 6 or so per person
  • Clementines – 1 between 4 people
  • Red onion – 1 between 4 people
  • Sage – 3 leaves per person or 1 tbsp dried between 4 people
  • Vegetable oil – a generous slick in the roasting dish plus a drizzle for the bowl of sprouts
  • Salt and Pepper to taste

Method

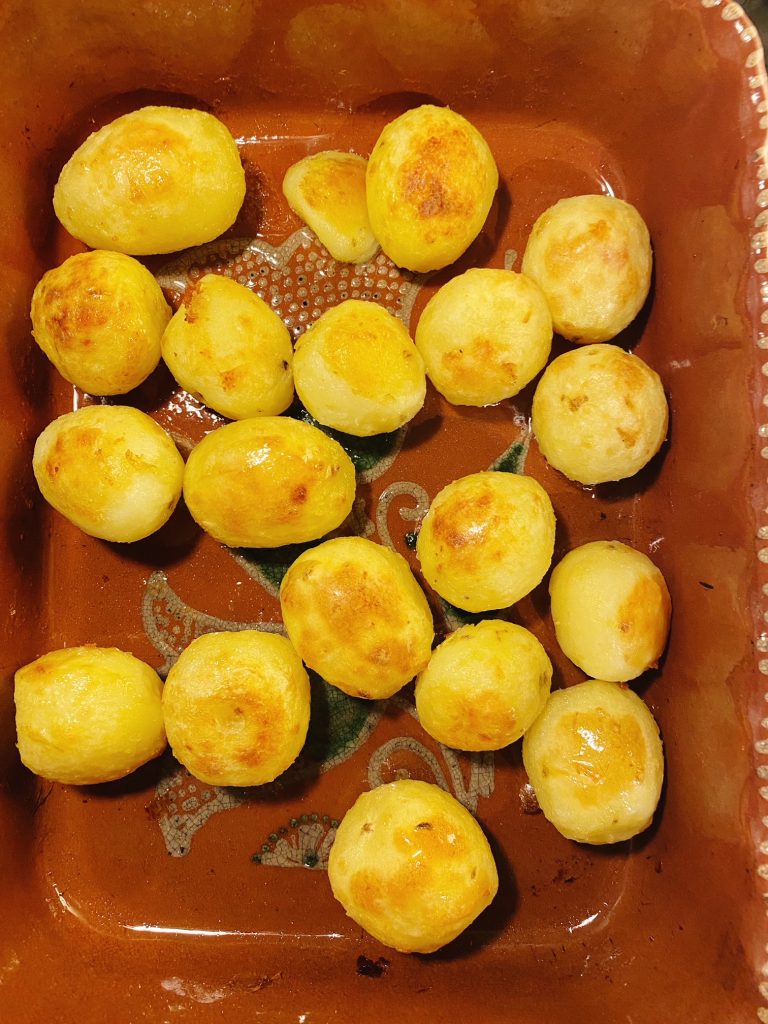
  1. Pre-heat the oven to 200C. Peel your potatoes and leave them whole if they are small, or cut them into large, even chunks. Place the potatoes into a large pot of water and bring it to the boil.
  2. Boil the potatoes until par-cooked. They should just be soft on the outside but still firm in the middle. Meanwhile pour a generous slick of vegetable oil into a roasting dish which will comfortably accommodate your potatoes and get it in the oven to heat up.
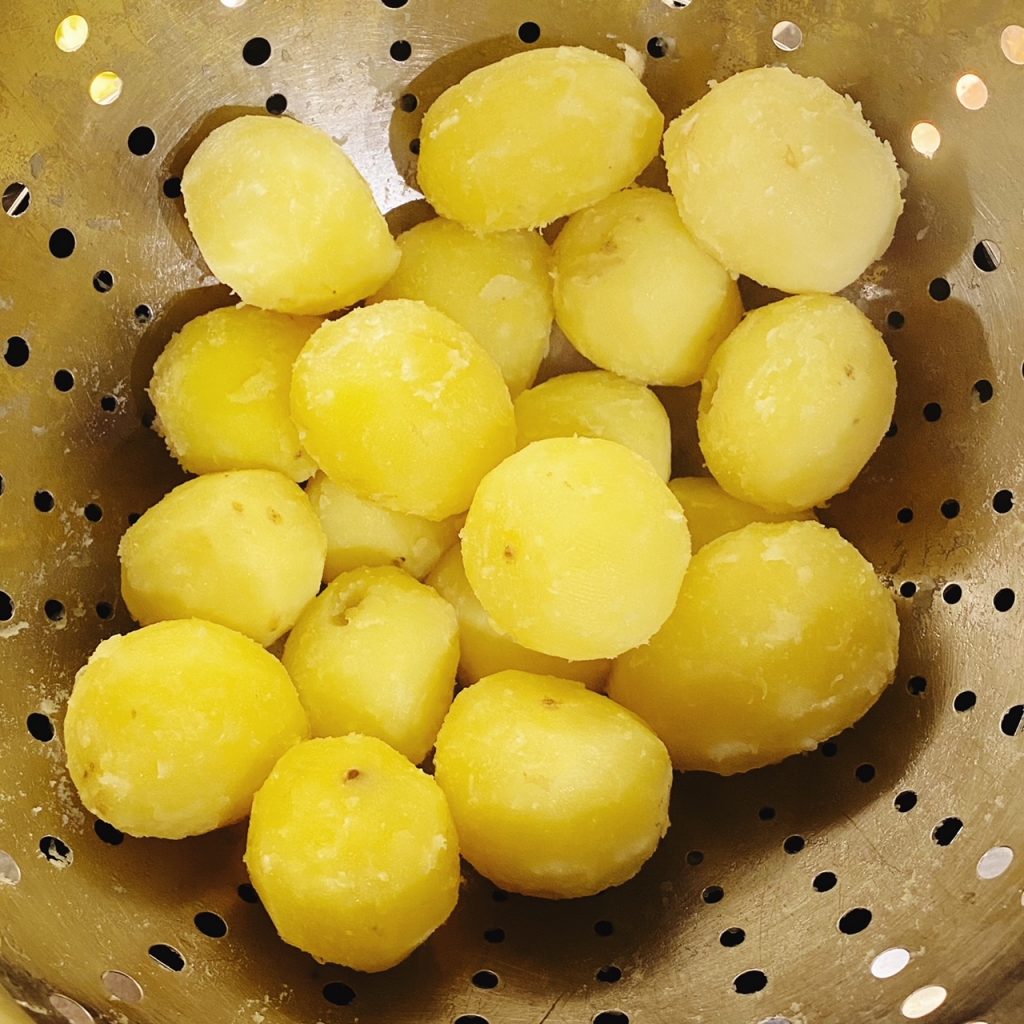
  3. Drain your potatoes into a large colander. Give the colander a good shake. This will rough up the outsides of the potatoes which will make a gorgeous crispy exterior in the oven.
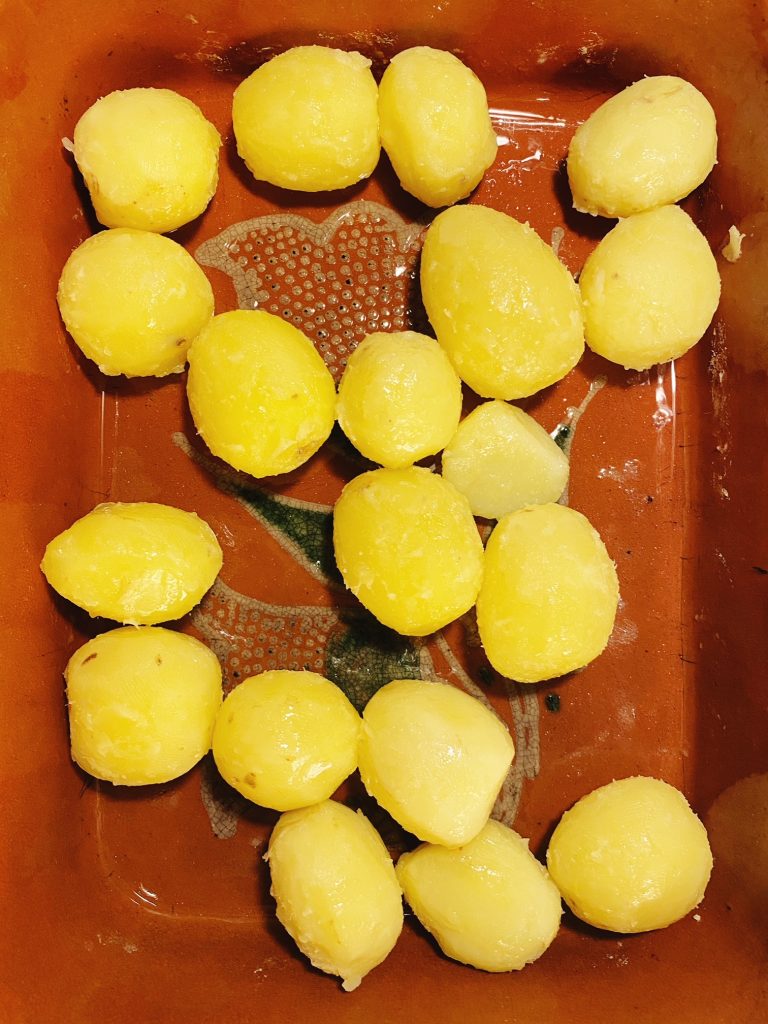
  4. Carefully remove the roasting dish from the oven and tip in the roughed up, par-boiled potatoes. Use a spatular or tongues to turn the potatoes in the hot oil then pop the dish into the oven to continue cooking the potatoes while you prepare the rest of the ingredients.
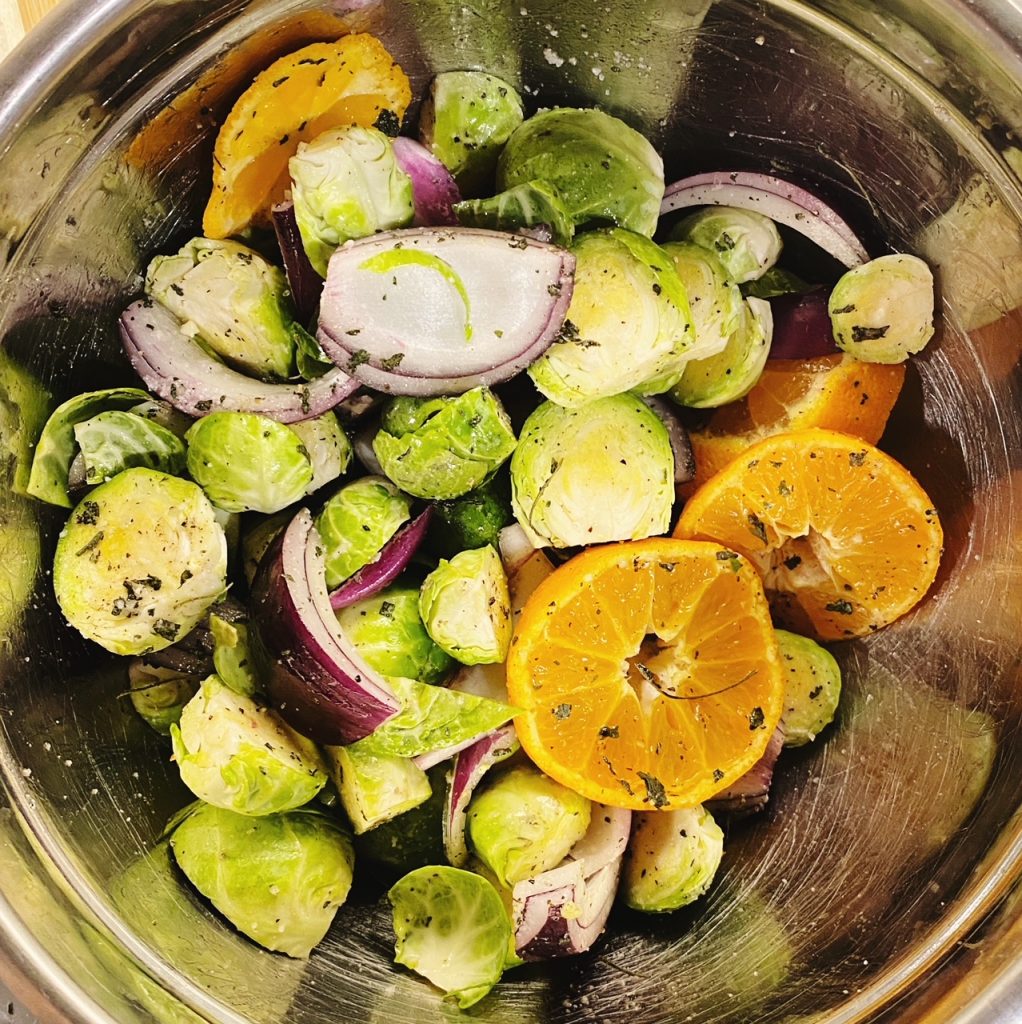
  5. Cut the ends off the sprouts and cut them in half. Remove any damaged outer leaves as you go. Put all the cut sprouts into a large mixing bowl.
  6. Slice the clementines into rounds and peel and slice the red onion. Add both to the bowl with the sprouts.
  7. Season the bowl of sprouts, red onion and clementines with salt, pepper and sage and mix well with a drizzle of vegetable oil.
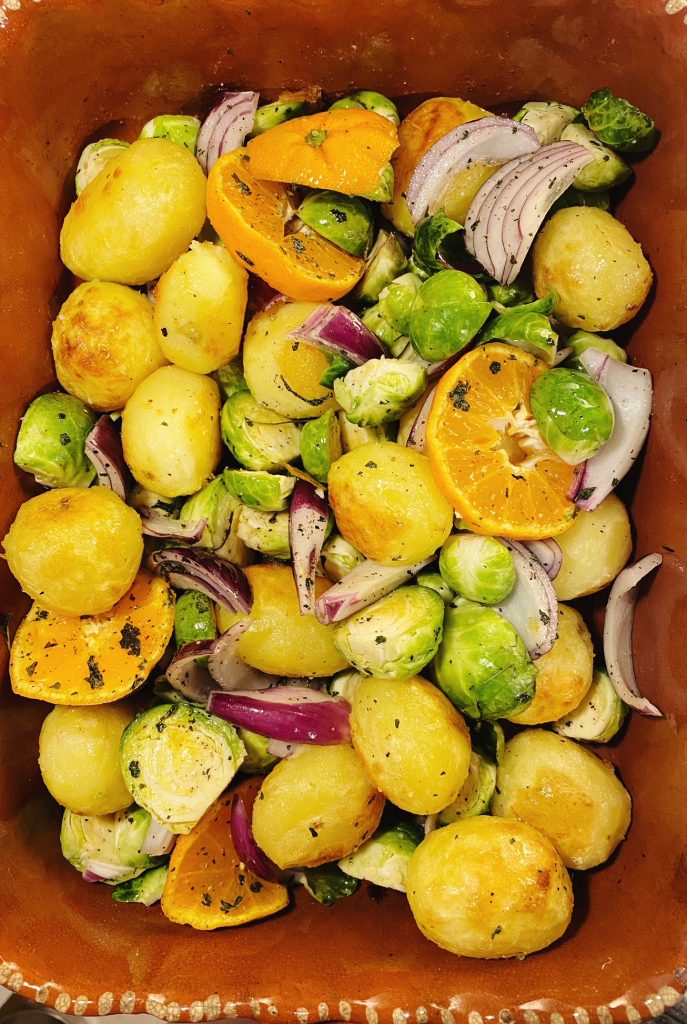
  8. Keep an eye on the potatoes in the oven and turn them regularly to ensure they are cooking evenly. Once they are beautifully golden and crispy (after around 20-30 minutes) remove the dish from the oven. Carefully tip in the prepared sprouts, red onion and clementines. Mix carefully then return the dish to the oven.
  9. After around 15 minutes, the sprouts and onions should be cooked through and the whole dish should smell amazing. Enjoy alongside your other roast dishes and gravy. Merry Christmas!

Rainbow Chickpea Salad

A few tins of organic chickpeas in the kitchen cupboard are always so useful! One of our kitchen staples for sure! Whizz them into hummus, smash them and mix with mayo for a stunning sandwich filler, simmer them in curries and stews, use the aquafaba for making vegan mayo or cakes, blend up with herbs and spices and make veggie burgers or falafels, or simply mix them with a dressing and seasonal veg for a satisfying salad. Here’s the one we’re having on repeat at the moment. A gorgeous combination of colourful, fresh veg with a simple vinaigrette. Goes perfectly alongside a BBQ!

‘Eating the rainbow’ at every opportunity is also a fantastic (and delicious) way to ensure you are getting a diverse range of the essential vitamins and minerals you need from your food. Liz

Ingredients

  • 1 heaped tsp wholegrain mustard
  • 4 tbsp extra virgin olive oil
  • 2 tbsp apple cider vinegar
  • 1 drained tin of chickpeas (keep the liquid in a tub/jar in the fridge to use for something else)
  • a large handful each of chopped red onion, cherry tomatoes, cucumber, yellow pepper
  • the stems from a bunch of rainbow chard, chopped
  • 1 bunch of asparagus, woody ends snapped off and composted, the rest chopped at an angle
  • 4 cloves of garlic, peeled and chopped
  • a little extra olive oil for sautéing
  • salt and pepper to taste
  • optional extra fresh herbs

Method

  1. Mix the mustard, olive oil and vinegar in the base of a large platter or salad bowl.
  2. Add the chickpeas, red onion, tomato, cucumber and pepper.
  3. Sauté the asparagus and rainbow chard stems with a little olive oil, salt and pepper until just tender. Then add them to the salad.
  4. Mix well, taste and adjust the seasoning if necessary.

Portobello Steak with Chimichurri

This one-tray bake is one of our favourite date-night specials with a bottle of red wine. It’s no hassle at all to put together and tastes incredible! It’s always the simple, organic ingredients that are the stars of the show. Who’d have thought a tray of some simply roasted vegetables could be so special? Portobello mushrooms are rich, juicy and simply spectacular when roasted. Their meaty texture and unique umami make them the perfect steak substitute! The Argentinian, herby chimichurri drizzle really brightens and lightens the dish and brings it all together. It’s a great sauce to add to your repertoire. It’s goes perfectly with BBQ’d and roasted vegetables.

Liz x

Ingredients (serves 2)

  • 4 portobello mushrooms
  • as many potatoes as you like
  • 1 red onion (or two shallots)
  • 1 bundle of asparagus (or any seasonal green you like – broccoli, kale…)
  • olive oil, salt and pepper to taste
  • 1 bunch of coriander
  • 1/2 bunch of parsley
  • 1 tbsp dried oregano
  • 1 shallot – peeled and roughly chopped
  • 1 red chilli – roughly chopped
  • 2 cloves of garlic – peeled
  • 1 large pinch of salt
  • 3 tbsp red wine vinegar (or any vinegar you like)
  • enough olive oil to blend into a loose sauce

Method

  1. Pre-heat your oven to 200C and find a large roasting dish.
  2. Arrange the mushrooms in the dish and scrub and cut your potatoes into thick wedges. If you have new potatoes, just cut them in half. Add them to the roasting dish along with a peeled and quartered red onion.
  3. Drizzle olive oil over the vegetables and season well with salt and pepper. Pop the dish in the oven to roast while you prepare the asparagus and the chimichurri.
  4. Add the herbs, shallot, garlic, chilli, salt and vinegar to a small blender or food processor. Add a generous drizzle of extra virgin olive oil and blend into a loose sauce. Pour the sauce into a clean jar and it will stay fresh in the fridge for at least 2 weeks. Bring it out next time you have a BBQ. Alternatively you can freeze any unused sauce to use another time.
  5. Snap the woody ends off the asparagus and add them to the compost bin (or pop them in a box of peels and offcuts in the freezer to make veg stock with another time). Put the spears in a large bowl and drizzle with a little olive oil. Season with salt and pepper and mix well to coat the spears in the seasoning.
  6. When the mushroom, potatoes and onions are cooked through and starting to take on some colour (after about 20 minutes or so in the oven), add the asparagus to the roasting dish and return it to the oven to roast for a further 5 minutes or so.
  7. Then dish up. Divide the roasted vegetables between two plates and drizzle the chimichurri over the roasted mushrooms. Enjoy with a glass of red wine.

Greek-Style Watermelon Salad

The watermelons on our list right now are super-sweet, organic of course, and the perfect size! Add one to your next order and try my Greek-style watermelon salad, it’s the most refreshing thing you’ll eat this year! Perfect as is with a slice of bread to mop up the juices, or as part of a BBQ.

You’ll need black olives, red onion, feta (or make my plant-based feta using the recipe from my book below), cucumber, tomatoes, extra virgin olive oil, vinegar/lemon juice and herbs. Find all the certified organic ingredients to your next order here. We deliver to every address in Ireland.

Liz x

Ingredients (serves 4+)

  • 1 red onion
  • 2 or 3 tbsp vinegar or lemon juice
  • 4+ tbsp extra virgin olive oil
  • 1 tsp dried oregano (optional)
  • black pepper to taste
  • 1/2 a cucumber
  • 1 punnet of cherry tomatoes
  • 1/4 – 1/2 of a watermelon
  • 1 pack of feta
  • 1/2 a jar of black olives (ideally kalamata olives)
  • fresh mint, parsley, basil as you like
watch the method here or read on below

Method

  1. Peel, halve and finely slice the red onion and break the thin strips up into a bowl. Add the vinegar or lemon juice and allow the onions to steep and blush crimson pink for 20 minutes or so. The longer you leave them, the more pickled and bright pink they will go.
  2. Add the olive oil, optional oregano and black pepper and stir well. Alternatively you can wait to add the olive oil and pepper at the end.
  3. Cut the cucumber in half lengthways and scoop out the seeds (don’t throw them away, add them to a smoothie), cut into bites and scatter into a large salad bowl or platter.
  4. Halve or quarter the plum tomatoes and add them to the bowl.
  5. Cut the watermelon into bite sized chunks, removing any seeds as you go, and get it into the bowl too, along with any juices on the board.
  6. Cube up the feta and tear the olives in half and add them to the bowl.
  7. Add the lightly pickled onions and all the juices. If you have not added olive oil yet, add a generous drizzle now.
  8. Gently mix the salad without bashing up the ingredients too much.
  9. Taste and if you like, add some salt (the feta and olives usually bring enough salt to the party). 
  10. Just before serving, tear over plenty of fresh herbs – basil, mint, parsley… I usually add an extra drizzle of delicious, peppery extra virgin olive oil too. Enjoy!

Tofeta

And here’s the tofeta recipe. It’s so easy to make. Just drain 2 packs of this extra firm tofu really well – really squeeze out as much water as you can – blend with all the ingredients and allow to set in the fridge overnight.

Fermented Onions

Fermented onions are pickled onions funky cousin. They are much easier to make than the traditional pickled onion and taste amazing. And as an added bonus, like all fermented vegetables, they are incredibly good for you! I use these beautiful, tangy onions on loads of dishes, from dals to tacos. How will you use yours? Liz x

A quick video tutorial for you.

Ingredients

  • onions (a mix of red and white or just one or the other)
  • natural salt
  • optional herbs/spices (eg bay leaf, peppercorns, coriander and mustard seeds, juniper berries, thyme, rosemary, chilli… anything you like)
  • a cabbage leaf (or something similar)

Method

Gather your ingredients and a clean jar, knife, measuring jug, measuring spoons and chopping board. There is no need to sterilise, but do make sure everything you are working with is nice and clean and well rinsed.

Make a basic brine in your measuring jug and put it aside to fully dissolve while you prepare the jar of vegetables. ***The basic brine recipe is 1.5 tbsp salt dissolved in 1 litre of water.*** If you are making just a small jar then halve or quarter the recipe.

Add a pinch of whatever pickling spices or herbs you’d like to flavour your pickled onions with to the jar.

Then peel and slice your onions and add them to the jar. Red onions, or a mix of red and white, will give you beautiful, bright pink fermented onions. Plain white are delicious too of course. Leave about an inch of head room in the jar.

Then pour the brine into the jar ensuring you cover the onions when they are pressed down, but still leave a little head space in the jar.

Pin the chopped onions down under the brine with the cabbage leaf. You may need to break it to size. Try and tuck it neatly under the shoulders of the jar so that everything is safely tucked under brine. Any floating bits of onion will be exposed to air and are at risk of going mouldy so tuck them under the cabbage leaf ‘follower’.

Add a weight on top of the cabbage leaf if it looks like it will float up over the brine. This needs to be something that is not corrosive when in contact with salt and water. Glass is ideal in this situation so a smaller jar or a glass ramekin is perfect. Otherwise you can buy specialist glass weights for this purpose.

Place the lid loosely on the jar to allow gases to escape during fermentation. If your lid does not fit over the weight, then cover the jar with a tea towel and secure it with string/elastic.

Put the jar in a bowl or on a tray on a shelf for one week to ferment at room temperature. It’s best not in direct sunlight as that would cause too many fluctuations in temperature.

Taste the onions after 1 week. They should taste vinegary and delicious, a lot like pickled onions. If you are happy with the flavour, remove the weight and follower and keep the jar in the fridge. Otherwise let it carry on fermenting at room temperature until you are happy with the flavour.

The onions should last for a long time in the fridge, at least a month but usually much much longer. Just keep an eye on them and no double dipping! Enjoy!

Jay and Joy Vegan Cheeses

Have you tried the Jay and Joy range of vegan cheeses we sell yet? They are absolute game changers. There’s no doubt that there are some dodgy tasting plant based cheeses out there, but these are the real deal. We love that they use recognisable, all organic ingredients. We love that they are made using ancestral French cheese-making techniques. But most of all we love the flavour. Here are some serving suggestions to inspire you to make the most out of these delectable little boxes of cheese. Let us know your favourite way of eating them in the comments or over on our facebook group. We are always looking for new ways to enjoy our carefully curated organic products.

Liz x

*as always, words in bold are clickable links to our shop so you can easily add the ingredients to your usual order


Goat Cheese, Blood Orange, Red Onion, Black Olive

Method (serves 2)

Arrange some washed fresh lettuce leaves in two bowls.

Trim off the skin of 1 blood orange and add juicy slices of it to each bowl.

Peel and thinly slice quarter of a red onion and add a few circles to each bowl.

Add a handful of halved salty black olives to each bowl.

Add four slices or so of Jay and Joy Goats Cheese to each bowl.

Drizzle everything with our excellent extra virgin olive oil and a crack of black pepper.

Simple as that! The sweet tang of the oranges contrasts the olive oil, salty cheese and olives perfectly. Every mouthful a delight.


Celeriac Steaks, Kale, Blue Cheese, Pear, Walnut

Method (serves 2)

Slice 4 steaks out of the middle of a celeriac – about 1cm thickness each. Then trim off the skin and knobbly roots of each slice. (Reserve the leftover ends of the celeriac for soups/stews/risottos…)

Melt a tbsp of plant based butter with a tbsp of olive oil in a large frying pan over a medium high heat.

Then add the celeriac steaks and season them with a pinch of salt and some cracked black pepper. Fry on both sides until golden brown and tender – this takes about 10-15 minutes.

Keep the steaks warm, propped up in one side of the pan then add lots of rinsed and chopped kale to the pan. Stir fry to wilt for 3 minutes or so then taste and season if necessary (there may be enough seasoning already in the pan from the celeriac steaks and butter/oil).

Divide the cooked kale onto two warm plates, top with the celeriac steaks and then quickly toast two generous handfuls of walnuts in the now empty frying pan.

Add a sliced pear to each plate, the toasted walnuts and finish with little slices of Jay and Joy Blue Cheese.

The balance of sweet pear, buttery celeriac, crunchy nuts and salty blue cheese is absolutely gorgeous. I hope you really enjoy it!


Baked Brie, Caramelised Red Onion & Thyme Toast

Method (serves 2)

Melt a generous tbsp of plant based butter and a tbsp of olive oil in a frying pan.

Add one peeled and sliced red onion and a pinch of salt and fry on medium for about 10 minutes or until it starts to collapse and caramelise.

Add four peeled and chopped cloves of garlic and fry for another 5 minutes or so.

Then to help the caramelisation, add a tsp of brown sugar and season with some black pepper and a tsp of fresh thyme leaves. Fry for another minute or so to bring the flavours together.

Meanwhile cut and toast two slices of sourdough bread.

Put the toast in a baking dish, divide the caramelised onion between the two slices and top with slices of Jay and Joy Brie.

Drizzle with a little olive oil and put the baking dish in a hot oven or under the grill for a few minutes. This vegan brie does not melt like regular brie, but warming it up really brings the dish together.

Scatter with a few more fresh thyme leaves and enjoy! Crunchy toast, sweet caramelised onion, creamy cheese and fragrant thyme…so good!