This is my simple and adaptable method for BBQing our gorgeous new potatoes! I have fond memories of pricking large jacket potatoes, wrapping them in foil and packing them in with the food for camping trips. Then we would carefully tuck them into the BBQ coals to bake while the rest of the grilling was done, they’d often come out perfect if we remembered to turn them occasionally, but more often than not, half the potato would burn and half would be raw, or the coals would burn out before the potato was done and there’d be some disappointment… So this way of par-boiling, dressing then skewering little salad potatoes provides a much more consistent result.
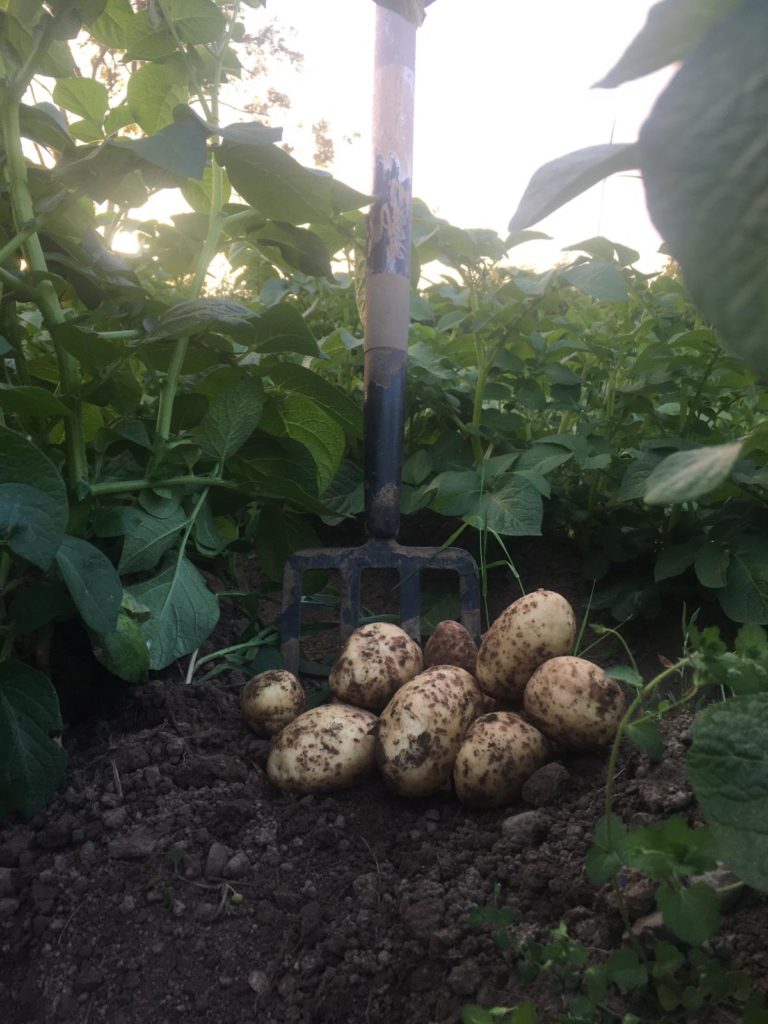
Start by boiling scrubbed new potatoes until they are nearly cooked through. Test a few larger ones with a sharp knife or skewer. Then drain the potatoes and allow them to cool in the colander while you prepare a tasty marinade or dressing!
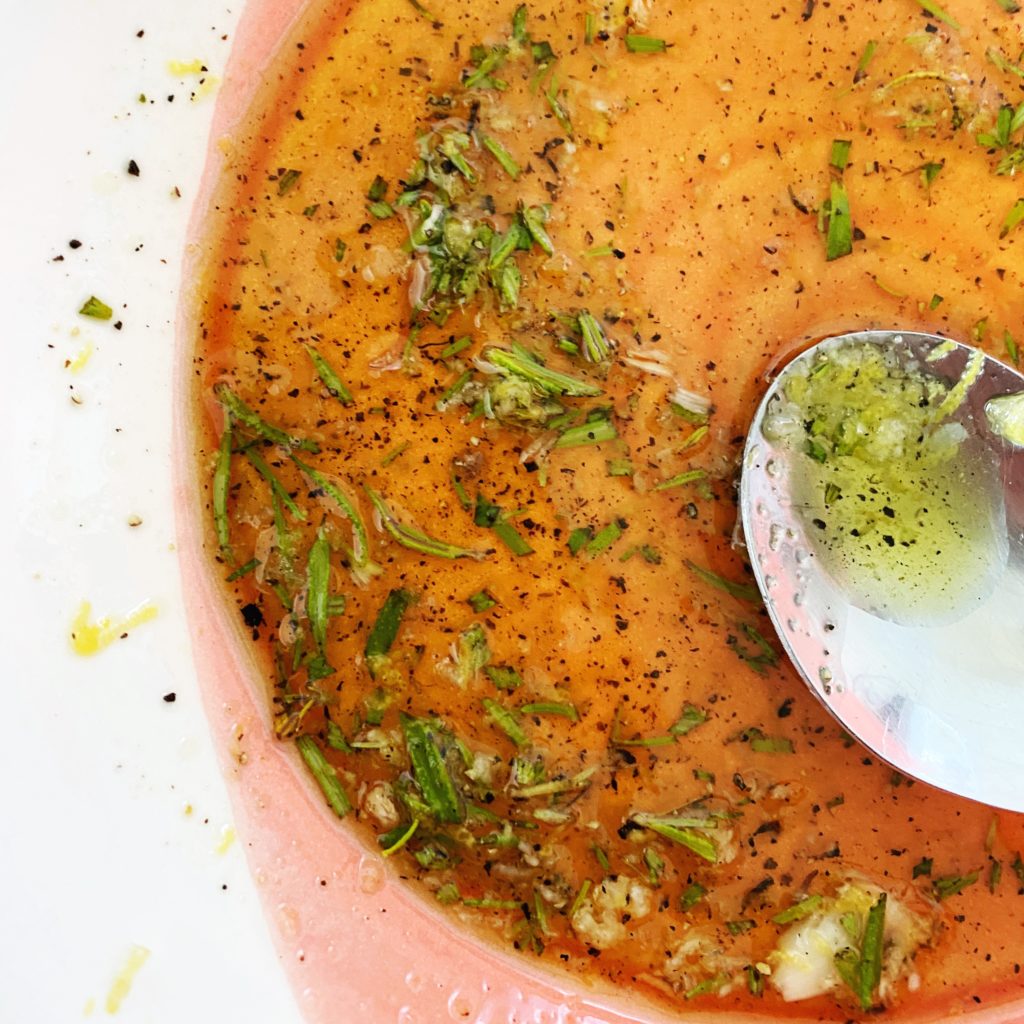
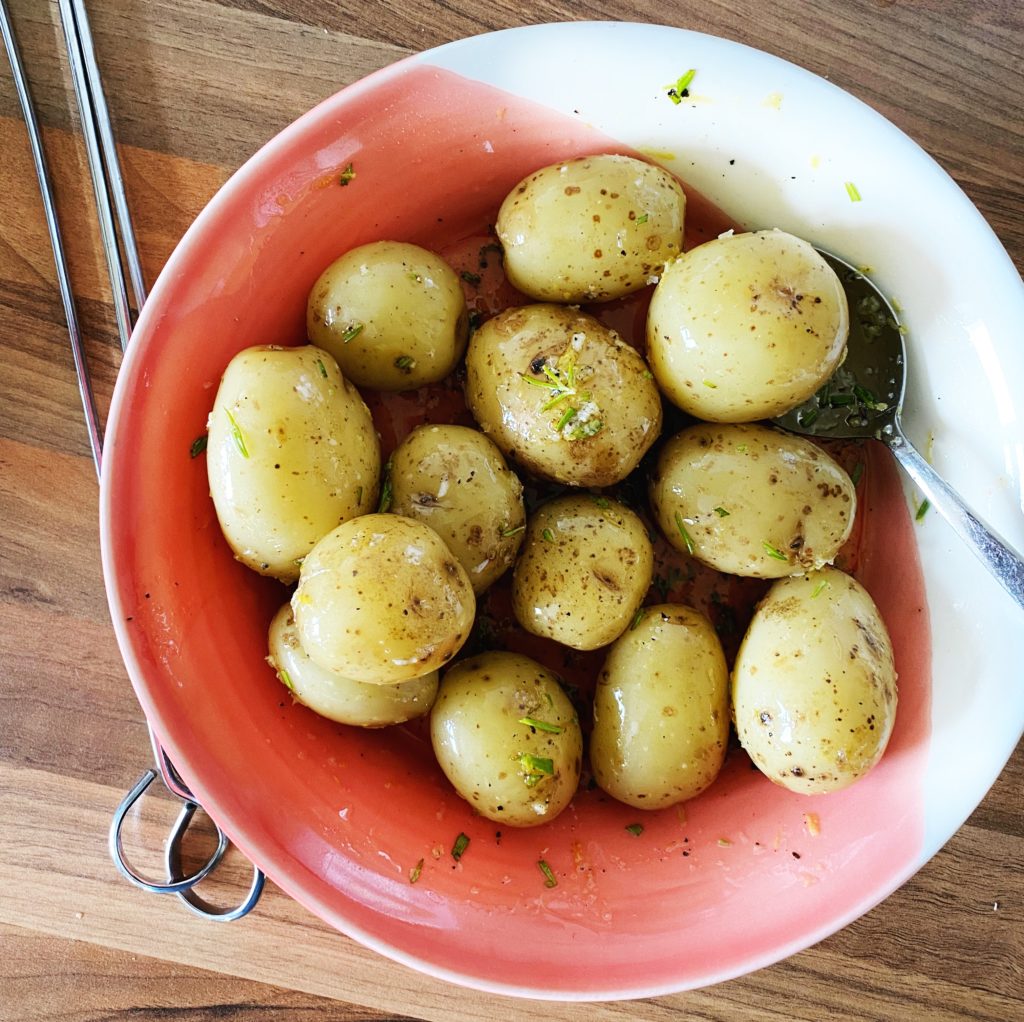
I love potatoes with garlic and herbs. This time I mixed olive oil, salt, pepper, crushed garlic, rosemary and lemon zest in a large bowl. Then toss the par cooked new potatoes in the dressing.
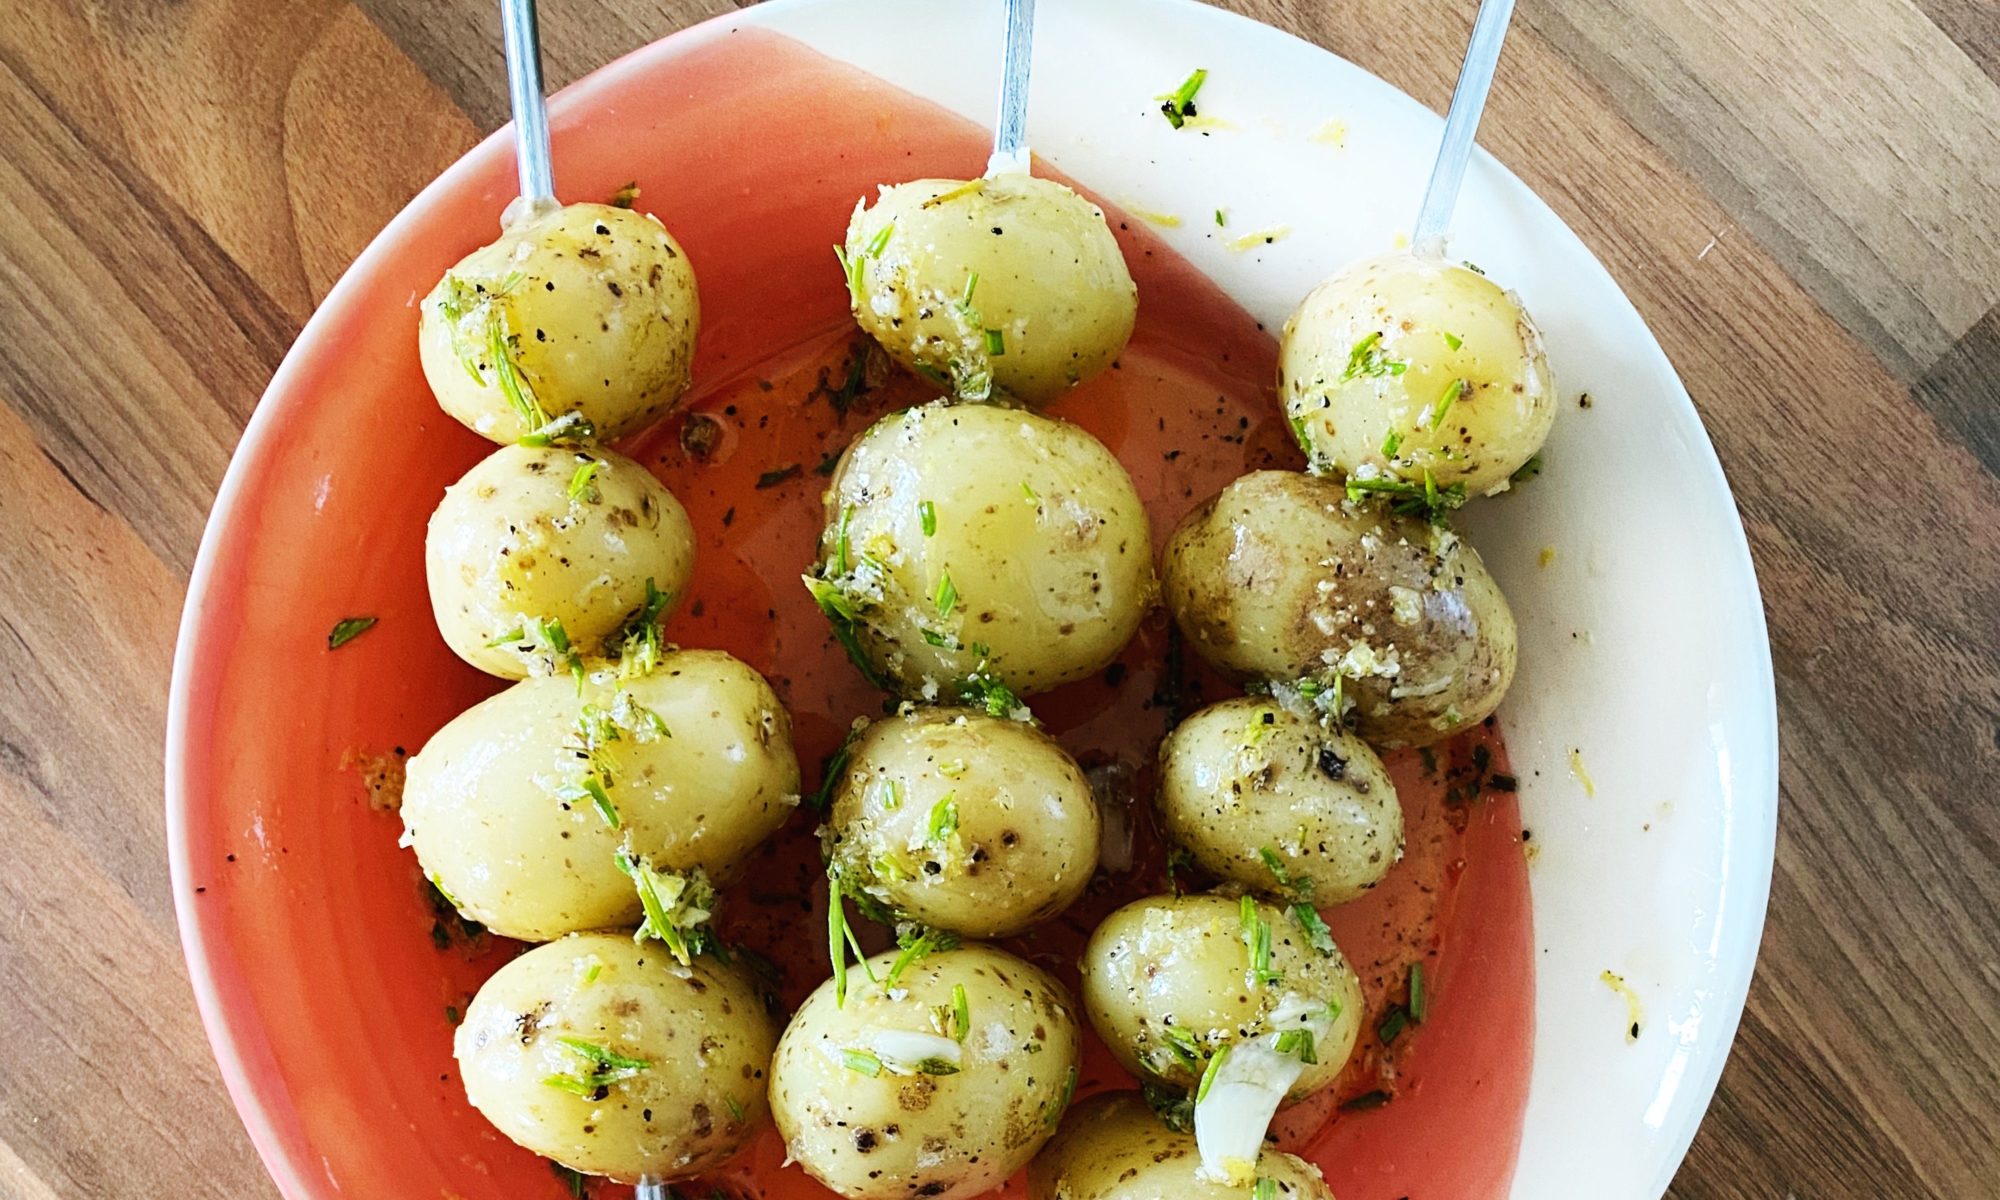
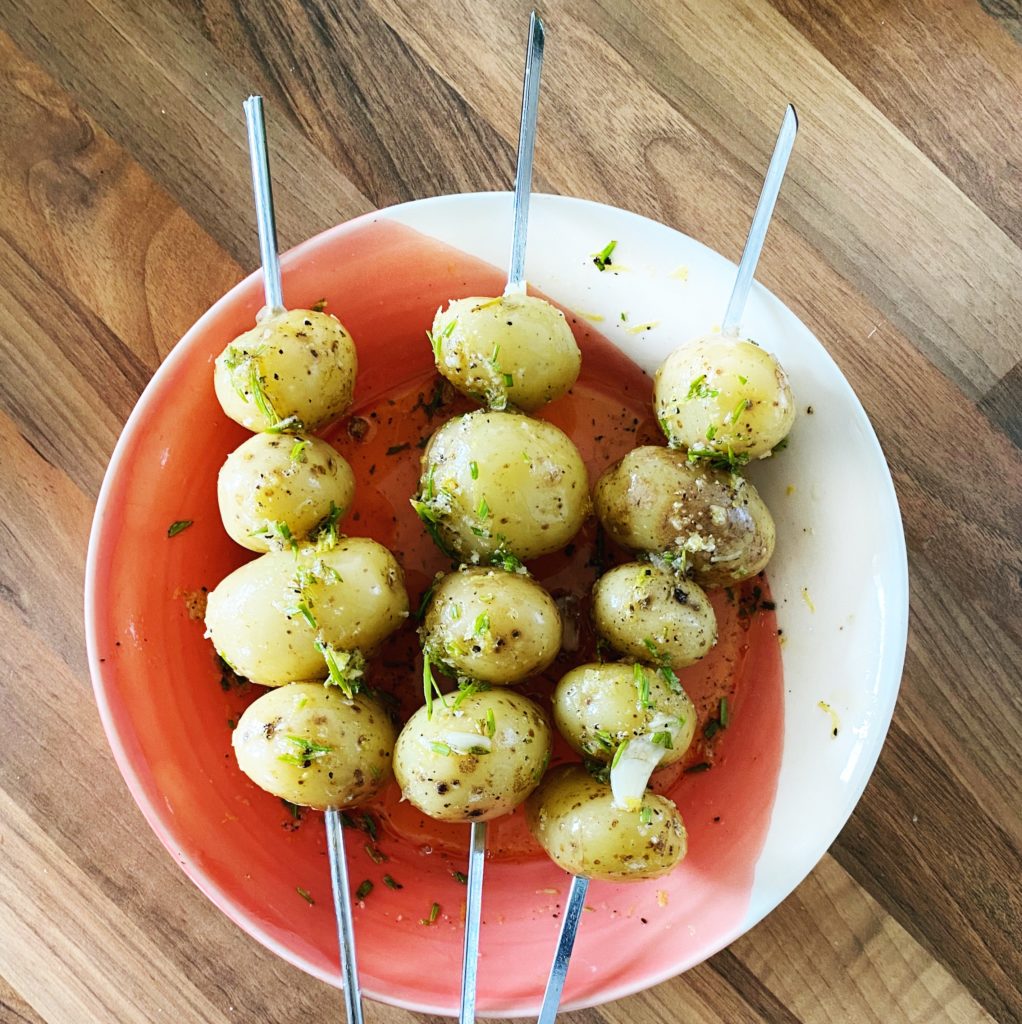
Push the potatoes on skewers (or cook in a BBQ basket) and get them onto a plate or tray ready to pop over the coals.
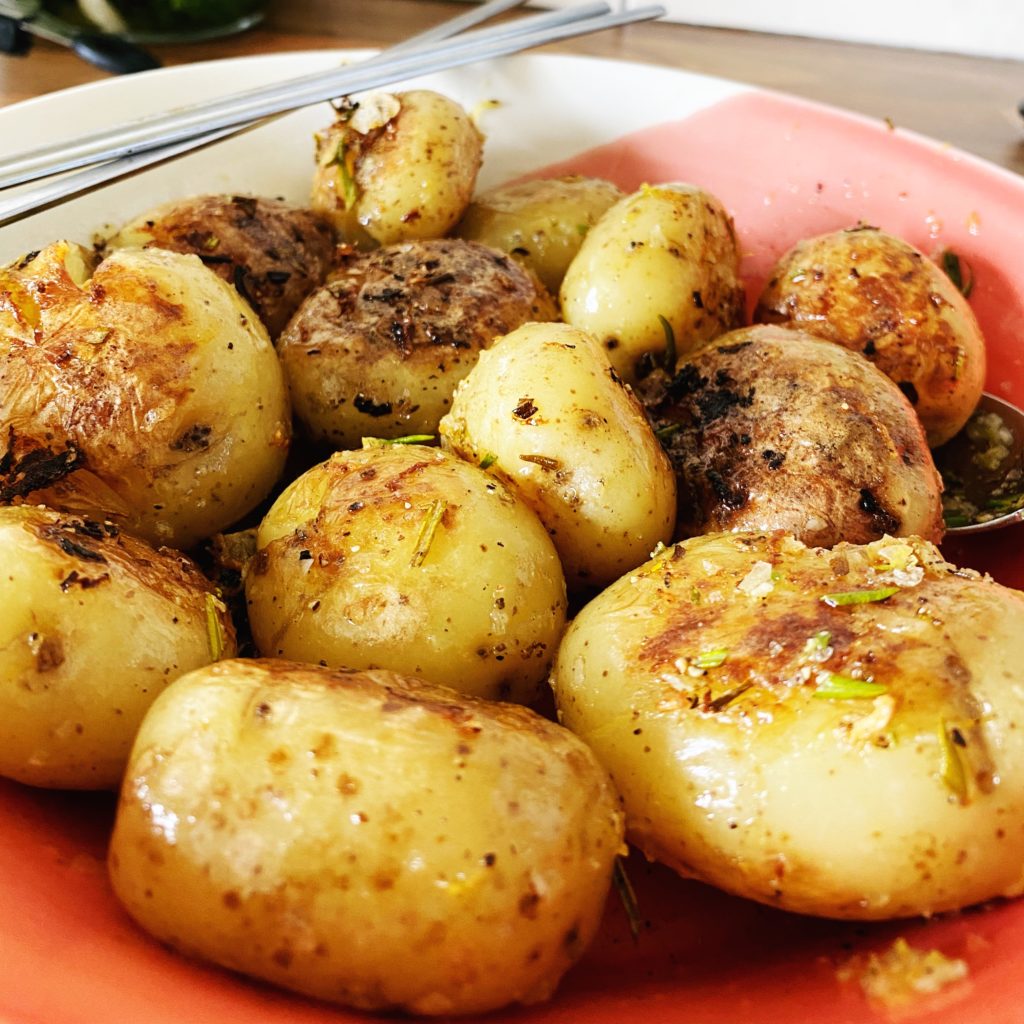
Cook on the BBQ, turning often until soft, smokey and delicious!
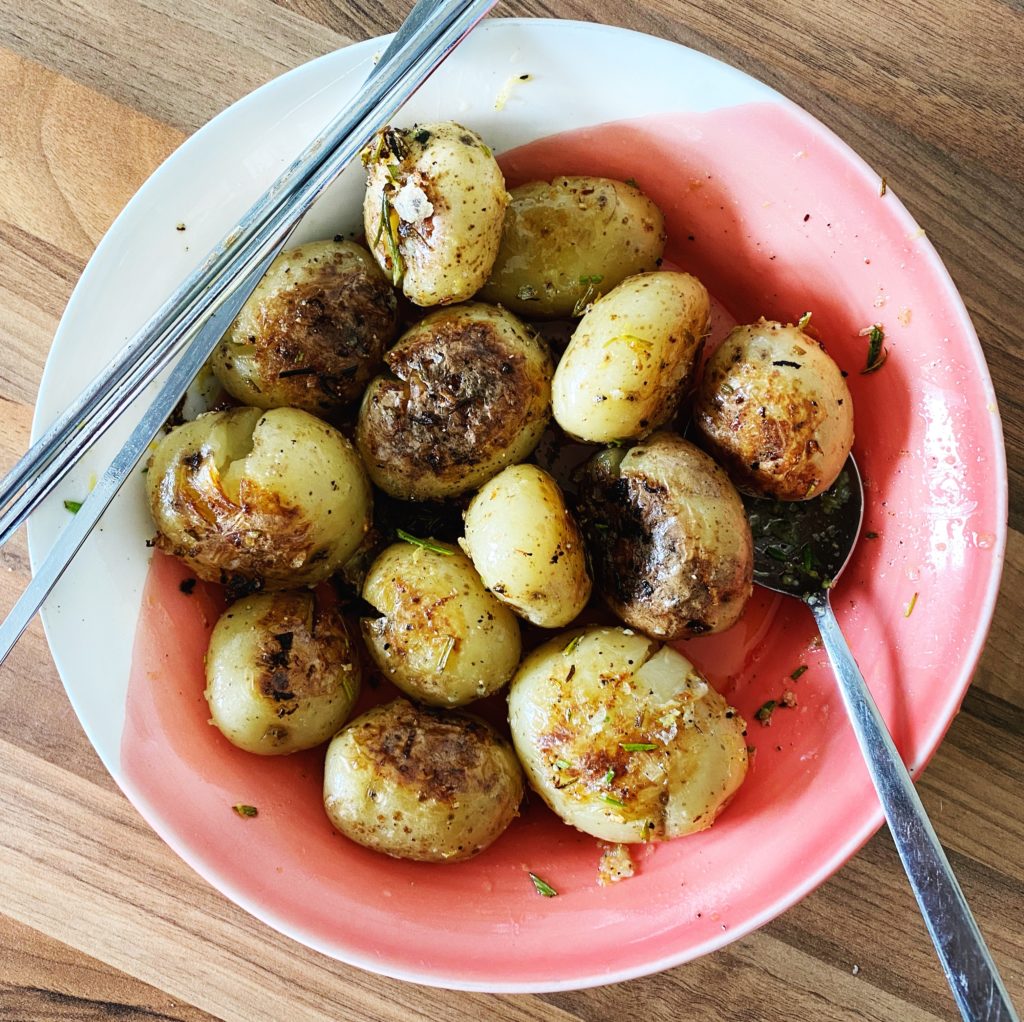
Then push them off the skewers, back into the dressing bowl and toss again to get any last bits of dressing and flavour back over the delicious, charred potatoes. Enjoy!
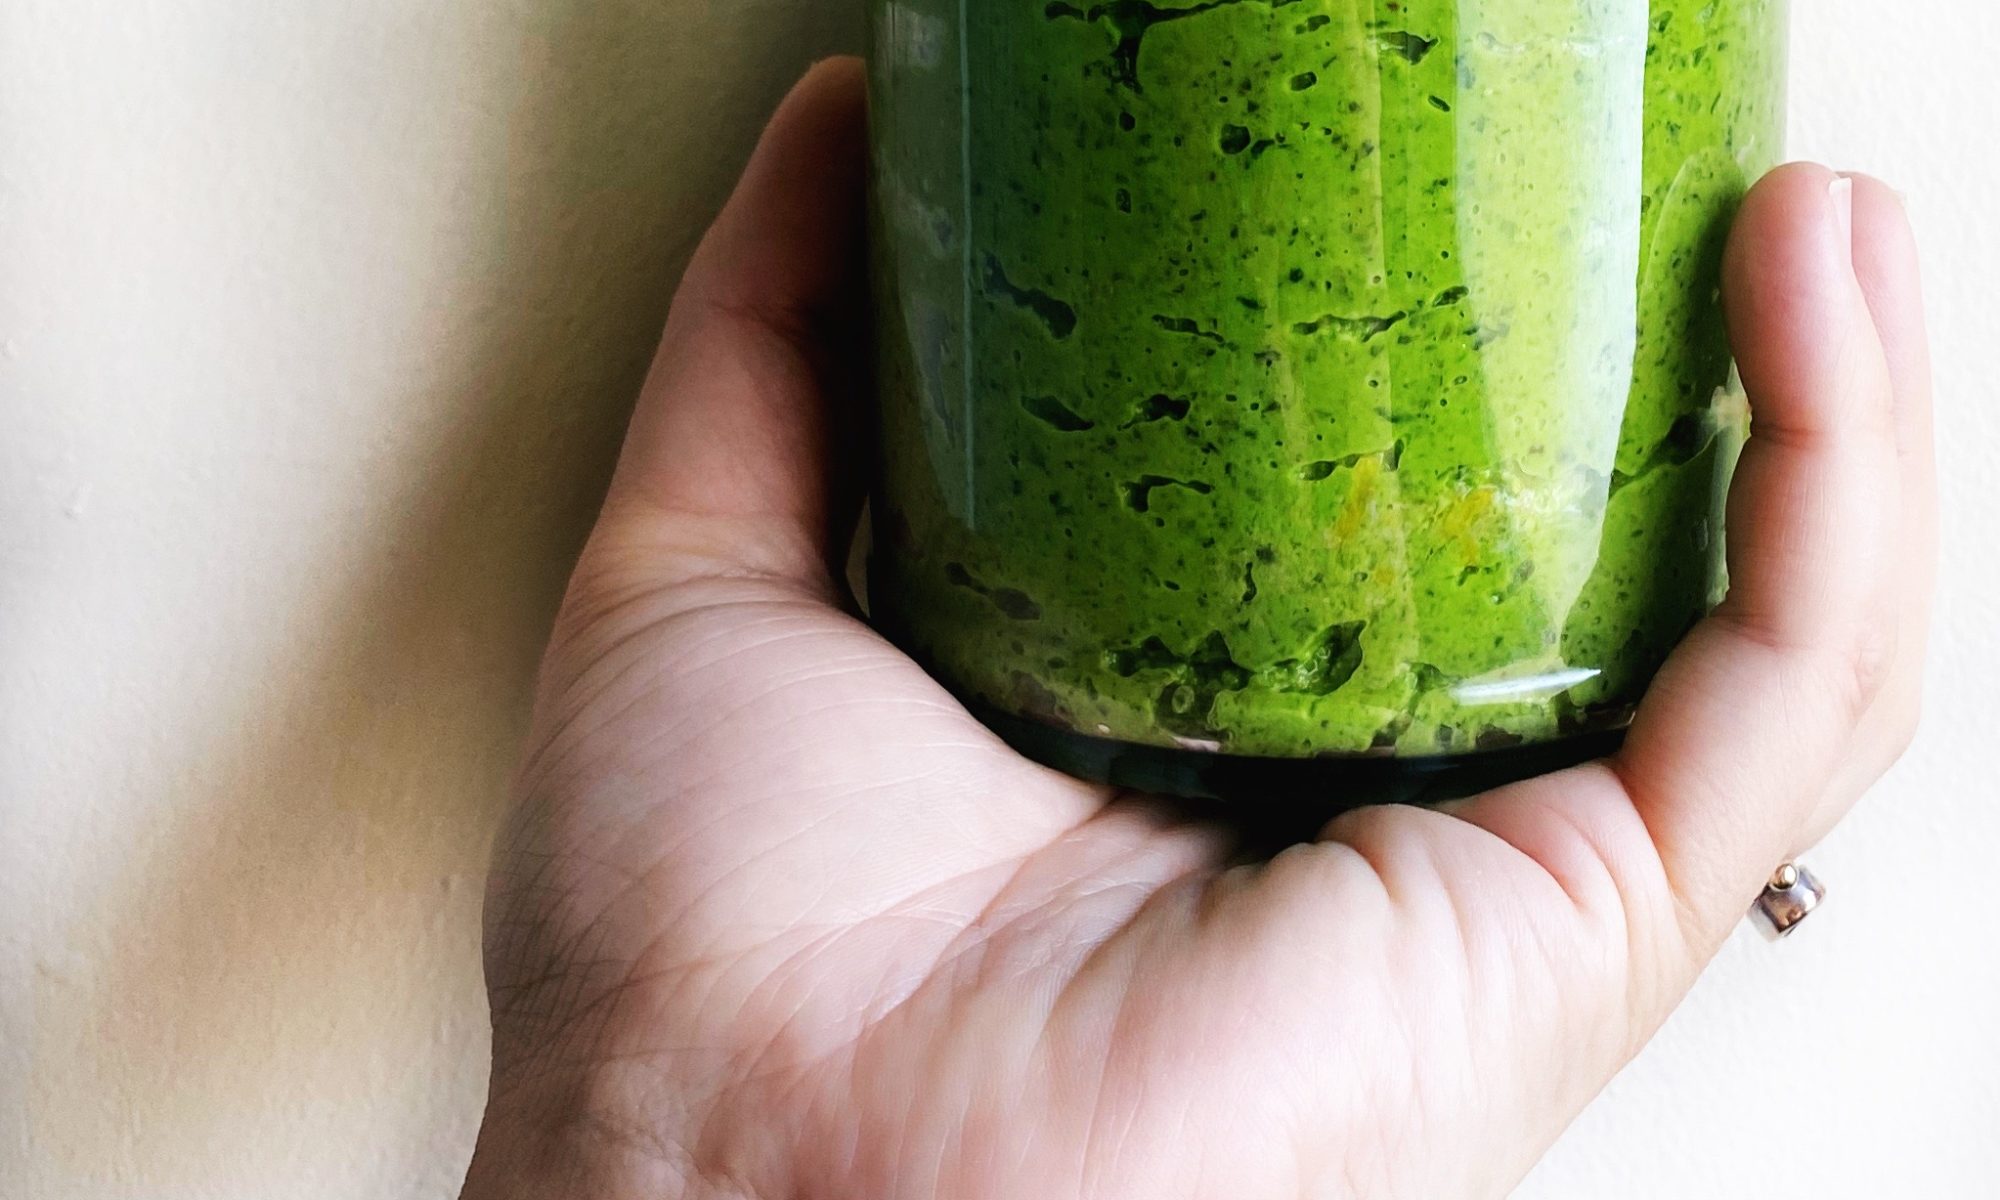
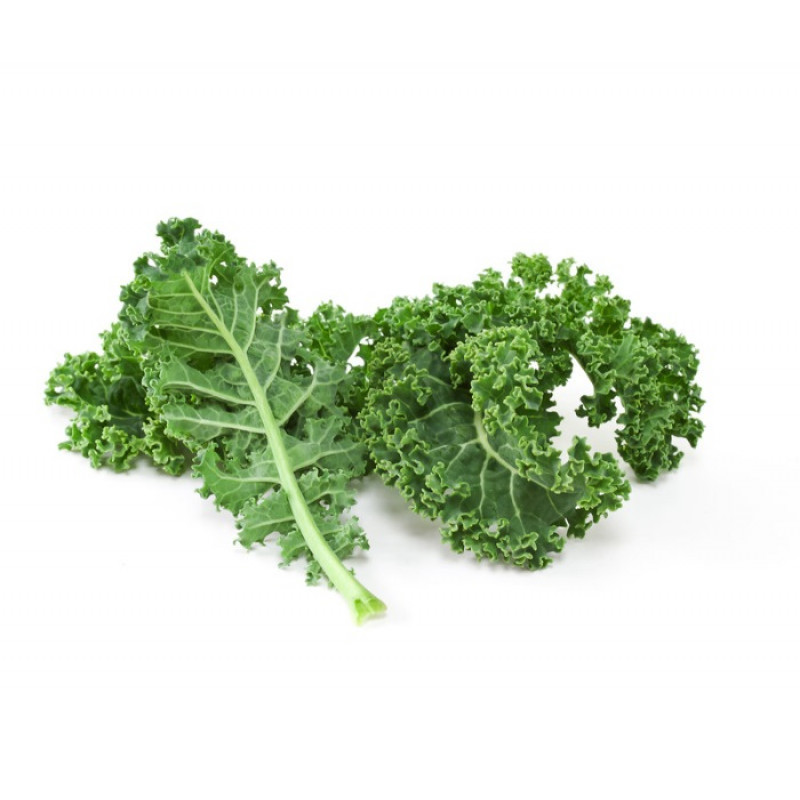
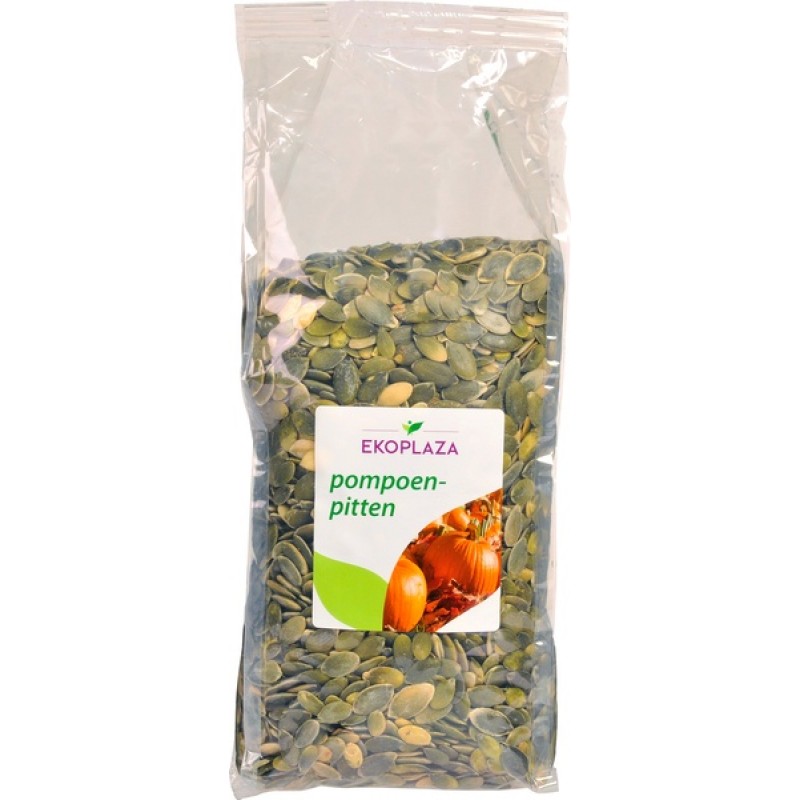
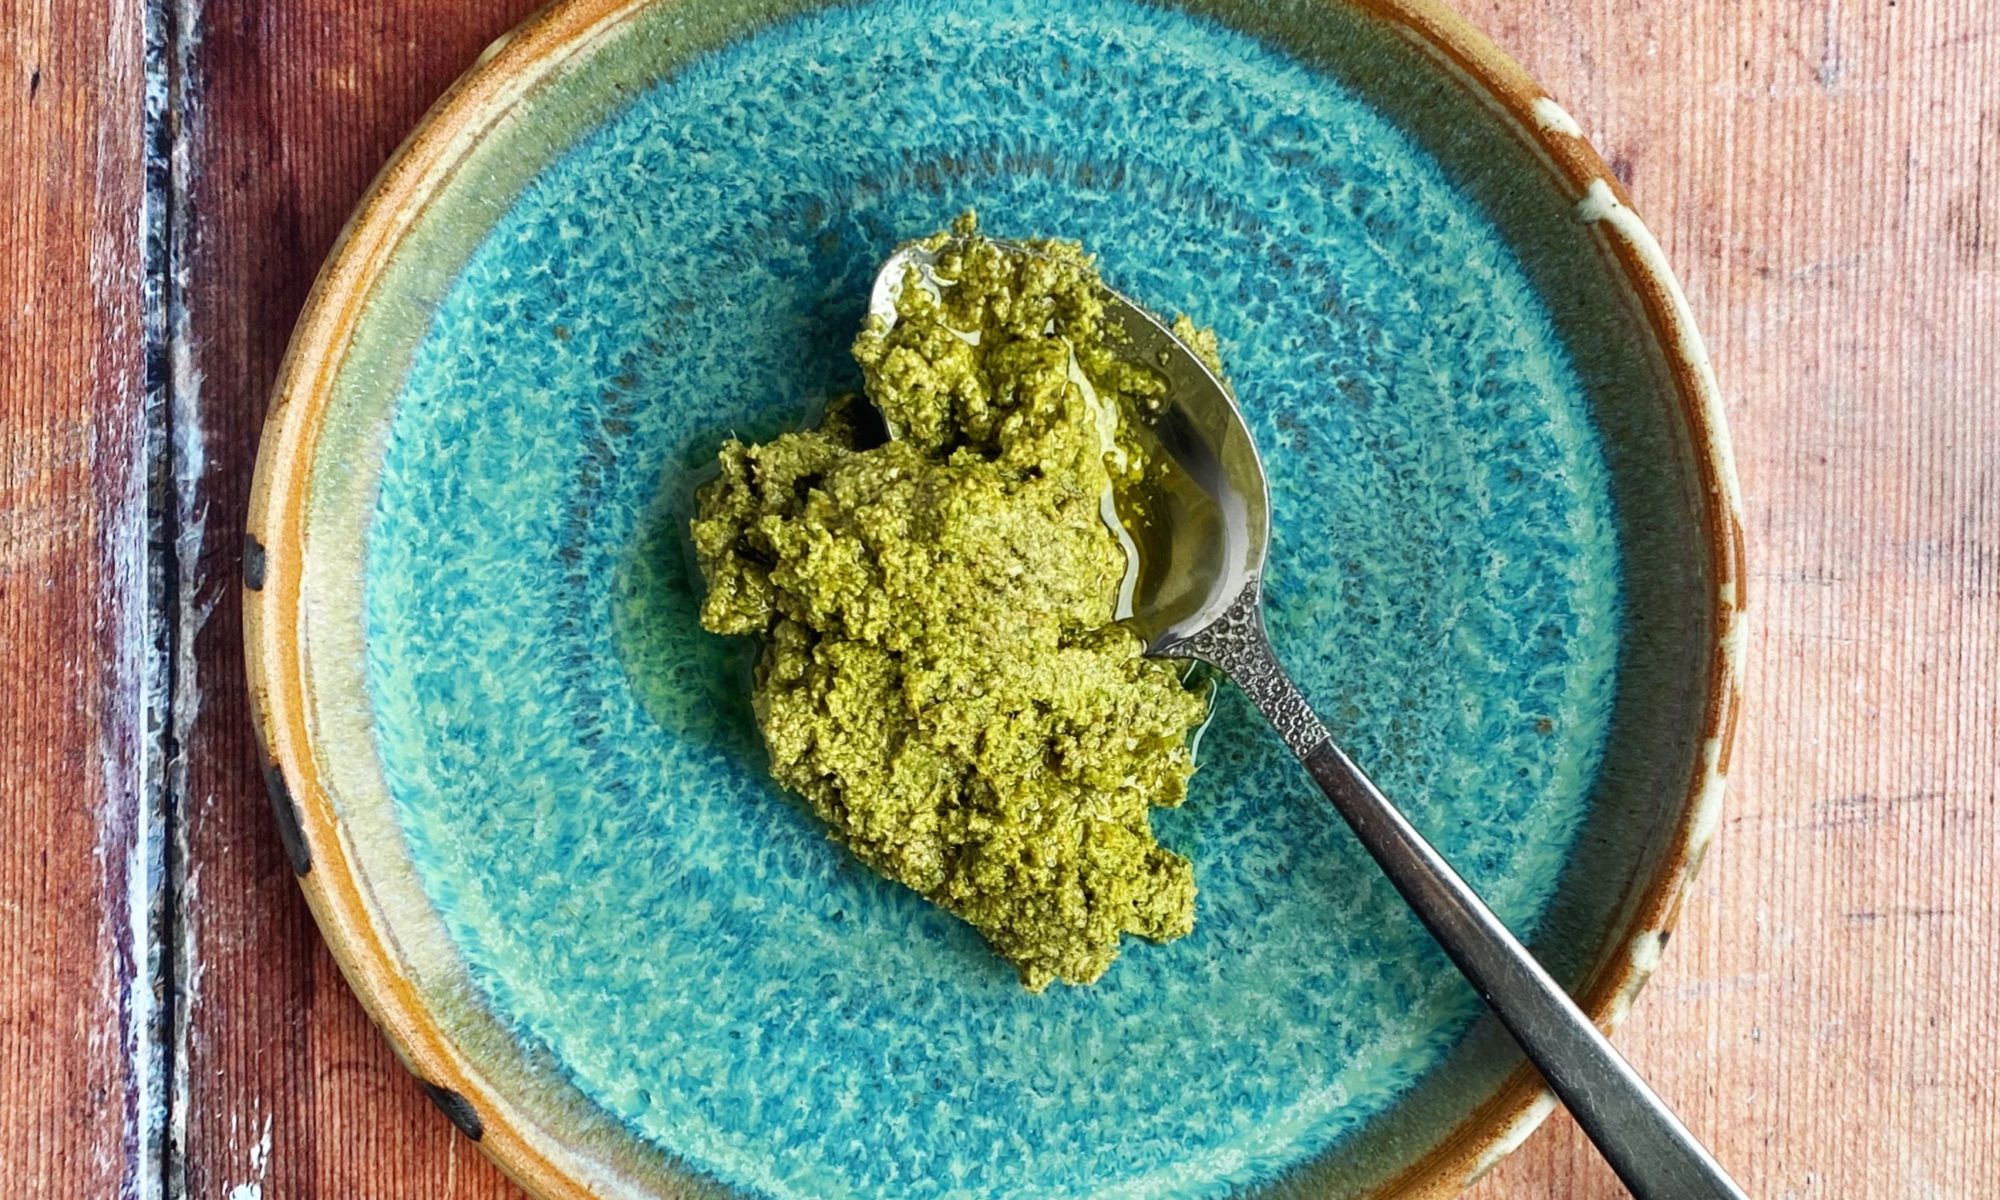
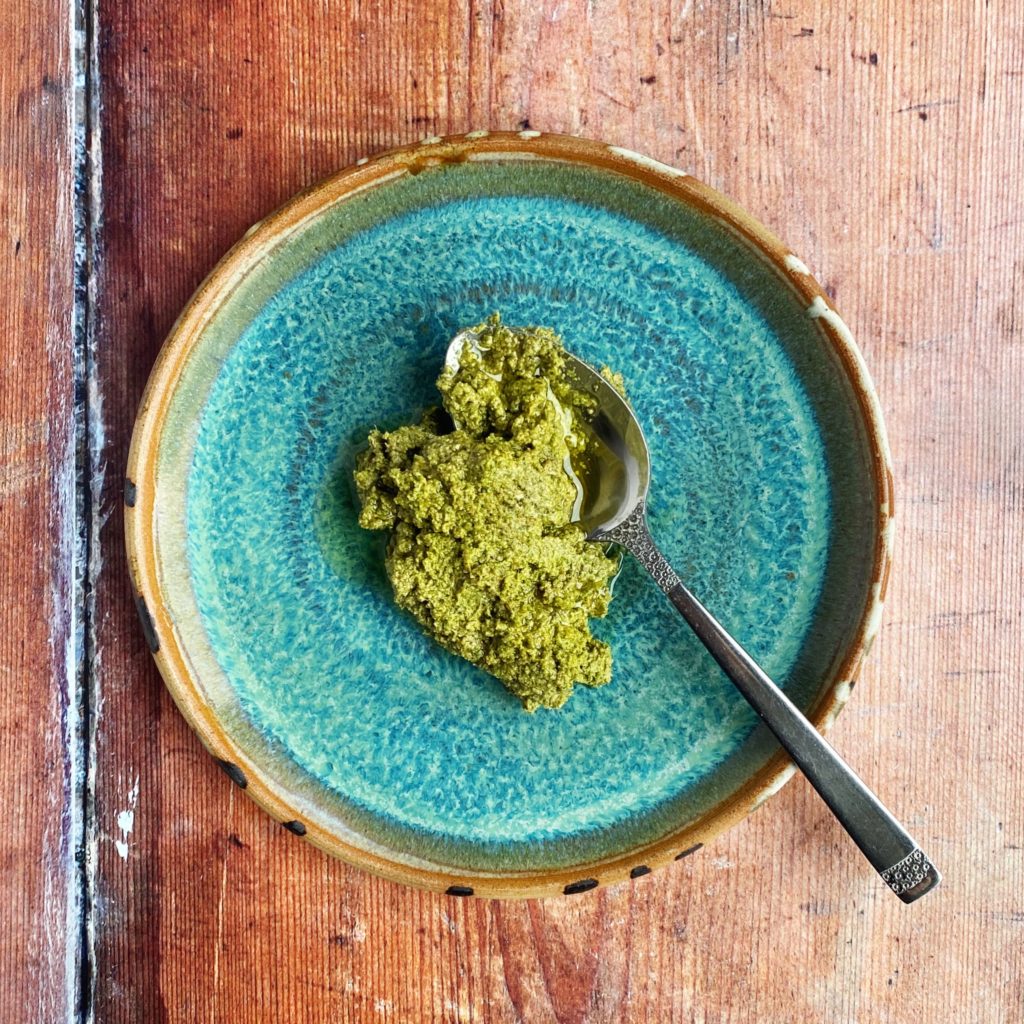
The new season kale coming out of our fields and tunnels is so stunning! We are adding it to all our meals. Don’t forget to add some to your next order! Here’s a quick and easy kale pesto recipe which is so handy, not just for pesto pasta, but for sandwiches and wraps, to spread on toast and top with scrambled egg/tofu, to toss through freshly boiled new potatoes… My recipe is dairy and nut free to make it allergen friendly (I use pumpkin seeds which are incredibly nutritious and ours come in compostable bags), but as always, tweak it to your liking with different nuts/seeds and cheese. And do share how you love to eat your pesto in the comments below.
Liz x
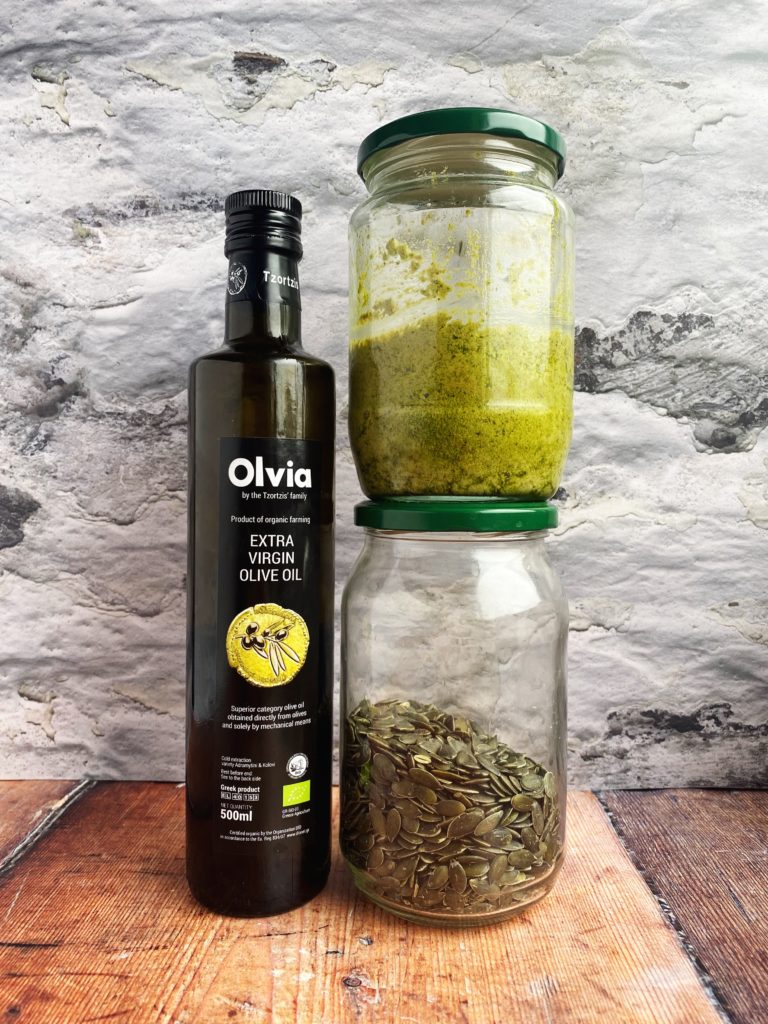
Ingredients (makes a jar like the one pictured above)
100g kale – rinsed
100g pumpkin seeds – toasted
1 clove of garlic – peeled
1 pinch of salt
1/2 a lemon – zest and juice
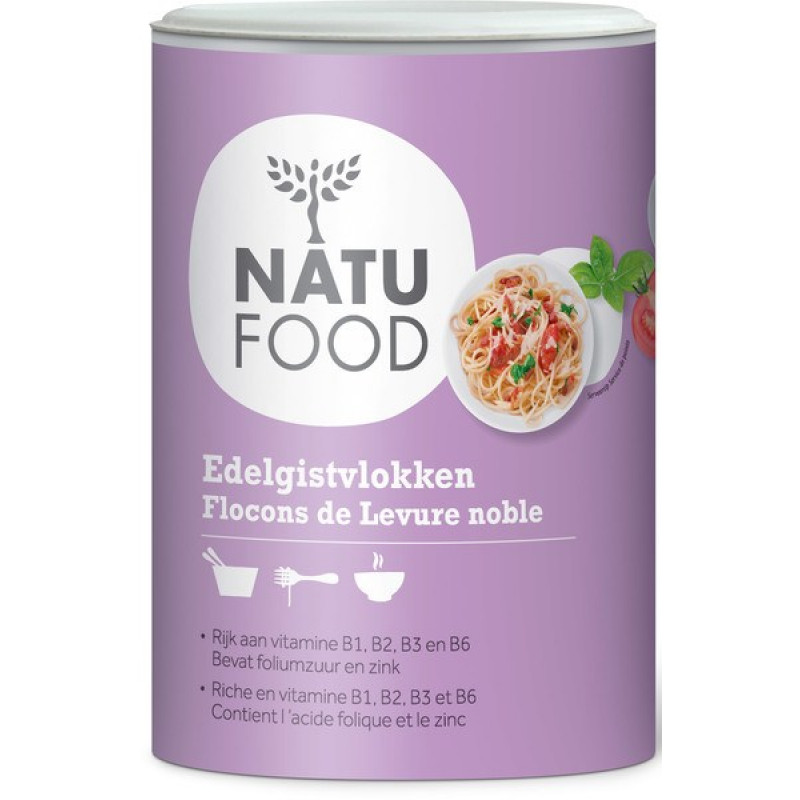
2 tbsp nutritional yeast
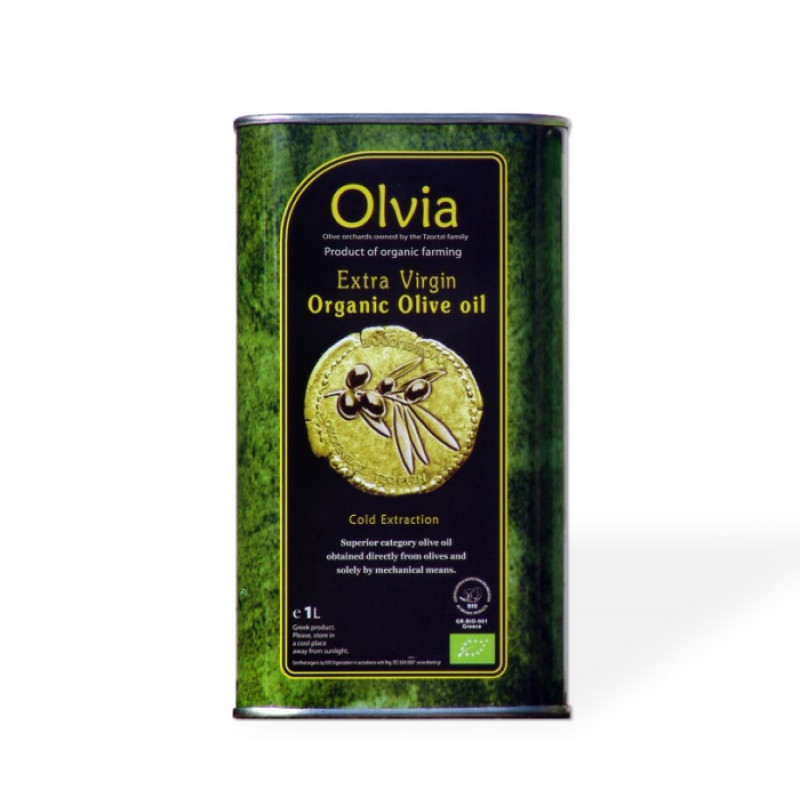
100ml extra virgin olive oil (plus extra for a thin layer on top at the end)
Method
Put all the ingredients into a blender or food processor.
Pulse until the ingredients come together into a rough, textured sauce.
Taste for seasoning and add more olive oil, lemon juice or salt as desired.
Spoon into a clean jar and top with a layer of olive oil to keep it fresher for longer.
Keep in the fridge and use within a week, or freeze for longer storage.
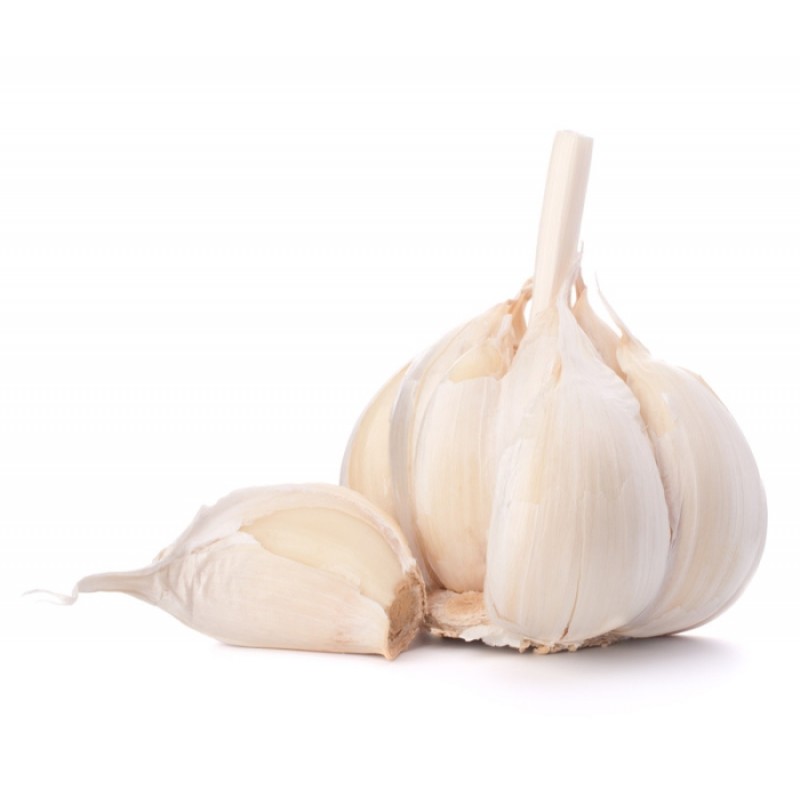
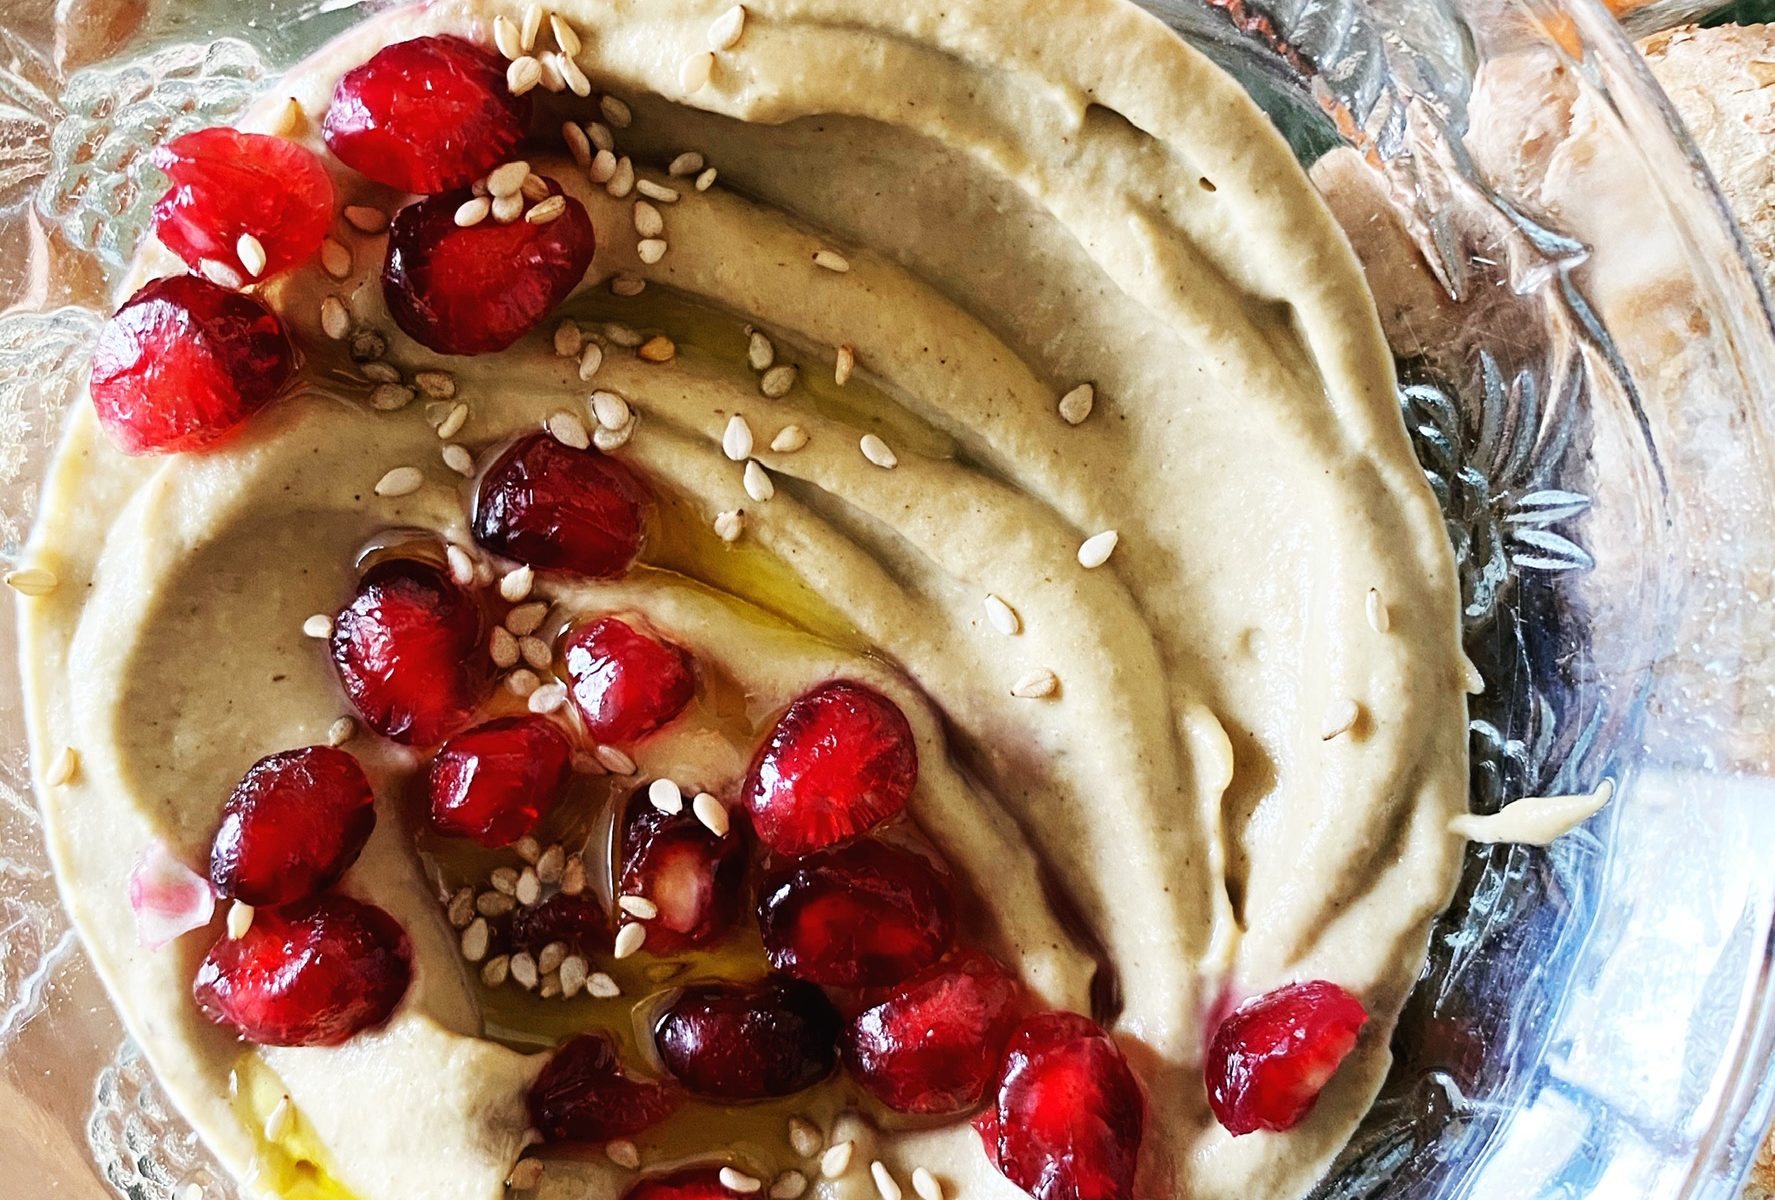
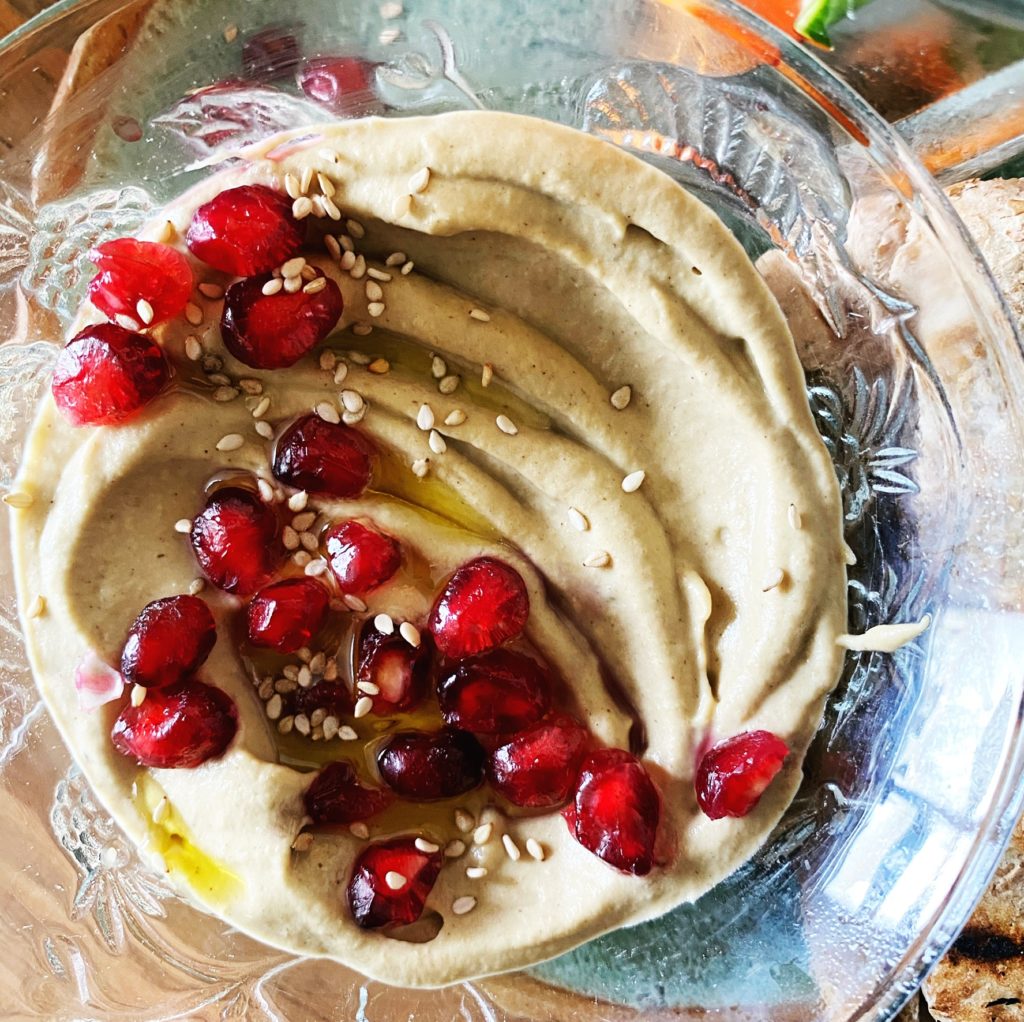
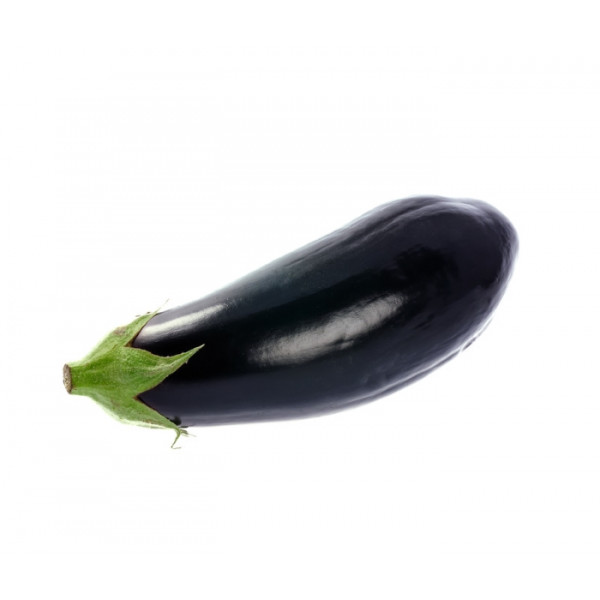
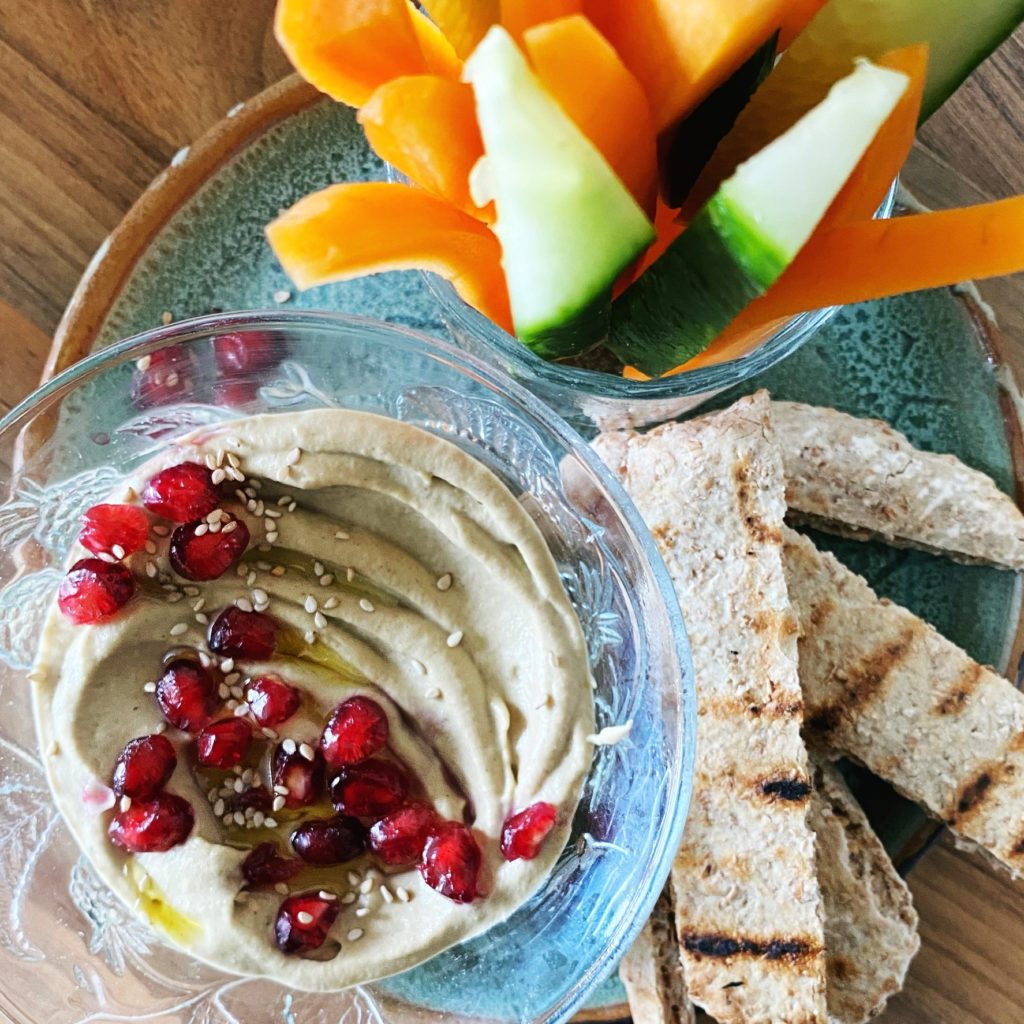
Babaganoush is similar to hummus, but made with aubergine rather than chickpeas. It’s softer, silkier and deliciously smokey! I always pop a few aubergines on the barbecue to make this dip. You can grill them in a hot griddle pan or roast them in the oven instead, but they won’t be as smokey. You’re looking to really blacken them on the outside and let them collapse and get silky soft in the middle. The blackened skin is then peeled off, then the flesh is blended (or mashed if you like more texture) with garlic, tahini, lemon and olive oil. Here’s my recipe for one aubergine. Serve with grilled or raw veg, salads, on toast or with pitta bread strips to scoop it all up.
OPTIONAL EXTRAS? A pinch each of cumin and smoked paprika and some pomegranate seeds and sesame seeds for garnishing.
Method
Grill or barbecue the aubergine until it’s completely soft inside and the skin is burnt and blackened.
Allow it to cool enough to handle, then slice it in half lengthways and scoop all the flesh out into a bowl to mash or blender to blend smooth. Scrape the skin carefully to get every bit of aubergine into the mix. Those bits nearer the skin have the best, smokey flavour.
Add the garlic (crush or finely grate first if mashing rather than blending), olive oil, tahini and lemon.
Blend or mash into a spoonable mixture, then taste and add salt and more lemon to taste.
Spoon the mixture into a small serving bowl and top with a drizzle of extra virgin olive oil and optional extras like pomegranate seeds, sesame seeds, smoked paprika, cumin…
Enjoy scooped up with flatbreads or toasted pitta bread and salads.
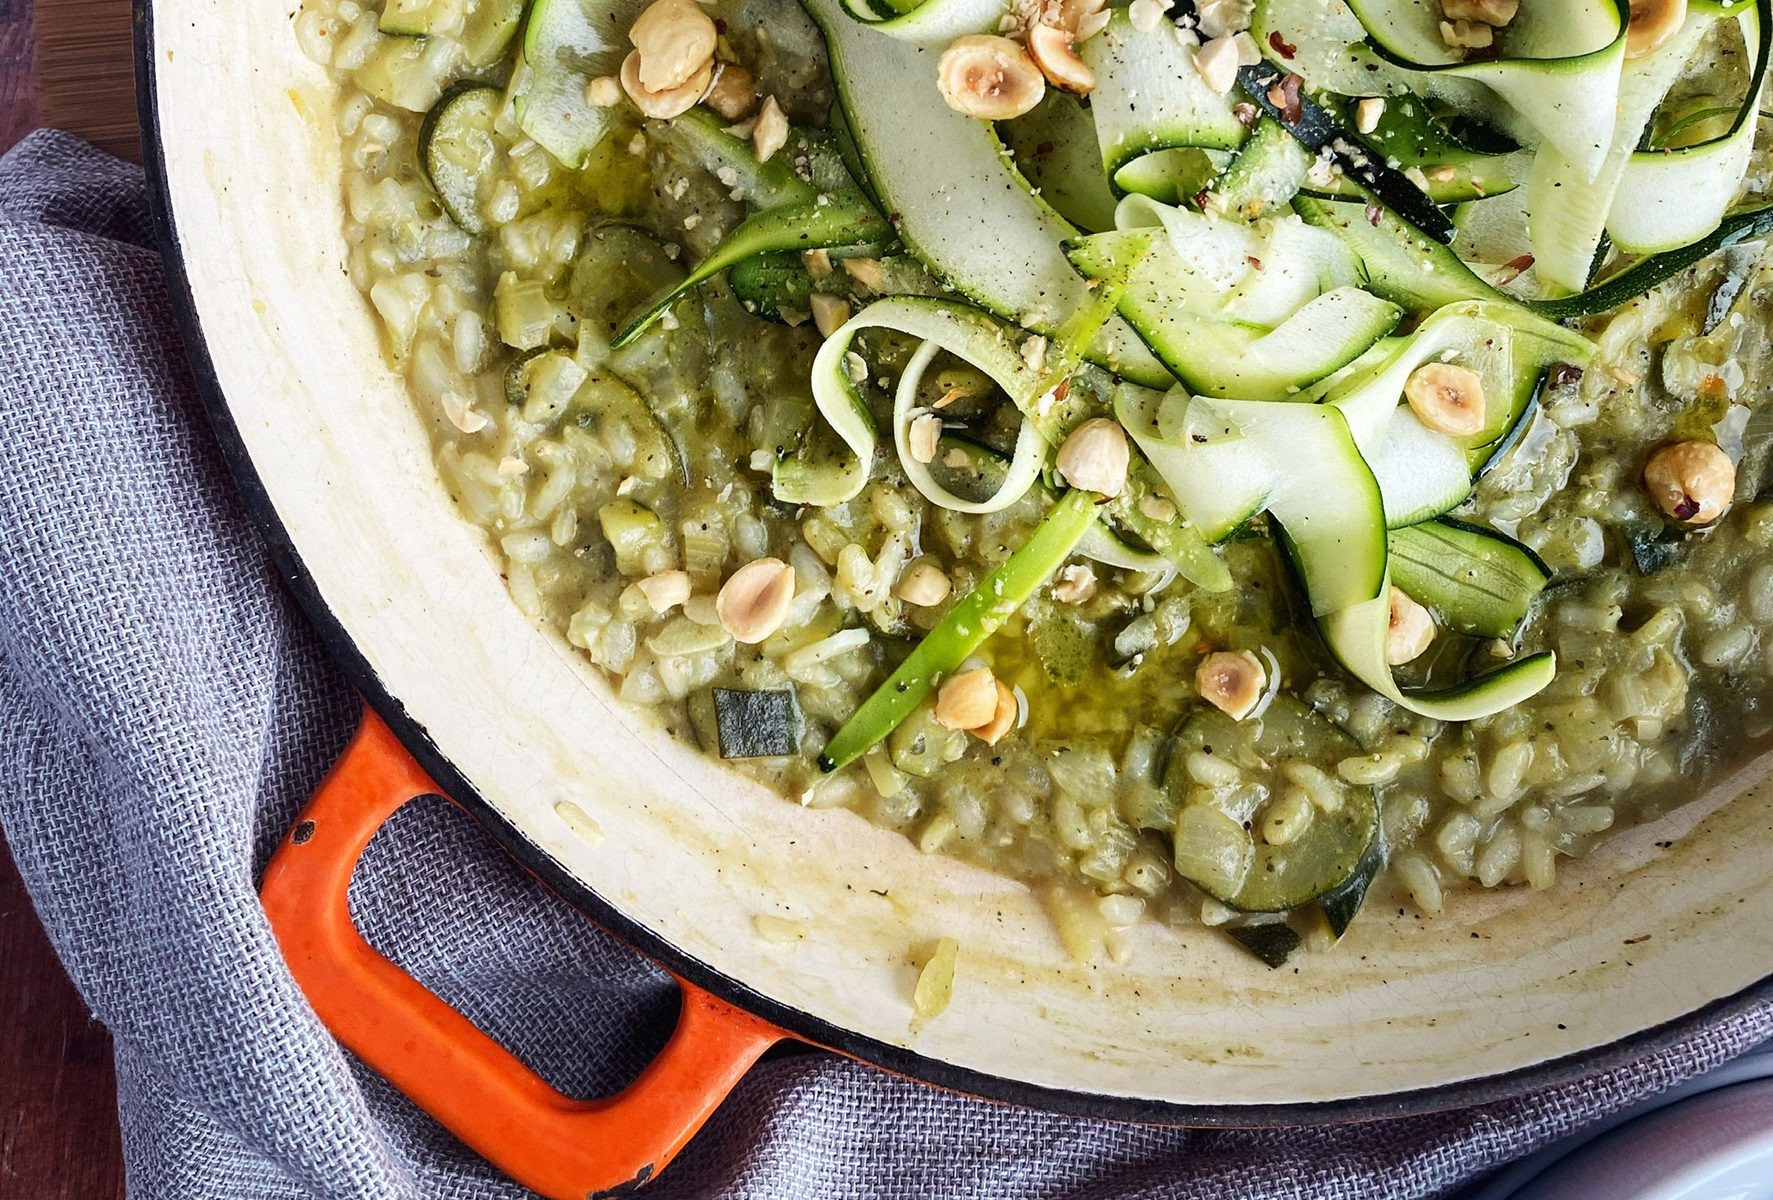
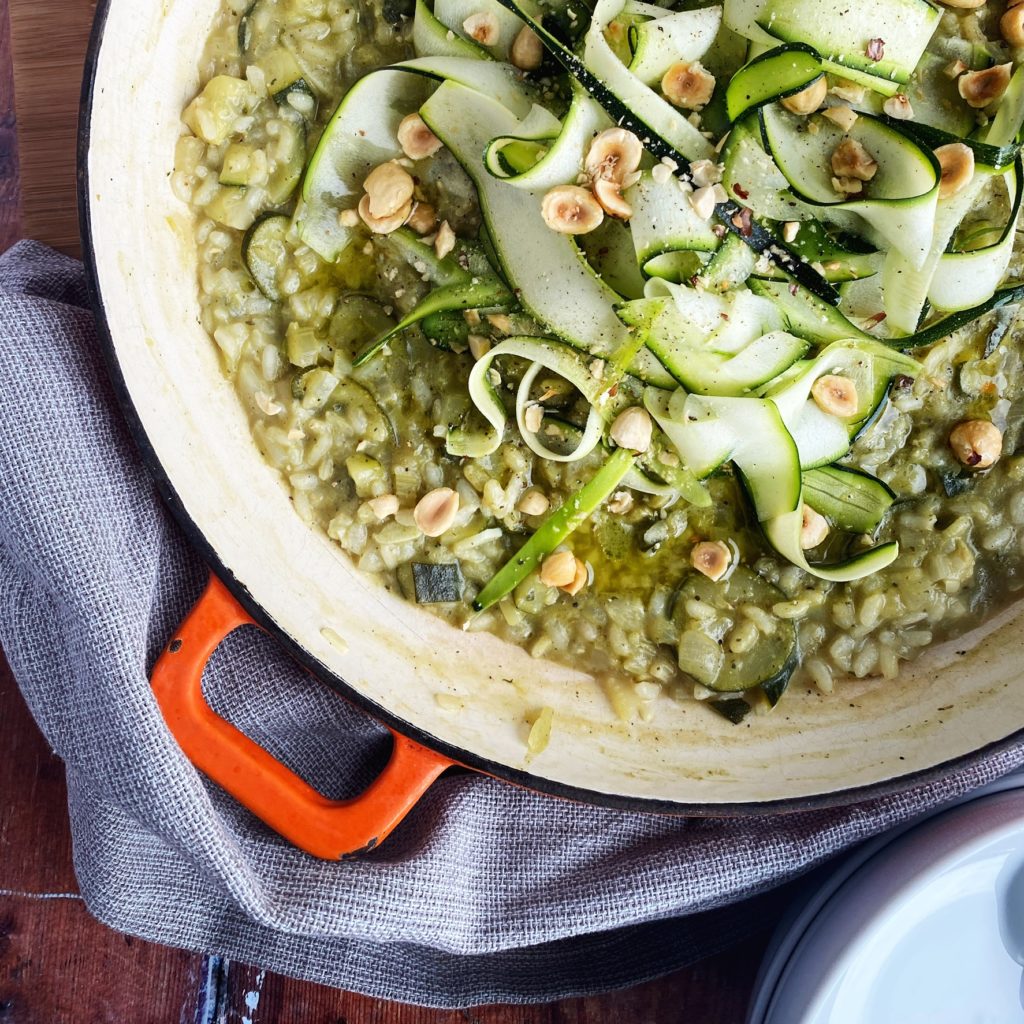
To me a risotto should elevate a single vegetable. It should celebrate it. Add too many ingredients to your risotto and the flavours will mingle and become indistinguishable in the long simmer. Courgettes are incredibly versatile. Fantastic cooked down low and slow into a silky mush, griddled and seared, battered and deep fried, raw… So for interest and texture in this dish I’ve cut each courgette differently. One diced and simmered with the onions into a meltingly soft sauce, one sliced into rounds for texture and body in the risotto and the last one peeled into raw ribbons to go on top. Serve with a swirl of pesto (try my salad bag pesto here), a drizzle of good olive oil and some toasted hazelnuts. Heaven.
Leave a comment if you tried this recipe or show us your photos on Instagram or our Facebook group. We love seeing your amazing recreations. Liz x
Ingredients (serves 4)
1 onion
1 tbsp butter and 1 tbsp olive oil
2 sticks of celery
4 cloves of garlic
3 courgettes
1 mug of risotto rice (or however much you like to serve 4)
1 lemon
1 stock cube
salt and pepper to taste
3 tbsp (or more to taste) pesto
extra virgin olive oil to serve
toasted, chopped hazelnuts to serve
Method
Dice the onion and put it in a wide pan with the butter and oil over a medium high heat. Add a pinch of salt and sauté and soften for around 6 minutes.
Dice the celery sticks, garlic and one of the courgettes and add them to the pan to soften too. Cook, stirring often until soft and golden. Around 10 minutes.
Rinse and add the risotto rice to the pan with the zest and juice of the lemon (or a glass of white wine). Crumble in the stock cube and add a generous grind of black pepper. Stir well to coat the rice in the seasoning then add a mug of warm water.
Slice the second courgette into rounds and add it to the pan. Simmer and stir until all the water has been absorbed then add another mug of water. Keep simmering and stirring.
Meanwhile use a vegetable peeler to slice as many ribbons from the third courgette. Chop up the middle bit and add it to the pan. Keep simmering and stirring and add another mug of water. Taste and adjust the seasoning with more salt, pepper or lemon once the rice started to swell up and become softer.
Once the risotto is cooked (the rice should be soft and creamy but still with a little bite) turn off the heat. Stir through a few tbsp of pesto, pile on the raw courgette ribbons, drizzle everything with extra virgin olive oil and scatter over the toasted hazelnuts.
Take the pan to the table and serve with the jar of pesto handy to add extra swirls through the bowls of anyone who wishes for more.
One of the most common ingredients that get wasted are salad leaves. The mixed bags of salad leaves really don’t stay fresh long, really they should be eaten within 3 days. So if you don’t get around to eating a salad, perhaps the weather changed and you were more in the mood for a hot meal, there are a few ways you can use them up in a different way. Whatever you do, don’t throw that bag of slightly sad looking leaves away! Salad leaves can be blended into a soup in place of spinach or watercress or make this very flexible salad bag pesto! If you have any fresh herbs around the place, chuck some of those in too.
Read more about food waste in my blog post on the subject here. Liz x
Ingredients
mixed salad leaves (and odds an ends of fresh herbs if available)
sunflower and pumpkin seeds (or any nuts or seeds you like)
lemons
garlic
olive oil
salt
nutritional yeast (or odds and ends of cheese)
Method
I’ve deliberated not given amounts as pesto is a very fluid recipe. You can taste and adjust it as you go. You should aim to have around half the volume of the mixture as nuts or seeds. So if you have about a mug full of salad leaves that need using, toast about half a mug of nuts or seeds.
Toast the nuts or seeds in a dry frying pan to bring out their flavour. Allow them to cool.
The put them in a food processor. I used a blender because my food processor is broken – it works ok but I prefer a food processor for pesto because I don’t want the mixture to be too smooth in the end.
Add a crushed or grated glove of garlic, a shake of nutritional yeast, a big pinch of salt and all the salad leaves.
Then add lemon juice (you can add the zest of the lemon too if you like, or save it in the freezer for something else). Start with a small amount of lemon juice, you can always add more later.
Add a very generous amount of olive oil. A quality extra virgin olive oil is best for pesto.
Pulse the mixture, scrape down the sides and pulse again until you reach a loose, rough paste. Add more olive oil as you go if needed.
Taste and adjust the seasoning with more salt of lemon juice as you like. Then store in a clean jar in the fridge. To make it last longer, cover it with a thin layer of olive oil to protect it from the air. Use it up within a week.
Pesto is not just for pasta! Use it for a dip, stir it into hummus or mayo, spread it into wraps or sandwiches, toss it through roasted veg or steamed greens, dollop it on your grainy salads…
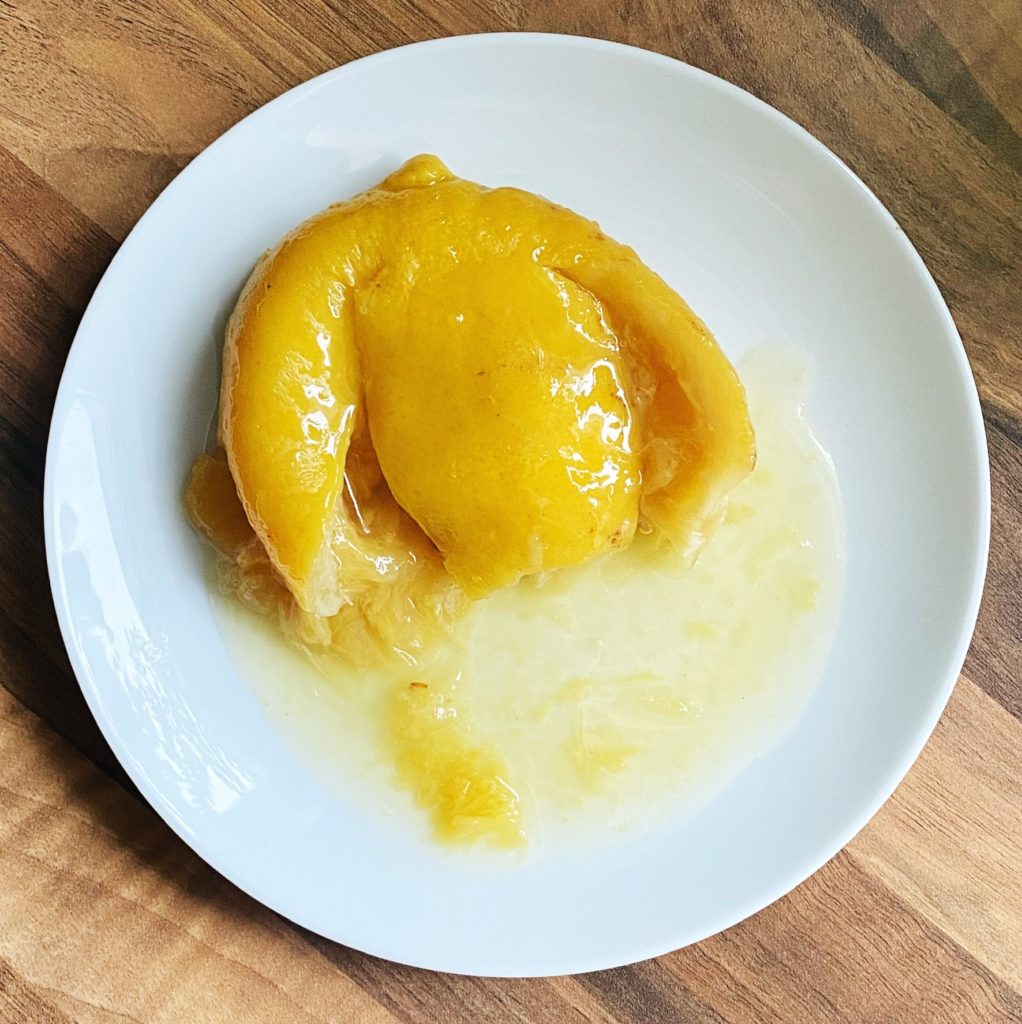
A preserved lemon from my last batch which I made about 9 months ago.
Preserved lemons are a very North African/Middle Eastern thing and so go well in tagines, whizzed into hummus and blended into spice pastes or marinades. They are absolute flavour bombs and once you get a taste for them you’ll be hooked. Luckily they are cheap and easy to make yourself. Apart from the stunning flavour, what I really love about them is that they are a great example of compleating (a waste free principle of eating the whole fruit/vegetable). The rind of the lemon softens during fermentation and is then the best bit! Although don’t waste the flesh and the liquor, all that can be used to pep up dressings, risottos, soups, stews…anything that needs some salty, lemony goodness.
Here’s a quick video explaining the process, it’s one of those recipes which is easier to learn through watching. Liz x
Ingredients
organic lemons (unwaxed)
natural salt
olive oil (optional)
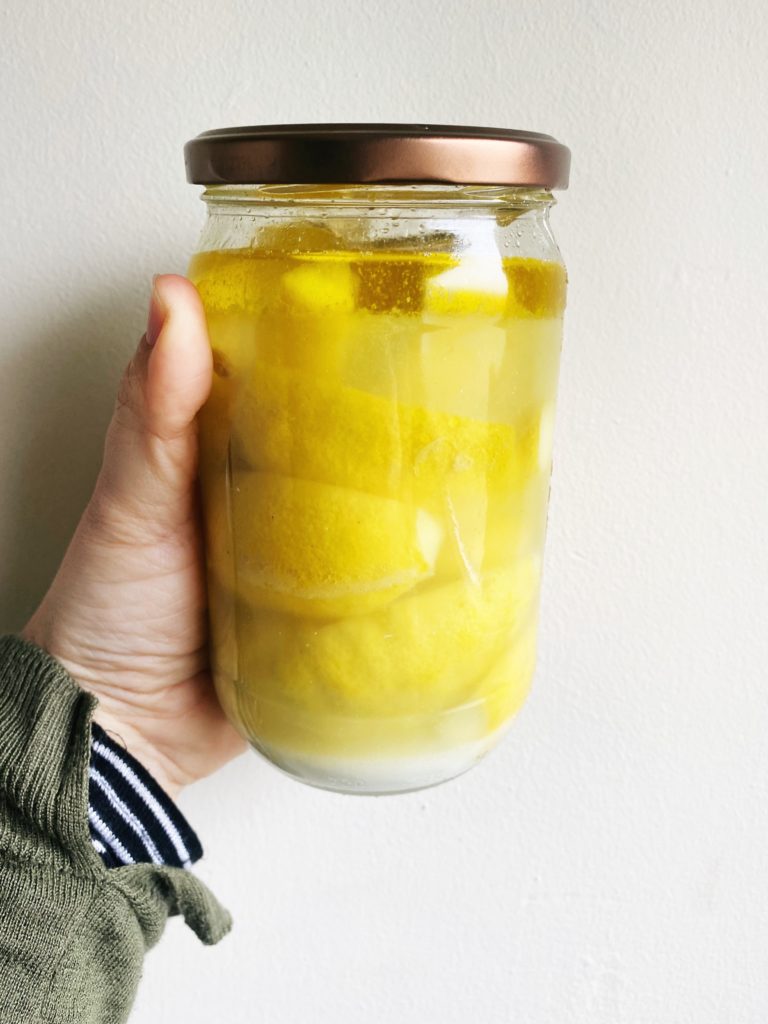
Just after jarring. These need 4 weeks fermenting at room temperature before they are ready.
Method
Rinse the lemons and prepare a clean chopping board, knife, tablespoon and large jar. They don’t need to be sterilised, but make sure everything is well cleaned and rinsed. Clean your work surface well too.
Slice the ends off a lemon (just a small sliver from the end that was attached to the tree, and the other end if it looks like it needs it. If it’s fresh and in good condition then just leave the bottom end on) then cut a deep score into the lemon about 3/4s of the way down.
Stuff the lemon with a tbsp of salt and press it firmly into the jar using the rolling pin to help.
Repeat until you have filled the jar or run out of lemons.
There should be enough juice in the lemons to create a brine to cover them all when pressed down. If not, add some extra lemon juice.
Weigh down the lemons under the brine using a small glass or a glass weight. Then add an optional layer of olive oil to float on top of the lemons and seal them from exposure to air.
Put the lid on (I like to make sure my jar is full enough so that the action of putting the lid on top of the weight pins down the lemons under the brine) and place the jar on a shelf at room temperature to ferment for 4 weeks.
During the first week of fermentation you may notice bubbles forming. Just open and close the lid to release any gases that have formed. Keep an eye on the jar and if any lemons start to rise about the brine just push them back under and re-arrange the weight.
After 4 weeks you should notice a change in texture, colour and aroma. They are done. Keep the jar in the fridge and use within a year.
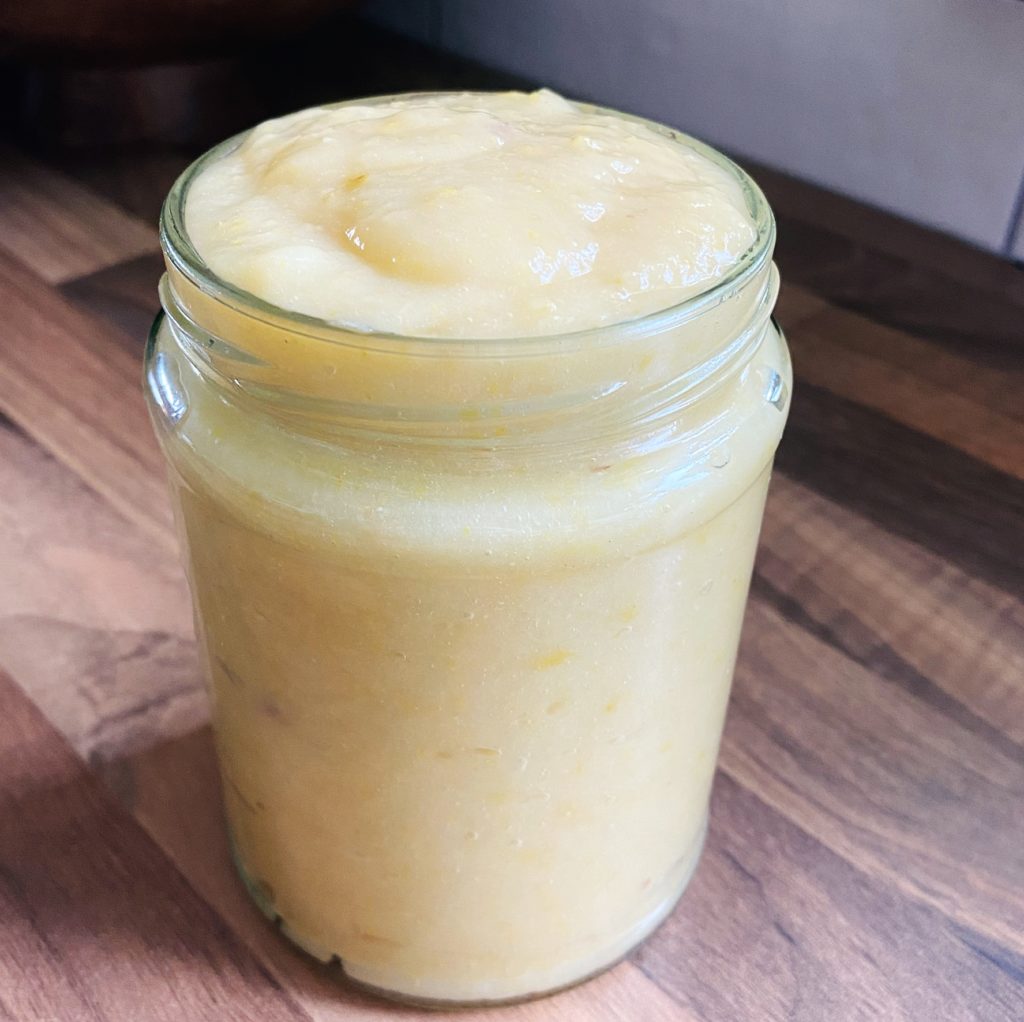
For ease of use, you could purée the fermented mixture in the jar and then just take out a spoon or so to add salty lemony flavour to many dishes.
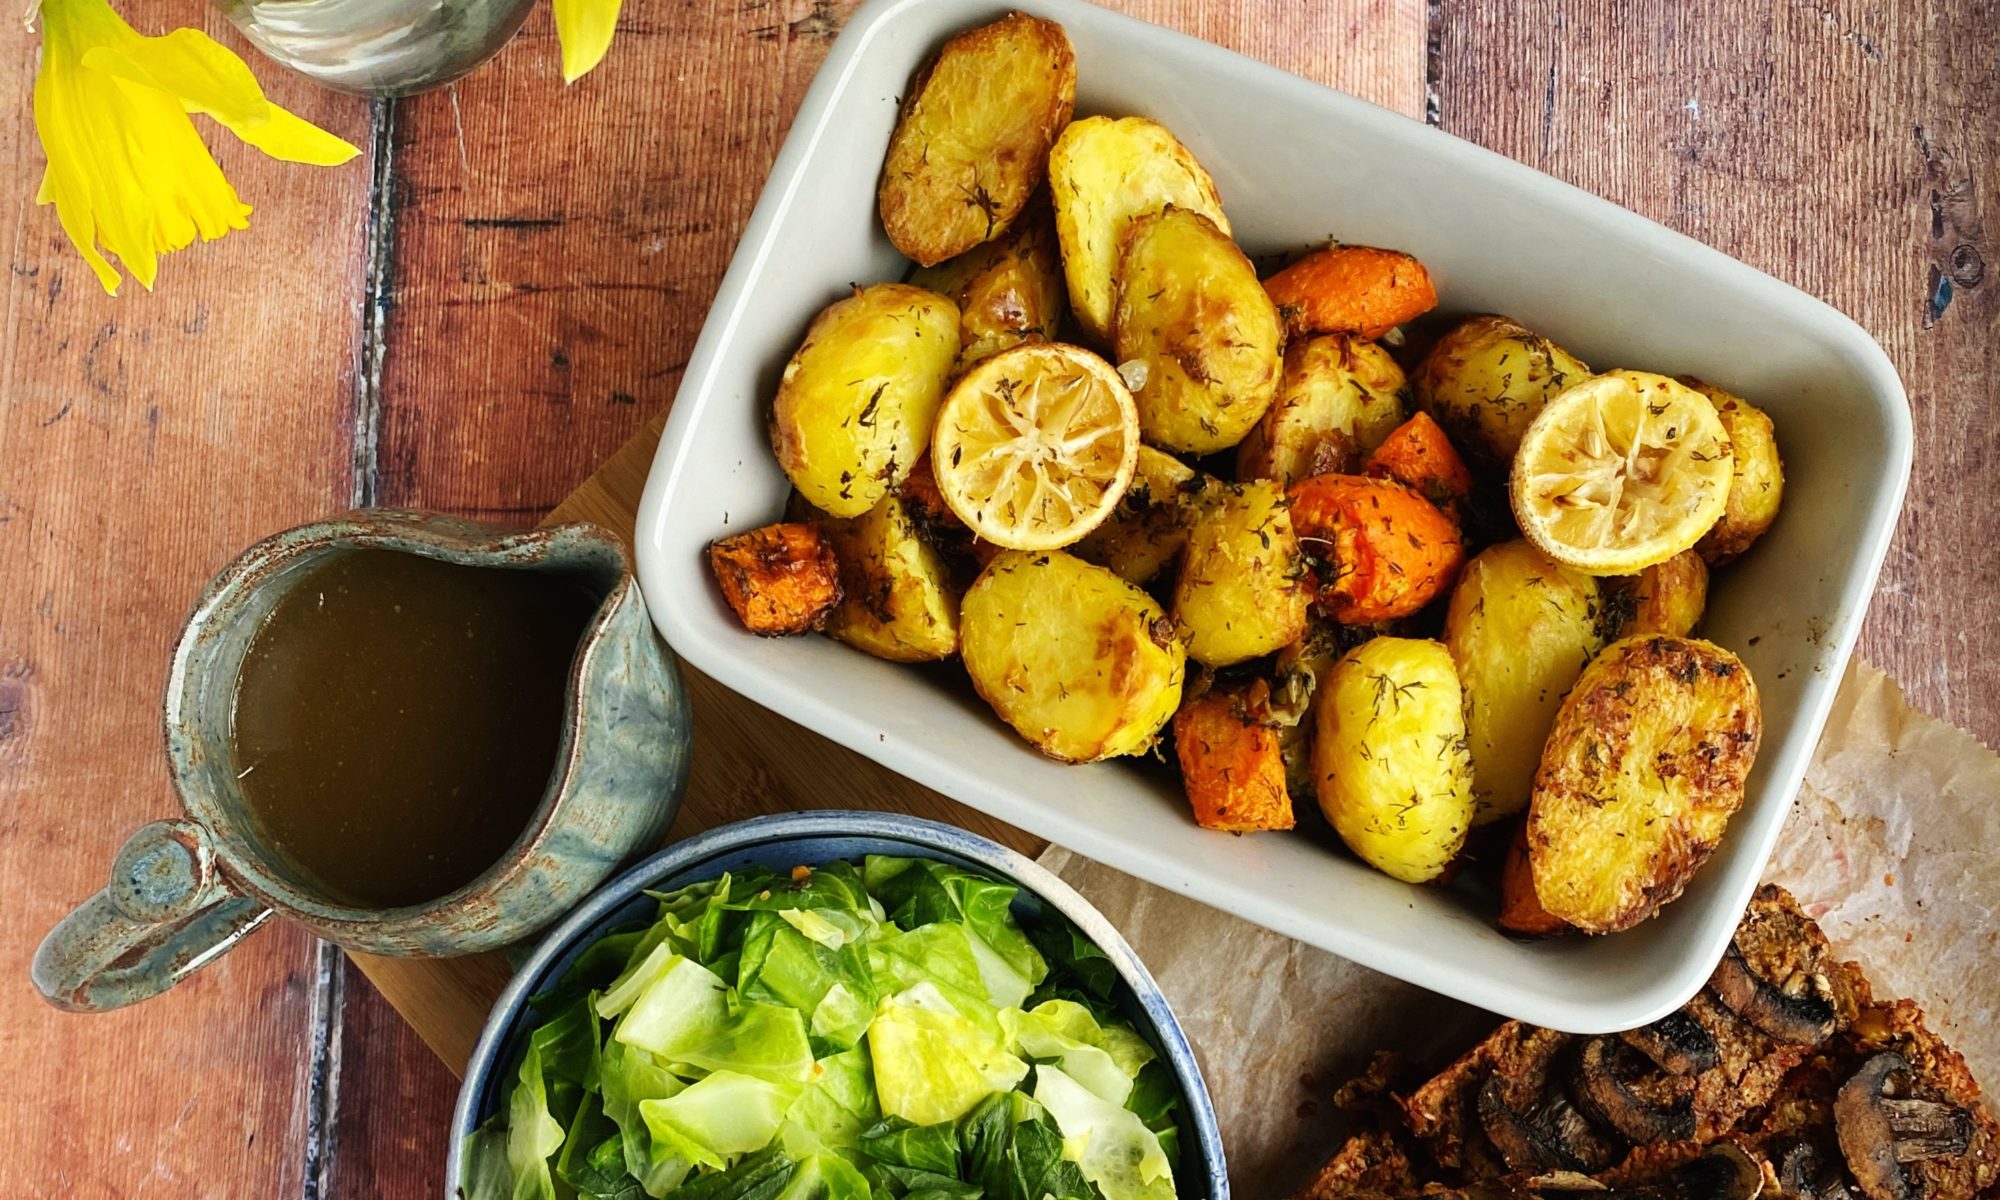
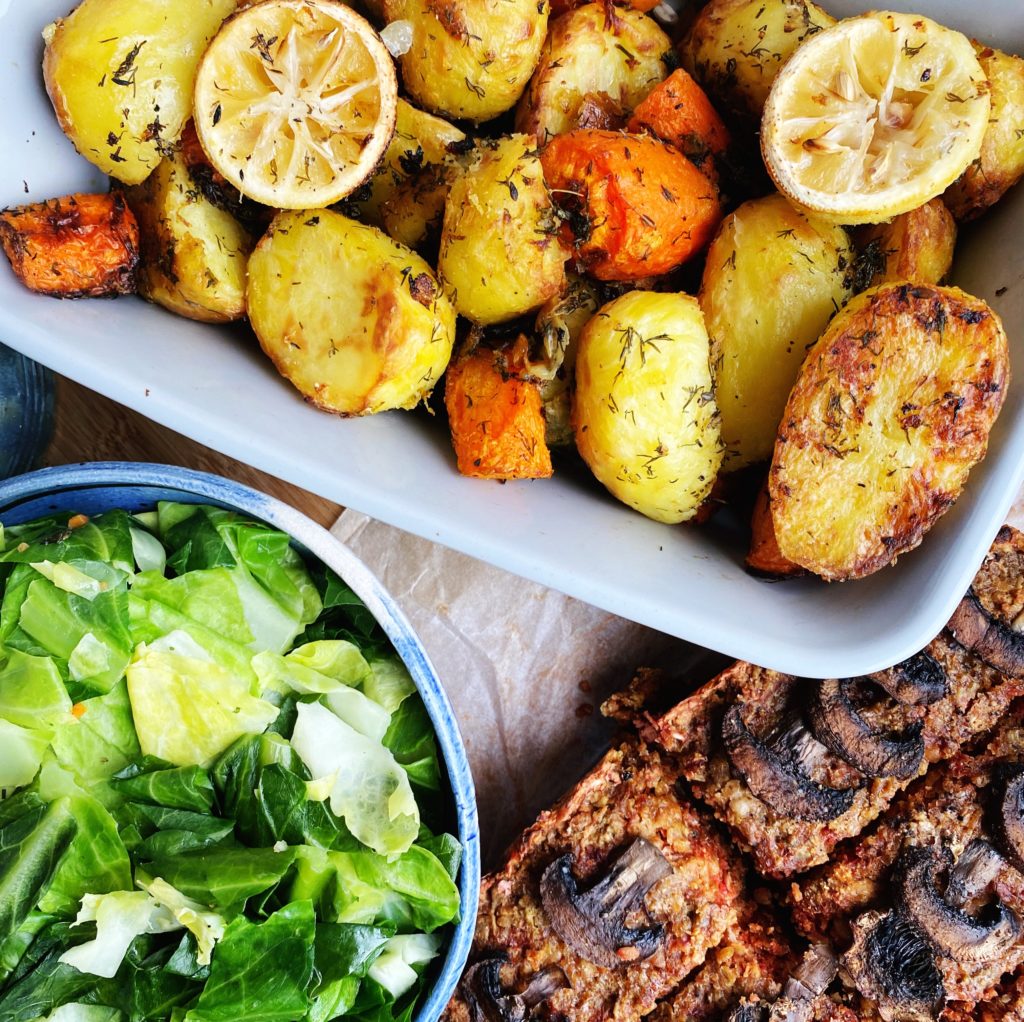
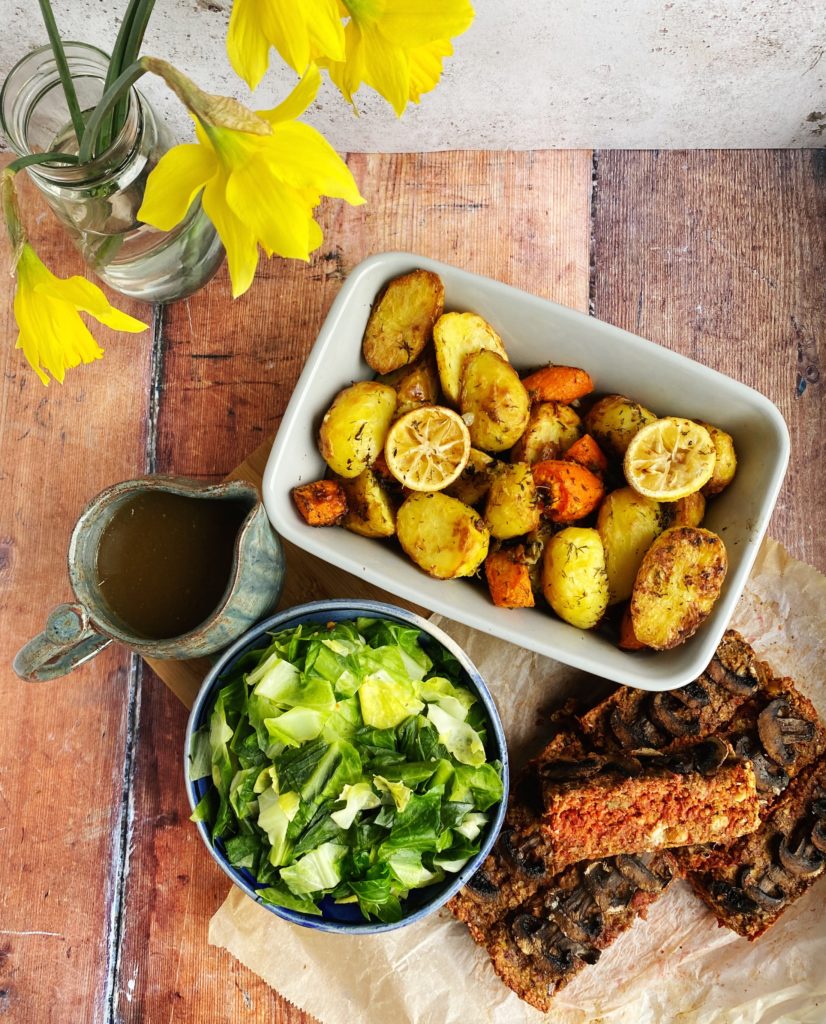
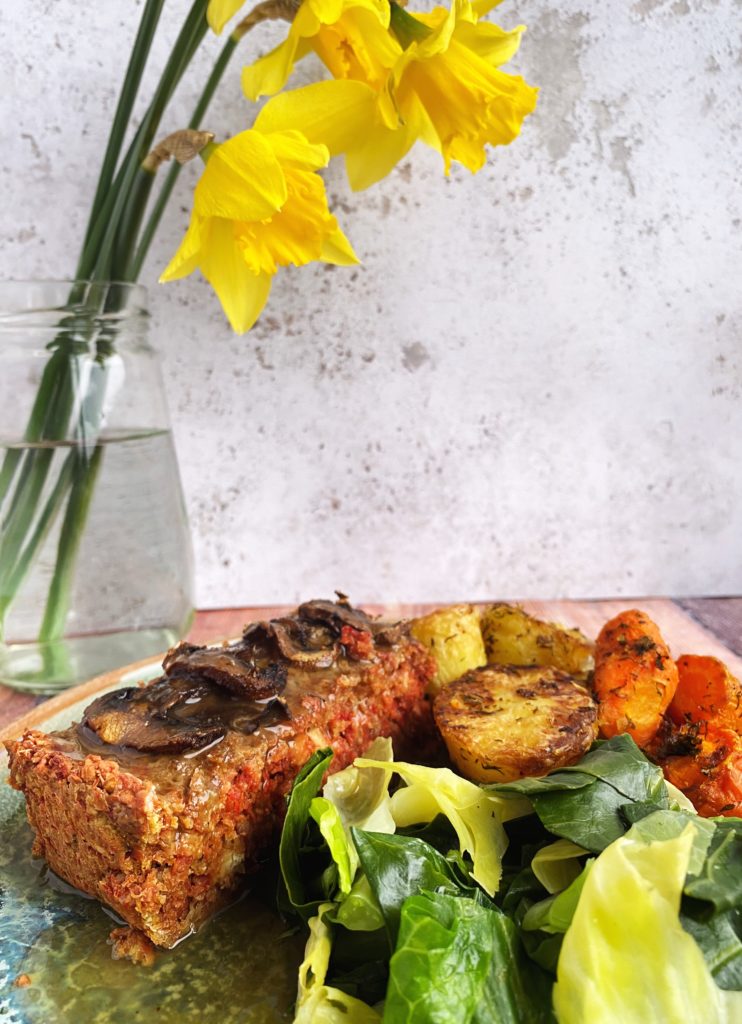
A roast on Sunday doesn’t have to be a big faff. Here’s a quick and easy recipe for a delicious beetroot and butterbean loaf with lemon and herb roast veg, spring greens and gravy. Liz x
*You can get all the ingredients from our online shop delivered straight to your door. Just click on any bold words to be taken to the item to add to your cart. We deliver to every address in Ireland.
Turn your oven to 200C. Find your biggest roasting dish and put it in the oven to heat up too.
Peel the potatoes and carrot, cut them into large chunks and just cover them with water in a big pot. Put the lid on the pot and get them on the stove to boil.
Meanwhile make the beetroot and butterbean loaf:
Toast the sunflower seeds in a dry frying pan and add them to a blender with the linseeds and oats. Pulse until coarsely combined, but still with some texture.
Grate the beetroots into a mixing bowl on the fine side of the grater. Add the drained tin of butterbeans to the bowl too.
Add the oat, sunflower seed and linseed mixture to the bowl, season well with salt and pepper (you could also add additional flavourings here like lemon zest, crushed garlic, herbs).
Using one hand, squish the mixture together into a stuffing-like mixture. You may need to add more oats as you go if your mixture is too wet. When you are at stuffing texture taste the mix for seasoning ad adjust as needed.
Then put the mixture into a baking dish or loaf tin lined with baking paper. Top with slices of mushroom a drizzle of olive oil and some salt and pepper. Then pop the dish in the oven to bake.
By now the potatoes and carrots will be par boiled so move them off the heat. Finely chop a generous couple of handfuls of herbs and put them into a bowl with the zest of a lemon, 3 crushed garlic cloves, salt, pepper and enough sunflower oil to bring it into a loose sauce.
Remove the hot, large roasting dish from the oven and drizzle it with sunflower oil. Use a slotted spoon to move the potatoes and carrots onto the hot tray and keep all the water in the pot (you’ll need this to cook the cabbage and make gravy with later).
Add the garlic/lemon/herb oil to the roasting dish of potatoes and carrots and stir to coat the veg in the mixture. Cut the zested lemon in half and add it to the roasting tray. Return the dish to the oven and get on with the greens and gravy.
Add a stock cube to the water that the carrots and potatoes were cooked in. Then rinse and chop the cabbage and add it to the pot to poach in the stocky water. When it is still slightly undercooked, use the slotted spoon to pull out the cabbage and keep it in the pan you used earlier to toast the sunflower seeds (you’ll use this to re-heat and finish cooking the cabbage when the beetroot loaf and roast veg are nearly done).
Then make the gravy. Put a tsp of dried mushrooms into the stock and bring it to the boil. You can also dip the bowl that you mixed the lemon/garlic/herb oil for the roast veg in and get all those flavours added to the gravy.
Mix the cornflour with a little cold water into a smooth paste in a cup. Then add that to the stock and simmer and stir until it has thickened into a gravy. Taste and adjust the seasoning if needed. I like to add a couple of tbsp of soy sauce to add a punchy umami flavour. You may wish to add a splash of wine or a spoon of recurrent jelly to your gravy. When you are happy with the flavour and texture of your gravy you can pour it into a jug through a sieve and keep it warm.
The beetroot and butterbean loaf and roast veg should be ready after about 40-60 minutes in the oven. Just keep an eye on them. Then re-heat the cabbage and gravy and serve!
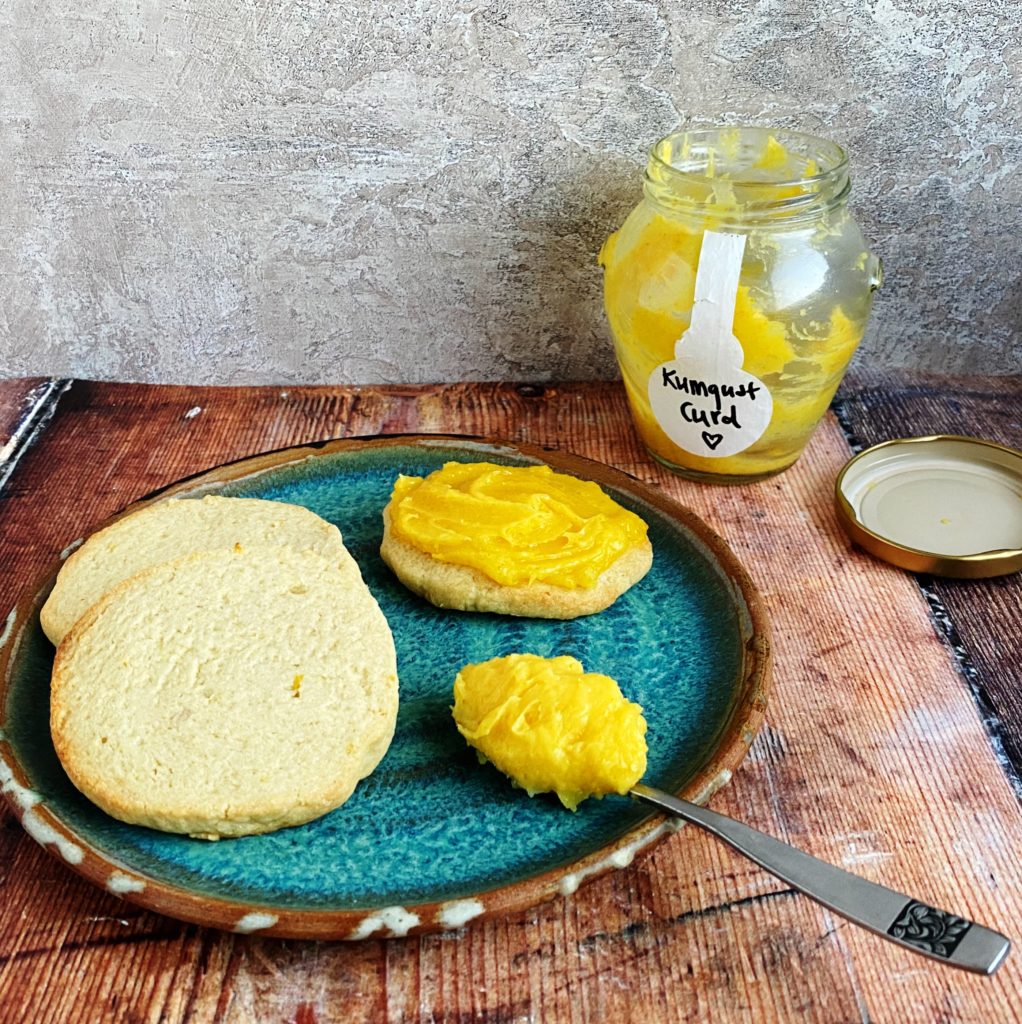
A classic shortbread biscuit is buttery and tender with a crumbly, melt in the mouth texture. It shouldn’t be soft or chewy like a cookie, but delicately crisp. The simplicity of the ingredients is what makes shortbread so good. The perfect sugar:butter:flour ratio is 1:2:3 and so you can easily work the recipe up or down to make a batch however large you like. The best way to get the right texture is to weigh the ingredients out carefully and not to overwork the dough. Here’s a handy little video which explains it all.
Let us know in the comments or over on our facebook group if you make the recipe. I’d love to see your photos. Liz x
300g plain flour (I love this spelt one for perfect biscuits and cakes)
optional extras – lemon zest, more caster sugar to roll the cookies in…
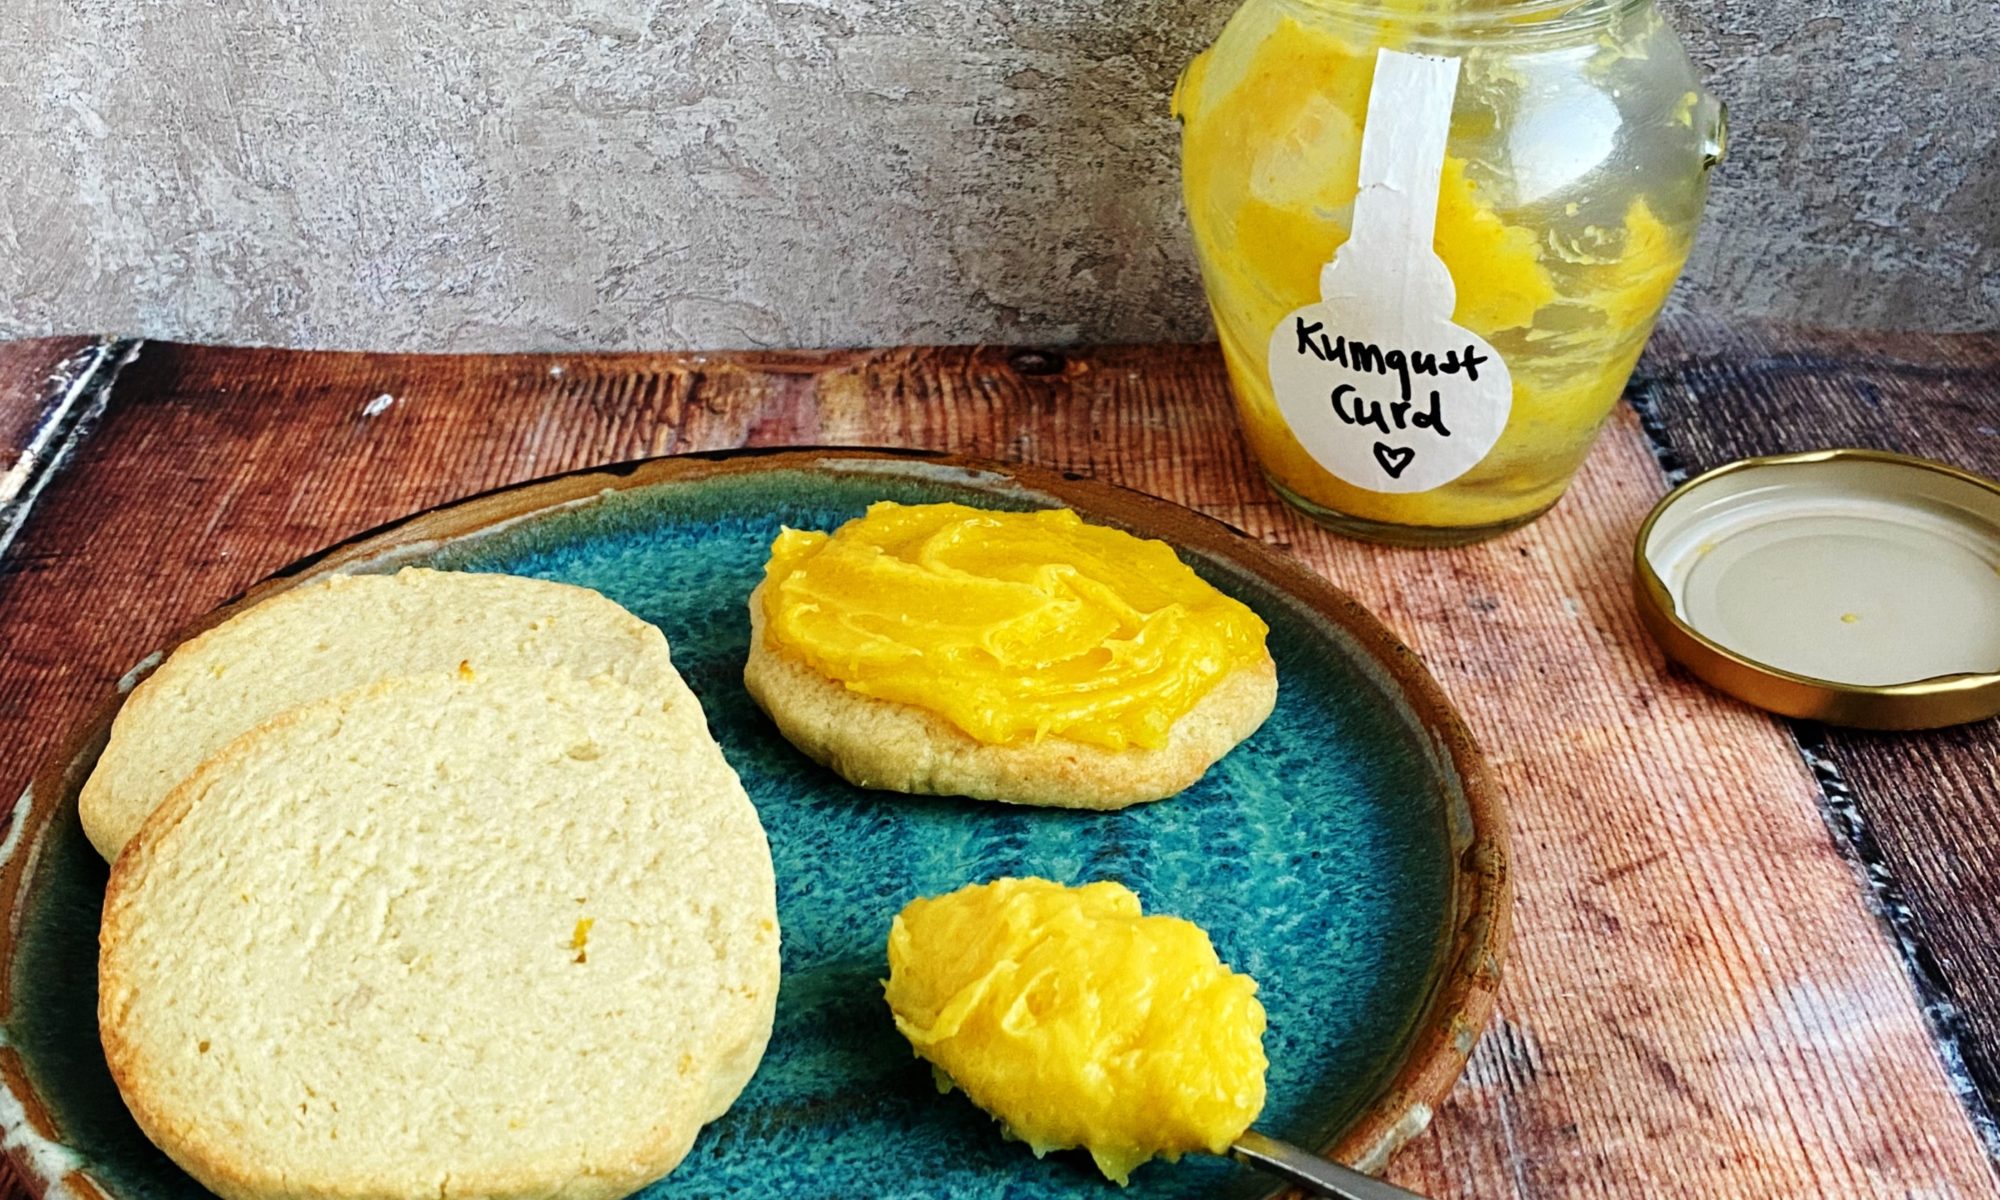
Bergamot zest shortbread with kumquat curd.
Method
Measure the sugar, butter and flour into a bowl. Add optional lemon zest – I used the gorgeous bergamot lemons we have in season now.
Using the tips of your fingers (so as not to make the dough too warm or melty) rub the flour and sugar into the butter.
When you reach a sort of wet-beach-sand-like texture, tip the mixture carefully onto a clean work surface.
Bring the dough together into a ball. Be careful not to overwork the dough as this can make it tough and chewy rather than tender and crisp. No kneading, just gently bring it together.
Then you need to wrap and chill the dough for at least half an hour. I like to roll the ball into a neat cylinder, the circular ends the size of the biscuits I want. Then wrap it in a sheet of baking parchment on which I’ll cook the biscuits later. Chill in the fridge for at least half an hour to firm up the dough.
Then pre-heat the oven to 175C.
Unwrap the chilled shortbread dough onto a large baking sheet. If you wish, you can roll the cylinder of dough in some extra caster sugar (with added lemon zest or chopped rosemary, or crushed lavender flowers…) to create a sweet, crunchy ring around the biscuits.
Slice the dough into 12 round biscuits and bake them for 8 minutes or until just starting to take on some colour.
Allow the biscuits to completely cool and then store them in an airtight container. Eat within a week. I am loving them with a dollop of my kumquat curd but they are delicious plain too. And just perfect with a cup of Earl Grey tea.
Carrots are such a staple you’d be forgiven if you’d never thought of them as the main event of a meal or barely even given carrots a second thought. But we love carrots over at Green Earth Organics and you’ll always find them in our subscription boxes. Covered in mud and fresh from the field here in Galway, I can honestly say these are the best carrots I’ve ever tasted. The scrubbed, plastic wrapped supermarket carrots just don’t compare. Muddy carrots seem to stay fresh longer and taste sweeter so if you get scrubbed ones, keep them in the fridge and use them in a week or so, the muddy ones are ok in a dark, cool kitchen cupboard or pantry for much longer.
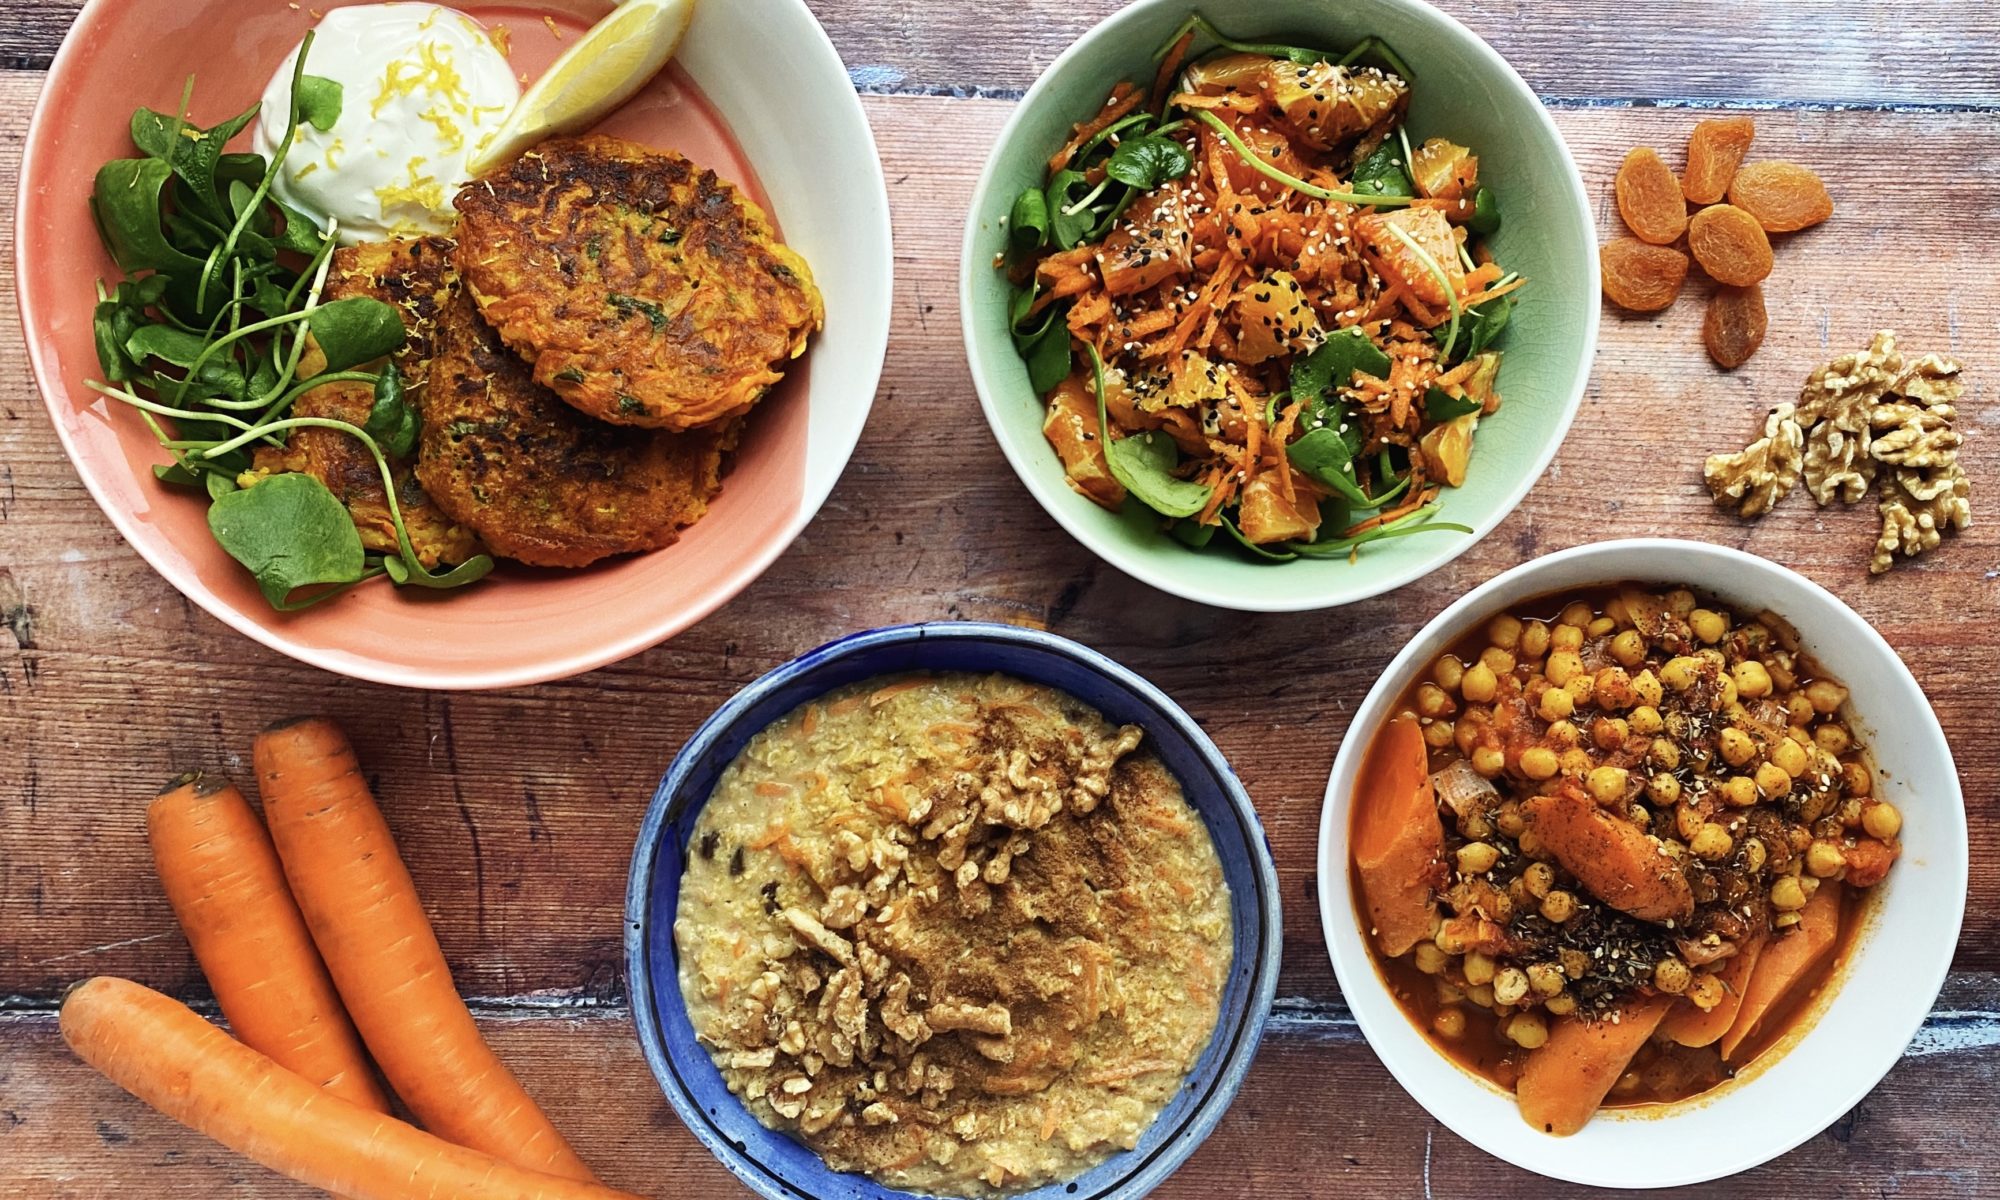
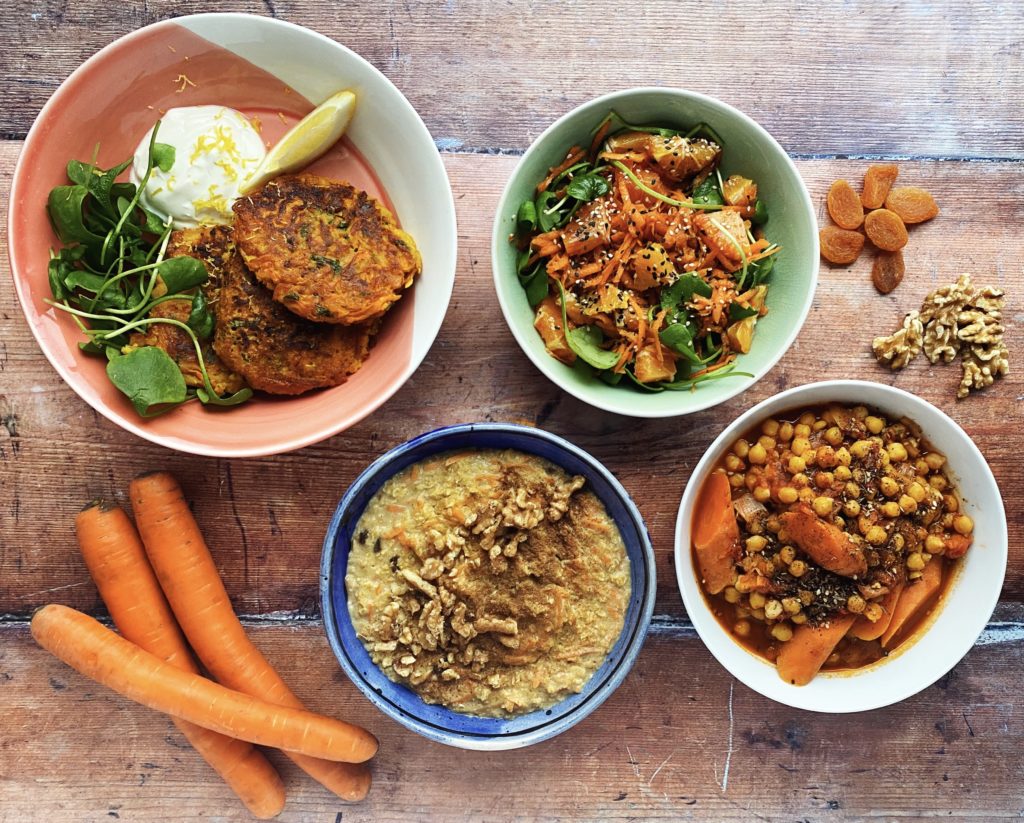
I’ve had quite a few requests for carrot recipes as that’s what most people seem to end up with as their next box is arriving – so here are four ways I cook carrots regularly. You can also click on my raw carrot cake recipe which uses a whopping 600g of carrot, my smoked carrot strips which are fabulous for breakfast with wobbly scrambled tofu or on a toasted bagel with cream cheese or my butterbean barleyotto topped with roasted carrots and carrot top pesto if you’d like further carroty inspiration. Please do share your favourite carrot recipes with us too – in the comments or over on our friendly facebook group. Liz x
Watch this ‘4 Ways With Carrots’ video (you can skip to the recipe you are looking for) or the recipes are below.
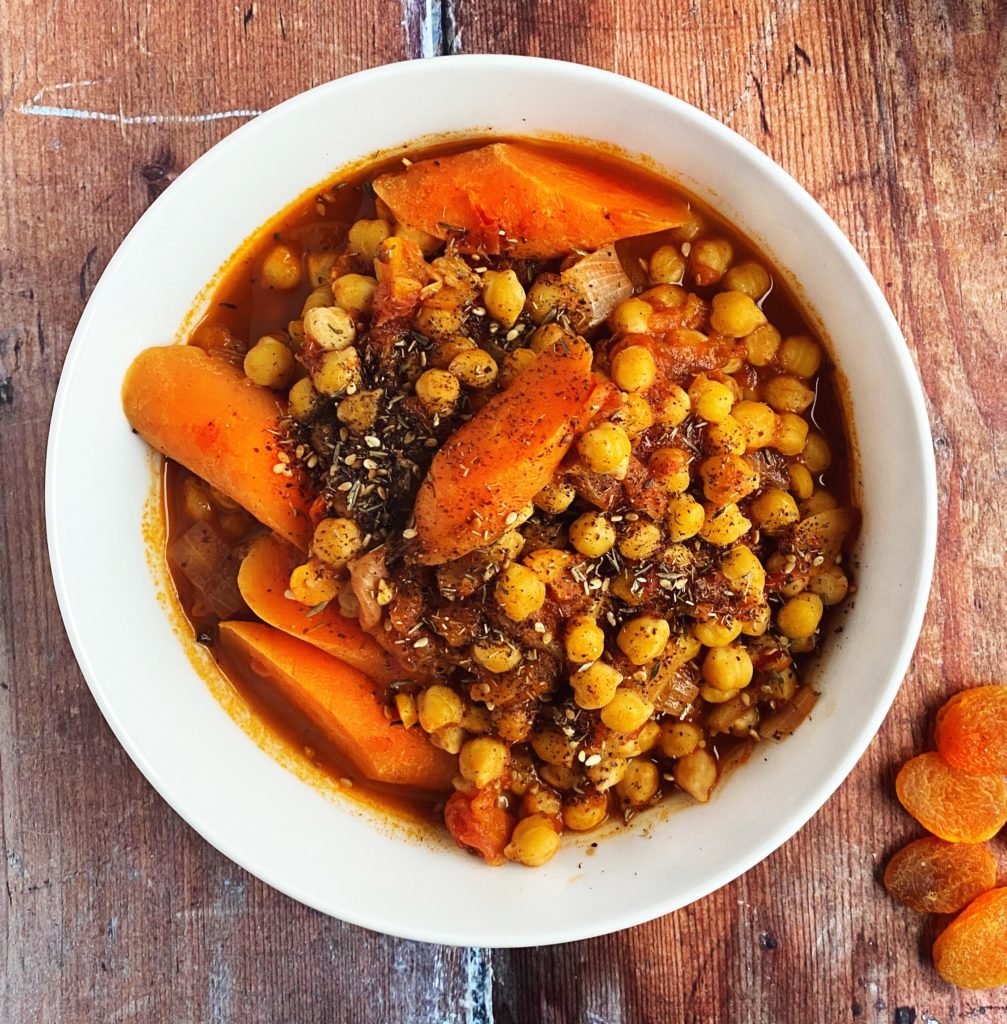
Carrot, Chickpea & Apricot Tagine
A warming Middle Eastern stew, simple to put together with punchy flavours from the chermoula paste.
Dice the onion and sauté it over a medium-high heat in a large pot. While it is cooking make the chermoula paste.
Crush the cumin and coriander seeds with a pestle and mortar until roughly broken up. Add the peeled cloves of garlic and crush some more. Then add the chilli flakes and smoked paprika and stir in 2 tbsp of olive oil. Finely dice the preserved lemon and stir it into the spices. Instead of using a pestle and mortar you could use a small blender and pulse the ingredients together into a rough paste.
Add the chermoula paste to the onions and stir for a few minutes to toast the cumin and coriander seeds. Once they are very fragrant, drain the tins of chickpeas and add them to the pot.
Chop the carrots into chunky slices and add them to the pot along with the two tins of chopped tomatoes and the tsp of ground cinnamon. Half fill the tomato tins with water and swirl out any remaining tomatoey juices into the pot.
Slice up the apricots and add them to the stew, season it really well with salt and pepper then put the lid on and simmer for an hour or so until the carrots are cooked through and the stew is rich and flavoursome.
Taste and adjust the seasoning as needed and serve with cous cous or rice or breads or even on it’s own. It’s fantastic with some freshly chopped parsley or coriander mixed through right before serving too. I’ve topped mine in the photo above with some homemade z’atar which is simply an even mix of toasted sesame seeds, dried thyme and ground sumac.
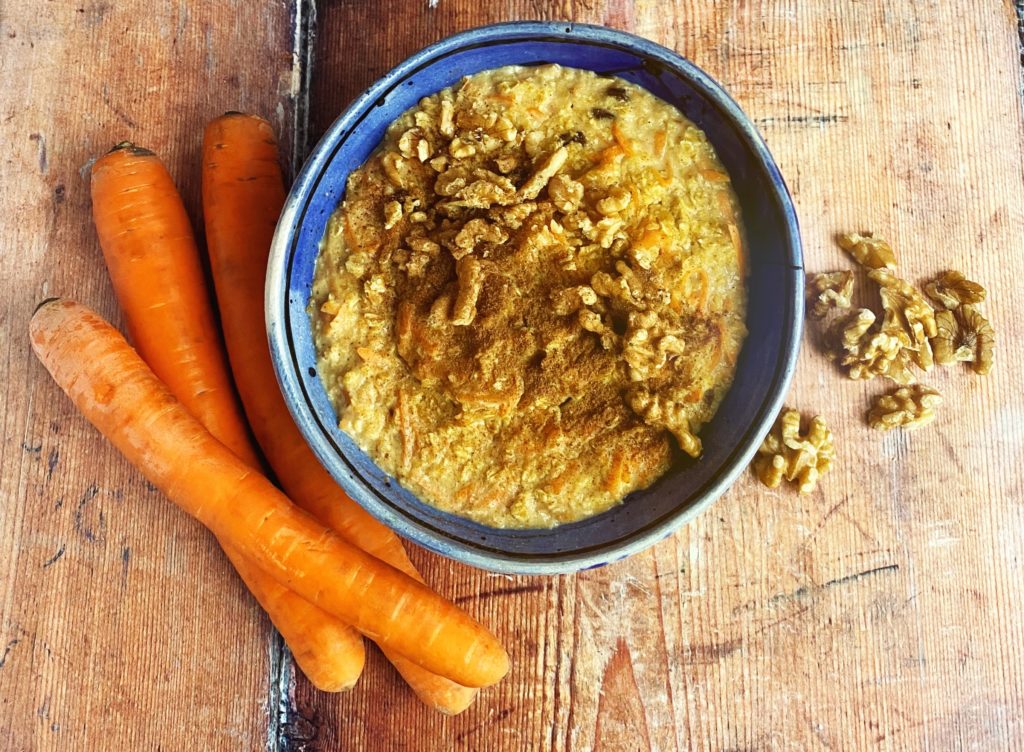
Carrot Cake Porridge
Sweet spices, grated carrot, creamy oats…delicious topped with walnuts on a cold morning.
walnuts and extra cinnamon/maple syrup to top the porridge
Method
Grate a carrot and put it in a small pot with the oat milk, oats, spices, raisins, oats and maple syrup.
Simmer and stir until hot and creamy, then serve topped with walnuts and a dusting of cinnamon. Add an extra drizzle of maple syrup if you like too!
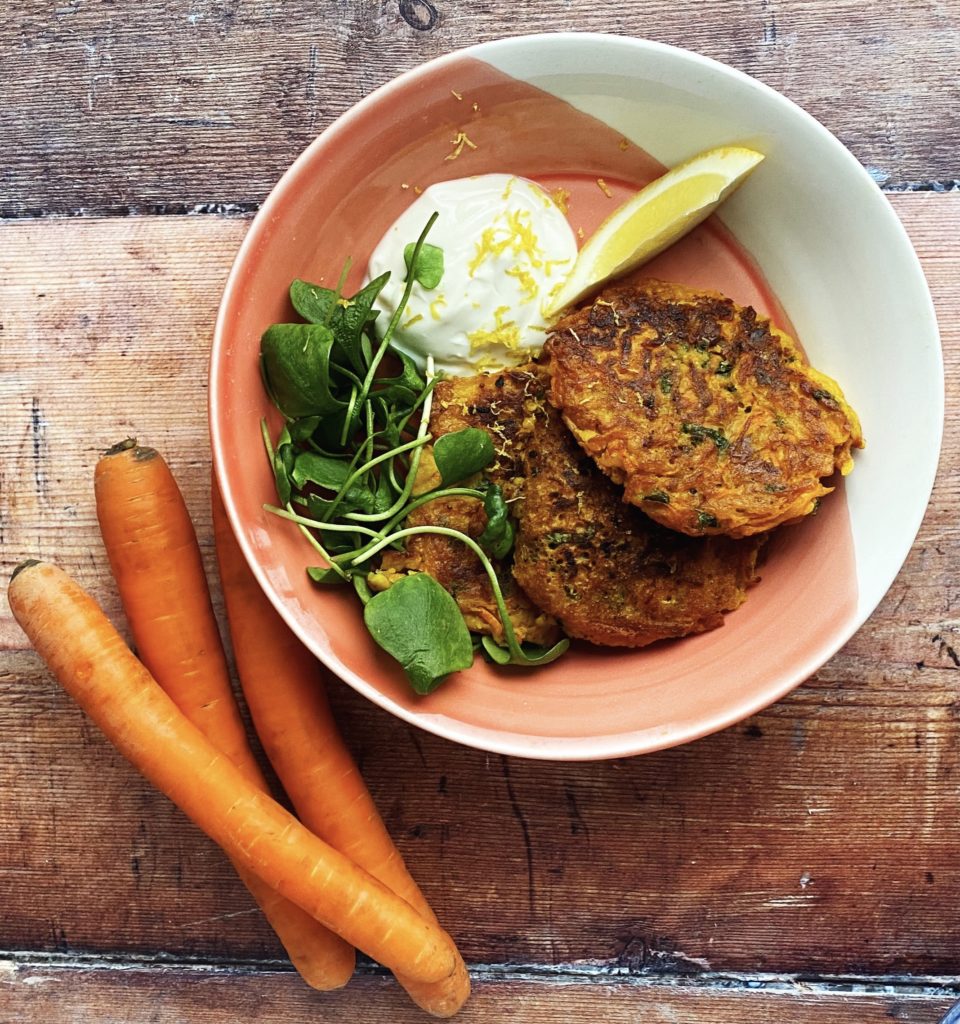
Carrot & Mint Fritters with Yogurt, Leaves & Lemon
Fritters are a fantastic light lunch with salad leaves and a simple dip. Or have them as a sandwich filler? Very versatile, use whatever herbs, spices and veg you fancy. This combination is especially delicious though. Tastes like Spring is around the corner!
Whisk the gram flour and water together into a smooth batter, then season it well with a big pinch of salt and pepper.
Stir in the grated carrot and chopped mint and then fry well spaced dollops of the mixture in a pre-heated to medium-high, well oiled frying pan. Fry on both sides for about 3-5 minutes per side or until golden brown and crispy and cooked through.
Serve hot with a couple of spoons of natural yogurt with a little lemon zested over it (lemon and mint work so well together), a few salad leaves and a wedge of fresh lemon to squeeze over the leaves and the fritters.
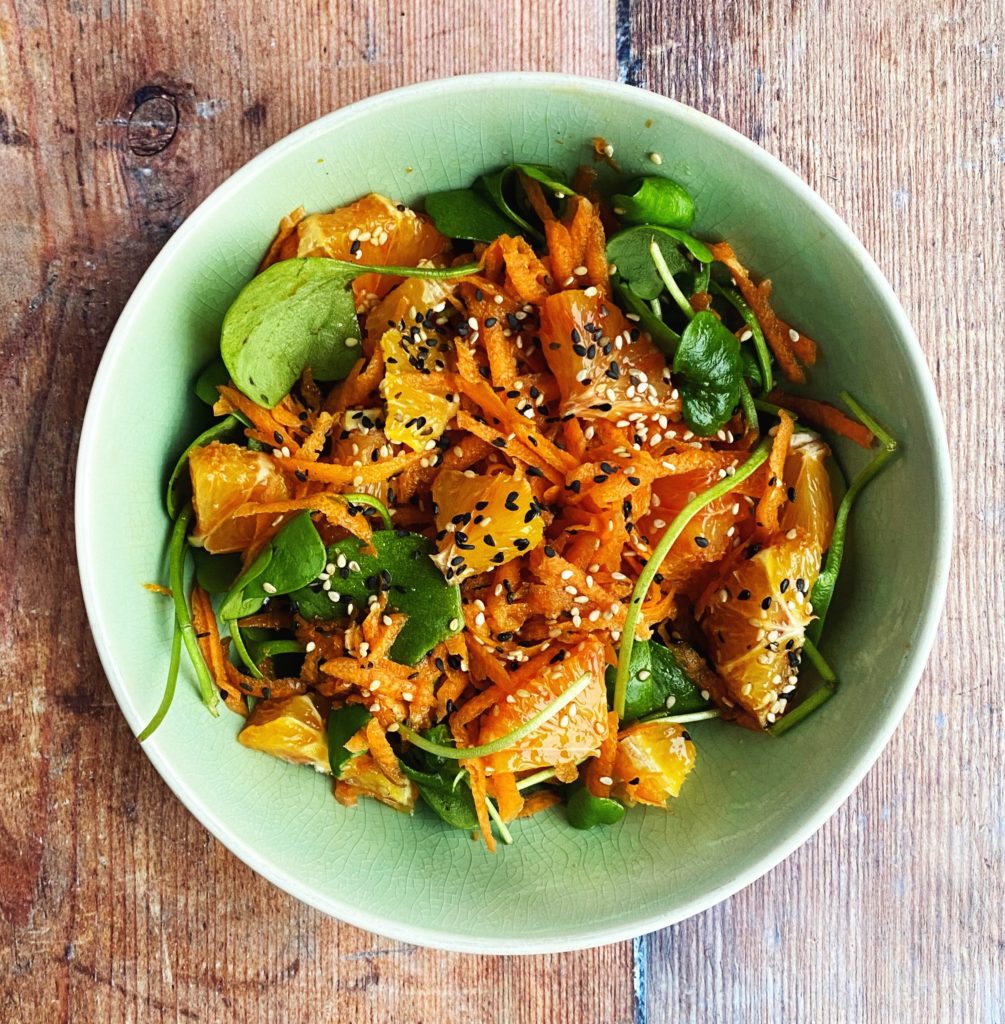
Carrot, Blood Orange & Sesame Salad
Toasty, salty, sweet, fresh and tangy – just the perfect combinations. This simple salad takes very little time to put together but has all the big time flavours!
Butternut squashes are the most common squash that we deliver on repeat at Green Earth Organics and it’s no wonder. Organic vegetables just taste better! If you’ve ever been disappointed by a bland, watery supermarket squash, we urge you to try one of ours. These vibrant veggies are sweet and nutty and their fabulous flavour is more than matched by their incredible nutritional profile. Butternut squash is a great source of fibre, vitamins and minerals including A, B, C, E, calcium, magnesium and zinc.
Here are just 4 ways I cook a butternut squash regularly. Let us know your favourite butternut recipes in the comments or over on our friendly facebook group. We love to see what you’ve been making with our vegetables.
Head to our shop here to sign up for a veg box subscription or order from our wide selection of organic fruit, veg and groceries.
Liz x
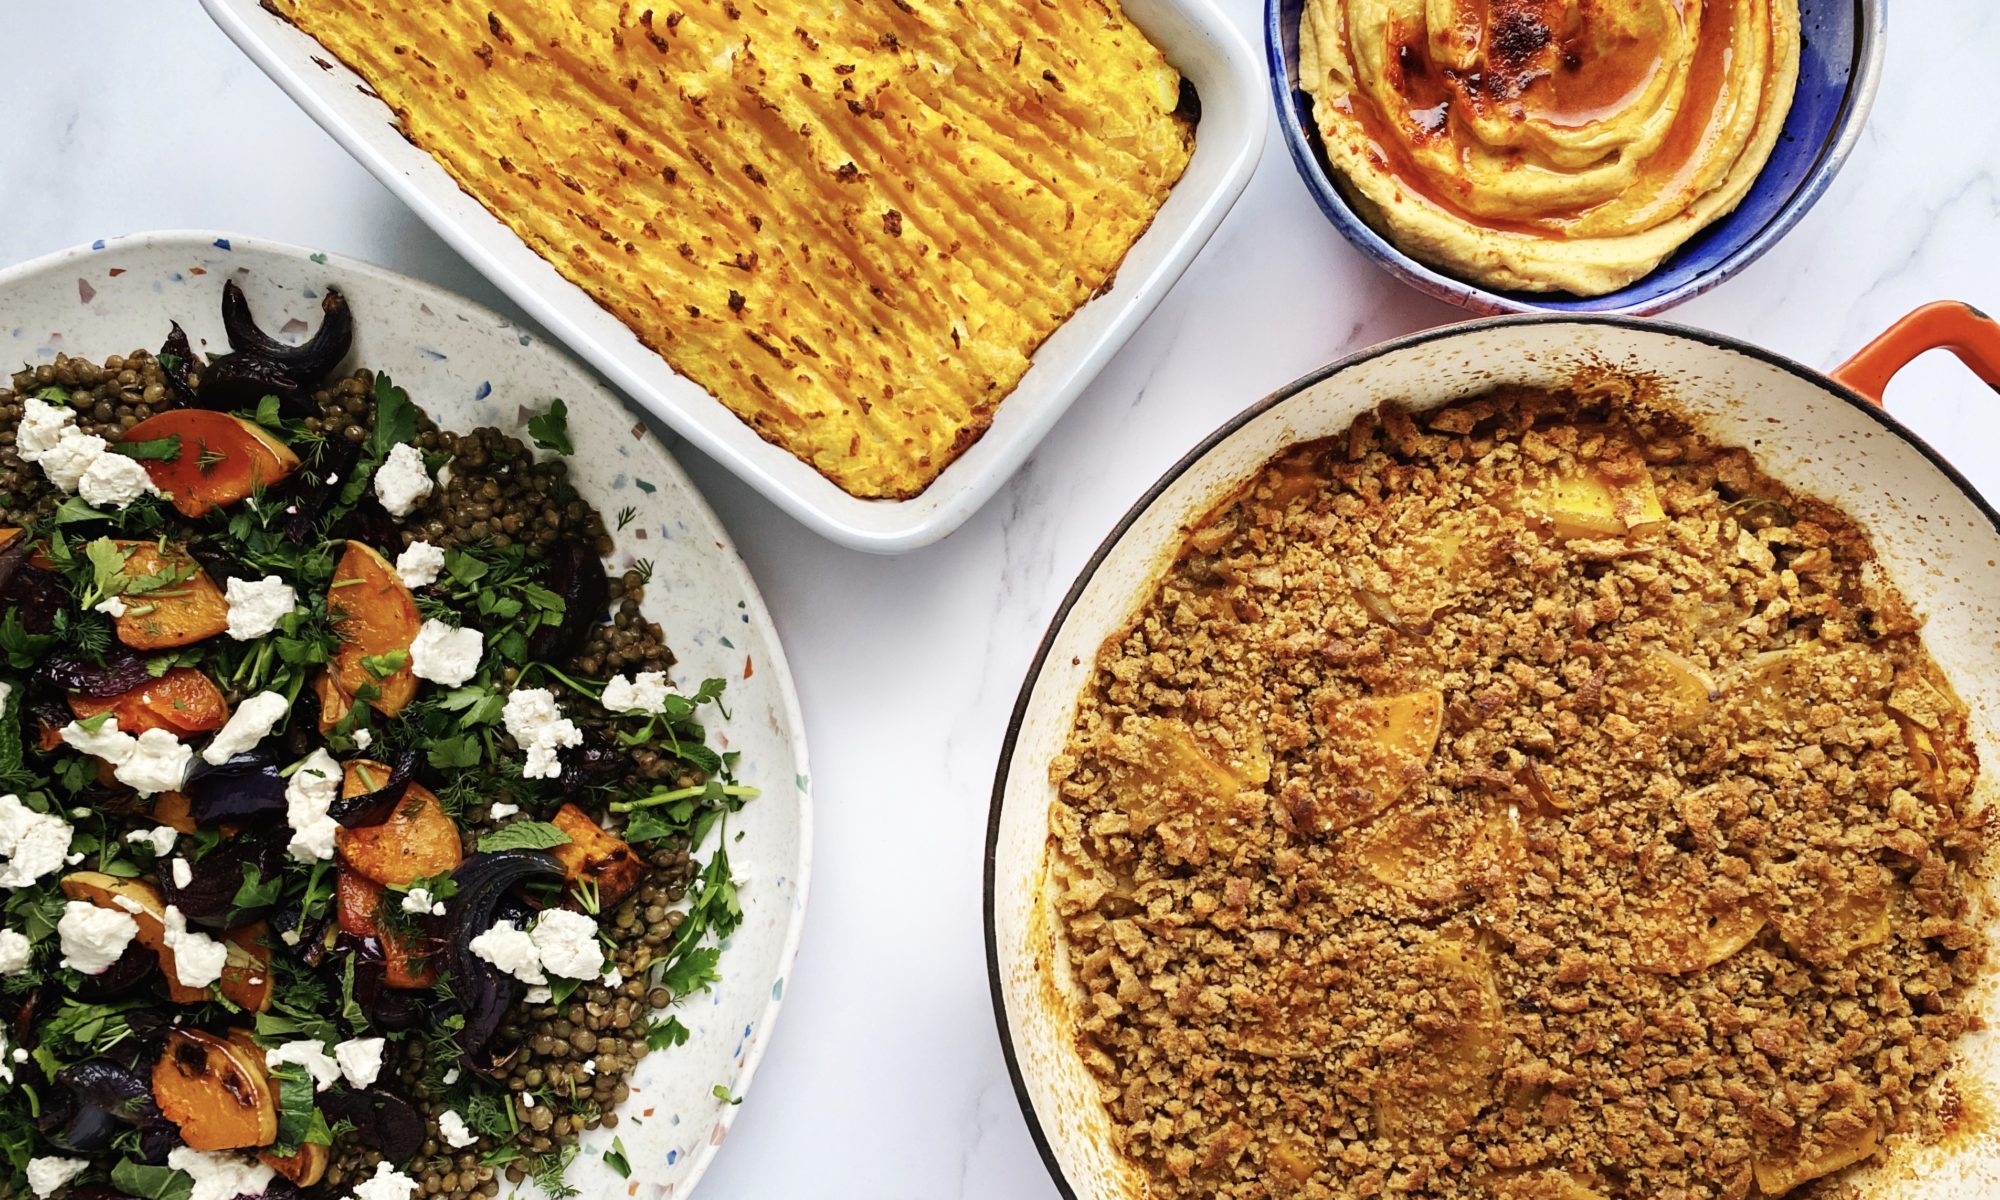
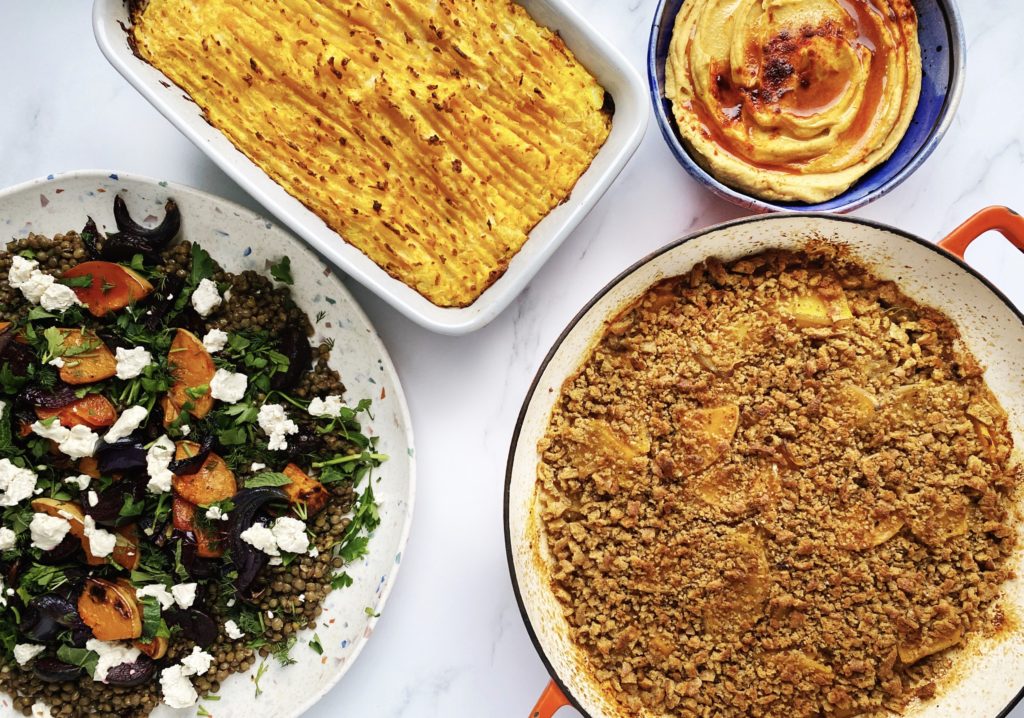
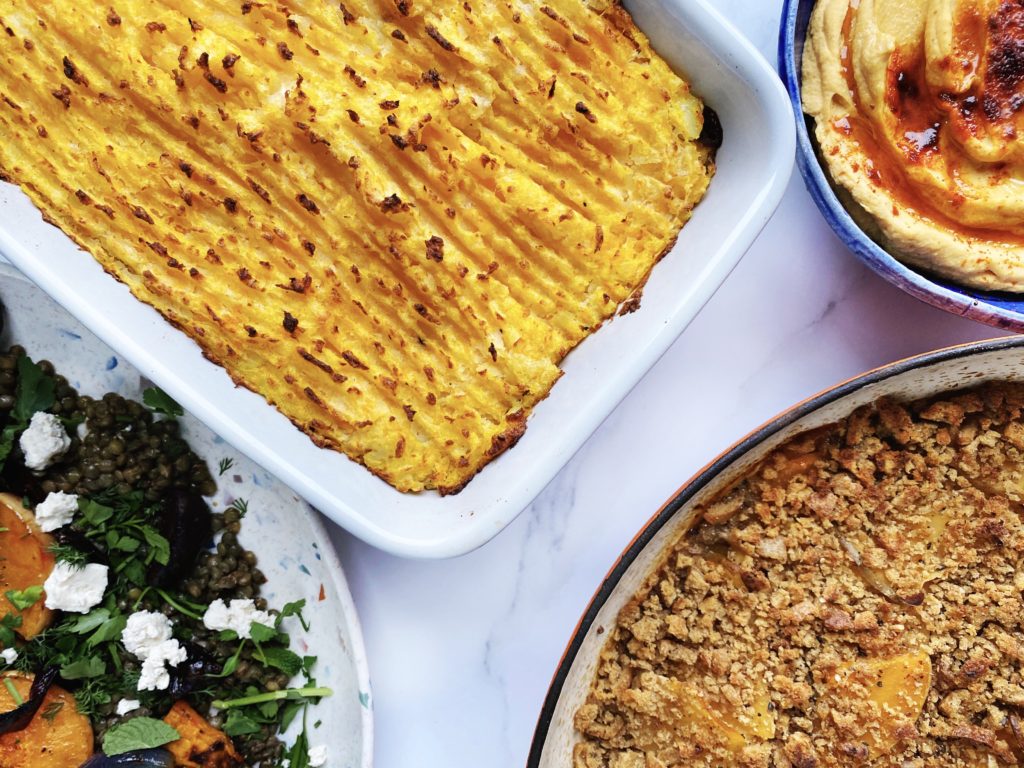
Lentil Pie with Squash Mash
Ingredients (serves 4)
1 onion, diced
3 cloves of garlic, crushed
10 diced mushrooms or two grated carrots or beetroots (use any base veg that is in season or a combination of veg that you like, diced or grated)
2 sticks of celery, diced
2 tbsp olive oil
1 vegetable stock cube or a big pinch of dried, crumbled mushrooms
1 mug of green/brown lentils (or two tins of cooked lentils, drained)
1/4 to 1/2 a butternut squash (or about 400g if you want to weigh it), peeled
a similar amount of potato as the squash, around 400g
salt, pepper and olive oil or butter for the mash – to taste
Method
Sauté the onion, garlic in a little olive oil over a medium-high heat until starting to soften and take on some colour.
Add the diced mushrooms/carrot/beetroot and celery and a big pinch of salt and sauté for a bout 5-10 minutes until they have cooked down a little.
If you are using raw lentils, add them now and the stock cub or dried, crumbled mushrooms and herbs if using. Cover with water and simmer and stir until the lentils are cooked through. Keep tasting and adding more liquid if needed.
If you are using pre-cooked lentils from a tin, add the stock/dried mushrooms/herbs and a mug of water and simmer the vegetables in that for 5 minutes first, then add the drained lentils to the pot and a touch more water if needed to make a nice (not too dry, not too wet) base for your pie.
Taste and adjust the seasoning if needed with salt and pepper. Pour the lentil pie mixture into a baking dish and preheat your oven to 200C.
Meanwhile peel, chop and boil the potato and squash together until soft. Drain and mash with salt, pepper and a little oil or butter. Taste for seasoning.
Top the lentil base with your sunny, butternut mash. Rough it up a little with a fork and drizzle with olive oil.
Bake for 20-30 minutes or until hot, bubbling and crisp and golden on top. Enjoy with seasonal greens.
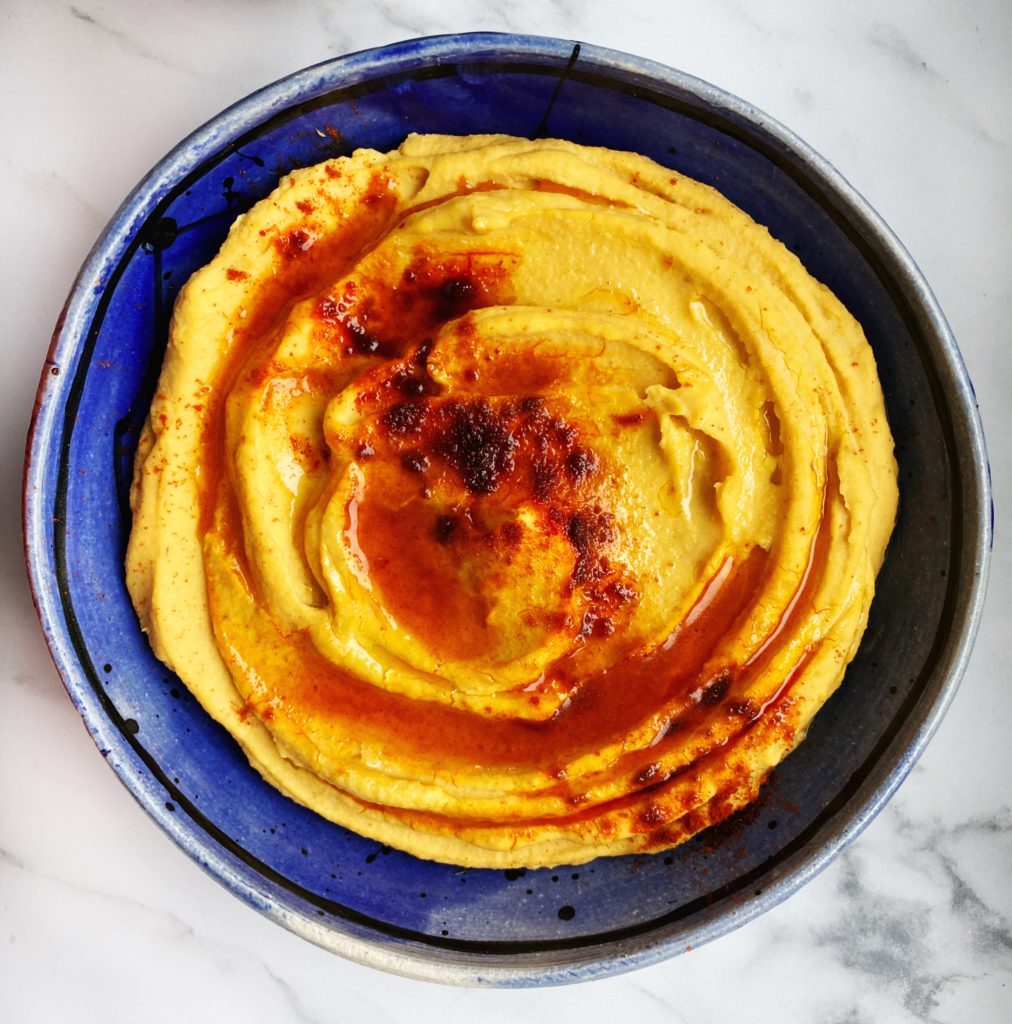
Butternut Squash Hummus
Ingredients (makes about 600g of hummus)
1 tin of chickpeas, drained over a jug to reserve the aquafaba
1 heaped tbsp tahini
1 clove of garlic, crushed
1/4 of a preserved lemon or the juice of 1 lemon
salt to taste
1/4 of a butternut squash (about 400g or so)
1 tsp cumin seeds
1 tsp smoked paprika and olive oil to drizzle
Method
Roast the butternut squash with a drizzle of olive oil, a tsp of cumin seeds and a pinch of salt until soft. This could take 20-3- minutes at 200C depending on the exact size of your squash, just keep an eye on it.
Place the drained chickpeas, preserved lemon, crushed garlic, tahini and cooked butternut into a food processor. If you are using lemon juice, start with the juice of half the lemon and see how you go.
Add a splash of aquafaba and a pinch of salt and blend into a smooth paste.
Taste and adjust the seasoning as you like with more lemon, salt, tahini, garlic as you prefer. If you like a lighter, fluffier hummus, add an extra splash of the aquafaba or some cold water and blend again.
Serve drizzled with extra virgin olive oil and a sprinkle of smoked paprika.
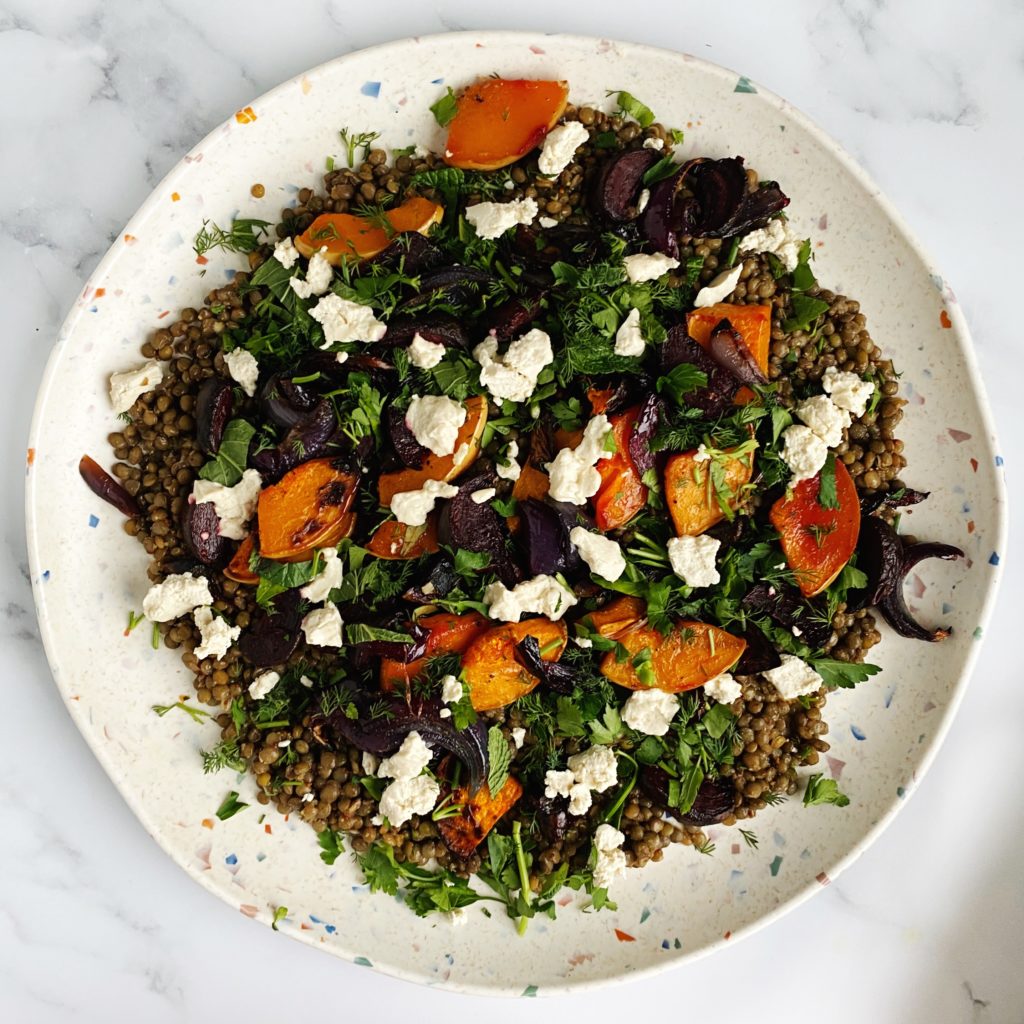
Butternut, Beetroot & Tofeta, Lentil Salad
Ingredients (serves 4-6)
1/4 of a butternut squash
2 beetroots
1 red onion
olive oil, salt and pepper to taste to season the above
1 mug of lentils boiled in 2-3 mugs of vegetable stock or water (or 2 drained cans of pre-cooked lentils)
dressing – 1 crushed clove of garlic, 1 tbsp wholegrain mustard, 1 tsp maple syrup, 2 tbsp apple cider vinegar, 3 tbsp extra virgin olive oil, pinch of salt
3 handfuls of chopped fresh herbs (dill, parsley and mint?)
This dish is really special with the addition of my tofeta. You can find the easy recipe illustration in this bog post here or in my book which is available to add to your order here. Otherwise use whichever cheese you prefer or replace the feta with toasted nuts or seeds.
Pre-heat the oven to 200C and find a large baking dish.
Boil green lentils in stock or water until cooked through. Drain off any excess liquid and leave to cool while your prepare the vegetables, herbs and dressing.
Chop the squash, beetroots and red onion into slim wedges, season them with salt, pepper and olive oil, then roast them until they are soft and slightly charred.
Mix up the dressing ingredients and stir it through the cooked lentils.
Chop the fresh herbs then arrange the salad into a large salad bowl or platter.
Put the dressed lentils on the base, spoon over the roasted vegetables, scatter over the fresh herbs and crumble the tortes on top.
Enjoy warm or cold. This keeps well in the fridge for no more than three days. Keep the tofeta seperately and it will last longer.
Butternut & Swede Gratin
Ingredients (serves 4)
1/2 a butternut squash
1 small swede or half a large one
2 crush cloves of garlic
a small handful of wintery herbs like thyme/rosemary/sage
salt and pepper
olive oil
oat milk
4 or 5 handfuls of breadcrumbs (add chopped herbs and nutritional yeast to your breadcrumbs to make them more flavoursome – or replace the bread crumbs with crushed nuts/seeds)
Method
Pre-heat the oven to 200C.
Thinly slice the butternut and swede and mix them together in a large, lidded baking dish with the crushed garlic, a generous drizzle of olive oil and salt and pepper to your taste.
Pour in enough oat milk (or use cream for a richer gratin) to cover about a cm of the base.
Put the lid on the dish and bake until the vegetables are soft all the way through. This should take about 30-40 minutes.
Remove the lid and add a little more oat milk. Scatter over a thin layer of breadcrumbs, drizzle with olive oil and return to the oven for a further 10-15 minutes, lid off, to brown on top.
Serve with seasonal greens or as a side to a roast.