Lemon & Poppyseed Pancakes

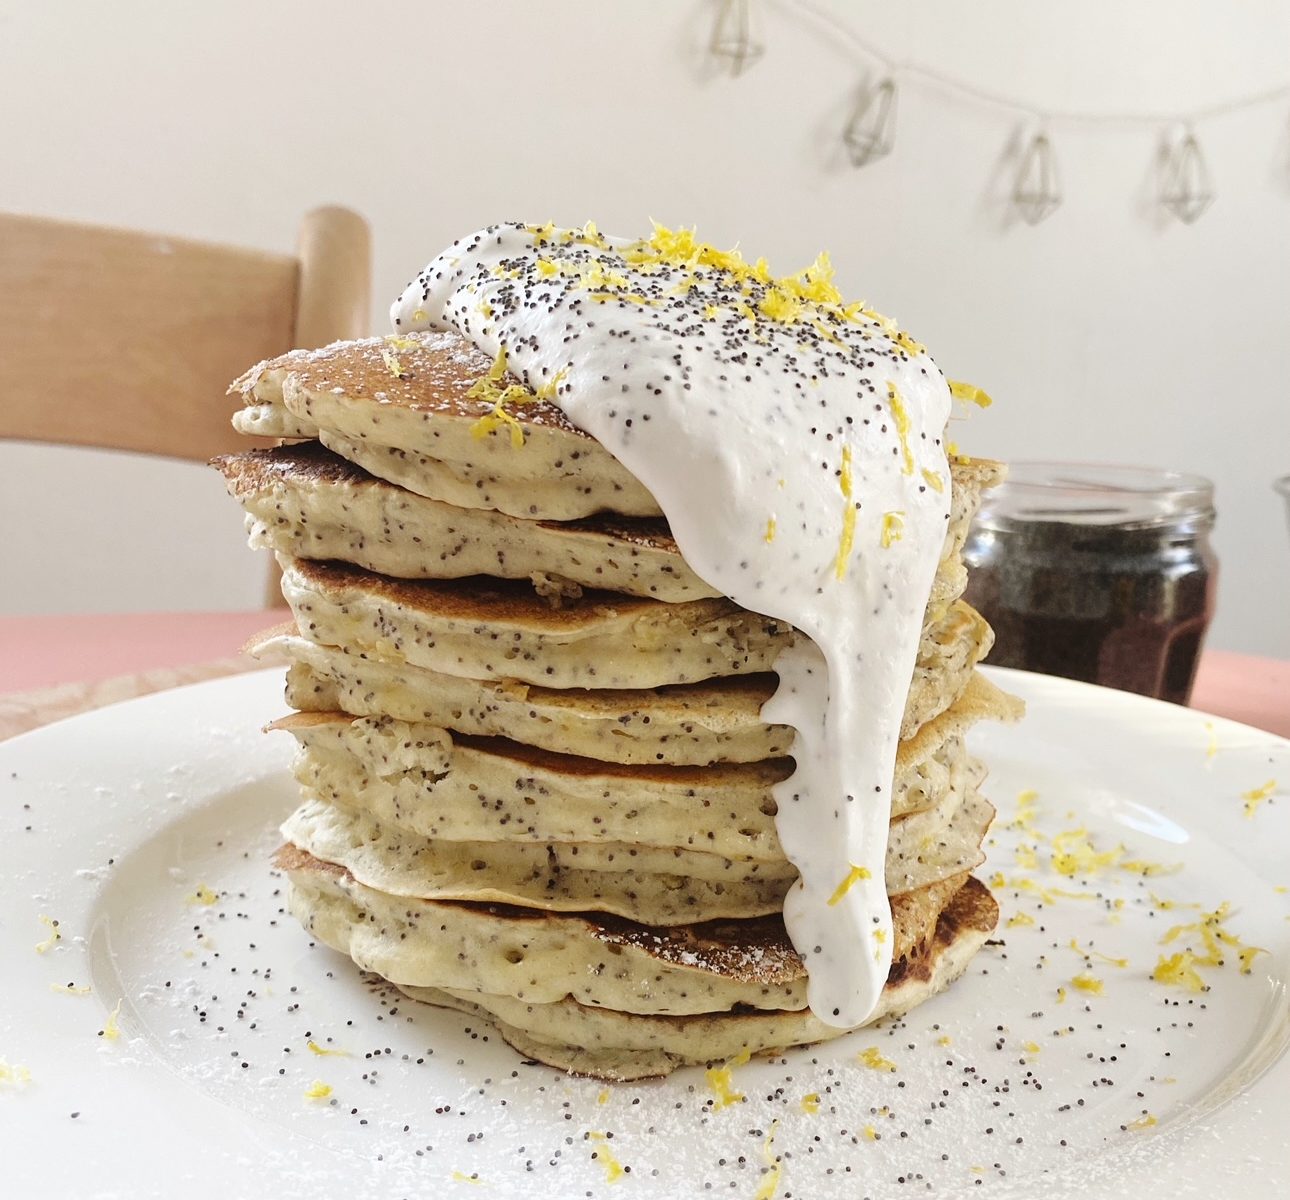
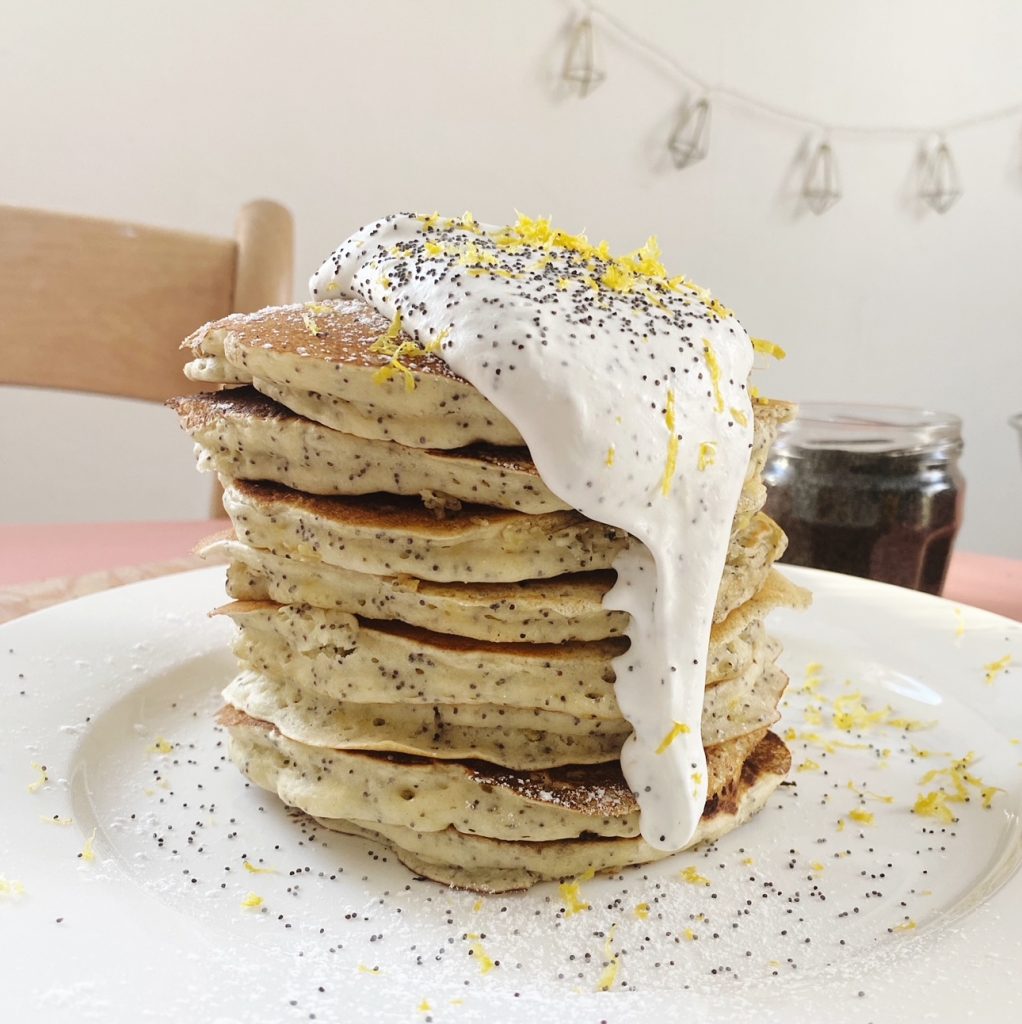
What kind of pancakes do you love to eat on pancake day? We enjoy them all! Thin crepes, fluffy American style and even savoury. This year we are going for a thick stack of lemon and poppyseed pancakes. We recommend always choosing organic citrus, especially if you are using the zest. Non-organic citrus fruits are treated post-harvest with all kinds of nasty waxes and chemicals to help them last longer on the supermarket shelves. You can be assured that all of our citrus fruit are organic, so it is totally safe to use the zest. Happy Pancake Day!

Liz x

Ingredients (makes around 10 large pancakes)

  • 1 large mug of flour
  • 2 tbsp poppyseeds
  • 1 tbsp baking powder
  • 1 tbsp sugar
  • pinch of salt
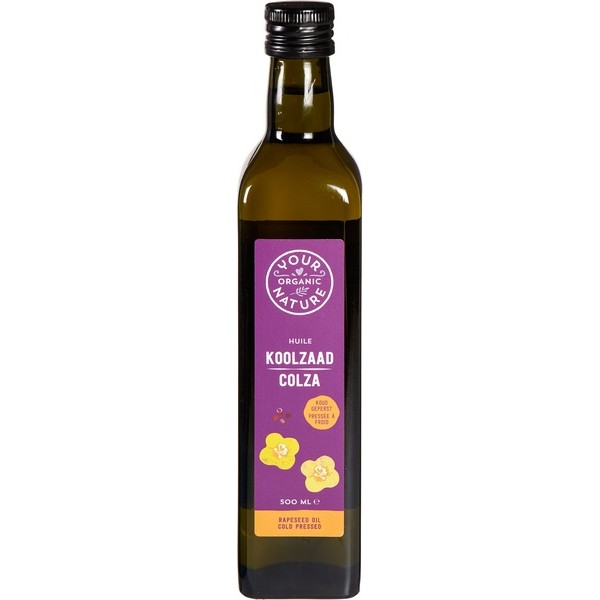
  • 2 tbsp cold pressed rapeseed oil
  • zest & juice of half a lemon
  • 1 mug of oat milk
  • butter for frying
  • to serve… whipped cream or natural yoghurt sweetened with icing sugar to taste, then lemon zest, juice and poppyseeds stirred through

Method

  1. Prepare your toppings and pancake pan first. Once you make your batter you want to cook it soon after before the raising agent starts to loose it’s oomph. Pre-heat your pan over a medium-low heat. Thick, fluffy pancakes cook low and slow so that they are golden brown on the outside and perfectly cooked through and fluffy on the inside.
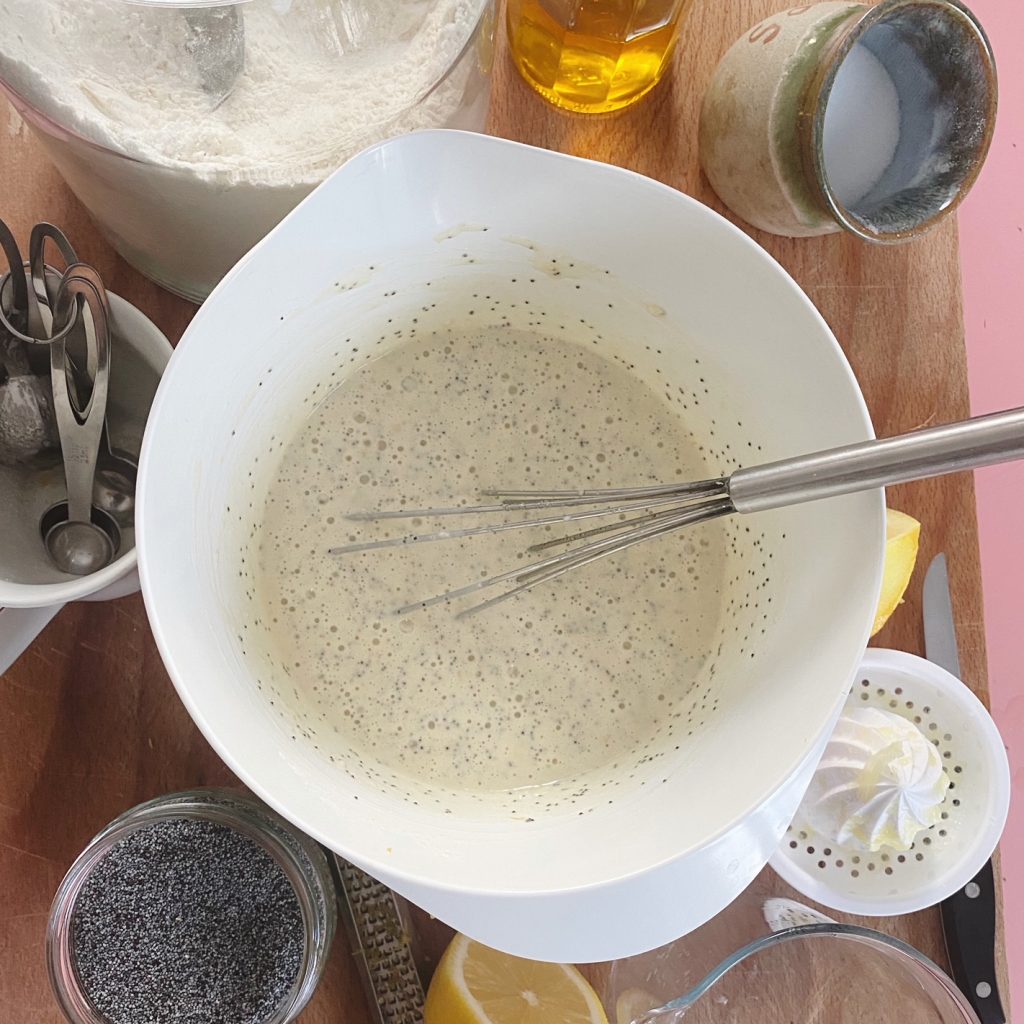
  2. In a mixing bowl, whisk together the flour, poppyseeds, salt, sugar, lemon zest, oil and baking powder. Then squeeze the lemon half and pour it into the mug. Top up the mug with oat milk and stir to create a soured milk. Pour the sour milk into the dry ingredients and whisk to just combine into a thick, smooth batter. Careful not to over-mix.
  3. Melt a little butter in your pancake pan then add a generous serving spoon of the batter. Allow it to cook until golden brown on the bottom (this takes around 3 or 4 minutes on a low heat) then carefully flip and cook for another 2 or 3 minutes or until the pancake is cooked through. Place in a tray to keep warm in a low oven.
  4. Repeat with the rest of the pancake mixture. Stack up the pancakes on plates and top with the cream or yoghurt, extra icing sugar, lemon zest and poppyseeds. Enjoy!

Kale & Apple Salad

This simple winter salad is so so delicious. We have it as a side to pretty much every meal at the moment. Sometimes topped with toasted seeds too. Don’t throw out the kale stalks! You can finely slice them and pop in a box in the freezer to take out in handfuls whenever you need some greens (or purples!) in your next stir fry, smoothie or stew. We have lots of delicious purple and green kale coming out of the fields so add some extras to your next order and try this quick salad.

Liz x

Ingredients

  • 1 apple
  • 6 kale leaves (3 green, 3 purple)
  • the juice of 1/2 a lemon
  • a pinch of flaky sea salt
  • 1 tbsp cold pressed rapeseed oil or extra virgin olive oil

Method

  1. Core and finely slice the apple. Place in a salad bowl and mix with 1/2 the lemon juice to stop it from going brown.
  2. Rinse the kale leaves and shake dry. Then remove the leaves from their tougher central stalk. (Finely chop the stalks and pop into a freezer box to use in a different recipe.) Gather the leaves and finely slice with a large, sharp knife.
  3. Mix the leaves into the salad bowl with the salt, oil, apples and lemon juice. Taste and add the remaining lemon juice if needed. Enjoy right away or store the fridge for up to a day.

One Pot Broccoli, Lemon & Garlic Pasta

One pot pasta dishes are our favourites! Not just because of less washing up, but also because when you create a sauce in the pasta’s starchy cooking water, it is so luscious, silky and rich.

We have loads of amazing broccoli here on the farm now, we love it so much that we use half a head per person in this recipe (based on the traditional Italian broccoli orecchiette). The broccoli is deliberately cooked for longer than we would usually cook it, until it collapses into the sauce. We use a big dollop of miso (in place of anchovies) for complex depth of flavour and loads of gorgeous garlic and lemon to make this simple dish sing. Give this recipe a try for your next pasta night.

Liz x

Ingredients (serves 4)

  • 4 tbsp extra virgin olive oil (plus extra for drizzling on the bowls)
  • 6 fat garlic cloves, peeled & finely chopped
  • 2 heads of broccoli, finely chopped – stalks included
  • 1 tbsp miso paste
  • the zest and 1/2 the juice of a lemon
  • 400g pasta (any small shape you prefer)
  • salt and pepper to taste
  • chilli flakes and grated cheese to serve

Method

  1. In a large, heavy bottomed pot, sauté the garlic and finely chopped broccoli stalks in the oil until very fragrant and starting to soften – about 5 minutes or so.
  2. Season with salt, pepper, miso and lemon zest and then add the dried pasta and broccoli florets.
  3. Just cover with water, give the pasta a stir and put the lid on the pot to help the water come quickly to a boil.
  4. Once boiling, remove the lid and stir to ensure no pasta is sticking to the bottom. Cook until the pasta is soft. Taste and adjust the seasoning as needed with more salt and pepper and the lemon juice.
  5. Let the pasta sit off the heat and rest a few minutes before serving. This will allow the sauce to thicken into the perfect texture. Serve with a drizzle of extra virgin olive oil, a sprinkle of cheese and chilli flakes. Enjoy!

Leek & Lemon Orzotto with Hazelnuts

Leeks are one of our favourite vegetables. They are so delicious, I like to make them the star of the show when I cook with them. This simple, one-pot, spring dish is all about those luscious, soft and sweet leeks offset by toasty, crunchy hazelnuts (we stock organic hazelnuts in compostable bags here) and tangy caramelised lemon. Orzo is just rice shaped pasta which I love to cook like risotto rice, we stock an organic bag from Irish company, Bunalun. We love their store cupboard staples so much. Top quality, organic and affordable. Add some Bunalun groceries to your next fruit and veg order with us here. We deliver nationwide.

Liz x

Ingredients (serves 4 hungry people)

Method

  1. Find a large, deep, frying pan or pot. Start by toasting the hazelnuts in the dry pan. Just turn the heat to medium-high, tumble the hazelnuts into the pan and keep them moving around until they smell amazing and are deliciously toasty. Tip them into a bowl to cool a little then chop or crush into smaller pieces and save for finishing your dish at the end.
  2. Then, in the same pan, add the butter and oil. Place the lemons, cut side down, into the melted fat and let them cook until caramelised. Remove them to a bowl to finish your dish with later too. Caramelised lemon is so delicious. It makes the lemon softer, juicier and sweeter…and it looks pretty too.
  3. Tip the chopped leeks and garlic into the pan and season with salt and pepper. Stir fry until the leeks are starting to soften.
  4. Add the orzo and stock to the pan and simmer and stir until the pasta has absorbed the liquid and is cooked through. Taste and tweak the seasoning if needed with more salt and pepper.
  5. Stir the chopped parsley through, then serve in four bowls, each topped with a caramelised lemon half and a handful of chopped, toasted hazelnuts. Enjoy!

Marmalade

There’s nothing like homemade marmalade is there? The gorgeous scent of oranges filters through the house and brings some much needed sunshine into our winter kitchens. Citrus season is in full swing now and we have organic bitter marmalade oranges in stock now. Alway choose organic citrus fruit to avoid waxes and sprays.

Here’s the classic recipe I always stick to as it’s easy to remember by heart and never fails. But of course you can make it your own with different citrus. I’ll be making a batch of blood orange marmalade for sure (I may reduce the sugar a little for that batch as they are so naturally sweet), and maybe a kumquat one too!

Will you be making marmalade this season?

Liz x

Ingredients

  • 1kg Seville oranges (bitter marmalade oranges)
  • 2 lemons
  • 2 litres of water
  • 2 kg sugar

Equipment

  • a large, heavy bottomed pot
  • a cloth bag (I use a nut milk bag) or a square of muslin and some string
  • a medium sieve
  • 3 or more small plates
  • a wooden spoon
  • a jam funnel
  • jars – I reuse old jars
  • a ladle or small glass jug

Method

  1. Put the little plates into the freezer. Pour the water into your pot. Place the sieve over the pot and then open out the bag or muslin into the sieve. Scrub the oranges and lemons.
  2. Cut the fruit in half and juice them into the pot, ensuring you catch all the seeds and pith in your cloth bag or muslin. You want to keep all the seeds and pith as that’s where the pectin is which will make your marmalade set. Use a spoon to scrape out any remaining bits of pith and other citrus innards into the bag. Now tie the bag and place it in the liquid with the string attached to the pot handle to make it easier to extract later.
  3. Cut the skins in half again and then into thin strips. (You can leave out the lemon skins if you like but I like to add them in so nothing is wasted.) I use a serrated knife but any sharp knife should work. Take your time and get all the skins cut as evenly as possible. Enjoy the process. Place the cut skins into the pot.
  4. Bring the pot to a rolling boil then turn down the heat and simmer at a gentle bubble, for 2 hours or until the skins are soft. You can test them for doneness by squeezing one between your fingers. It should easily break apart. You should also notice that the liquid has reduced quite a bit too, that’s good.
  5. Now remove the bag of seeds and piths and put it in a bowl to cool down. Turn the pot to the lowest temperature.
  6. Pour the sugar into the pot, it will seem like an obscene amount but oranges are very bitter so it is needed I’m afraid. Gently melt the sugar on the lowest setting, take your time. Don’t stir too much, just a few times with a wooden spoon. Once the sugar is completely melted you will notice it doesn’t feel grainy on the bottom of the pot and when you pick the spoon out of the liquid you will not see any sugar crystals. It’s important to melt the sugar on a low temperature before turning the heat up to boil and set the marmalade. Don’t skip this step or your marmalade will come out grainy rather than the desired shiny jelly.
  7. Your bag should hopefully be cool enough to handle now. Pick it up and squeeze it over the pot. You want to extract as much of the cloudy, gelatinous stuff out through the bag as possible. Use a spatular or the wooden spoon to help scrape off the gel as you squeeze. Then stir it into the marmalade.
  8. Turn the heat up and bring the marmalade to a rolling boil. Boil hard for 15 minutes, keep an eye that it doesn’t boil over. Then turn the heat off, give the marmalade a stir and scoop off any unwanted scum that is stubbornly not re-incorporating into the mixture.
  9. Take one of the plates out of the freezer and place a spoon of the hot marmalade on it. Put it in the fridge for 3 minutes then do ‘the wrinkle test’. This is where you push your finger slowly through the marmalade to see if it has set. It should feel like jam and look wrinkly. If it has not set yet then return the marmalade to the boil and try again every 5 minutes until you are happy with the set.
  10. Sterilise your jam funnel, ladle, jars and lids. Then fill the jars with the marmalade whilst it is still hot. Screw the lids on tightly and leave them to cool and seal on your counter top overnight. Then label them with the date and keep in a cool, dark place for up to 12 months. Once opened, keep in the fridge. Enjoy!

Cauliflower Noodle Soup

This is THE soup to make when you’re feeling under the weather. It’s a plant based take on that classic chicken noodle soup which brings so much comfort. It’s brothy and light, bursting with vitamins, but at the same time hearty and satisfying. I used bay leaves, lemon and thyme to flavour the broth with lots of garlic and a little turmeric for it’s sunny colour and medicinal properties. You’ll feel like a whole new human after a bowl of this. Happy slurping!

Liz x

Ingredients (serves 6)

  • 3 tbsp olive oil
  • 1 leek, sliced
  • 4 sticks of celery, diced
  • 3 carrots, diced
  • 6 cloves of garlic, sliced
  • 3 bay leaves
  • 1 tbsp dried thyme
  • 1 tsp turmeric
  • 2 tsp salt
  • 1 tsp ground pepper
  • 100g quinoa, rinsed
  • 1/2 a head of cauliflower, diced
  • 120g noodles (I prefer quick cooking ramen or Thai rice noodles here but you can also use Italian style pasta in any shape you like. Just adjust the cooking times as explained below.)
  • 1 lemon, juiced

Method

  1. In a large, heavy bottomed pot, sauté the leek, garlic, carrots and celery with the olive oil. After 5 minutes the vegetables should be starting to soften.
  2. Then add the bay leaves, thyme, turmeric and quinoa. Top up with a couple of litres of water, season with the salt and pepper then simmer. After 10 minutes, the vegetables should be soft and the quinoa just starting to release it’s tails.
  3. Add the cauliflower and simmer for another 5 minutes. Taste the broth for seasoning and add more salt if necessary.
  4. Then add the noodles* and give the soup a stir to ensure they’re not clumping together. If they are the quick cooking type, turn the heat off, put the lid on and let them cook and soften in the residual heat. If they are Italian style pasta noodles and need longer cooking then you should add them with the cauliflower during step 3.
  5. Brighten the soup with the lemon juice and serve in large bowls. Enjoy!

TOP TIP – *only add the noodles/pasta if you’ll be eating this soup immediately. If you are making this in advance, add the noodles when you reheat it, otherwise they’ll get too soggy. You can even cook the noodles/pasta separately and put them into bowls, then ladle the soup over each portion.

Sprout Spaghetti

Brussels sprouts are in season and are certainly not just for Christmas Day. Have you been adding them to your boxes? What’s your favourite sprout recipe? I love sautéing them like this with garlic, herbs, nuts and citrus, then folding them through pasta. They’re also brilliant stirred through rice or another cooked grain like barley, quinoa, buckwheat etc for a gorgeous warm salad. Here’s my sprout spaghetti recipe, it makes a stunning mid-week meal and will only take as long as the time to boil your pasta. Quick, festive and delicious!

Liz x

Ingredients (per person)

  • 70-100g dry spaghetti (depending on appetite) or other grain/pulse of your choice eg quinoa, rice…
  • 1 heaped tbsp butter (I use our new dairy free Natruli blocks)
  • 2 tbsp extra virgin olive oil
  • 1 clove of garlic
  • 7 Brussels sprouts, thinly sliced
  • a small handful of hazelnuts, roughly chopped
  • 3 sprigs of rosemary
  • 1/2 tsp lemon zest
  • 2 tbsp lemon juice
  • salt and pepper to taste (it’s extra good with lots of black pepper!)

Method

  1. Bring a large pot of water to the boil, meanwhile chop your sprouts, garlic and hazelnuts.
  2. Generously salt the boiling water and drop in the pasta. Give it an occasional stir to prevent it from clumping or sticking to the bottom. While the pasta cooks, prepare the rest of the dish.
  3. In a wide pan, melt the butter, add the oil and sprouts, hazelnuts, garlic and rosemary. Stir fry for a few minutes then season well with salt and pepper.
  4. Add the zest and juice of the lemon when the sprouts turn bright green and are mostly cooked through. Stir well, taste and adjust the seasoning if need with more salt, pepper or lemon. Turn off the heat for now.
  5. Drain the pasta but reserve a mug or so of the starchy cooking water. Add the pasta to the sprouts and turn the heat back on. Add a few splashes of the cooking water and mix the pasta and buttery sprouts together. The pasta water and butter should create a delicious, light, lemony sauce. Taste again and you’ll probably want to add more black pepper.
  6. Serve in bowls and top with grated cheese or nutritional yeast flakes if you like. Enjoy!

Ribollita

This classic Tuscan soup is just gorgeous. A hearty combination of white beans, tomatoey broth and seasonal vegetables, most notably kale. What makes this soup extra delicious for me is the combination of garlic, lemon zest, really good olive oil and fragrant rosemary and sage. This is one of those stew-like soups that is better the next day. Once you’ve done all the chopping, it’s really simple to make. Leave it brothy if you like or thicken the soup with torn chunks of stale bread or blend a portion of the beans before adding them. I prefer to leave it brothy then serve the soup over torn bread. Let us know your favourite way of eating ribollita.

Liz x

Ingredients (serves 6)

  • 6 tbsp extra virgin olive oil
  • 2 onions, peeled and diced
  • 3 sticks of celery, diced
  • 3 large carrots, diced
  • 6 cloves of garlic, peeled and diced
  • the zest of a lemon
  • 1 tbsp chopped rosemary
  • 1 tbsp chopped sage
  • 2 stock cubes
  • 1 tin chopped tomatoes
  • 2 tins white beans, drained
  • 8 kale leaves, stems finely chopped, leaves torn
  • the juice of a lemon
  • salt and pepper to taste
  • stale bread to serve, optional

Method

  1. In a large, heavy bottomed pot, sauté the onion with the olive oil on a medium-high heat until soft and starting to colour. This should take at least 5 minutes.
  2. Then add the diced carrot and celery and the thinly sliced kale stems, season with salt and pepper and stir for a couple of minutes.
  3. Add the chopped garlic, lemon zest and chopped herbs. Stir for another minute or two, your kitchen should smell really really good now.
  4. Crumble in the stock cubes and tip in the tin of chopped tomatoes. Fill the tin with water 4 times and pour that water into the pot.
  5. Add the drained beans then bring the soup up to a boil, turn the heat down and simmer for 15 minutes with the lid on.
  6. Then add the torn kale leaves and the lemon juice to the pot, pop the lid back on and let the leaves wilt for just 3-5 minutes. Taste and adjust the seasoning if needed. Add more water if you’d like a brothier soup, blend some of the soup if you’d like it thicker.
  7. Serve in generous bowls, as it is or with torn pieces of stale bread.

Hummus

A lunchbox essential! Spread into a wrap or a sandwich, or packed in a little tub with some sweet, crunchy carrot sticks, everyone loves hummus! Hummus is not only delicious but incredibly nutritious too! Who knew this humble spread contains all of the following:

👉Chickpeas provide fibre, protein and essential, energy-giving carbohydrates.
👉Tahini is rich in healthy fats and minerals including copper, selenium, calcium, iron, zinc and phosphorus.
👉Raw garlic retains more beneficial compounds (like allicin) than cooked garlic.
👉Olive oil is a healthy fat and contains vitamins E and K and is rich in antioxidants.
👉Lemon is a great source of vitamin C.

It’s so easy to make your own hummus from scratch. Especially using our organic tins of cooked chickpeas. We also sell organic tahini, garlic, lemons and olive oil! Add some of our organic pantry essentials to your next veg order here.

Liz x

Ingredients

  • 1 tin of chickpeas
  • 1 clove of garlic, peeled
  • the juice from 1/2 a lemon
  • 2 tbsp tahini
  • 1 tbsp extra virgin olive oil
  • 1/2 tsp salt
  • optional extras like more olive oil, smoked paprika and sesame seeds to top the hummus

Method

  1. Drain your tin of chickpeas over a bowl to reserve the aquafaba. (You can use some of it in this recipe and the rest to make vegan meringues, mayonnaise or cakes. Use the search bar above to find our aquafaba recipes.)
  2. Put the drained chickpeas into a food processor with the S blade attachment. Add the garlic, salt, tahini, lemon juice and olive oil then pulse into a thick, rough paste.
  3. Taste the paste and decide if you’d like to adjust the seasoning. Perhaps more lemon juice or salt?
  4. Then loosen the paste into a creamy hummus by blending again with a couple of spoons of the reserved aquafaba or a couple of ice cubes. Ice cubes make a really fluffy, creamy hummus.
  5. Spoon into a jar, tub or bowl and either enjoy immediately or refrigerate and eat later. Homemade hummus should be eaten within 3 days.

Courgette & Lemon Loaf

Here’s a sweet way to use up your courgette glut. Grated courgette keeps a cake wonderfully moist and the little flecks of green are so pretty. But be careful, when creating this recipe I had a fair few flops before getting it right, don’t be tempted to add more courgette than the recipe states. The extra moisture can put the balance out of whack and make the cake sink after it comes out of the oven.

I made this in a loaf tin so it took about an hour to bake, but if you bake it in a round cake tin it will cook much quicker as there is more surface area and a shallower batter, just keep an eye on it. Why not double the recipe and bake two round cakes to sandwich together? Make a simple lemon buttercream and decorate with raspberries and pistachios for a real summery treat.

Liz x

Ingredients

  • 250g grated courgette
  • 300g plain flour
  • 200g caster sugar
  • 1 tsp bicarbonate of soda
  • a pinch of salt
  • 100ml oat milk
  • 100ml olive oil
  • zest and juice of 1/2 a lemon (reserve the other half of the lemon juice and zest for the icing)

Lemon Drizzle Icing

  • the juice of half a lemon
  • enough icing sugar to bring it into a consistency you like
  • the zest of half the lemon to decorate

Method

  1. Pre-heat your oven to 175C and line a loaf tin.
  2. Mix the dry ingredients (flour, sugar, salt, bicarb) together in a large mixing bowl so that they are evenly dispersed.
  3. Add the wet ingredients (oat milk, oil, lemon juice) and stir to just combine. Do not over-mix. This batter should be fairly dry and thick to compensate for the water content of the courgette.
  4. Add the grated courgette and lemon zest to the bowl and use a wooden spoon to fold the mixture together into a thick batter.
  5. Scrape the batter into the lined loaf tin and level it out.
  6. Bake in the centre of the oven for 1 hour or until it’s cooked through. If your oven is fan assisted it may cook faster. Test for ‘doneness’ by inserting a skewer into the centre of the loaf. When pulled out it should be fairly clean.
  7. Allow the cake to cool for 5 minutes or so in the tin before carefully pulling it out onto a cooling rack. Let it cool completely before icing.
  8. To make the icing, squeeze the juice of the other half of the lemon into a bowl and whisk in spoons of icing sugar until you reach your desired consistency. I like it quite runny so it just creates a delicate glaze over the cake but if you prefer a whiter, thicker icing, keep adding sugar until the mixture is fairly thick.
  9. Spoon the icing over the cooled cake and, while it is still wet, sprinkle over the reserved lemon zest. Allow the icing to set then serve in thick slices with mugs of Earl Grey tea.