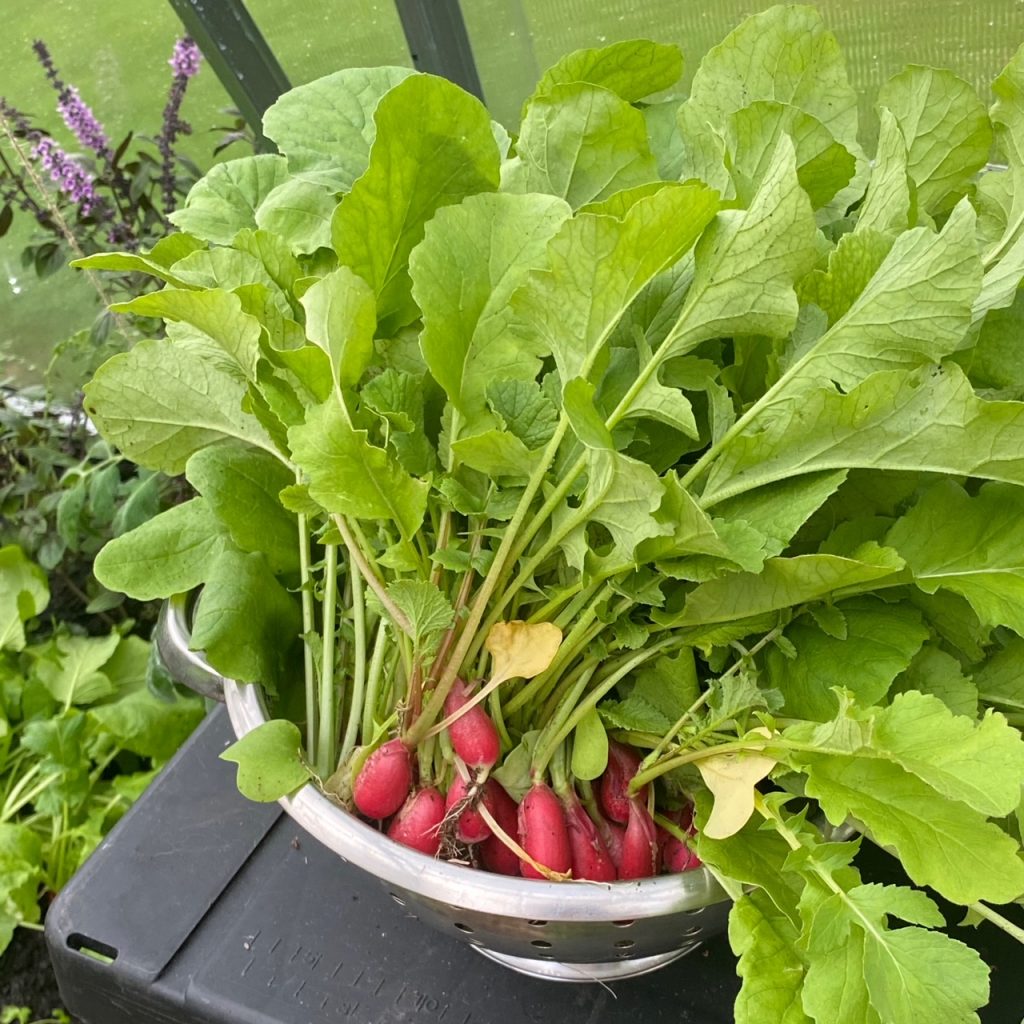
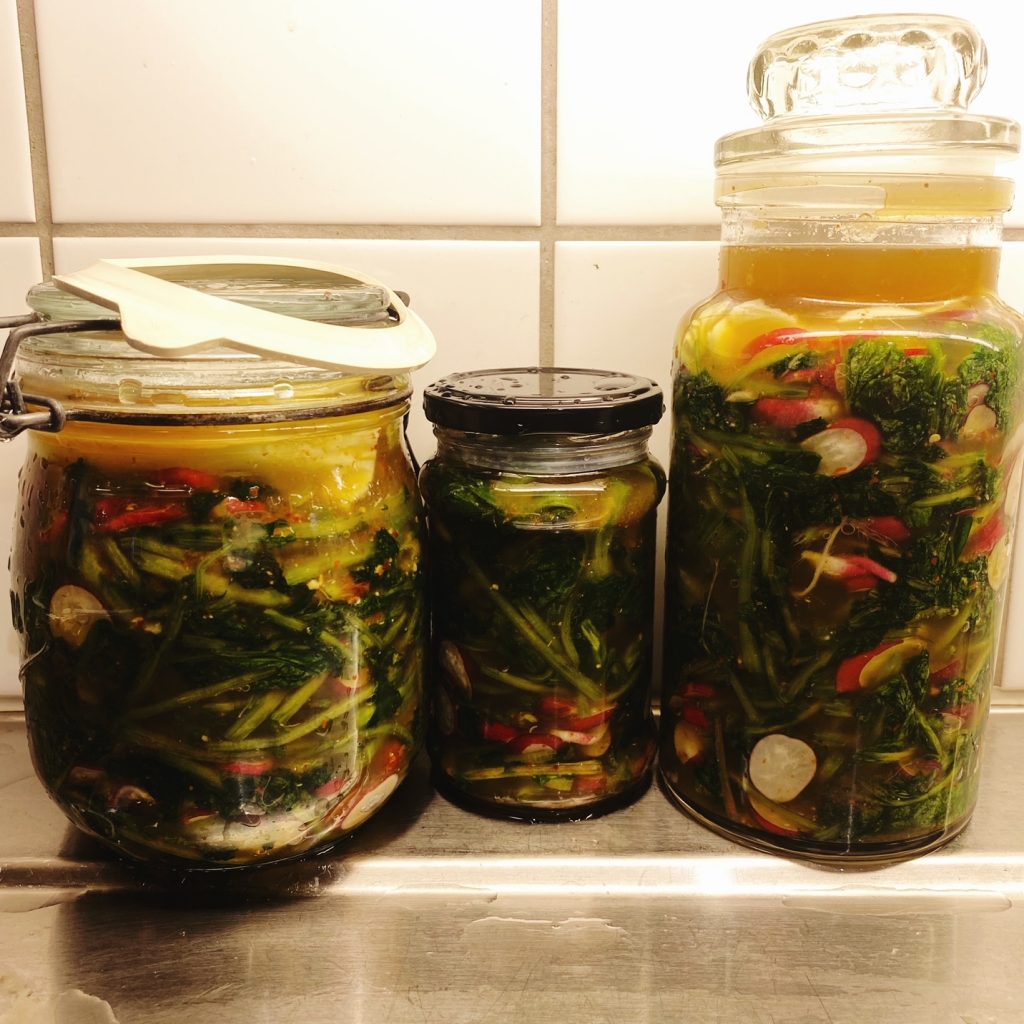
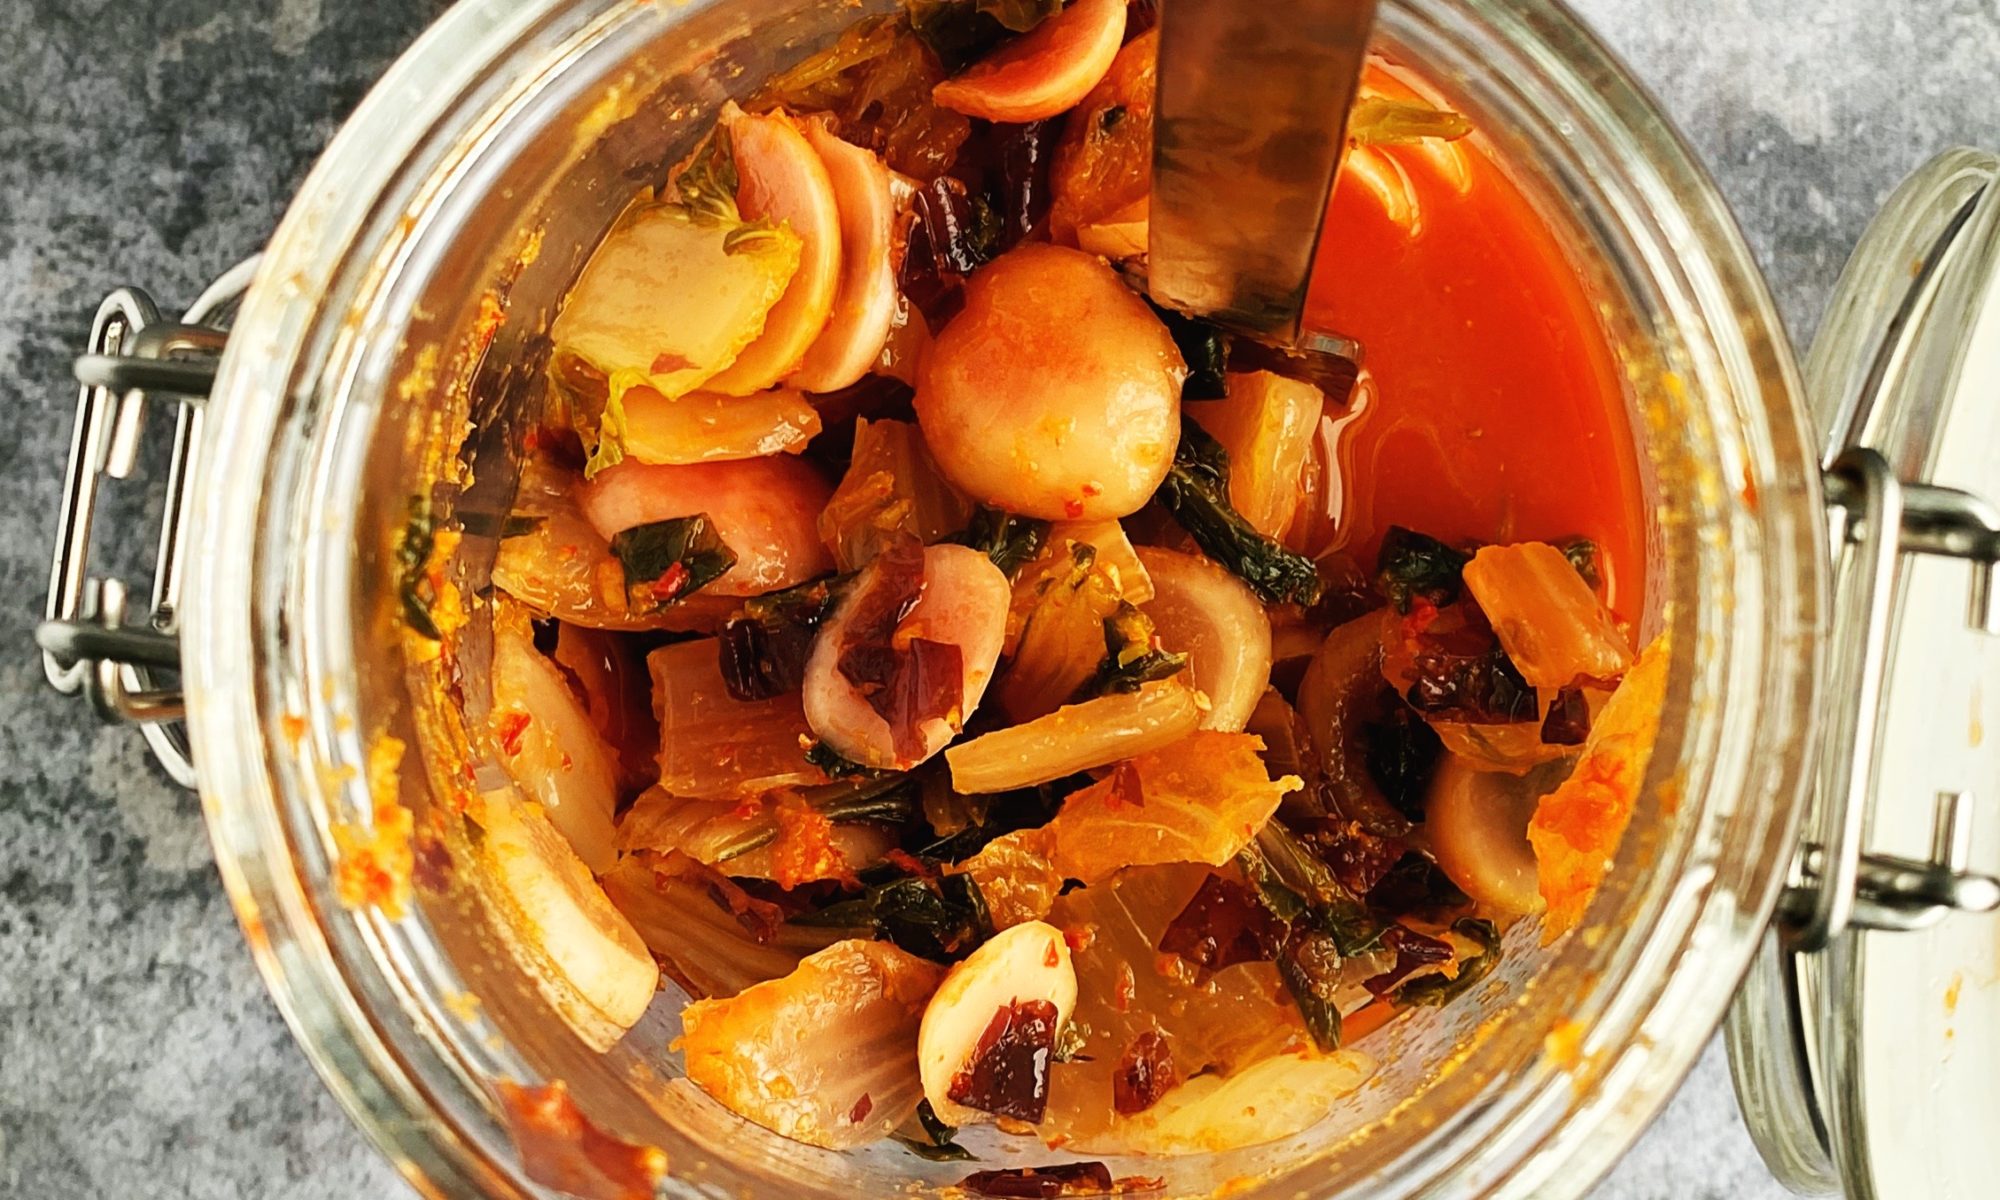
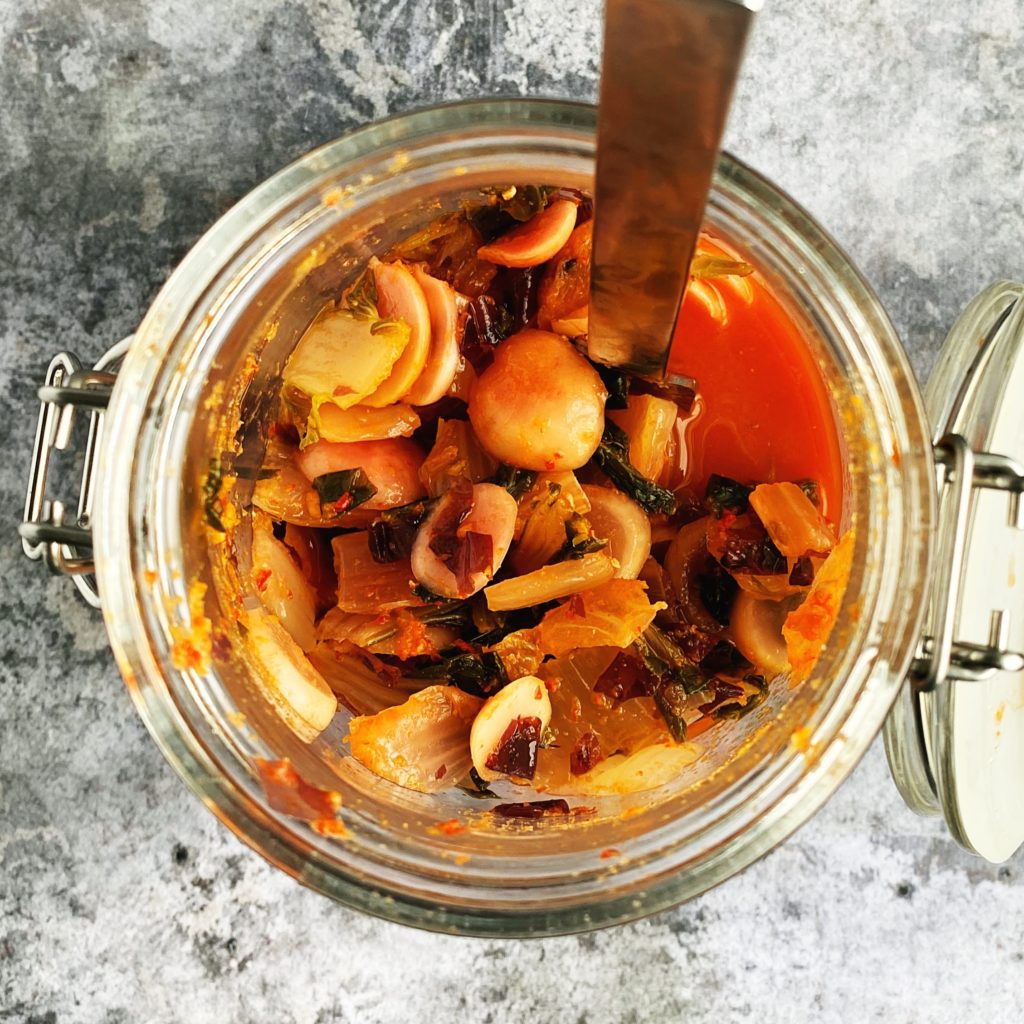
Did you know that radish leaves are edible? Get more bang for your buck (and save food waste) by eating them up! They are delicious and peppery, a little like rocket. Many people are not fans of their slightly bristly texture so, even though they are delicious fresh in a salad, you can also cook them in a soup or stew or as greens in a quiche or as a side dish with garlic. You can also blitz them up with nuts or seeds into a peppery pesto or ferment them as I have done here.
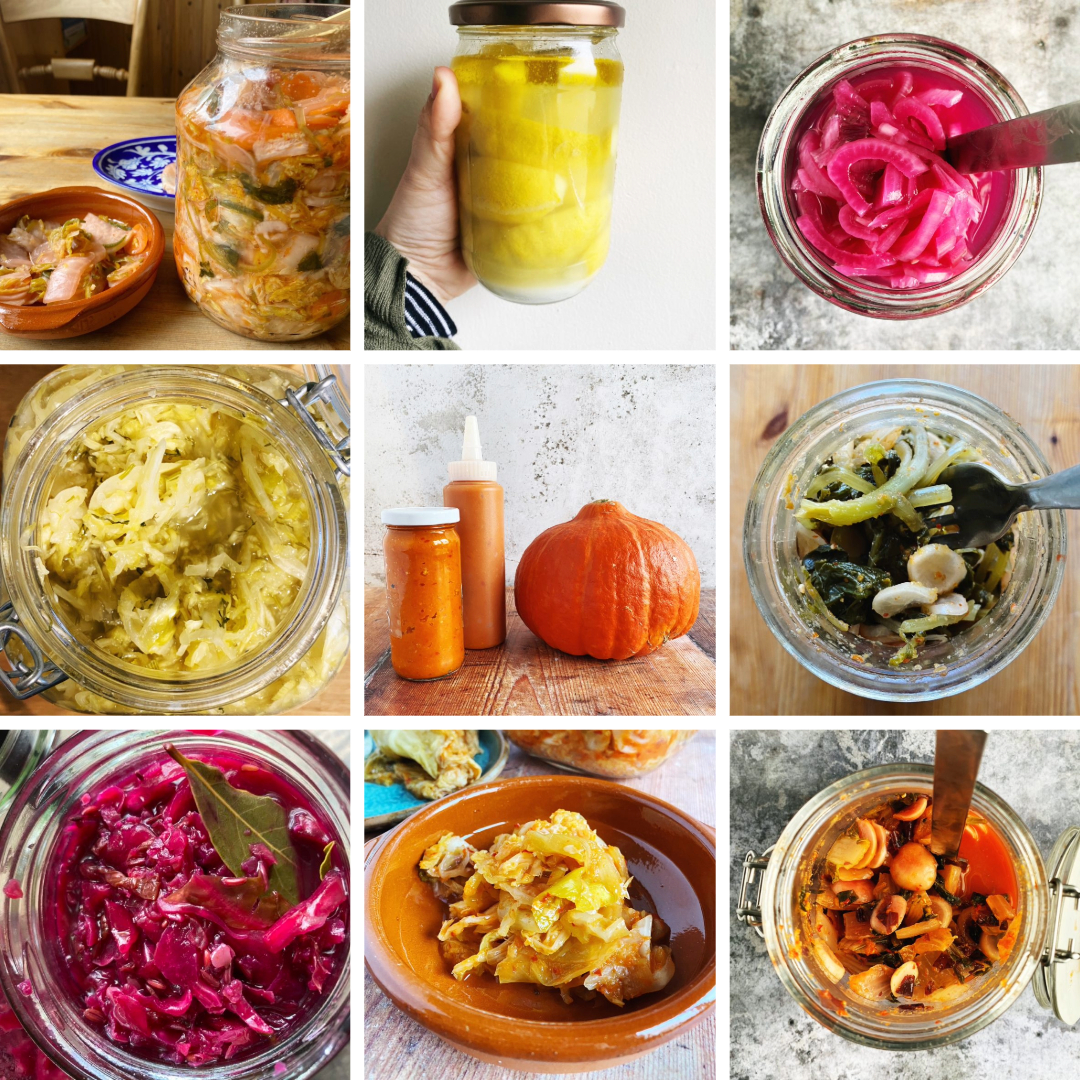
We are a little obsessed with kimchi in our house. We eat a lot of rice (or other grain) bowls and kimchi is just the thing to finish it off. If you’ve not had kimchi before, it is a tangy, spicy fermented condiment – a pickle of sorts – from Korea. Once you get a taste for it, you’ll be hooked, so it’s definitely worth learning to make your own. The health benefits of fermented foods are incredible too. Full of live, gut friendly bacteria to aid your digestion, nutrient absorption, mood and more! We do stock an organic kimchi here if you want to see how it is supposed to taste before you give making your own a go.
Liz x
Ingredients
radishes with leaves – washed and separated
salt to taste (or you can weigh your radishes and leaves, work out 2% of the weight and use that amount of salt if you prefer being precise)
garlic, ginger and chillies to taste
a couple of cabbage leaves to use as ‘followers’ which help keep the radishes submerged in brine
You will also need clean jars, a clean chopping board and knife and a large, clean mixing bowl.
Method
Chop the leaves and stems into 3 or 4 cm chunks. Place them in a large bowl and sprinkle with salt – enough to make them taste pleasantly salty. Mix gently with your hands to tumble the salt around and coat each leaf. You will soon notice that the volume of the leaves decreases and they start to look wet as the salt draws the liquid from the leaves and creates a delicious brine.
Thinly slice the radishes – you can leave on their cute tails which are also perfectly edible. Add them to the bowl and mix them in too. Taste a leaf, does it need more salt?
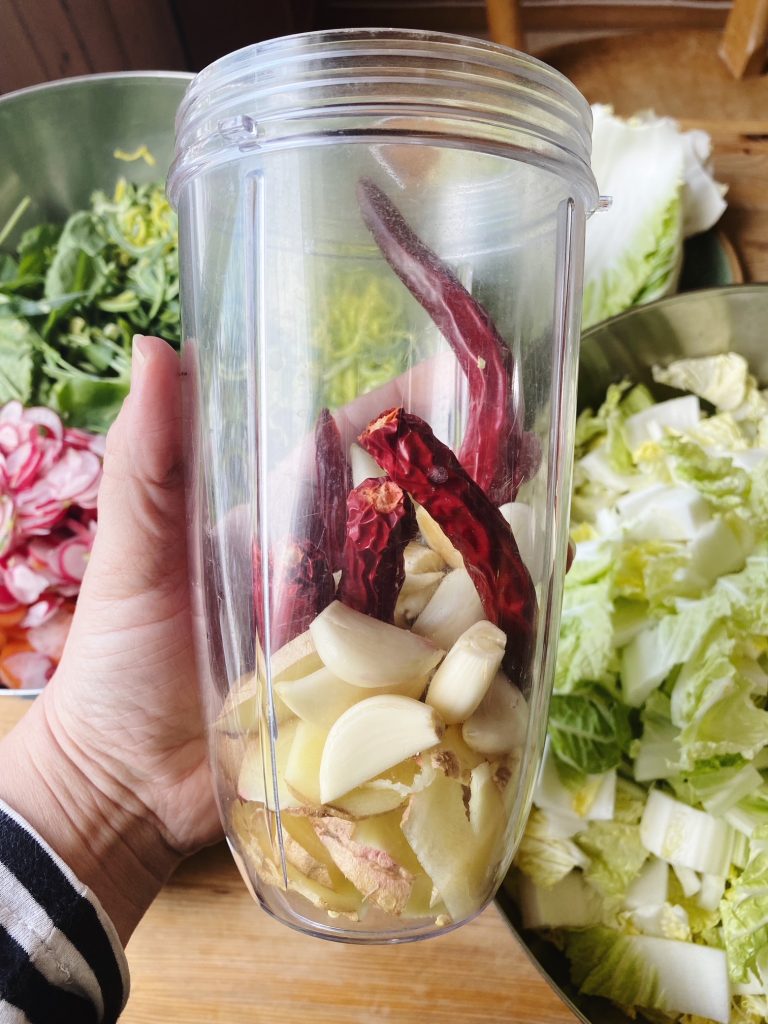
Now make a paste with fresh garlic, ginger and fresh or dried chillies. I use a small smoothie maker and add a good thumb of fresh ginger – sliced but not peeled – the cloves of half a bulb of garlic, peeled, and a good tbsp or two of chilli flakes or a couple of fresh red chillies. Do it to your taste, for example, make it extra garlicky and not so spicy if you like.
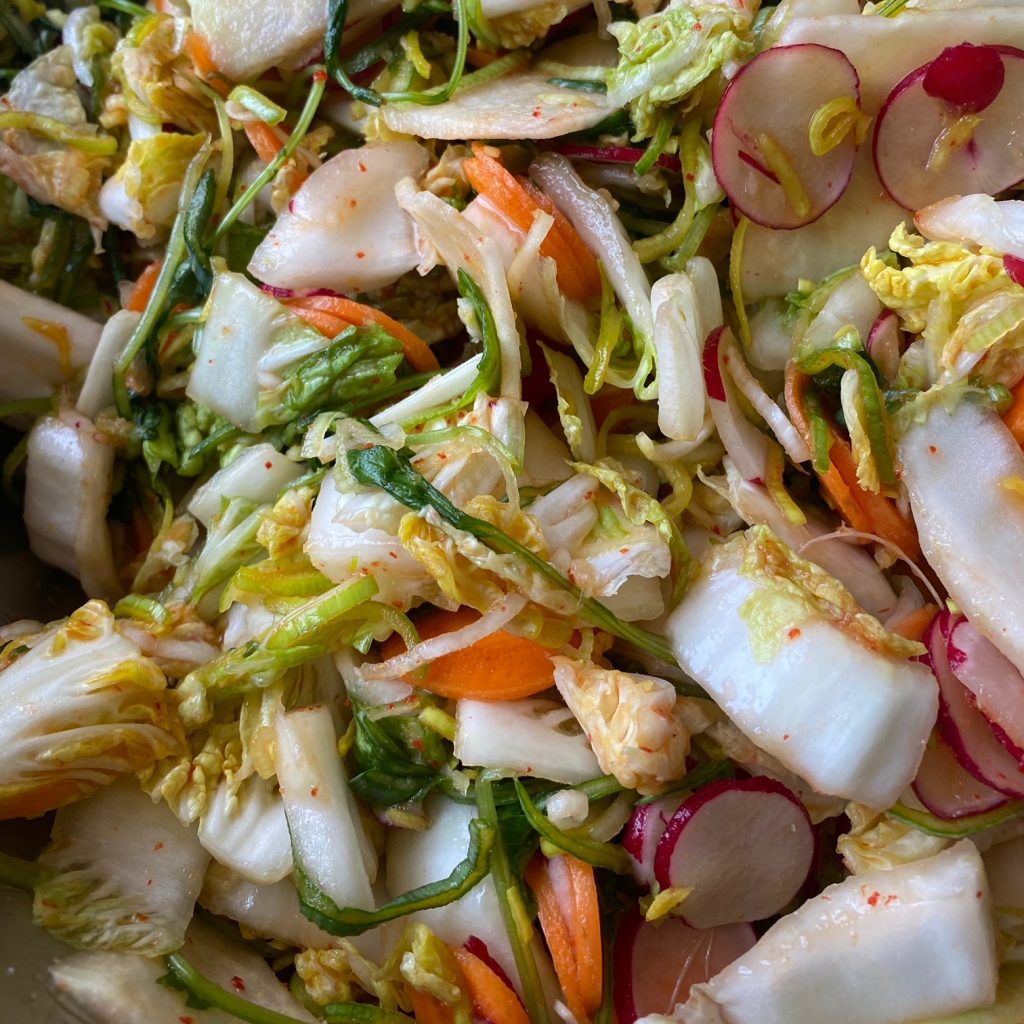
Stir the paste through the salted radish and then firmly stuff the mixture into clean jars. Push the mixture in very tightly, you want to avoid any air pockets in the jar. Pour in any brine that has collected in the bottom of the mixing bowl too. Ideally leave a couple of centimetres of head room in the jars. When you push down on the vegetables, brine should cover them.
Now tear a cabbage leaf to be slightly bigger than the surface area of the jar. Push it in over the kimchi mixture and tuck the chopped veg neatly under the brine. Then clean up the jars with a paper towel and loosely replace the lid to allow gases to escape during fermentation.
Place the jars on a plate or in a plastic box somewhere in your kitchen that doesn’t get direct sunlight. Allow the kimchi to ferment at room temperature for a week. Keep an eye on it, If the vegetables rise up above the brine, use a clean spoon to push them back down. Bubbling is normal, as is some of the brine escaping through the loose lids – hence the instruction to place the jars on a plate or in a box. You will undoubtedly notice a tangy, spicy aroma near the jars too – again this is normal and a good sign that things are fermenting as they should be.
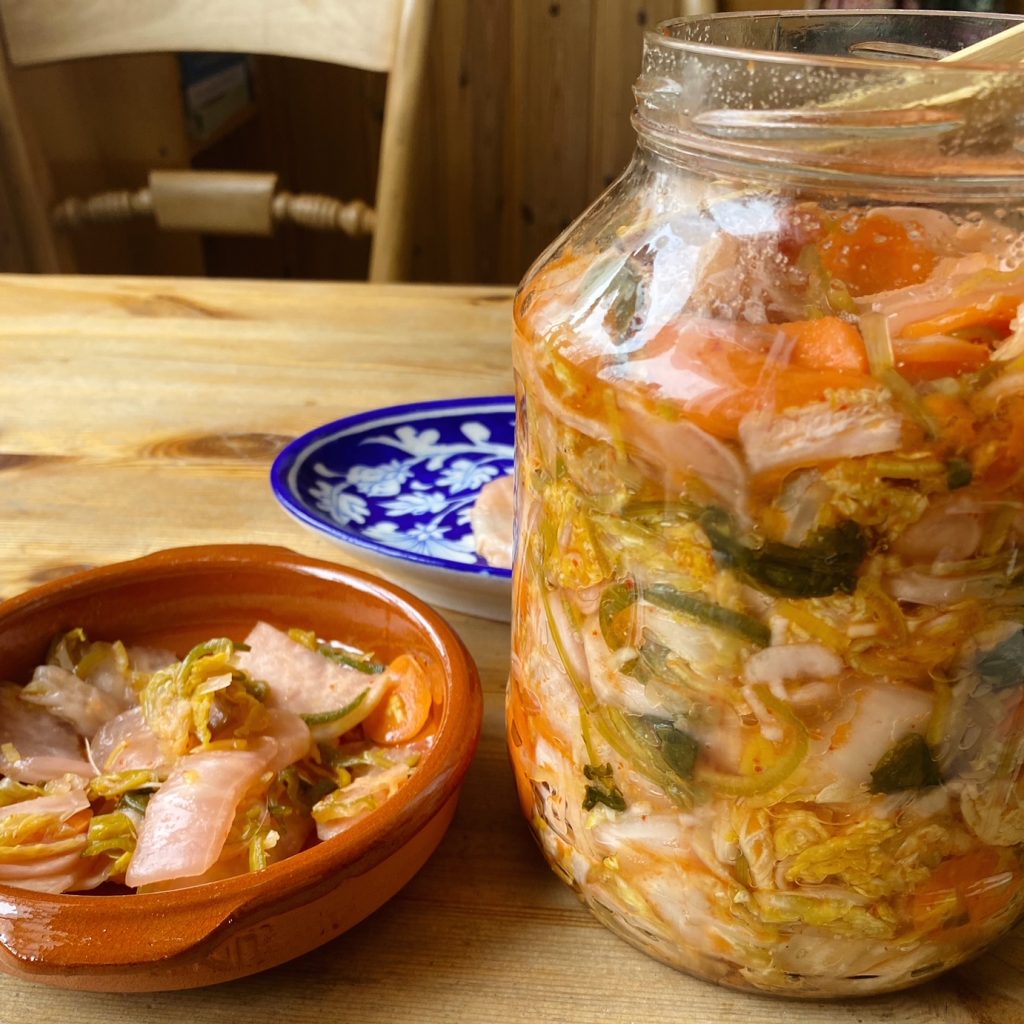
Taste the kimchi. It should be tangy and spicy and salty and delicious. Now clean the jars up again and put the lids on tightly. Store in the fridge and enjoy!
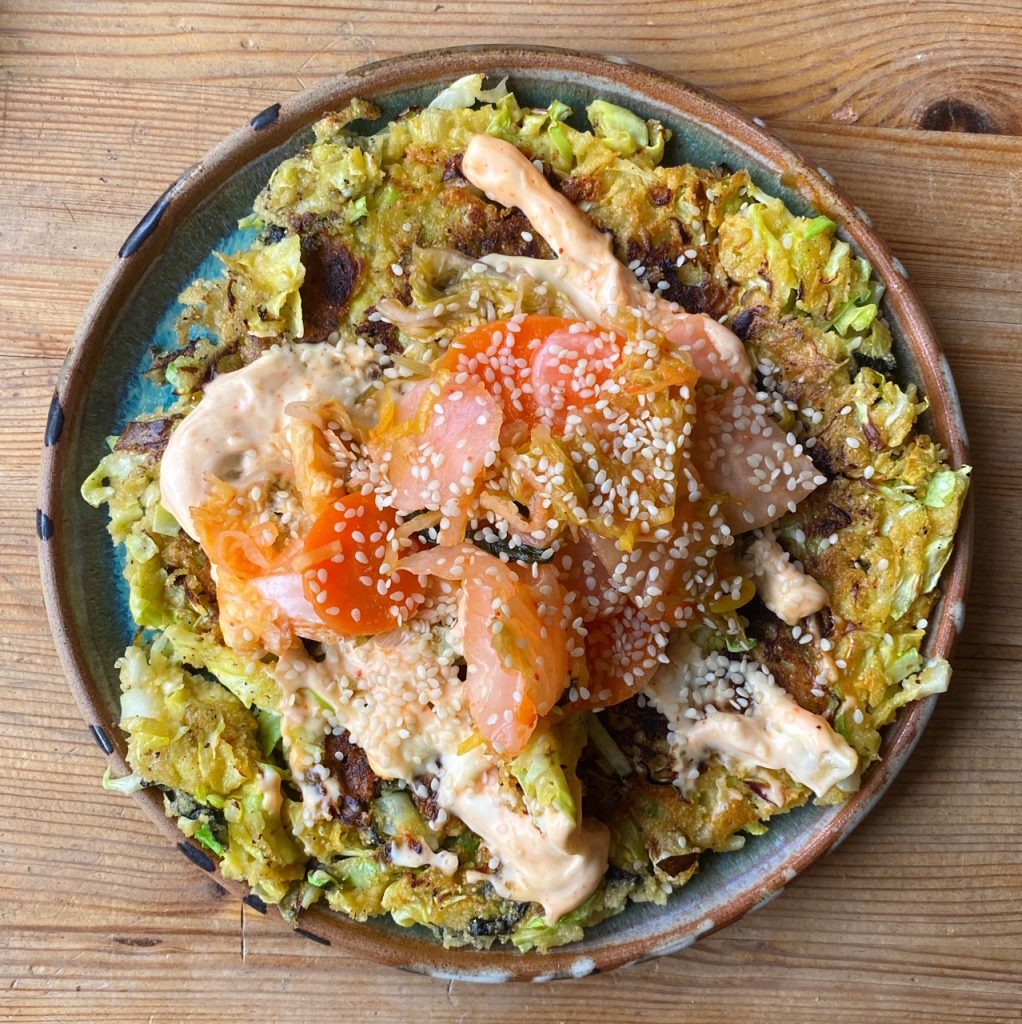
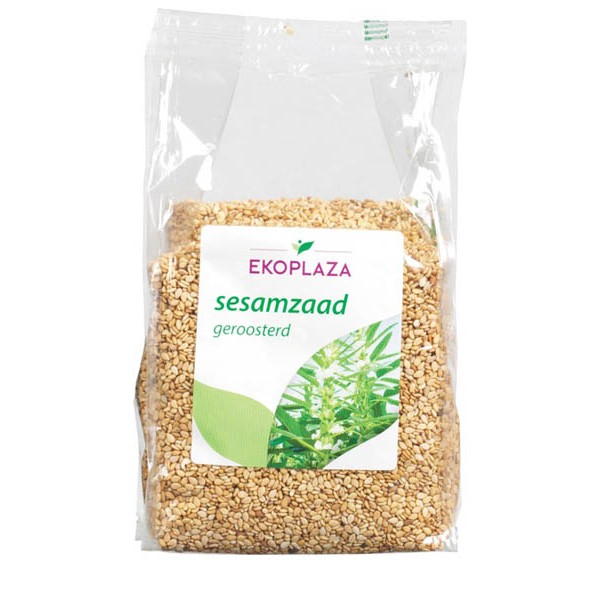
This plant-based twist on the ’anyway you like it’ Japanese street food might be my new favourite way to eat cabbage! Instead of an egg and wheat batter (and several impossible-to-find specialist Japanese ingredients) I’ve used a simple chickpea flour batter. This simple dish doesn’t take long to put together and is perfect for any meal! Breakfast, brunch, lunch or even a quick dinner. Top with mayonnaise (I like a bit of sriracha too), kimchi (find my recipe here) and sesame seeds. Delicious!
Liz x
Ingredients (serves 2)
1 small mug of chickpea flour
1 tsp salt
1 small mug of water
1/4 of a cabbage, chopped
1 nori seaweed sheet, snipped into strips
vegetable oil for frying
kimchi, mayonnaise, sriracha and sesame seeds to serve
Method
Whisk the chickpea flour, salt and water together into a smooth batter.
Add the cabbage and nori and mix well to coat them in the batter.
Heat a frying pan over a medium heat and add a generous drizzle of vegetable oil.
Add half the mixture to the pan and spread out. When golden brown underneath, carefully loosen and flip the pancake over and cook on the other side until golden brown.
Cook the other half of the mixture in the same way then serve with toppings as you like.
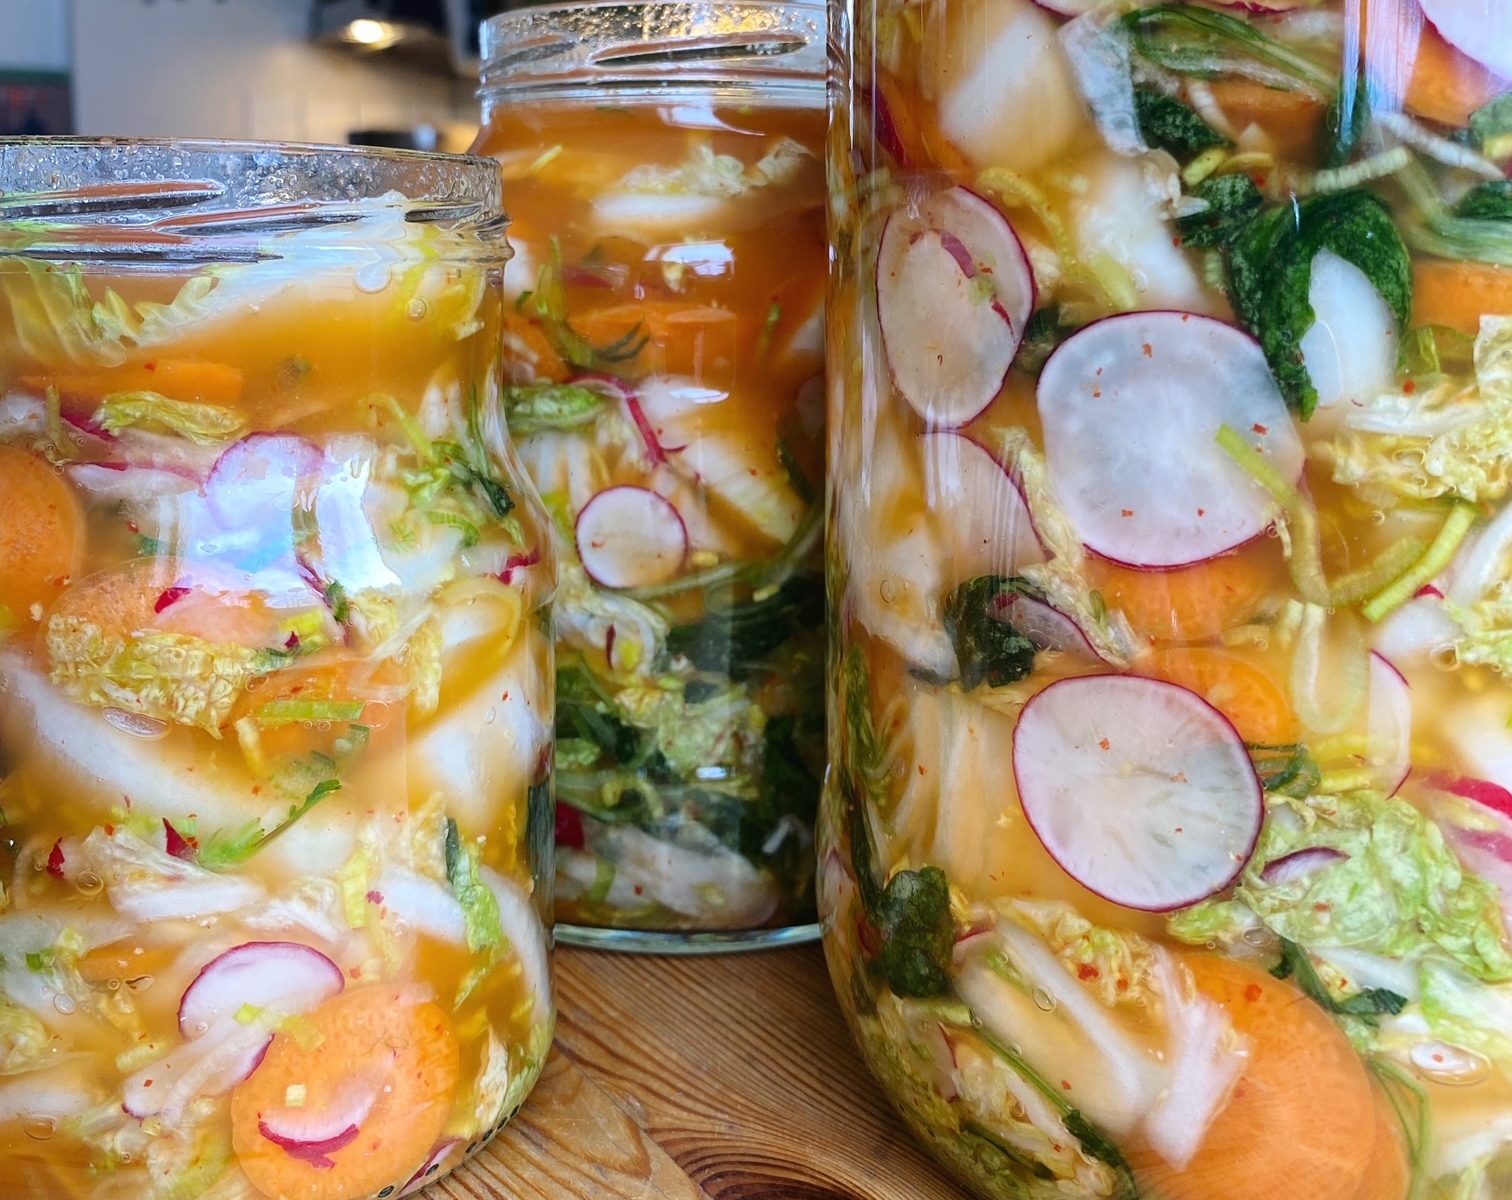
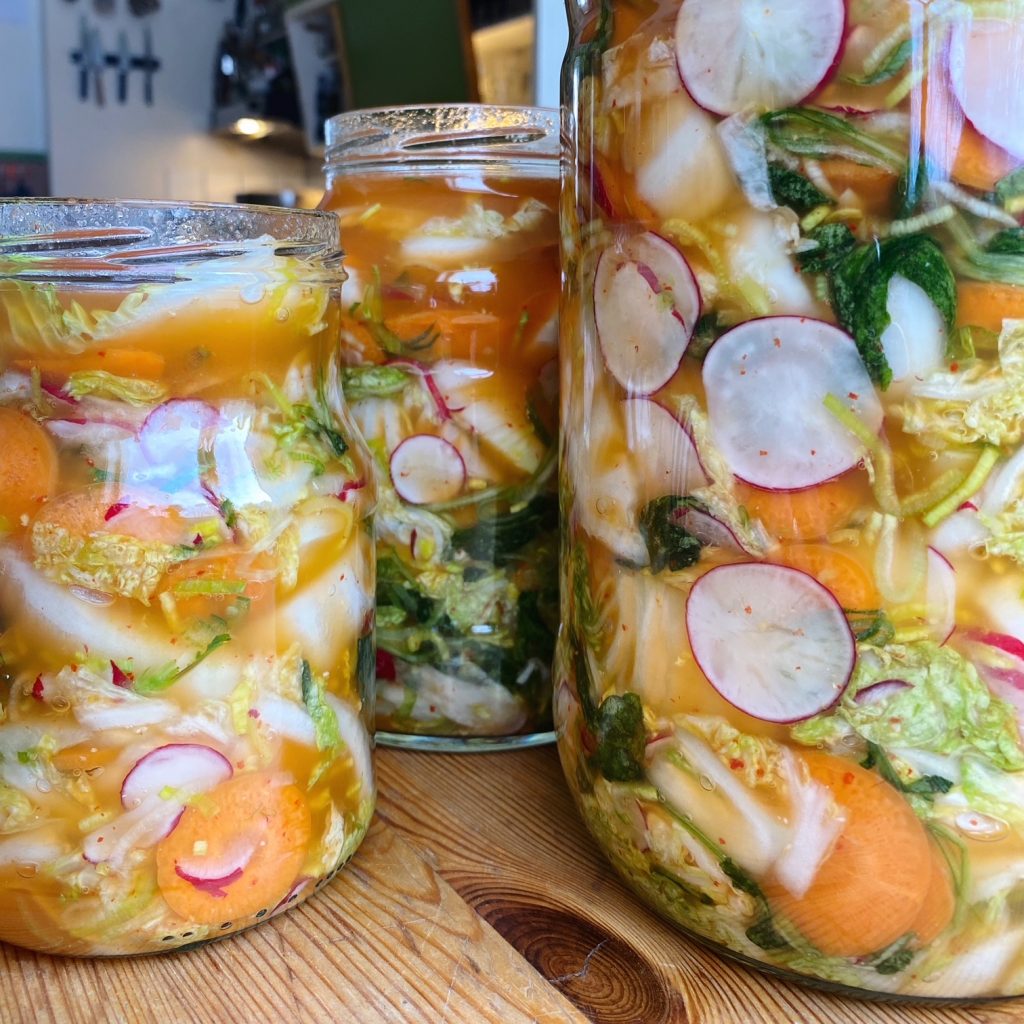
We are very excited about the first harvest of radishes this year. Have you ever grown them yourselves? They’re what we recommend for beginners (or kids!) as they are so satisfying to grow and only take a few weeks to turn from tiny seed to plump, ruby bulbs. They are so refreshing and peppery, of course brilliant in a salad, but our favourite way to eat them is fermented in a kimchi along with their leaves. Zero waste! Kimchi is a really delicious fermented cabbage, Korean side/topping, like a spicy version of sauerkraut. If you’ve never tried it before, it’s like a pickle – tangy, salty and spicy. So good with rice or noodles, in sandwiches (you HAVE to try a kimcheese toastie!) …we love filling dumplings with tofu and kimchi and pilling it up on savoury cabbage pancakes. Here’s the very flexible recipe.
Liz x
Ingredients (these are suggestions and amounts can be flexible)
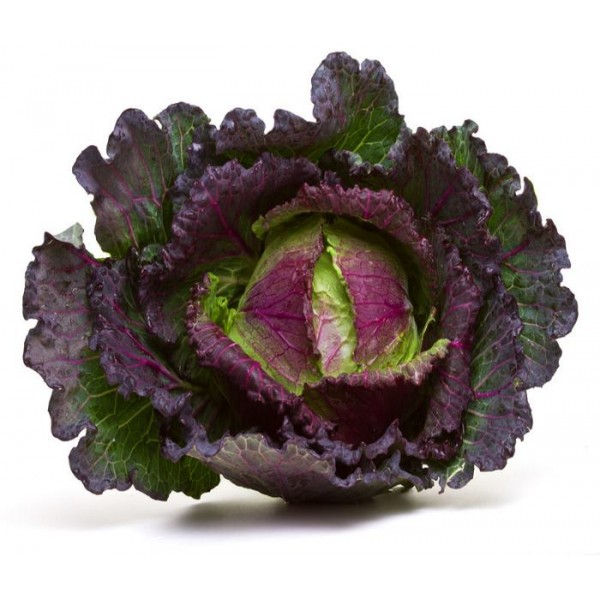
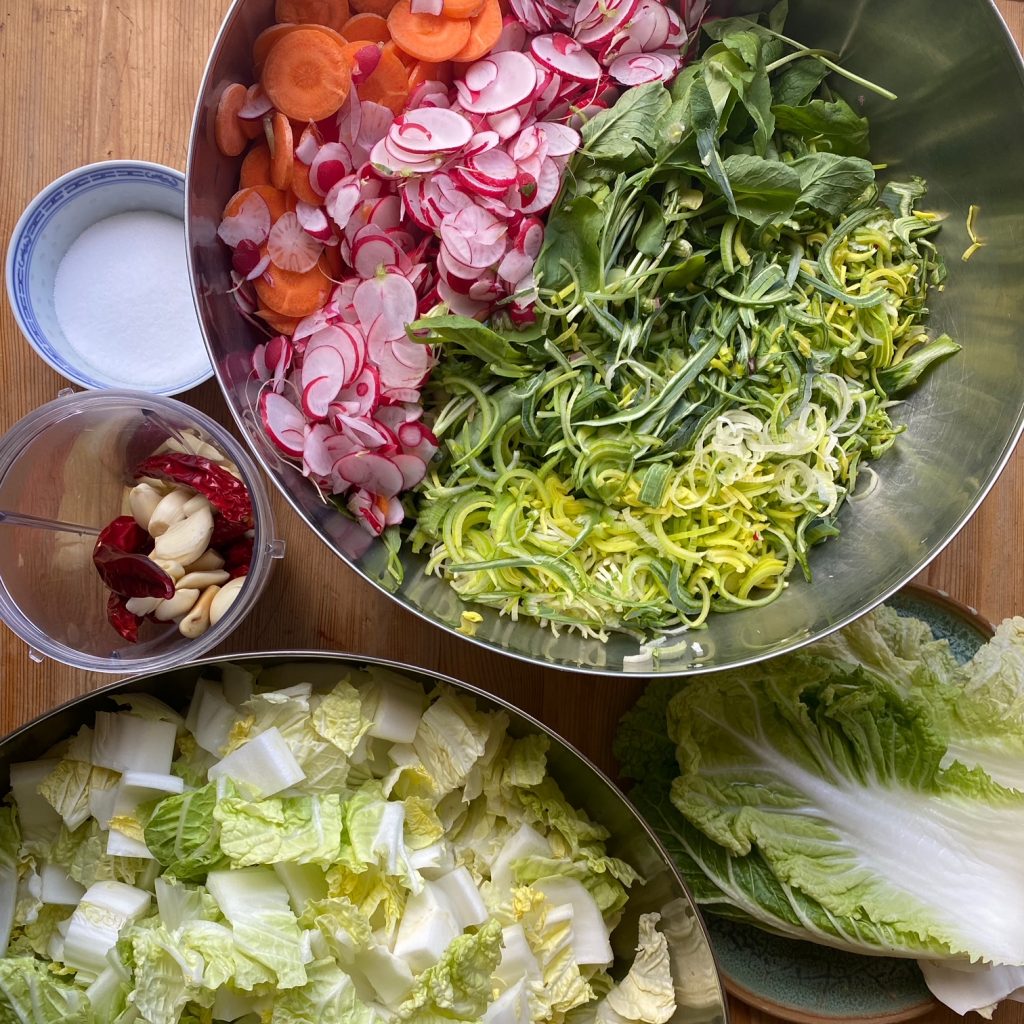
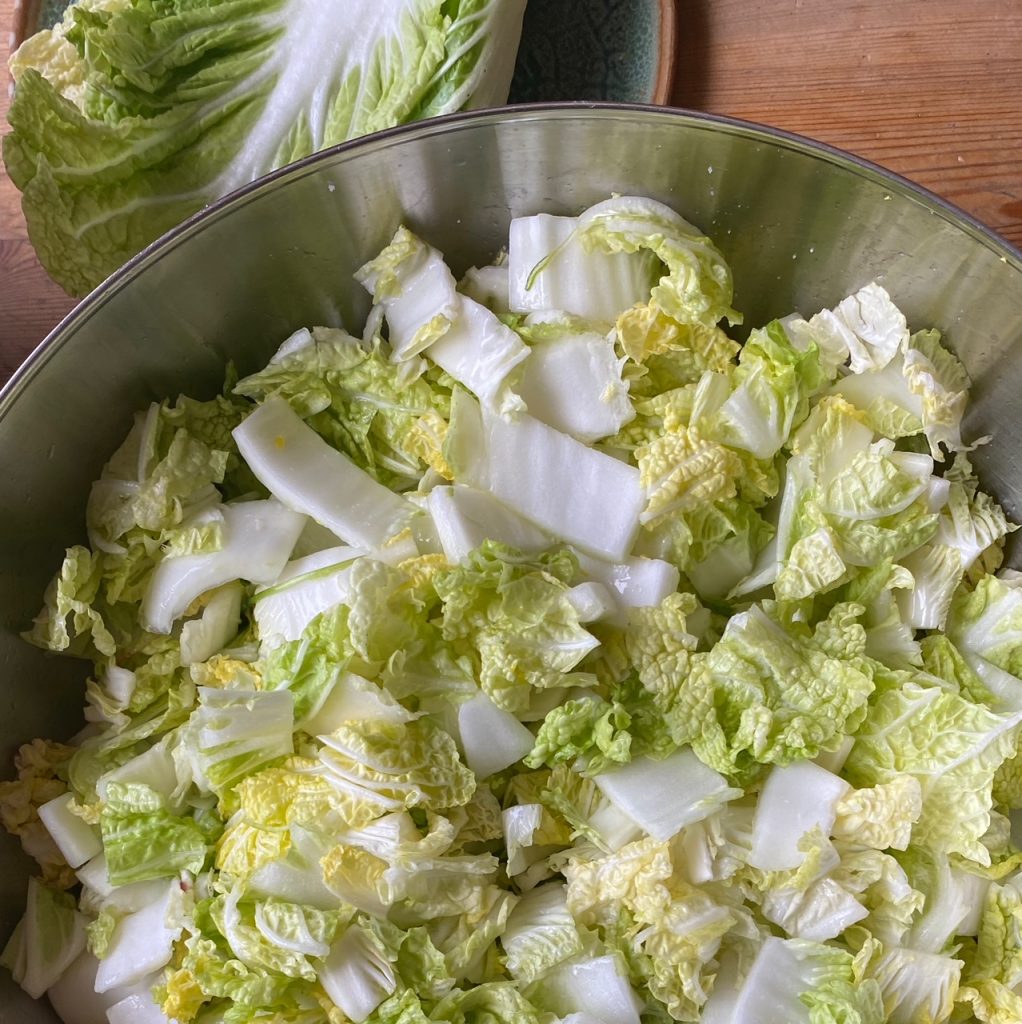
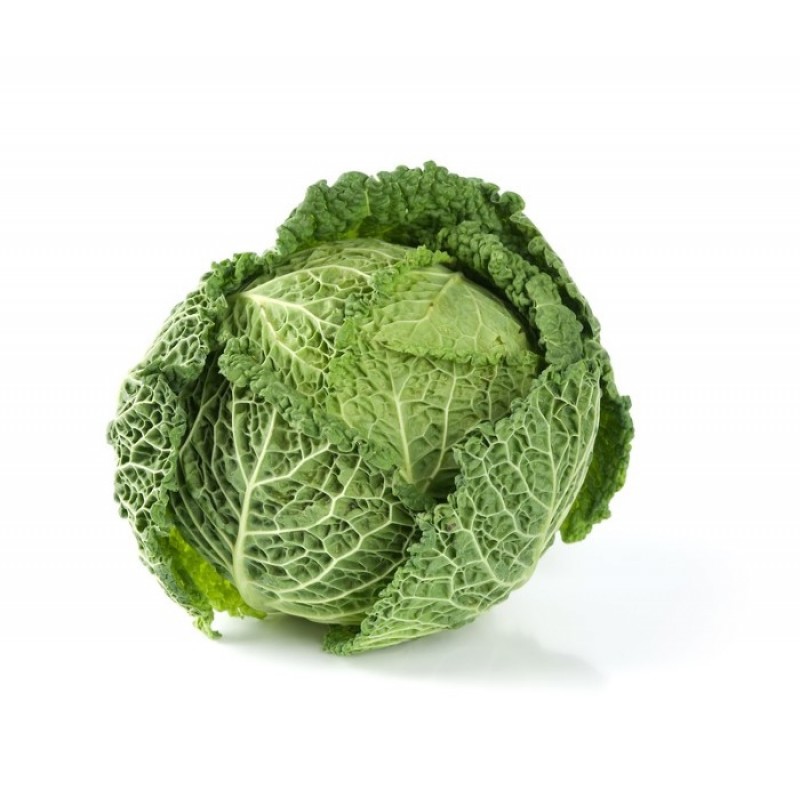
1 cabbage (Chinese Napa cabbages are traditional but you can use any loose, leafy cabbage – Savoy or January King work really well here)
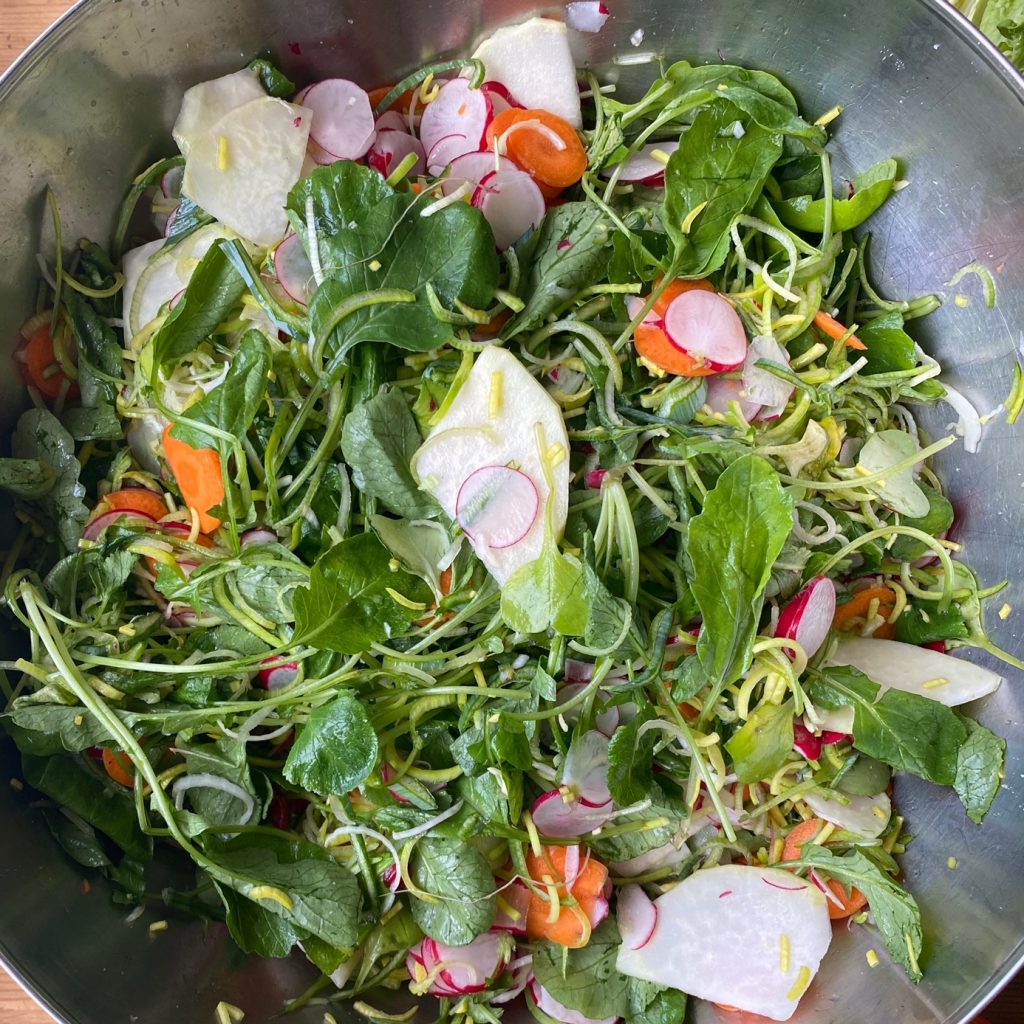
4 carrots
2 bunches of radishes (including their leaves)
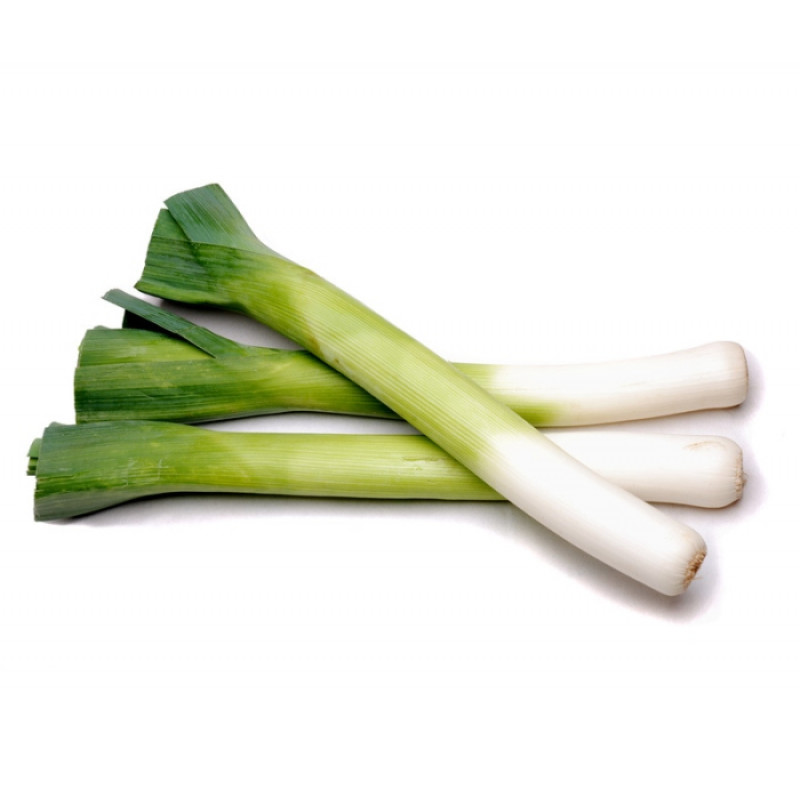
1 leek or a bundle of scallions
Optional extra veg like a kohlrabi or a turnip…
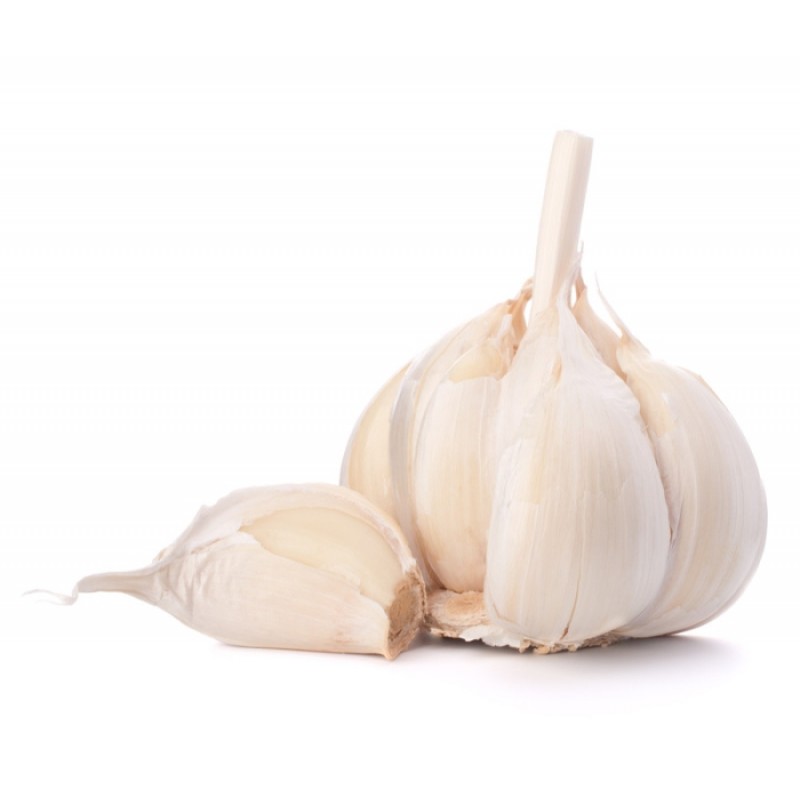
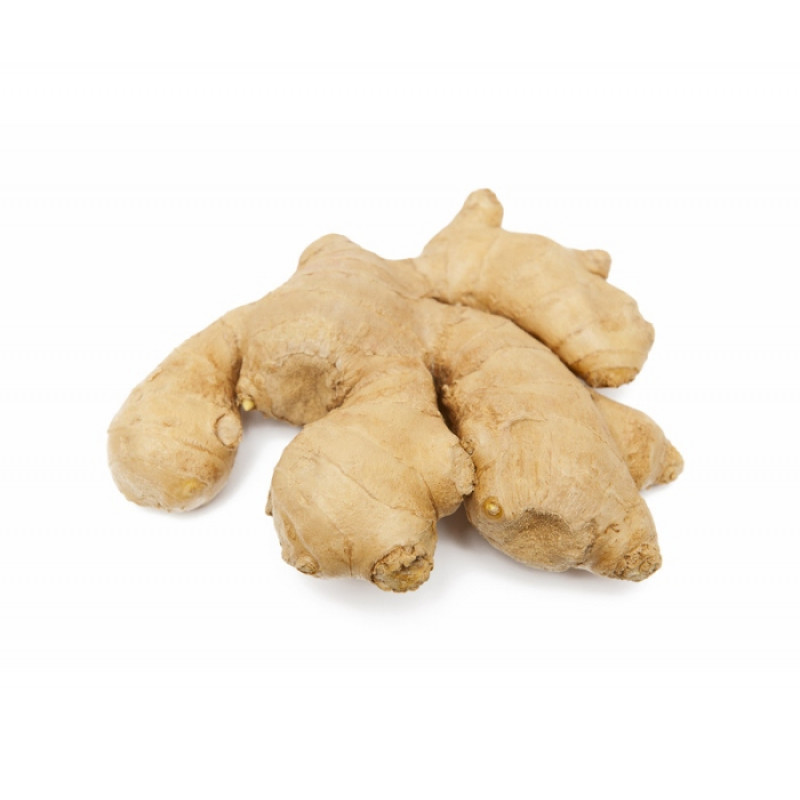
6 cloves garlic, 1 large thumb of ginger and 3 red chillies to make a paste
salt (2% of the weight of all the above)
Method
You will need clean equipment (large bowls, jars, chopping board, knife, blender, serving spoon and rolling pin) but it does not have to be sterilised. Apart from the superior taste and beneficial bacteria, fermenting rather than pickling is also easier in this way.
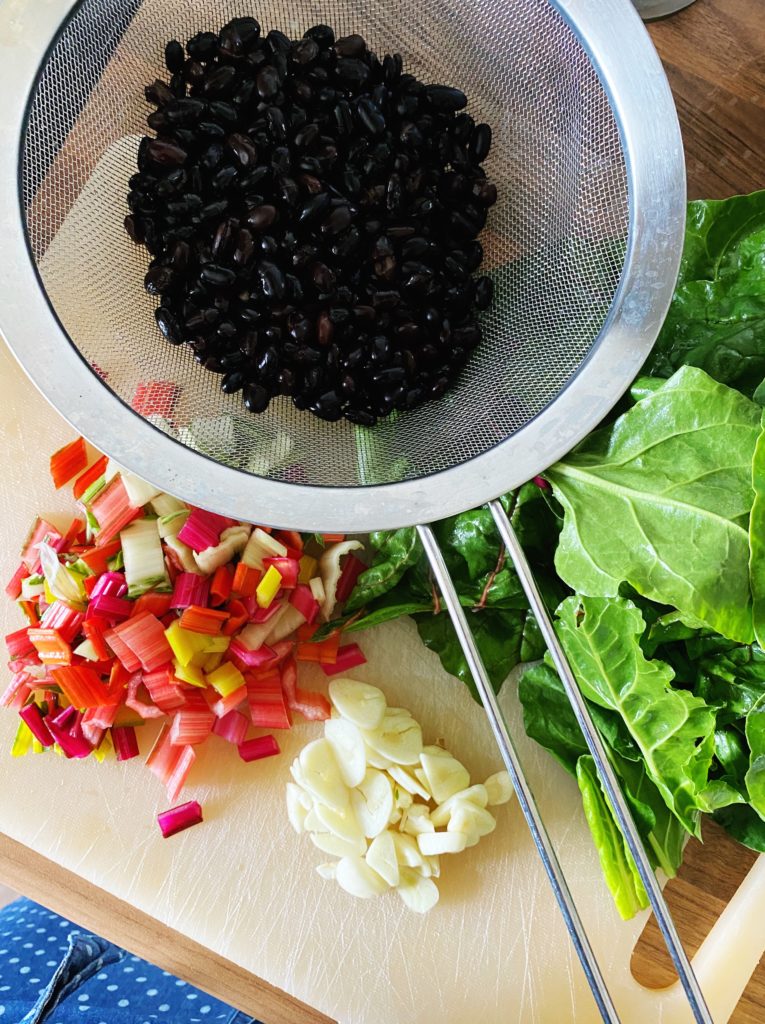
Rinse your vegetables and start chopping. Save a few outer leaves of the cabbage but cut the rest into bite sized pieces. Weigh it and add to a large bowl. Thinly slice the other vegetables, leave the radish leaves whole, weigh them and add to the bowl.
Weigh the garlic, ginger and chilli then blend into a paste. Add up the weights of all the different veg to find the total weight and work out what 2% is.
Measure the salt and mix it through the chopped vegetables. Give them a light massage to encourage brine to form. Then stir the spice paste through using a serving spoon.
Pack the mixture very tightly into jars. Use the spoon or a clean rolling pin to really pack the vegetables into the jar ensuring no air-pockets have formed. Leave a couple of inches of head room in the jar if you can. Then break a reserved cabbage leaf to size and press it down on top of the cut vegetables and tuck it in under the shoulders of the jar to keep the small bits of sliced vegetables submerged in brine. If they get exposed to air then they are likely to go mouldy. Your cabbage leaf may be enough to keep the kimchi submerged in brine, if not, use a weight. Something brine-proof like a glass, small jar or ramekin.
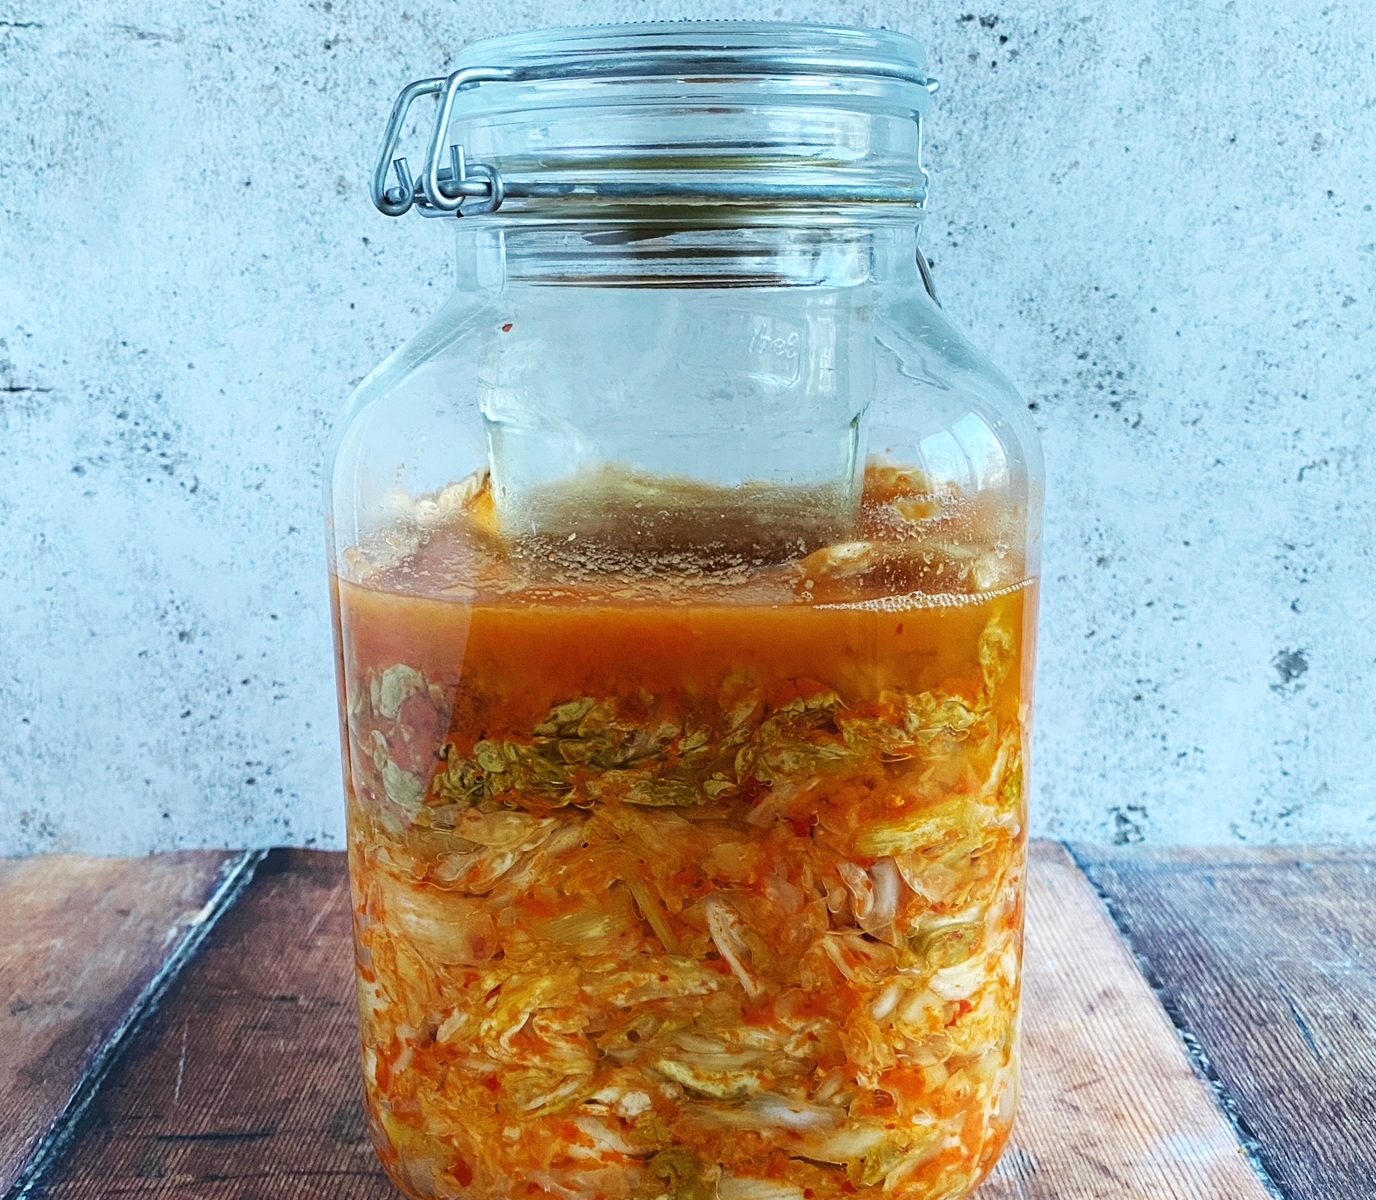
Place the lid on the jar loosely to allow gases to escape during fermentation (be aware your kitchen is going to smell a bit funky this week!) and put the jar on a plate in a room temperature place in your kitchen, not too exposed to light as the extreme changes in temperature are not ideal. Allow the kimchi to ferment at room temperature for one week then refrigerate.
TOP TIPS: – no double dipping! This could introduce new, unwanted bacteria from your mouth. – Remember the mantra, “Submerge in brine, all will be fine”. Check the jar every day whilst fermenting. Have the gases pushed the vegetables up above the brine? If so push them back under with a clean spoon.
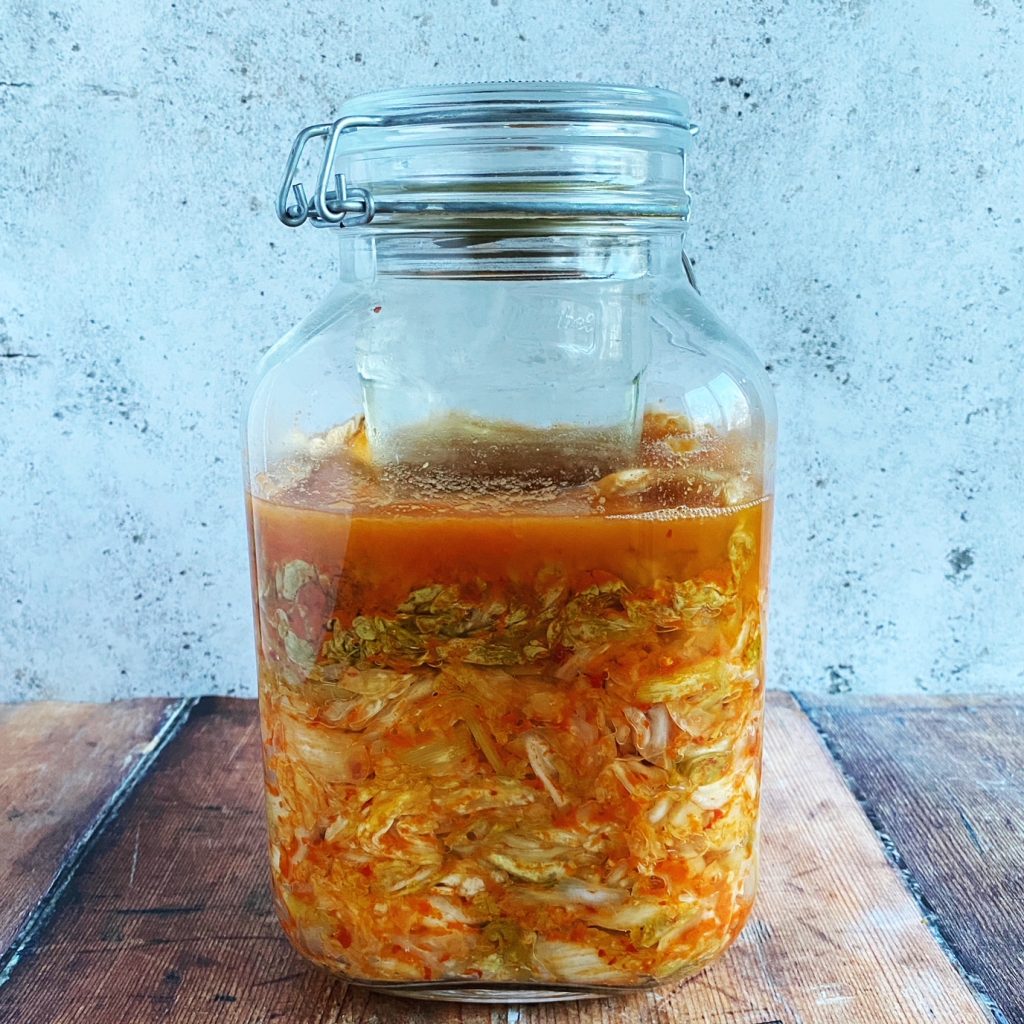
This is an Irish take on the traditional, spicy, fermented side dish from Korea, kimchi. The most common kimchi is traditionally made with Chinese leaf (or Napa) cabbages, but we love to make seasonal versions all year round with our incredible range of Irish cabbages. This recipe would work with any cabbage but my favourite cabbage for kimchi has got to be the beautiful Savoy. With its beautiful ruffled edged, crinkly leaves and deep ridges, it is the perfect vessel to hold the spice paste and it is hardy enough to keep its shape even after fermentation. We have a wonderful harvest of savoys this year, why not add some extras to your next order and give fermenting a go!
Fermenting vegetables can sound a little strange and like a lot of work. But it is actually a very simple way to preserve excess vegetables (just a case of salting or submerging vegetables in brine and leaving them to do their thing at room temperature for a week or so) and it is incredibly beneficial to our health. Fermented vegetables contain trillions of live beneficial bacteria which enhance our gut health. This has a positive knock-on effect to our entire wellbeing. As well as being easy and super-healthy, fermented vegetables are completely delicious! They have a complex flavour and cut through rich foods, think ‘salty pickles’. Just the thing for finishing off a dish or popping into a salad or sandwich. We have jars of ferments on the table for pretty much every meal. Kimchi, of course, goes particularly well with rice bowls and ramens or rolled into sushi, but we are a bit addicted to ‘kimcheese’ toasties. Kimchi is also amazing on peanut butter toast or as a side with macaroni cheese. How do you eat kimchi?
Liz x
Ingredients
1 savoy cabbage
1 leek
natural sea salt
1/2 bulb garlic
4 red chillies (or to taste)
1 large ‘thumb’ of fresh ginger (or to taste)
Method
First clean your work surface and the tools you will need – Find a large jar or several smaller jars and wash them and their lids well with dish soap. Rinse throughly with very hot water. Leave to air dry on a clean tea towel. Find your largest mixing bowl, or if you don’t have a very big one, use a large stock pot or plastic storage box. Clean it very well as above. Clean a large chopping board and knife and a small blender too. Now you are ready to start.
Pull a few of the tough, outer leaves off your cabbage, rinse and put to one side for later. These will be your ‘followers’ which will be important later. Rinse the rest of the cabbage, slice the leek in half lengthways, keeping the root end intact, and rinse out all the mud. Rinse your chillies and thumb of ginger too.
Chop the cabbage into quarters, remove the core from each quarter and thinly slice it and add it to the bowl. Then cut the rest of the cabbage into bite sized chunks and add them to the bowl. Chop up the leek into chunks too and add it to the bowl with the cabbage.
Now you need to add salt. If you want to be very precise, you can weigh the chopped cabbage and leek, work out what 2% of that weight is and use that amount of salt. Or you can do it by taste. I normally start with a heaped tbsp of salt for a whole cabbage and a leek. Mix it well and give the veg a bit of a squeeze and a massage, then taste. They should just taste pleasantly salty. Add more salt if needed, our cabbages are pretty big at the moment so you may well need to. Then let the salted vegetables sit while you make the spice paste.
Peel the garlic, slice off the stalks of the chillies and slice the ginger. Add them all to a small blender and blend into a paste. You may need to add a splash of water to help it blend.
The salt in the cabbage and leek will have started to draw out liquid from the vegetables and create a brine in the bottom of the bowl. You can help this along by giving the vegetables another massage. The vegetables will wilt and decrease in volume and should look quite wet. When you pick up a handful and squeeze, lots of lovely brine should drip down into the bowl. Then you know you are ready to mix in the spice paste and pack your jars.
Use a wooden spoon or gloved hands to mix the spice paste into the salted vegetables. Be careful not to get any of the spice paste on your skin or in your eyes as it can really sting. Then start packing your jar/s.
Do a small amount at a time and firmly press it into the jar ensuring there are no air pockets. Use gloved hands or a clean rolling pin or spoon to help you pack it firmly into place. Keep going until you have either used up the mixture or you have a couple of inches of headroom left in your jar. You don’t want to over-fill the jar as during fermentation the brine can bubble over and escape, making a bit of a mess in your kitchen.
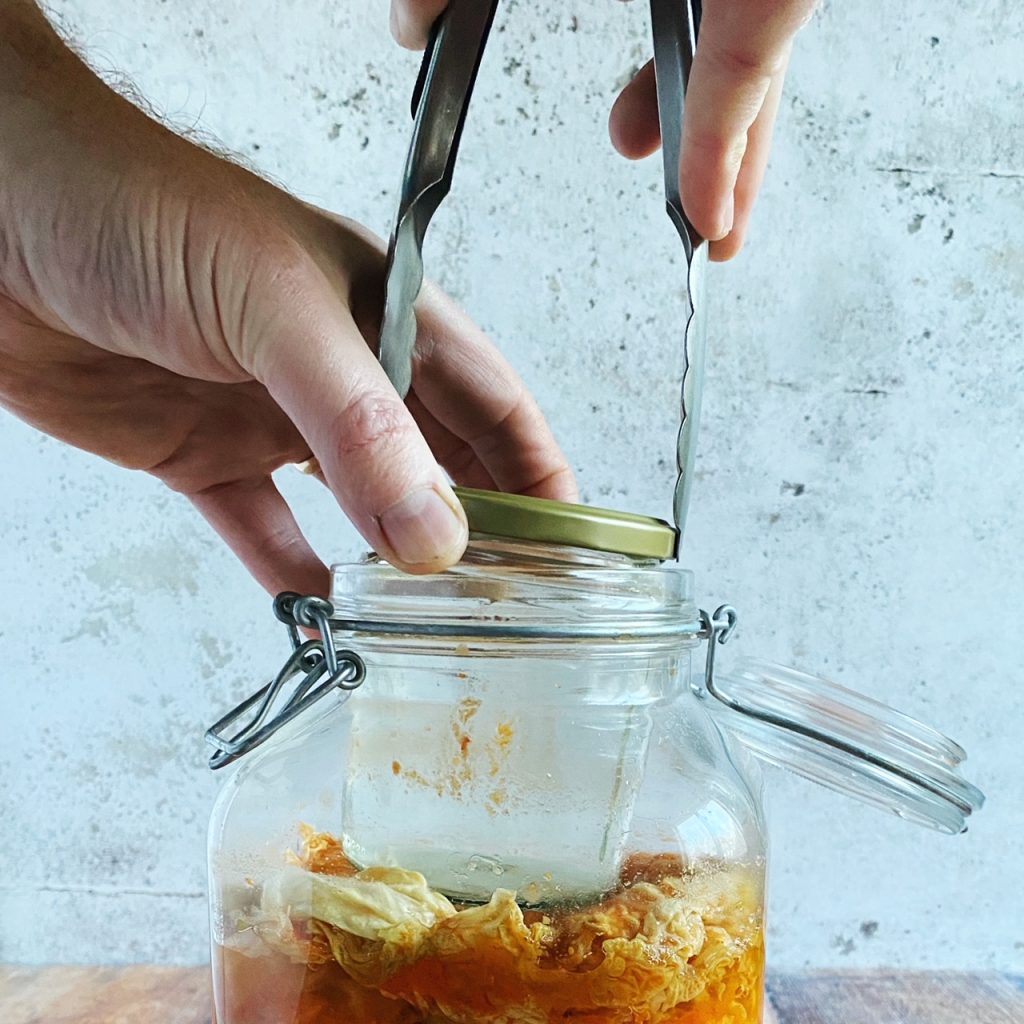
Now you need to figure out a way to hold the vegetables safely down under the brine. Any veg exposed to air on the surface are likely to catch mould. So first use the outer leaves of the cabbage, that you saved at the beginning, to tuck the vegetables in so they won’t float up during fermentation. Take your time and press the edges of the leaves down around the insides of the jar to ensure there are no gaps for the chopped bits to escape through.
When you are happy that your ‘follower’ leaf has done its job, you can add a weight to hold everything down under brine. This needs to be something food safe that won’t react with the salt. So glass is best. A small water glass or ramekin which fits inside your jar and can be pinned down with the lid is good. Or fill a clean pesto jar or similar with water, make sure the metal lid isn’t touching brine, and pop that in. Other weight ideas are a large, very clean (boiled) beach pebble (just make sure it is not a limestone/chalk) or a ziplock bag filled with water.
Place the lid loosely on your jar so that gases can escape during fermentation but no bugs/dust can get in. Or you can put the lid on tight and ‘burp’ your jars every day by opening and closing them to release built up gases. If you have a clip-top jar like mine, you can simply remove the rubber seal during fermentation.
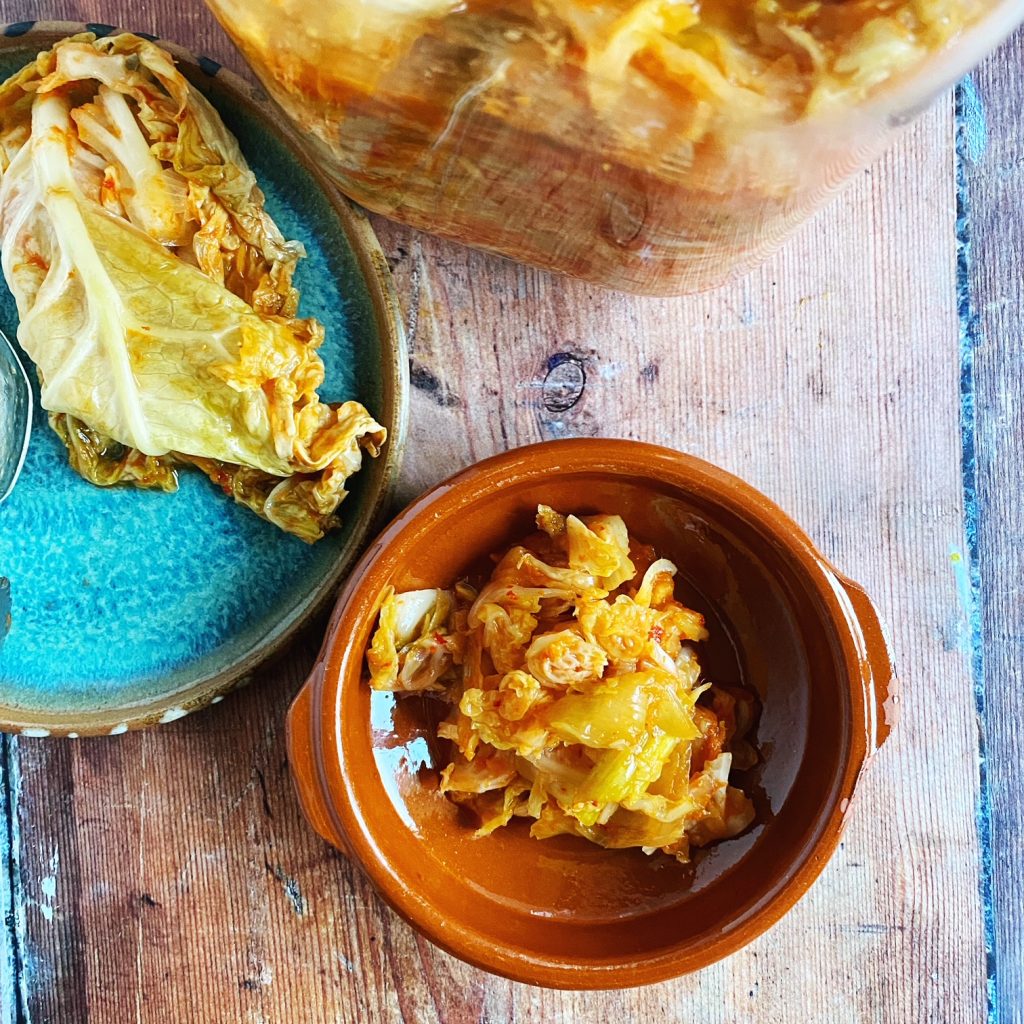
Put the jar on a tray or plate on your work surface out of direct sunlight. Let it ferment for 1 week then it should have transformed into a tangy, delicious pickle! If you would like to ferment for longer then you can of course, just find a cooler part of your house like a basement so that it ferments slowly. When you are happy with the flavour you can remove the weight and ‘follower’ and pop the jar into the fridge where it will keep for 3-12 months.
Make your kimchi last well by decanting it into smaller, very clean jars and just eat one jar at a time. This way the pickle will be exposed to less air. Also, never double dip when eating your kimchi as this would introduce new bacteria from your mouth into the jar. Enjoy!
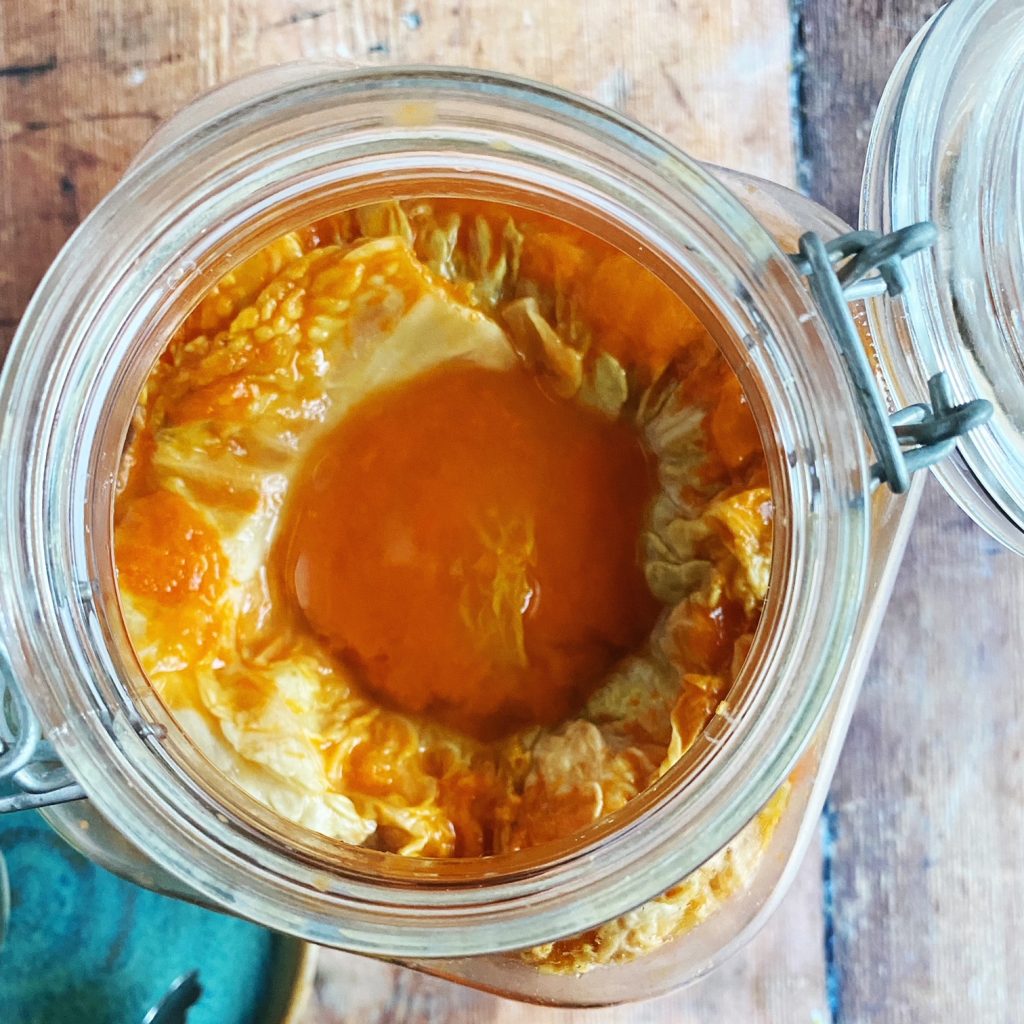
Here you can see the weight holding the cabbage leaf ‘follower’ down, which pins all the chopped vegetables safely under brine. This is after 1 week of fermenting at room temperature.
Removing the weight and ‘follower’. The follower is edible too of course!
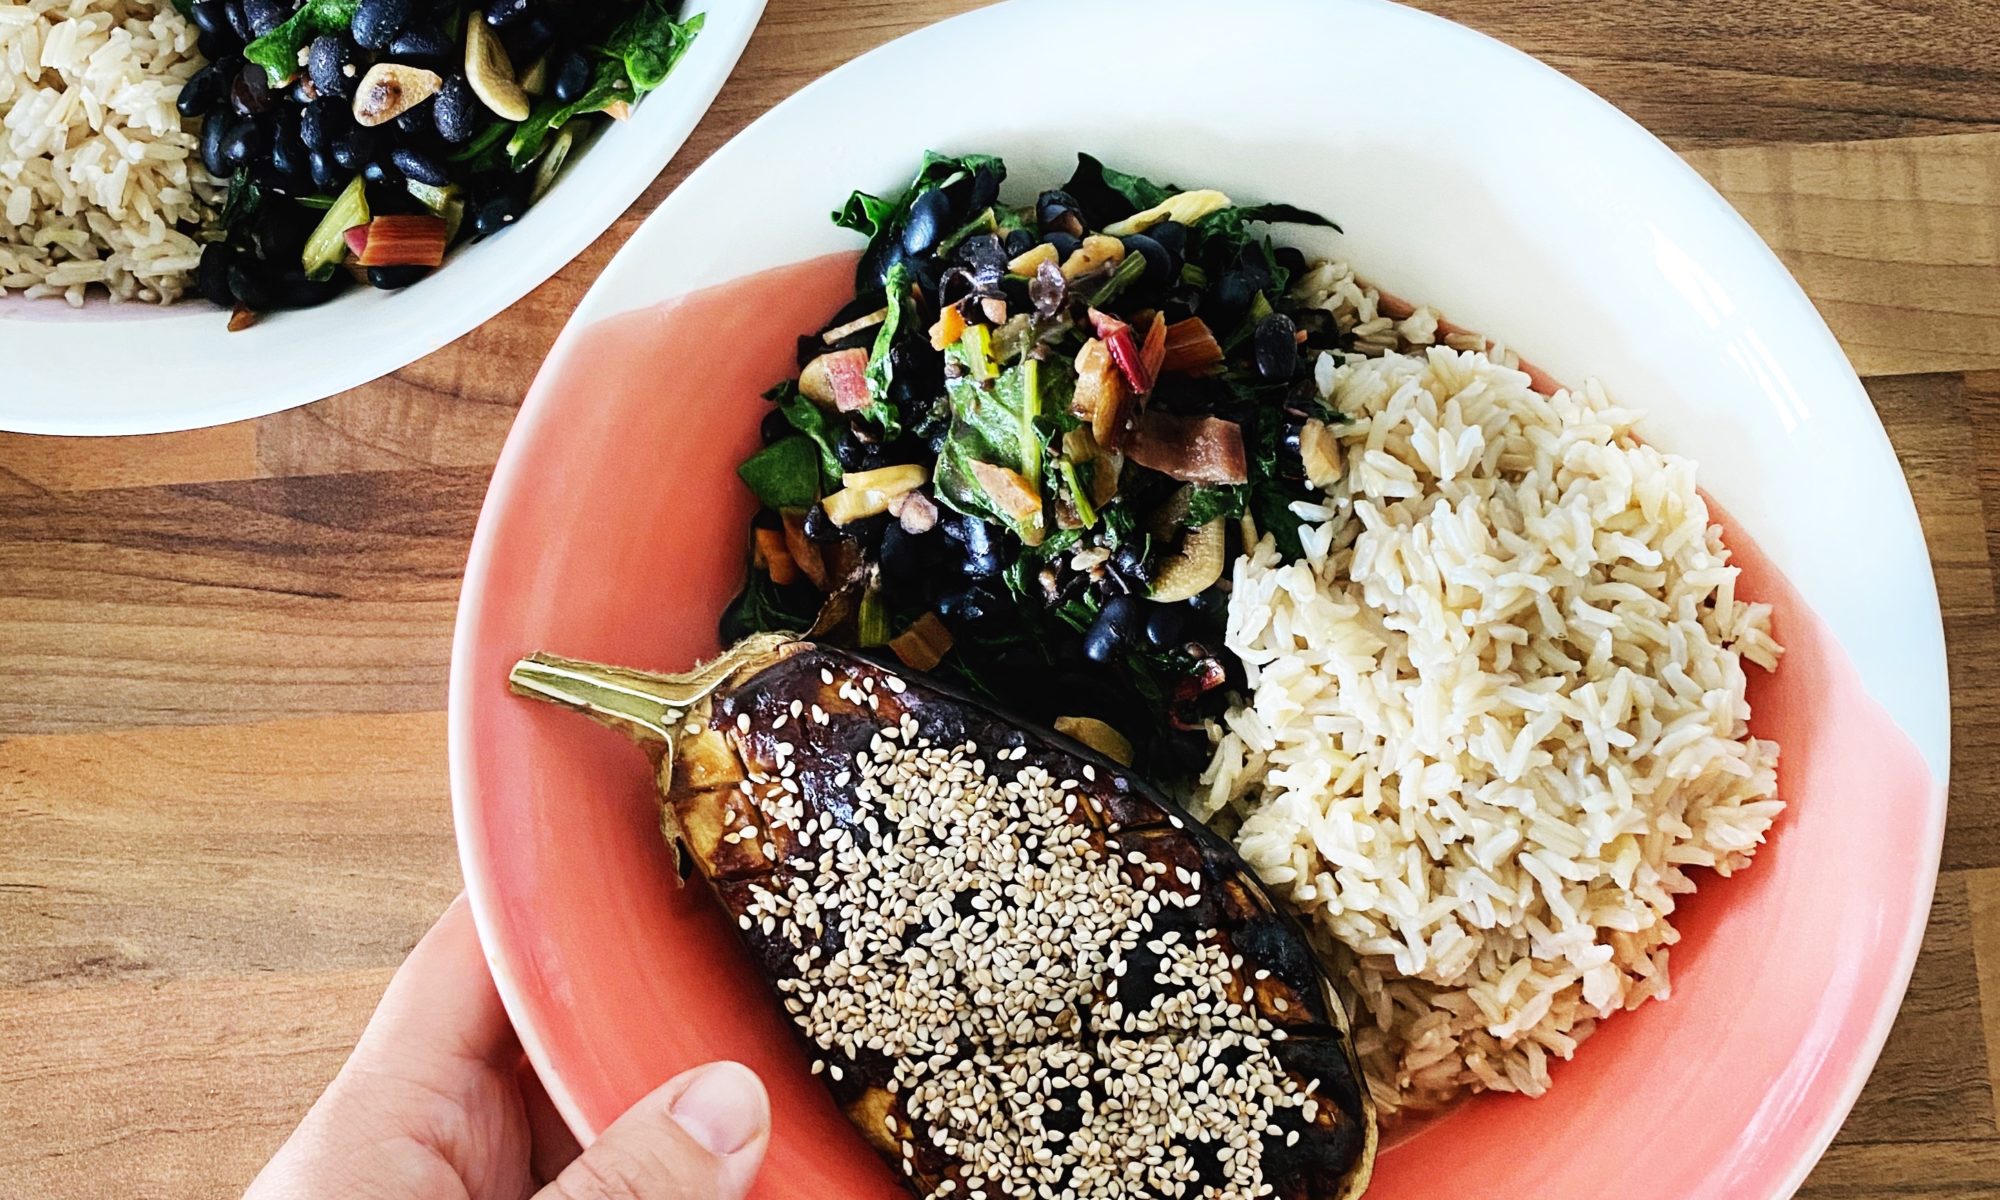
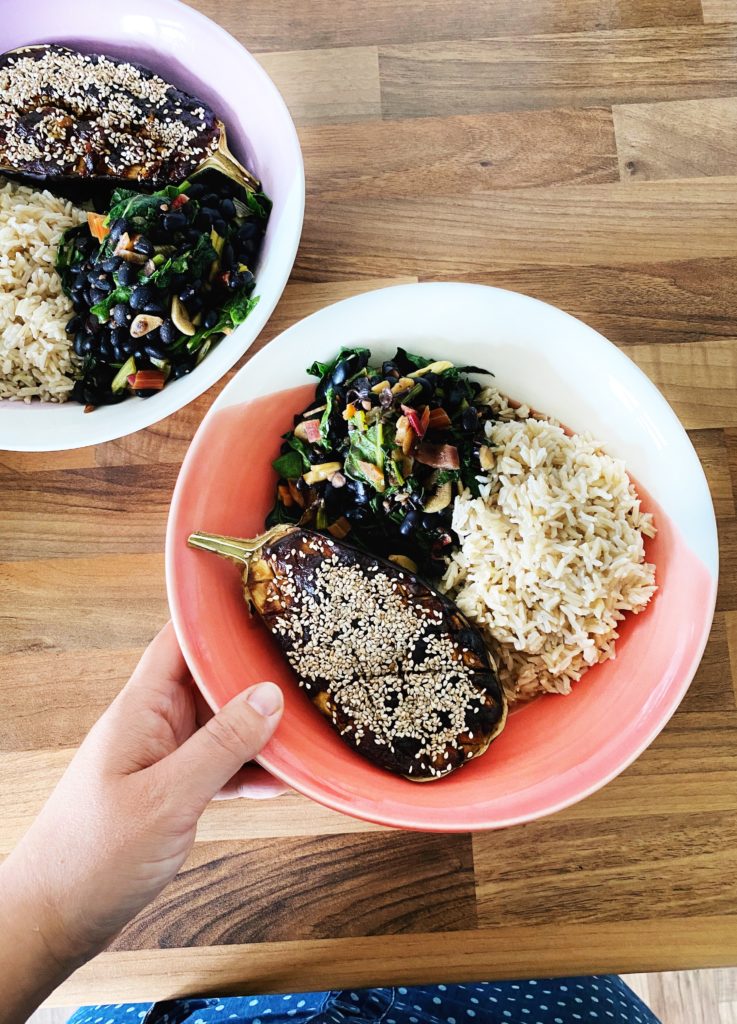
We have a new product in our grocery section that is absolutely delicious. These sachets of umami pastes which are basically organic miso with added ingredients like ginger, garlic and chilli. They are flavour bombs and we love them as a marinade for aubergine in this simple, hearty supper. The paste can be used to marinade skewers of tofu and mushrooms for the barbecue too, or even as a stunning broth base for a light miso soup. How would you use them?
Liz x
Find lots of organic groceries here to be delivered along with your fresh fruit and veg.
Ingredients (serves 2)
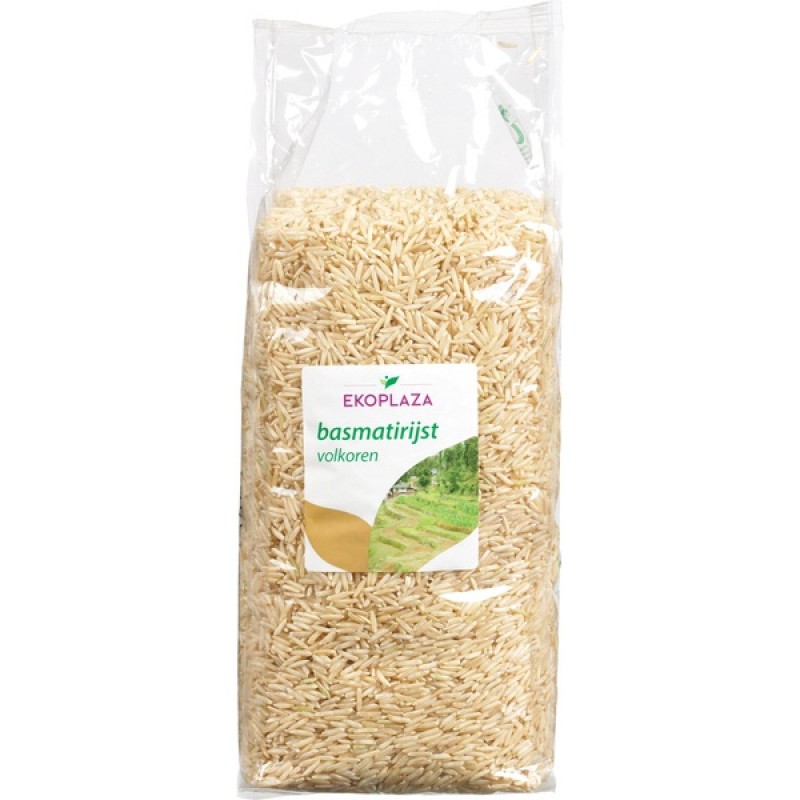
rice for two (I bring 1/2 a mug of brown rice with 1 mug of water to a boil in a pan with the lid on, then turn down to the lowest setting and simmer until the rice has absorbed all water)
1 aubergine
2 tbsp umami paste
1 tbsp vegetable oil
3 garlic cloves – sliced
1 bunch of rainbow chard – stalks separated and sliced
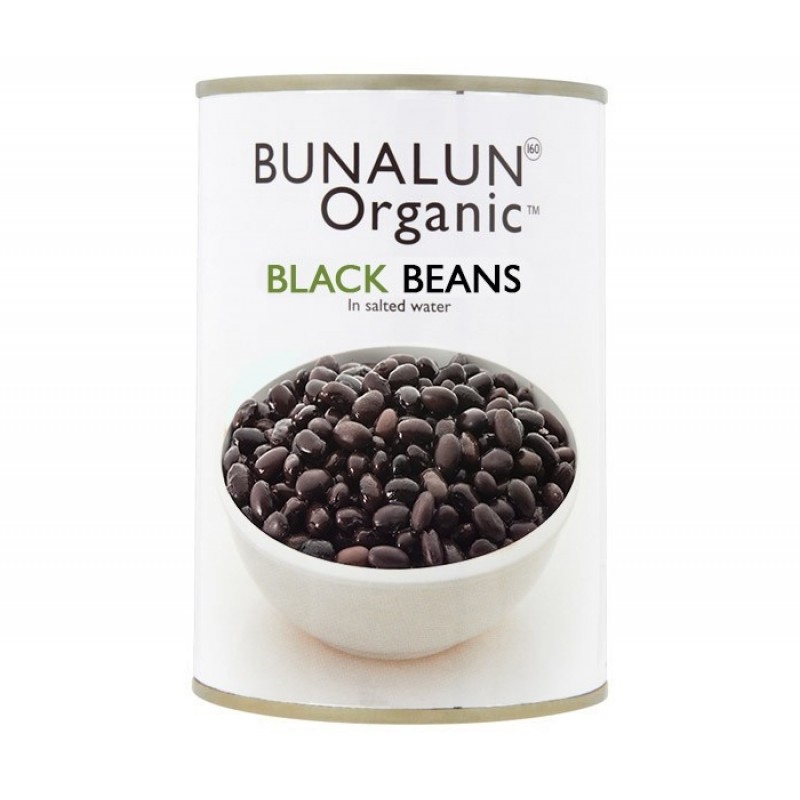
1 tin of black beans – drained
2 tbsp soy sauce
1 tbsp sesame seeds
Method
Pre-heat the oven to 200C and get some brown rice on to cook – see ingredients list for my super-simple method.
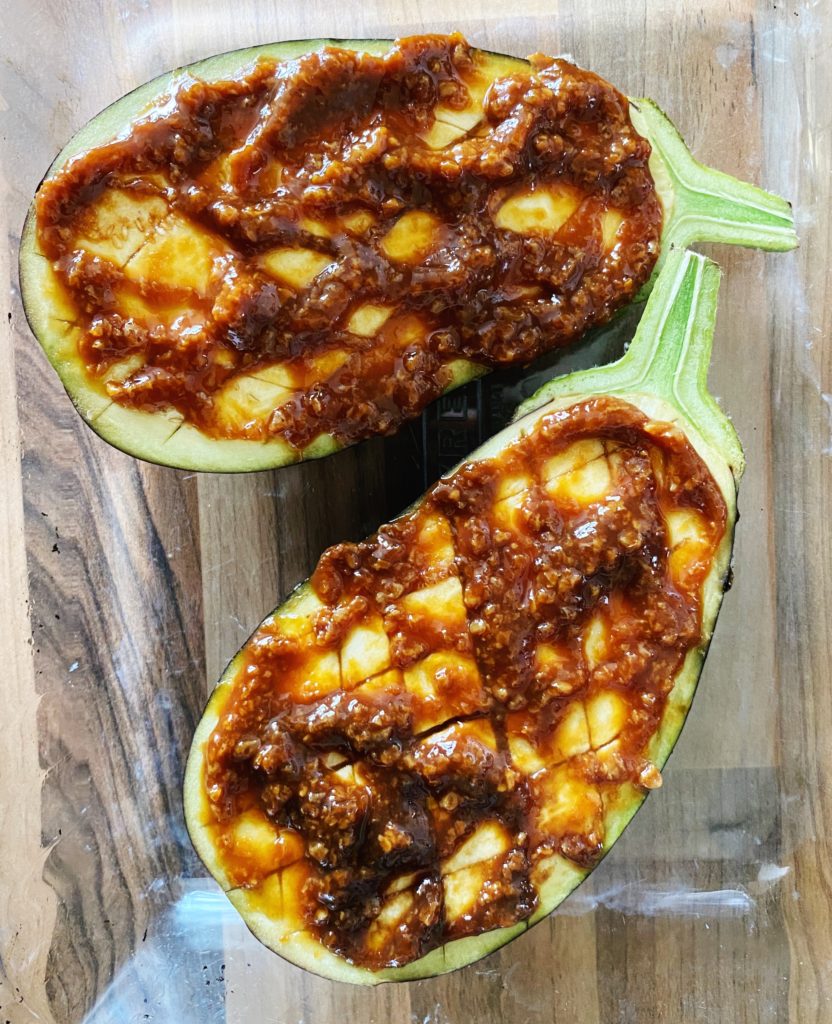
Cut the aubergine in half lengthways and score the cut side deeply with a small, sharp knife. Spread a tbsp of umami paste onto each half and make sure you get it into all the cuts. Place the aubergines in a small roasting dish in the oven to cook while you prepare the greens and beans.
Separate the stalks from the rainbow chard and slice them. They take longer to cook than the delicate green leaves. Put them in a pan with the vegetable oil and sliced garlic. Sauté until just starting to soften.
Then add the drained tin of black beans to the pan and turn the heat off until the rice and aubergine are cooked through.
When the aubergine is soft (this usually takes around 20 minutes), remove it from the oven and sprinkle it with sesame seeds. Return the dish to the oven for 5 minutes to toast the seeds.
Meanwhile turn the heat back on under the beans and add the greens and a splash of soy sauce (around 2 tbsp). Stir and wilt the greens. Then serve.
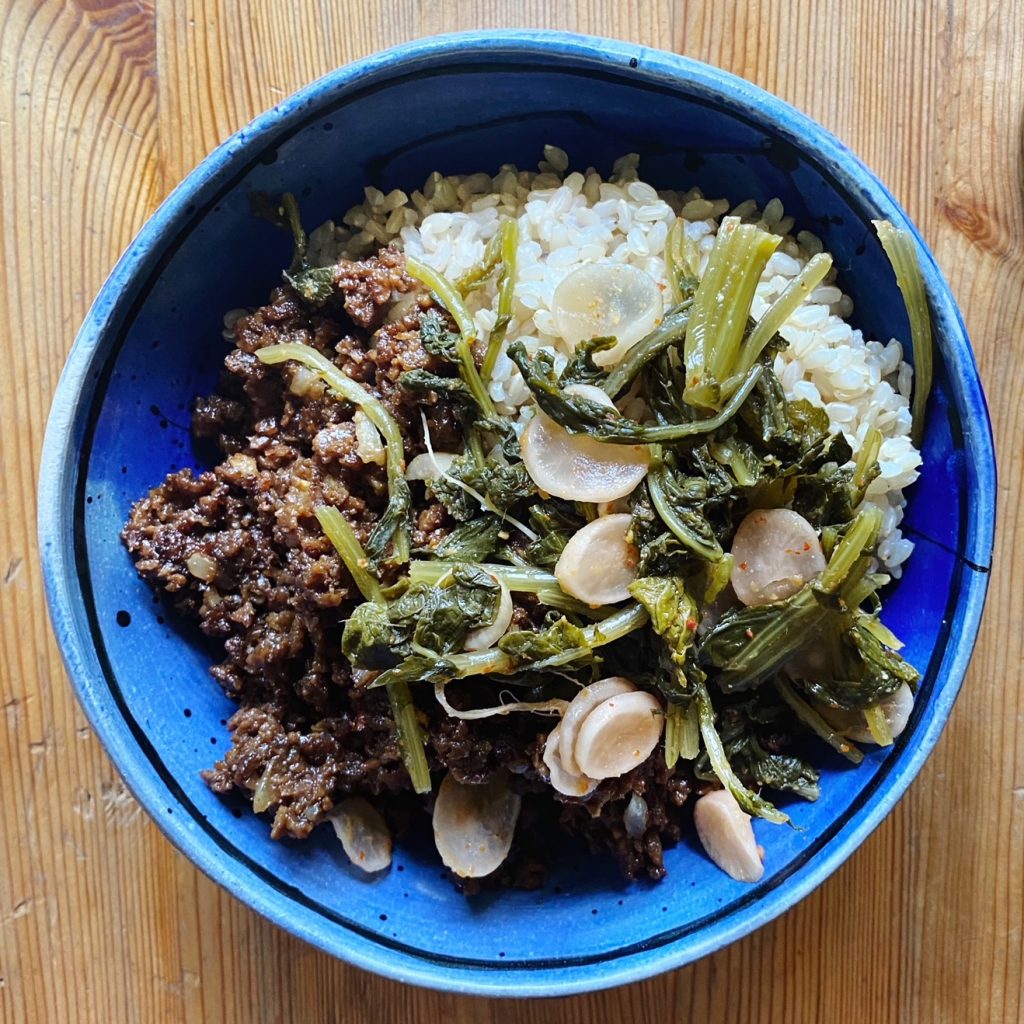
Divide the rice between two bowls. Add the garlicky beans and greens and a half of the aubergine to each bowl. Enjoy as it is or with a side of kimchi.
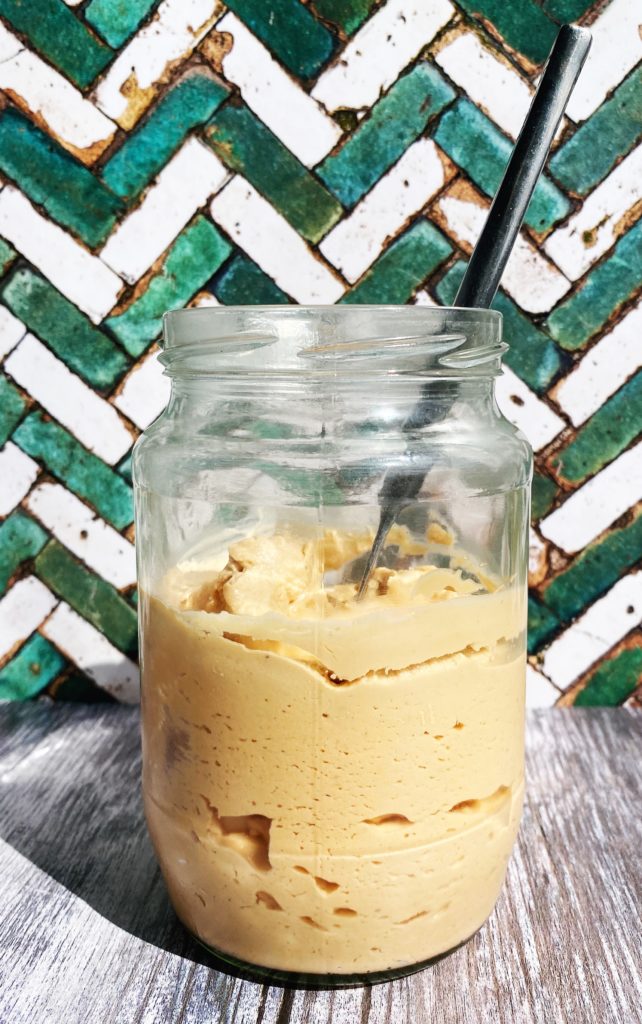
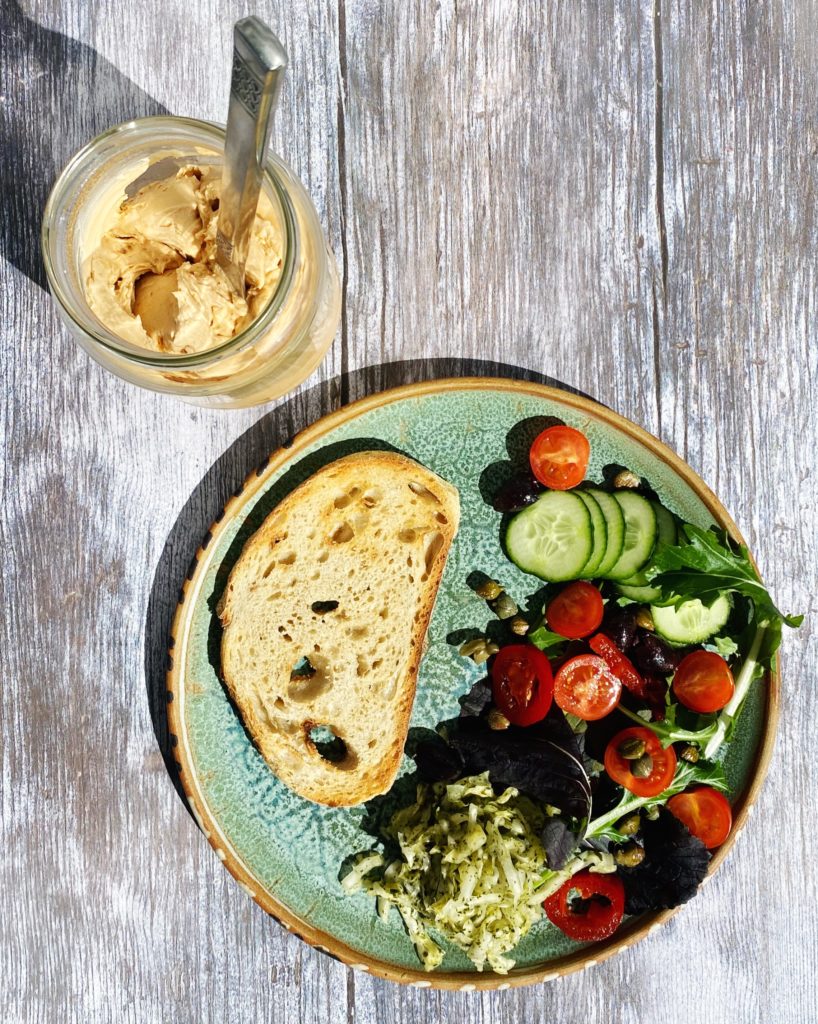
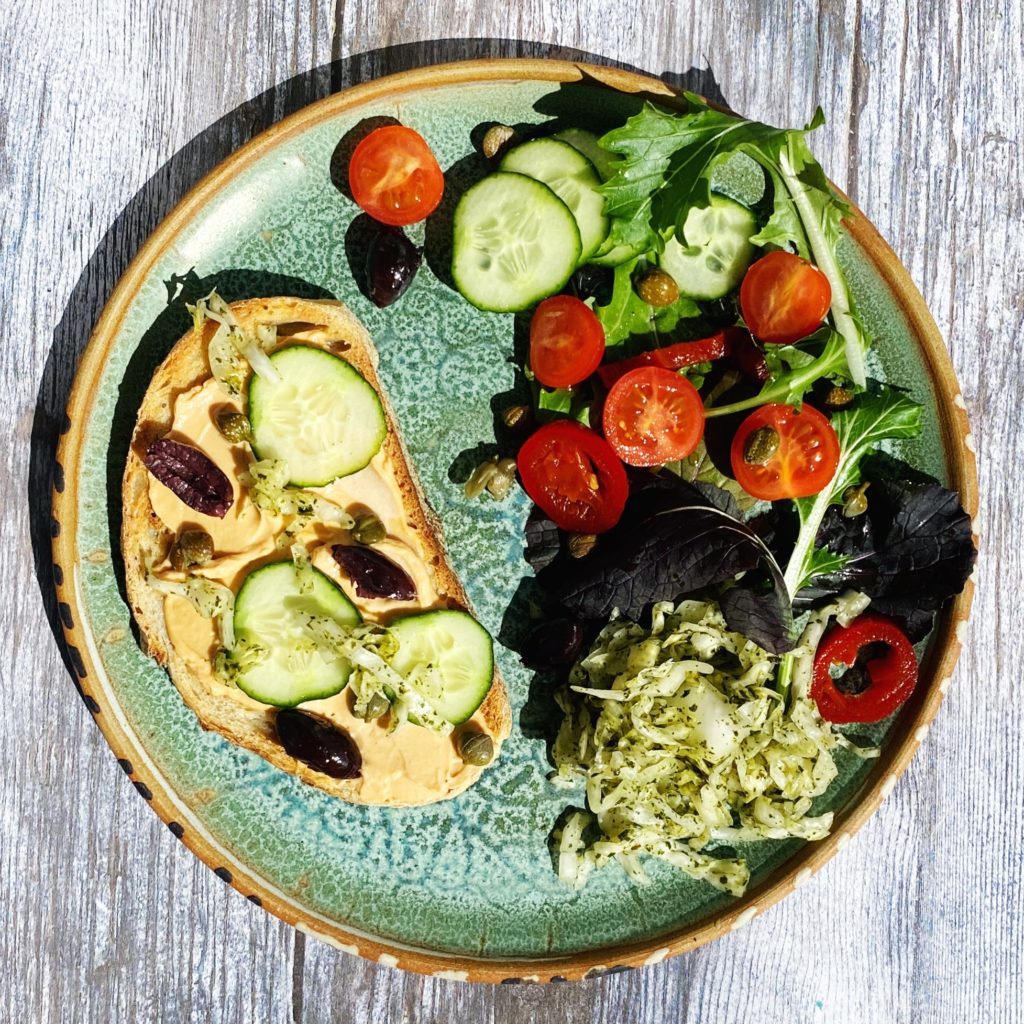
So you’ve made my kimchi and you’ve got a lot of brine left over in the jar after eating it up. Here’s one delicious way to use up that potent, beneficial bacteria infused liquid. Whatever you do, don’t throw it away! If you don’t fancy making this fermented cashew nut cheese with it, drizzle it over rice or noodles or add it to your Bloody Mary in place of tabasco!
Here’s the simple method. If you don’t have your own homemade ferments to inoculate the nuts, then we sell raw, unpasteurised, organic, Irish ferments here which you can add to your next fruit and veg order. You don’t have to use kimchi brine, any left over brine from a fermented product will work.
Liz x
Ingredients
Cashew nuts (or use any creamy nut or seed like sunflower seeds or almonds)
No need for exact measurements. Just put a volume of cashews nuts that you want in your strongest blender.
Add brine from a ferment. It doesn’t really matter how much you add, as long as it is raw and unpasteurised it should have enough bacteria to kick start the fermenting process. Adding more brine will create a stronger flavour of the ferment and a looser, creamier cheese. Less brine will create a thicker cheese.
Blend the nuts and brine until completely smooth and creamy. Taste and add salt to your liking.
Then scrape the cashew cream into a very clean jar. Try to keep it tidy, use a flexible spatular to scrape down the sides and a piece of kitchen paper to wipe around the sides.
Put the lid on the jar and leave it at room temperature in a shady part of your kitchen to ferment to your liking. This could take anywhere between 12 hours and a week depending on how active your starter brine is and how warm your kitchen its. Just keep an eye on it. You’ll notice air bubbles forming as it ferments.
Give it a taste and if it’s sufficiently tangy then it’s ready to be stored in the fridge for about 2 weeks. Use it on crackers, toast or bagels, wraps and sandwiches, as a dip with salad and crudités… anywhere you like soft, creamy, tangy cheese. Enjoy!
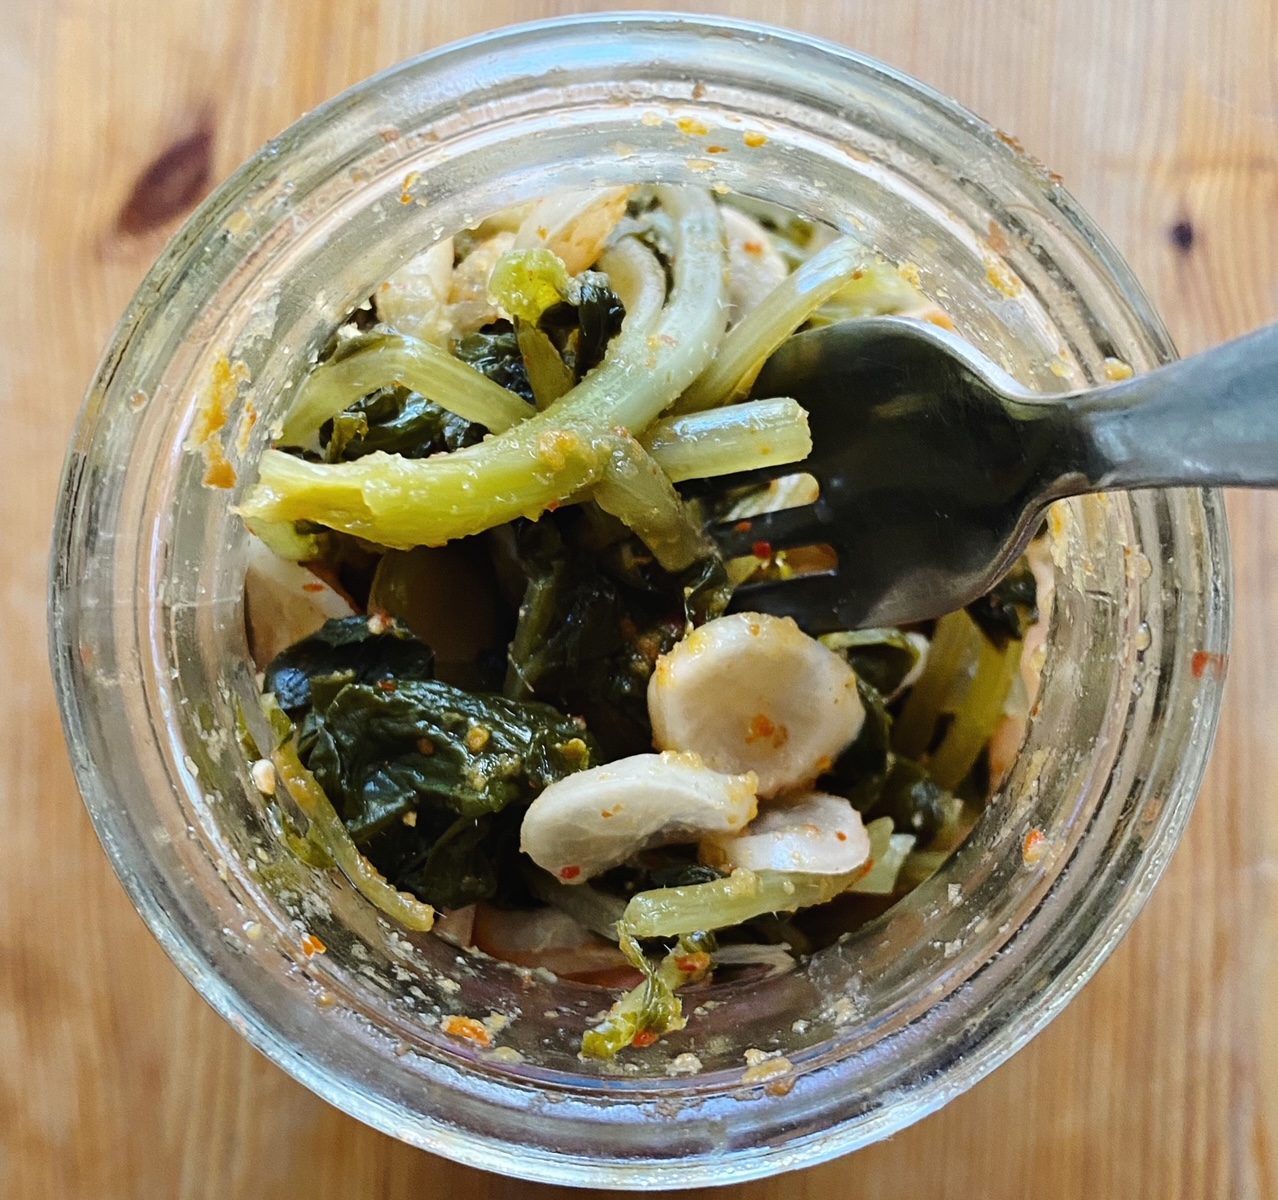
Like all fermented vegetables, kimchi is incredibly good for you. Luckily it’s mind-blowingly delicious too…and very easy to make yourself. I’ve made it with pak choi, seaweed and little radishes this time but you can play around with the ingredients and make it your own. Use local, seasonal vegetables for the best results. Here’s my quick tutorial video so you can see how easy it is to make yourself. Loads more fermenting inspiration in my book which is available to add to your veg order here. Any questions? Pop a comment down below and I’ll get back to you asap. Liz x
Ingredients
2 large pak choi
2 bundles of radishes
1 handful of dried seaweed
1 tbsp natural salt
3 fresh chillies (or dried to taste)
1 thumb of fresh ginger
6 cloves of garlic
Method
Gather and rinse your ingredients. Find a large jar, a chopping board, a sharp knife, a spoon, a rolling pin, a blender, a mixing bowl and a small jar or glass that fits snugly inside your large jar. Ensure all your equipment is nice and clean – no need to sterilise.
Reserve an outer leaf or two from your pak choi. These will be used as ‘followers’ at the end of the recipe.
Slice the rest of the pak choi into bite sized pieces and put them in the large bowl.
Thinly slice the radishes and add them to the bowl too.
Rinse and slice the seaweed too (if you are using nori, no need to rinse first) and add it to the bowl.
Add the salt to the bowl and use your hands to tumble the ingredients and evenly disperse the salt. Sit the bowl to one side to give the salt time to dissolve and start drawing brine out of the vegetables.
Meanwhile make the spice paste. Take the green stalks off the chillies and roughly chop them. Put them in a blender. Peel and chop the ginger and add that to the blender too. Peel the garlic and then blend the 3 ingredients together into a bright space paste.
Taste the salted vegetables and add more salt if needed. They should taste pleasantly salty and should now look wet and wilted. If they are too salty, add some more vegetables eg grated carrot or another pak choi.
Mix the spice paste through the salted vegetables. Be careful not to get any on your bare skin. Wear gloves or use a spoon.
Then pack the mixture carefully and firmly into the large jar. Use the rolling pin to tamp down each new layer to ensure no air pockets are left in the jar. Leave at least an inch or two of head room in the jar.
Now cover the chopped vegetables with the ‘followers’ (the leaves you reserved earlier). Tuck everything neatly in under the brine. Use the spoon to help tuck the leaves down the sides of the jar and ensure no little floaty bits are above the brine.
Weigh down the ‘followers’ with a small glass/jar/ramekin. See the video above for more details.
Then close the jar – if you are using a clip top jar, remove the rubber seal to allow gases to escape, otherwise just close a regular jar loosely or remember to ‘burp’ the jar every day to allow gases to escape by briefly opening and closing it.
Put the jar on a tray or in a bowl to catch any overspill and set it on a dark shelf to ferment at room temperature for at least one week. Keep an eye on it. Does it need burping? If so, do it over the sink! Have the gases caused the veg to rise up above the brine? If so push the weight down to expel and air bubbles and get everything neatly under brine again.
After one week at room temperature, taste your kimchi. It should be tangy, spicy and delicious. If you are happy with the tang-level, remove the weight and pop the jar in the fridge. It should last well for at least one month, if not many more.
*Tips to make your fermented food last longer in the fridge: No double dipping! Consider transferring the ferment to smaller jars before refrigerating.