Growing up we always had baked and filled potatoes or mushrooms but never beetroot. In fact beetroot in our house usually came pickled in a jar. Beetroot usually gets the job as side veg but here it’s the star of the show.
Beetroots are an all year round veg, hearty and filling and full of goodness. If you get nice big beetroots in your box why not give this recipe a go. It’s sweet from the beets and salty from the feta and toasty from the spices. topped with crunchy walnuts its a complete meal.
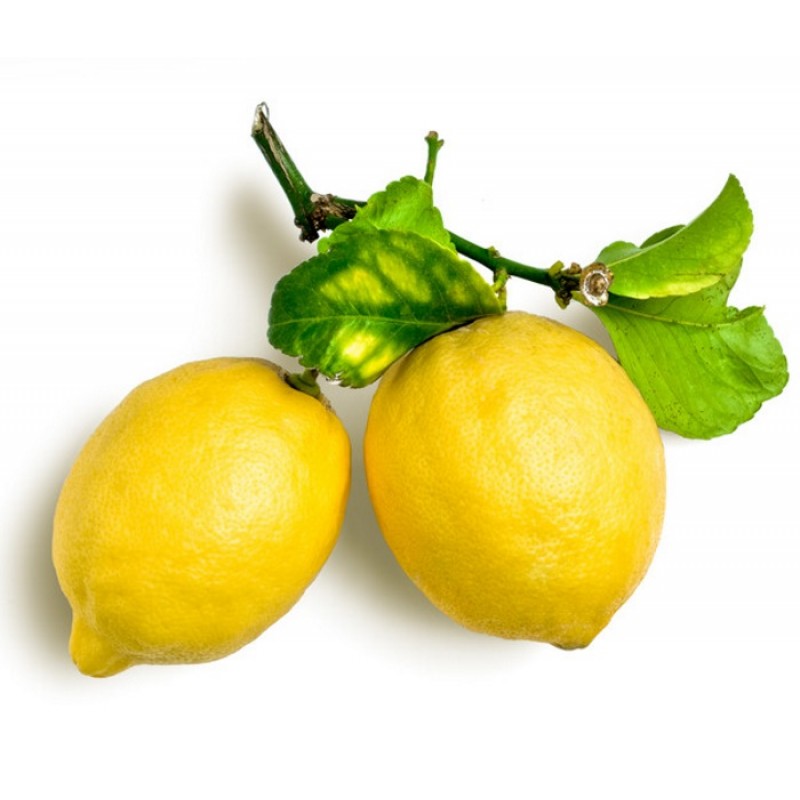
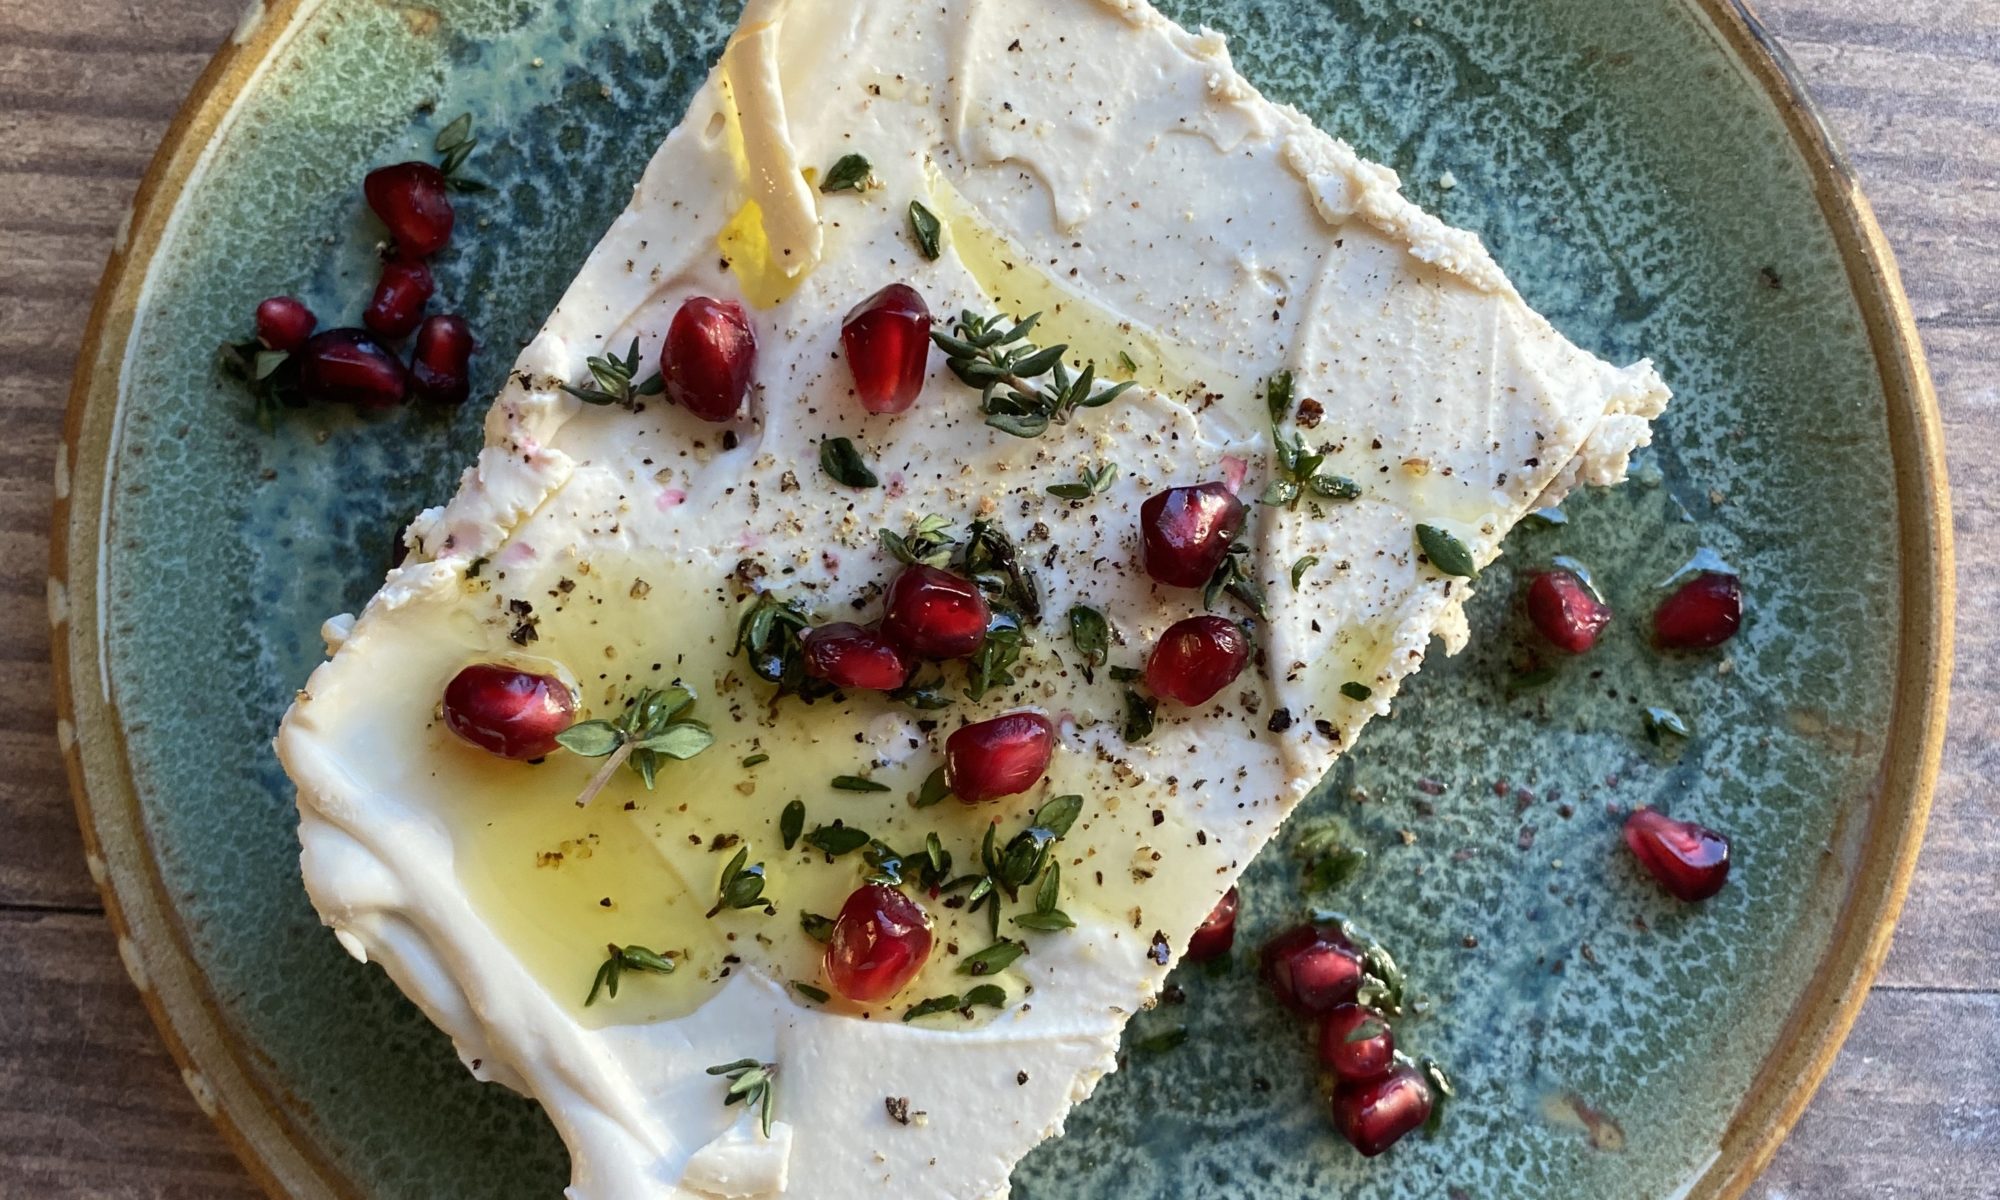
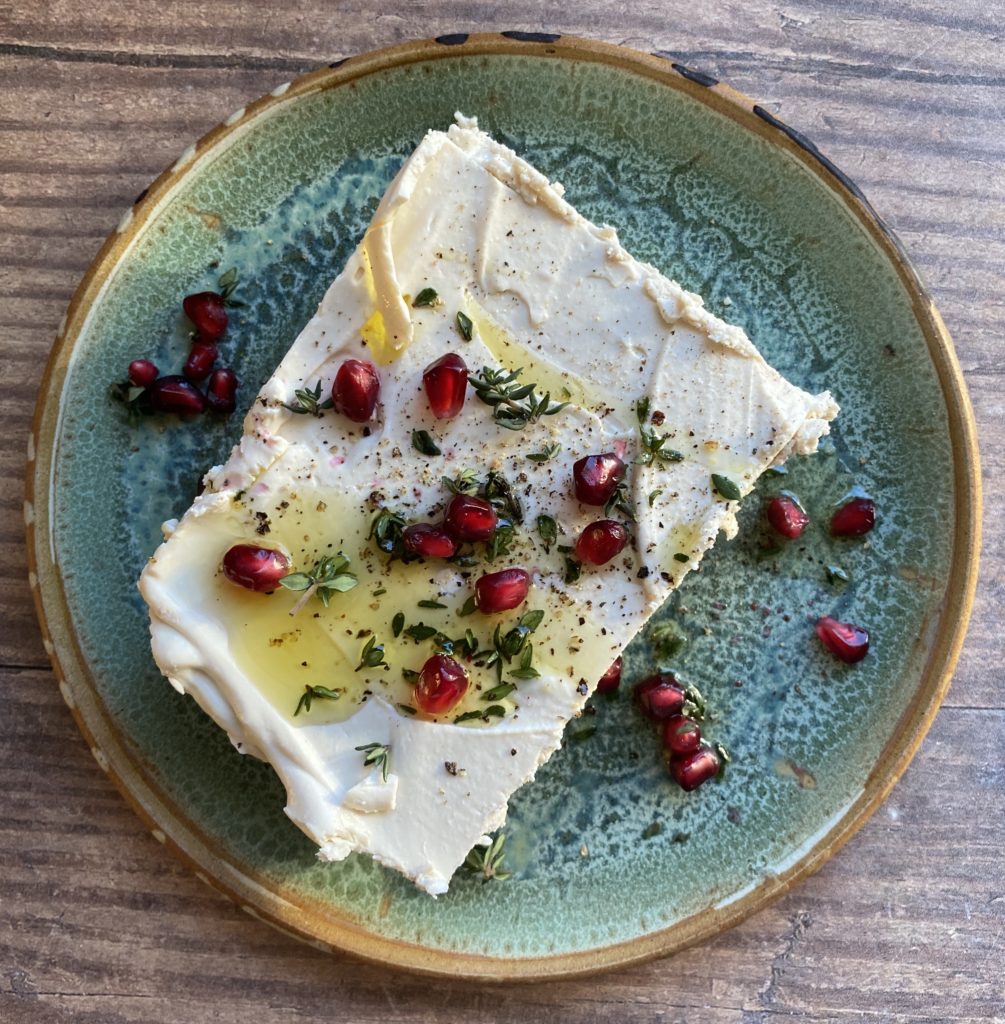
Tofeta is an essential in our dairy free home. If you don’t eat dairy and find shop bought vegan cheeses a bit disappointing (not to mention full of processed junk) then this tangy feta cheese is the answer to your prayers. It’s made from extra firm tofu (a really healthy, whole food ingredient) and coconut oil to give it that creamy texture and to firm it up into sliceable, crumbly, melty feta. Flavoured simply with salt, lemon, garlic and vinegar, you’ll be amazed at how close to feta this cheese tastes! Crumble over pasta or salads, cube up into a classic Greek salad with sliced tomato, cucumber, red onion, basil and olives, spread into sandwiches or on toast/crackers… however you would normally use feta, this substitute will work!
TOP TIP – find some unscented/flavourless coconut oil or your feta will taste a bit coconutty.
Liz x
Ingredients
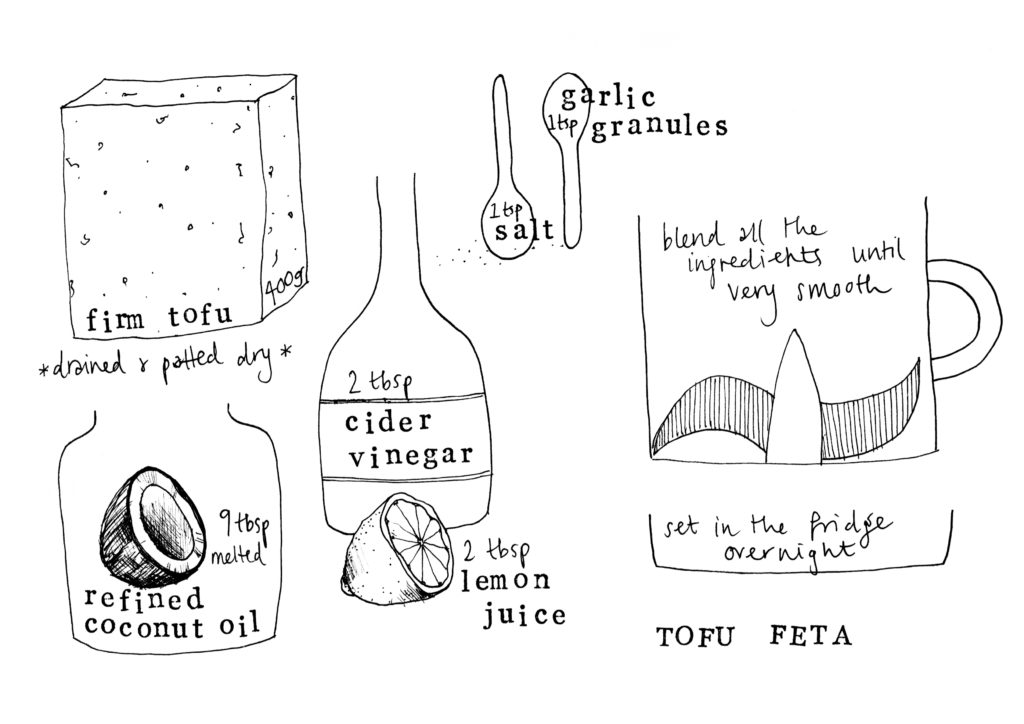
400g extra firm tofu
9 tbsp coconut oil (flavourless is best here)
2 tbsp lemon juice
2 tbsp vinegar (apple cider or white wine vinegars work best here)
1 tsp garlic granules
1 tsp salt
Method
Start by pressing as much water as you can out of the tofu. This will ensure a nice crumbly, sliceable feta. If you can’t be bothered to do this step, not to worry, you’ll end up with a spreadable feta which is so delicious and useful too! To press the tofu, chop it into chunks and put it in a sieve over a bowl. Then place another bowl, which fits inside the sieve, on top and then place something heavy in the bowl like a big jar of pickles. Leave this set up to drain for an hour or so in the fridge. Then squeeze each chunk by hand before placing it in the food processor.
Add all the other ingredients to the food processor and blend until silky smooth. You will need to stop the machine and scrape don the sides half way through.
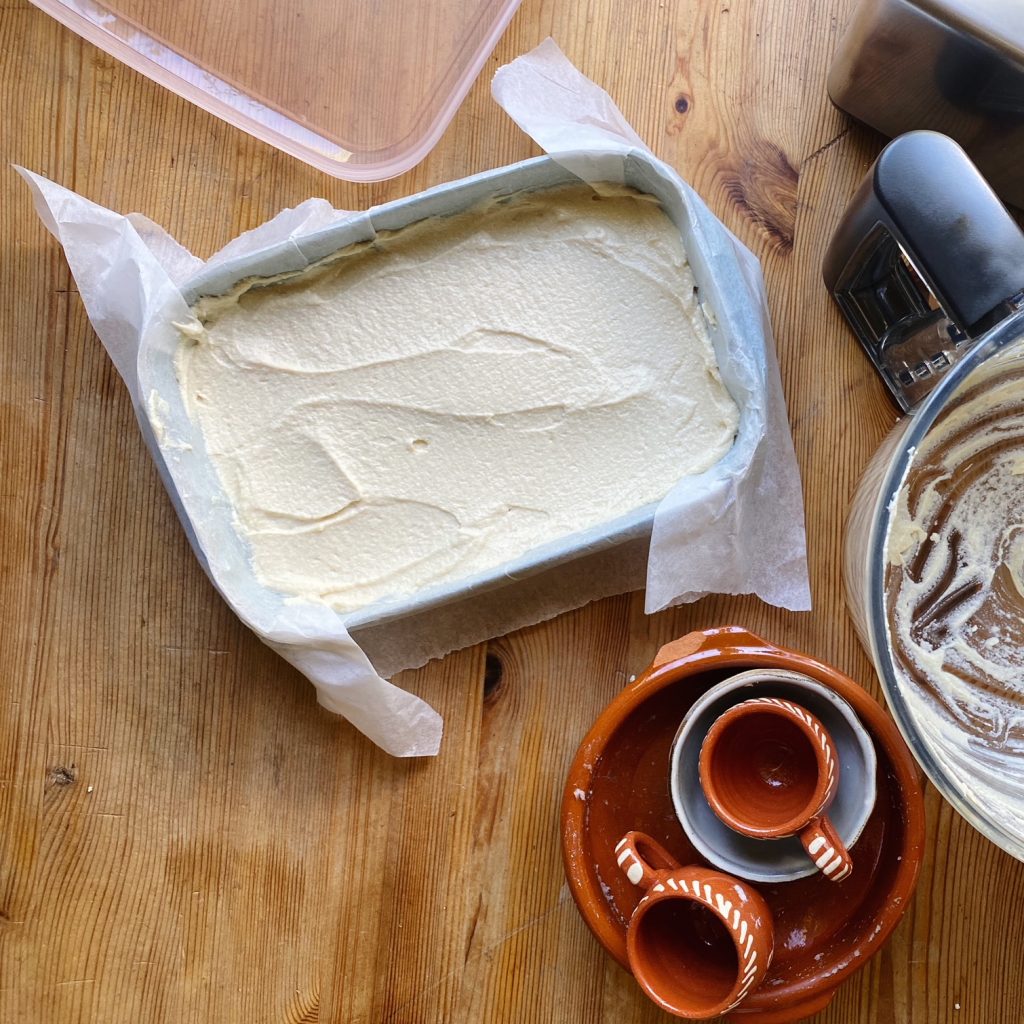
Line a plastic tub with baking parchment and smooth the tofeta mixture into it. Put the lid on and set in the fridge until solid.
Then carefully tip the feta onto a clean board and slice or crumble as you like. This tofeta will stay fresh in the fridge for 4 days. Enjoy!
The invasion of Ukraine is causing a huge humanitarian crisis as millions flee the violence. So this week we are raising money for UNICEF who are on the ground providing life-saving aid to refugees. Thank you for your charity box orders, we are adding an extra €10 to each and donating them (as cash, not boxes) to Unicef Ireland.
Ukraine has incredibly fertile farm land and a rich and diverse food culture. One of my favourite Ukrainian chefs is Olia Hercules. Her food (and instagram account) is always so inspiring. I’ll be sharing some plant based twists on some of her recipes this week too. Celebrating different cultures than our own through our shared love of food is one way to honour, respect and bring some humanity to an awful situation. Do you have any Ukrainian experiences or recipes to share?
First up are these fried buns. Think of them like savoury donuts (although you can stuff them with fruit or jam before frying too and make delicious sweet versions) they make an incredible snack or packed lunch on their own or I often serve them as a side to a brothy Ukrainian style stew or borshch.
Liz x
Ingredients (makes 12)
250ml oat milk (or any milk)
1 tsp sunflower oil
1 tsp salt
1 tsp sugar
7g dried yeast
350-400g flour (plus extra for dusting)
300g potatoes, boiled
150g cheese, crumbled or grated (feta works well, have you tried my tofeta recipe?)
1 white onion (sliced and fried until caramelised with a pinch of salt and a tbsp of sunflower oil)
a handful of chopped dill
salt and pepper to taste
about 100ml sunflower oil, for frying
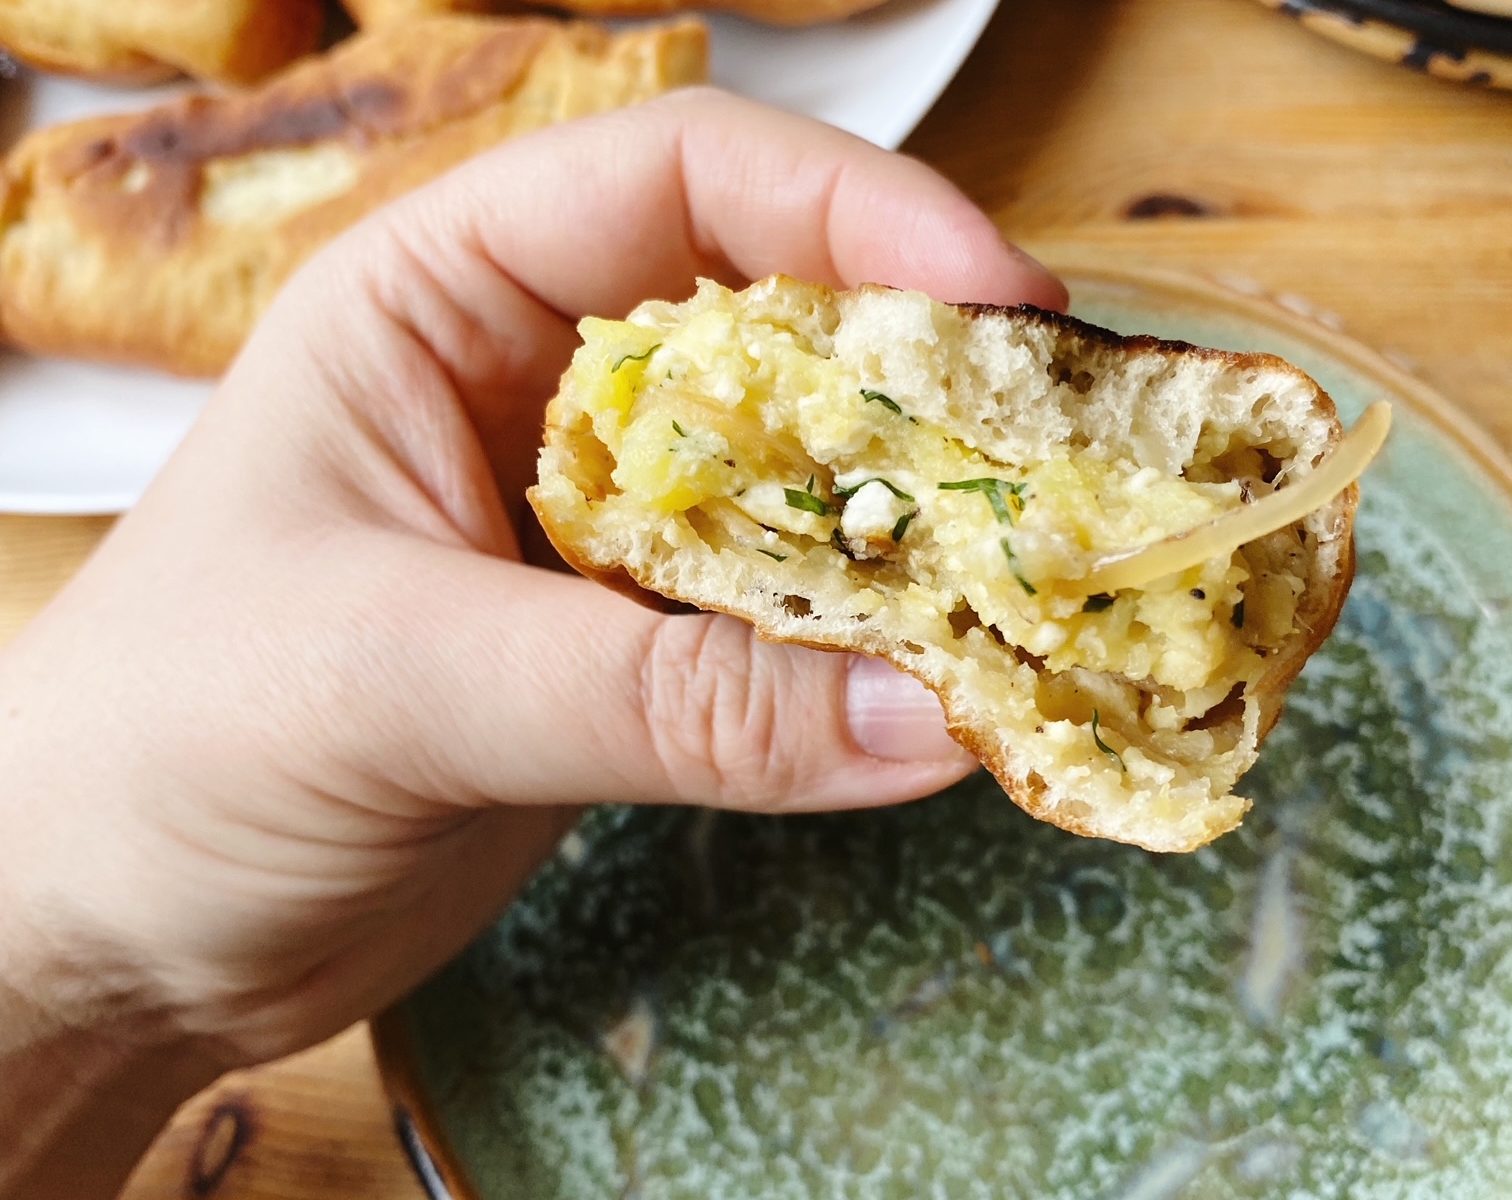
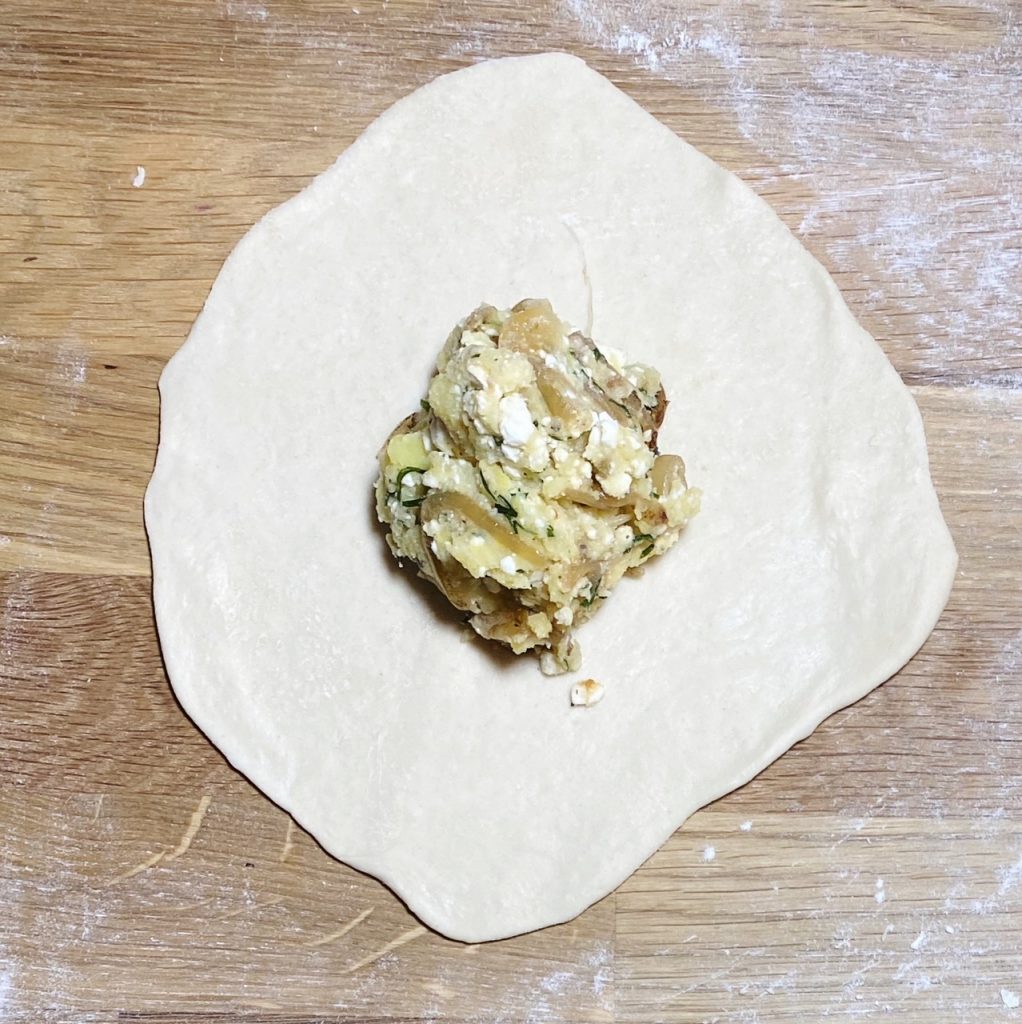
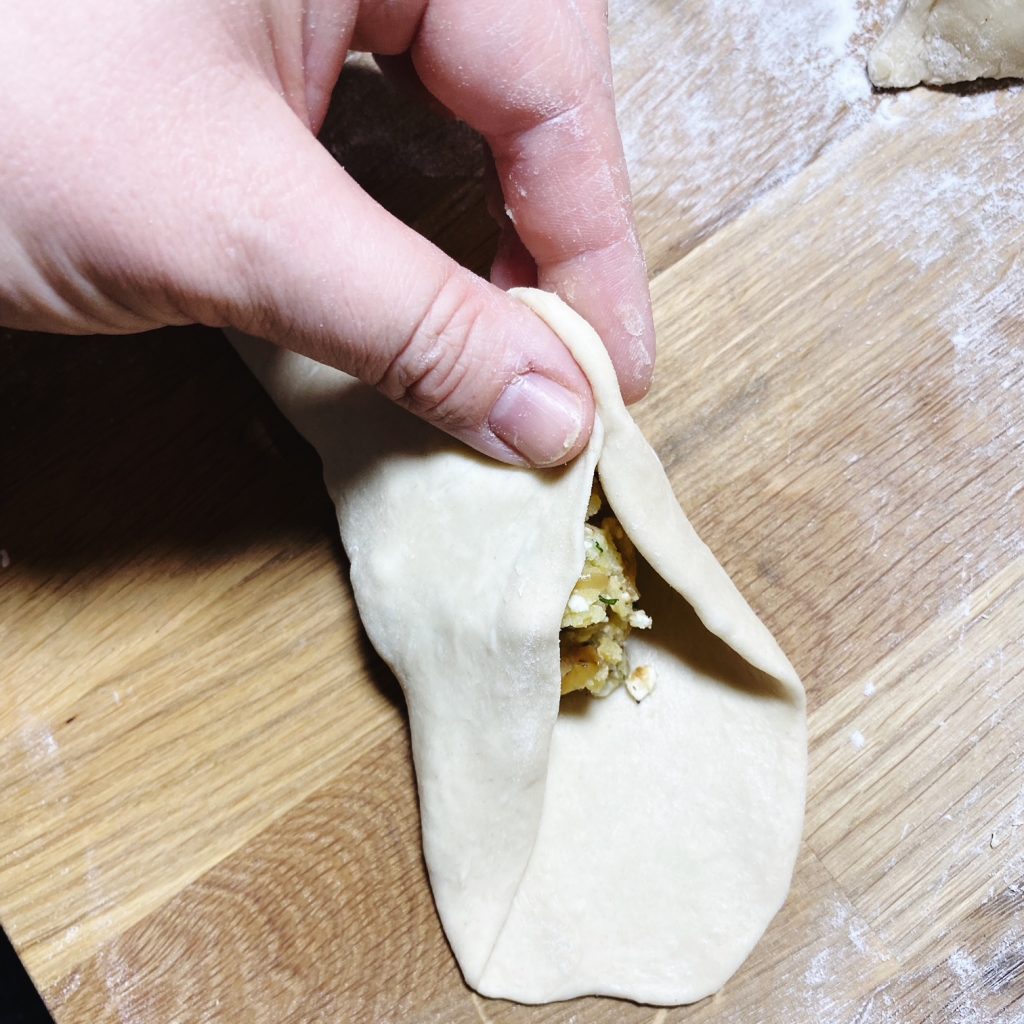
Just sealed bun on left, 3 buns on right after being turned and gently squashed.
Method
In a large mixing bowl, whisk the milk, sunflower oil, salt, sugar and yeast until frothy. Add 350g of the flour and mix with one hand into a sticky dough. If too sticky to handle, add the remaining 50g of flour and fold and knead in the bowl until you have a soft, smooth ball. Cover with a clean tea towel and allow the dough to rise for 45 minutes in a warm place.
Meanwhile make the filing. Mash the potato then mix in the fried onion, dill and cheese. Taste the mixture and season well with salt and pepper. Of course you make any kind of filling you prefer. We love sautéed cabbage and mushrooms, mashed beans… or for sweet fillings, chopped fruit with a drizzle of honey or a sprinkle of sugar.
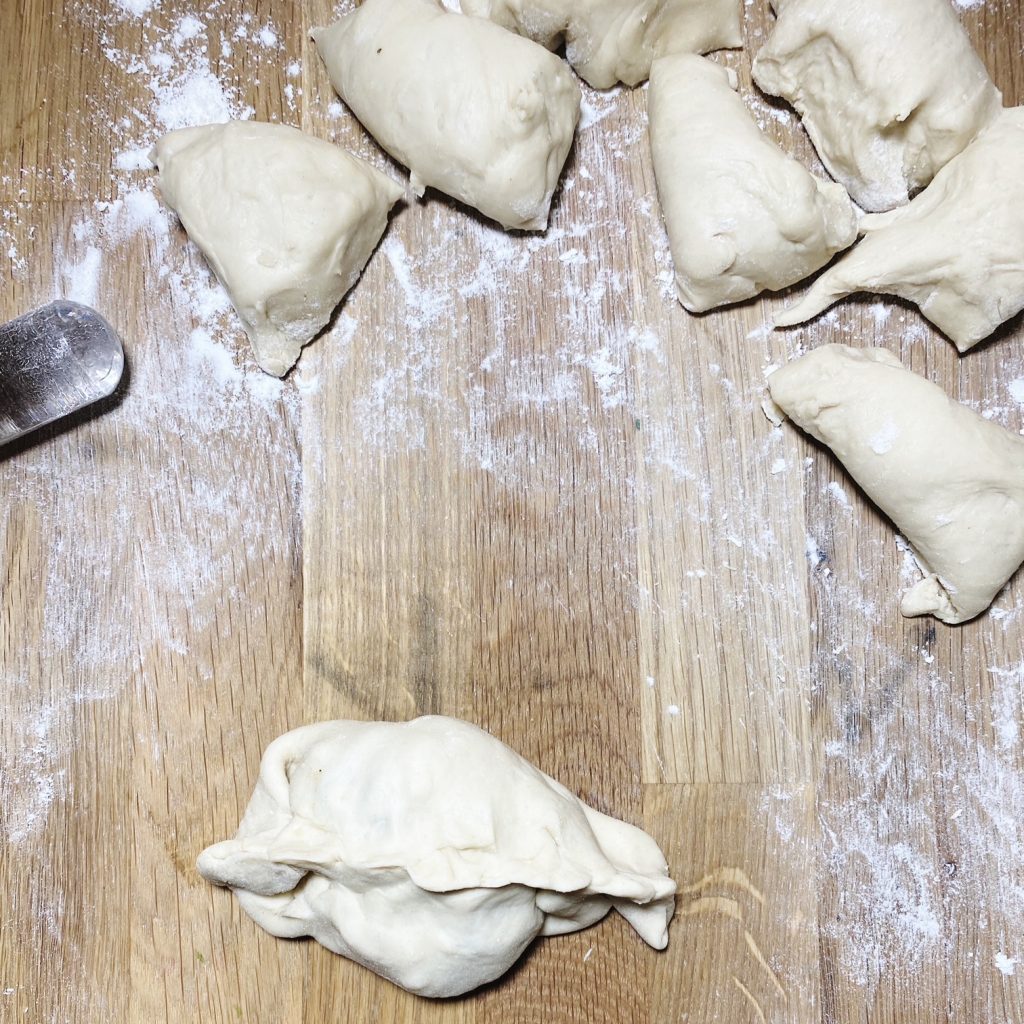
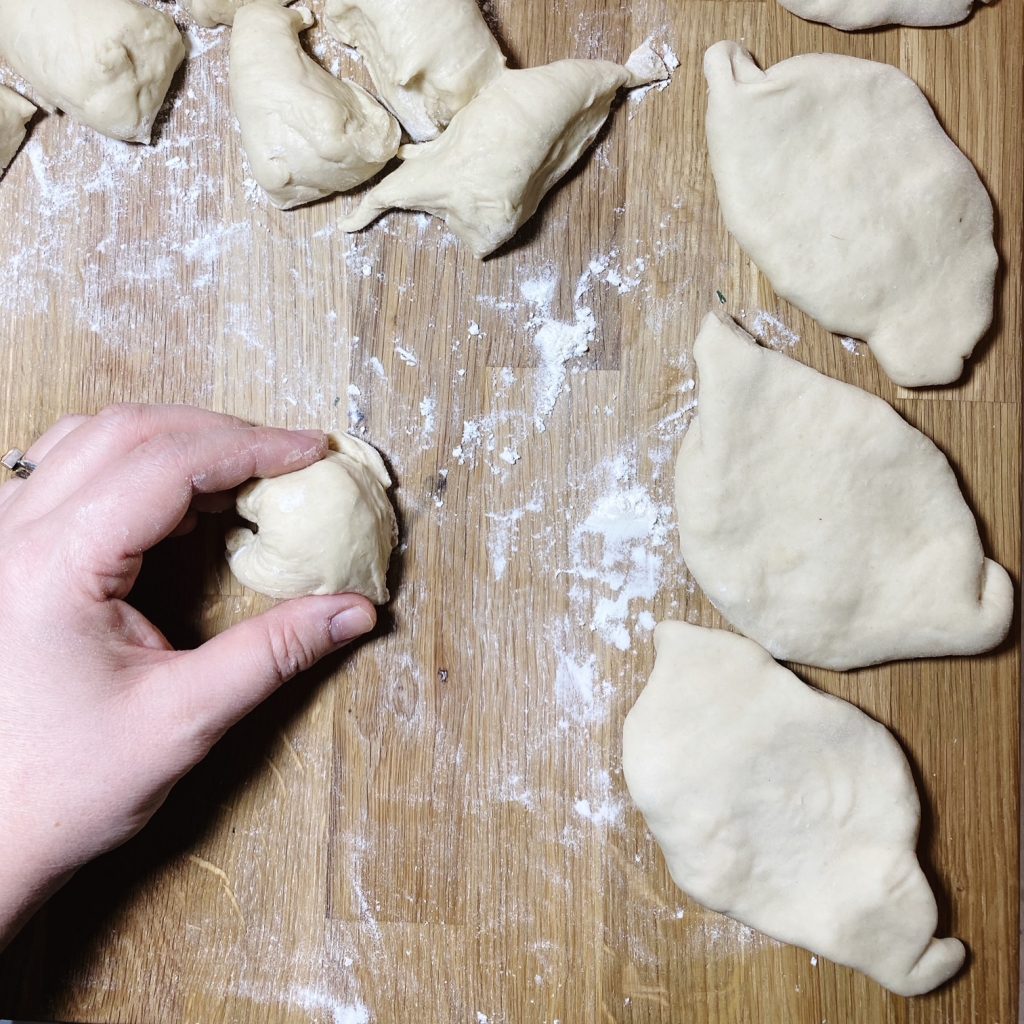
When the dough has risen, tip it out onto a floured work surface and cut it into 12 equal pieces. Use a rolling pin to roll each piece into a circle. Then place a heaped tablespoon of the filling in the centre of the circle. Bring up the sides of the dough and pinch them together ensuring there are not holes. Then turn the bun over so the seam side is down and gently squash the bun with the palm of your hand. You should end up with palm sized, lemon shaped buns. Repeat with all the dough and keep them on a lightly floured work surface or tray, not touching each other, until you are ready to fry.
Heat the sunflower oil in a wide frying pan until very hot. Carefully fry the buns in batches for 3 minutes on each side or until golden brown. Turn the heat down a little if you find they are catching. I find a medium-high heat works best. use metal tongs or two spatulas to carefully turn the buns. Be careful not to splash hot oil onto yourself.
Serve the buns whilst still warm or enjoy them cold on a picnic or for a packed lunch.
Golden, fluffy bun after being fried for 3 minutes on both sides.
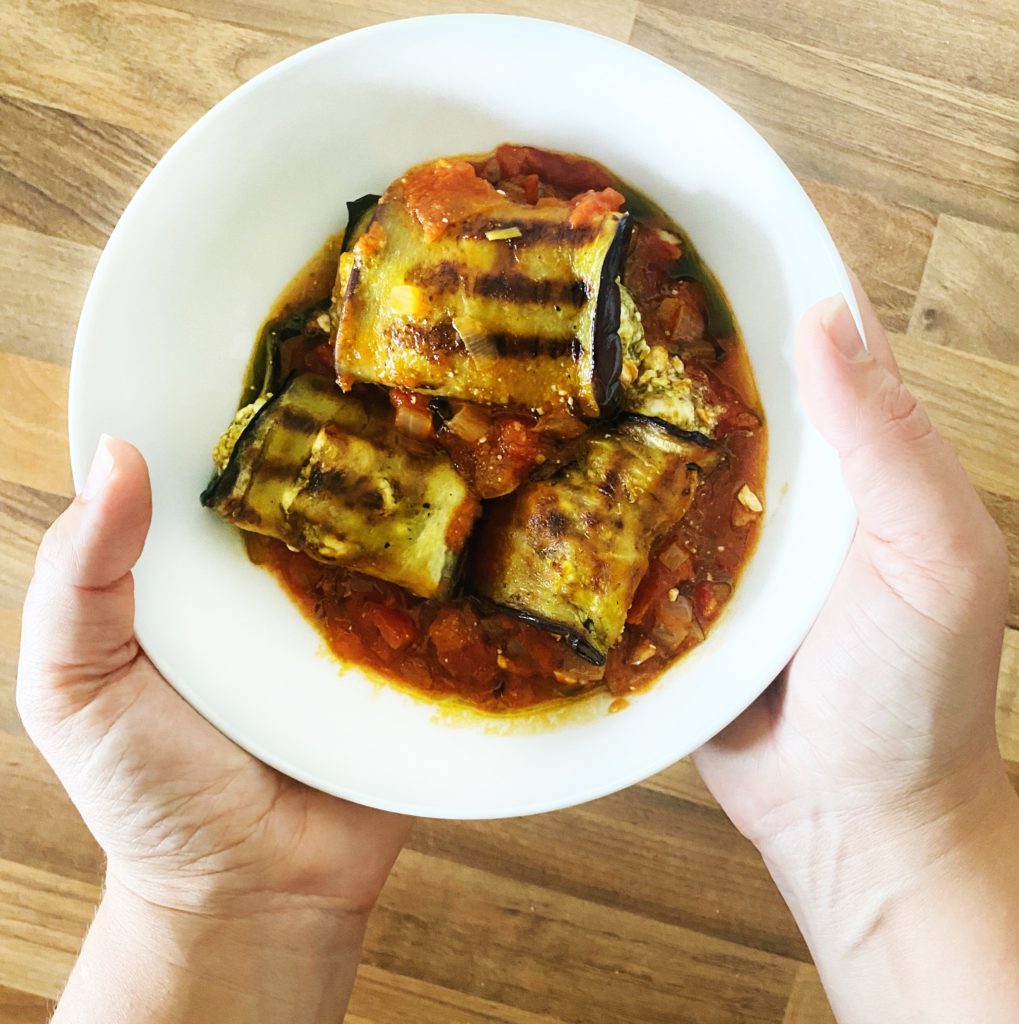
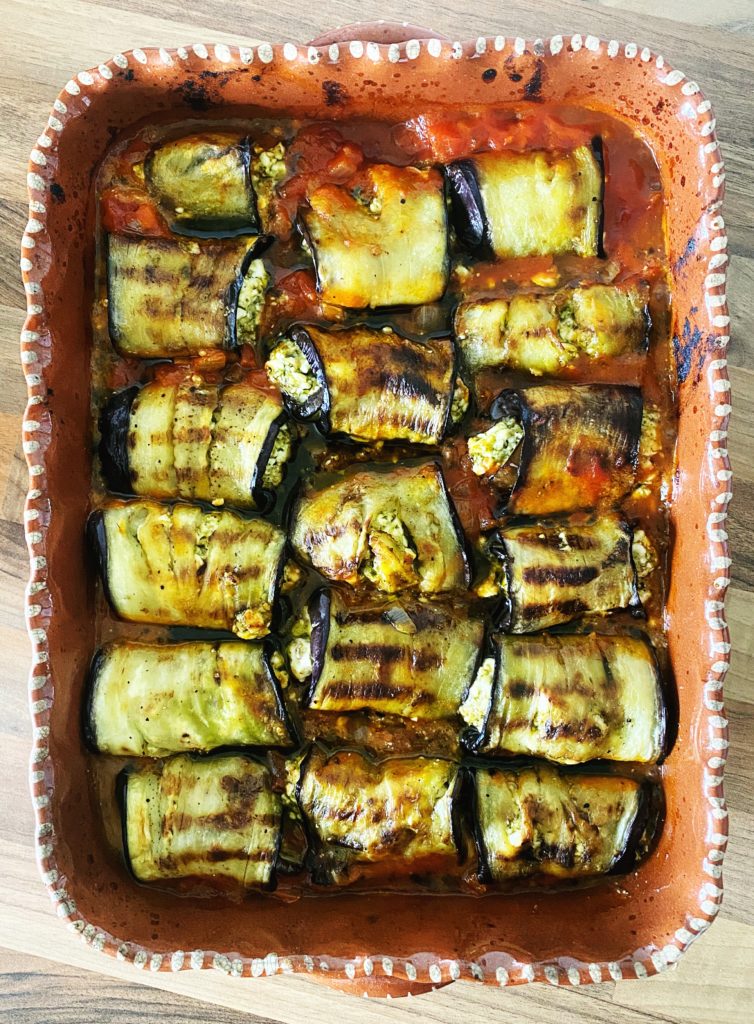
Involtini in Italian means ‘rolls’ and this aubergine version is one of my all time favourite dishes. I am obsessed with aubergine, perhaps it’s because I used to hate it as a child and now I’m making up for lost time? But whenever aubergine season hits, this recipe is at the top of my list. I also make this with courgettes in place of the aubergines sometimes, especially when there’s a lot of them to use up. Griddled courgette strips are so tasty so give that version a try too.
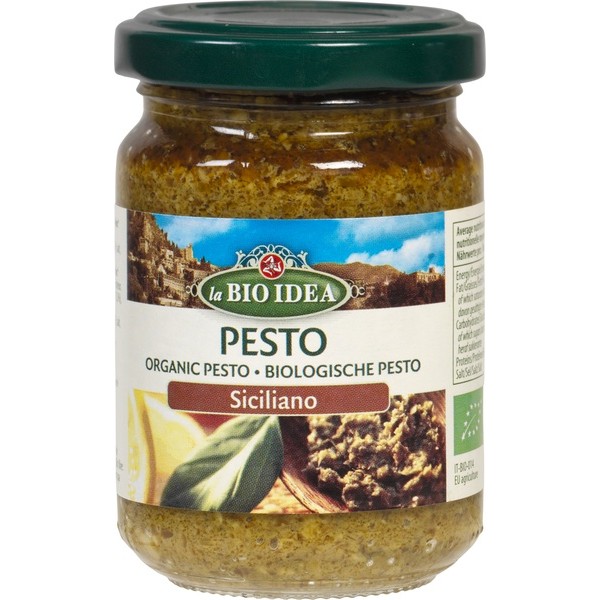
The filling can be whatever you want it to be. I usually go for something simple like a mixture of cheese (vegan feta or cashew cheese are my favs) and pesto. But roasted and crushed squash with toasted pine nuts or hazelnuts is also really good! Perfect for that summer-autumn crossover. Let us know in the comments what fillings worked well for you?
Liz x
Ingredients (serves 4-6)
2 aubergines
4 tbsp olive oil
salt & pepper to taste
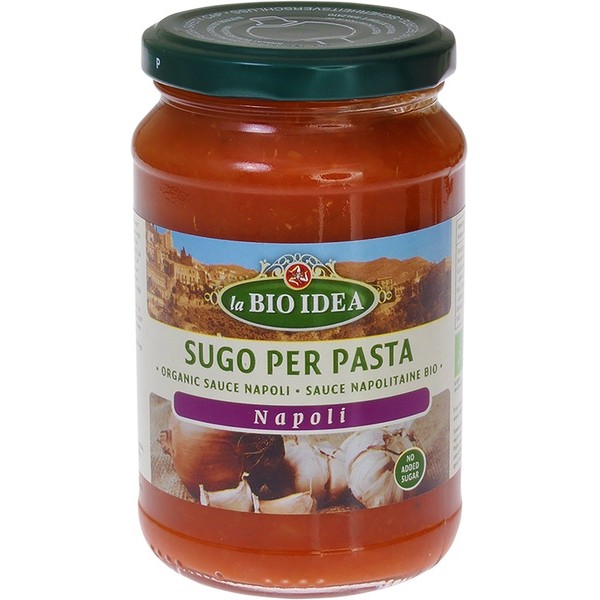
2 jars of Napoli tomato sauce (or make your own tomato sauce by sautéing a diced onion and 4 cloves of garlic with a little olive oil until soft, then add 2 tins of chopped tomatoes, salt and pepper to taste and some torn basil leaves and simmer for 15 minutes or so)
130g jar of pesto
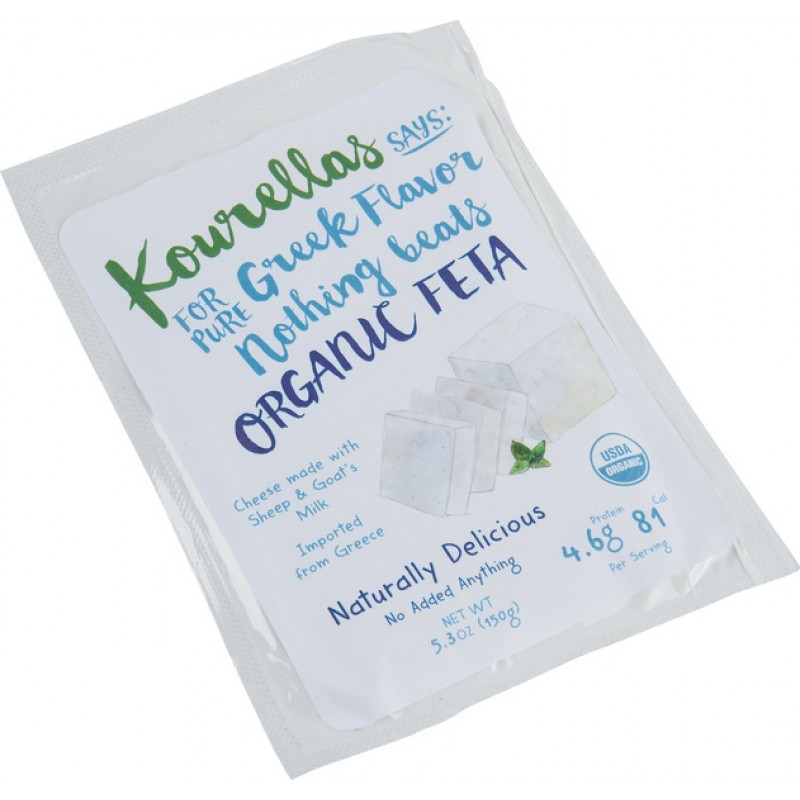
200-300g cheese of your choice (feta works really well here – I use my tofu feta recipe found at the end of this blog post, otherwise we stock a variety of plant based cheeses and organic feta)
pasta or fresh bread to serve
Method
Find a medium sized, deep roasting dish and turn your oven to 200C to warm up while you prepare the dish.
If you’re not using our tasty, ready made tomato sauce, make a simple batch yourself using two 400g tins of chopped tomatoes. I sautéed a diced onion with a couple of tbsp of olive oil and 4 cloves of garlic until soft and just starting to colour. Then tipped in the two tins of tomatoes (swirled out the remaining tomatoey juices from the tins with a little water and added that to the pot too) and seasoned with salt and pepper. Then simmered the sauce with some torn basil leaves for around 10-15 minutes until it was rich and delicious.
Keep the sauce warm while you prepare the aubergines and filling.
Slice the tops off the aubergine as close to the stalk as possible, then peel or slice off any still-attached leafy bits. Carefully cut the aubergines into around 4mm thick, long strips.
Pour the olive oil into a small bowl or glass and season it with a big pinch of salt and pepper. Then brush the aubergine slices with the seasoned olive oil and grill them in batches in a griddle pan, or under a hot grill in the oven. Turn halfway through. They should be soft and beautifully charred but still manageable. As they cook, lay them out on a large chopping board or clean worksurface ready for stuffing and rolling.
Meanwhile make your filling. I mashed about 300g of feta with a jar of pesto.
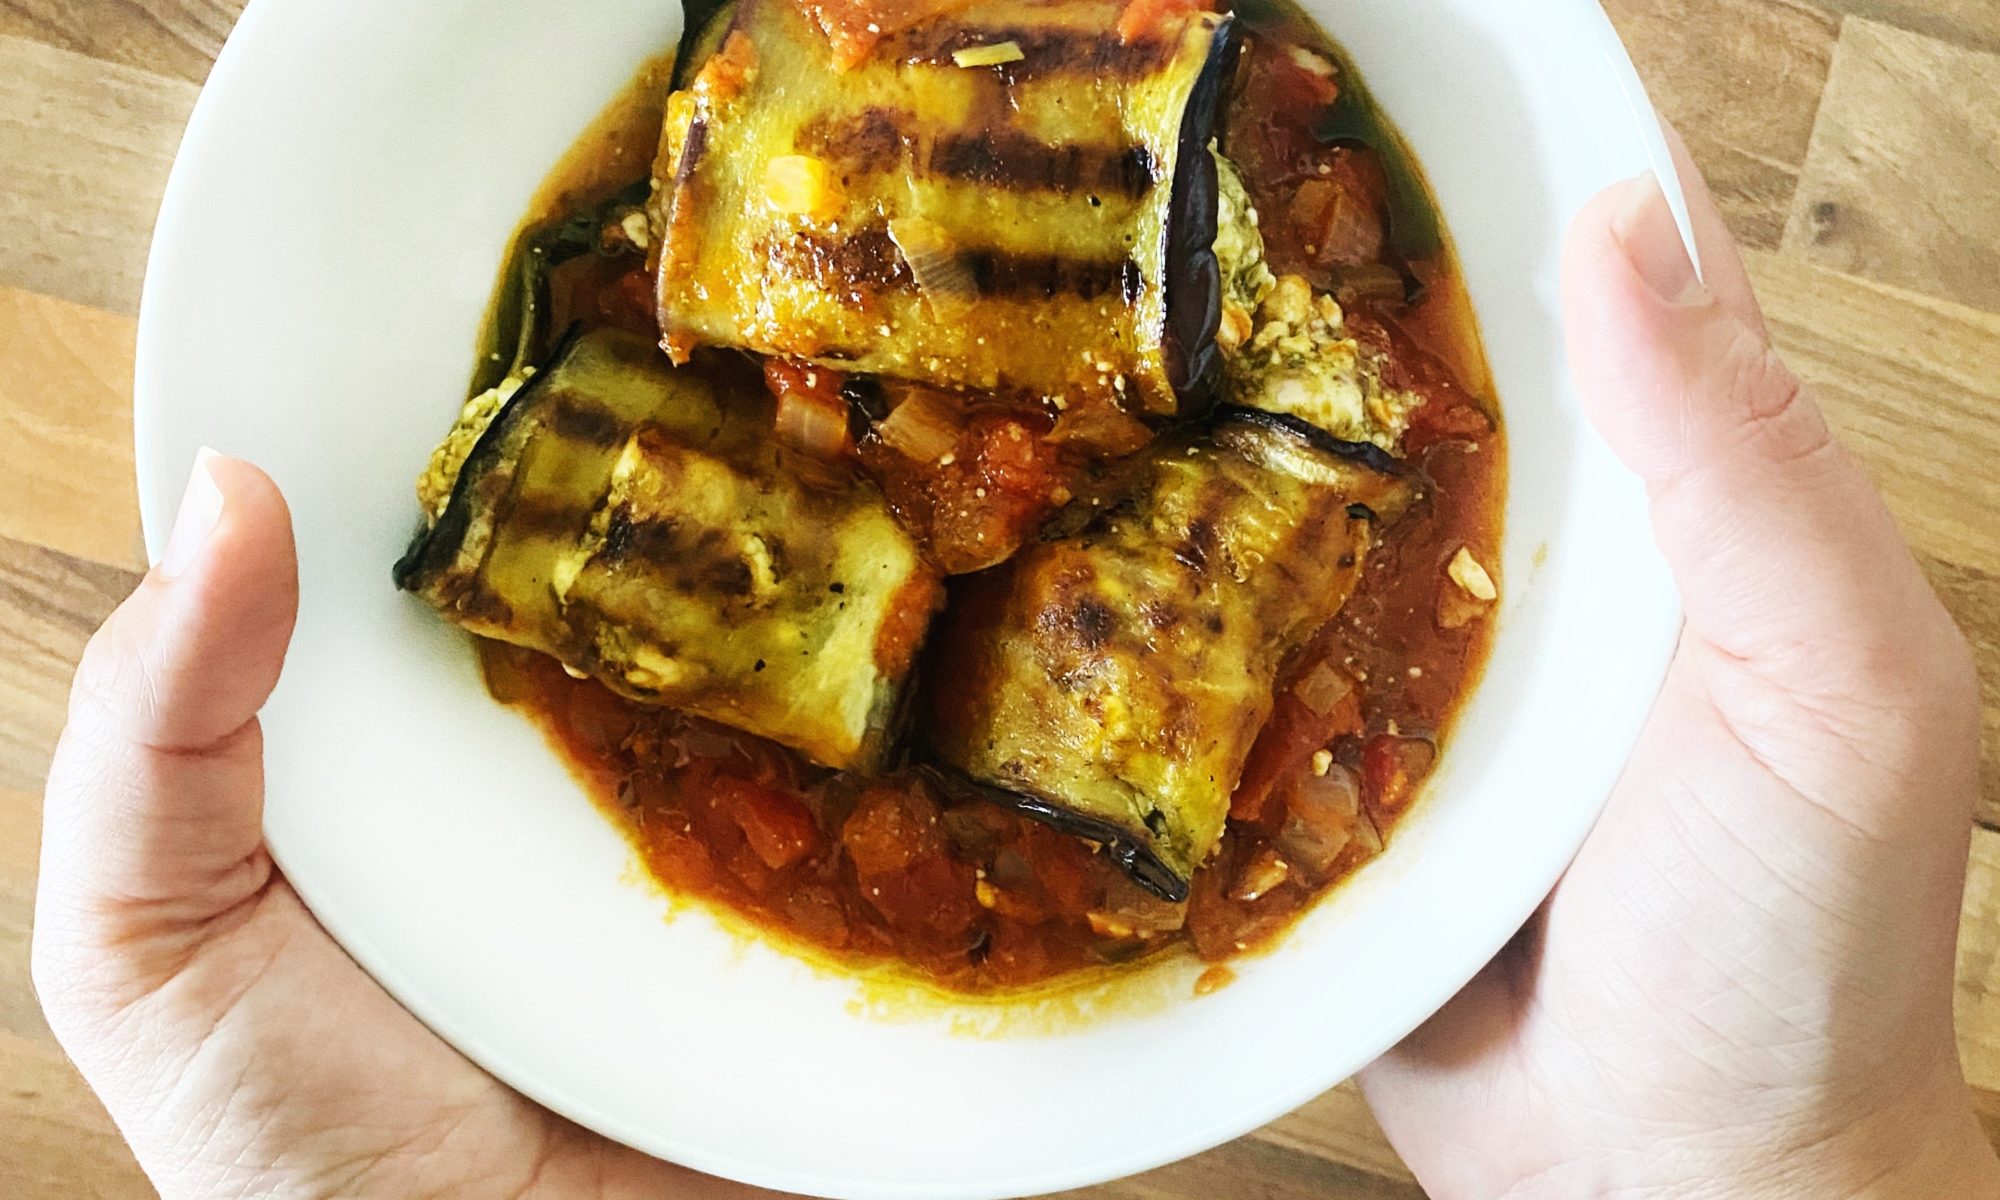
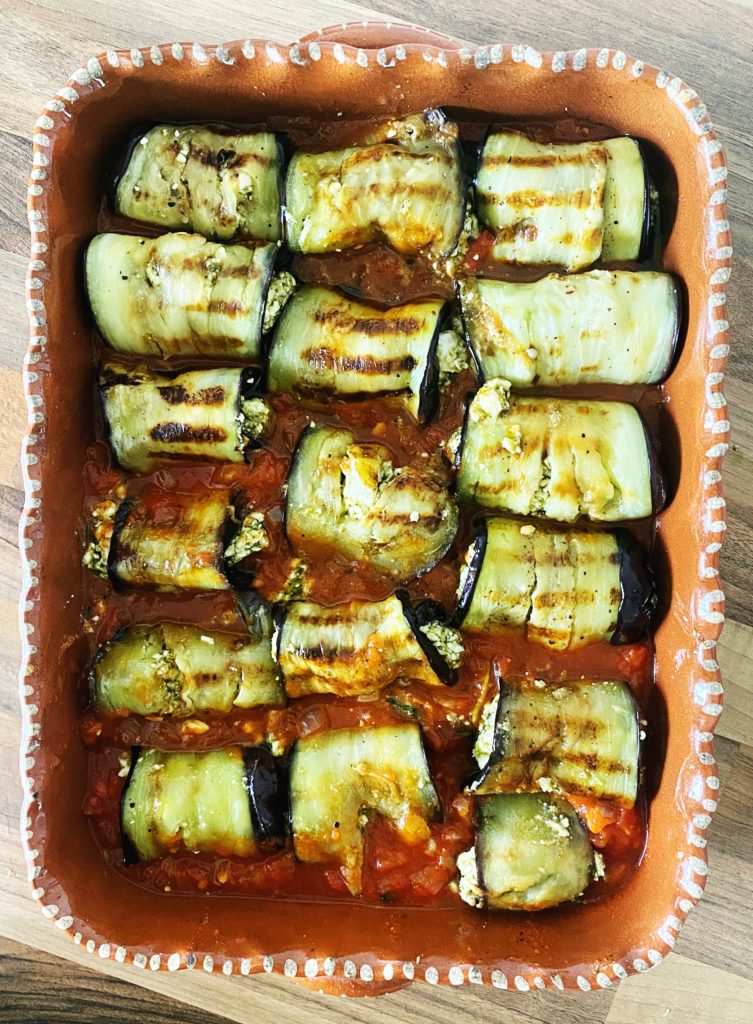
Pour the warm tomato sauce into your baking dish and start assembling the involtini.
Place a tablespoon of filling at the end of a griddled aubergine slice. Then roll it up and tuck the roll, seam side down, into the tomato sauce.
Repeat until all the rolls are stuffed. Then place the dish in the oven and bake for around 15-20 minutes or until hot and bubbling.
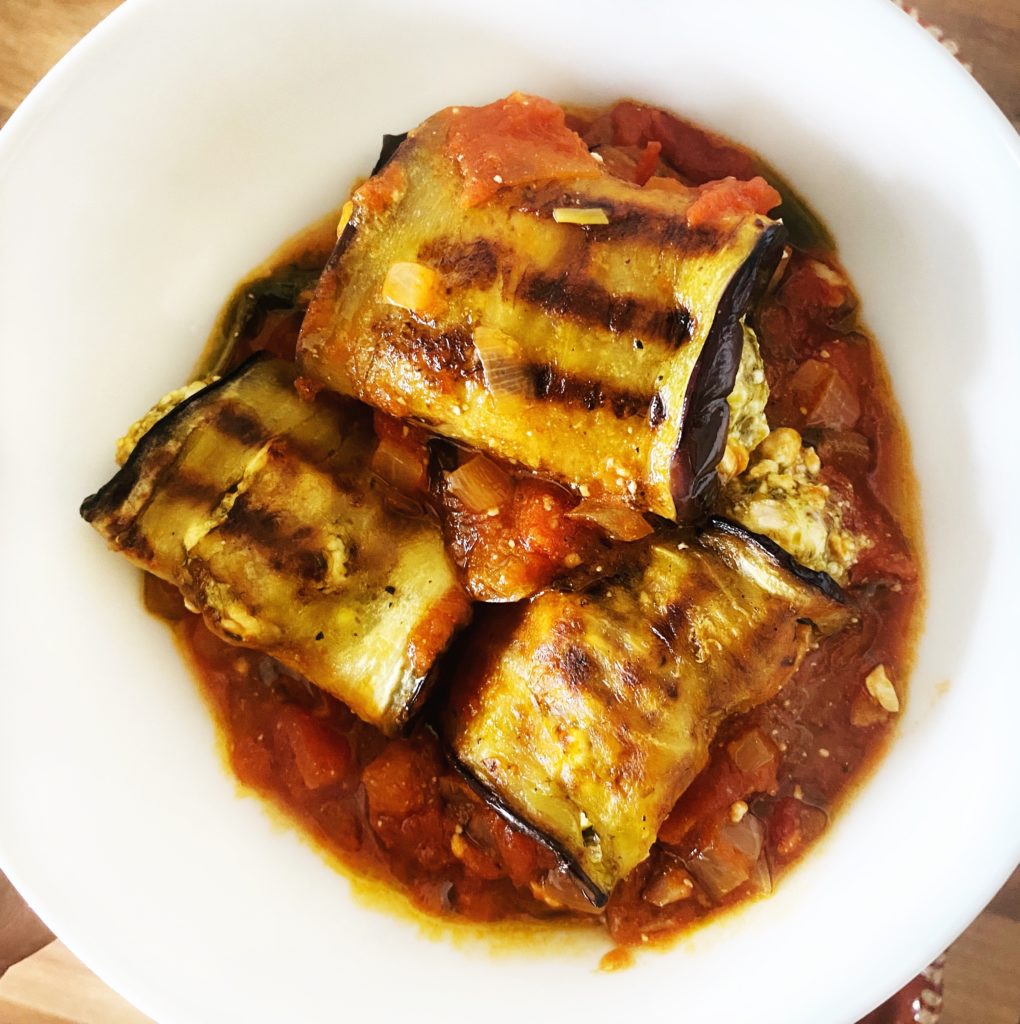
Serve with freshly boiled pasta or some crusty bread and enjoy!
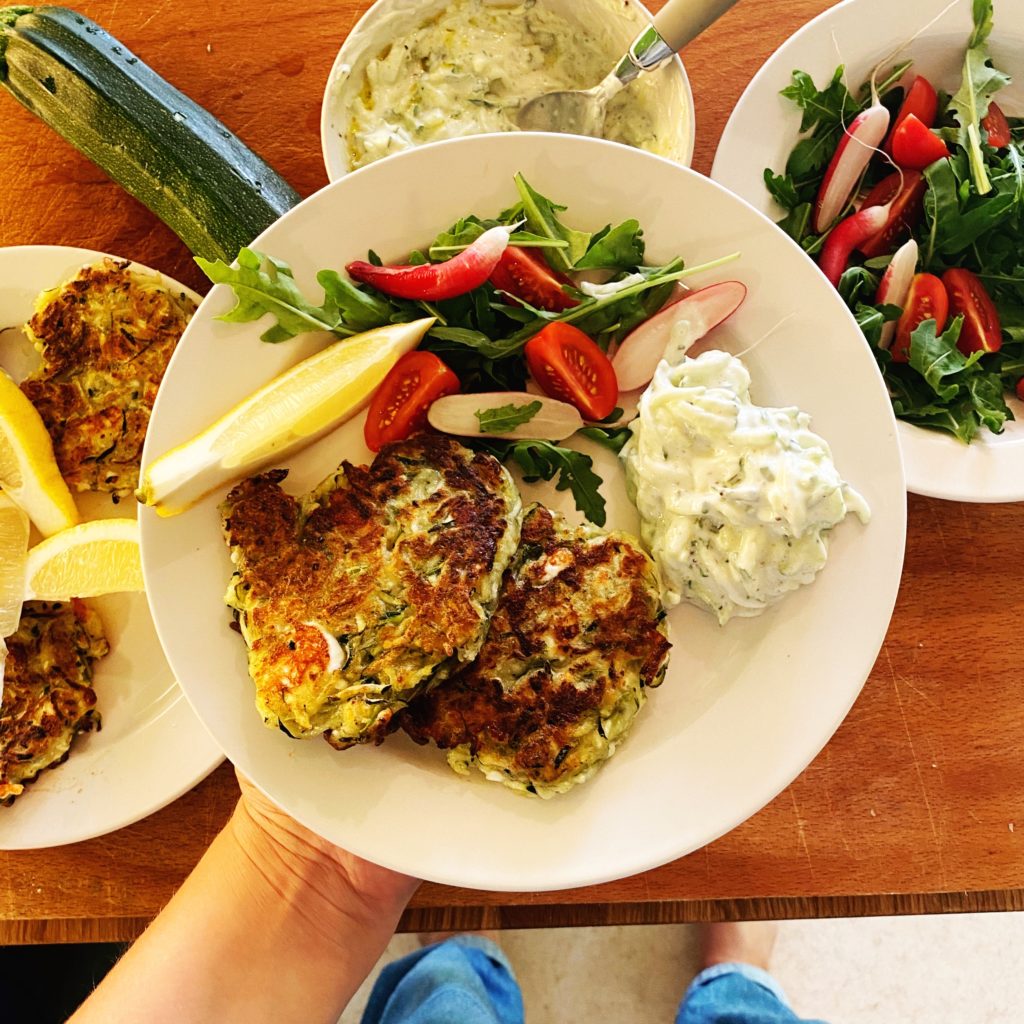
Fritters are a fab summer lunch with salads and a great way to use up a glut of vegetables. Courgettes are having their ‘glut moment’ on the farm right now, so here’s a delicious courgette fritter recipe for you to try if you get a lot of courgettes in your box and you’re stuck for ideas.
I usually make a gram flour (chickpea flour) batter of just gram flour, water and seasoning, and then stir in shredded/finely chopped veg to make fritters, but I didn’t have any gram flour so here’s a wheat and corn flour variety which works well too! Fritters are fairly forgiving, just use whatever flour you have in. Courgettes are quite watery vegetables, so I like to grate and salt them, then after the salt has drawn the liquid out, mix in enough flour to make a fairly thick batter. No need to add any other liquid or you’ll end up with soggy rather than crisp fritters!
Liz x
Ingredients (makes 6-8 fritters)
1 large or 2 small courgettes
a large pinch of salt (about 1/2 a tsp or to taste)
black pepper to taste
a big handful of chopped dill or fennel fronds (or any herbs you like – mint or parsley work well)
a block of feta, crumbled (or make my tofu feta recipe here)
4 tbsp plain flour (or more/less – see method)
4 tbsp cornflour/cornstarch (or more/less – see method)
olive oil for frying
lemon wedges, salad & tzatziki to serve
Method
Start by grating your courgettes into a large mixing bowl. Use the course side of the grater.
Sprinkle over the pinch of salt and pepper and mix well. Then taste and decide if you’d like to add more. The courgettes should just taste pleasantly seasoned.
Give the salt time to draw the liquid out of the courgettes and use this time to prepare some salads and make a tzatziki (simply mix grated cucumber through thick yoghurt, season with salt, pepper and a little crushed garlic, stir well and add a drizzle of extra virgin olive oil and fresh dill or mint).
Once the courgettes are wet, this only takes 10 minutes or less, you can start adding the flour. I like to use an even mix of cornflour and plain flour. The corn flour makes the fritters a little crispier.
Add one heaped tbsp of each flour to the wet courgettes then stir the mixture. Keep adding more of both flours and stirring until you have a thick fritter batter. If your courgette is very watery you’ll need more flour, if it’s drier you’ll need less.
Then stir through the herbs and crumbled feta and warm up a frying pan to medium with a generous slick of olive oil in the bottom of the pan.
Fry spoons of the mixture in small batches in the pan. Turn over after 3-5 minutes, once golden brown and crispy underneath and fry the other side for a further 3-5 minutes.
Keep the heat at medium, don’t be tempted to turn it to high or you may get fritters which are burned on the outside and raw and doughy in the middle.
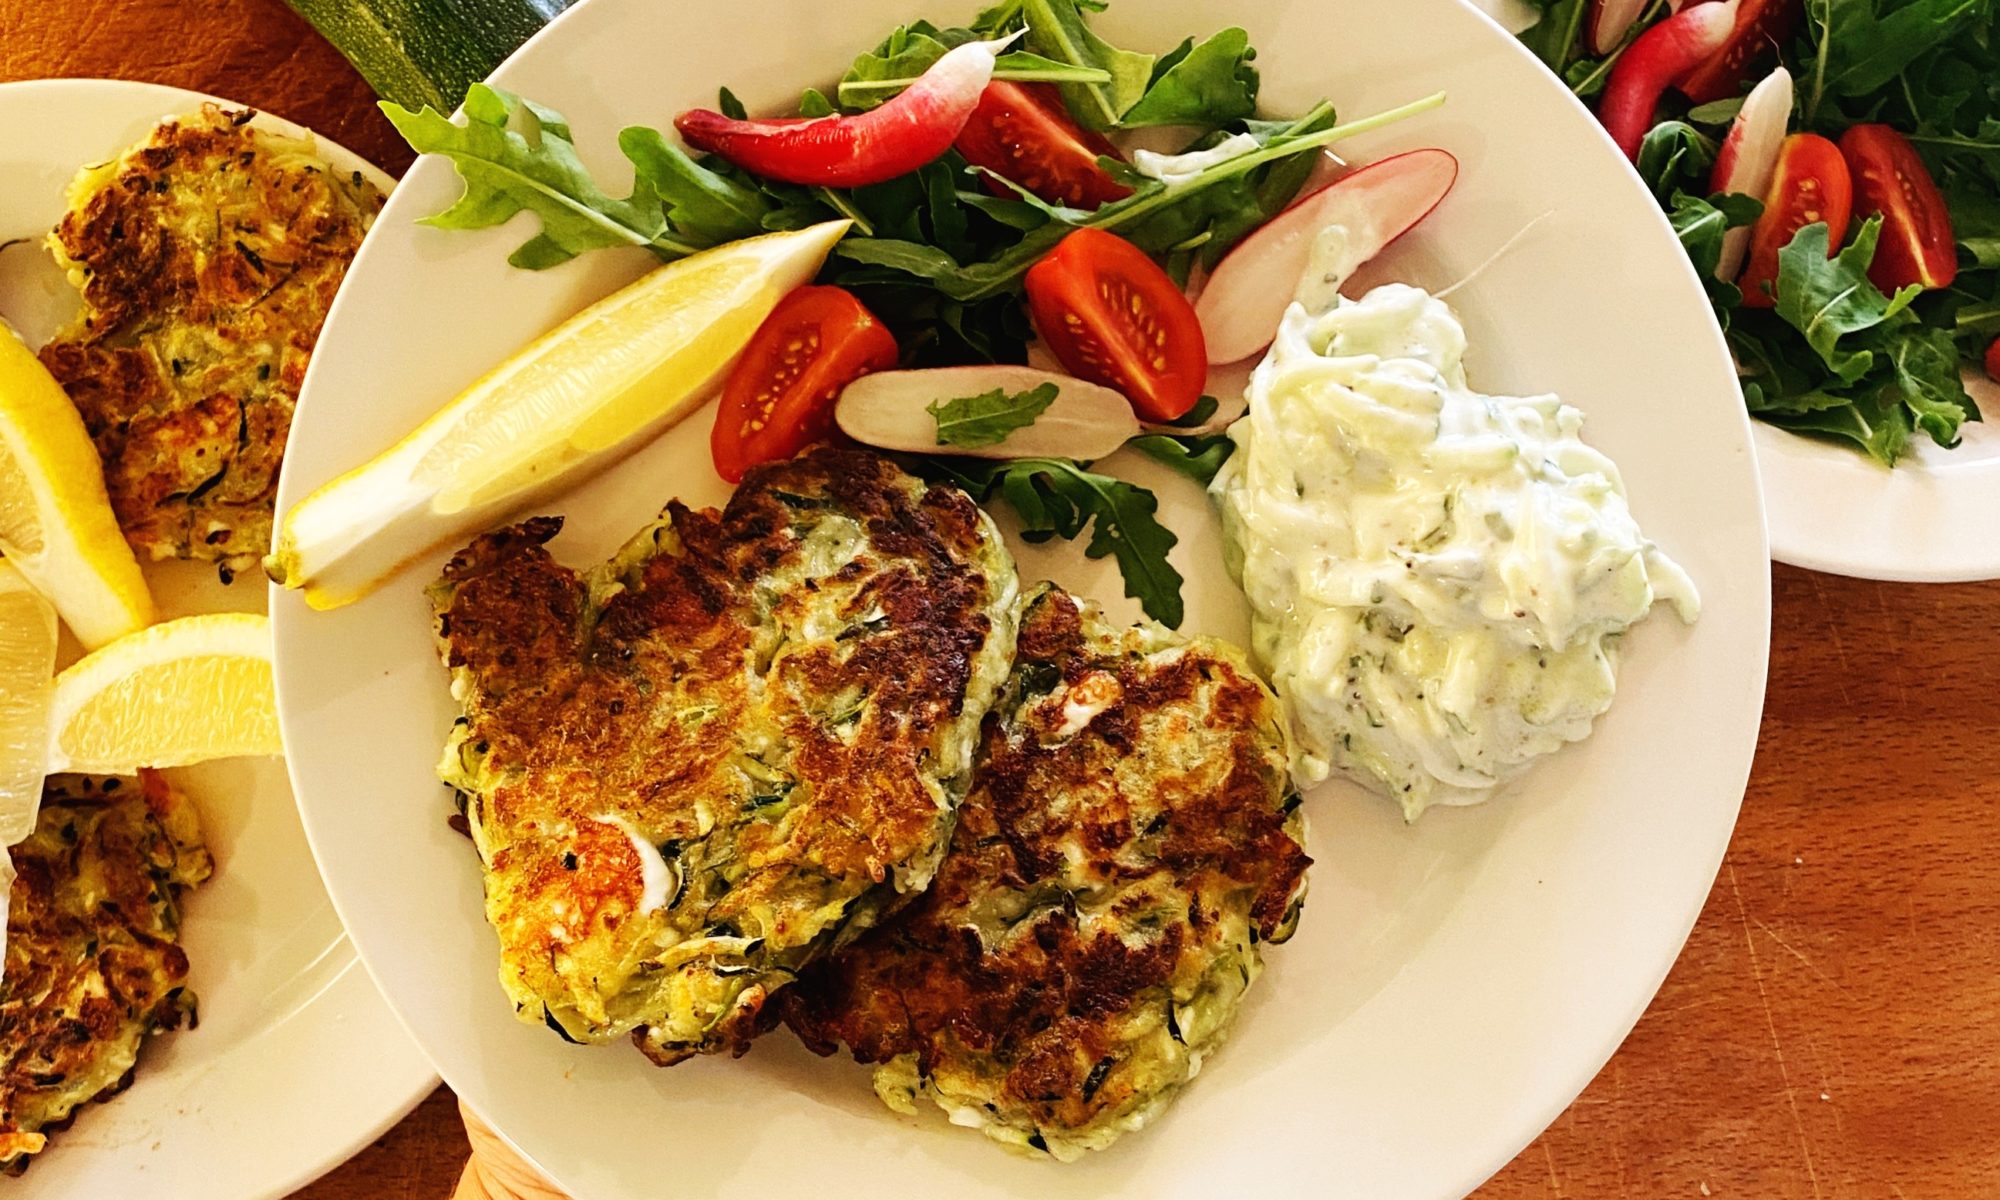
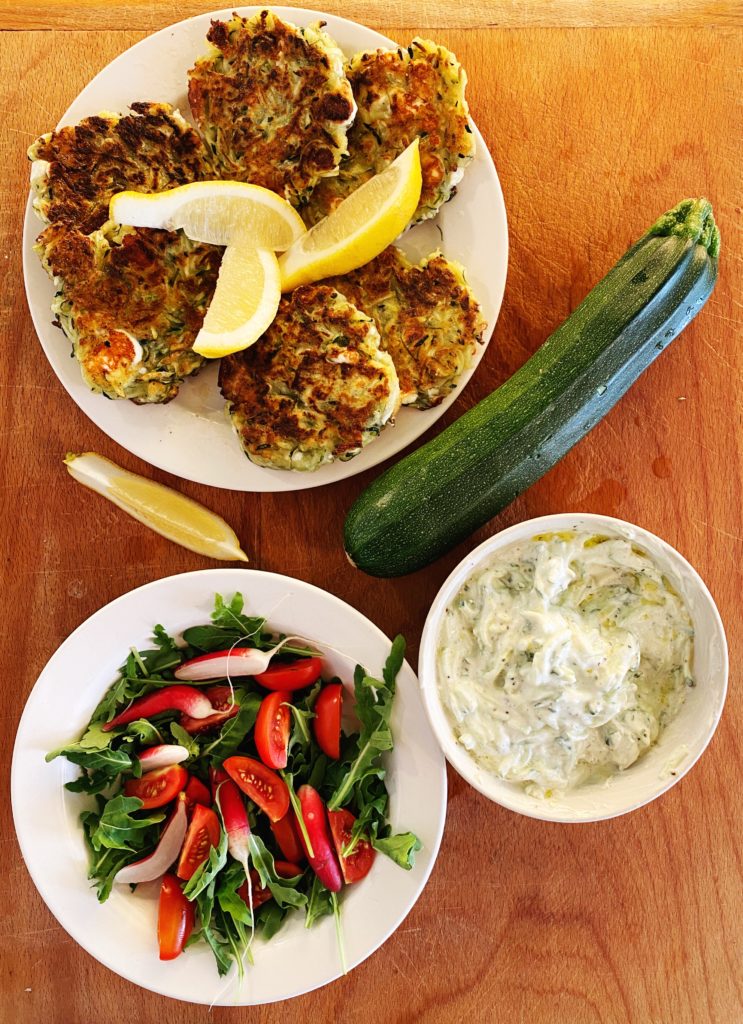
Serve with salads and tzatziki for a lovely lunch. The fritters are delicious eaten hot with a squeeze of lemon. Or pop the fritters into a burger bun or sandwich as a summery veggie burger or sandwich filler alternative.
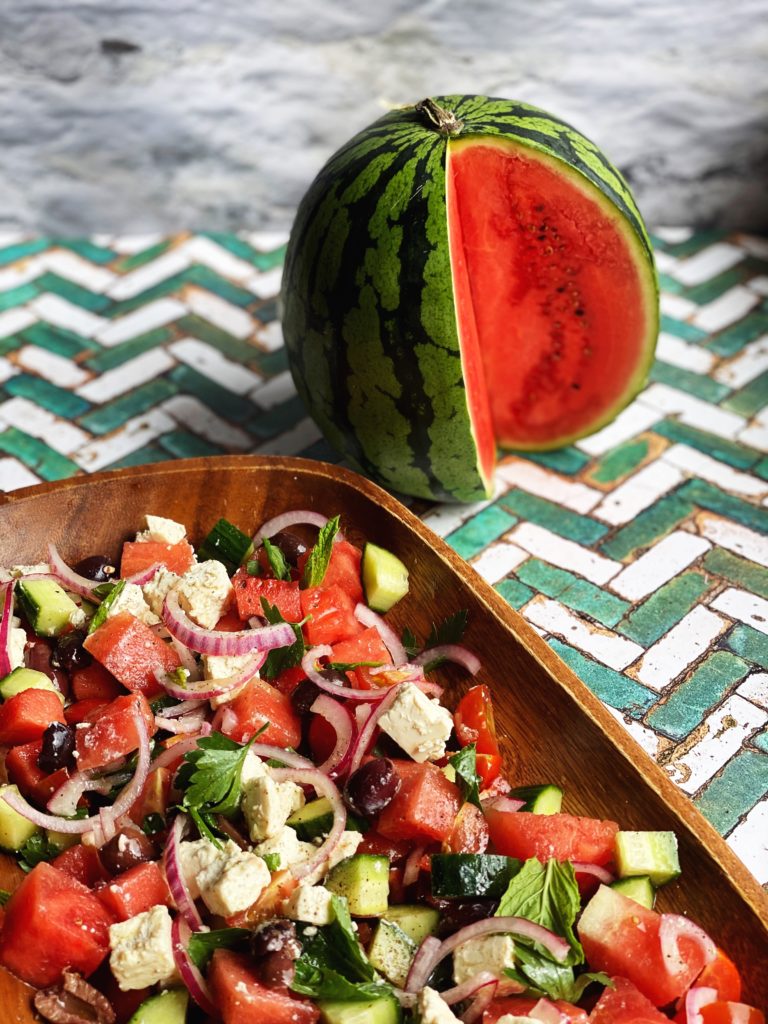
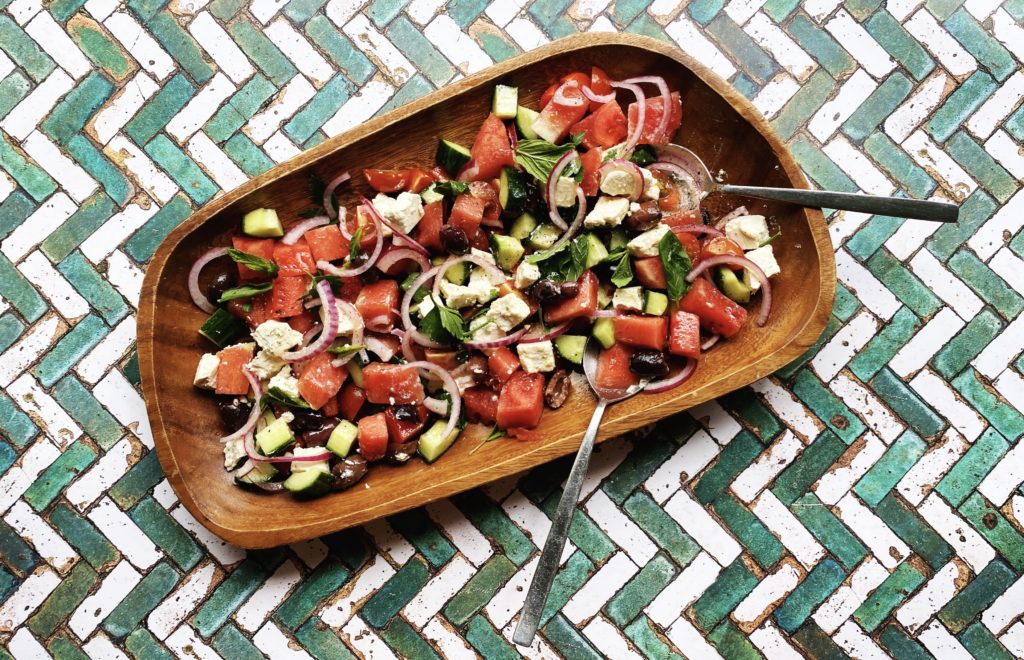
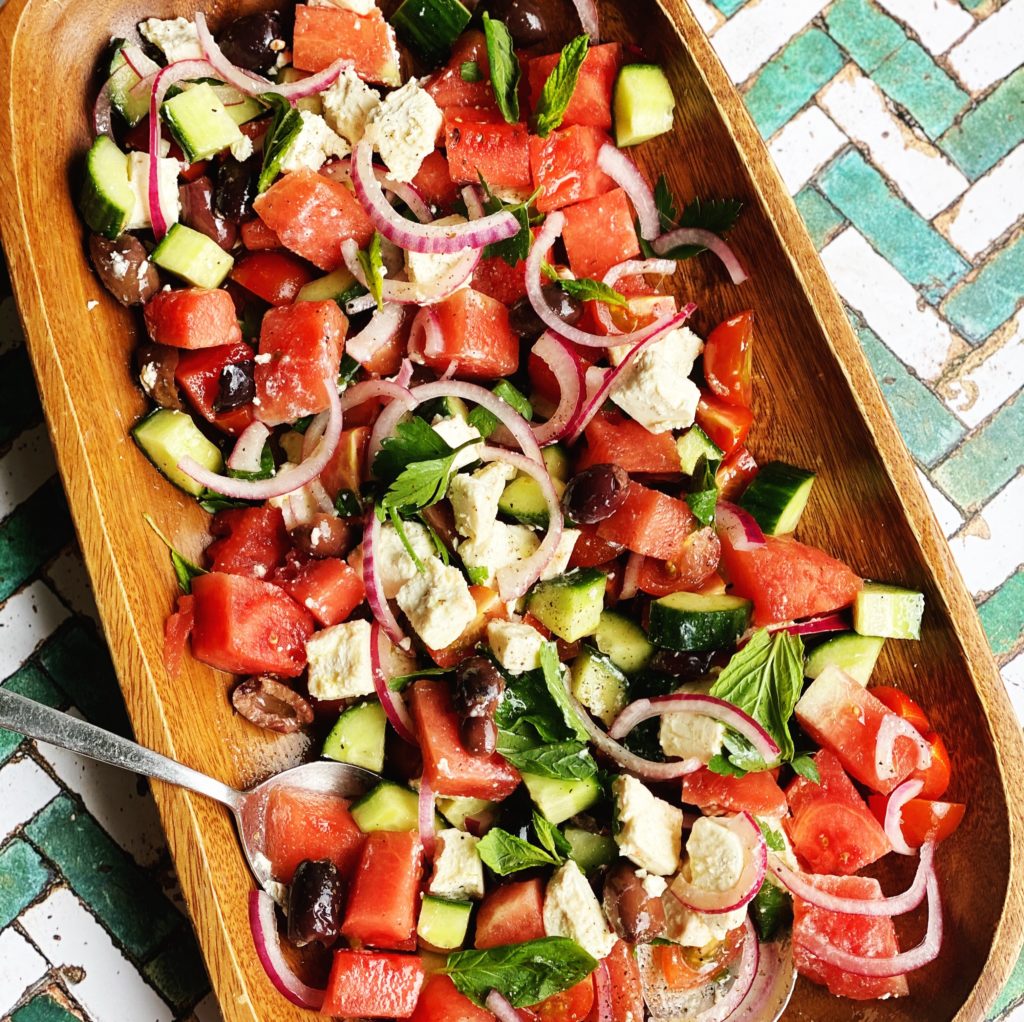
The watermelons on our list right now are super-sweet, organic of course, and the perfect size! Add one to your next order and try my Greek-style watermelon salad, it’s the most refreshing thing you’ll eat this year! Perfect as is with a slice of bread to mop up the juices, or as part of a BBQ.
You’ll need black olives, red onion, feta (or make my plant-based feta using the recipe from my book below), cucumber, tomatoes, extra virgin olive oil, vinegar/lemon juice and herbs. Find all the certified organic ingredients to your next order here. We deliver to every address in Ireland.
Liz x
Ingredients (serves 4+)
1 red onion
2 or 3 tbsp vinegar or lemon juice
4+ tbsp extra virgin olive oil
1 tsp dried oregano (optional)
black pepper to taste
1/2 a cucumber
1 punnet of cherry tomatoes
1/4 – 1/2 of a watermelon
1 pack of feta
1/2 a jar of black olives (ideally kalamata olives)
fresh mint, parsley, basil as you like
watch the method here or read on below
Method
Peel, halve and finely slice the red onion and break the thin strips up into a bowl. Add the vinegar or lemon juice and allow the onions to steep and blush crimson pink for 20 minutes or so. The longer you leave them, the more pickled and bright pink they will go.
Add the olive oil, optional oregano and black pepper and stir well. Alternatively you can wait to add the olive oil and pepper at the end.
Cut the cucumber in half lengthways and scoop out the seeds (don’t throw them away, add them to a smoothie), cut into bites and scatter into a large salad bowl or platter.
Halve or quarter the plum tomatoes and add them to the bowl.
Cut the watermelon into bite sized chunks, removing any seeds as you go, and get it into the bowl too, along with any juices on the board.
Cube up the feta and tear the olives in half and add them to the bowl.
Add the lightly pickled onions and all the juices. If you have not added olive oil yet, add a generous drizzle now.
Gently mix the salad without bashing up the ingredients too much.
Taste and if you like, add some salt (the feta and olives usually bring enough salt to the party).
Just before serving, tear over plenty of fresh herbs – basil, mint, parsley… I usually add an extra drizzle of delicious, peppery extra virgin olive oil too. Enjoy!
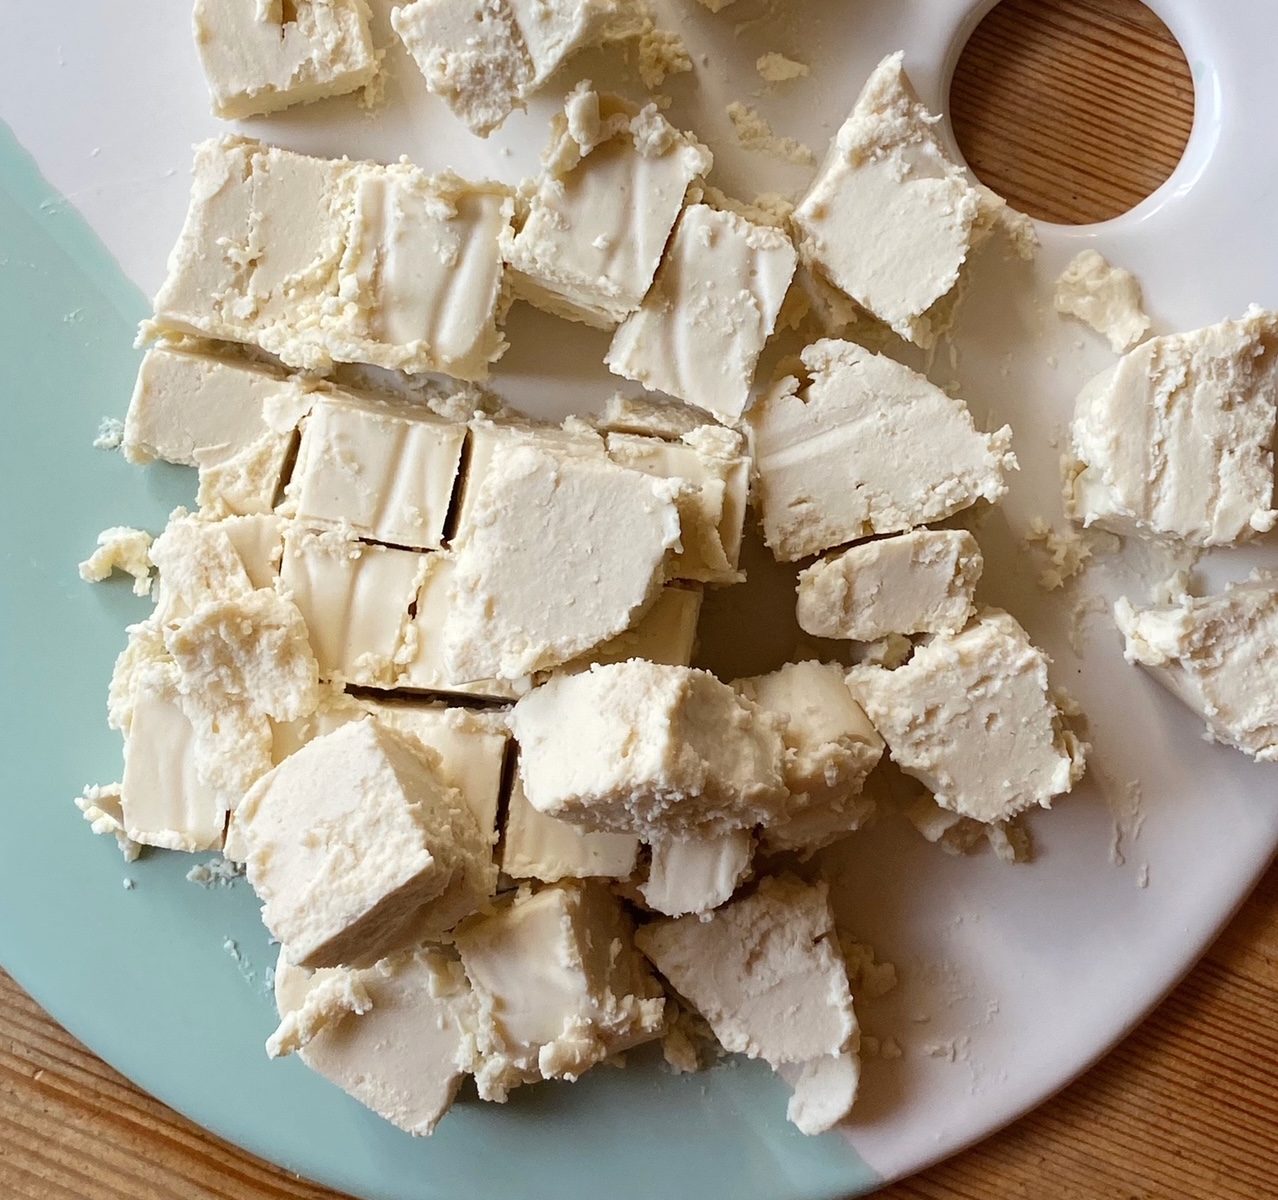
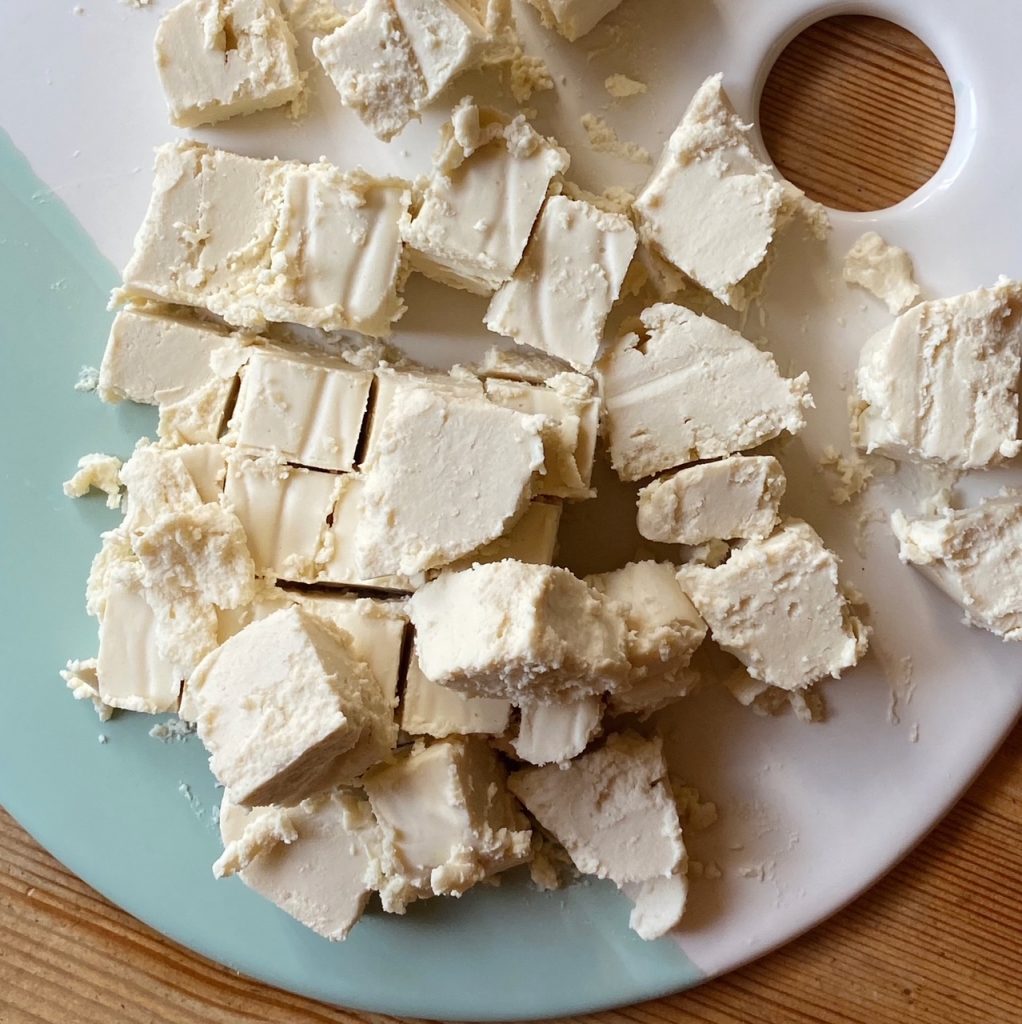
Tofeta
And here’s the tofeta recipe. It’s so easy to make. Just drain 2 packs of this extra firm tofu really well – really squeeze out as much water as you can – blend with all the ingredients and allow to set in the fridge overnight.
Butternut squashes are the most common squash that we deliver on repeat at Green Earth Organics and it’s no wonder. Organic vegetables just taste better! If you’ve ever been disappointed by a bland, watery supermarket squash, we urge you to try one of ours. These vibrant veggies are sweet and nutty and their fabulous flavour is more than matched by their incredible nutritional profile. Butternut squash is a great source of fibre, vitamins and minerals including A, B, C, E, calcium, magnesium and zinc.
Here are just 4 ways I cook a butternut squash regularly. Let us know your favourite butternut recipes in the comments or over on our friendly facebook group. We love to see what you’ve been making with our vegetables.
Head to our shop here to sign up for a veg box subscription or order from our wide selection of organic fruit, veg and groceries.
Liz x
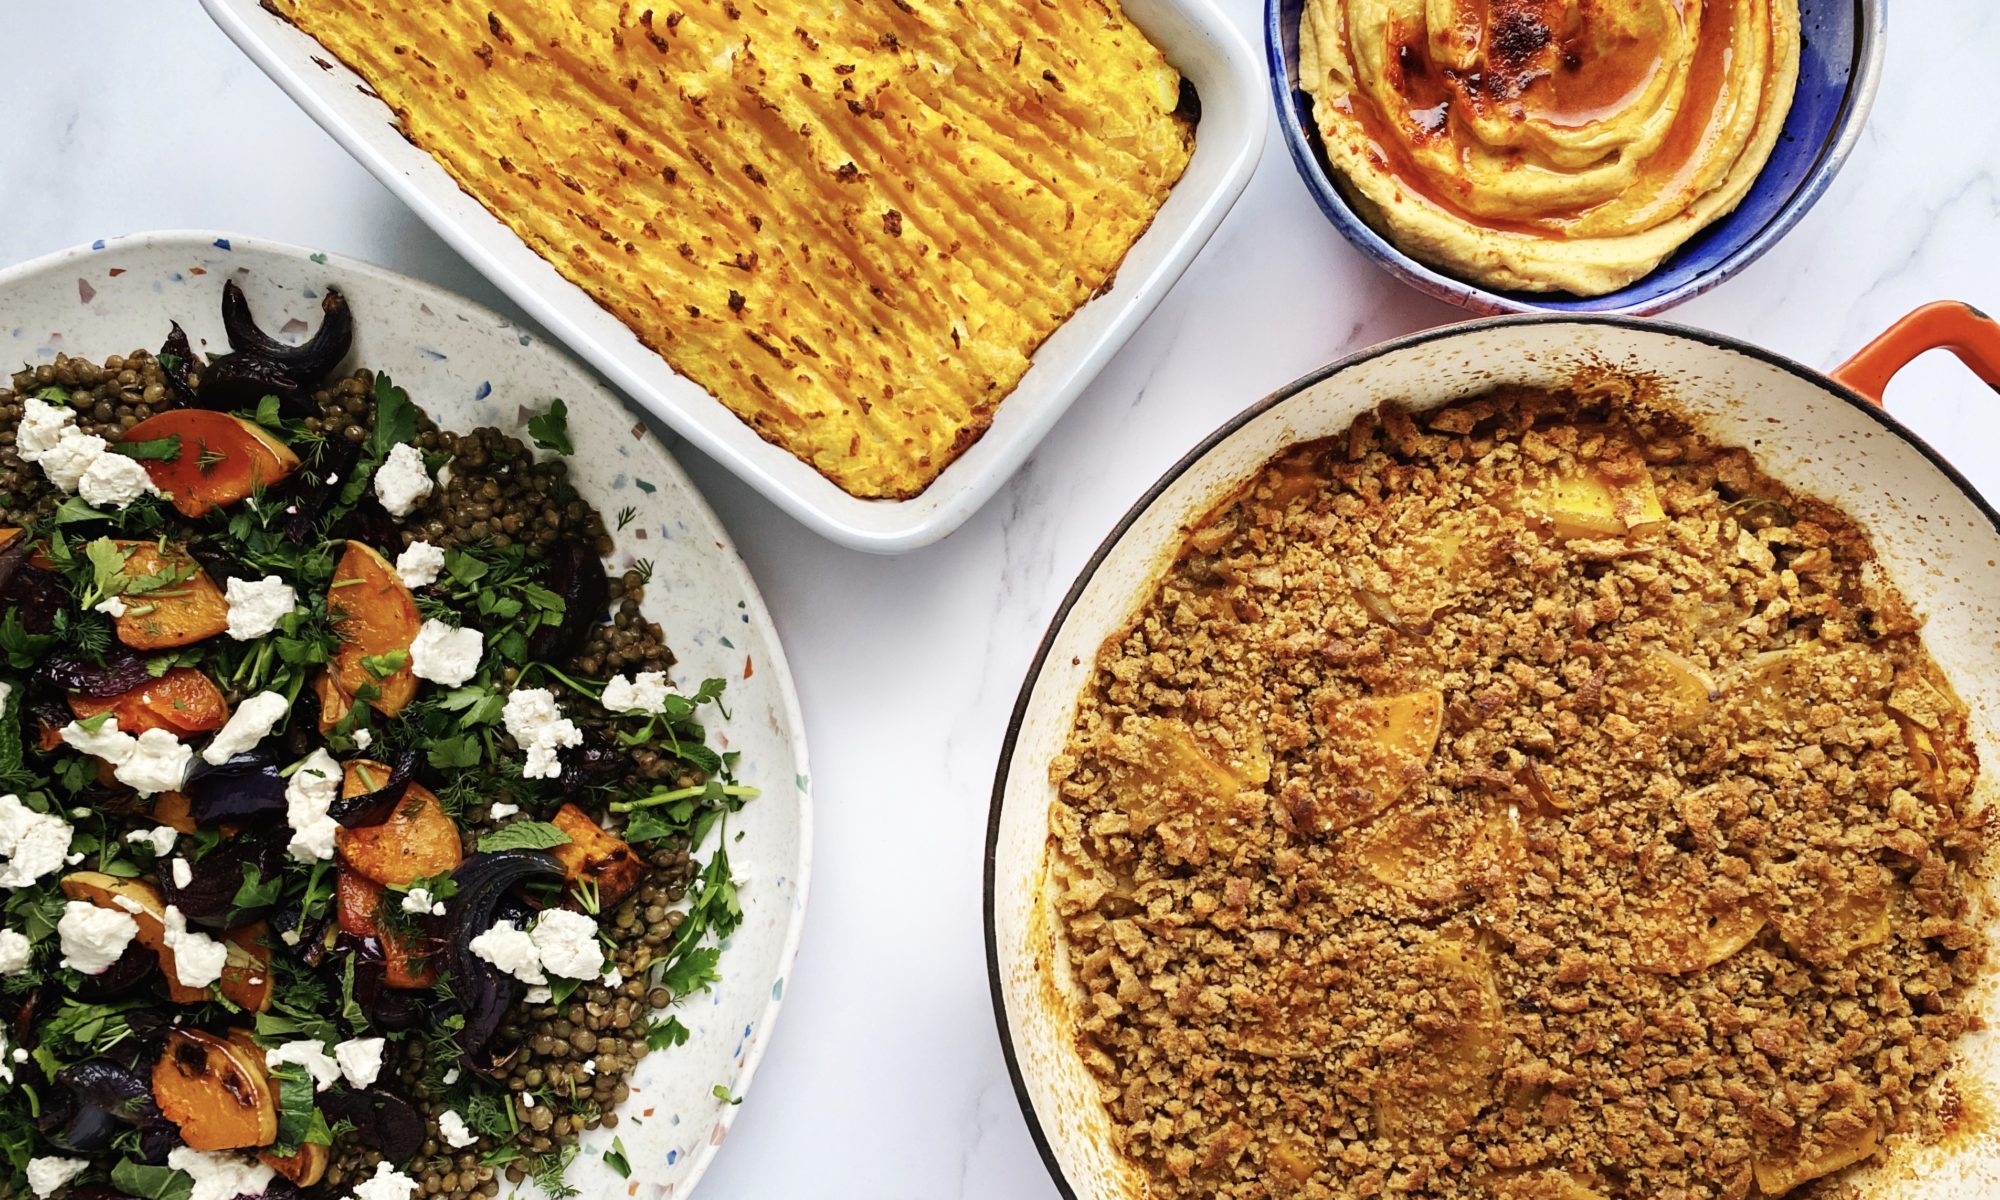
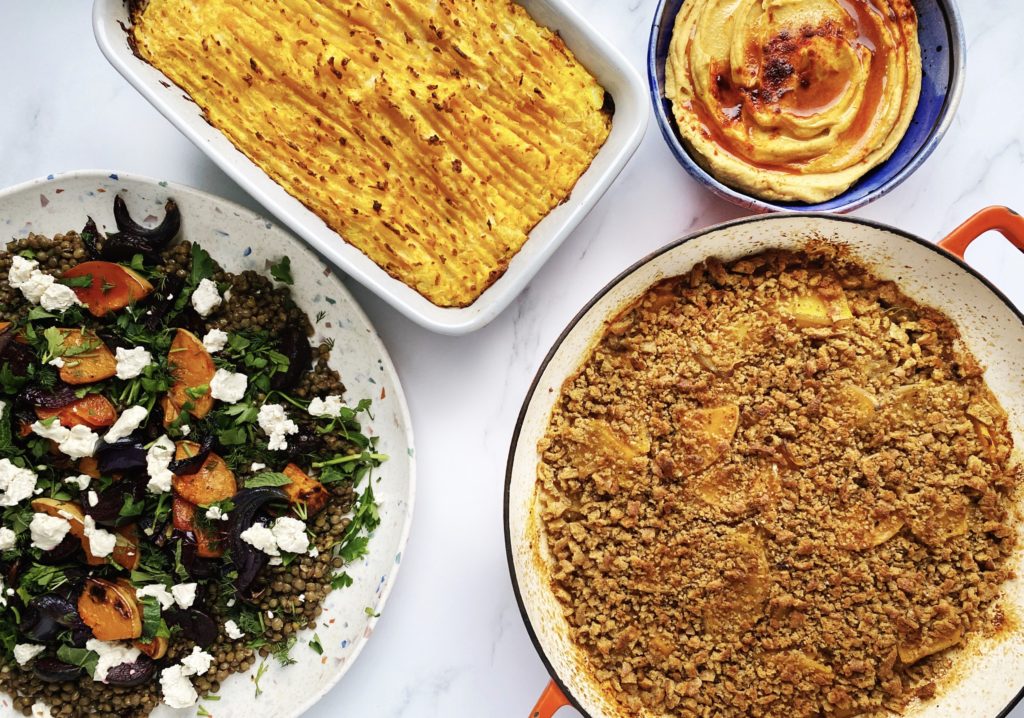
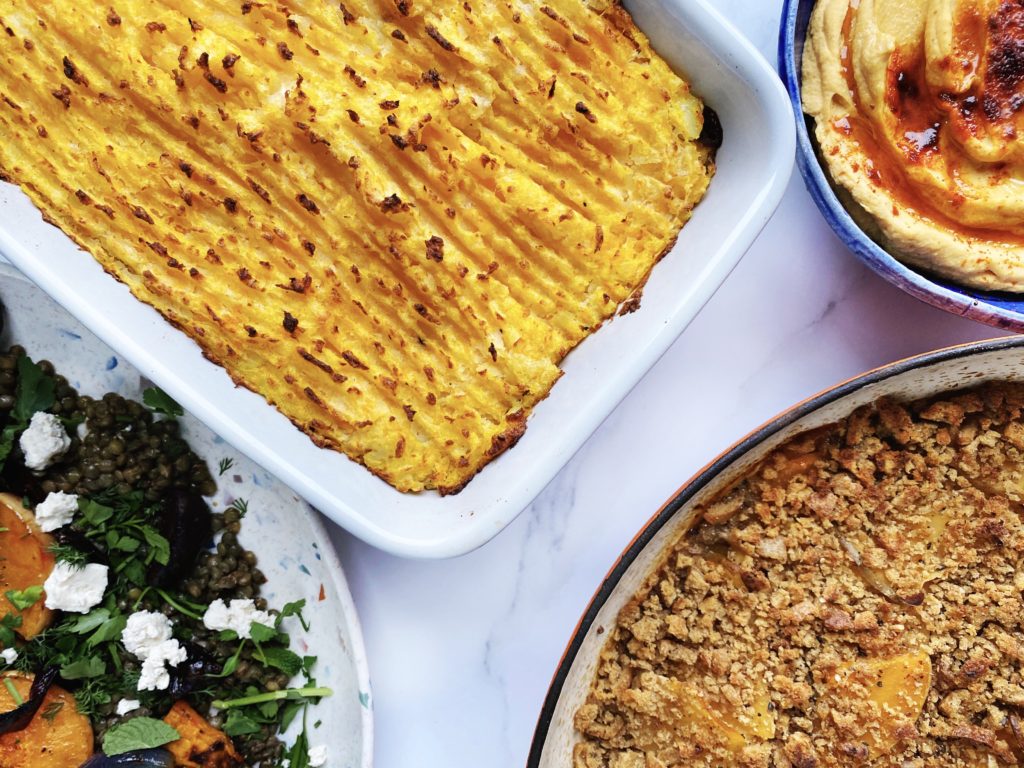
Lentil Pie with Squash Mash
Ingredients (serves 4)
1 onion, diced
3 cloves of garlic, crushed
10 diced mushrooms or two grated carrots or beetroots (use any base veg that is in season or a combination of veg that you like, diced or grated)
2 sticks of celery, diced
2 tbsp olive oil
1 vegetable stock cube or a big pinch of dried, crumbled mushrooms
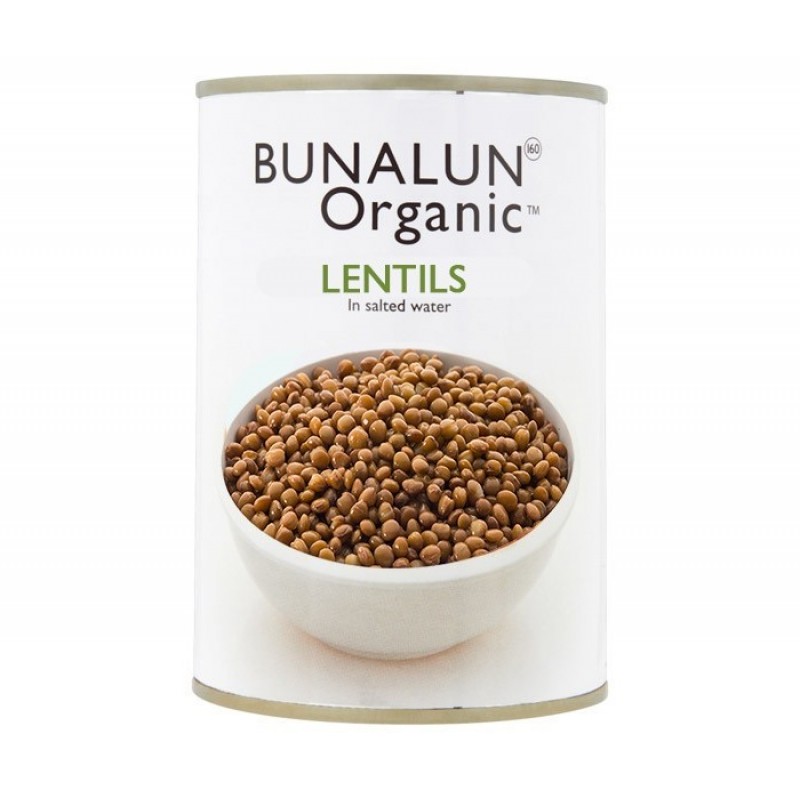
1 mug of green/brown lentils (or two tins of cooked lentils, drained)
1/4 to 1/2 a butternut squash (or about 400g if you want to weigh it), peeled
a similar amount of potato as the squash, around 400g
salt, pepper and olive oil or butter for the mash – to taste
Method
Sauté the onion, garlic in a little olive oil over a medium-high heat until starting to soften and take on some colour.
Add the diced mushrooms/carrot/beetroot and celery and a big pinch of salt and sauté for a bout 5-10 minutes until they have cooked down a little.
If you are using raw lentils, add them now and the stock cub or dried, crumbled mushrooms and herbs if using. Cover with water and simmer and stir until the lentils are cooked through. Keep tasting and adding more liquid if needed.
If you are using pre-cooked lentils from a tin, add the stock/dried mushrooms/herbs and a mug of water and simmer the vegetables in that for 5 minutes first, then add the drained lentils to the pot and a touch more water if needed to make a nice (not too dry, not too wet) base for your pie.
Taste and adjust the seasoning if needed with salt and pepper. Pour the lentil pie mixture into a baking dish and preheat your oven to 200C.
Meanwhile peel, chop and boil the potato and squash together until soft. Drain and mash with salt, pepper and a little oil or butter. Taste for seasoning.
Top the lentil base with your sunny, butternut mash. Rough it up a little with a fork and drizzle with olive oil.
Bake for 20-30 minutes or until hot, bubbling and crisp and golden on top. Enjoy with seasonal greens.
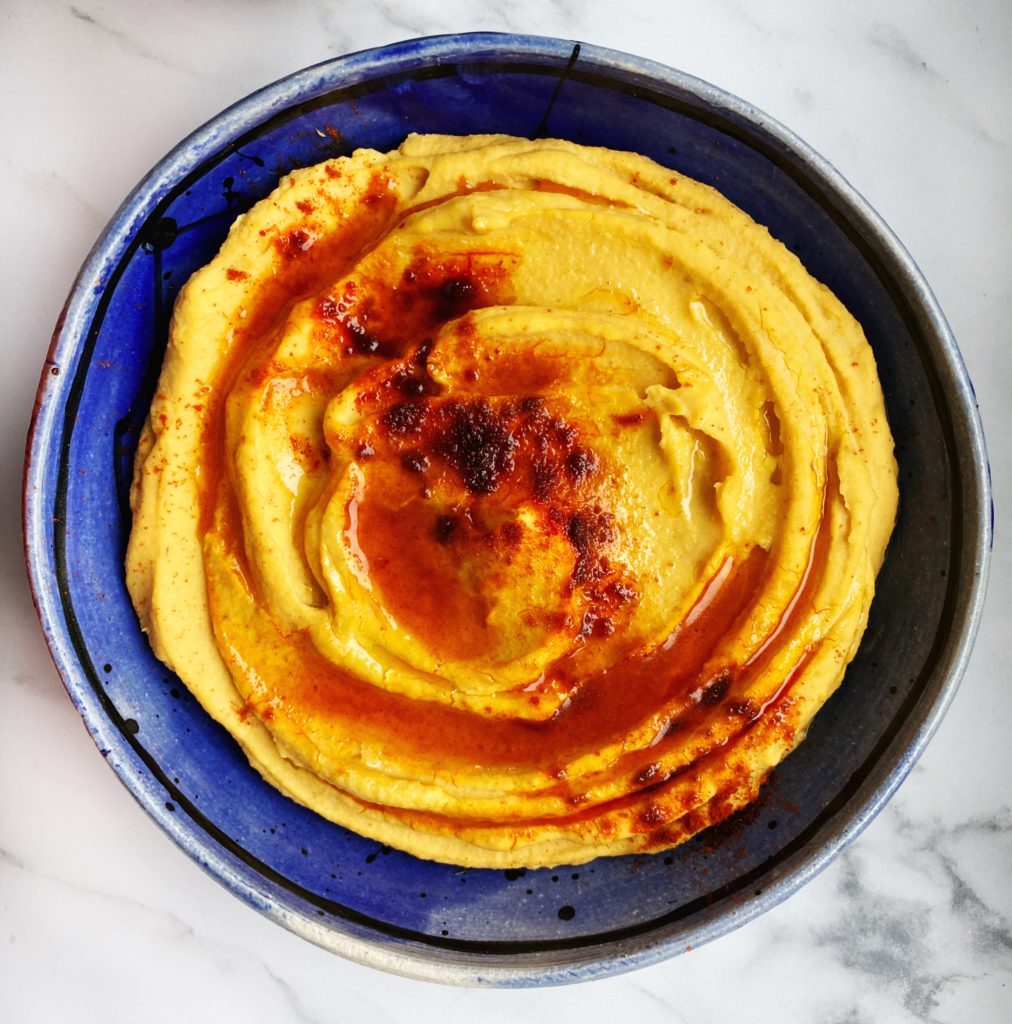
Butternut Squash Hummus
Ingredients (makes about 600g of hummus)
1 tin of chickpeas, drained over a jug to reserve the aquafaba
1 heaped tbsp tahini
1 clove of garlic, crushed
1/4 of a preserved lemon or the juice of 1 lemon
salt to taste
1/4 of a butternut squash (about 400g or so)
1 tsp cumin seeds
1 tsp smoked paprika and olive oil to drizzle
Method
Roast the butternut squash with a drizzle of olive oil, a tsp of cumin seeds and a pinch of salt until soft. This could take 20-3- minutes at 200C depending on the exact size of your squash, just keep an eye on it.
Place the drained chickpeas, preserved lemon, crushed garlic, tahini and cooked butternut into a food processor. If you are using lemon juice, start with the juice of half the lemon and see how you go.
Add a splash of aquafaba and a pinch of salt and blend into a smooth paste.
Taste and adjust the seasoning as you like with more lemon, salt, tahini, garlic as you prefer. If you like a lighter, fluffier hummus, add an extra splash of the aquafaba or some cold water and blend again.
Serve drizzled with extra virgin olive oil and a sprinkle of smoked paprika.
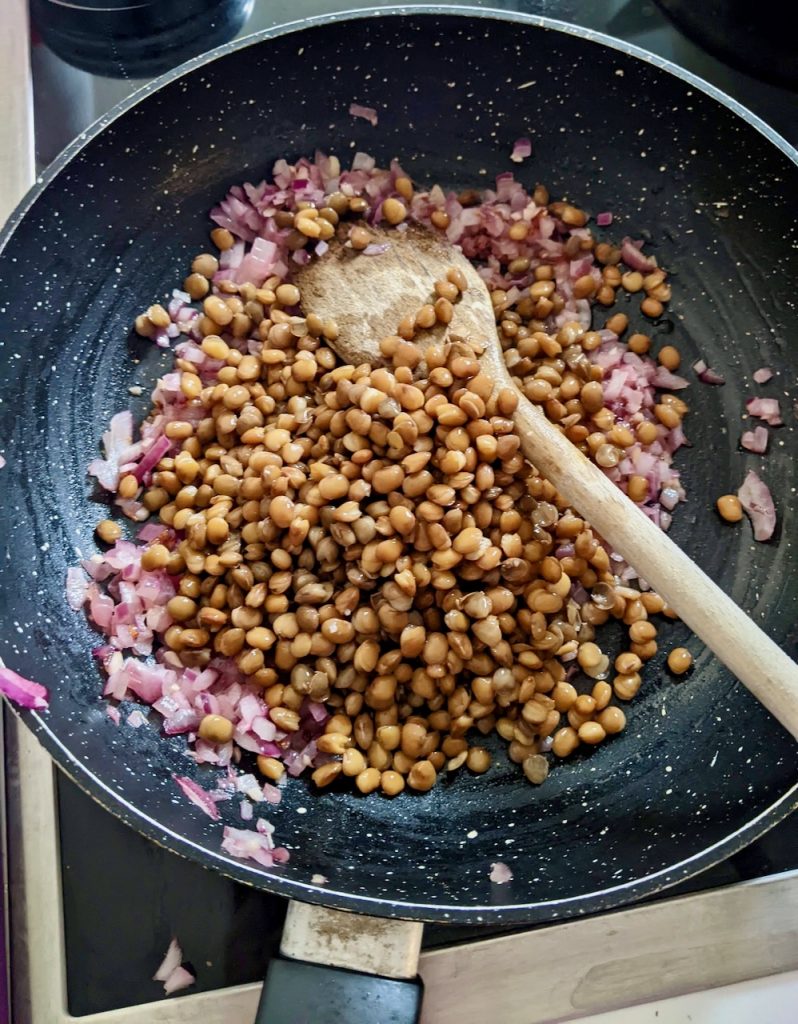
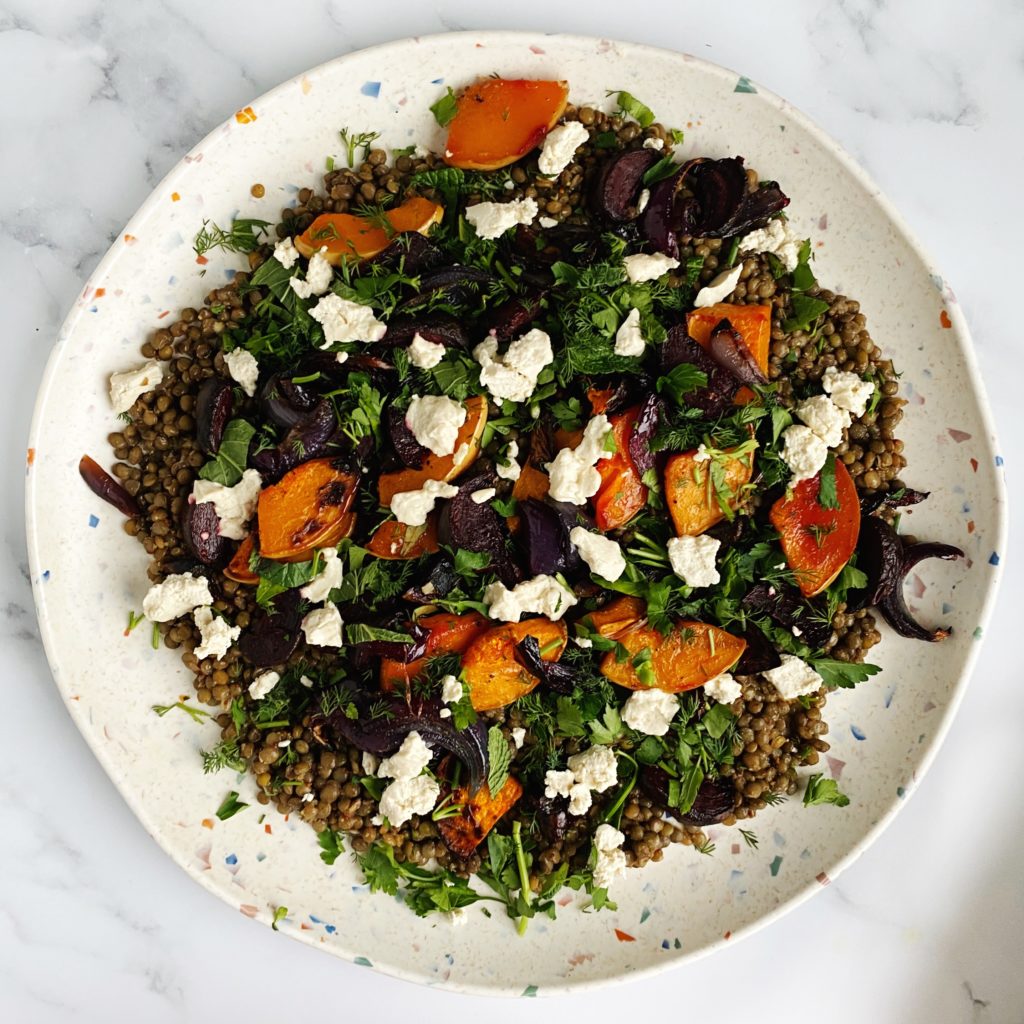
Butternut, Beetroot & Tofeta, Lentil Salad
Ingredients (serves 4-6)
1/4 of a butternut squash
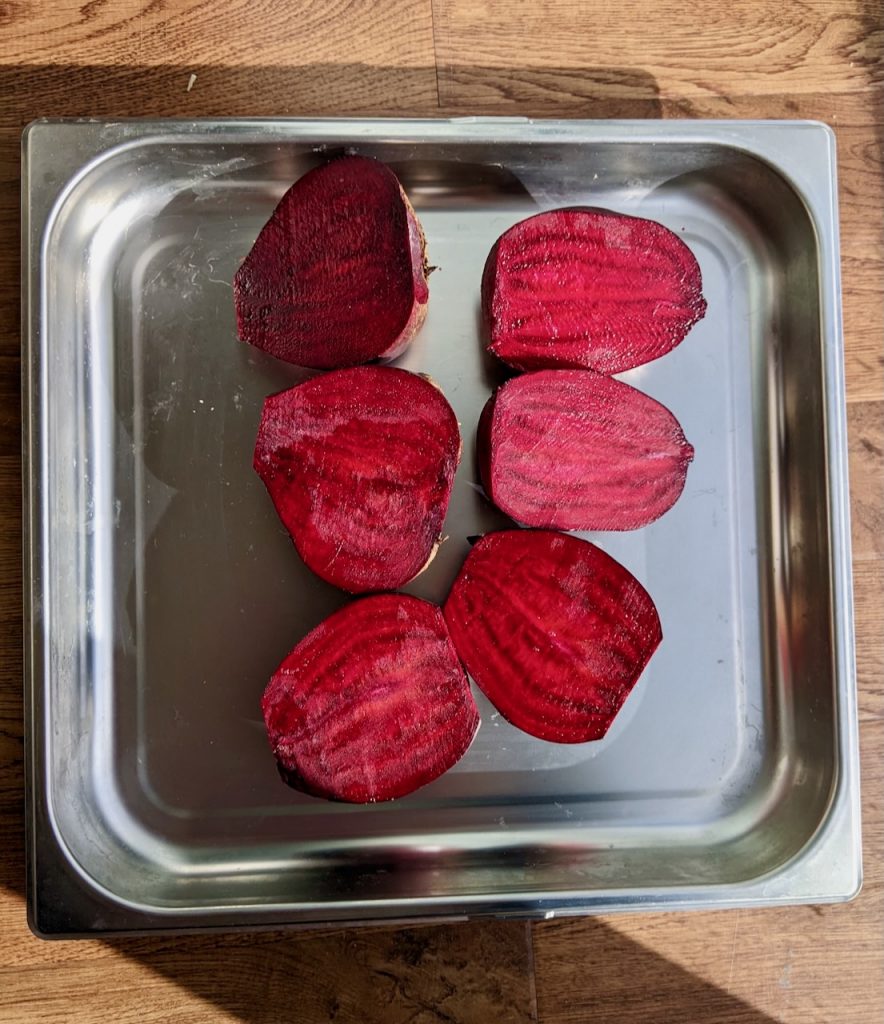
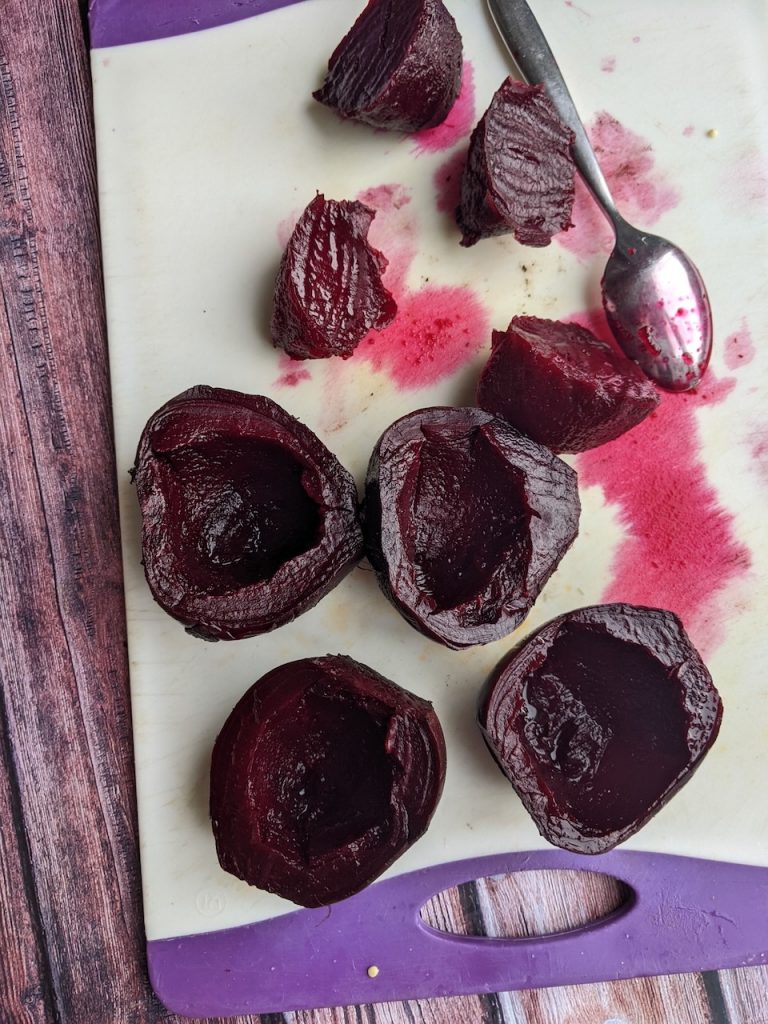
2 beetroots
1 red onion
olive oil, salt and pepper to taste to season the above
1 mug of lentils boiled in 2-3 mugs of vegetable stock or water (or 2 drained cans of pre-cooked lentils)
dressing – 1 crushed clove of garlic, 1 tbsp wholegrain mustard, 1 tsp maple syrup, 2 tbsp apple cider vinegar, 3 tbsp extra virgin olive oil, pinch of salt
3 handfuls of chopped fresh herbs (dill, parsley and mint?)
This dish is really special with the addition of my tofeta. You can find the easy recipe illustration in this bog post here or in my book which is available to add to your order here. Otherwise use whichever cheese you prefer or replace the feta with toasted nuts or seeds.
Pre-heat the oven to 200C and find a large baking dish.
Boil green lentils in stock or water until cooked through. Drain off any excess liquid and leave to cool while your prepare the vegetables, herbs and dressing.
Chop the squash, beetroots and red onion into slim wedges, season them with salt, pepper and olive oil, then roast them until they are soft and slightly charred.
Mix up the dressing ingredients and stir it through the cooked lentils.
Chop the fresh herbs then arrange the salad into a large salad bowl or platter.
Put the dressed lentils on the base, spoon over the roasted vegetables, scatter over the fresh herbs and crumble the tortes on top.
Enjoy warm or cold. This keeps well in the fridge for no more than three days. Keep the tofeta seperately and it will last longer.
Butternut & Swede Gratin
Ingredients (serves 4)
1/2 a butternut squash
1 small swede or half a large one
2 crush cloves of garlic
a small handful of wintery herbs like thyme/rosemary/sage
salt and pepper
olive oil
oat milk
4 or 5 handfuls of breadcrumbs (add chopped herbs and nutritional yeast to your breadcrumbs to make them more flavoursome – or replace the bread crumbs with crushed nuts/seeds)
Method
Pre-heat the oven to 200C.
Thinly slice the butternut and swede and mix them together in a large, lidded baking dish with the crushed garlic, a generous drizzle of olive oil and salt and pepper to your taste.
Pour in enough oat milk (or use cream for a richer gratin) to cover about a cm of the base.
Put the lid on the dish and bake until the vegetables are soft all the way through. This should take about 30-40 minutes.
Remove the lid and add a little more oat milk. Scatter over a thin layer of breadcrumbs, drizzle with olive oil and return to the oven for a further 10-15 minutes, lid off, to brown on top.
Serve with seasonal greens or as a side to a roast.
The ‘dip, dress, sprinkle’ chapter of my book is probably the most useful chapter. It’s one I refer to the most and it’s those little extras, the condiments, crunchy toppings and delicious dressings that really make meals go from ‘good’ to ‘great’. At the end of the chapter is this tofeta recipe which is really simple but incredible! It’s crazy how like feta it is!
Tofu is a really nutrient dense, brilliant food, wrongly vilified as bad for humans and the environment, it’s nothing new and has been eaten by healthy cultures for around 2000 years. Most soy grown for human consumption is not grown in deforested areas (unlike the vast majority of soy which is grown for animal feed). If you buy organic tofu like the one we sell, you can rest easy knowing it is not genetically modified and is grown in a sustainable way.
Use this tofeta as part of your cheeseboard at Christmas, top a homemade pizza with it (roast beetroot or squash, red onion and tofeta is a brilliant winter pizza topping, especially with wilted spinach or kale in the tomato sauce), layer it in your lasagna, top a moussaka with it, or make my festive cranberry and tofeta cigars. They make a great starter – or make them a little smaller and they are perfect for nibbles on a canape tray with drinks.
Open out a pack of filo pastry onto a clean chopping board or work surface. Most shop bought filo is incidentally plant based but check the label.
Cut the pastry in half (or quarters if you would like smaller cigars) with a large, sharp knife.
Brush one sheet of pastry with olive oil, then spread a tsp (or half tsp if making smaller cigars) of cranberry sauce onto the pastry in a neat line about the size of your little finger, centred but about 5cm away from the left edge.
Place a little finger sized slice of tofeta onto the line of cranberry sauce then fold the 5cm left edge over it.
Fold the top and bottom sides over each other then brush them with more olive oil and roll up the pastry, left to right, into a cigar shape.
Brush the outside of the cigar with a little more olive oil and place it, seam side down, on a lined baking sheet. (I use this compostable baking parchment or a re-usable one).
Repeat until all the pastry is used up. Then sprinkle with some optional sesame seeds and bake at 180C for around 15-20 minutes or until they are golden and crispy. They are lovely served warm or cold.