Glazed Tofu

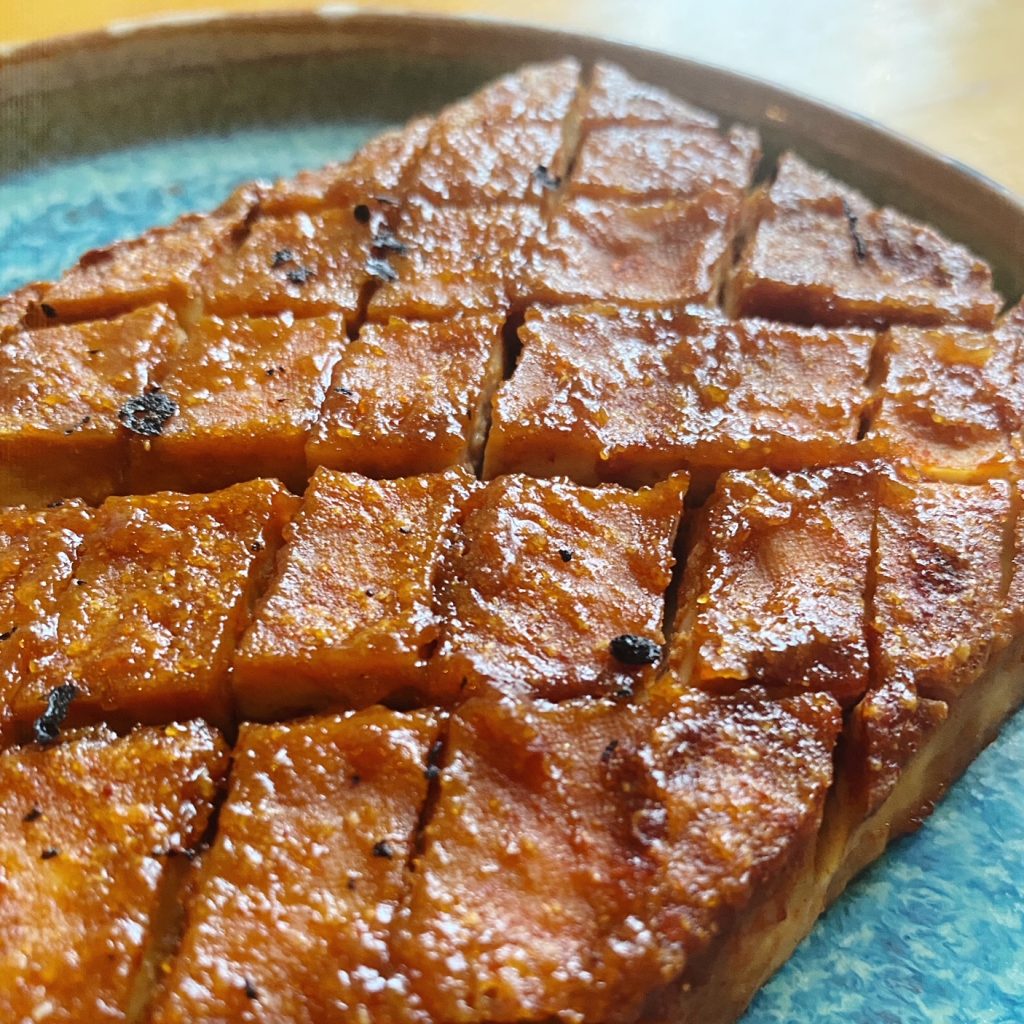
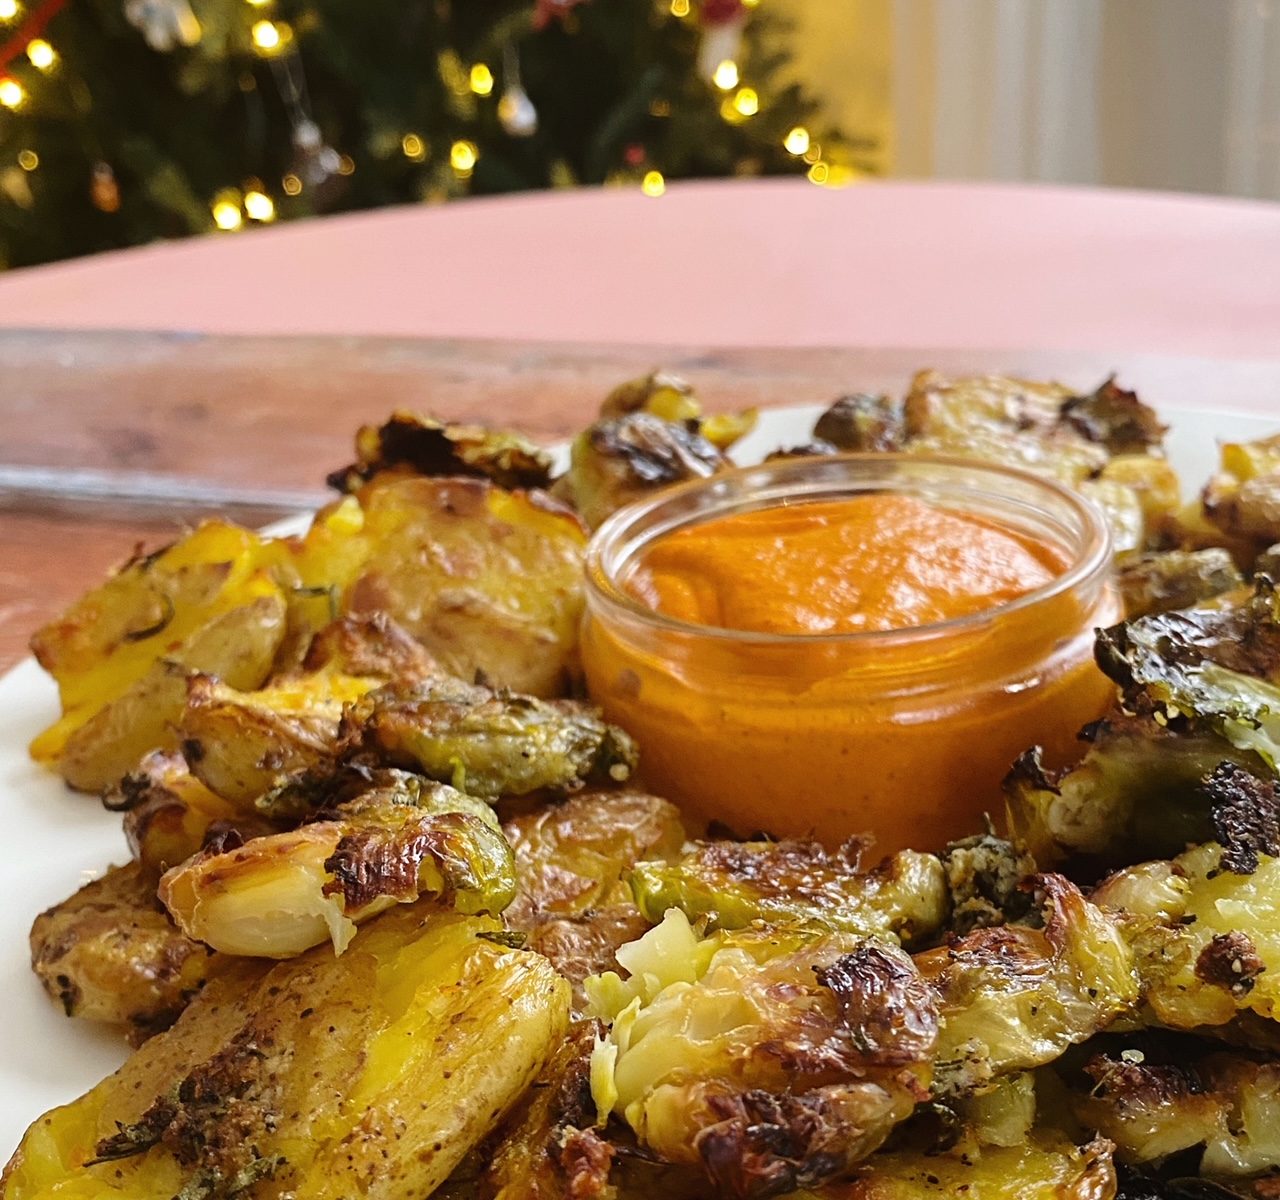
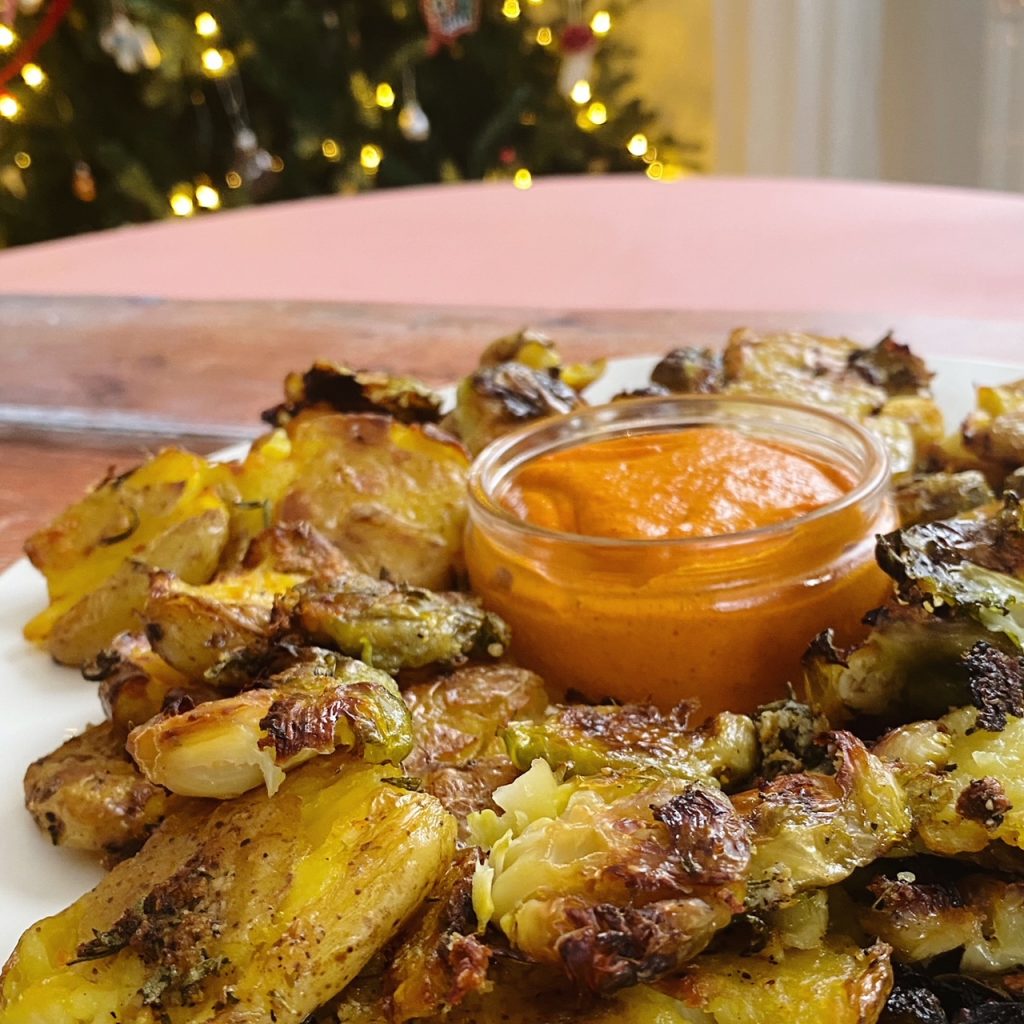
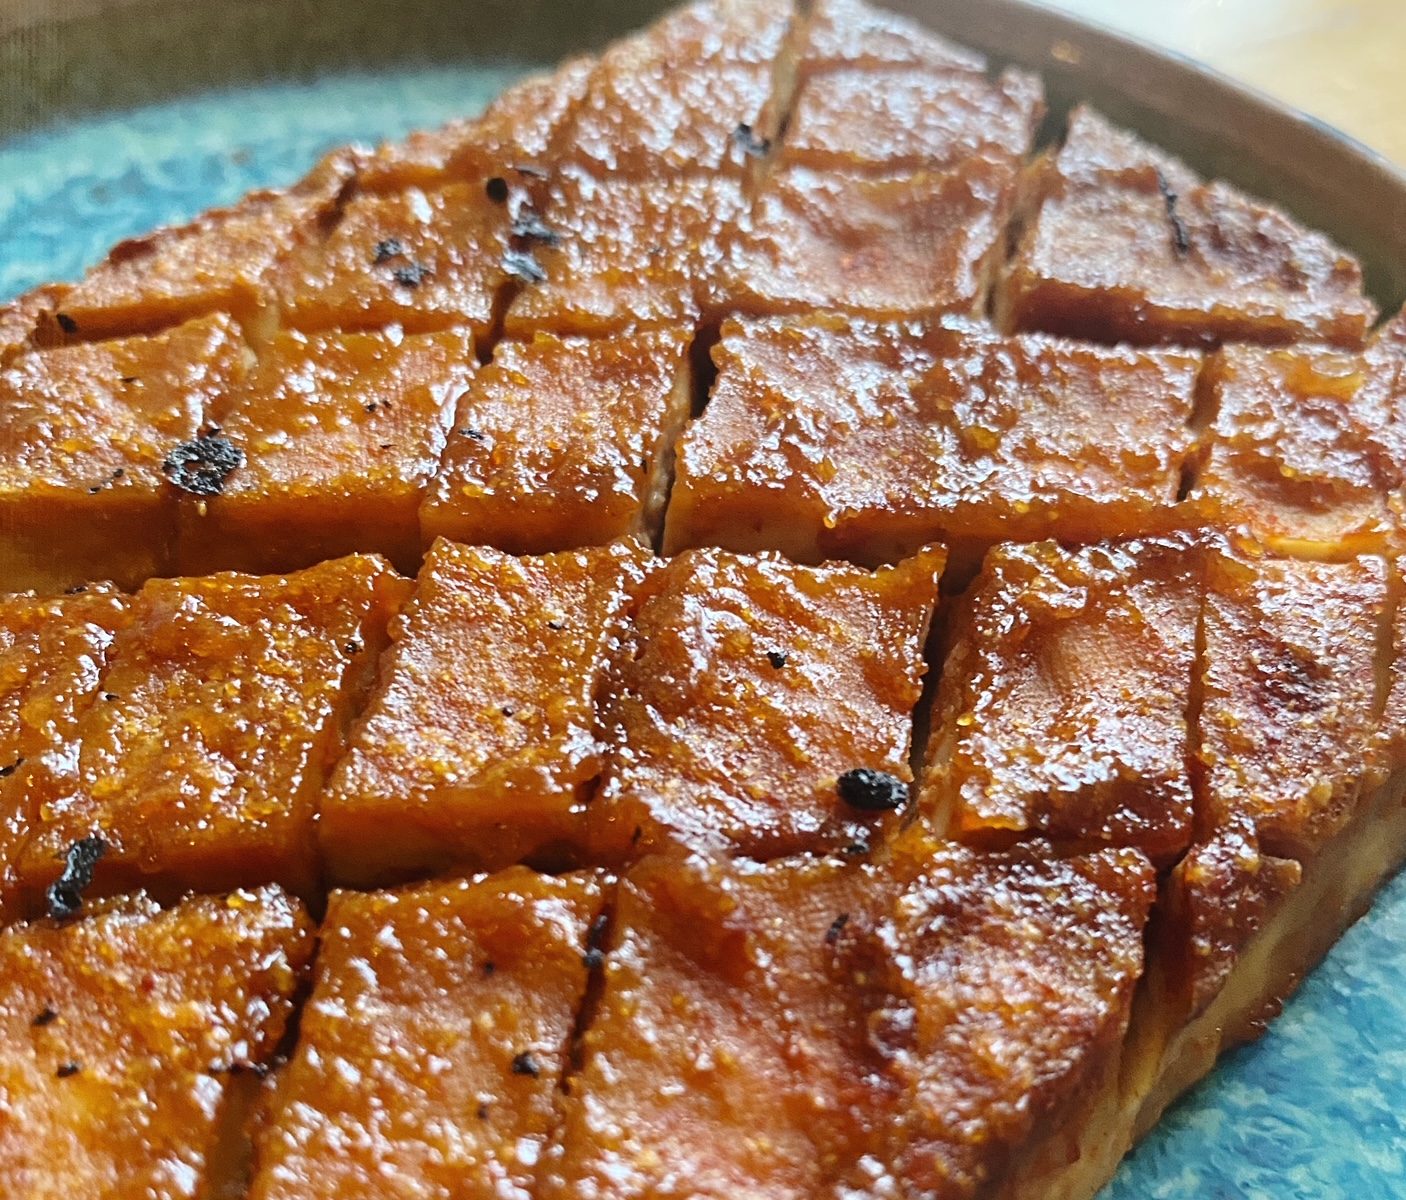
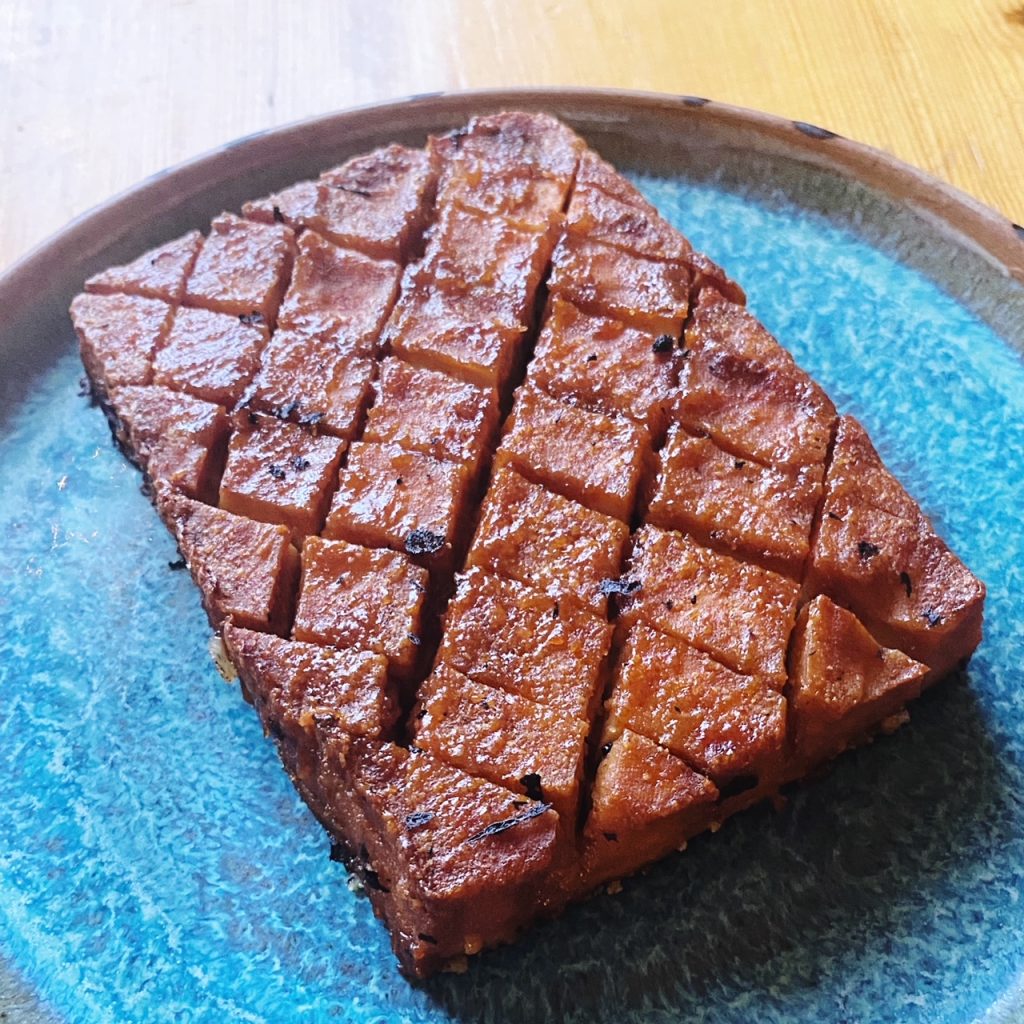
Looking for a quick and simple, yet utterly delicious, centerpiece for your veggie/vegan guests this Christmas? This glazed tofu is the answer. It is gorgeously caramelised on the outside and beautifully tender inside. Firm tofu is a wholesome, healthy and satisfying protein, but definitely a blank canvas that needs a good marinade to shine. This sweet glaze is spiked with mustard and garlic and is honestly, so moreish. Enjoy!

Liz x

Ingredients (serves 2-4 depending on sides and appetite)

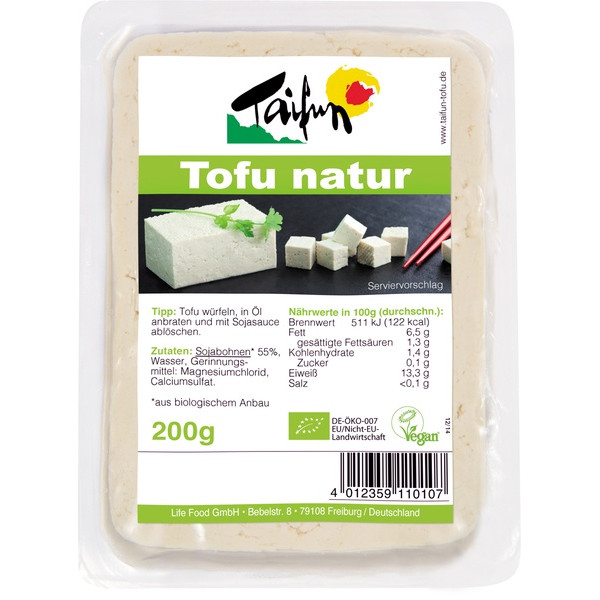
  • 400g extra firm tofu (2 of our blocks)
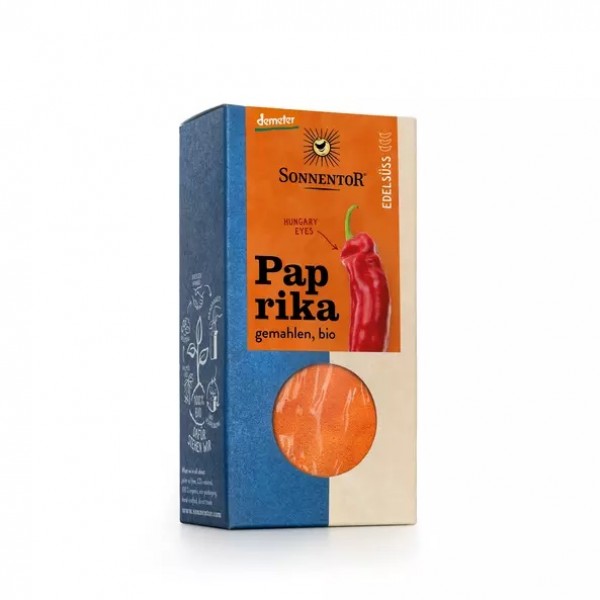
  • 4 tsp smoked paprika
  • 4 tbsp soy sauce
  • 2 tbsp brown sugar
  • 1 heaped tsp garlic granules
  • 1 heaped tsp dijon mustard
  • a splash of just-boiled water
  • salt to taste

Method

  1. Place your blocks of tofu into a small, lined roasting dish. Sprinkle the first sides with 2 tsp of smoked paprika and 2 tbsp of soy sauce. Turn the blocks over.
  2. Score the tops of the blocks of tofu in shallow, diagonal cuts. Then sprinkle these top sides with the remaining smoked paprika and soy sauce. Pop the dish in a hot oven to roast for 30 minutes.
  3. Meanwhile prepare the glaze by whisking together the sugar, mustard, garlic granules, salt and hot water into a smooth sauce.
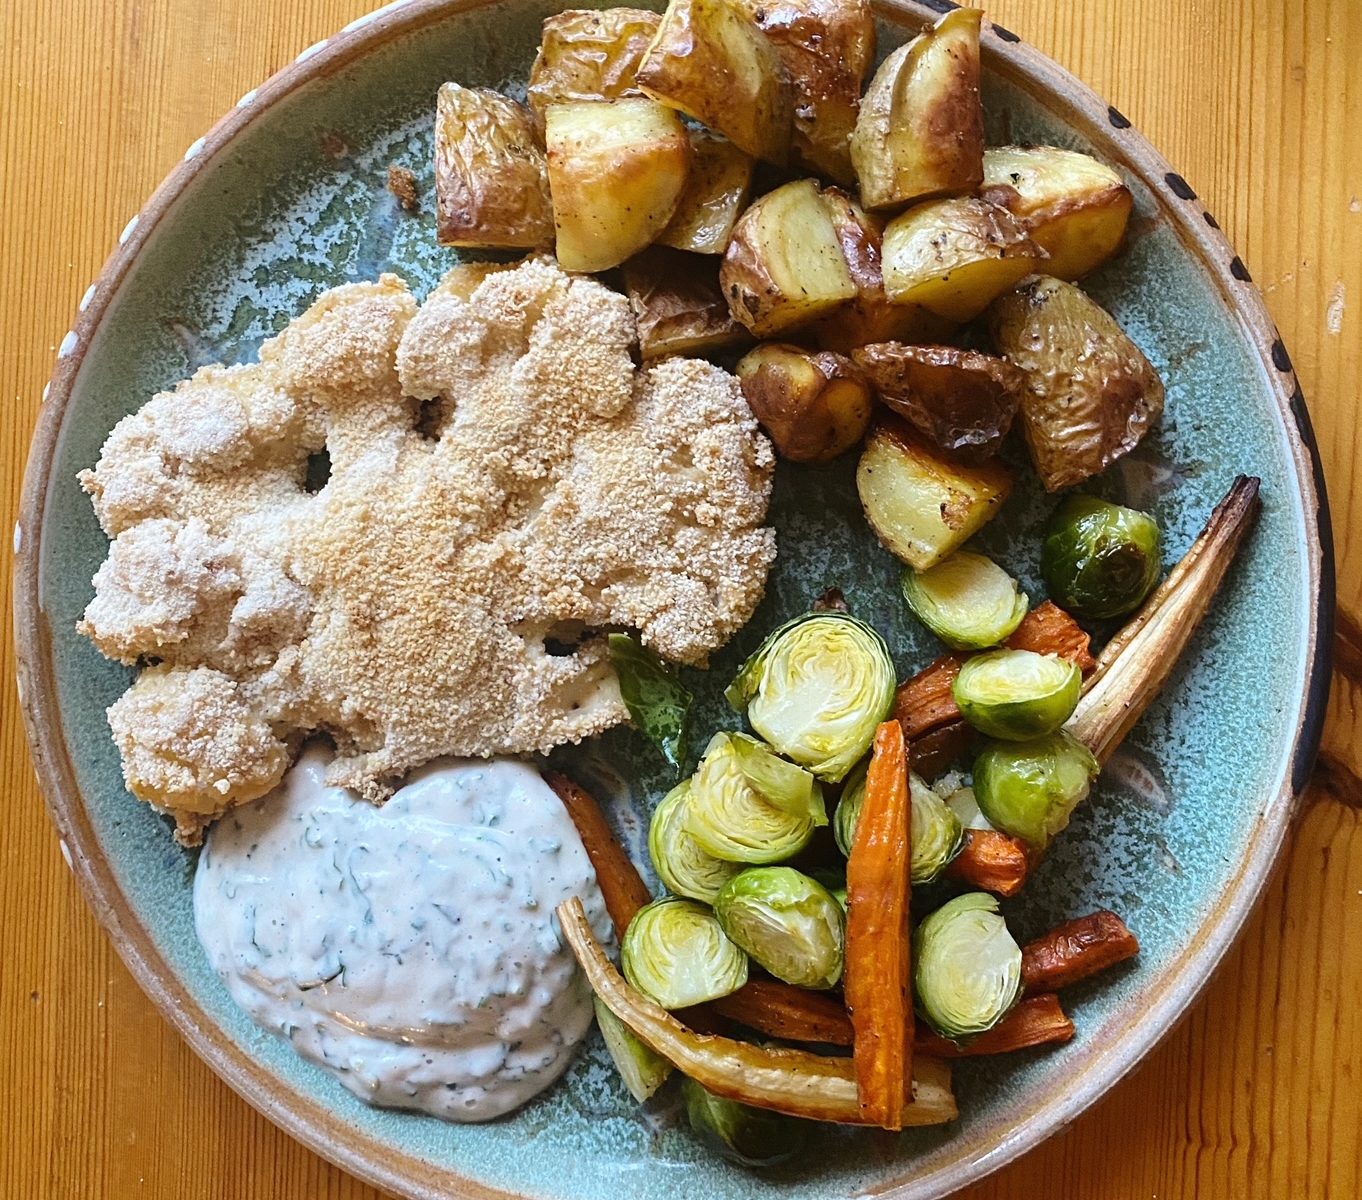
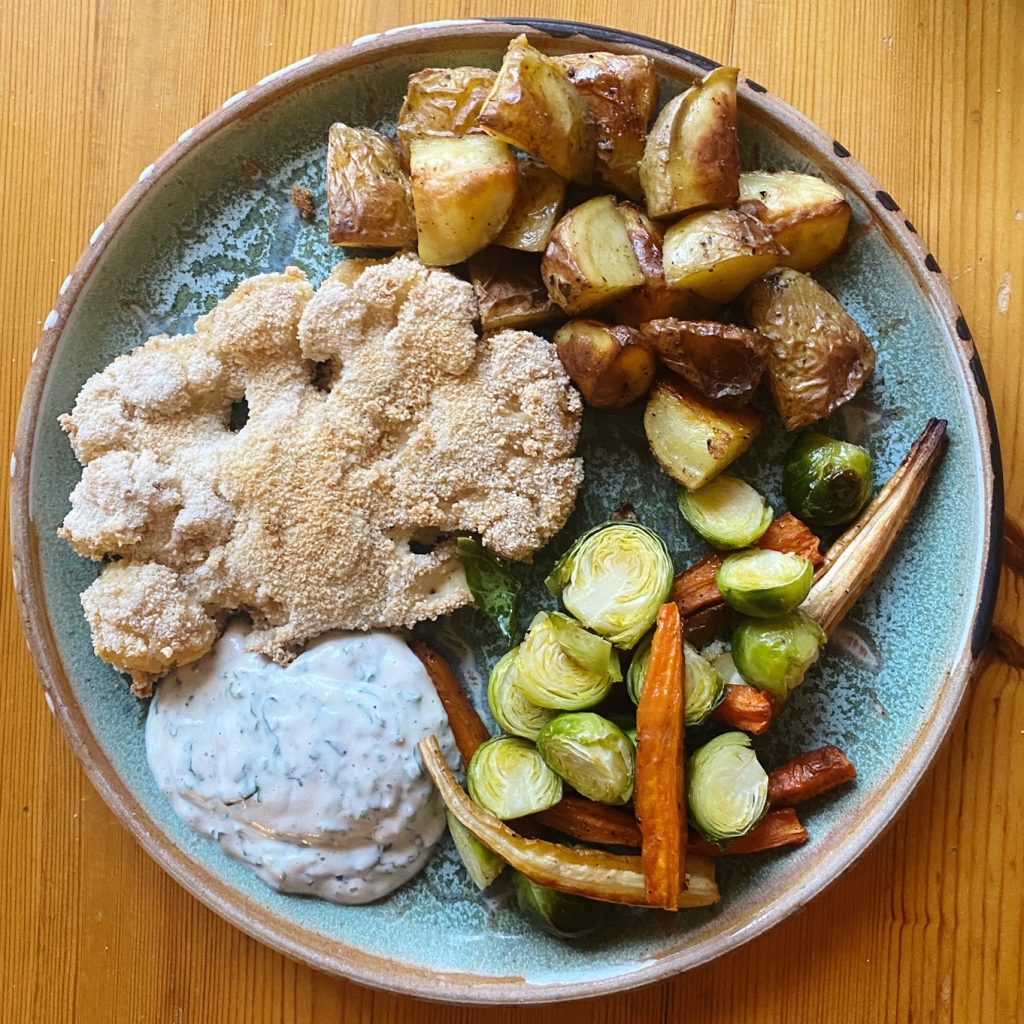
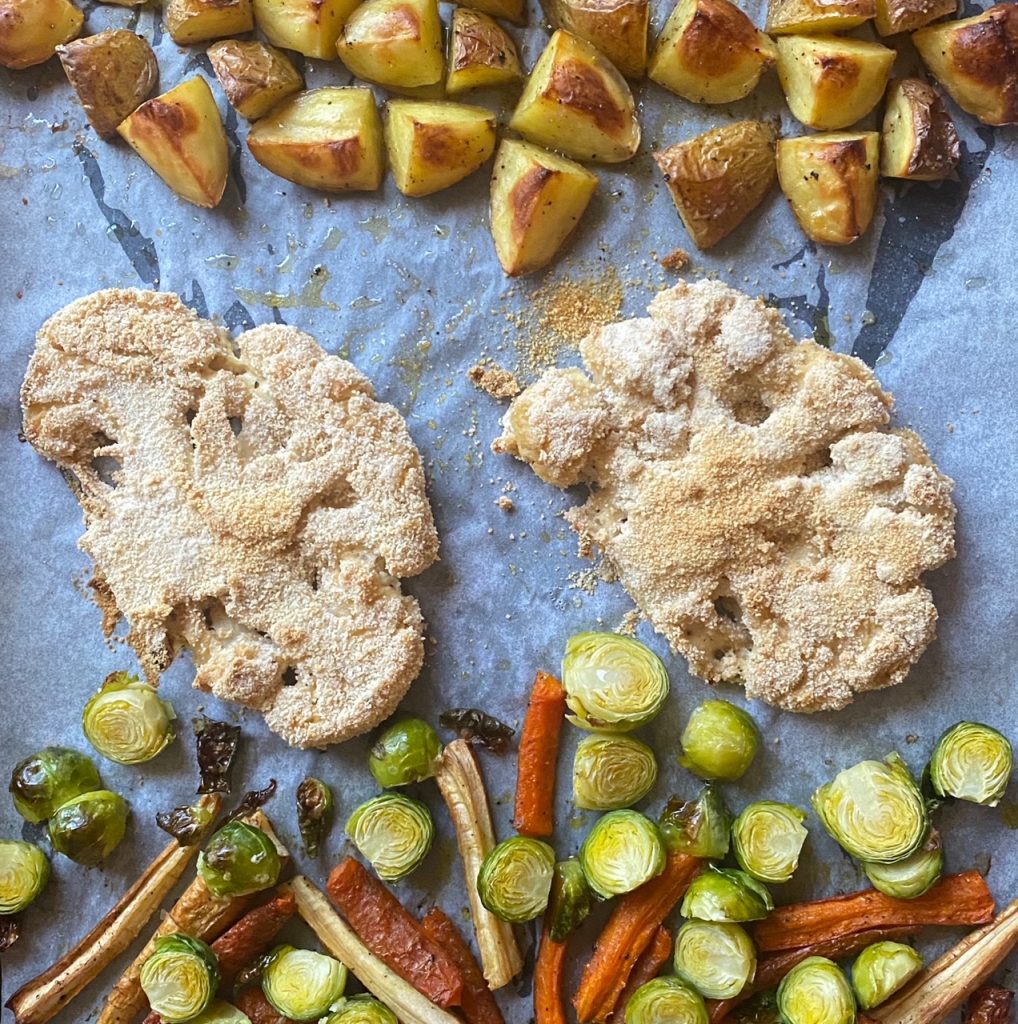
  4. Remove the tofu from the oven and brush liberally with the glaze. Return to the oven for another 15 minutes or so until dark brown, sticky and delicious! You can check on the tofu every 5 minutes and baste with any glaze that has pooled around the bottom of the dish. Enjoy alongside all your usual Christmas roast trimmings.

Cauliflower Schnitzel Tray Bake

There is nothing more satisfying and healthy than a big plate of local, seasonal vegetables. This dish is so simple to put together, and it’s faff-free, all being baked on one tray. So perfect for a mid-week meal. The crunchy, breaded cauliflower brings delicious texture to the plate (we recommend doing the same technique with butternut squash slices too) and the creamy garlic and herb dip makes every mouthful delectable! Hope you enjoy it!

Liz x

Ingredients (serves 2)

For the cauliflower schnitzel:

  • 2 large slices from the middle of a cauliflower (pop the rest of the cauliflower back in the fridge to use in another recipe)
  • around 8 tbsp natural yoghurt
  • salt & pepper to taste
  • around 8 tbsp bread crumbs

Vegetables for the tray:

  • 4 medium potatoes
  • 2 parsnips
  • 2 carrots
  • 10 brussels sprouts
  • olive oil, salt & pepper to taste

For the garlic & herb dip:

  • 100g cashew nuts
  • 100ml water
  • 2 tsp vinegar
  • 1 clove of garlic
  • a large handful of chopped herbs eg chives, parsley, sage, rosemary
  • salt & pepper to taste

Method

  1. Turn your oven on to 200C and get your steamer set up. Line a large baking tray with baking parchment. Cut your cauliflower into two thick steaks and pop them into the steamer for 8 minutes or until just tender.
  2. Meanwhile prepare two wide bowls, one with the natural yoghurt and one with the breadcumbs. Season the yoghurt with salt and pepper and mix well. When your cauliflower steaks are tender, drench them first in the yoghurt, then in the breadcrumbs, turning over a few times until nicely coated. Place the breaded cauliflower steaks on the baking tray.
  3. Cut your potatoes, parsnips and carrots and arrange on the tray alongside the cauliflower schnitzels. Drizzle with olive oil and sprinkle with salt and pepper then place in the oven to bake for around 30 minutes. You can carefully turn everything after 15 minutes to ensure an even bake.
  4. Prepare the brussels sprouts by cutting off the base and slicing them in half. Toss in a small bowl with a little oil and seasoning, these can be added to the tray for the last 10 minutes of cooking.
  5. Prepare the garlic and herb dipping sauce. In a strong, small blender, blend the cashews, water, garlic & vinegar until completely smooth. Taste and season with salt and pepper, then stir into a bowl with the chopped herbs.
  6. When the schnitzels and vegetables are cooked through and golden brown, divide between two plates and add a generous side of the dipping sauce. Enjoy!

Festive Chocolate Puddles

Make your favourite bar of chocolate that bit more special by melting it into puddles and adding festive toppings. We love adding green pistachios and red pomegranate seeds to ours for fresh bursts of flavour and Christmassy colour. But be aware that if you are using fresh pomegranate seeds, these chocolates will need to be stored in the fridge and eaten within 3 days, so only make as much as you’ll need. These are a great (minimal effort but maximum wow factor) treat to bring to a Christmas gathering to be enjoyed with a glass of mulled wine.

Did you know that most chocolate has quite problematic origins? Cocoa production is rife with child and slave labour, as well as environmental issues with land clearing and overuse of chemical fertilisers and pesticides. Organic, ethically sourced chocolate is of course more expensive, but I think we can all agree that it is totally worth spending a few more cents to help make the world a fairer place. Playing with your chocolate like this and adding nuts, seeds, fruit etc can also make it go further. Check out our chocolate selection here.

Liz x

Ingredients

  • Your favourite chocolate
  • pomegranate seeds (or use freeze-dried fruit for longer lasting puddles)
  • desiccated coconut
  • sea salt flakes
  • pistachio nuts, chopped
  • or any toppings you prefer

Method

  1. Line a tray with a sheet of baking parchment and make space in your fridge or in a cool, dry place in your house. Prepare your chosen toppings.
  2. Gently melt the chocolate. The best method is in a glass bowl over a simmering pot of water.
  3. Spoon the chocolate out onto the parchment and use the back of the spoon to create little puddles.
  4. While the chocolate is still wet, sprinkle over the toppings. Set in a cool place until solid then enjoy! If you are using fresh pomegranate seeds, store the chocolates in a container in the fridge and eat within 3 days. Dried fruit and nuts will last a lot longer.

Crushed, Roasted Potatoes & Sprouts

Looking for some fantastic festive nibbles for your next seasonal soirée? These smashed and roasted potatoes and sprouts are incredible! Taking the time to squash, dress and roast your boiled/steamed veg is really worth it. This process creates gorgeous craggy edges which turn into crispy deliciousness in the oven! Perfect with a nutty romesco dipping sauce or any dip you fancy. Enjoy!

Liz x

Ingredients

For the potatoes and sprouts:

  • 1 kg potatoes, steamed/boiled until fork-tender
  • 500g brussels sprouts, steamed/boiled until tender
  • 5 tbsp oil (I used golden rapeseed oil)
  • the zest of an orange
  • 4 crushed cloves of garlic
  • 2 tbsp chopped fresh rosemary
  • 1 tsp ground black pepper
  • 1 tsp fine salt

For the romesco dipping sauce:

  • 100g almonds, roasted
  • 2 roasted and skinned red peppers (from a jar is perfect)
  • 1 tbsp smoked paprika
  • 1/2 tsp fine salt
  • 1 small garlic clove, peeled
  • 1 tbsp vinegar (apple cider, red wine or sherry vinegars all work well here)
  • 2 tbsp olive oil

Method

  1. Preheat the oven to 200C and prepare the vegetables. (Boil or steam the potatoes and sprouts until they are fork soft, roast the almonds in the oven for 5 minutes, roast the peppers or use pre-roasted from a jar, prepare the dressing ingredients…)
  2. Spread the sprouts and potatoes onto a large, lined baking tray and squash them gently with the base of a glass.
  3. Mix the dressing ingredients and drizzle/brush over it all over the squished vegetables. Then place the tray in the oven to bake until golden and crispy (around 30 minutes).
  4. Meanwhile blend the romesco dipping sauce ingredients together until smooth. Serve the crisped up vegetables on a large platter with the sauce in a ramekin – fab festive finger food! Any left over sauce makes a great pasta or pizza sauce or can be frozen to use another time.

Parsnip Gnocchi with Sprouts, Sage & Hazelnuts

Making gnocchi from scratch is a little intimidating, but it’s actually not that complicated. Simply mix puréed, seasoned vegetables with enough flour to form a soft dough, roll the dough into snakes and cut into bites. Then boil the bites until they rise to the surface and you are ready to sauté, roast or simmer them in sauce. This parsnip variety is ridiculously delicious. Give it Christmassy vibes with sprouts, sage and hazelnuts.

Liz x

Ingredients (serves 4)

For the gnocchi:

  • 500g parsnips, boiled/steamed until soft
  • 2 tsp salt and a grind of pepper
  • 250g flour (plus more as needed for dusting and rolling)

To finish:

  • lots of butter (to sauté the gnocchi in batches)
  • around 20 Brussels sprouts, quartered
  • a handful of hazelnuts, chopped
  • fresh sage leaves
  • salt and pepper to taste

Method

  1. Mash the cooked parsnips until smooth. If they are a little stringy or you left the skins on, use a blender to get them very smooth. Stir in the salt and pepper and taste. They should be over-seasoned at this stage before you add the flour.
  2. Tip in the flour and use a spoon to roughly combine it with the pureed parsnips. Then tip out onto a floured surface and bring together into a soft dough. Don’t give in to the temptation to knead, you are not looking for stretchy gluten in gnocchi, you want a tender dough.
  3. Cut the dough into smaller pieces and roll into slim snakes. Use flour as needed to help avoid stickiness. Then cut the snakes into little bites and spread them out on a floured tray. If you feel up for some kitchen meditation time, you could roll each bite over a gnocchi board or the back of a fork to create beautiful grooves, but it’s not necessary.
  4. Bring a large pot of water to a rolling boil and drop the gnocchi in in batches. After just a few minutes, they should start to rise to the top, scoop them out with a slotted spoon a place on a large platter. Keep going until you have boiled all the gnocchi.
  5. Heat up a large frying pan with a generous tbsp of butter. Add half the sprouts and season with salt and pepper. Sauté for 3 minutes until they start to colour. Then add half the gnocchi, half the hazelnuts and around 6 sage leaves. Add another tbsp or so of butter and stir fry to warm up the gnocchi and give it some golden colour. The nuts should get wonderfully toasted and the sage leaves impart gorgeous fragrance and flavour.
  6. Tumble into two warm bowls to serve and repeat step 5 with the other half of the ingredients. Enjoy!

Mushroom, Parsnip & Potato Gratin

This creamy, comforting, warm winter side dish will make you cosy from the inside out. It’s special enough for the Christmas table, but once you try it, you’ll be making it to go alongside all your winter roasts. Deep, dark, earthy mushrooms mingle perfectly with sweet parsnips and rich cream. The nutmeg, garlic and bay leaves infuse beautifully into the sauce making your whole house smell amazing!

Liz x

Ingredients

  • 250g fresh mushrooms, thinly sliced
  • 3 garlic cloves, peeled & sliced
  • 1 tbsp oil
  • 600g potatoes, thinly sliced
  • 600g parsnips, thinly sliced
  • 1 tbsp dried mushrooms (soaked in 400ml boiling water)
  • 1 tsp ground nutmeg
  • 2 bay leaves
  • 400ml cream (oat cream works well)
  • salt & pepper to taste

Method

  1. Turn your oven on to 200C and prepare all your ingredients. Boil a kettle and cover a tbsp of dried mushrooms with 400ml of just-boiled water. Find a large, oven and hob safe pot with a lid (or use a large soup pot on the stove and decant to an oven dish to bake).
  2. Sauté the sliced fresh mushrooms for 5 minutes with the oil, garlic and a good pinch of salt and pepper. Once soft add the potatoes and parsnips to the pan.
  3. Pour the mushroom stock (including all the now rehydrated mushrooms) over the vegetables. Add the bay leaves & nutmeg and season well with salt and pepper. Carefully stir to combine the ingredients, then level out with the back of the spoon.
  4. Pour over the cream then pop the lid onto the pot and simmer for around 8-10 minutes until the vegetables are just soft. Remove the lid, use the back of the spoon to push all the veg under the liquid. Taste and add more seasoning if needed.
  5. Place the dish in the oven for 20-30 minutes to brown and reduce into a gorgeous gratin. Allow the dish to sit out and set for 5 minutes before serving in generous scoops. Enjoy!

Celeriac Soup with Smokey Mushrooms

Our large, knobbly celeriac are finally back in season, perfect for all your winter soups and stews. If you haven’t tried celeriac before, it is a delicious and versatile vegetable which tastes like a cross between celery, parsnip and potato. As well and soups and stews, it is stunning raw in creamy salads like remoulade. You can also roast it or bake it in a gratin. We love pairing it’s sweet, herby, mild flavour with something strong flavoured like capers or these salty, smokey mushrooms. Give it a try and do share your favourite celeriac recipes in the comments, we are always looking for inspiration.

Liz x

Ingredients (serves 6)

For the soup:

  • 1 tbsp oil
  • 1 white onion, peeled & diced
  • 4 cloves of garlic, peeled & sliced
  • 3 sticks of celery, sliced
  • 1 celeriac, peeled & cubed
  • 1 stock cube or 1 tbsp bouillion powder
  • 1 tbsp dried thyme
  • salt and pepper to taste

For the smokey mushrooms:

  • 1 tbsp maple syrup
  • 2 tbsp soy sauce
  • 1 tbsp oil
  • 1/2 tsp ground black pepper
  • 1 tsp garlic powder
  • 2 tsp smoked paprika
  • 300g chestnut mushrooms, thinly sliced

Method

  1. Put a kettle on to boil with 1 liter of water. Then, in a large soup pot, sauté the onion, garlic, celery and celeriac with the oil and a sprinkle of salt and pepper. After 5 minutes the vegetables should be slightly softened.
  2. Add the thyme, crumble in the stock cube and pour in the freshly boiled water. Give the pot a stir then get the lid on and simmer the soup for 15 minutes or so until the celeriac is soft enough to blend.
  3. Meanwhile, mix together the maple, soy, oil, garlic, pepper and smoked paprika in a bowl. Tumble in the sliced mushrooms and mix well to coat each slice in the marinade. Scrape the mushrooms into a large frying pan and stir fry until hot and beautifully browned.
  4. Blend the soup and taste for seasoning. Add more salt or pepper as needed then serve in bowls topped with the smokey mushrooms. Enjoy.

One Pot Tomato & Chickpea Spaghetti


This beautiful budget meal saves you time, money, water and washing up! It’s a regular weeknight supper for us and is popular with the whole family. As the pasta cooks with all the ingredients and absorbs most of the water, it releases starch and creates a gorgeous, silky sauce. This recipe is fuss free too, all you need to do is give it stir every few minutes to ensure it doesn’t stick, it’s so simple and honestly, so delicious! We have a really nice delivery of organic tomatoes from Holland in at the moment as our Irish ones are out of season.

You’ll need a wide, deep pan with a lid. A big stock pot would work too or even a wok. Something that your pasta can lay flat in.

Liz x

Ingredients (serves 4)

  • 400g spaghetti
  • 4 medium/large tomatoes, roughly chopped
  • 4 cloves of garlic, peeled and minced
  • 1 red onion, peeled and thinly sliced
  • 1 tin of chickpeas, drained
  • 4 tbsp extra virgin olive oil
  • 2 tsp salt
  • 1 tsp ground black pepper
  • 1 liter freshly boiled water
  • optional chilli flakes, cheese or capers to serve

Method

  1. Gather and prepare all your ingredients and put a kettle on to boil with 1 liter of water.
  2. Place all the ingredients into the pan and pour over the freshly boiled water. Give the pan a stir with some tongs, then put the lid on and turn the heat up to high.
  3. As soon as the water comes back to boiling, remove the lid and stir again to loosen any bits of pasta trying to stick to the bottom.
  4. Replace the lid and after 2 minutes, stir again and replace the lid.
  5. Repeat step 4, twice. Now you should have cooked your pasta for around 7 to 8 minutes. Turn the heat off but leave the lid on for 5 minutes to allow it to finish cooking in the residual heat and the sauce to thicken up.
  6. Taste and add more salt or pepper if you need, I also like another drizzle of good olive oil. Serve in bowls with the topping of your choice. A sprinkle of chilli flakes, some salty capers or a generous grating of hard cheese perhaps? Enjoy!

Coconut & Spinach Dal with Roasted Swede & Cauliflower

What’s the meal that you have on repeat every week? In our house it’s dal. This creamy lentil curry is so good in so many ways. Firstly, it’s always delicious no matter how we tweak it. Sometimes with a tin of creamy coconut milk, sometimes with a tin of tangy tomatoes, sometimes neither. But always with some seasonal curried vegetables! Secondly, lentils are a very affordable ingredient which satisfies the whole family for a few cents. Thirdly, lentils are incredibly nutritious, full of healthy plant-protein, fibre, vitamins and minerals. I could go on but I’ll finish with the fact that they are quick and easy to cook. Add to soups and stews for body, texture and extra nutrients, or make them the centerpiece in an Indian curry like this one.

Have I inspired you to try lentils? Let me know in the comments. Top your dal with roasted veg, pickled veg, fermented veg, raw veg…anything you like to add colour and texture and taste. We went for curried, roasted swede and cauliflower as they really soak up those spices beautifully!

Liz x

Ingredients (serves 4-6)

For the roasted veg:

  • 1/2 a swede
  • 1/2 a cauliflower
  • 1 onion
  • 1 tbsp rapeseed oil
  • 1 tbsp curry powder
  • 1 tsp whole cumin seeds
  • 1 tsp whole mustard seeds
  • 1 tsp salt and pepper to taste

For the dal:

  • 1 mug of red split lentils, rinsed
  • 2 cloves of garlic, grated
  • 1 thumb of fresh ginger, grated
  • 1 tsp turmeric
  • 1 mild fresh chilli, chopped (or to your taste)
  • 1 tsp salt & a generous grinding of black pepper
  • 1 tin of coconut milk
  • 2 tins of water
  • 100g fresh spinach, rinsed

Method

  1. Turn your oven on to 200C. Chop the swede into small cubes, peel and roughly slice the onion and break the cauliflower into florets. Toss in a large baking dish with the oil, spices and seasoning and place in the oven to bake.
  2. Meanwhile put all the dal ingredients (except the spinach) in a pot and simmer until the lentils are cooked through and creamy. This should take around 15 minutes. Stir regularly to ensure the lentils don’t stick and burn. Turn the heat off and add the spinach to the dal. Place the lid on the pot and allow the residual heat to wilt the spinach while you take the roasted veg out of the oven and get bowls and spoons ready.
  3. Serve the dal in bowls topped with roasted vegetables. You can also serve with brown rice or breads to make it a heartier meal. Fresh coriander, sliced chillies, Indian chutneys, toasted nuts etc make great toppings too. Get creative and add extra nutrients and interest to your bowl.

Kale & Apple Salad

This simple winter salad is so so delicious. We have it as a side to pretty much every meal at the moment. Sometimes topped with toasted seeds too. Don’t throw out the kale stalks! You can finely slice them and pop in a box in the freezer to take out in handfuls whenever you need some greens (or purples!) in your next stir fry, smoothie or stew. We have lots of delicious purple and green kale coming out of the fields so add some extras to your next order and try this quick salad.

Liz x

Ingredients

  • 1 apple
  • 6 kale leaves (3 green, 3 purple)
  • the juice of 1/2 a lemon
  • a pinch of flaky sea salt
  • 1 tbsp cold pressed rapeseed oil or extra virgin olive oil

Method

  1. Core and finely slice the apple. Place in a salad bowl and mix with 1/2 the lemon juice to stop it from going brown.
  2. Rinse the kale leaves and shake dry. Then remove the leaves from their tougher central stalk. (Finely chop the stalks and pop into a freezer box to use in a different recipe.) Gather the leaves and finely slice with a large, sharp knife.
  3. Mix the leaves into the salad bowl with the salt, oil, apples and lemon juice. Taste and add the remaining lemon juice if needed. Enjoy right away or store the fridge for up to a day.